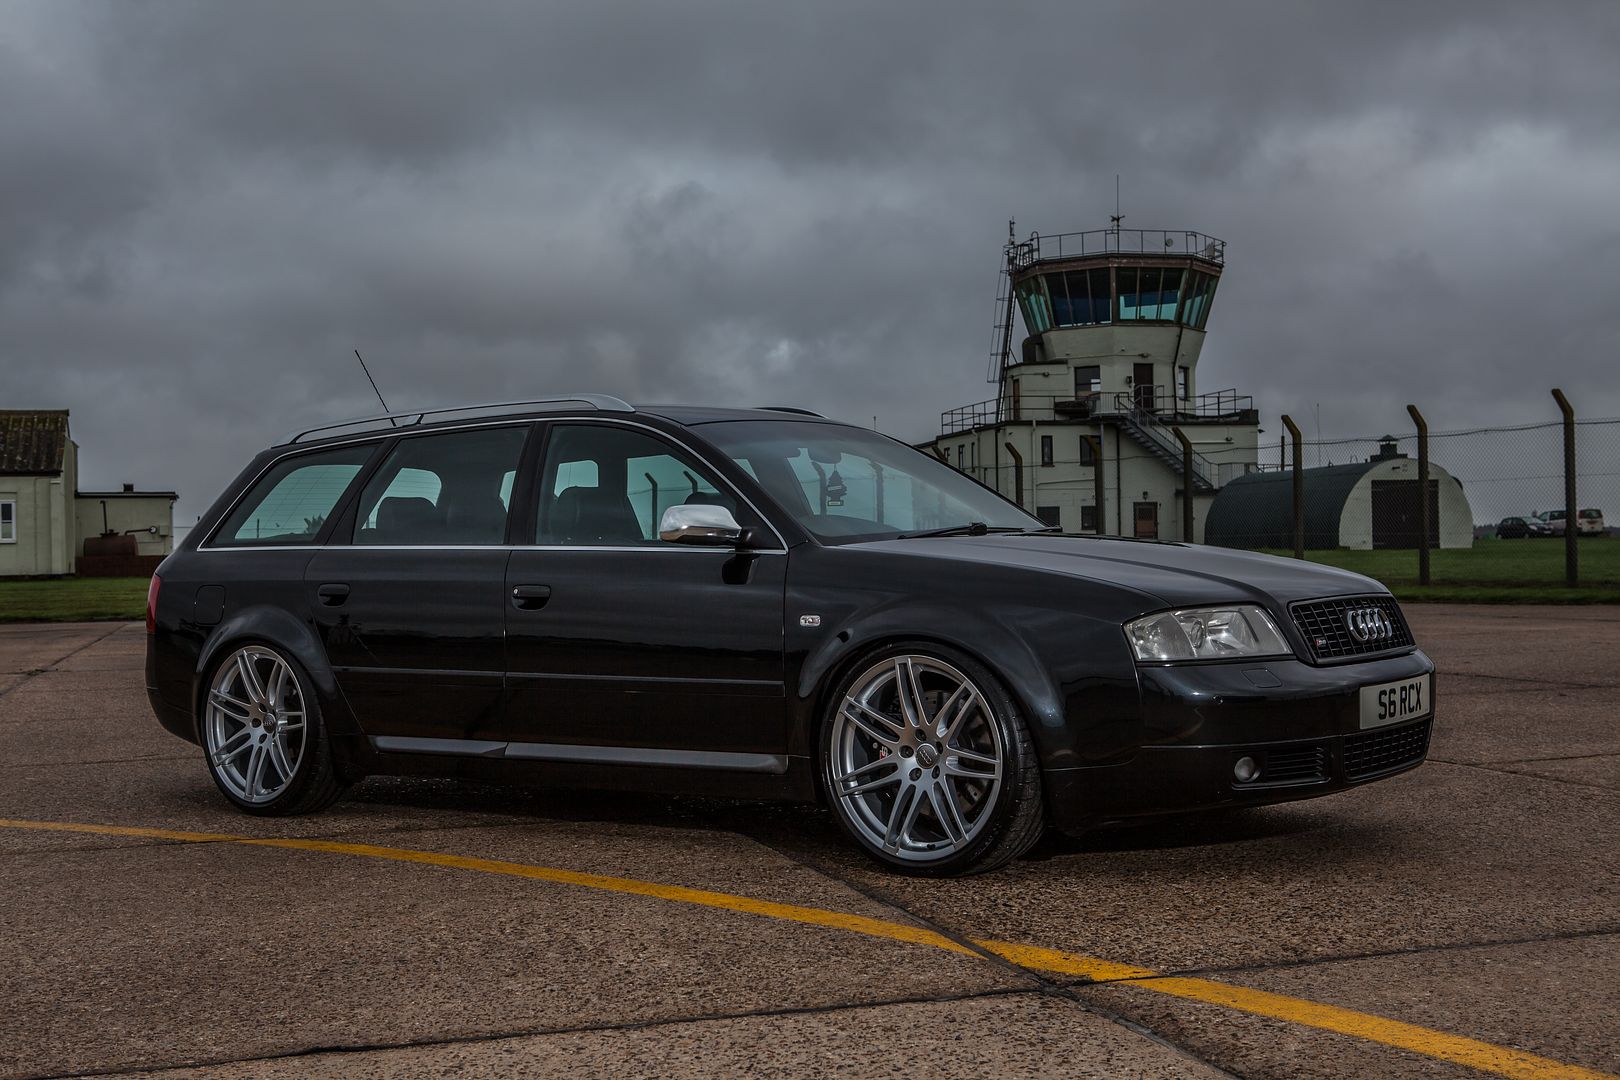
My new C5 S6 Avant - V8 family car

Started the day with a hoover out


and me and the boy set off to the loco show (no t.v's in the front so he brought a book lmao)


and arrived :)


not really my kind of show, everyones got air ride and 5k wheels kind of thing, but my mates do a great job organising it


but there was a new RS6 and the brakes were colossal!!!


it then got cloudy and ****ed it down!


but we didn't care :)


a quick doughnut and off we went home!

it only seems the other day i was taking him to shows at this height :eek:

 
  • Like
Reactions: Greeny233, quattrojames and slacky
Nice to meet you and the boy today. Your car looks amazing, the wheels look huge and the brakes! That RS6 was epic, it's not on air ride either it's running KW Coilovers . I thought about entering show and shine until I turned up and saw the other cars The standard of some of those cars is off the scale, having air ride and big wheels just isn't enough.
 
Good to meet you and thanks for coming over :friends:

I've worked on a few of the low collective cars and the money them spend is phenomenal!
 
  • Like
Reactions: Greeny233
Well i sent a few emails out and finally got a letter back today from the highways agency about the pot hole claim..... saying it has been unsuccessful :( they state, with quotes of laws, that basically they are not responsible for any damage caused by the roads, only responsible for fixing damage when it is found. and only have to pay out if they are found negligent in the upkeep of the road.

They sent me the logs of the inspections on that section of road and it had been inspected weekley with the last one being on the 26th May, and the innocent happened on the 30th. the next inspection was carried out on the 2nd June, a fault found (obviously) and fixed that day. I was the first to report the pothole so they had no knowlage of it before i hit it, thus they couldn't have fixed it.

I can apply again if i provide new evidence, but there isnt any more evidence i can provide.

Pretty ****!
 
If only you could refuse to pay your road tax until they could prove the roads you drive on are all suitable for cars...
 
Great read, very impressed.
I admire how you still manage to get the camera out even when things go wrong!
I often think I should photo document my jobs but when my hands are dirty and just want to finish and get a cuppa I rarely remember to get some photos. (unless it's tricky and I need to remember how it goes back together then I take lots of photo's!!!)

Tom.
 
Glad you enjoyed it. I do love reading a good detailed thread, so I see it only fair I return one for others too :) plus the more pictures you take it looks like you've done a lot more work lol

Just been keeping it clean and enjoying it at the moment :)


I've appealed to the pothole claim, but it's just a waiting game again.
 
  • Like
Reactions: Stanningtonglen and mrnice
Excellent read, I admire your car and patience, keep up the good work!
 
Loads happened since I last checked in here, unfortunately not all good.

Can you not use the wrong £500 tensioner to do the other side so that it's not dead money, and you have piece of mind the other side won't go, or is it not compatible with the car at all?

I'm currently thinking about selling my 1.9tdi B6 A4 to buy a 2.5tdi C5 Allroad, and reading your thread jusy fuels the fire.
 
Yea the 'wrong' tensioner will fit the passenger side. I've put it up for sale for a bit incase someone wants one and I can get some money back, if not eventually I will probably just fit it some time, even though mines ok.

It's all been running tip top since though and trouble free up to date.

I was out with the kids the other day and found a couple of cool spots for pics :)


Photos hide a million sins though, it's ******* filthy!!


So gave it a being up before going to a wedding :)

 
  • Like
Reactions: barkclark
Few little bits to update from yesterday.

i am now happy to say i am leak free :) so decided to put the undertray back on


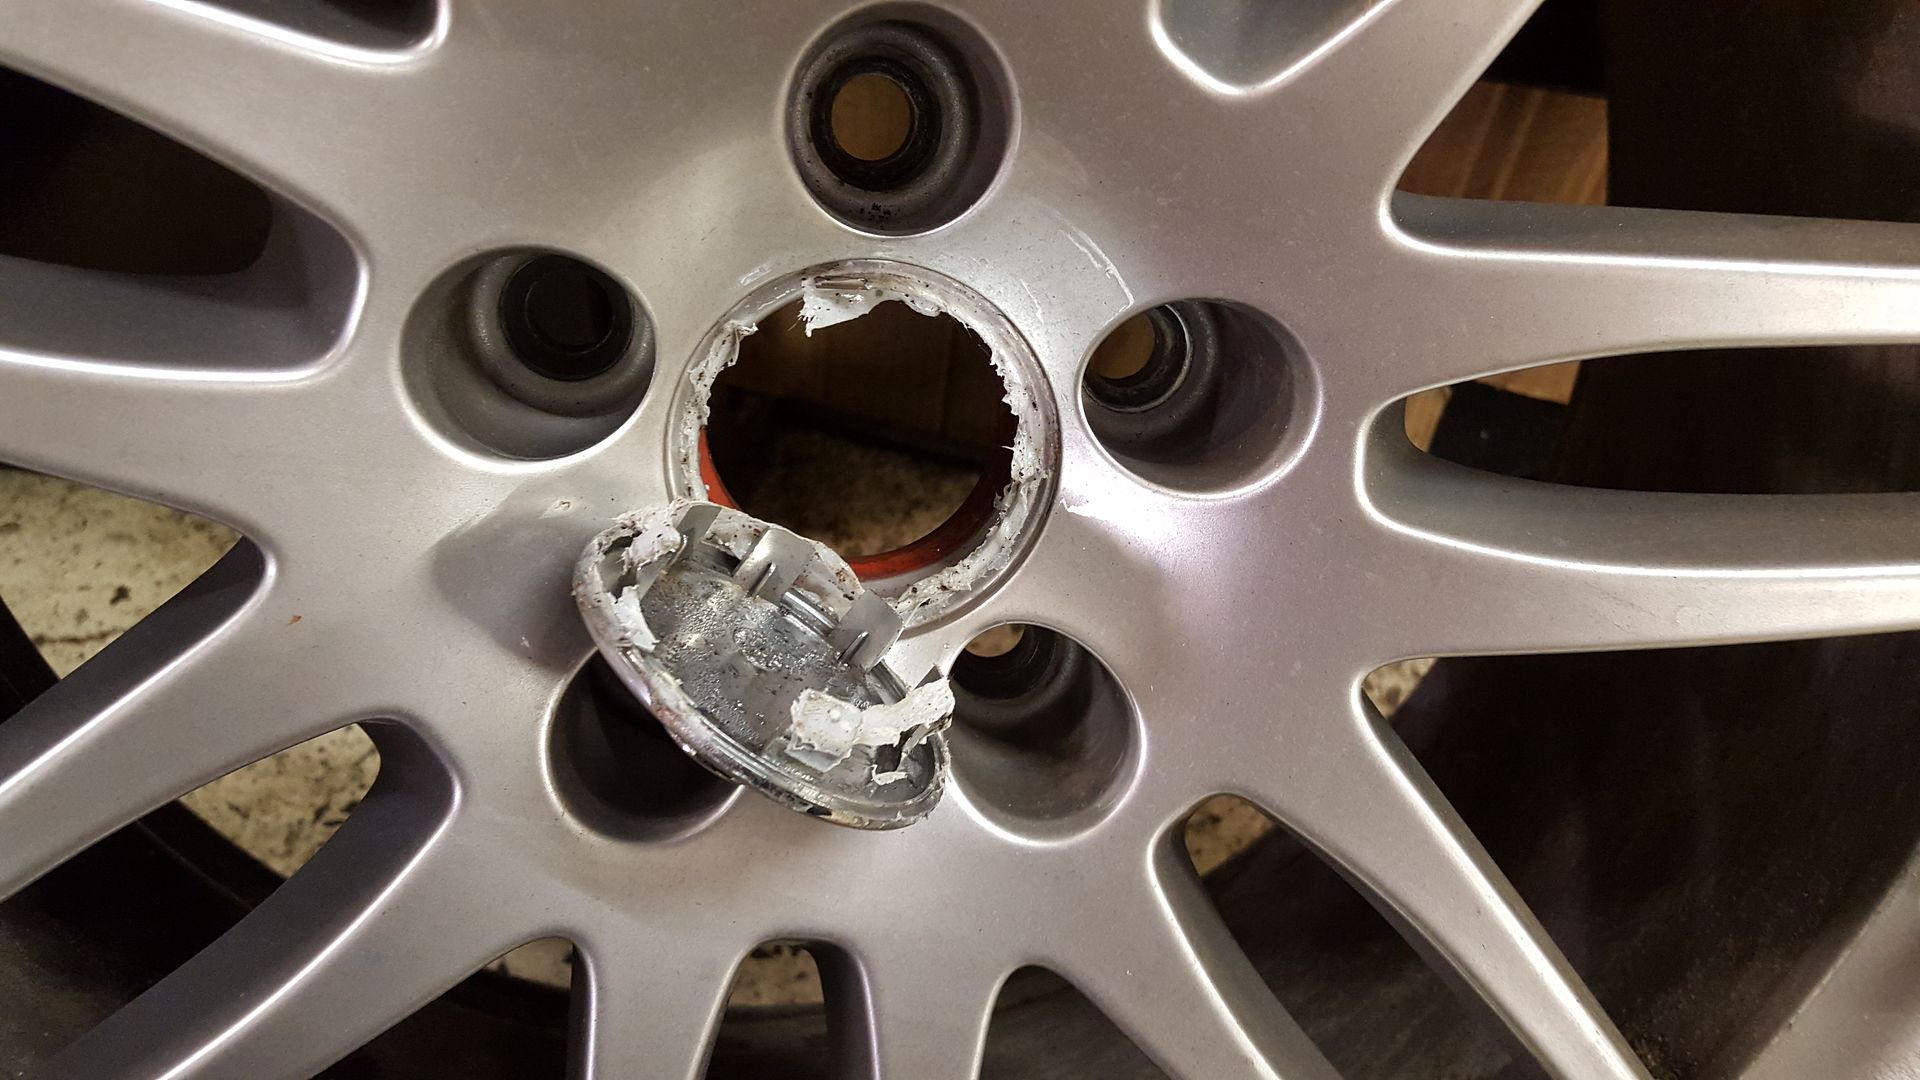
while it was up i took the wheels off and knocked out the centre caps. they were from the origional reps that came with the car, and were a mm too small to fit the genuine wheels, so i had to build it up with double sided tape to keep them in,

looked fine from the outside


but was a bit messy lol


i got a set of ebay the correct size


i don't think they are genuine ones... but they do have all the marks :confused:


new ones on the right


and clipped in properly on their own


also the rear badge Jordan fitted when he got it was looking a bit worse for wear and was going pink and rusty


so que ebay again


old one off


and bling back on


i also had these wheel nut covers from a car a broke a few years ago and never got round to fitting them to the white a4


but finish off the new centre caps nicely :)


now despite the previous cleaning update from last weekend, it doesn't last long out here in the sticks!


super wash and bling later :cool:


and it was tucked up for the night in the unit.
 
  • Like
Reactions: Stanningtonglen, bluemoona3246 and barkclark
What is all this finishing touches for i hear you ask? It was my 30th birthday not long ago and a few of my Auntie's were stuck on what to get me, so they decided to get me a professional photoshoot on my car :) a great supprise, and perfect for me, i'd rather that than clothes or other junk all day long!

i met the photographer (another mate of mine) first thing this morning at Bentwaters park airfield. i got there a bit early to clean off the travel grime


and he got to work


We did lots of rolling shots too, i wanted it so the background and wheels were blurred but the car was crystal clear, we did a couple of runs back and forward with him hanging out the passenger window of his car at 20mph with him playing with shutter speeds etc to make it look faster than it was but it didn't quite look right, in the end we were doing 90mph side by side on the runway crosses with him hanging out his car and the pics look EPIC!!!! its exactly what i wanted, i only saw them on his camera but they looks ******* awesome!!

He took over 300 pics and is now cracking on editing them all up. i cant wait to see them :) :)
 
  • Like
Reactions: barkclark
What is all this finishing touches for i hear you ask? It was my 30th birthday not long ago and a few of my Auntie's were stuck on what to get me, so they decided to get me a professional photoshoot on my car :) a great supprise, and perfect for me, i'd rather that than clothes or other junk all day long!

i met the photographer (another mate of mine) first thing this morning at Bentwaters park airfield. i got there a bit early to clean off the travel grime


and he got to work


We did lots of rolling shots too, i wanted it so the background and wheels were blurred but the car was crystal clear, we did a couple of runs back and forward with him hanging out the passenger window of his car at 20mph with him playing with shutter speeds etc to make it look faster than it was but it didn't quite look right, in the end we were doing 90mph side by side on the runway crosses with him hanging out his car and the pics look EPIC!!!! its exactly what i wanted, i only saw them on his camera but they looks ******* awesome!!

He took over 300 pics and is now cracking on editing them all up. i cant wait to see them :) :)

.................and neither can we!
 
awesome, loving your work, car looks perfect on those rims, ebay centre caps look very like the ones i got to go on rs6 reps, only thing is the chrome plate started flaking off after a year or so, going to pic up another set and give them a few coats of clear this time.
 
I got a shreek from one of the kids yesterday as he was getting into the car without shoes on, i went and checked and the passenger side rear footwell was soaking wet! as in under water wet!


i picked up the carpet and it was a bath, the foam is completely waterlogged right up to the matt


there was no holes in the floor, no evidence of it coming in the doorshut.. all the other foot wells are bone dry! mystery??

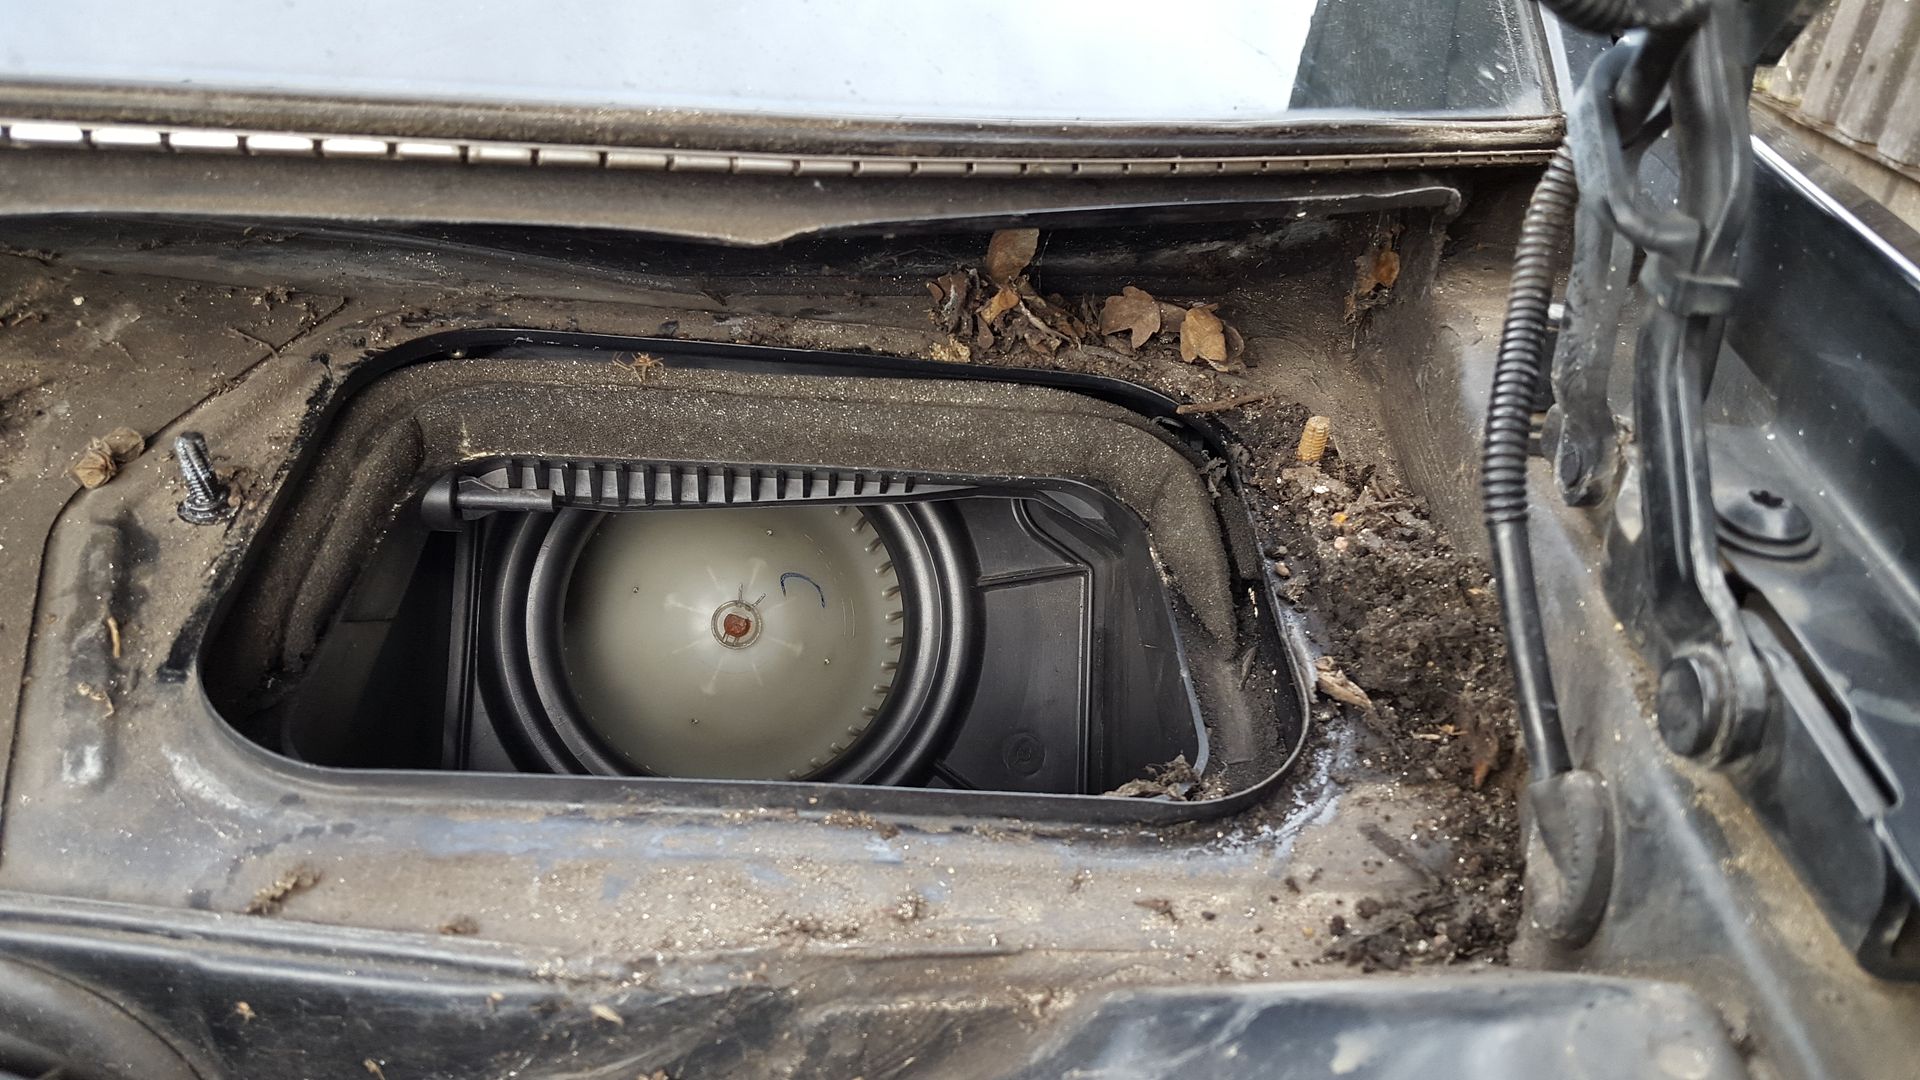
a bit of a google session and the are quite a few A6s with this problem. it turns out the seal perrishes between the pollen filter housing and the bulkhead letting water in there, and following gravity the water flows in the pollen filter and comes out under the seat duct for the rear heating.

so took the scuttle panel off, nothing major to note


but down the back edge was a bit grotty of mud


took the pollen filter housing off and sure enough the foam seal was knackered


and it was very muddy behind it.


this is where the water runs off the screen then down to the ground. it was all just getting stuck in all this mud, then through the perished seal and into the car

so cleaned it all up


and got rid of all the old seal and filled the it up with sealer


and bolted it back in, loads squshed out so i know its a good seal, and i smoothed it off so the water will now all run past freely


and fitted a new pollen filter for good measure.


hopefully no more water will get in, but ive got to try and dry out the rear carpet, not the best time of year for that :lmao:

i think its been happening for quite a long time as i have been noticing the inside steaming up over night for a while now, but never noticed the wet rear floor.
 
Check out under the carpet in the front passenger footwell. Obviously the water has to go through this area on its way to the rear footwell and its here that the convenience module is located under the carpet. If this gets water damaged you have potentially big problems.
 
Yea after finding the swamp in the rear I checked the front too for this reason. But surprisingly it's all dry there. It doesn't come through the pollen filter and run down the bulkhead and into the front footwear, it runs down inside all the heating ducts, and comes out the rear floor vent. Hence how it's only the rear that's wet.
The previous owner had the trouble of the scuttle bungs getting blocked up and water ingress to this module and he lost his central locking , so he had to replace the set.
 
Little update, I fitted the tow bar when i got the car but had only got as far as poking the wiring into the car. In it comes


The tow bar was off an A6 allroad, no problem i thought, same chassis (ish) but what i didn't think about is the Allroad is jacked up to 4x4 height meaning to keep the tow ball at a standard height to thew floor it is alot shorter than a normal A6. I spotted a proper westfalia A6 one on ebay the other day cheap so snapped it up

pretty obvious


the Allroad one was alloy, but the new one is steel and weighs a ton!

i got the tow bar from a breaker so they just hacked the loom off, not leaving much length


as factory these go into a towing module, which sits in the back and changes loads of things when a trailer is connected, like turning the parking sensors off, adjusting the esp, locking the air suspension on the Allroad, turning off the cars fog lights etc. but this is all part of the car loom and i haven't got it.

So i'm just going to do it the aftermarket way into the rear lights using a relay (not to upset the bulb out warning)


its an euro 13 pin socket, but there are too many wires, and as its an Audi loom they aren't the standard trailer wiring colours, but luckily they are the same colours in the rear lights (with a couple of extras)


trailer sockets have a little switch inside them that pushes down when you put a trailer plug in it, that's how the car knows it has a trailer connected. usually on aftermarket sockets this just switches the fog light supply so it doesn't come on if a trailer (or caravan) and reflect back. but on this one as it all goes back to a module it has an extra foglight wire and two extra thin brake lights.


not sure if you can use these with out the module. will have to see if i can find an Allroad wiring diagram.

so started connecting it up to the relay


found a spot for it and started wiring it up


took a supply from the cigarette lighter in the boot


and all done, not a scotch lock in sight :)

 
  • Like
Reactions: Greeny233 and voorhees
Well... i let my self get the better of me and i couldn't let it go :doh: that little switch inside the socket that stops the cars foglight going on when the trailers connected. fired up the Elsawin and started trailing through wiring diagrams until i found what i wanted and it explains why there's so many wires


as it turns out the switch is separate to the socket wiring, differs from normal aftermarket sockets that switches the fog output. this has a fog live all the time to the trailer socket fog pin, and another down to the switch, then back to the foglight bulb. it has another wire when switched that goes to the parking sensor control module. when the trailer socket is inserted it pushes the switch which earths a little feed from the parking sensor module, it must be a small voltage as it doesn't illuminate the bulb.

when you go into the wiring diagram for the parking module wiring diagrams it shows this socket switch connection to the switch going to pin 5 on the module, a red/white wire. So, located the parking aid module,


unclipped the plug and sure enough there it was :)


fired up the vagcom and one of the blocks shows trailer: no


i looked in coding of the parking assist module and the first digit is Trailer Hitch, changed the 0 for an 1


connected an earth to this new wire i've found


and every time that is earthed the the trailer status changes to yes :) :) :) :) cracked it :)


so now i know it is going to work i could wire in the socket properly, started by interrupting the fog light feed


and running it down to the socket wiring


and running the little wire up to the parking aid


and tidying away


and i can confirm when there is a socket inserted for a trailer the rear fog light goes out AND the rear parking sensors are disabled, as soon as the trailer socket is removed they are all reactivated.

and the internet said it can't be done :cool:

Now i was always told there was a trailer module in the system and it deactivates everything. but from the wiring diagrams i found on Elsawin it shows the trailer wiring just T's straight into the rear of the lights direct


when the car gets the signal that there is a trailer connected, via the socket switch, via the parking aid control unit, it must either modify or turn off the bulb-out monitoring module so that is can see the double load on the rear lights, thus not flagging up a bulb out fault on the dash. If this is the case then i needn't have fitted the bypass relay. it also explains why all the colours in the trailer wiring loom i received were the same as the rear lights.

Also coming out of the hazard switch is an outlet for the trailer operation warning lamp


so again when the car knows the there is a trailer attached, via the socket switch, via the parking module, it must illuminate this symbol on the dash too.
 
Good work Ron, I suspect I might be needing to digest some of this myself soon.....
 
Just read the thread from the beginning and have to say I'm speechless...quite a journey you've been on

A true credit to you
 
And to complete my trailer installation, number plate, socket converter, and a pair of boot struts as mine are starting to sag


The little socket goes in to convert my euro socket


to 7 pin, depending what trailer I use


And the struts, looks like it's had an odd pair in the past


Will knock your teeth out it goes up so fast now :lol:
 
  • Like
Reactions: Greeny233
I noticed the inside of my o/s/f wheel was getting grubby so i decided to take a look and as suspected, the inner CV boot had split. Whilst checking the inner CV joint for free play i found there was quite alot of movement in the driveshaft. At first i thought it was just the CV joint, but then found that the whole gearbox flange was moving!! the CV joint seems tight to the shaft, and tight to the gearbox flange, but all the movement is coming from what i believe to be the diff bearing. The other side is nice and tight and firm with no free play as you'd expect.

The strange thing is whilst driving there is no symptoms of this at all, no whining, no noises, no clonks, the drive train is seamless, its not even leaking oil from the diff seal. I have only discovered this whilst looking at the CV boot.

here are a couple of videos to show the movement


****ety ****!

So going to need to do a bit of investigating.

It looks like it's a taper bearing setup

 
So today turned out to be a bit of a disaster. I ordered two inner OE CV joints and a full set of upper front suspension arms as 2 were goosed and two weren't great from Allgermanparts.co.uk (after seeing lots of good reviews). Normally i get all Lemforder arms, but i saw on the RS forums the newer TRW bits are supposed to be just as good but for 2/3 the price. I ordered them all last Friday and was told Tuesday/Wednesday delivery. Nothing came Wednesday so go onto the email and was told Thursday they would be here Friday (today), then late Thursday night i got an email saying there has been a mistake on their catalogue and the CV's listed on my reg are not the ones for my car so they took them out of the order and couldn't get the correct ones so have just refunded me. Brilliant :puke:

now i'm struggling to find the correct inner CV joints for my car, as even in eurocarparts checker etc it comes up with the wrong type.

anyway, i have stripped it down and found the bearing at fault, full update to come but photobucket is in the middle of a meltdown.
 
No photobucket has revived itself, yesterday's update:

So I'd been shopping, here are the upper suspension arms from allgermanparts


The inner CV joint **** up was because for some reason all the car parts databases show my car having this type like a golf


But it has this type


And I'm struggeling to find them as everywhere lists the first one. And tps want £180 each!!

I was all ready to do the CV Joints, and one thing I find with aftermarket joints is their boots are crap and just perish, so I hit up TPS for some genuine boot kits, hub bolts and some diff oil for when I open up the front diff.


So was time to get it in


Looks like I'm going to need some pads soon too, any recommendations? Anything that gives off less dust than the buggers that are in there now


Got the shaft out

Checked the centre bolt and that was still tight, so undid it and removed the flange


Eventually got ****** off with working around all the suspension so whipped it all out the way.


The top pinch bolt was sieezed solid, surprise surprise, and I didn't want to snap it off as unlike the Lemforder arms the TRW ones done come with new bolts. So going to have to get some more bolts before attempting that.

Nice easy access


The main diff bearings are fine the diff is very firm in situ. There is a smaller needle bearing in the centre, which was suggested as possible failure point on these.

Looking on the drive flange it is pretty rough (hard to pick up on camera)


And the bearing is a bit on a rough side. I was told that you can't get this bearing from Audi, but luckily the part number is visible on the bearing 'INA HK 32X39X24 GERMANY'


I've found them online pretty easily, but I'm a bit dubious about the quality from the pictures, they don't really look INA precision


So I'm going to see my local bearing place as I know they are INA dealers so will be genuine from them.

I did phone audi and you can't get it from them at all, need to buy a new gearbox. I need a new flange as mines a bit pitted so enquired about that and £249+VAT. eek. So will source a second hand one.

All in all pretty crap day, couldn't fit the top arms as the pinch bolts sieezed, couldn't fit the CV Joints as they weren't here, but at least I've found the problem.

I will have to make up a custom puller to get the bearing out, but should be able to do it all in situ (hopefully)
 
EBC brake pads are sold as giving off lower amounts of dust and from previous experience they do work. I had Green Stuff on the old diesel and I'll be putting Red Stuff on the S4 when the current ones are done.
 
A little bit of shopping


Got a new lower arm and drop links in Lemforder as I noticed mine was shot when I took it all out last week, allgermanparts did a cracking deal after the CV joint fiasco.

Went to TPS for a load of bolts, got new pinch bolts as I don't think the olds one will come out in one piece.


Got a new seal for the gearbox flange as it's will be sods law that once I got it all back together it will start? A new bolt for the flange, and 12 driveshaft bolts for when I do eventually get new cv joints.


And the needle roller bearing, I wasn't convinced by the authenticity of the ones online and on eBay, so went to my local bearings place and got one directly from INA, £12.49 all in :)


I got some cheap pullers off ebay so I can shop and weld and modify to get the old needle bearing out without stripping the box down

 
Welcome to the latest episode of how expensive it is to own a S6, on this gloomy day


i had to put it back together last week to use for work, and its been driving like ****. got it up in the air and found the top bushes were no longer connected! must of disturbed it all with the remove and refit (that should be in the middle)


so whipped it all out again


undid the top arm bolts and the bushes just fell out, no wonder it was driving like crap!


top pinch bolts snapped as expected, alot of hammering but no movement at all, got some heat on it for a good 15-20 mins


another half an hour of beating the **** out of it, but still not even a mm of movement, so had no other choice but to start drilling


working up the drill bits a step at a time


untill, with even more hammering, it came out! even the top ball joints were sieezed in.


i had been beating the crap out if it in the vice and had left all sorts of gouges from the jaws, so got the flap wheel out and cleaned it all up


This took about 4 ****** hours to get to this point!!
 
onto thinking about getting the needle bearing out, these are the cheap nasty puller i got to modify


i grinded down the arm to fit the slot behind the bearing


and started chop chop weld weld


and finished up with this puppy


slotted it in, did up the horizontal bolt to lock the jaw arms outwards,


then started doing up the two outer bolts


and out it came :)


achievement :)


i put the new bearing on the flange and drove it in


whipped the old seal out and put the new one in ( this was just a precautionary, it wasn't leaking, but no doubt it would have done afterwards)


and the flange back in with a new bolt, and filled back up with fluid to the drain plug :)


onto the suspension refit, great audi design means you need to drop the rear of the subframe to get the lower arm bolt out as it fits the body if you dont


was just about to put the driveshaft back in and i nothiced a part number on the inner cv, cleaned it up and found 4B3407341B. so that might aid my search for the correct cv joint!


and got all the new arms on


something alot of people miss out is to make sure you do all the bolts for the arms up when the car is at its actual ride height. not hanging down, or the bushes wont last 5 minutes. i know my hub to fender is 33 inches, so jacked it up to that and did all the bolts up


and back together


Didnt even attempt the other side as tried cracking the pinch bolt and it was solid so i recon it will be the same again :(

But it does drive alot better now with the new arms, a big improvement!
 
  • Like
Reactions: mrnice and Greeny233
Nice work again (and what a nightmare), I did upper arms and coilovers recently and spent 3 hours on the first punch bolt, eventually drilling it out, 2nd pinch bolts I cut to the chase and cut the ends off then drilled out what was left, only took an hour without all the heat and bashing. Good luck with the other side!