

Rocko
TT 225
Ok heres the "How to.." for doing your lights black like mine. After doing these ones last week Ive upped the difficulty rating to 3 Stars. So only take this one, if you have extreme amounts of patience and you like a bit of butchery! I ******** off before the process was completely finished but you basically reverse the first part and put them back on the car.
Here goes.
Ok, first job is to remove the front bumper. Its 3 x 10mm bolts either side of the bumper and two more underneath. You get to the side ones through the splash guards. Get someone with small hands to do this, thats why we have a "Weeballs" (as seen on the right).
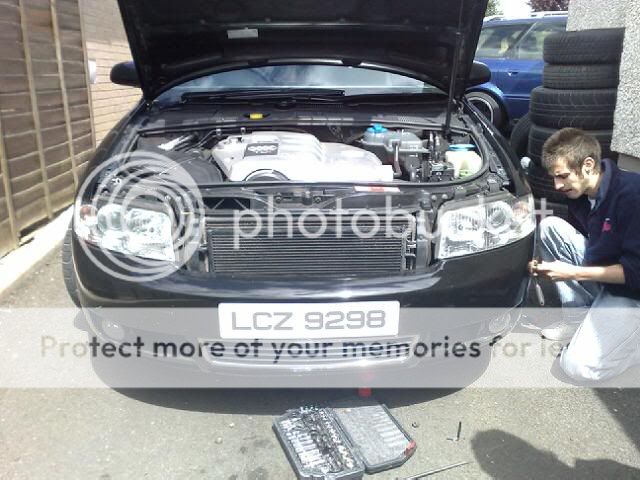
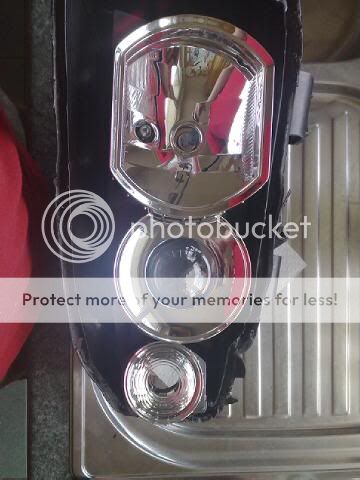
Lights look like this before...

Once the bumper is off try not to look at the car, its quite a sorry sight.

Now to remove the lights, you take out the 4 x Torx screws, two on top and two underneath. Excuse the rock fingers, I dont have very big hands either.
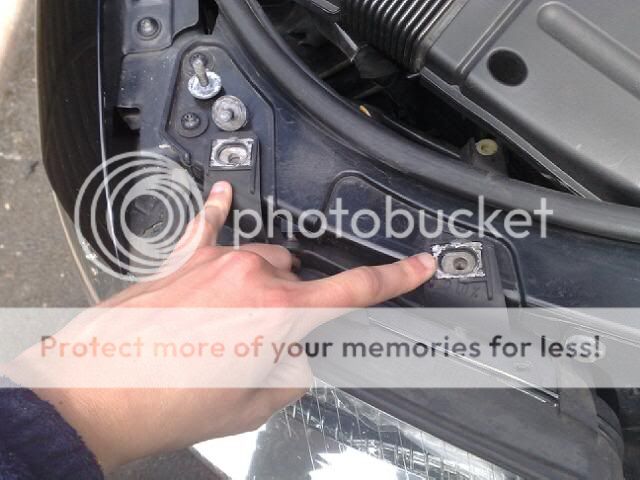

Once free'd, just pop the light connections out as so..

Hole you leave should look like this and the front looks like....


So thats the lights removed, now we have to get them ready for baking. Remove the bulbs you can, its been proved that the heat doesnt upset them too much.
Remove this rubber surround, it just pulls off but dont go mad as you can rip it.

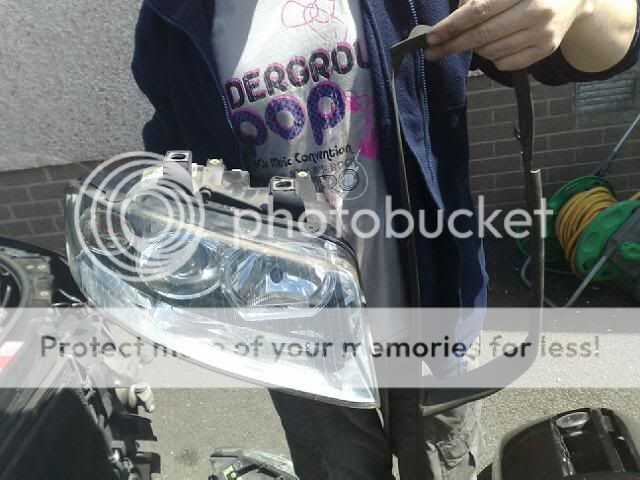
Top of the light should now look like this...

During this process, preheat your oven to 100 degress C. Now bosh them in the oven for 1 hour.


Make tea.

After an hour or so, doesnt matter if you're 15 minutes over, take them out. Be careful as they are hot and all the little metal bits are fecking roasting! Use oven glves and a Ryan.

Now, this is the hard part. Go to work on the bonder running round the lights with a butter knife working it into all the gaps and prising the light apart. At this point, its a good idea to get a legend such as myself to help.
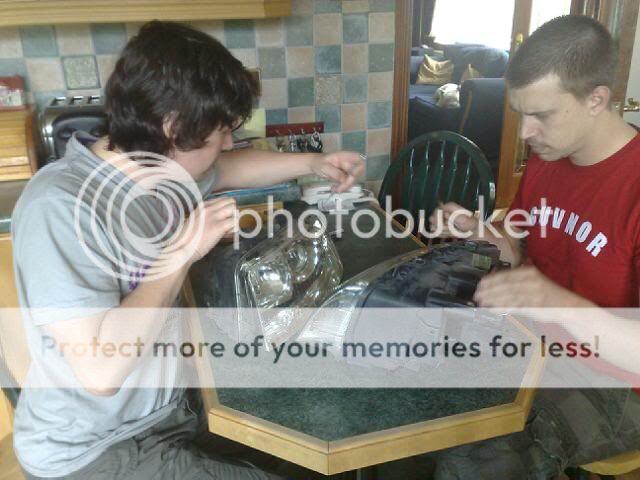
You really need to go to town on the bonder to get a gap created to eventually pull the lights apart. AS I said before, dont attempt this if you dont like butchering your car parts.

If the bonder cools too much, itll become very difficult to work apart so dont be afraid to chuck them back in the oven for a while. (These ones took 2 hours!, mine took an hour)
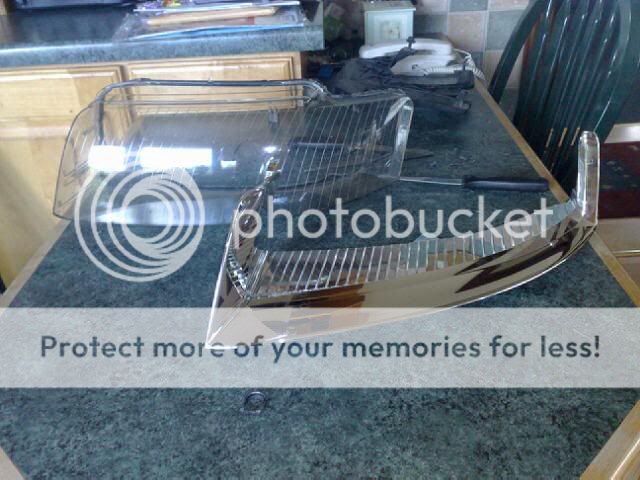
Once you have the plastic cover off the light, you will have the light assembly and the plastic lens cover containing the chrome bit you want to paint. Best way to remove the chrome piece from the plastic to the persuade (gently!!) the thin part to the right of the light out first. Then it will all just pop out. (Thin part on the right hand side of this picture)
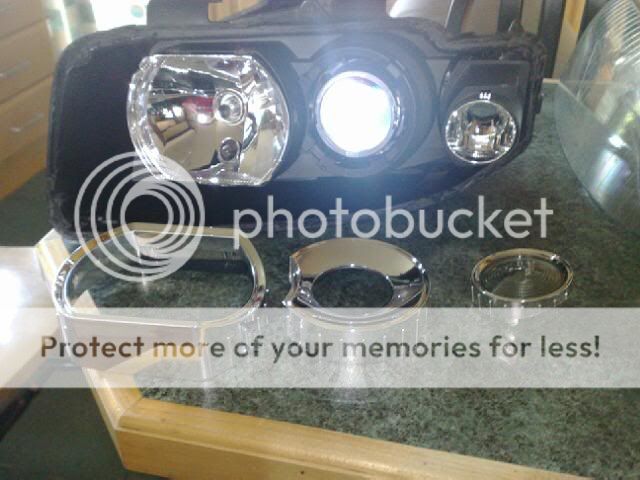
Now you want to get your chrome lens surrounds off. Again they just need a bit of persuasion and they'll pop off no problems.
Now what I do, is tape the front of these and spray the outsides. Best way to do it is to layer tape on and then cut the excess off.
Once its been given a few coats of matte black paint and left to dry, reassemble in the reverse order. Put them back in the oven to reseal the bonder, but if you think it needs more sealing then just use normal bonder. Mine didnt, they resealed in the oven. Reverse all the other steps and bingo, dark lights for your A4.
Not everyones ideal mod or way to do it and please only do it if you have patience, and dont mind hacking into your lights with a knife. And make sure you dont slice your knackers off in the process. That would not be good.
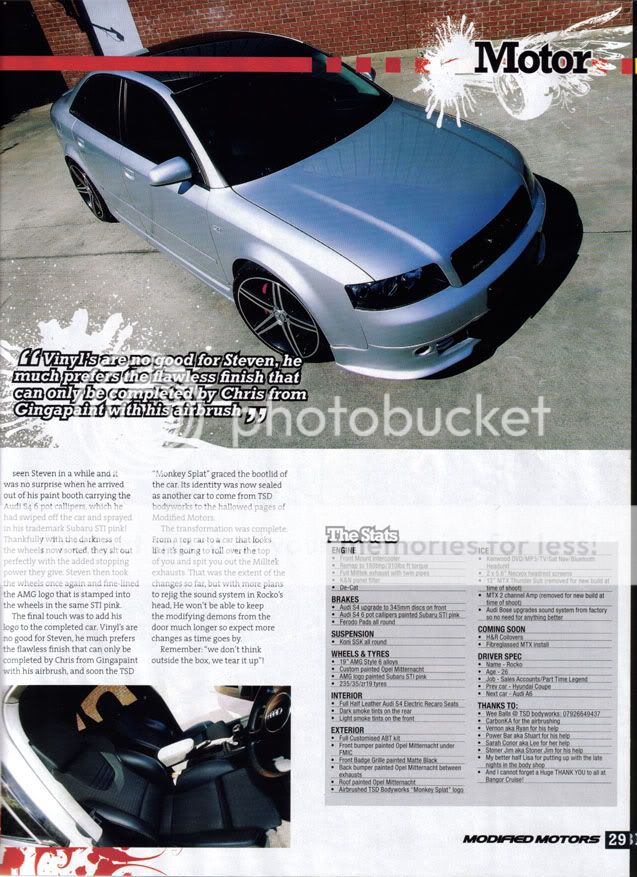
Since I fecked off before the car was finished, Ive only got photos of my own car.
So here it is.
Here goes.
Ok, first job is to remove the front bumper. Its 3 x 10mm bolts either side of the bumper and two more underneath. You get to the side ones through the splash guards. Get someone with small hands to do this, thats why we have a "Weeballs" (as seen on the right).
Lights look like this before...
Once the bumper is off try not to look at the car, its quite a sorry sight.
Now to remove the lights, you take out the 4 x Torx screws, two on top and two underneath. Excuse the rock fingers, I dont have very big hands either.
Once free'd, just pop the light connections out as so..
Hole you leave should look like this and the front looks like....
So thats the lights removed, now we have to get them ready for baking. Remove the bulbs you can, its been proved that the heat doesnt upset them too much.
Remove this rubber surround, it just pulls off but dont go mad as you can rip it.
Top of the light should now look like this...
During this process, preheat your oven to 100 degress C. Now bosh them in the oven for 1 hour.
Make tea.
After an hour or so, doesnt matter if you're 15 minutes over, take them out. Be careful as they are hot and all the little metal bits are fecking roasting! Use oven glves and a Ryan.
Now, this is the hard part. Go to work on the bonder running round the lights with a butter knife working it into all the gaps and prising the light apart. At this point, its a good idea to get a legend such as myself to help.
You really need to go to town on the bonder to get a gap created to eventually pull the lights apart. AS I said before, dont attempt this if you dont like butchering your car parts.
If the bonder cools too much, itll become very difficult to work apart so dont be afraid to chuck them back in the oven for a while. (These ones took 2 hours!, mine took an hour)
Once you have the plastic cover off the light, you will have the light assembly and the plastic lens cover containing the chrome bit you want to paint. Best way to remove the chrome piece from the plastic to the persuade (gently!!) the thin part to the right of the light out first. Then it will all just pop out. (Thin part on the right hand side of this picture)
Now you want to get your chrome lens surrounds off. Again they just need a bit of persuasion and they'll pop off no problems.
Now what I do, is tape the front of these and spray the outsides. Best way to do it is to layer tape on and then cut the excess off.
Once its been given a few coats of matte black paint and left to dry, reassemble in the reverse order. Put them back in the oven to reseal the bonder, but if you think it needs more sealing then just use normal bonder. Mine didnt, they resealed in the oven. Reverse all the other steps and bingo, dark lights for your A4.
Not everyones ideal mod or way to do it and please only do it if you have patience, and dont mind hacking into your lights with a knife. And make sure you dont slice your knackers off in the process. That would not be good.
Since I fecked off before the car was finished, Ive only got photos of my own car.
So here it is.


")
