Yeah loads but this young man ( the only Shepard in bali aside from military dogs) is much more useful for keeping evil out of the house 

 sound 1000000% better than what I took out , well pleased and lights up red and white like the dash clocks
 It's an A4 (B6) one which everyone states you have to trim , I didn't !Which fascia is that for double din?
It already has been Ian , my daily is a vw caddy van so it going to come in VERY handyYou'll find that vcds cable will be worth everything you paid for it and then some!!!
I'm not sure what all the extra bits are in that listing ?
Ok. Thank you very much. I was searching long time for double din fascia.I'm not sure what all the extra bits are in that listing ?
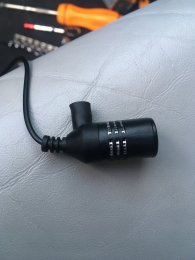
This is what I bought .
View attachment 135819
, brake lights and haldex now as they should be 
Sorry buddy England it is lol yeah know what you mean got to take major organs out first to get power up been toying with the idea of some cheap quality rods..Errrr no !
My S3 is in England !
My dad lives in Bali which is why I was there in June .
350 isn’t happening until I have fully sorted the chassis and done rods and valve guides and inconel valves
Between being busy with work I’ve got round to the inlet stuff that I’ve had nearly a year to the day !!
Cracked on
View attachment 155101
And
View attachment 155102
Good stuff
View attachment 155103
View attachment 155104
All new injector cups , note the special tool for winding them in (a ground down unf bolt )
View attachment 155105
With a bead of RTV to prevent any boost escapes
View attachment 155107
Injectors sonically cleaned and new o rings
View attachment 155108
The main purpose of all this was the inlet spacer (thanks to @StaceyS3 ) and the WMI spacer .
Took the opportunity to finish off the JCS hi grip swap to all clips while access was good .
View attachment 155109
Annoyingly the phenolic spacer doesn’t come with washers (be warned) so had to pop out as is usually the way when doing things
View attachment 155110
Very happy with how this turned out
View attachment 155112
Next on the agenda is the long overdue front suspension refurb along with hunter alignment I’ve just got to decide if I want to lower it or not !!!!
Impossible decision
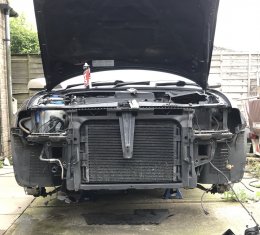
Lastly this makes me sad
View attachment 155113
But now I’m happy
View attachment 155114
Hats off to the designerLooks a well designed bit of kit that
<tuffty/>

Only thing to watch out for is the bit of angled ali at the bottom of the cooler... seems that in the more 'wintery' climates of the UK the salt from the roads can collect there and corrode the bottom part of the core causing a leak...Hats off to the designer
@<tuffty/> given this is so well designed would you please take a minute to explain where I have gone wrong ?Looks a well designed bit of kit that
<tuffty/>