

Manda's B8 A4 build thread - Picture Heavy
- Thread starter Meemo
- Start date
You are using an out of date browser. It may not display this or other websites correctly.
You should upgrade or use an alternative browser.
You should upgrade or use an alternative browser.
worth it though
Agreed, I risk it for a biscuit, then pray I can talk my way out playing the blonde 'I had no idea' card if it comes to it.OMG you bought one of the god awful splitters from the dodgy UK seller too? was yours cracked and full of holes too?
hahaha could try that but might not get same results
yup although mine was from ireland, £130 or something like that thought id got a great deal until it turned up, cracked right through at one end, full of dimples and i think it had been finished with some 80 grit paper, needed the full treatment fiberglass filler etc, fit was fine to be fair but deff not just a paint and fit job
yup although mine was from ireland, £130 or something like that thought id got a great deal until it turned up, cracked right through at one end, full of dimples and i think it had been finished with some 80 grit paper, needed the full treatment fiberglass filler etc, fit was fine to be fair but deff not just a paint and fit job
Where did you get the tint for the fog lights?
ebay seller vtcust0ms
They are not the cheapest but the film is thick non fading, and resistant to stone chips and weather. I would not go for the cheapers ones which will look chipped and nasty very quickly, especially coloured ones.
DangerS3
Registered User
- Joined
- May 22, 2015
- Messages
- 333
- Reaction score
- 100
- Points
- 28
ebay seller vtcust0ms
They are not the cheapest but the film is thick non fading, and resistant to stone chips and weather. I would not go for the cheapers ones which will look chipped and nasty very quickly, especially coloured ones.
Brilliant cheers, will have a look. And I completely agree.

Nothing exciting going on.
Taken my Klucthes off and they are waiting patiently for a new home.
Put MJ in winter mode a little early and got 4 new michelin pilot super sports on them. Last pictures of MJ on the Klutches now.
originally had 2 Bridgestone S0001's fitted, and as soon as I left the I wheel spun out the exit.. figured they needed wearing in. 100 miles later after motorway etc, can wheel spin in 3 gears, and any slight acceleration and traction control was going mad and stearing going hard then twitching, it was nasty!
So back on the monday explained how wrist exercise they was, and got the michelins back on, moral of the story... dont skimp on tyres.
Michelins as usual a dream, hard acceleration and nothing but grip.
Any ways, pics of MJ's hilarious pooment on the standards.. comtemplating some spacers..
went 245/35 18 so no driving low on these.. I smash on everything. (backs are 245/45 in the pic as I had tyres done later on)

Before:
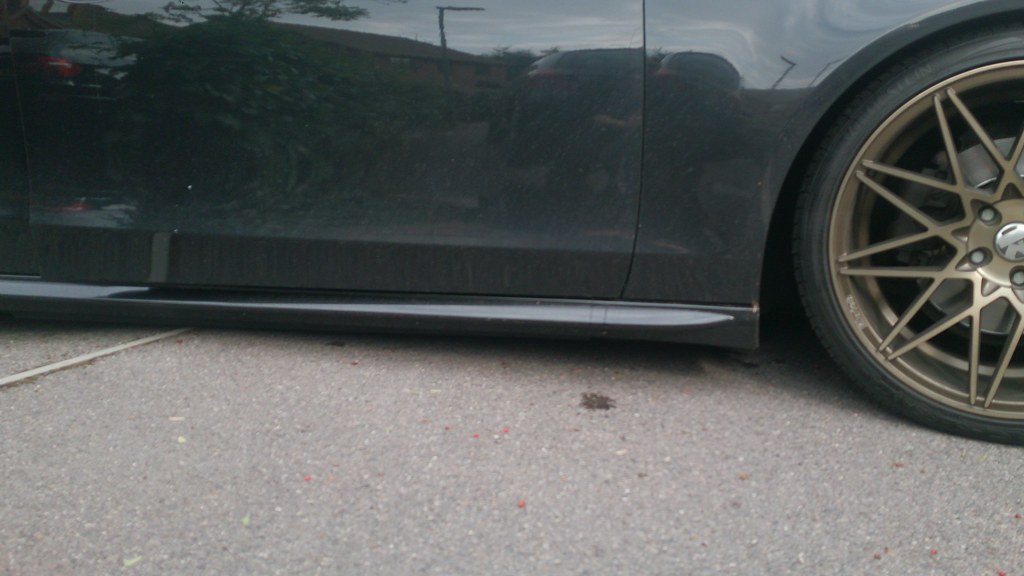
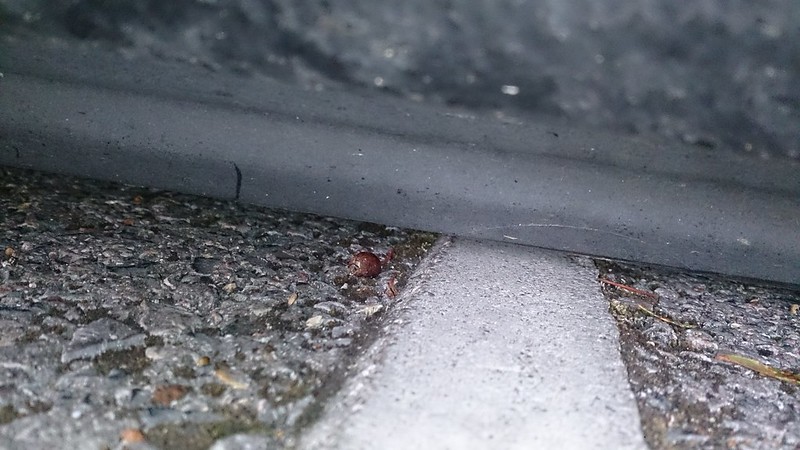
I then lowered the front some more and enjoy the daily scrape on and off the drive
Serious FML moment leaving a multistorey carpark, curbed my wheel a gooden!
went to merge after paying and didnt see the huge cement separator hadnt actually ended.
Never one to disappoint or do things in halves...
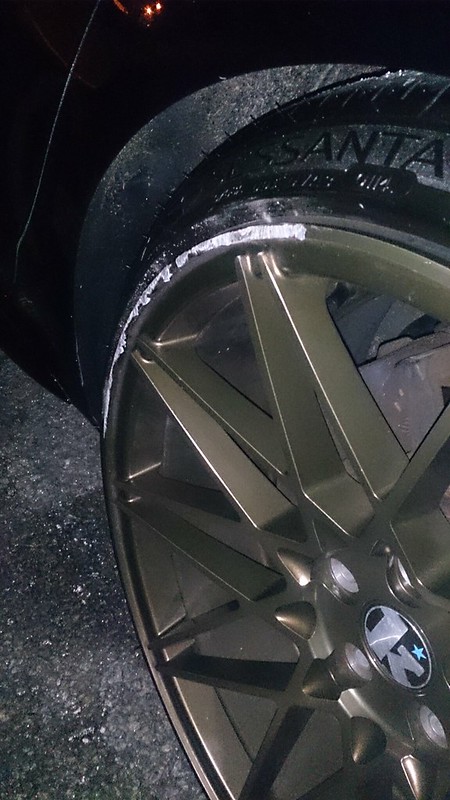
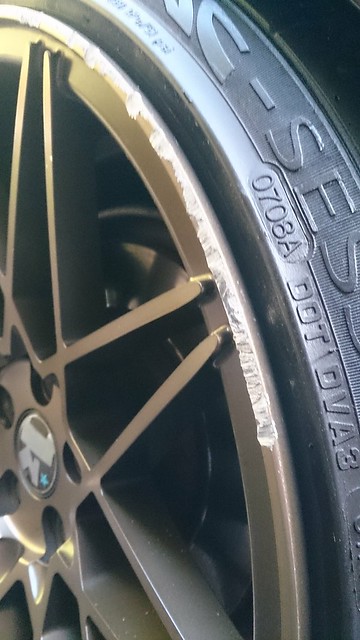
So spent my sunday refurbing my wheel boooo
Painful before shot, then sanded with 80 grit paper :S

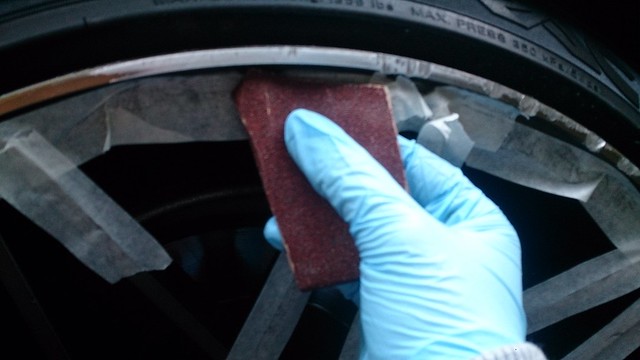
Looked instantly better after sanding with a harsh grade.

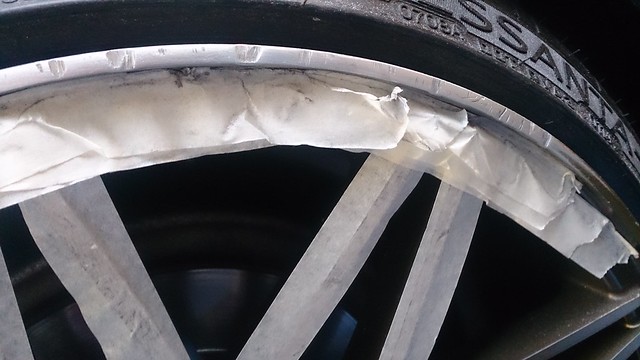
First pass of the filler
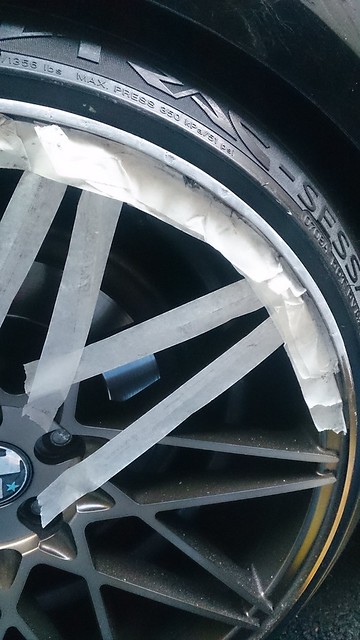
Second pass of the filler and some sanding


Really happy with it so far, not the actual curbing, hopefully be close to original finish just to get me through the winter.
Then had a subtly tint on the tails:
They was so bright and was aiming for a cherry red colour like the gti/gtd mk7s.
Before:
(I dont actually have that much arch gap that side at the rear, super wonky drive lol)
After:
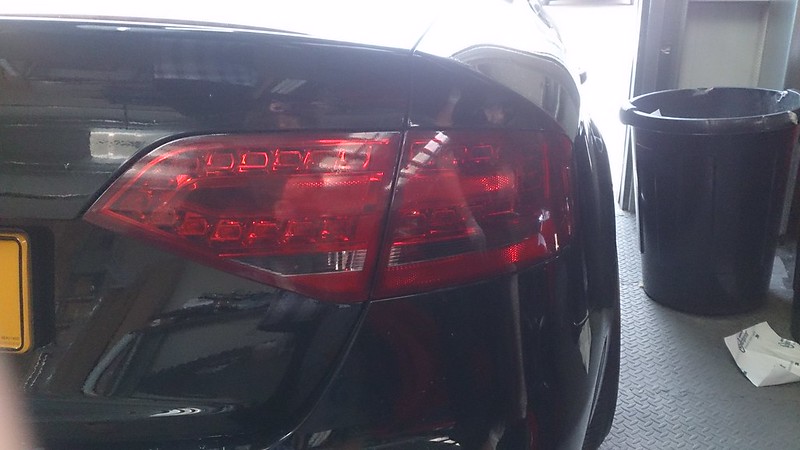

So subtle you wouldn't know unless I told you but I love the difference, looks so mean at night with the LED's all lit
Hi Manda,
I really like what you did to the rear LED's. I thinking of doing the same to mine. Where did you purchase that colour film from?
Thanks.
speechless!
That's a class motor. Alot of love has gone into that.
Thank you
Hi Manda,
I really like what you did to the rear LED's. I thinking of doing the same to mine. Where did you purchase that colour film from?
Thanks.
Thanks, got it on ebay from VTCustoms (should be the name).
Actually been really lazy with updates on here:
she had a little tidying up over winter.
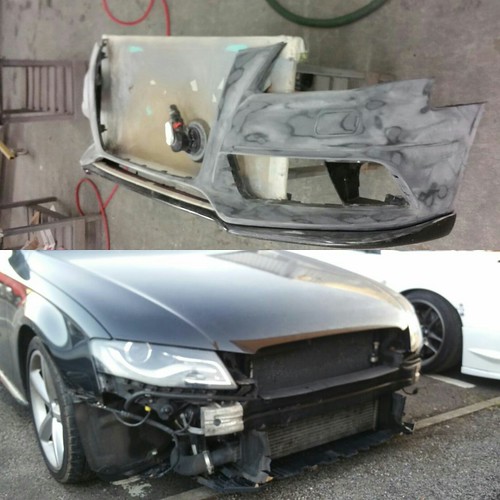
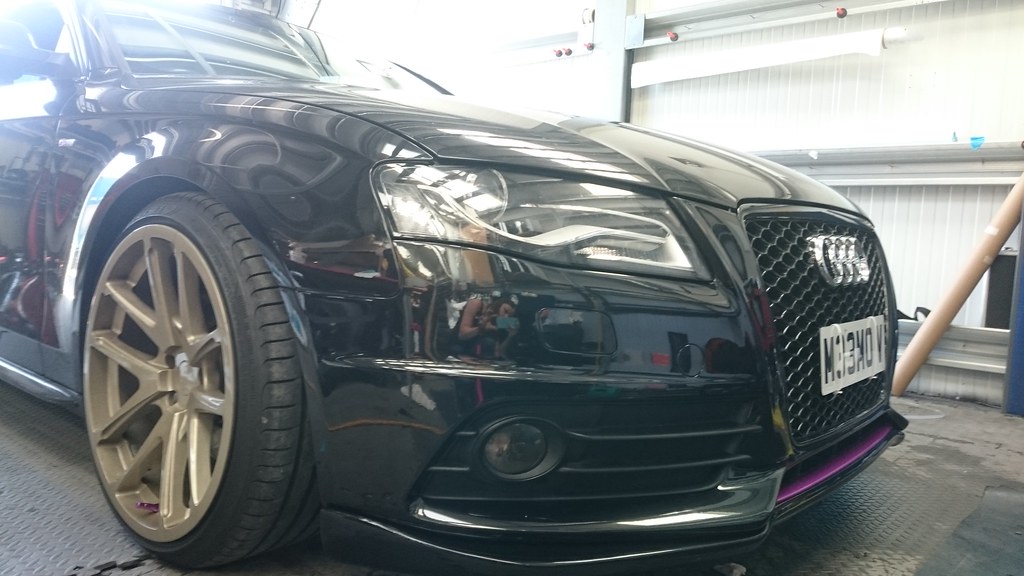
Front bumper had a respray, didnt really need it badly, but the rattle can splitter was showing the stone chips so got the whole thing done. Cant take any credit on the bumper, sent it to the pros
:
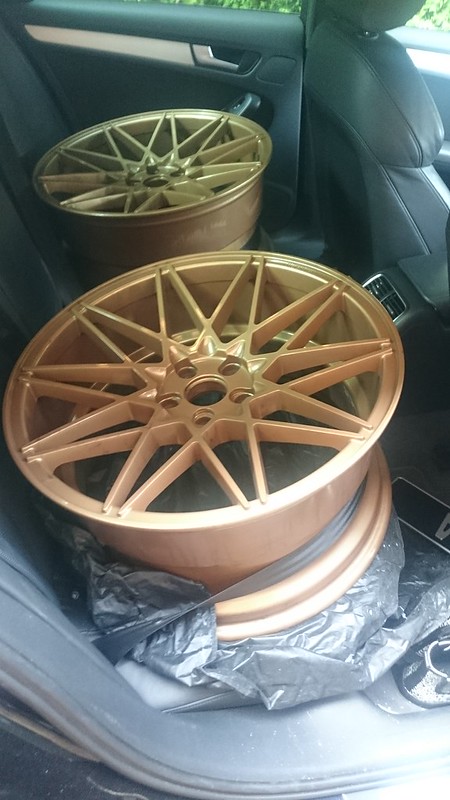
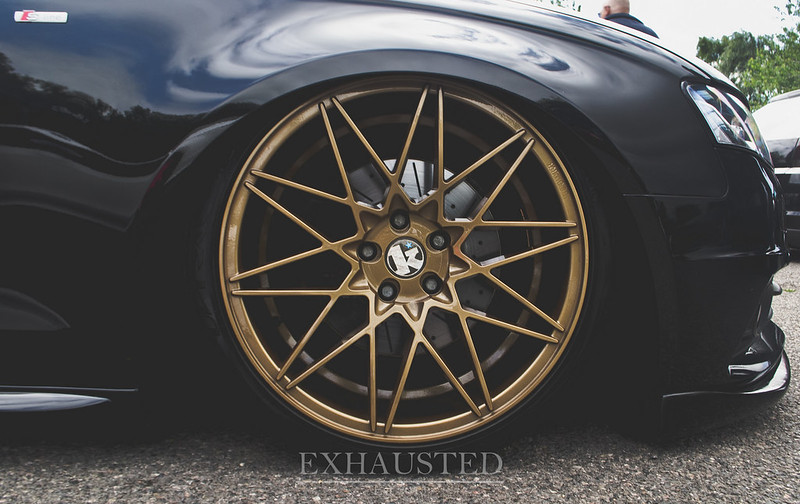
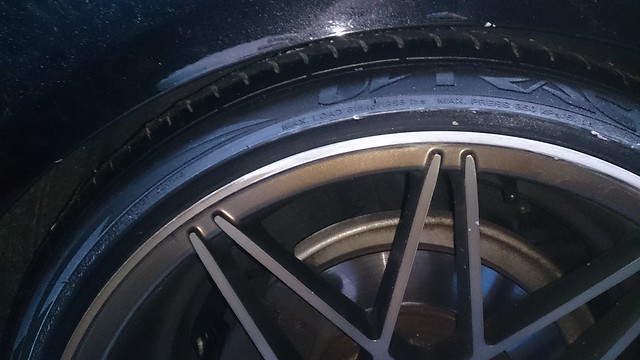
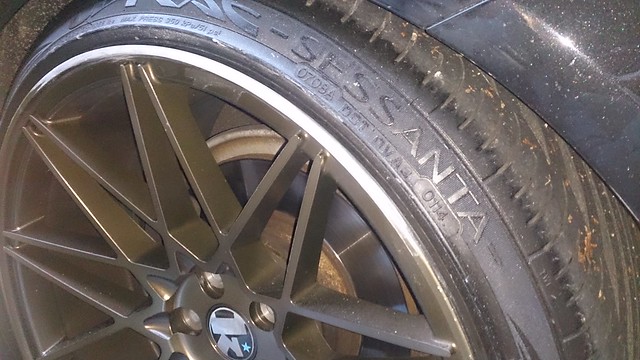
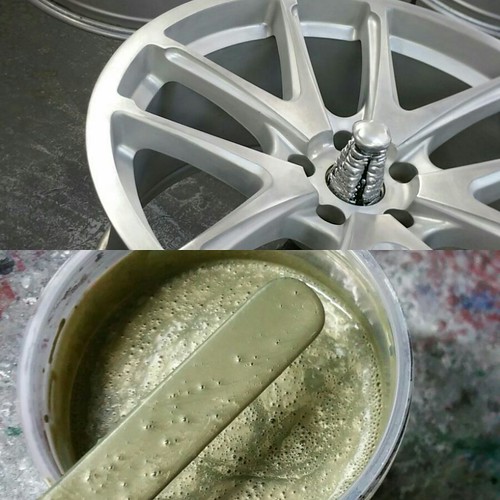
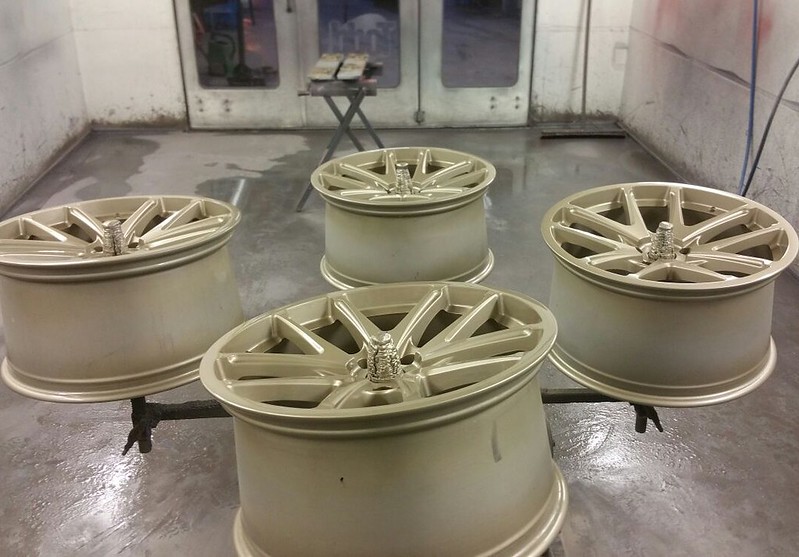
Spent the odd day sanding and filling the wheels I got last year, then when I had finished prep sent them to get painted in a champagne gold colour (same place on bumper). Saved a few pennies doing the prep luckily.
Really pleased with these:
Got new silver rings, not that any one will notice, but the rings from my old standard grille never fitted on the rs grille, so i had to break the clips and wedge it on, so it hung off leaving a gap!
Xenon UK sorted me out some hoops and looks much tidier
top picture shows the gap, bottom is new flush rings
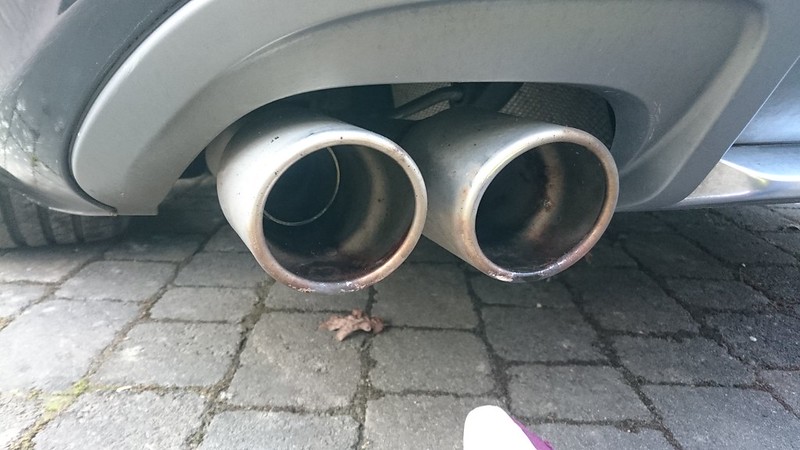
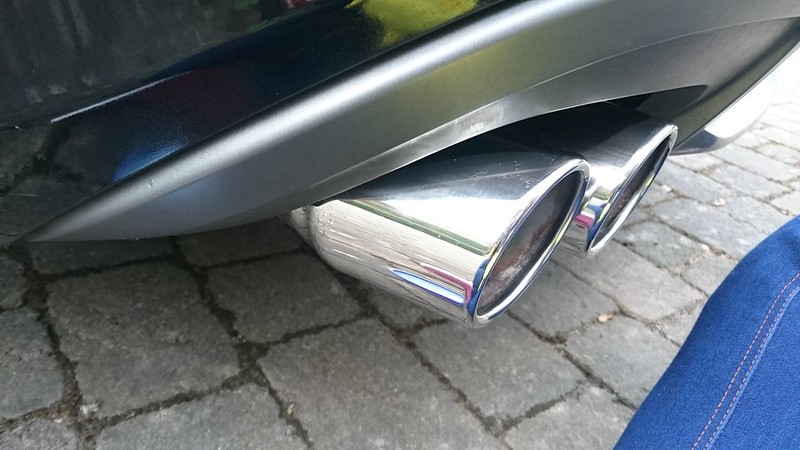
Exhausts got pretty corroded over winter so polished them up with some meguiars metal polish
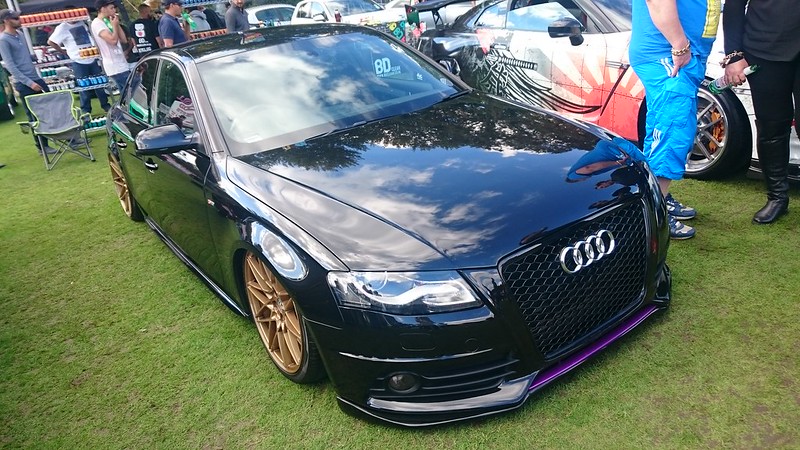
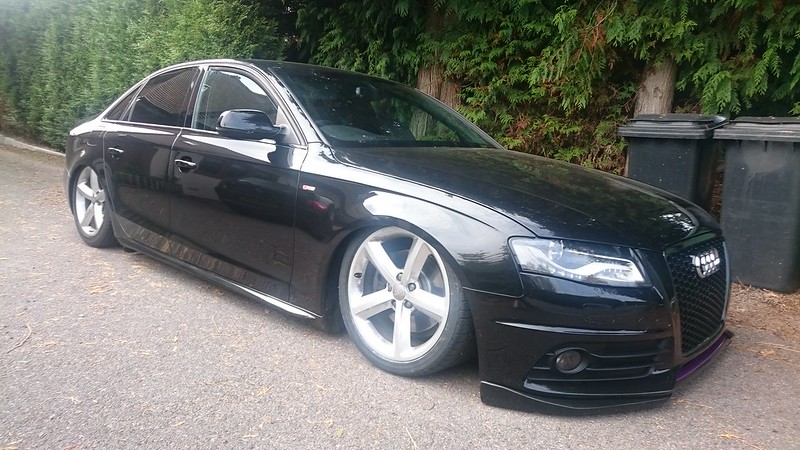
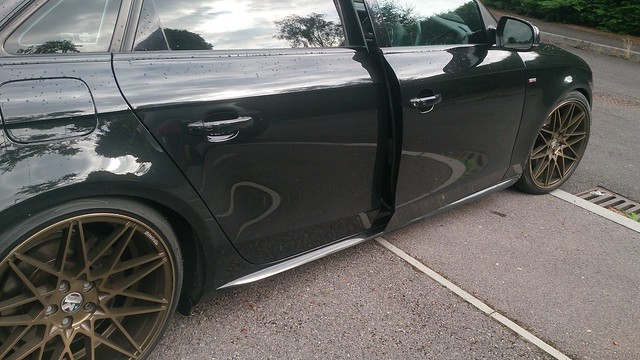
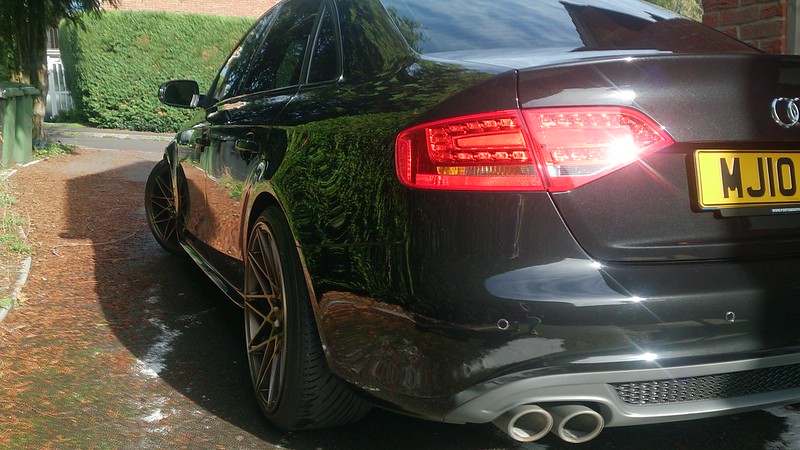
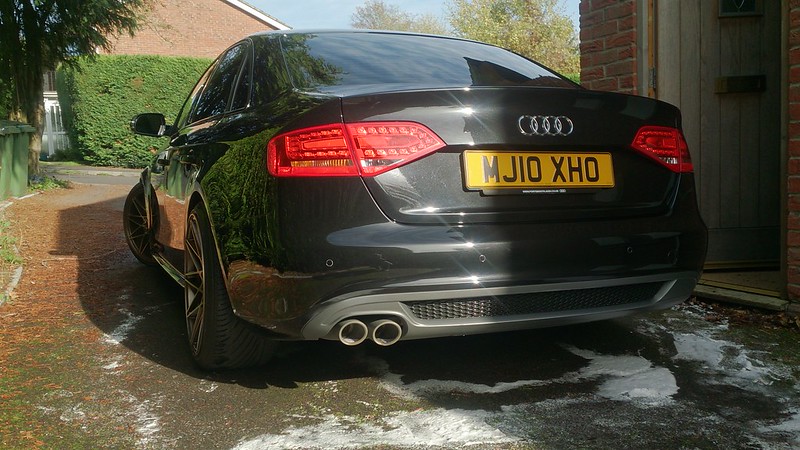
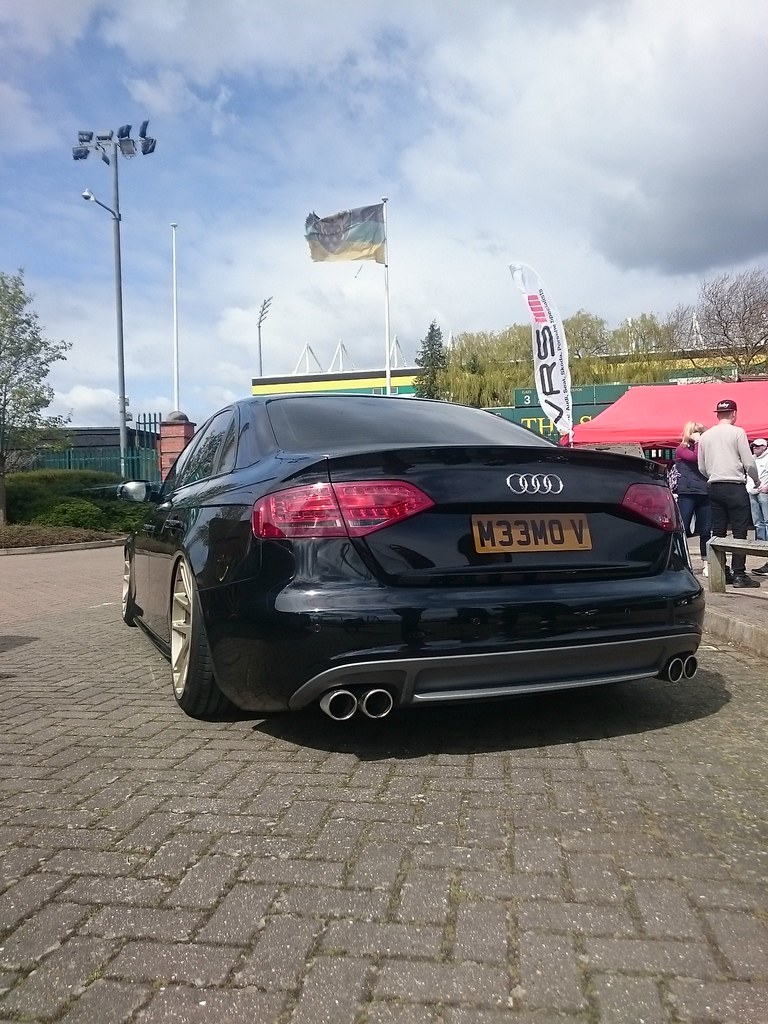
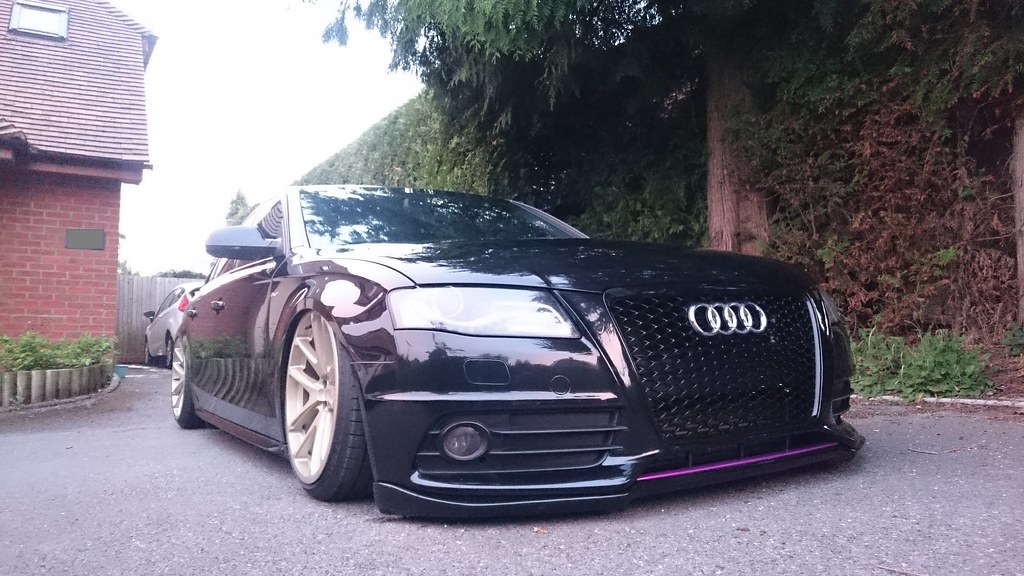
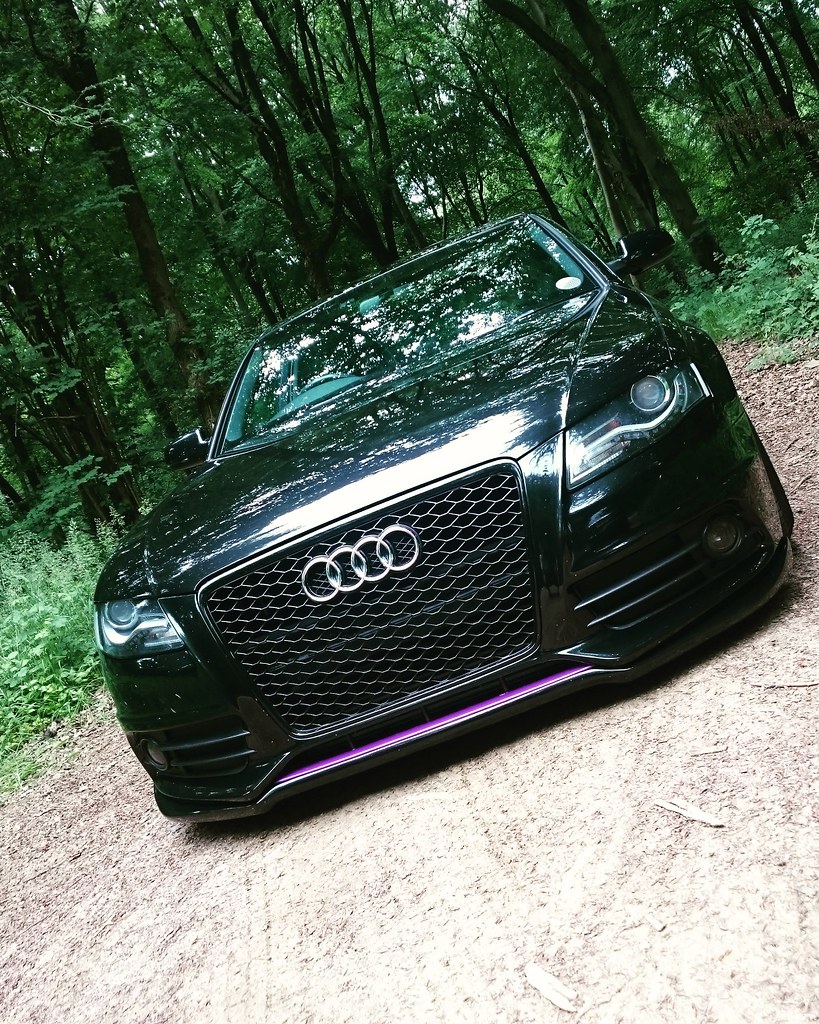
and finally how she is sitting at the moment
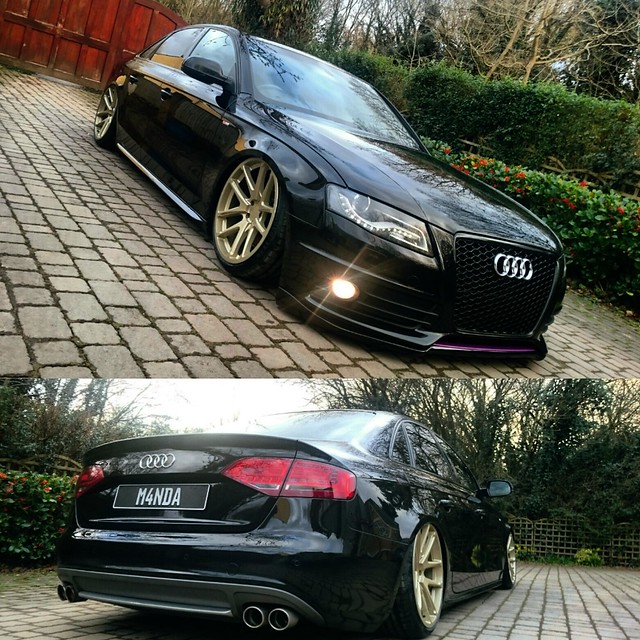
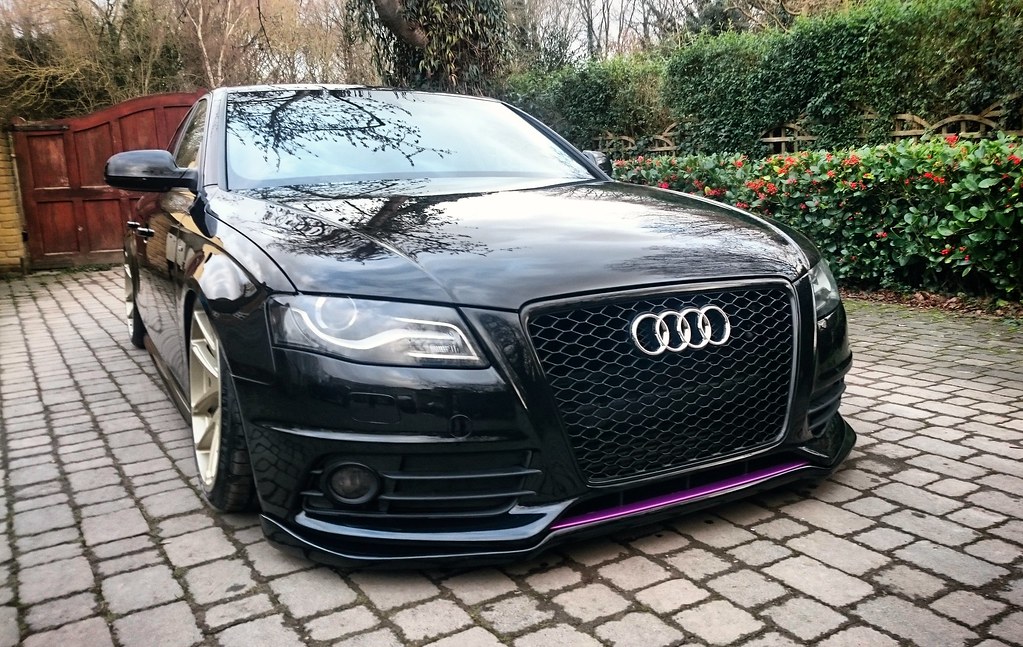
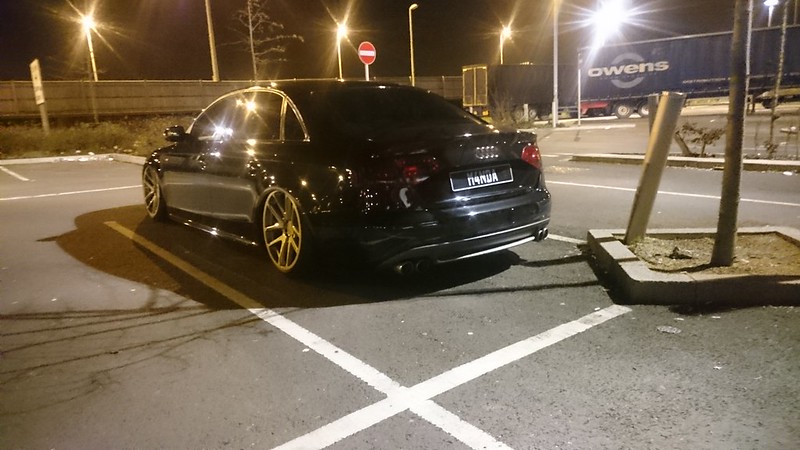

Got nice subtle concave and little bit of natural camber at the front which I love.

How much have you ever spent on this [gorgeous] car, lots I'd like to do, but it all adds up... quite a bit!
Honestly no idea but actually not as much as you think, bought some stuff used and either fit on the driveway, or with the air had a good guy fit it reasonable price, air was used so cheap. And other things rather than get them done pro, have done at home with stuff carefully bought off the internet. mods on a budget
Lucky to have met good people who have looked after me price wise on anything i have had to go to them with.
Been wanting to get a personal plate for years, but never seen one that I can keep for years car to car, nearly got B8 LOW or B8 XOO, but was hesitant as I couldnt really take it to my next car. Thought of mu surname FRY but if/when i marry prob wont want it.
Then i was linked a numberplate with my nick name at ridic low price and couldnt resist!
M33MO V
Very fitting, my bestie since I can remember has called me Meemo, and has been my user name for practically everything since i discovered the internet.
There was a mix up on my new plate order so was sent 2 originally spaced plates for the rear in stead of one original and one Meemo spaced one, but for now untill i receive my resolved order and tint one of the plates
Got my plate order corrected and now have 5 Meemo plates :S
Tinted the rear spaced one, prob will use this for just meets and shows, and use my legal ones rest of the time
Tinted them with light smoke film i had left over from my last number plate, tail lights and fog lights.


And finished


Tinted the rear spaced one, prob will use this for just meets and shows, and use my legal ones rest of the time
Tinted them with light smoke film i had left over from my last number plate, tail lights and fog lights.
And finished
looking good, i run tinted plates much nicer imo
Thanks
I put the 'tinted plate' on and barely looks tinted! i think I need to get some darker tint lol
But as it doesnt look dark think I will run this spacing and level of tint unless I brush with the law on it.
The only reason spacing plates was originally made illegal was so that the old plate recognition tech could read the plates, technology has come a long way since then and the spacing doesnt affect them taking readings any more, maybe they will update this law one day as it seems obsolete now.


My old plate holder I fashioned is too long for the shorter plates I now have, so untill I know how to plastic weld, have DIY'd another plate to make it releasable:
Using:
Releasable/reuseable cable ties
Kitchen role/Cushioning
Duck Tape
Epoxy resin
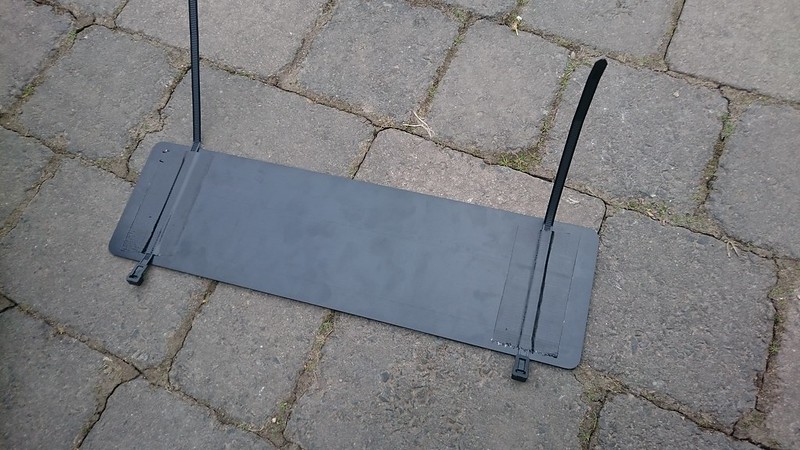

Bit of Epoxy to hold it all together and:
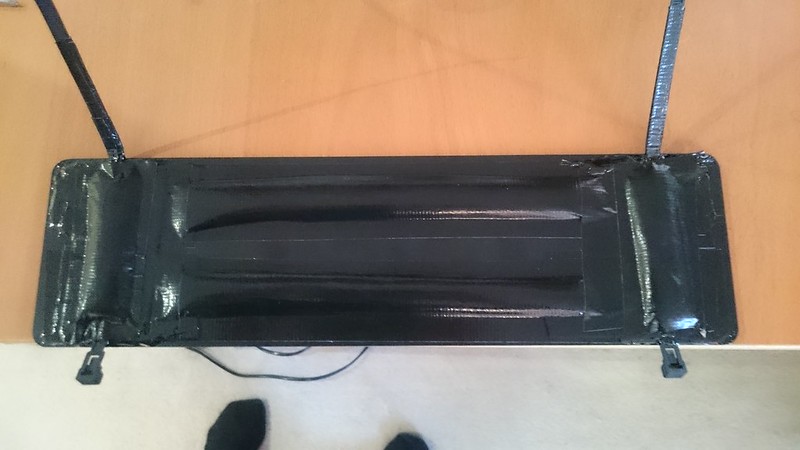

Very VERY home DIY, but it works and I am happy

And a shot of the new plate on the car clean at Fourinstances monthly West End Dubs meet:

Using:
Releasable/reuseable cable ties
Kitchen role/Cushioning
Duck Tape
Epoxy resin
Bit of Epoxy to hold it all together and:
Very VERY home DIY, but it works and I am happy
And a shot of the new plate on the car clean at Fourinstances monthly West End Dubs meet:

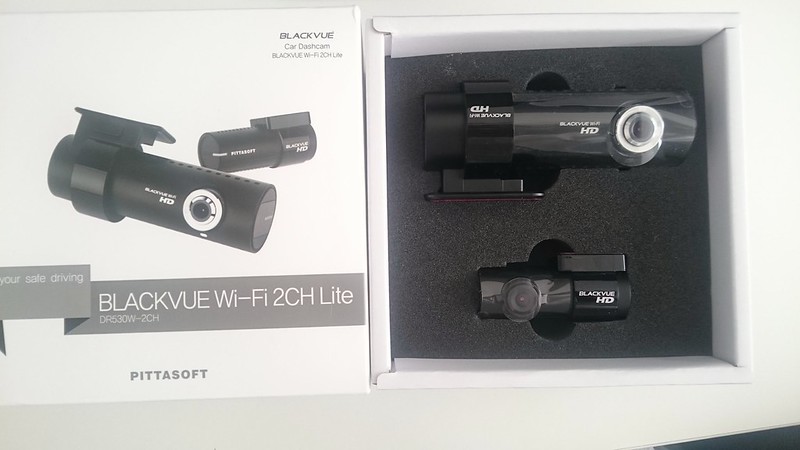
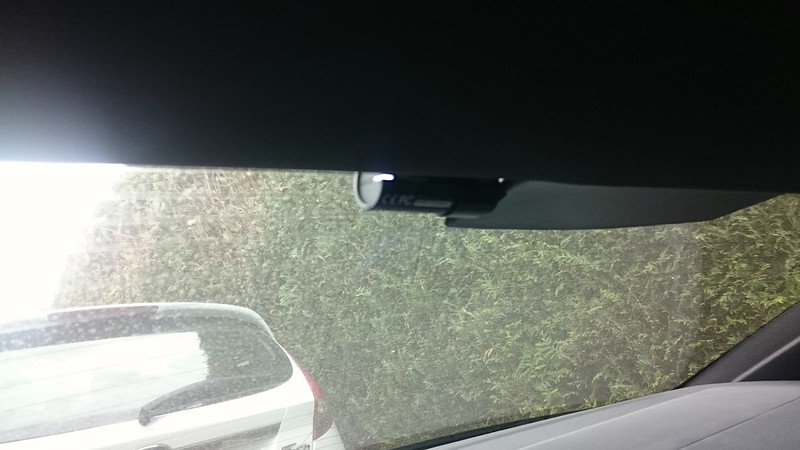
got one of the last gen black vue cameras stupidly cheap as the 530 model was replaced with the 600 this year. rrp £250-£289, got the last of stock at £139 so pretty chuffed. Bought the hardwiring power magic pro box used to monitor the power levels and cut off when your battery gets to a certain level.
Favourite part, motion sensor parking mode, I have had all my cars bar 1 hit either when parked on my drive (was fuming!) or parked in car parks or on roads, so to finallly be able to have somehting to catch any future hit and runs makes me feel every penny was worth it.
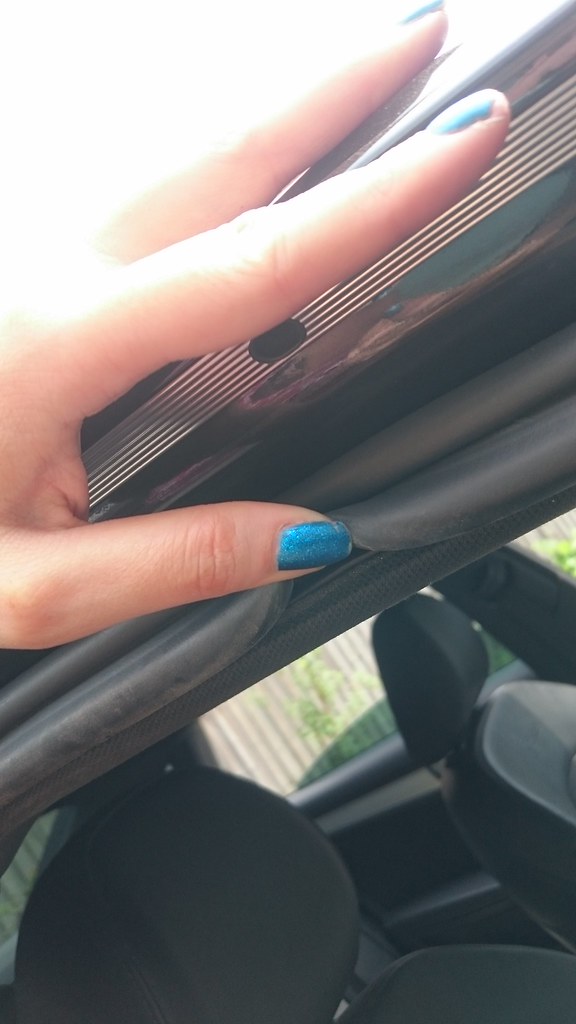
Fitted in about an hour this weekend, was actually really easy to hard wire and route behind the panels having not done one of these before.
Grounded then just the Live (yellow) to my horn (25 amp fuse), and ignition (red) to my AC (5 amp fuse).
the wires to the left are the excess dash cam wires as there was a nice clear space to put them there
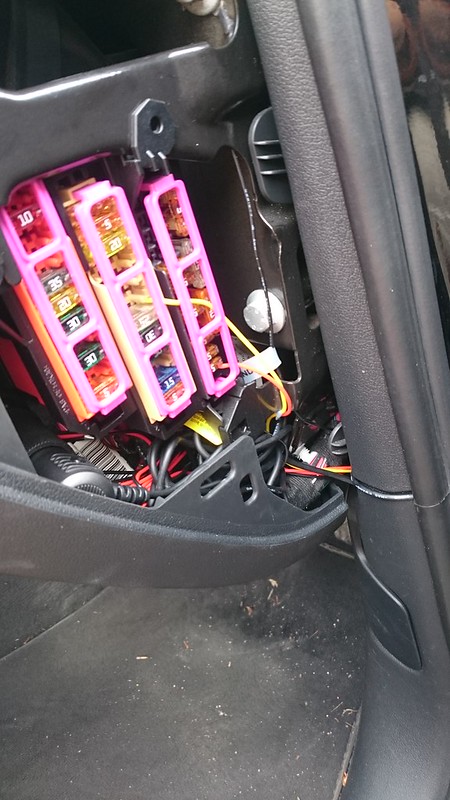
This is the power monitoring box, the black wire on the right is now neatly away out of site, but took this whilst i was wiring it all up.
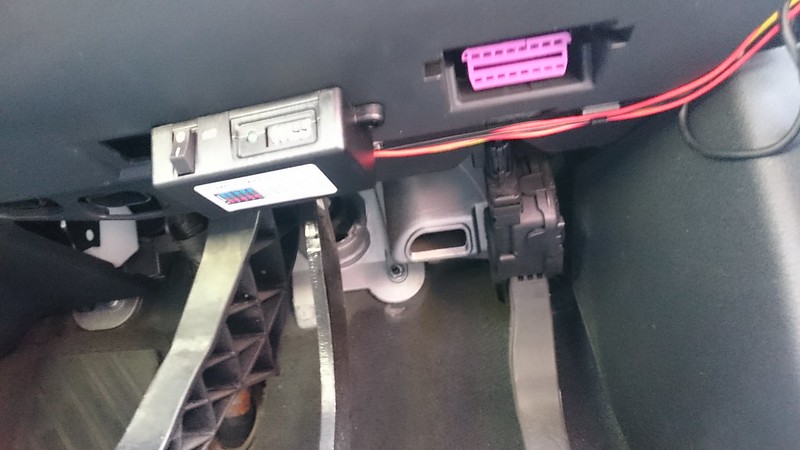
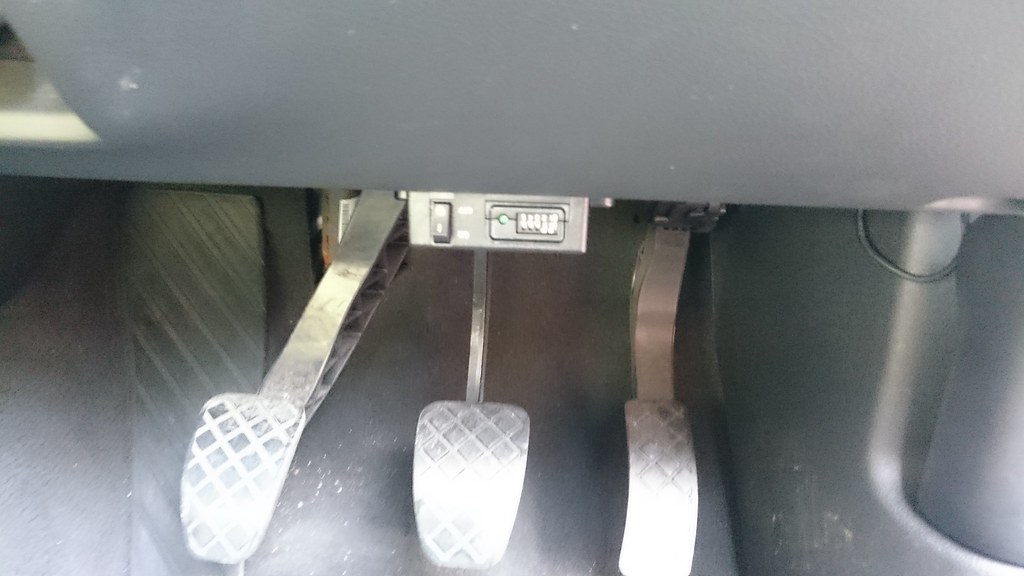
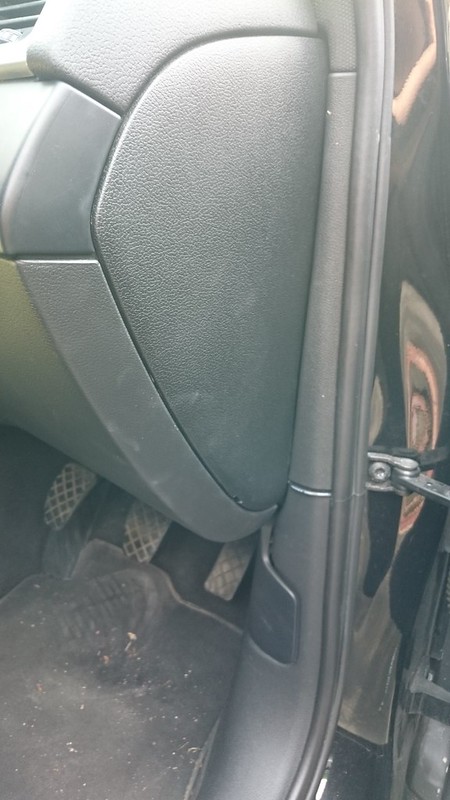
Wired it under the headlining and middle pillar:
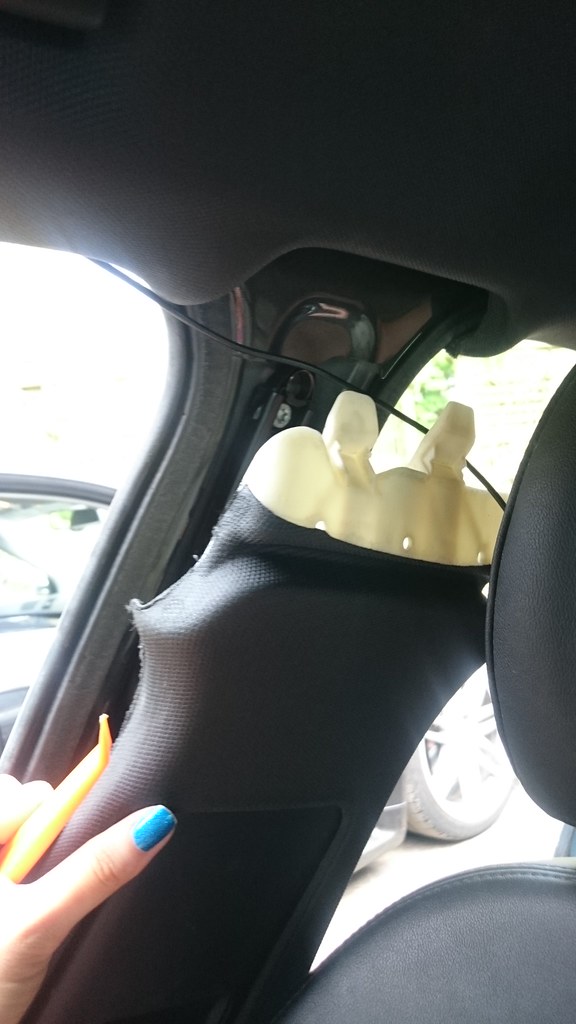
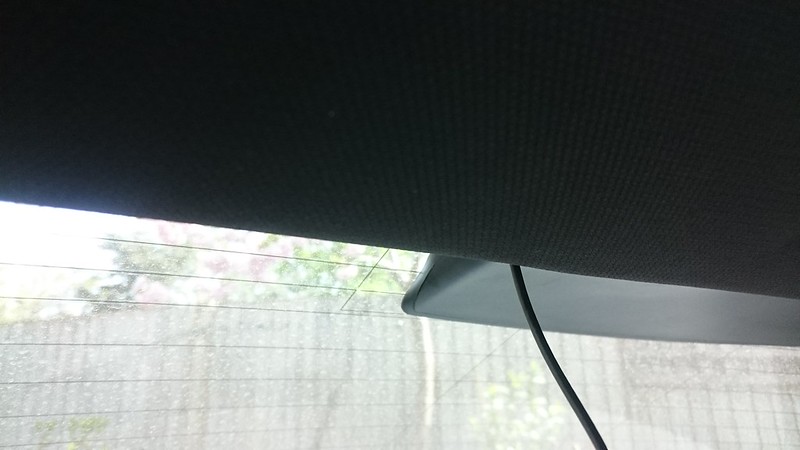
All hidden not a wire in sight.
From outside is really subtle so very pleased
front:
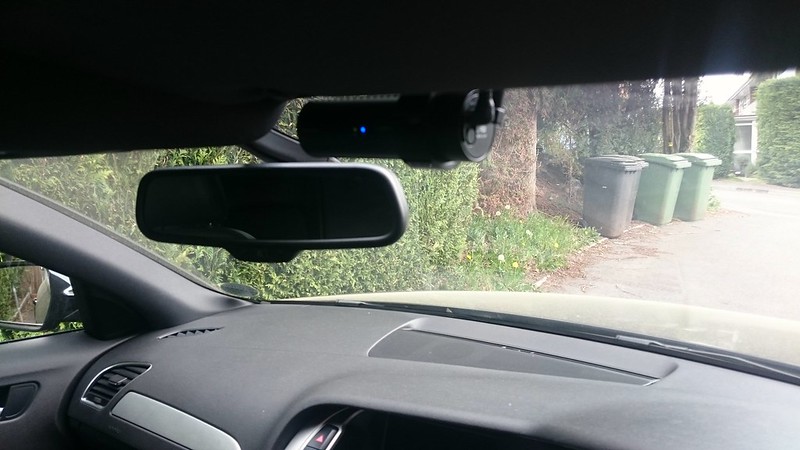
Rear:
Favourite part, motion sensor parking mode, I have had all my cars bar 1 hit either when parked on my drive (was fuming!) or parked in car parks or on roads, so to finallly be able to have somehting to catch any future hit and runs makes me feel every penny was worth it.
Fitted in about an hour this weekend, was actually really easy to hard wire and route behind the panels having not done one of these before.
Grounded then just the Live (yellow) to my horn (25 amp fuse), and ignition (red) to my AC (5 amp fuse).
the wires to the left are the excess dash cam wires as there was a nice clear space to put them there
This is the power monitoring box, the black wire on the right is now neatly away out of site, but took this whilst i was wiring it all up.
Wired it under the headlining and middle pillar:
All hidden
not a wire in sight.
From outside is really subtle so very pleased
front:
Rear:
Also had a bit of a nightmare with the 'Professional' paint job I had on the front bumper, paid £260 to have the bumper fully resprayed by a paint place that does insurance work for Audi, but in less than 1000k it was battered in stone chips, at the point i had only covered 500 miles, and a guy at a car show come pup to me and says 'your car suffers the same problem as mine, bumper is completely covered in stone chips isnt it'...
Of course i had it only resprayed 'professionally' the month before and was quite upset.
So took it back and they have resprayed a second time but i think this is another 'blowover' job again so will chip quickly, left it to cure last 2 weeks...
Not sure whether to ceramic coat it or clear wrap it?!
Did a 5 hour run of DA'ing her, only managed to get the wings (front and back), boot and bonnet done. Plan to do the remaining doors and rear bumper another weekend.
Also DA'd out the etching on the boot from the old number plate on another evening.


and some pictures taken recently of her

Of course i had it only resprayed 'professionally' the month before and was quite upset.
So took it back and they have resprayed a second time but i think this is another 'blowover' job again so will chip quickly, left it to cure last 2 weeks...
Not sure whether to ceramic coat it or clear wrap it?!
Did a 5 hour run of DA'ing her, only managed to get the wings (front and back), boot and bonnet done. Plan to do the remaining doors and rear bumper another weekend.
Also DA'd out the etching on the boot from the old number plate on another evening.
and some pictures taken recently of her
Adamwagg
Registered User
[QUOTE="Meemo, post: 27346ave the bumper fully resprayed by a paint place that does insurance work for Audi, but in less than 1000k it was battered in stone chips, at the point i had only covered 500 miles, and a guy at a car show come pup to me and says 'your car suffers the same problem as mine, bumper is completely covered in stone chips isnt it'...
Of course i had it only resprayed 'professionally' the month before and was quite upset.
So took it back and they have resprayed a second time but i think this is another 'blowover' job again so will chip quickly, left it to cure last 2 weeks...
Not sure whether to ceramic coat it or clear wrap it?!
Did a 5 hour run of DA'ing her, only managed to get the wings (front and back), boot and bonnet done. Plan to do the remaining doors and rear bumper another weekend.
Also DA'd out the etching on the boot from the old number plate on another evening.
and some pictures taken recently of her
[/QUOTE]
What cutting compound were you using to da yours. I had same problem as you had rear of my car Re painted due to lacquer peel only after 2 months to start peeling again
Of course i had it only resprayed 'professionally' the month before and was quite upset.
So took it back and they have resprayed a second time but i think this is another 'blowover' job again so will chip quickly, left it to cure last 2 weeks...
Not sure whether to ceramic coat it or clear wrap it?!
Did a 5 hour run of DA'ing her, only managed to get the wings (front and back), boot and bonnet done. Plan to do the remaining doors and rear bumper another weekend.
Also DA'd out the etching on the boot from the old number plate on another evening.
and some pictures taken recently of her
What cutting compound were you using to da yours. I had same problem as you had rear of my car Re painted due to lacquer peel only after 2 months to start peeling again
What cutting compound were you using to da yours. I had same problem as you had rear of my car Re painted due to lacquer peel only after 2 months to start peeling again
I never DA'd the newly painted panel, infact I wont even snow foam it till it has been 6 months to be safe.
I used the Megauirs cutting compound with the DoDo juice pads.
Adamwagg
Registered User
Yeah I agree I haven't DA'd the rear it was the front I was doing. I have found the Maguires is the best to use. Your car looks amazing
good idea, it shouldnt need a DA if it is freshYeah I agree I haven't DA'd the rear it was the front I was doing. I have found the Maguires is the best to use. Your car looks amazing
ah good to hear, I havent used any other brand tbh, didnt think much of their pads, but combined with the DoDo results was very quick especially for just a little DA.Thankyou
Tried to find a thread for yours but couldnt, looks nice in the thumbnail, very low! Adamwagg
Registered User
Yeah I have not done a build thread yet I keep saying I will but keep forgetting lol that's how it sit at moment it's parked on a slope so it looks higher there. Keep toying with idea of buying a black votex kitted one.but can't seem to part with it.the dodo juice is a good choice I swear by it

got one of the last gen black vue cameras stupidly cheap as the 530 model was replaced with the 600 this year. rrp £250-£289, got the last of stock at £139 so pretty chuffed. Bought the hardwiring power magic pro box used to monitor the power levels and cut off when your battery gets to a certain level.
Favourite part, motion sensor parking mode, I have had all my cars bar 1 hit either when parked on my drive (was fuming!) or parked in car parks or on roads, so to finallly be able to have somehting to catch any future hit and runs makes me feel every penny was worth it.
Fitted in about an hour this weekend, was actually really easy to hard wire and route behind the panels having not done one of these before.
Grounded then just the Live (yellow) to my horn (25 amp fuse), and ignition (red) to my AC (5 amp fuse).
the wires to the left are the excess dash cam wires as there was a nice clear space to put them there
Where did you snap this bad boy up from? I need to get my hands on one as soon as.
Sadly it was the last one left on Amazon, they are discontinued and replaced by the BlackVue DR650w-2ch which is £280 :sWhere did you snap this bad boy up from? I need to get my hands on one as soon as.
You might be able to get the last of stock on another site hopefully reduced to clear, model is BlackVue DR530w-2ch, I paid £139 in clearance.
I had a problem with the bumper respray sadly, after between 500-1000k it was peppered in white stone chips, I didnt take any pictures but a guy at GTI Springfest kindly spoke to me and told me how bad my stone chips are... on my 500 miles 1 month old newly sprayed front bumper so I booked it in and did another show before it went back in.
I contacted they company that did it and they was very apologetic and admited the changed laquers for another brand and found it did not heald up well and offered to respray again with different laquer to rectify the issue.
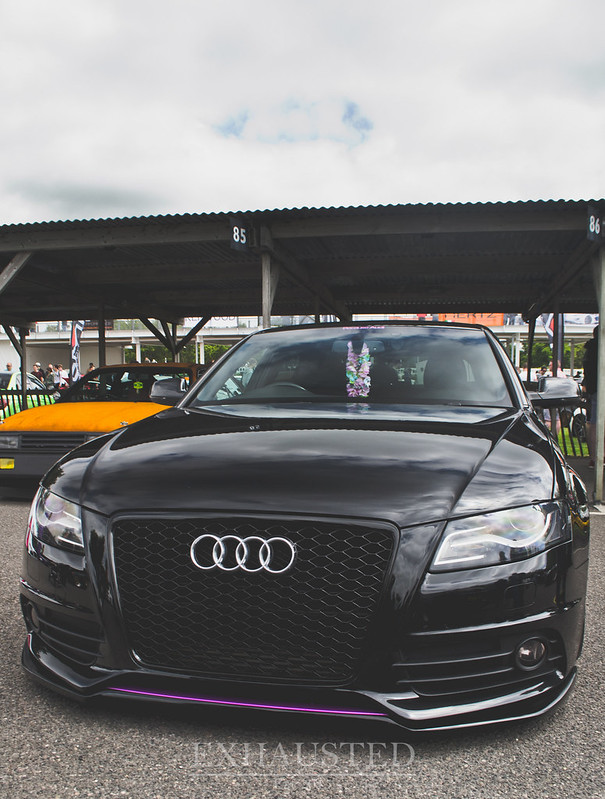
So MJ has been a lawn ornement for a month whilst I waited for the paint to fully cure. Then yesterday took it to the boys at Monsterwraps in southampton to have a Self healing clear bra fitted. I wanted to clear wrap myself, however the self healing bras you cant buy in the UK seperate, only through approved resellers, luckily I know monsterwraps is good so trusted them with the job
The kits come pre cut to the shape of the bumper, and are not like normal wrap, they are thick clear plastic and cant be bended around edges or it would just flip back up, this is why they pre cut them to an exact shape with splits pre cut into any edges where it would not be able to stick due to how ridgid it is.
They are cut a few mm smaller than the bumper so the edges dont come up. If you inspect closely you can see edge, however you would not ever know if you arent told what you are looking for. My splitter is custom so they ordered off cuts to cover the bottom and front with 2 joins hidden in the pointed bits. I tried to get pictures but black car so the edges dont show up in pictures which is a good sign really
Being fitted, shows the glossyness, the rest of the car and wheels in the first picture and filthy.
Fitted with 3m Venture Shield Self Healing clear wrap/bra
You can see ever so slightly around the left headlight washer cover in the pictures (if you zoom in).
I tried to get pictures of the edges, but they just dont pick up on a black car in pictures, however if you see me at any shows and want to look I promise I dont bite and you are most welcome.
The clear wrap is VERY Glossy which is really nice, and you wax it like you would the rest of your paint.
Any swirls or car park scuffs, you just pour hot water over it, or leave it in the sun, and it self heals
And a picture of her on the streets of pompey when I went for my exam in the morning.

so I booked it in and did another show before it went back in.I contacted they company that did it and they was very apologetic and admited the changed laquers for another brand and found it did not heald up well and offered to respray again with different laquer to rectify the issue.
So MJ has been a lawn ornement for a month whilst I waited for the paint to fully cure. Then yesterday took it to the boys at Monsterwraps in southampton to have a Self healing clear bra fitted. I wanted to clear wrap myself, however the self healing bras you cant buy in the UK seperate, only through approved resellers, luckily I know monsterwraps is good so trusted them with the job
The kits come pre cut to the shape of the bumper, and are not like normal wrap, they are thick clear plastic and cant be bended around edges or it would just flip back up, this is why they pre cut them to an exact shape with splits pre cut into any edges where it would not be able to stick due to how ridgid it is.
They are cut a few mm smaller than the bumper so the edges dont come up. If you inspect closely you can see edge, however you would not ever know if you arent told what you are looking for. My splitter is custom so they ordered off cuts to cover the bottom and front with 2 joins hidden in the pointed bits. I tried to get pictures but black car so the edges dont show up in pictures which is a good sign really
Being fitted, shows the glossyness, the rest of the car and wheels in the first picture and filthy.
Fitted with 3m Venture Shield Self Healing clear wrap/bra
You can see ever so slightly around the left headlight washer cover in the pictures (if you zoom in).
I tried to get pictures of the edges, but they just dont pick up on a black car in pictures, however if you see me at any shows and want to look I promise I dont bite and you are most welcome.
The clear wrap is VERY Glossy which is really nice, and you wax it like you would the rest of your paint.
Any swirls or car park scuffs, you just pour hot water over it, or leave it in the sun, and it self heals
And a picture of her on the streets of pompey when I went for my exam in the morning.
Adamwagg
Registered User
- Joined
- Jun 20, 2015
- Messages
- 555
- Reaction score
- 300
- Points
- 63
Look extremely tidy you ever down Bournemouth way??
Thank you
no sadly not, I am based around southampton, spend allot of time in Kingston though.ah thank youthe front view of you car with just the short plate and rings is stunning
I am back to cable ties for my second plate which is spaced differently, but plan to make a new holder out of my old holder that was easy to pop on and off.My Jack that came with the car when i last used it, whilst letting the car down buckled and twisted itself, is now useless (and dangerous!).
So decided to up my tool kit so that i dont have to rely on borrowing stands and tools all the time.Means I can now service my car on the drive after work on my own which make my life so much easier.
Did my oil change earlier in the week after work and enjoyed not having to race around to use other peoples stuff.
Got a new Low entry Jack, had to return the first one but second one is good, very pleased
http://www.costco.co.uk/view/p/arcan-2000kg-aluminiumsteel-service-jack-model-hj2000eu-900930

£83 in store or £89 online inc delivery.
*Aluminium
*Wide Lift section
*2 Tonne
*Low entry
*Nothing but amazing reviews from actual Garages
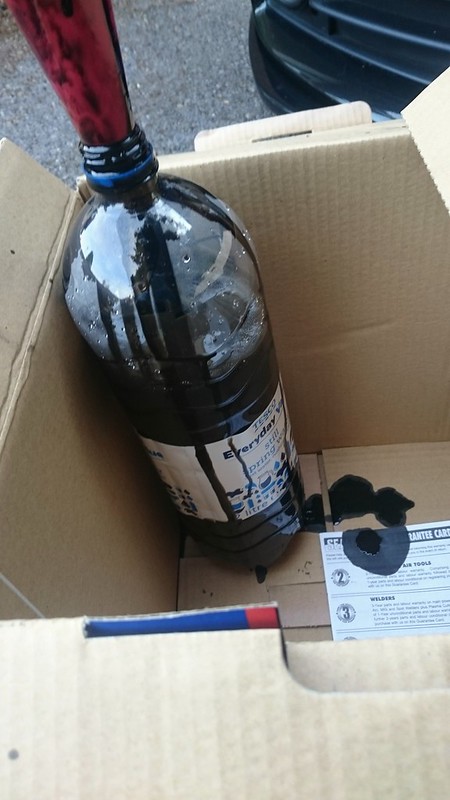
Got an Oil extractor pump, cant say i got on with it well as it seemed to take longer than emptying from the sump, however others says they found it quick, so maybe i was using it wrong, however it did eventualy drain the oil and car is happy with a new oil filter and freshcastrol edge 5w30 refill.


YUCK! THIS NEEDED CHANGING..
Also went to players classics in good woods, got very burnt whilst watching the cars in the track, then took the car to my local woods on the way home and took some pictures as she was looking pretty and clean
Took delivery of new ratchet axle stands (with pins) and a 1/2 drive torque wrench,
I plan to replace my rear shocks and top mounts in the next 2 weeks, think I got what i need:
Never done it before but have watched, is it just a case of:
1. Undo 2 bolts up top on top mount
2. Undo third bolt on bottom of Shock
3. Remove shock with top mount
4. Remove Top mount from the (heald on by a nut i think?)
5. Remove dust cover from old shock and transfer to new shock
6. Fix new topmount to new shock and do up nut
7. put bolts all back in
My Airlift bags also need new bushings which if I can I would like to do at the same time (rear only, I dont know how to do the fronts). When the shock is out I can pull the subframe down to get the bag out(at least this is how the springs came out previously).
I have all the new bushings, bilstein shocks and new topmounts ready.
to disconnect the bag for the new bushing, i got some advice from other forums and it should be a case of pushing the airline in towards the bag and pushing the sleeve back it will release. Then change the bushing on the bag once out, put it back in place, freshly cut the airline and push it back in, pull speeve back over, then re presurise.. I should at this stage use soapy water to test for any air leak.

Adamwagg
Registered User
How much did you pay for your oil sucker pump that's a really good idea and saves a lot of time and effort
Sent from my SM-G388F using Tapatalk
Was £35 for the 5.5Litre one.. And it really wasnt quicker, infact took an extra 2 hours more than had I just emptied the sump.
I will likely do it sump next time as I am not convinced it actually got all the oil out.
Electric one would prob be much better

palfy86
Registered User
D9N DK best one to go for is the next model up SEALEY TP69, use this twice a year for the past 4 years and has never failed.
I've been hearing good things about oil suckers there apparently ment to be quicker. I'll check that one out @palfy86
Thats the one I am told i should of got, plenty of users who love it
Sent from my iPhone using Tapatalk
eeep thankyouI need one of these in my life . One of my fav cars on here
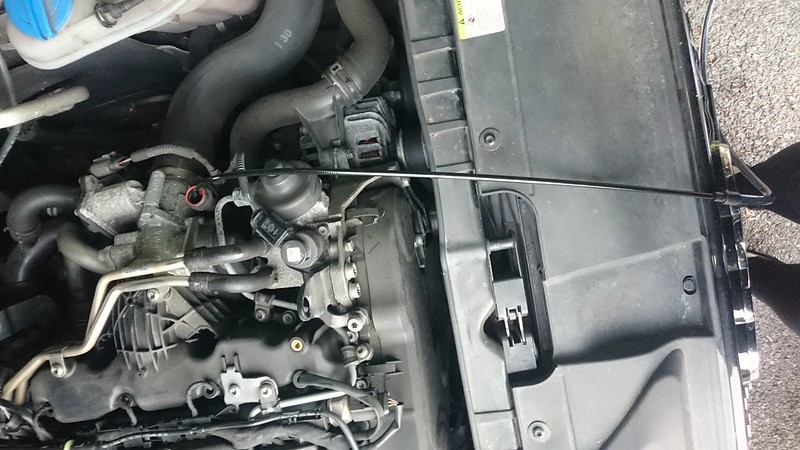
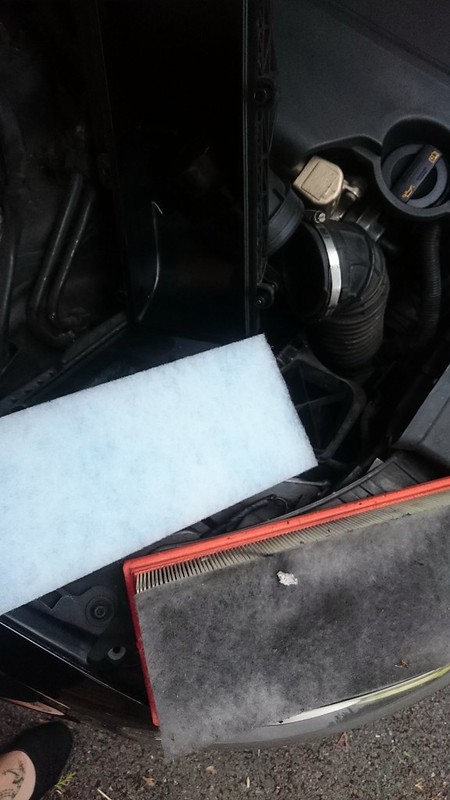
Still not got around to doing the shocks, topmounts and airlift bushings. But when swapping the cars around quickly changed the air filter for a clean new one as I had 10 minutes to spare.
Easy quick job but you do have to pop the MAF hose and inlet pipe off to get to one of the screws which is a stupid design flaw.
Shiny new new
seeing the state of my engine bay has planted some thought of cleaning it up and tarting up the plastics though...
Like the idea of painting the engine cover, Grille scuttle cover and Airbox a Black cherry colour...