Northampton OFN's project thread

Northampton_ofn

Registered User
Joined
Jul 21, 2015
Messages
297
Reaction score
106
Points
43
Hi guys, my name is Ben and I'm from Northampton. This is going to be my build thread for the cleaning up and improving of my B6.

image_9.jpg


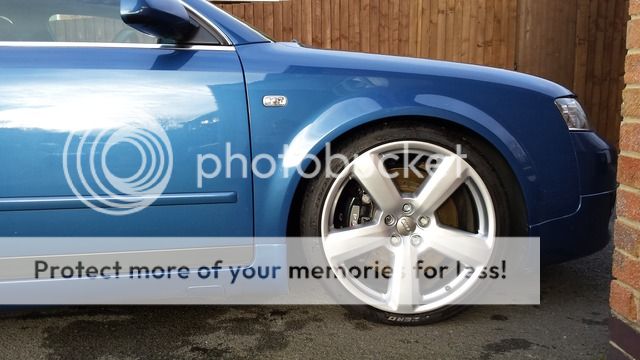
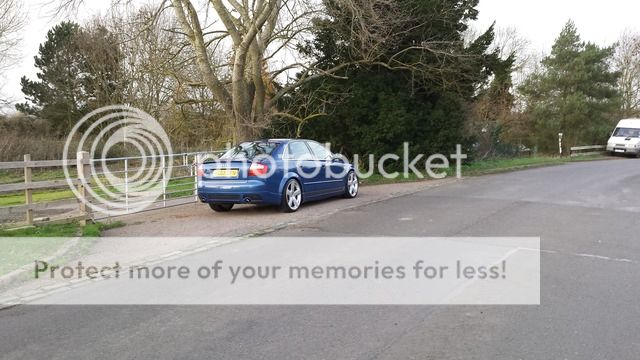
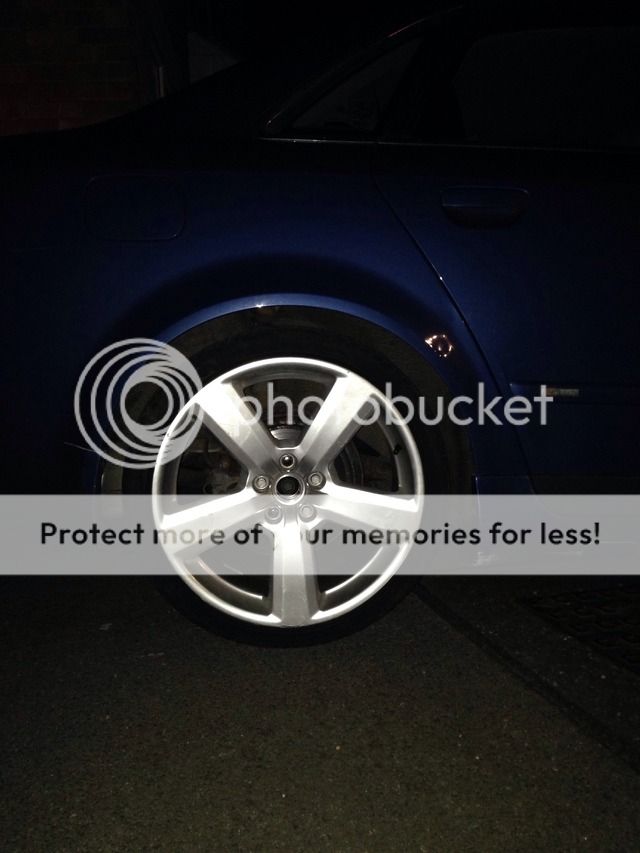
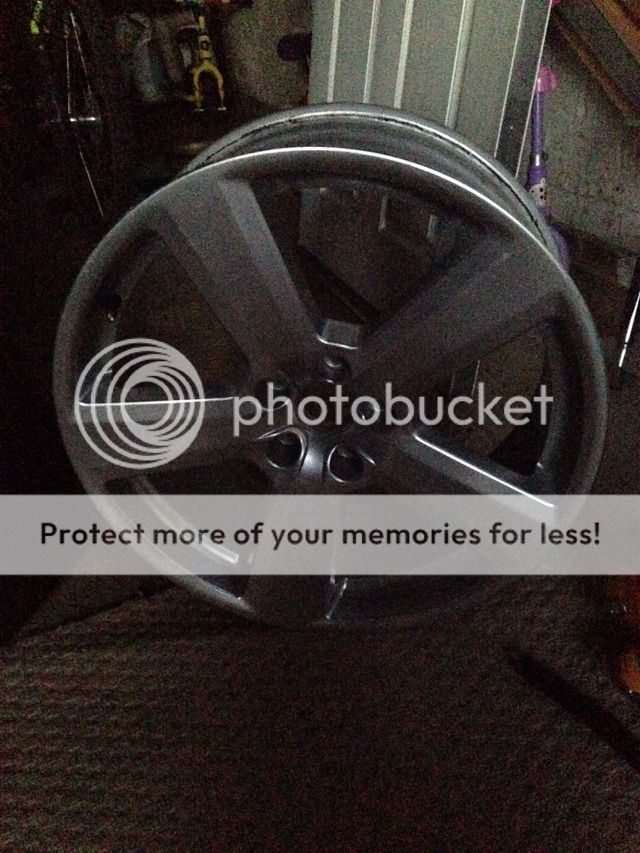
I bought her in April 2013 looking like this from a Polish bloke in Northampton , having previously owned mainly Vauxhalls I was more than impressed with build quality. For some reason the car had come with 3 18"s and a 17 (pictured).


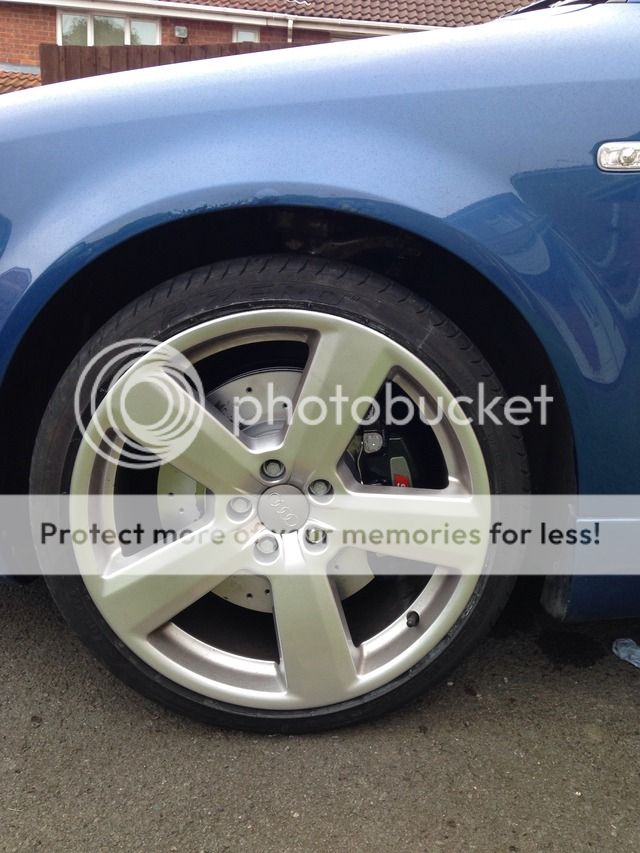
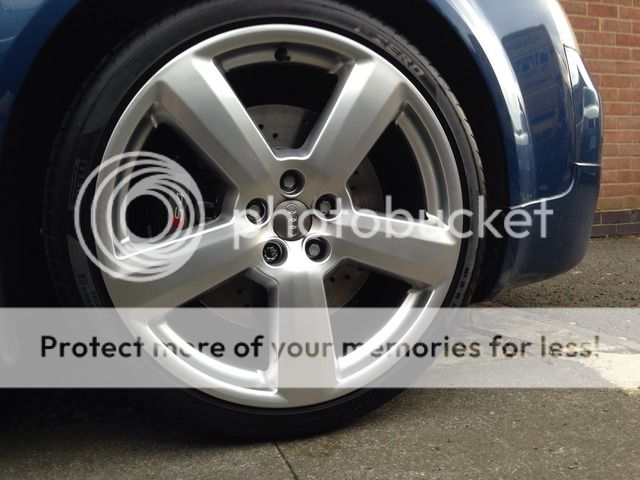
So I bought a fourth RS6 style wheel.

These are commonly called RS6 wheels in the scene but are actually called 5 Arms by Audi. I had all the tyres changed to Proxes T1R. And that was it.

I suppose the build got quite boring at this point as I left everything as it was and just cleaned her properly once a week for nearly two years whilst saving for a house. I also occasionally detailed the paint.


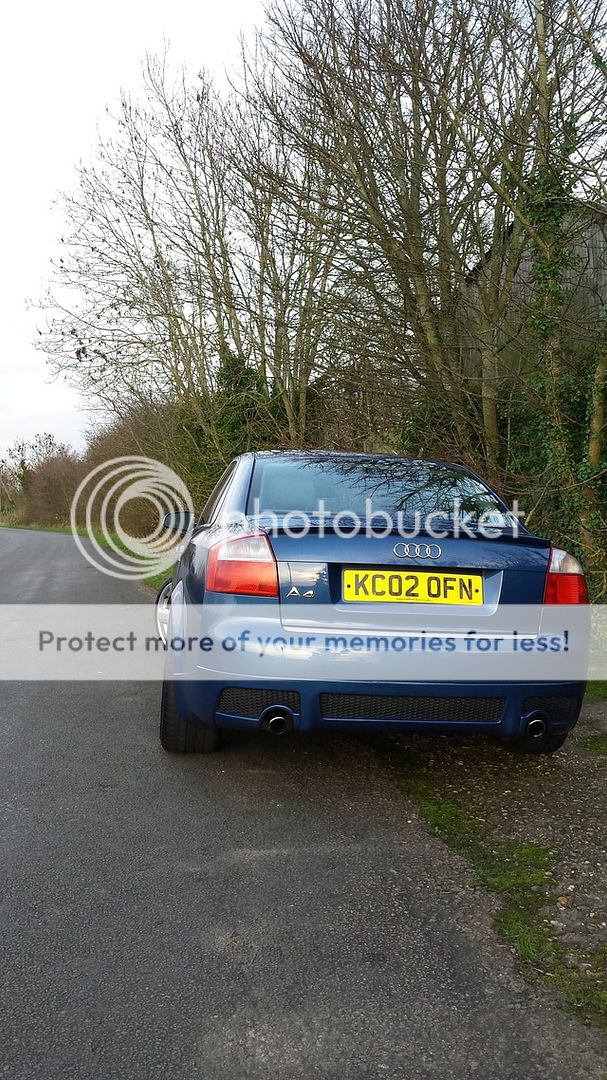
Then, for no good reason I can remember other than seeing another very tastefully modified B6 out and about, I got the modding bug! The car I saw and liked looked really wide on the rear so my first move was to get some spacers.


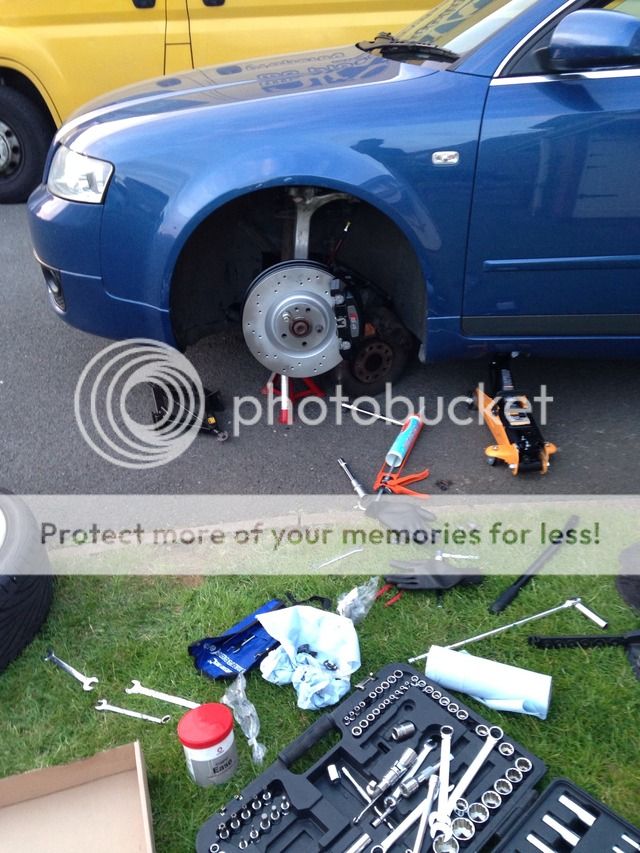
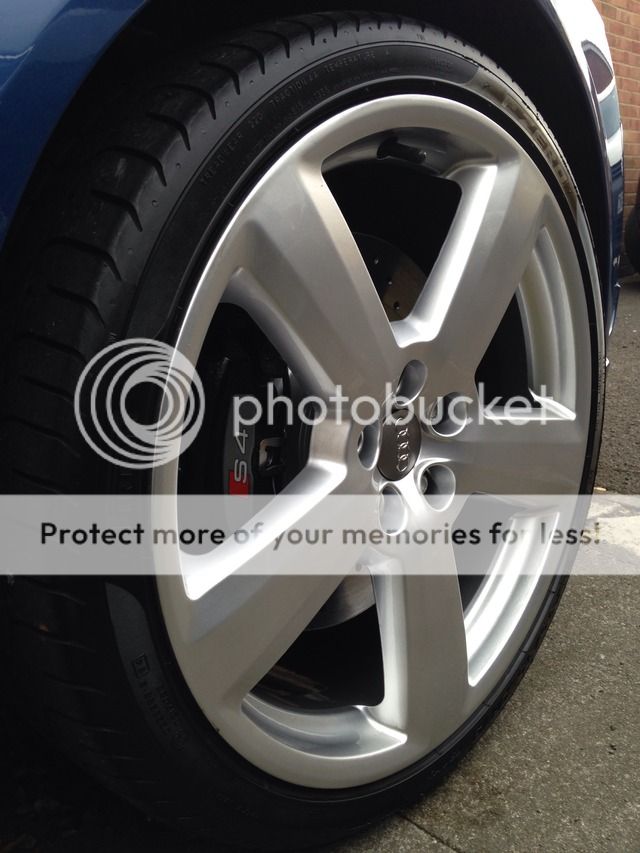
On further inspection (didn't know much back then) I realised the 18"s I had got with the car weren't genuine but an aftermarket ET33 8J set.


I fitted the spacers on the back


Then I bought my first home and stuck the Audi on the drive.

All you home owners will know how time consuming houses are! So the car got ignored for a while whilst I set about decorating my little girl's room and the kitchen.
I did however clean her whenever I got a minute and kept on top of regular services.


Well that brings it up to the beginning of this year and is enough for one night. More to follow when I get time.
 
Well Ben, I look forward to next installment of your build thread.;)!
 
Found some time so here's some more..

Then the steering developed a knock. It was a very slight noise coming from the front and could be felt mostly when shaking the steering wheel with the engine off. It would also make a clunk when making a turn onto an uneven surface. So I had a poke around and found control arm rubber joints failing all over the place.


So got to work on the nearside.

At this stage I had used my full vocabulary of expletives on removing the long bolt (b**ch bolt) and was left with both ends snapped off and it still not budging whatsoever with a punch and lump hammer, so out came the grinder.
I tried running the grinder into the pinch grooves to separate the bolt into pieces but even after this I only managed to get the small threaded section out (about 12mm's worth haha). So I turned to the Internet and found I was by no means the first person struggling with a 13 year old, salt corroded bolt. It seemed I had used a few "wrong" techniques so it was time to get the whole lot off.
image_21.jpg

Now having ground off the top arms I couldn't undo the hub nut. So I removed the 6x 11mm(??!!) multi-spline bolts into the gearbox hub, doused the two bottom arm bolts in WD40 and removed them from the bottom of the control hub (they came out so much easier!! Such a better designed joint).

No photos but the whole driveshaft/control hub was now easily removed and taken to a friend's work shop for some oxy acetylene loving!!

The offside was much easier with the knowledge found online, I bought a blow torch and blasted the pinch area very hot, snapped off the hex head from the bolt and drew it out the other end by its thread with a nut. Used lots of WD40, and had to grind off the thread once it fouled the other pinch casting. Once I ran out of thread I backed off the nut and spaced it away with lots of washers. The last inch or so was done with a punch through from the bolt head end. It all sounds complicated but only took an hour. Was so involved I forgot photos but here's one of the nearside bolt!
image_23.jpg


I'd been wanting bigger brakes due to the original 288mm's being very poor. I'd researched into what would fit and had bought some B7 S4 calipers with the plan being to refurb them but a late night including beer and eBay ended up in a brand new set of B8 S4 calipers (which I'd confirmed bolt straight up!) from Poland with pads and sensors arriving.
image_22.jpg

Pictures don't do justice just how huge these are.

Whilst the car was off the road I decided to fit all the parts that had been piling up, in one go. These included genuine full set of top control arms, a red HEL pair of front braided brake lines, the B8 brake calipers, genuine disc guards with bolts from Audi <expensive>, new Audi caliper bolts and some S4 B7 discs (after having ordered Zimmermann A6 C6 347mm which I'd read on audizine would bolt up, but of course didn't, this delayed me by a few days whilst I waited for some drilled EBC discs to arrive)

Pile of bits.
image_32.jpg


Then I threw it all together
image_24.jpg

Also ended up changing the front offside rear bottom control arm for a new genuine one as I didn't like the look of the rubber joint to the subframe.

I'd been scanning the bay for 19"s and a couple came up cheap near me so..
image_25.jpg


18"
image_26.jpg


And test fitting a 19"
image_27.jpg


And after a refurb.
image_31.jpg


image_30.jpg


What an improvement tire gel makes.
image_28.jpg


image_29.jpg


And temporarily running 19"s front and 18"s rear..
image_33.jpg

Kept looking and found one more in good condition (£30!!!)
image_34.jpg


225 Tyre fitted, spacer fitted and on the car.
image_35.jpg


image_36.jpg
 
  • Like
Reactions: THQuattro
I didn't know you could fit the calipers from the B8 S4, I went for the B7 S4's all round.
 
Hi Jimmy. Yeah I found that out whilst looking at brake options on Audizine.

I plan to do the rears soon too so I've got the full set, not sure if rear B8's go on too (anyone?) but if not I'll go B7.

- - - - -

By far my best mod so far!; ordered some Akebono Euro pads from the U.S.

Had initially planned to put them on with the brakes but they take ages to get here so did a few miles on the Audi pads first.
And all fitted.

They're amazing. After the initial quite scary bedding in period they grip identically if not better than OEM. But the main pro, virtually zero dust! Love them!

Then decided through a combination of wanting more lows, and everything else on the front being so shiny, that I wanted to change the struts. So bought some very low mileage B7 S-line diesel fronts fully made up for a very good price.
Wanted to get my front springs powder coated and then run the new shocks with them, with some genuine new B5 perches I'd purchased from the stealer.
Broken down

Off to the sandblaster


In the meantime I was driving around with the front sky high 4x4 style on B7 S-line Diesel springs.

Just goes to show how much heavier that lump must be.

Was too excited when 10 days (wtf!?!) later shiny springs came back so forgot pictures until..
NS strut made back up


And ready to go on (running the B7 top mounts, triangular plates, shocks, spring supports and B5 perches)

It occurred to me after installation that you could surely get another 5-10mm lower removing the rubber bottom spring support that engages the spring to the perch? Anyone tried this or know if it's feasible?

Anyway.


I had measured hub centre to top of arch curve with a square and tape measure before starting

With B7 springs the ride height was almost 20mm higher! And after finishing (but not yet settled) I was already down 15mm offside and 18mm near. Haven't measured since but would be a nice comparison one rainy day.

Another simple but very effective mod is removing the back door S-line badges. Looks so much better without IMO


The Audi had been leaving an increasing amount of spots on my driveway and I got a low oil warning on a long journey. Time to chase the leak. After reading up on thread after thread of terrible oil leaks on the 1.8T I finally cleaned all around the head and block with evaporating degreaser and then had a good look around after a few more miles. It was quite apparent that the cam cover gasket was seeping oil in more than one place.
So off it came.


And a new genuine TPS one fitted.

Becomes pretty apparent how much hotter the turbo corner of the head gets! Most of the oil was coming through the gasket there in the front right corner (see the wet patch in the picture) and there was much more oil found in the spark plug ways nearest the turbo than the rear ones. I stuffed blue roll down them with a blunt flat head to soak it all up and changed the plugs whilst I was there with NGKR's.

Then back together
 
I left the rubber in when fitting my H&R's and B5 perches, as without it the springs would probably move around on the perch.

Does the B8 not have an electronic handbrake?
 
I suppose the H&R's are quite a bit shorter than standard are they Jimmy? So they'd move/rattle a lot easier with the suspension fully extended when you lift the car? Even with the B5 perch on, mine were still solid once the compressors were off. However it probably isn't a good idea to remove the rubber as it probably stops metal on metal noise and I guess the two surfaces would strip each other's paint and corrode..

Done a little homework and you're correct, the B8 rears can't be done due to the E-brake, discs being wrong bore and offset & calipers mounted in a completely different position on B8.
 
No, they were tight up against both ends, but with the forces involved I would imagine they would move and make noise as you say.
If you fit S4 rears you need to loosen the cable a bit, and if you want to fit the dust shields you need to slightly modify them. You need to drill two new holes, and space them slightly.

HERE is a good thread I used when looking into it.
 
  • Like
Reactions: Northampton_ofn
Good stuff. Think I will try and get used ones like the bloke did in the thread. Can't see the point in butchering new ones. I will probably make a second hand pair fit, then weld the required spacers to the holes to give the correct mounting angle and then get them blasted and powder coated. Probably silver cos that makes them look bigger and I'm a tart like that haha
 
Yeah I just pulled all the dust shield off the car I got the brakes from.
 
Nice and tasteful mods. I'll be following this
 
I totally forgot to mention what will shortly become an important point;
Whilst I was doing the cam cover gasket I noticed a bit of gunk on the inside of one of the breathers that has to be removed to get the cover off. So whilst I was working I decided to leave all the breathers, joints & the PRV in some chemical degreaser. When I needed to put them back I blasted them out with the garden hose.

Anyway, as I said before I put the engine bay back together. And went out for a drive, partly to see if the leak had disappeared but also thinking I might have gained some performance back by clearing the breather system.
Then this.

5 minutes into my drive and just getting up to temp I got the dreaded symbol


Had no idea at this point what a sludge issue was, I just saw a red oil symbol and pulled straight over.
I got the car recovered and after lots of checking over my own work followed by trawling through thread after thread it became clear that I had the sludge issue, and that I'd probably freed up just enough crap to block the final few holes of the pick up tube mesh whilst cleaning the breathers. D'ohhh!!!!

For anyone who doesn't know, the in line mounted 1.8T's were designed to have 10,000 mile oil changes due to the small capacity sump and filter. But when Audi started to offer the long life service scheme many people opted for the 20,000 mile servicing which is far far too long for a turbo engine, let alone a small oil capacity engine with tiny turbo feed lines. The oil loses its viscosity and other qualities and starts to build deposits in the engine which eventually clog up the pickup tube and starve the engine of oil. Add to that the use of poor quality oils and some hearty driving and you've got a huge problem killing 1.8T's the world across.

So I was left with the task of checking if my engine was worth saving or should be scrapped. I found a test which was to check the forward most exhaust cam caps by taking them off and checking for oil starvation, in the form of pitting or scoring.
Exhaust cap #5

And the decider:


Good! It's worth keeping. Time to spend some money. Here's what I bought with P/n's to help anyone who might need them in future:
06B115251 pick up tube
N0282222 pick up tube o-ring
06B103623P windage tray (NN)
06A115105B oil pump (NN)
N90823501 subframe stretch bolt M12 (2x)
N90663002 subframe stretch bolt M10 (4x)
058145757A turbo oil line to sump gasket

The things marked NN aren't necessary but you might as well while you're there for piece of mind. It's a big job to do twice.

No photos here because I got the car towed to my MOT garage for them to do it as they have an electric hoist (to hold the block up) over a pit. I have since however discovered a pit in my very own garage :D and would definitely do this myself next time..

In a nutshell though, the engine was hoisted up, subframe dropped, sump pan dropped, above parts changed and sump cleaned & all put back together. My garage only charged £200 but I think that's mates rates cos I've sent so much business their way over the years.

When I got her home i changed the breather system too. Below is a list of parts required if you're overhauling the breather system at the same time, which Audi themselves change when carrying out a warranty engine de-sludge:
06A103213F breather pipe
035103245G one way valve
06A129101D pressure relief valve
058133753D suction pump
You can also change the metal piping that runs parallel to the exhaust side of the head but I decided a proper clean was sufficient.
The breather pipe sits on top of the oil filter housing under the inlet manifold, an old one will almost definitely have gone brittle and snapped or broken up. Mine was dumping chunks of plastic into the engine so ofcourse got renewed.

Whilst I was at it I decided the cam chain tensioner gasket and half moon should be changed. So cam cover back off

Offending article

I'd read allsorts of threads about locking tools and rolling the car in gear etc but what worked best for me in the end was picking up the front end

I then removed all the bolts holding the tensioner down except the one closest to the exhaust cam which I left in by a couple of threads to pivot from. I wedged a chock under one of the front wheels and with the gearbox engaged in 5th, turned the other front wheel until the tensioner lifted up from the head:

This left a good inch and a half to get the old gasket and half moon out

And then clean the contact surfaces with degreaser sprayed on blue roll, wrapped around the end of an Allen key.

I inserted the half moon and the gasket, double checked they were correctly aligned and then span the wheel back to lower the tensioner back on to the head, and fitted the bolts back.


And then cleaned the tensioner and everywhere I could access in the head with upwards strokes to ensure nothing fell back towards the sump and my fresh pick up tube!
 
Last edited:
I had a look at the bottom of the cam cover. Years of use plus my close shave with sludge had caused a fair build up of the tough crud to form. I loosened it up and removed any flakey bits with a wire brush.

Then I got some neat chemical degreaser and, section by section, left it to eat away at the grime before cleaning it off with rag. (Took ages)


It foams up attacking the grime.

And all done.

Then gave the inlet cam cap covers the same treatment.

I doused some blue roll with degreaser and left it laid on the cam cover mating surfaces of the head for a while then cleaned up all the old residue

Cam cover gasket back on and torqued, cover on (gave this a little clean although you don't see it) and spark plugs back out to thoroughly clean the coil pack channels

Looking good after not many miles from new.


I still had the undertray off from when I prepped the engine for the sump removal.

It was looking a bit of a mess from the oil leak on to it. So decided to give that a clean and regretted it about an hour in to a 2 and a half hour job.

All done, hardest job so far!!

Fitted all new clips from eBay to finish off cos there were a couple missing on removal.

Didn't refit the undertray straight away as I wanted to do a 300 mile oil change in case I'd loosened up any more sludge with all the cleaning.
So wired the coil packs back in, put the bay back together and went for a drive. :D


All this messing about had meant I'd not been looking for another 19" to complete the set and AITP7 had creeped up. So feeling defeated I polished her up and went with 3 19"s haha. (F it)

Rather annoyingly my phone decided to delete all the other photos I took on the day. But during the polishing process I had decided to lose the 1.8T and S-line badges from the boot lid which cleans it up even more IMO. (Shall I just get rid of the A4 one too and be done with it?)


A few miles later I did an oil and filter change

Used the larger Mann filter and Edge as is specified by Audi.

Around the same time I did the scuttle plenum drain hole checks. For those who don't know, the B6/7 had a badly designed plug at the bottom of the chamber where all the water runs down from the windscreen. The two rubber plugs very easily get clogged up with leaves and debris and water starts to back up, worst case scenario you'll find water getting into your brake servo or Ecu housing.
The previous winter after heavy rain I'd had an issue with the brake lights staying on when the pedal is released which can be water getting through the Ecu housing and down to the switch for the brakes (and others like accelerator pedal). So I removed my battery and had a look around. There was a little debris on the battery side but it was only slowing the water from escaping, not blocking it. The other side however opened the floodgates when I cleared it. It is positioned right underneath the servo, is a right old PITA to get at, and can be got at by forcing your hand under the servo from the battery side (once removed). I cleaned the area and put the battery and everything back together. No photos because my phone camera had totally given up.

The next time I drove the car after having the battery disconnected for half an hour, it felt like a different engine! The throttle response was vastly improved, it idled better and pulled stronger through the revs. Anyone want to explain that one? I have a theory.

Anyway, previous owner's Mrs had fake nails so

Much better.

A full set of genuine RS6 9J x19" ET35 p/n 4B3601025Q came up on eBay very cheap, I lost the bidding but the seller messaged me saying the buyer hadn't made contact. So a cheeky offer, a trip to Sheffield and a McDonalds later I had the wheels.

Turns out you can't double stack 9J in the boot FYI.
 
I had to do the same thing with my light switch due to a lady owner in its past.
 
One modification I forgot to mention before was a set of HID's I had fitted about 5 months after buying the car. They were slim line ballast type that I'd bought from a workmate.
They had generally worked fine but I remember every now and then I'd get flickering from them, mostly at idle.
Well now the nights are drawing in for winter and most of my driving is done in the dark I've noticed the n/s dipped HID is almost constantly flickering at any revs which is very annoying.
Having lots of space to fit the ballast on this side I had put it here originally
http://s175.photobucket.com/user/benpge2k88/media/Mobile%20Uploads/image_79.jpg.html][/URL]
On the other side there was far less room so I'd nut and bolted the ballast under the headlight tray.

But I'd read somewhere that the EMI can play games with the ABS module (and had had my fair share of warnings on the dash) so I decided to move things around to see if there was any improvement.
So 4 bolts and the connector and out came the N/S headlamp.
http://s175.photobucket.com/user/benpge2k88/media/Mobile%20Uploads/image_80.jpg.html][/URL]

And had a quick look at the condition of the bulb.
http://s175.photobucket.com/user/benpge2k88/media/Mobile%20Uploads/image_81.jpg.html][/URL]

Checked the data in case I ever need to order any more.
http://s175.photobucket.com/user/benpge2k88/media/Mobile%20Uploads/image_82.jpg.html][/URL]
These are 6000k 35 watts.

Then I put the bulb back in the projector and pushed all the bulb supply wiring up to the connectors in to the headlight fitting to keep it out of the engine bay.
http://s175.photobucket.com/user/benpge2k88/media/Mobile%20Uploads/image_83.jpg.html][/URL]

I wrapped all of the high voltage wiring in aluminium foil and cable tied the ends.
http://s175.photobucket.com/user/benpge2k88/media/Mobile%20Uploads/image_85.jpg.html][/URL]

And fitted the ballast in its new home under the headlight tray by drilling a 6.5mm hole. http://s175.photobucket.com/user/benpge2k88/media/Mobile%20Uploads/image_84.jpg.html][/URL]
I ended up turning the nut and bolt the other way up because the thread fouled the lamp body.
I wrapped the remaining wiring and the relay in foil.
http://s175.photobucket.com/user/benpge2k88/media/Mobile%20Uploads/image_86.jpg.html][/URL]

And pushed the headlamp right back in to its normal position,
http://s175.photobucket.com/user/benpge2k88/media/Mobile%20Uploads/image_87.jpg.html][/URL]
Job done.

Upon testing I found the HID not coming on at all haha so it was currently all in vain and I haven't managed to see if the flickering has improved/gone but it was too late so I packed up. I suspect either a connector came loose during the final positioning of the headlamp or the bulb has given up.

Anyway, some goodies have been turning up ready for a session soon, got rear S4 guards
http://s175.photobucket.com/user/benpge2k88/media/Mobile%20Uploads/image_88.jpg.html][/URL]

Also got new Lemförder snub engine mount and anti roll bar bushes sat around waiting to go on.
 
Small update, today the headlamp I had removed's xenon was working. However the other side had gone out :sob: but a couple of off and on's and they both fired up. But the one I worked on was still flickering (which according to research means ballast faulty), plus I got the abs warning too.

So all of this has led me to the conclusion that cheap is no good, OEM is once again the winner.

So if anyone can help with the query at the bottom of this thread http://www.audi-sport.net/xf/thread...d-xenons-to-h7-headlight.112120/#post-2607029 then I get ordering.

Thanks
 
Great read mate love the way it looks much better on the 19" your not that far from me I'm in Bedford potton don't fancy some private work do you haha
 
Haha anytime mate, seriously though bring it over in summer and we'll do it.
:wrench::nutbolt::greyrs4::hammer: :triangularruler:

Yeah I've been test fitting the 9" 19"s (pics to follow) but not sure now whether to refurb these or buy the B7 RS4 19"s that I've fallen in love with
 
great read mate, lots of work done, for me drilled front discs 312mm and that is my budget or to put it another way al that I can get away with.
Nice going on the car, I fitted hids on my Avant and had no trouble with them and they have been through several M.O.T,s,
one thing I like about the 1.8T is the rear twin out exhaust would love that on my 2.5tdi. Cheers from Colin
 
Thanks Colin, yeah I love the twin exits too. Think I might get half an inch larger pipes welded on at some point to fill the apertures properly.

Good luck with the brakes, just carriers and discs you'll need for that IIRC..?
 
Thanks Colin, yeah I love the twin exits too. Think I might get half an inch larger pipes welded on at some point to fill the apertures properly.

Good luck with the brakes, just carriers and discs you'll need for that IIRC..?
no problem my discs are 312 mm so it is swap like for like if it is as straight forward as that, and regarding the twin outs I was advised to change the bumper and them cut off the bent exhaust and weld on some stainless straighr pieces but it is getting hold of a 1.8T bumper or similar that is not too damaged, allthe best for Xmas from Colin
 
looking good ben, next time iam over at billing aquadrome will have to come an see you car in the flesh. great work buddy.
 
Thanks Neil, yeah I'll get the kettle on then. Do you head over there much or do you mean during show season?
 
hi mate i used to work on billing aquadrome up until last year. iam passing your way over the festive holidays ill pm you when iam over your way.
 
Well, I've been trying to not spend time or money on the car as I'm still renovating my house and that takes all of the above, however, the following parts have been miraculously arriving in the post :whistle2:

OEM Valeo Ballasts
Valeo D1S/D2S adapters with starters and screened cable
Philips D2S bulbs

So I think the next mod will certainly be an overhaul of the headlights, I'm thinking a good quality bi-xenon projector upgrade, with side lights and indicators in LED. I'll move my night breakers out of the fogs into the full beam and then run matching temperature LED fogs and look into running them at 10% as a DRL.

After that I really must focus on the house for a bit but by Feb/March I will be doing cam belt/water pump/engine mounts and rear brakes are in the pipe line (no pun :friendly wink:) too.

Other bits sat around are Lemförder arb bushes, my genuine RS6 wheels which need painting, rear S4 disc guards & genuine bottom control arms.

How about you?? AIR!!?
 
yes can't lie mate the next thing on my list is the air as it is all sitting in my garage waiting to go on i can hear it calling me from in side my house haha, then i need to sort out my headlights steaming up when i drive in the rain i need to seal the back cover where the wire comes out for my light kit then i need to give the body work a good detail and remove all the winter grime and I've got a home light universal kit i need to fit so when you unlock the doors the fog lights come on which is a bit unique on the b6
 
hi mate ive got s line door blades and sill covers and rear bumper. iam finding it hard to get a front one. seam very popular, iam going to fit electric rear windows. still looking into that one. the leather interior is in the bag. . and look foward to meeting you at some time.
 
I've been putting together some parts to go OEM Valeo Xenons in the headlights. I got some LAD5GL ballasts, Valeo D1S/D2S adapters with screened cables, genuine Philips 4300k D2S bulbs and a couple of adapter rings from the U.S. that allow you to run a D2S bulb in place of the H7 halogen. Search Woorlord on here to find a great "how to" on it..

The original plan was of course to just retrofit in to my current halogen headlamps. But as usual this mini-project has got out of hand and today I picked these up.


They are genuine Valeo Xenon headlamps with stepper motors, got them for a great price.


The driver's side is brand new and has clearly never even had bulbs fitted. On closer inspection, this one is designed to take a D1S bulb as it has the square locating hub on the rear of the reflector bowl.


The other one is used but is in great condition with just one small stone mark to the outer lens and could do with a wipe over. This one came with the D2S fitment with a Philips bulb in place, a LAD5G ballast, a screened starter and a full beam halogen bulb.


So the new plan will be to get these fitted so I can take the unreliable cheap Xenons out and have good light for the dark winter evenings. And then run another project alongside (when I get time) where by I'll butcher my halogen headlights, as it seems a shame to split these with them in such good nick, do the Joey mod and fit some much better reputable aftermarket bi-xenon projectors in place of the halogens.
More to follow when I get time.
 
Have you thought about going all out and do a double projector headlamp
 
[COLOR=rgba(0, 0, 0, 0.701961)]Update time then.

I often waffle too much so I'll let the photos do the talking for once and then summarise.


Old and new.


[/COLOR]
 
[COLOR=rgba(0, 0, 0, 0.701961)]


And got the old one on the work bench for a little poke about.


So the passenger side was pretty straight forward. Had to swap the indicator over because I haven't got my LED's yet and also the new lamps didn't come with bulb bases. The old units are so badly stone chipped that they almost look hazed over. You can see it a bit in the close ups but it's most noticeable in the comparison shot of old and new with the full beam on, the old one is just purely glare but you can actually make out the dipped projector in the new one. I'm hoping I'll be able to sand down the old ones and make them mint again.

Drivers side wasn't as straight forward due to the D1 fitment. The bulb locates perfectly but the holding clip is nowhere near. Here's how I got around it..


And all fitted!


Really happy with the result performance wise, they strike up rapidly and the cut off is more than acceptable.

However


Even though the bulbs are identical brand new items, the temperatures are off. I have a suspicion that it might be the age of the reflector bowl compared to the new one as I've read that they were a bad design and would melt (although it felt like metal to me) but I have one more thing to try; because being lazy I didn't replace the D2 headlamp's ballast as I knew I'd be taking it back out to fit LED's soon and wanted to test that it works correctly so I can sell it. I think this is a 4G unit, anyone know whether that could effect the bulb temp?

Anyway, all in all very happy with the Valeo setup. [/COLOR]
 
Hahaha waiting for that project then. And to your other question mate a ballast can make the bulbs look off I had it before with an aftermarket kit
 
Unfortunately the old headlights have gone into a box in the garage, who knows when they'll next see daylight (hopefully soon)

Ah good stuff Dan, hopefully that'll sort it then. That old ballast is probably designed for a different output bulb..

Found some more free time and threw on a 9" RS6 wheel to get an idea of what tyres/spacers I'll need to run. The RS6's came with 255/35 which I think is the OEM spec but three of them are budget and the one I fitted has a conti contact fitted.
20151206_135500.jpg


Gave the car a quick clean and put some turtle wax on to protect the paint a bit over the next few harsh months.
20151206_131848.jpg


A few more of the fit of the RS6.
20151206_131936.jpg

Plenty of poke
20151206_131957.jpg


Makes the 235/35's on the front look a bit rubber band like. Think I prefer the larger wall, opinions welcome..
20151206_133321.jpg


20151206_135443.jpg


Then I decided to go for a little drive and get some photos as they're usually always on my driveway haha.
20151206_151334.jpg

20151206_151348.jpg

20151206_151545.jpg

20151206_151617.jpg

20151206_151631.jpg

20151206_151938.jpg


There was a tiny little bit of scrubbing from the RS6 corner. But they're is literally nothing in the back so I assume with a bit of shopping and my little girl etc in the back it would be worse. Not that it matters as I never planned to run those tyres anyway. Would like to see what it looks like on 245/35 and possibly 235/40 too as I think I prefer the chunkier sidewall, plus it fills the arches and means I can lower it by whatever the tyre heightens it without worrying. If I get too much tuck I can always space the wheel back out. So that's the rear and it was a tight fit, I wonder what the front is going to need..... :blink:
 
I very much doubt that you will be able to run 255/35/19 on the front with ET35 mate, even though your not quite as low as me.
I run 235/35/19 at ET40 on a 9j at the front, and that just about clears.

Do you have a link for the under tray fixings, some of mine could do with replacing.
 
Looks good mate like I said before love the bigger wheel and the bigger profile tyre fills the arch better but you are going to get rubbing issues
 

Similar threads

Replies
2
Views
2K
Replies
58
Views
5K
Replies
16
Views
2K
Replies
8
Views
2K