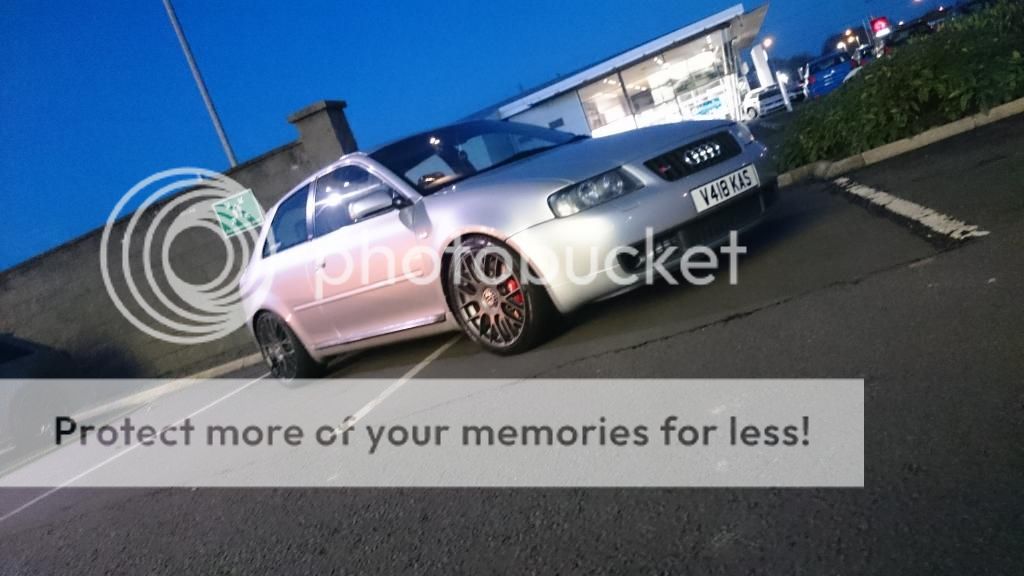
mark_S3 Progress Thread

Two days before mapping (Thurs 16th April) I went ahead with fitting my new NGK BKR7E plugs....

Unfortunately I had a heart sinking moment....


Plug snapped leaving the thread down the bore and the ceramic part out.... Gosh I nearly went crazy....


After some advise from a few including Paul (Tuffty)... I decided to go for the stud screw remover...

So managed to finish work early on the Friday so I could source a stud remover kit and hope for the best....


Got home and proceeded to begin. Slowly I started screwing the remover into the centre of the plug thread... Then it began to stiffen, and all of a sudden went loose.... Started to panic thinking has it now started to eat away creating metal fillings that now have fallen into the top of the piston....

So just kept screwing until it was completely loose... Slowly I lifted my extension bar to reveal this...


Fully intact.... No damage to threads... No damage to top electrode and nothing fallen down the bore....

I was gobsmacked, and overwhelmed with joy as I knew now where I was going the next day....

BADGER5
 
  • Like
Reactions: JohnStan725
Great thread.. looks amazing for its age!
Yeah she's fairly in good nick for her age....
Engine is extremely healthy for the mileage. Slowly but surely she's being restored.
Paintwork is in good condition however there's some rust bubbles still remaining and some door dings... This summer it's going in for a complete respray so that should be the final touch to the outside....

Thank you for your comments though... Nice to hear feedback from all my hard effort
 
Then I slowly started to develop a vibration through the steering and play in the steering.

I decided to have the wheel bearings replaced along with new ball joints and track rod ends.

Unfortunately this didn’t cure any issues apart from the slight play I had....


So after investigating, I found that I had two buckled alloys both on the NS.


This then lead to me purchasing a new set of 18” Team Dynamics Imolas in Graphite Satin. I did think about having the TT 240 Sports re-straightened and refurbed but I was paranoid about the buckling happening again. These will be kept for the future though.


So along with new wheels and some new Goodyear Eagles F1's, this cured my vibrations and awful drive... Happy Days....

Is the Eagles way better from the Maxxis mate?
 
Is the Eagles way better from the Maxxis mate?
Yeah imo.

Can't fault the Maxxis though. Great mid range tyres. Definitely grippy in all weather and a fairly decent wear rate.
However the Goodyear Eagles F1's are a another level of grip. Can't comment on wear rate yet as only done a few thousand miles since fitting.
There quiet on road and as they have a built in rim protector least they will protect your rim in some way.
Eagle's are worth the extra over Maxxis
 
  • Like
Reactions: TitaniumRx
Yeah imo.

Can't fault the Maxxis though. Great mid range tyres. Definitely grippy in all weather and a fairly decent wear rate.
However the Goodyear Eagles F1's are a another level of grip. Can't comment on wear rate yet as only done a few thousand miles since fitting.
There quiet on road and as they have a built in rim protector least they will protect your rim in some way.
Eagle's are worth the extra over Maxxis

Thanks for you answer Mark :)
 
Can't remember all dates I've fitted these but all since April this year...

Secondary Water pump develop a noise so a nice new one was fitted.

 
Then I managed to source a Connect 2 kit and SONY CD Player off Trufty.

Kit all nicely fitted behind glovebox with Ipod connection nicely tucked away inside the glove box.


A new MAF was ordered and fitted as my old one was running weak.

 
  • Like
Reactions: feck_on_a_stick
Forge MAP Tube was also sourced and fitted. Tight squeeze and some modification to the battery box saw it go in.


Along with Trackslag Charge Pipe there was a noticeable gain in induction noise and flow....
 
  • Like
Reactions: IPG and feck_on_a_stick
Seems as ive smooth out and gained better flow, made sense to aid cooling alittle better.

Ordered a insulating gasket for the Inlet Manifold off Badger5.
As inlet was off, it was treated to a few coats of VHT Silver Paint.


  • Like
Reactions: <tuffty/>
Anyway.... I decided to buy a AEM V2 WMI off Badger5.

Unfortunately I didn't do much research about the timing characteristics that will alter with WMI, therefore increasing torque. As I'm currently still running standard Rods with Torque set at a safe limit after mapping at Badger5 I thought it would it be best not to connect and run WMI.
Advice off here was the decision not to run it.
Seems as ive got the kit already, it would be foolish not to fit and leave in place when I do finally get Rods......

After much thinking on where to place the tank (most place on Near Side Boot Trim) I decided to place it on the Offside Boot trim on the luggage panels.
Didn't fancy the popular Nearside as it means I wouldn't gain access to subwoofer, etc and the offside basically had nothing to gain access to apart from oil bottle storage.


Two kits (one for another member)
 
Time to proceed...


As I still wanted to gain access through hatch to oil bottle storage on offside, I decided to cut hatch panel in two and completely fix one side to mount tank to and other side with handle to still function.


Unfortunately I came into a problem with the actual pump and mount. The pump and mount is actually mounted so the flow is positioned (looking at face of pump) the wrong way if I was to mount on offside.
To overcome this I took pump off mount, turned around pump so flow is towards front and mount back on mount with jubilee clips.


Tank and pump mounted.


Wiring and hoses ran through interior to correct locations...


Warning LED fitted on blank


Unfortunately I didn't get any pictures of hoses and wiring into bay. These where run behind steering column, through access hatch and along underside of scuttle panel and into bay.

That's about it. All fitted and ready to be wired up and plumbed into FMIC.

Pretty much took me 6hrs to fit what I've done, even after a few issues to work around and route stuff through interior and bay.

Least of all my OCDness is still intact and have two functional luggage compartment hatches...

Still looks OEM aswell....
 
Last edited:
  • Like
Reactions: IPG
After the slight modifications to the flow system and cooling, myself and ShaunS3 conducted some logs to compare AIT readings from pre FMIC and stage 2 mods to present.


Quite a difference at 6k in reduction of AIT. A total of 16 degrees which frankly shows the benefits of cooler denser air with better flow.
 
  • Like
Reactions: IPG
A few weeks ago back, thought it would be wish to conduct a pre-winter service of the brakes and a brake fluid change.

Up on all fours.....


Fronts done along with the caliper cleaned and waxed sealed.


Brake Fluid change using ATE Superblue Racing Fluid

 
Unfortunately at the same time as doing NSF brake.... I noticed the Inner CV Boot was split....


So sourced a new genuine boot kit from Audi....

 
Strip down of Inner CV Joint....


Spline and Shaft cleaned and a lick of paint.


Inner Joint cleaned


Rebuild joint, lubed up, boot on and clamps nipped up.


All done....

 
Upon refitting N/S Shaft, the new hub nut some how wouldn't thread onto the hub thread.
After a thought, it made me think along the lines that the garage that had fitted my front wheel bearings 10 months pervious, might have cross-threaded the threads.... Doh....

So only only way to get around this was to order a new outer joint....


Got a GKN from ECP...

So shaft back off and strip down of outer joint.


C Clip off.


Joint off, cleaned up and boot on.


Knocked joint back on. Then tightened clips. All done.


Shaft back only, and hub nut nicely threaded on, torqued to spec. Job done.
 
Test drive after fitting shaft revealed no issues with the drive.

Apart from a unknown creaking noise.... ******.....

Upon diagnosing the creaking noise from the front Nearside it was found that my rear bush on the wishbone had finally ended it's life span.
Just my luck....
 
Anyhow.... Wishbones where removed last week.


Looking at them and my OCDness made me think it was only right to spruce them up.
So I asked a fellow member (ShaunS3) if he knew anybody that shot blasted.

Here's the result...


Absolutely gobsmacked at the finish. Pretty much like new and only took minutes....

So on with the painting. First off was Zinc Primer Coating.


Then four coats of Matte Black (Metal paint)


And thats them this morning with my box of Superpro Bushes


BTW.... My wishbones are the original, more desirable 30mm front bush ones.
Unfortunately Superpro only sell the 45mm for the S3.
To overcome this I had to buy MK4 Golf bushes which fit perfect.
 
Last edited:
Later today I popped over to a place I use for various mechanical work to press-fit the bushes into place.


And with brand new Lemforders Ball Joints and new OEM bolts and nuts.


Time to fit metal sleeves, other bits and bolt together.


And finally the wishbones fitted.


Bolts torqued upto OEM spec (50lbft + 90degree turn)

Tomorrow is to double check every, wheels on and test drive.

4WA is booked this Wednesday coming so can't wait to feel the difference.
 
Nearly forgot....

My strut brace was looking alittle worn with years of wear, scratches and marks.
Off it went for shot blasting and powder coating.

Whilst it was away, gave me time to clean up the strut tops. First off was a wash with Autosmart G101, hand polished the sealed with wax.


Bay looking tidy


A few days later I went off to collect my freshly powder coated strut brace.
Finished in a Bentley Matte Black.


Fitted into place


And finished off with brand new OEM nuts.


Pleased with the Matte Black finish which creates that OEM look. Alot better OEM looking that the original gloss black paint.

Gotta say it's small things like this that make the difference.
 
Last edited:
  • Like
Reactions: Gops
And the last update.

Whilst it was up in the air, yesterday when collecting a few things I picked up 5l of Shell Helix Ultra and a Mann Oil Filter.
Generally change oil every 6k or 6months, in which 6 months was just over due.

Old filter


New filter


On all service items on mine or other cars, I label the item with date and mileage so for future reference either myself or others can know when it was last changed.
 
  • Like
Reactions: Gops and A3-Lee
Double checked all bolts, wheels back on, off the Axle Stands and Rolled her out of the garage.
Oil levels checked.
Perfect.....

 
  • Like
Reactions: MrPG8, Gops and tomjol
Picked these up at the weekend.

Another set of wings for my respray. Unfortunately my current, even after some TLC at beginning of year.... the rust has reappeared.

These are pretty much rust free with a small dent and some surface scratches.


(S3 Gives You Wings) Lol

Just on the hunt for a set of rust free doors aswell for the respray.

Purchased a set of Depo Headlight units for Bi-Xenon upgrade.
Nice to have a new headlights to go in after respray.
 
I did enquire about purchasing new front wings from Audi but there very expensive. £270 each....

I did want to go down the new wings route but it would of been a large cost out of my budget for the respray.

Aswell.... No companies make copies of the S3 wings so only option was to source a set of second hand ones.
 
Day off.... So Road Trip.....
Pictures taken just off Butter Tubs Pass.
Shame weather was against me and poor visibility due to bad fog so had to take it careful. 180miles done from West to North Yorkshire, Cumbria, County Durham then back to West Yorkshire.


Had a delivery today.

Brand New set of Depo Headlights (A3), ready for my Bi-Xenon conversion. More than likely have these stripped down by end of weekend for some internal trim painting (just too much chrome trim for my liking).


Need to order my Bi-Xenon Projectors (on my eBay wishlist.. Lol)

Hopefully Saturday I can take a trip out to source another set of Silver doors....
 
  • Like
Reactions: JohnStan725 and <tuffty/>
Bi-Xenon 2.5inch Projectors turned up today.

Powered both up to test the flap works.... All good....

Hopefully I can find time this weekend to strip headlight units apart and fit the projectors.


  • Like
Reactions: JohnStan725
Managed to strip the new headlights apart.... That was the easy bit.

After this, it became frustrating.

* Manufacturing holding brackets for the projectors *

Spent 3 hours cutting, grinding and drilling various pieces of metal mending plates without any luck.
Trying to align and make pieces fit was without ease.
Tuffty and others who have managed to do the conversion do not make it look easy I can tell you.
Trying to repeat each piece is very difficult.

Unfortunately at the present I've given up on the idea or until I figure out what is the best route to make the brackets.
As I went for a different kit (to fit H1 HID's) to others the mounting holes/points aren't the same so there brackets will be different.


  • Like
Reactions: mark_S3 and Sandra

Similar threads

Replies
9
Views
2K
Replies
26
Views
2K
Replies
1
Views
887
Replies
65
Views
7K