My new C5 S6 Avant - V8 family car

woke up a bit early from my night shift so nipped to tps to pick up my bits. not alot of bits for £113 :eek:


rear prop seal, 6 prop bolts, 1 centre bolt, track rod end bolt, centre diff fluid, cv boot kit.

turns out the engine sump doesnt have a gasket, just some super expensive sealent. £20 for this little tube


started with the prop seal, time to clean all the mess


new seal in


centre hub back on


prop back on with new bolts


then time to fill the transfer box, another impossible filler on the side. ****** gravity!


got it in with a long pipe. 0.8litres

and got at the heat shields back on :)


not decided on what to do with the gearbox yet. ive read some posts and **** my self about it to be honest. ZF state its a sealed box for life, audi have varying facts about service intervals, and some people have found if you change the fluid in a healthy box a few thousand miles later the box craps itself due to the new consistency of the fluid where it had worn in nicely with the old fluid.

the fluid, filter and gasket comes to about £150, i phoned up my local audi and they only want £169 do do a gearbox fluid and filter change.

so not sure what to do at the moment....
 
Have to take issue with that. ZF are the ones that say the oil should be changed and Audi say it's sealed for life. Given that ZF are the manufacturers, I would listen to them. I'm on my second C5 A6 auto (a 2.8 & a 3.0) and had the oil changed in both by auto trans specialists. The £169 quoted by an Audi dealer sounds too good to be true - check out exactly what they're going to do for that - possibly just draining the oil & refilling?

I posted this on another forum:

"Have to disagree about not changing the oil. Can only think its a myth started by the fact that Audi say it's 'filled for life' which is particularly odd given that ZF, the manufacturers of the 'box state the oil should be changed every 50,000 - 75,000miles.http://www.zf.com/brands/content/en/...hange-oil.html
BMW use the same gearbox and have a scheduled oil change. I rang Audi UK a few years ago, before having the oil changed on my previous A6 and asked how long was a 'lifetime.' The answer was ' errr....I don't know! I've just had the oil changed in the 'box of my latest A6. There was nothing horrendous about the oil that came out (115,000miles) and no metallic 'whiskers' on the magnets but it was certainly very black and probably well out of viscosity. Also give some consideration to the state of the filter. If you change the oil and filter in the engine why would you not do the same for the gearbox? Especially given that it arguably has more 'duties' to carry out than the oil in an engine."

As you can tell, I'm definitely in the camp for changing the oil. You'll have to make your own call but bear this in mind; What's the first thing everybody will tell you to do if something starts to go wrong with the box (after checking the codes)? Answer: Change the oil...............by which time, ironically, it's probably too late.
 
Thanks for your input. This is the problem i'm facing that every where I look has different info on ZF and audi, dont change/do change, etc etc. and now the horror stories too.

i'm a big believer in oil changes, oil deteriates, seals fatigue etc. nothing is sealed for life in my option. but this has me a little worried. I've done a fluid change on my A4 3.0 quattro which was probably the origional fluid at 116k miles.

This is now on 91k and gearbox is nice and tight no problems apart from gasket weeping a bit :sour:
 
Had some deliveries so could crack on a bit. got the next size up clips for the injector pipes


got the injectors all on :cool:


also got the next size t-pieces through for the matrix pipes


so started with draining the coolant, theres a handy little tap on the radiator


while it was draining i did the leaky top hose seal


old one was very perished


so then t'd into the matrix pipes


and piped up


and round to the lpg regulator


with all the coolant work done at the back i put the inlet back on. blinging :)


now the inlets on a i crack on with the lpg wiring


started working it out


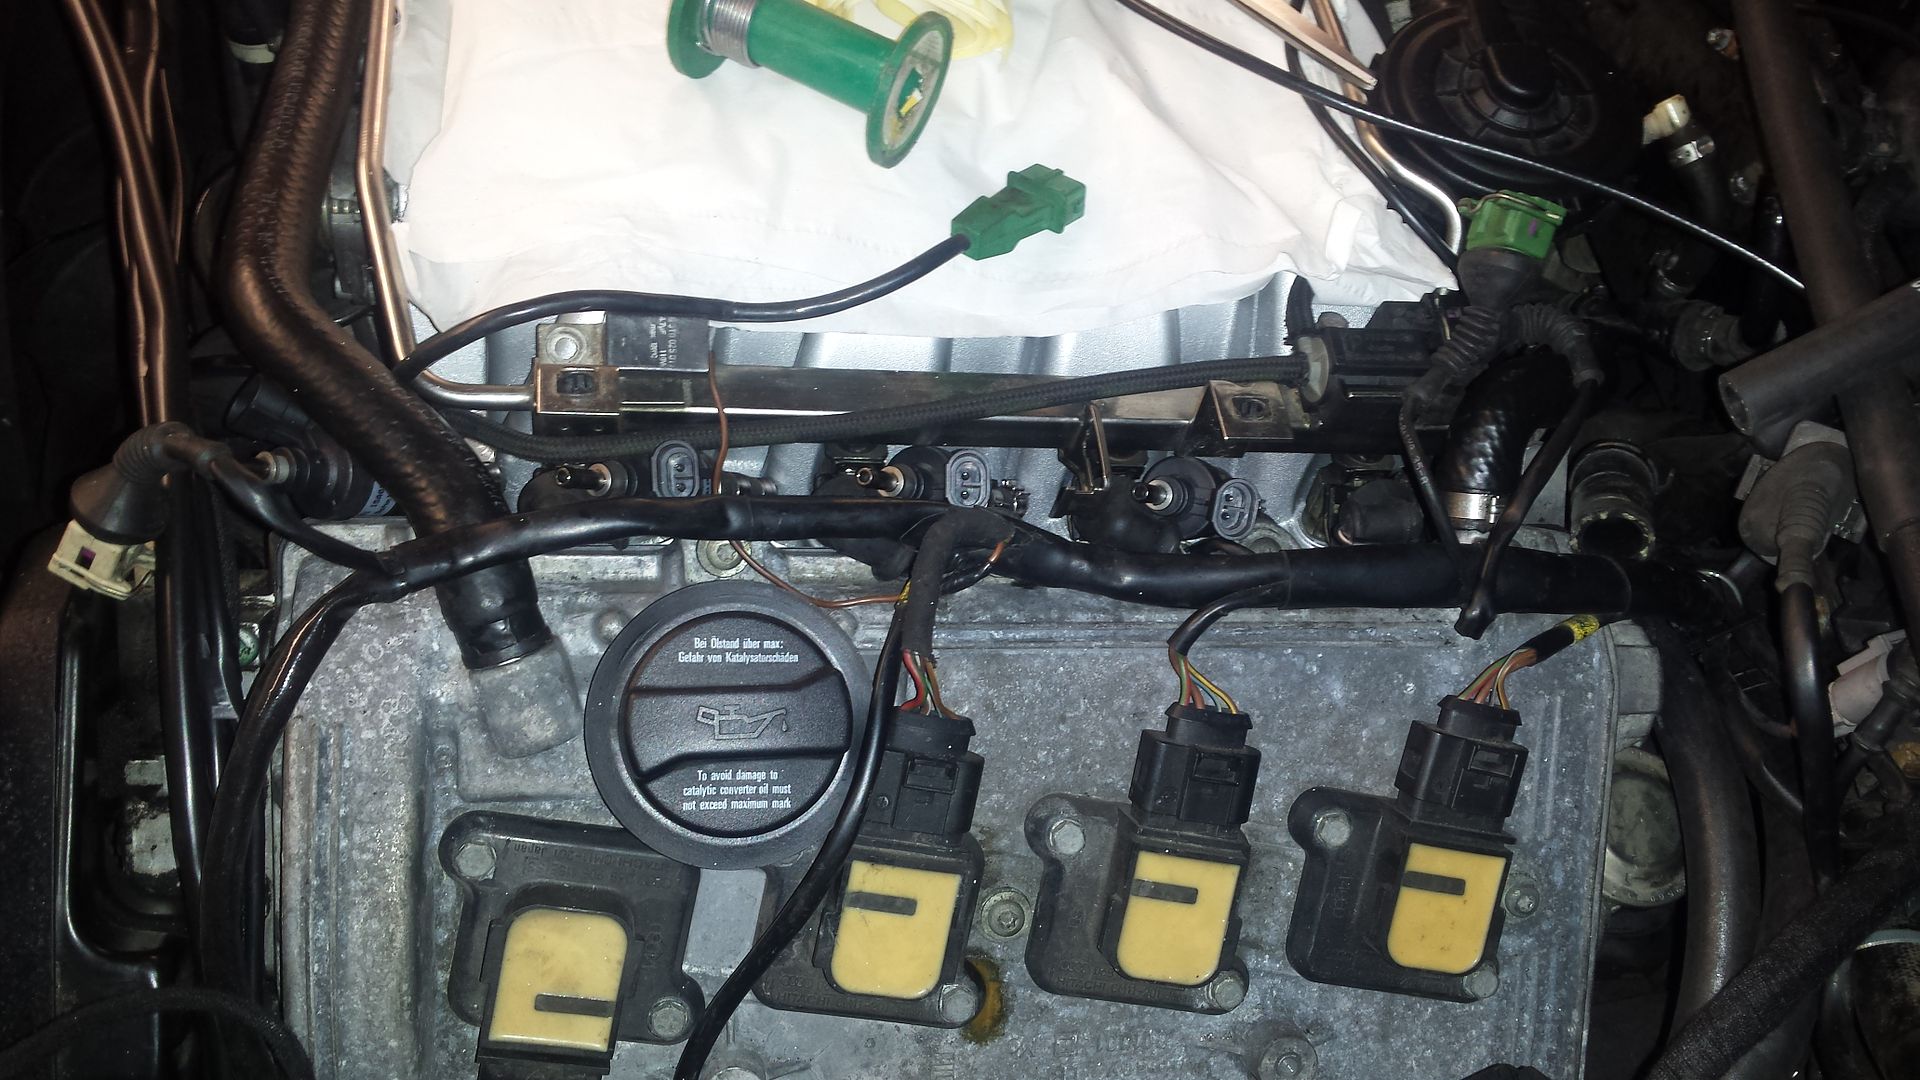
opened up the audi loom to splice in. this is the only bit you can really **** up your car in installation as the injectors are no longer connected to the car ecu, they run through the lpg ecu now and that then sends the signal to the petrol injectors


cut into the signal side of the injectors, sliced into the injectors live for an ignition live, and sliced into number 1 coil to get an rpm signal. its handy they're all one place on this


also noticed the SAI motor wires are all cracked and open, supprised it wasnt shorting out!


so got a bit tapey tapey


and all loom taped up, looking nice and factory


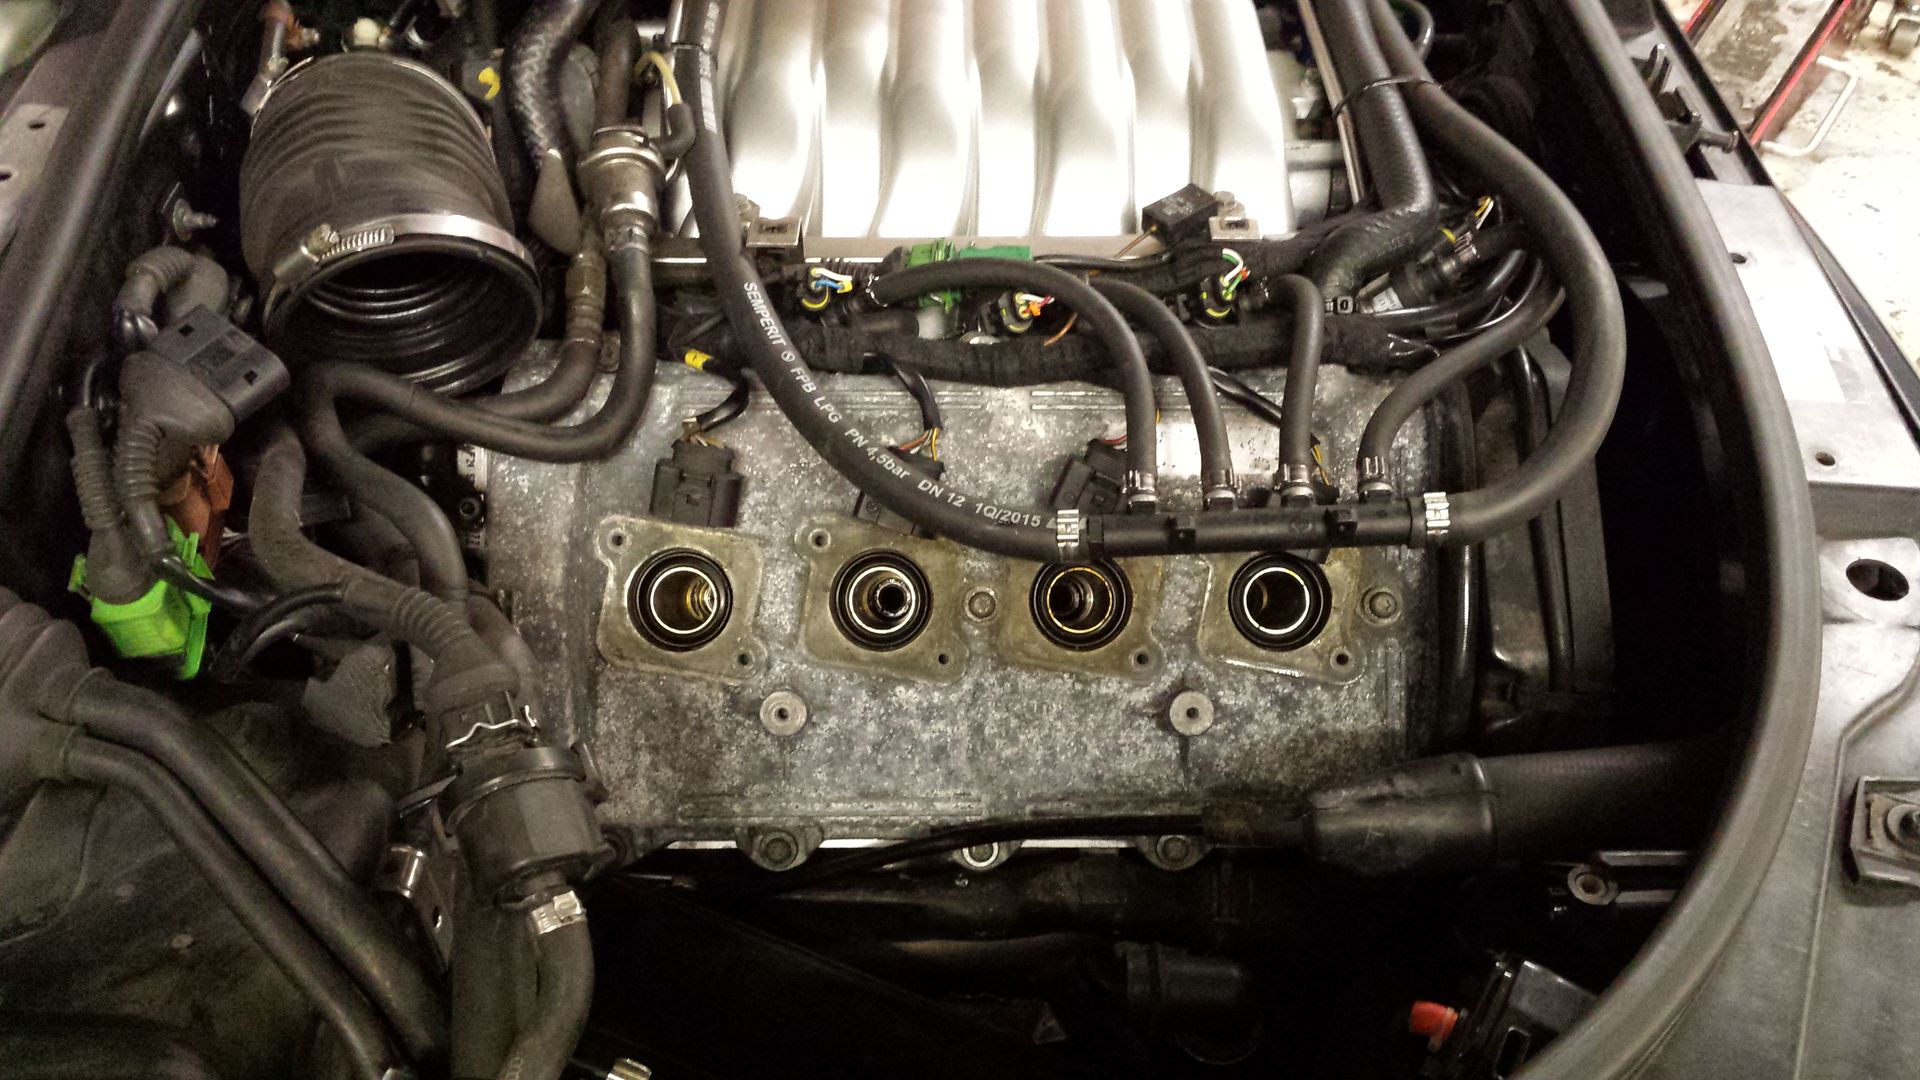
the lpg injectors all snuggled in


now on the normal car that would be done............

but this has another 4 cylinders to do :lol:
 
Those cam covers look a little dirty now compared to that nice shiny inlet ;) More great work Ron, best thread on here.
 
  • Like
Reactions: Super Ron
Bit more wiring done today, went to the other bank


got the scalpel out


and spliced the looms into the injectors


taped back together


and loomed up


had a bit of a problem that this fell off, not sure what it is, it links into the earth wire on the coils


went under neith to connect the wires i brought forward from the tank for the tank solonoid and fuel gauge


and started wrapping everything up


i had to get the power wires up to the battery, i needed to get this loom through this hole, the little one, i've got this handy tool for that


the 3 prongs open right out and stretches the grommit to allow the loom to pass through


and through


and then had to solder the fuses back on the other side


thats the electrics all done apart from connecting to the lamba sensors. these have 4 wires going to each lambda and not sure which one is the signal so gonna have to look that up.

also got to run the wire into the car for the switch

with the electrics done it was onto the plumbing, i put the pipes back in i had already made


and all the spaced out covers still fit (covering up the unpainted rocker covers lol)


fitted the lpg filters for each bank and also the gas pressure and temperature sensor inline


they even just about fit under the little cover and hide away

 
something that had bugged me a bit on the inside was the tvs in the headrests, Jordan said it was the first time he had done headrests before and just cut them in, on his second attempt in his landrover he did it a different way which i liked alot and thats folding the material over the frame, looked alot better


so starterd picking them out to see if i could unattach them from the leather and fold them over


but unfortunatly the leather all came off with the glue

i had some old leather(ette) material from years ago that i used to cover a sub box or something and a mate knows a mate who does retrimming so i got him to redo the headrests with the frames on the inside. looks much better :) :)


it was a squeeze to get the screens back in as there wasnt really a gap for the material to be in


looks much more factory now :)


also got the paint through to do the calipers :)

 
  • Like
Reactions: Greeny233
Did the mechanicals this morning, got a new Lemforder track rod and the genuine cv boot kit all for the drivers side


started strippy strippy


new inner track rod, put it on in the same place so should drive the same, planning to get it all 4wheel aligned in the not too distant future anyway


driveshaft out


its not split yet but is cracking so catching it before it does


all stripped down.


then fitted it all back together, took a little tip from DaveB and put a little bead of sealer in the groove before fitting the boot so you dont get that little bit of seepage that can happed


and done


putting it back in i found a problem with the S6 that i didnt have with the A4, to get the monster torque on the hub bolt i usually put a 4foot long bar on the torque wrench, but with the wide arches the wrench is actually inisde the arch lol


but got it all back together and done


next got the RS6 exhaust back on


got the reducer on and it fits perfect


started to put the flexy in the downpipe


welded that in and got the other reducer on


im able to use the smaller clamps but the bigger ones are just mm's too big so think im gonna have to use some u-clamps :(

tried the bumper on and it wedged itself in the exhaust


i was going to try and get the exhaust centred on the holes that are already there, i read in another thread that someone else trying this had to cut the tail pipes off and re weld them at a different angle, but i couldn't work out why, well now i do, the tailpipes are offset to the boxes, meaning if i pushed the tailpipes together then the silencers hit the spare wheel well. i didn't want to cut the exhaust up as long term i do want to get RS6 bumpers for this so i cut the bumper to one side. you can see the offset silencer in this pic


its only noticeable at ground level, it looks fine at normal height


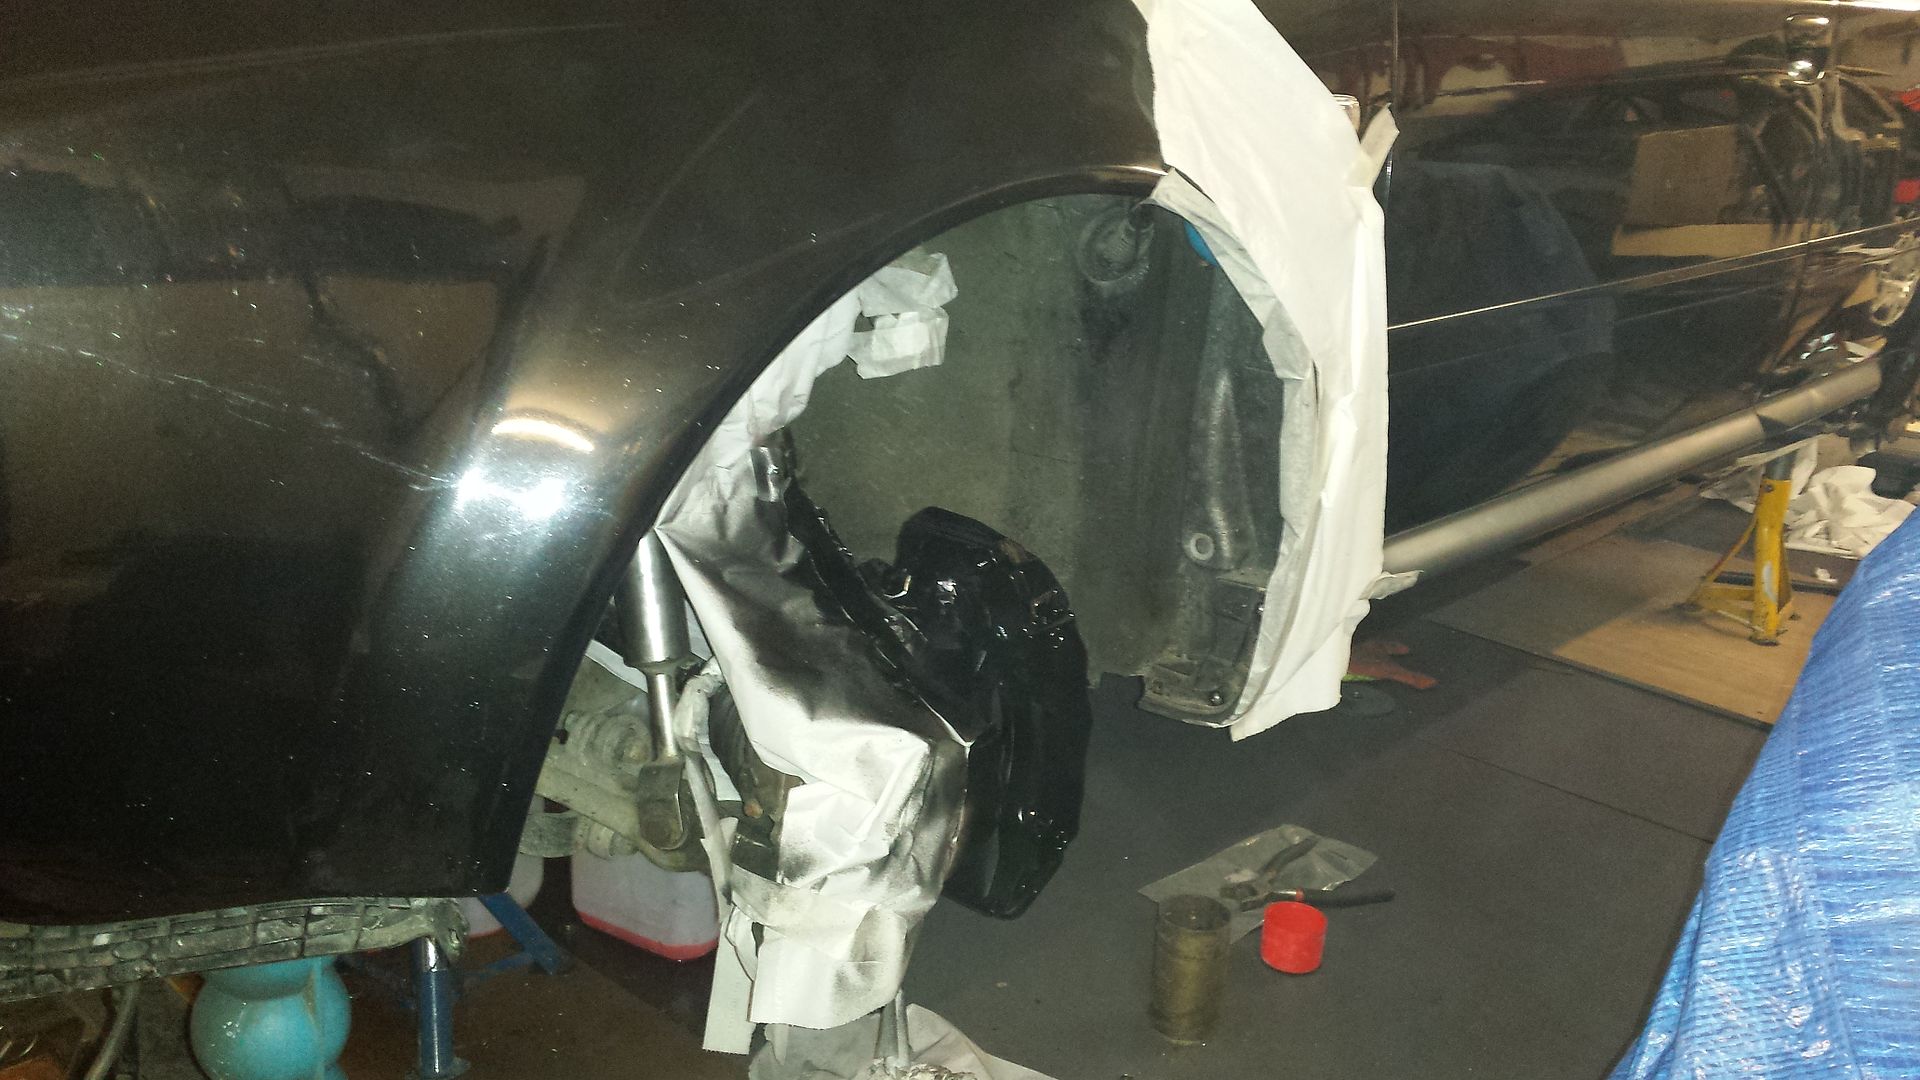
next it was time to paint the calipers, i didnt want to break the brake lines so i made a spray booth in place :)


and the rears too


done them gloss black, they look fantastic :)


they're blacker than the car now :lol:


rears too, did the top arms also


and did the discs in silver, i didn't mask it off as i wanted the overspray to drift over the edges because the pads don't go right to the edge of the disc so it will wear off on the first run and create a perfect circle :)


while i was letting them dry between coats i carried on putting the bay back together, looking good!


and with the cover back on :)

 
  • Like
Reactions: mrnice
Really enjoying this thread, great work and terrific attention to detail!, what kind of paint did you use on the discs if you don't mind me asking?
 
  • Like
Reactions: mrnice
Today started with brakes

unmasked the rears (look great)


and masked them up the other way


and painted up, again i left the overspray to drift over as the pads don't go right to the edge so they will cut in a nice circle


on to the fronts, fitted the discs and bolted on the calipers


got the pads and bits back on


then played it safe with the decal selection


and repeated the other side


i think they look fantastic, and huge!


the pack of decals came as a set of three, so stuck some little ones on the rear too


brakes on i carried on with the lpg. i needed to get a couple of wires inside the car, didnt want to drill any new holes so i used one of the unused bungs in to the ecu box, i like these rubber nipples they leave as you can cut to what size you need


snipped the end off and got my stretcher out again


and through and water tight :)


i didnt want to drill a hole in the dash, and the blanks on the dash are too small, so opted for beside the handbrake. the problem was the the wire wasnt long enough, so with a cheeky bit of trailer wiring 6 wires were extended


perfect length


and in (and illuminated) horray.


started finishing off all the things i had to move to make room for the lpg bits. made an extension for this vacuum reservoir thing


had to extend a couple of vacuums and bits and pieces but just about got the bay back together, the only thing left is to fit some clips to the top of the injector hoses that are on their way, and connect up to the lambda sensors, but still cant find any diagrams yet


with the front end just about complete the last thing i need to do for the lpg is the filler point,


fitted the tow bar beam back on


then thought i'd try the allroad towbar on


but it doesnt let the bumper go on. the deeper crash bar bits the parking sensors, but that does unbolt and it turns out the allroad tow bar is a hell of alot more manly than the one that was on there


so gonna use the allroad one

started fabricating the mount for the filler


tacked it on


i needed to chop the **** out on the under tray bit as it wouldn't even go over the exhausts


sort of goes around the filler


makes it a bit less obvious


and then welded it on


Its been a busy weekend but im pleased with progress.

i started it up and the exhaust sounds fantastic! it sounds just like a RS6, its an exhaust note aftermarket boxes just cant replicate, before it was just plain garyboy loud but now its got a real performance tone.

it is still quite loud (quieter than before) so may still think about putting the cats back in, but will see.
 
  • Like
Reactions: mrnice and Greeny233
made up the last bit of copper pipework


to connect the filler point


to the tank


decided to give the grilles a paint up too. they were pretty stonechipped and a bit peely.


stipped them out


rubbed them all down


ans painted up. did the chromes gloss black and the plastic grilles matt black.


and done


they're not perfect but looks tons better. long term i am looking to get RS6 items and when i do i may look at a different ways to blacken the chrome as they always seem to chip easily.
 
Great thread Ron.

Do you know the full spec of the front brake upgrade? I want to do this with my S6 but I'm struggling to find a definitive answer on which calipers to use.
 
Great thread Ron.

Do you know the full spec of the front brake upgrade? I want to do this with my S6 but I'm struggling to find a definitive answer on which calipers to use.

Looking at the guys old thread they're 18Z callipers from a Porsche Cayenne Turbo and 350mm Mercedes ML550 discs.
 
Thanks for that Ron, can you link me to the tread.
 
Clicked the grilles back together today


the gloss surround and matt centres came out great


attached the new filling pipe


the pipe coming out was just poking out the heatshield and in the vicinity of the exhaust


so i had a old head shield i decided to cut up to make an extension


and on, much better


and thats the filling point all finished, almost factory looking


to get my S6 bumper beam to fit over the allroad towbar i had to give it a trim around the tow hitch


and all bolted on for the final time (hopefully)


there is a kind of undertray for the rear bumper that finished it at the bottom


but i have been chopping the **** out of it to fit around everything, the towbar, the fold down electrics, and the lpg filler. and now further along i want to try and get them round the RS6 tailpipes too


no chance


so lots more choppy choppy and was left with just the lower sections


and the bumper back on


and the tow bar if i fancy it too :cool:

 
  • Like
Reactions: Greeny233
with the rear all bolted back together it was on to the front


put the black grille and headlight trims back on the bumper


and all bolted on


wheels on


then i was the careful balancing act of getting it back down on the trailer deck


then i had to jack the whole deck up and lower it down, a bit of a caution as the boards arent actulally screwed down , they're just placed on, so didnt want the whole lot sliding off! some make shift ramps off


and off


didnt get any more pics as my battery went flat, but nearly there now :)
 
  • Like
Reactions: mrnice
last little jobs, made a bracket for the lpg ecu


and got the clips through for the injectors, i kind of like it without the centre cover on, looks alot more modern


but put the cover on anyway


then it was time for a quick wash, it had got filthy in sitting in there the last few weeks


with the mechanicals done it was on to the paintwork. this is the bit that really let it down and NEARLY put me off buying it. as Jordan was away with work for so long at the time the paintwork got covered in everyday fallout and tree sap etc it etched in. there was barely any refelection and it felt like sandpaper. it doesnt look too bad in pics, but real life it was very poor


all the alloy was very murkey


so it was time to crack out the machine polisher and started making a cut :)


a little before and after on the bonnet, you could barely tell it was a metallic before


and cracked on around the car


Last edited:
8 HOURS LATER!


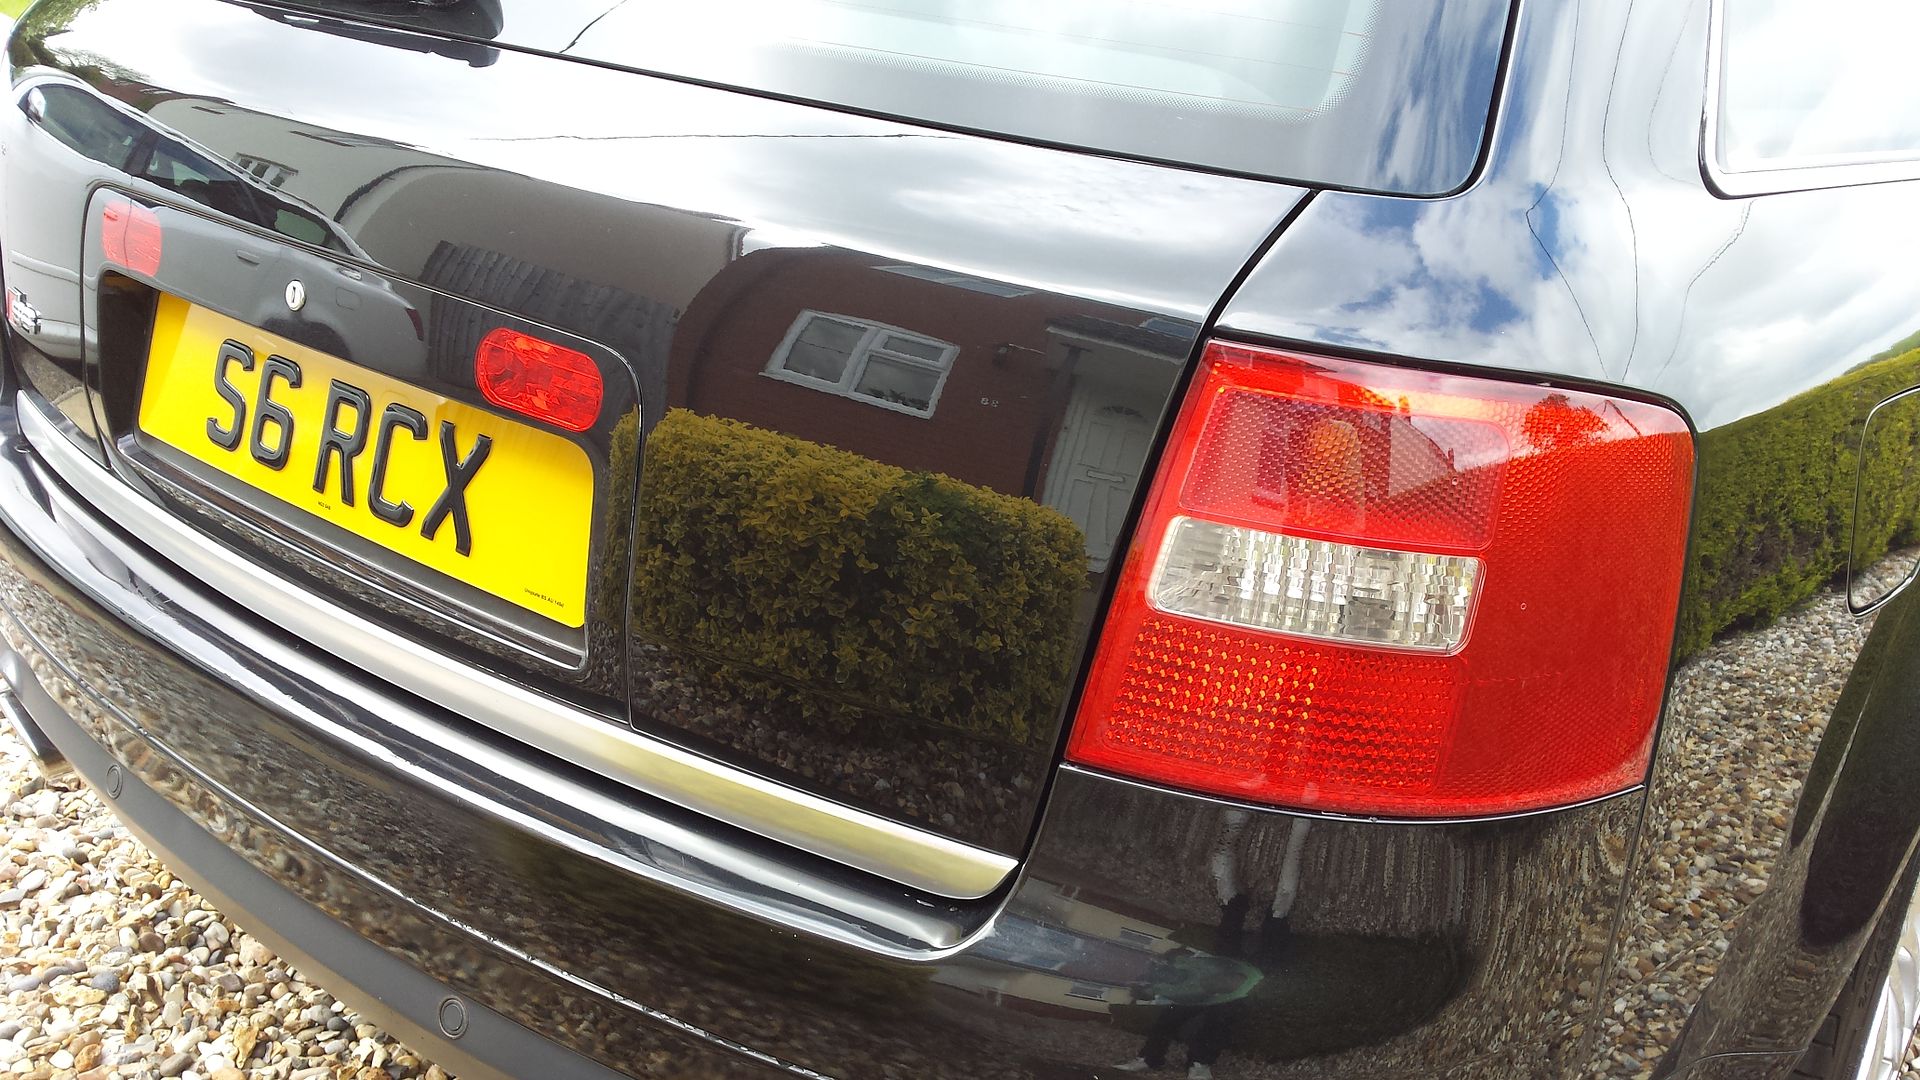
reflection time


and done


audi brothers


its now as good as the pics, better infact :cool:

 
Last edited:
  • Like
Reactions: barkclark and kanecullen89
Some fantastic work!
What does the LPG give you as an equivalent MPG?
 
It rained last night, booo, but the rain hardly stuck to it


a before and after of the door handle


and some more reflection shots


  • Like
Reactions: barkclark and kanecullen89
Fantastic thread. A really thorough job and very informative.
Car looks spot on. :cool:

Just in need of a wheel refurb as it looks like they have kissed a kerb or two in the past :kissmyrings:
 
Fantastic thread. A really thorough job and very informative.
Car looks spot on. :cool:

Just in need of a wheel refurb as it looks like they have kissed a kerb or two in the past :kissmyrings:

Thanks very much :) yea I've got to make a decision on the wheels, I'm going to drive it for a bit and see what it drives like on 20s, the cheap tyres are awful! it lights them up on roundabouts with no effort. if they're straight enough I'll get them referbed and new proper tyres.

going from the A4 which had new shocks and eibach springs, all new joints, rs4 arb, new pirelli pzeros, the handling on this is rather disapointing.
 
filled up with LPG, calibrated it, and all seems great! horray! still goes like stink on LPG all the way to the redline :)

its always been missing the boot carpet centre, even before jordan had it, so i decided to knock one up


and in


will find some carpet to cover it and will look great.
 
  • Like
Reactions: Greeny233 and barkclark
gave the seats a clean and condition, not as satisfying as as doing my cream interior, these just stayed black lol


now everythings settled down the rear has dropped a bit with the extra weight of the lpg tank and towbar hanging out the back (yes i know its filthy already)


gave it a measure up, floor to arch


one way to correct this would be to raise the rear back up 10mm on the coilovers.......... the otherway to do it is drop the front down 10mm :cool:


good quailty coilovers were still completely free :)


5 threads down on the front and re set the control arms


the exhaust was blowing a bit at the join, so whipped it off


and gunked it up


one other thing was one of the gas injector pipes was a bit tight on the curve, thats as much pipe as i had left


so got a bit more, much better

 
  • Like
Reactions: barkclark
had to go and pick up a new dining set today and the S6 swallowed it with ease


was all nicley squatted down :)


was the first time i'd given it a good run. I'd only done about 50miles since its been on the road (only live 5 miles from work :lol: )
Did 200miles today and it ate it up.
few points, need to get round to regassing the aircon. black leather, black interior, black exterior, 20degrees ambiant temperature...... swealtering!

point two, need to crack out a mapping session on the lpg, its just on the base calibration map at the mo and its a bit hessitant at low revs, and its MAJORLY thirsty, like 6mpg thirsty, think its overfuelling lol.

and i dropped the front down 10mm, looked awesome


didnt touch anywhere, clears the arch no probs as they sit well in the bubble arches at the top and loads of room even on lock.
But on the motorway with some of the big dips there was a little chirp from what i thought was just the splashguard. On the way back however there was a chirp chirp scurrrff ff ff fff ff ff ff, so pulled over and it turns out it clears the arch fine at the top.... but touches front and back on full compression in a straight line, pulled the lip out a bit where it got caught in the tread and its cracked a bit of old filler in the wing.

 
Bit of a better pic where its pulled the lip out


got the hammer and dolly out and straightened everything up,,its a shame its had a bit of filler down the bottom and cracked, not really noticeable in real life though


you can see theres loads of room at the top, doesnt even touch the splashguards


its just at the front it caught, just above the crack


looked at the other side and you can just see a shiny bit where it touches


so gave that a little fettle too, lucky no cracks this side. then a smart repair respray for now


and pleased to report no more catching :) went on a little trip to a local car show today, along the same road as it caught on yesterday, and no scuffs at all :)


  • Like
Reactions: quattrojames, barkclark and xpoweruk
little upgrade, the rear wiper was goosed and didn't do alot of wiping


so upgraded to an ebay C6 flat blade wiper and arm


much better


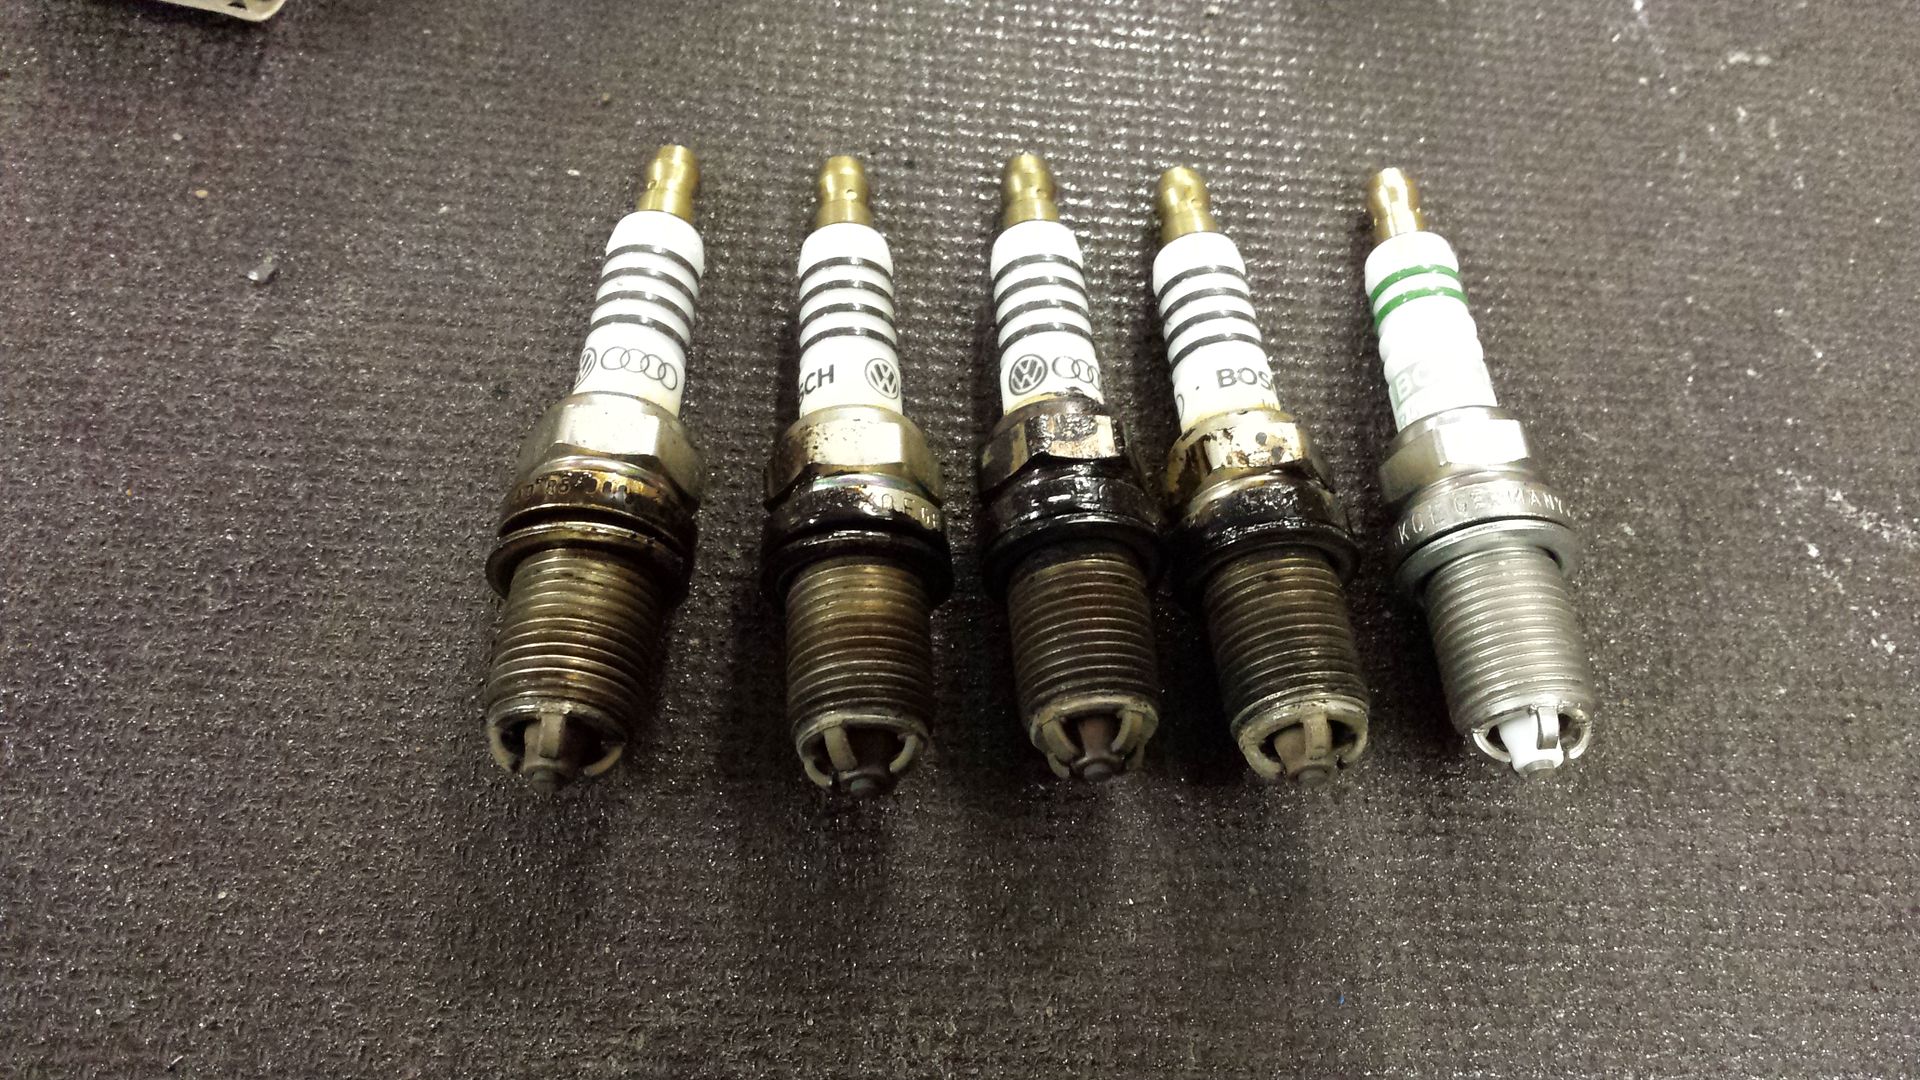
the other thing I've been picking up is a bit of flutter/hesitation from low revs sometimes. as lpg is less conbustable than petrol it needs a top notch ignition system to ignite it, spark that might be good enough for petrol might not be quite good enough for the gas. the one thing i hadn't changed or checked is the spark plugs.

i phoned up TPS for some genuine plugs and it was £101 PLUS VAT for a set :eek: perhaps not :lol: i found out what the part number audi put in the S6 (they're different to normal 4.2 V6 A6's) is bosch FGR6KQE and with a bit of searching around found euro car parts were the cheapest at £6odd per plug coming up at £55 per set


so whipped the covers back off


one bank out


it had genuine plugs in, and they even had the FGR6KQE written on them too :)


and the other bank


and all back together


definitely alot crisper now :)
 
Don't expect an eBay C6 blade to last long , after 6 months mine had split and replaced it with a Bosch.
 
was happy the ride height was all equal at 64.5 cm fender to floor all round so took it into my old work for a 4 wheel laser alignment


the wheel brackets only JUST fitted between the tyre and arch


and it was MILES out, every measurement lol no wonder i was a bit disappointed how it drove compared to my white one, the front wheels were all over the place and the rears weren't alot better. luckily though none of the adjusters were sieezed and everything is adjustable apart from the front camber. we managed to pull everything up to spec, as its so low the rear camber was right on the limit of the adjusters but we just about got it there, and the front cambers not a millions miles out


while it was there i got the aircon regassed aswell as it was empty


took it for a few laps of the private test track and its like a different car. before it had no confidence, didnt turn into corners very well, the back end was all over the place at speed, flying around the countryside was impossible, it was like a barge :lmao: Now it feels so much more positive turning to corners and so much more stable at speed. There is a big S-bend on our private test track and i knew full well i could take it at 100ish mph in my white one, but barely dared taking this over 60mph round it, now it soars round there at a ton without even a wobble :cool:

With the rear wheels put on the front, coilovers set up, and geometry up to spec its a completely different car to the one i picked up, with a RS6 rear ARB and some decent tyres this is going to far out perform the white one :) :)

Everything was going great...... it didnt last, more to follow :(
 
The car was clean and driving spot on, the sun was blazing, the aircon was now blowing ice cold, it was time to do some family duties and go and get the kids some new trainers (the buggers keep growing!) Steadily going along the duel carriageway in the fast lane round a bend and before you know it..... **** concrete rocks in the road.... bang straight over one, instant flat tyre, wife ****s her self as there's a lorry right next to us in the slow lane, but manage to get around that and get off the road at a break in the barriers where the coppers/litter pickers park.

pulled over and got out to have a look. flat tyre ******!


luckily we were only a couple of miles from my parents house so called them to come and pick up the wife and kids and my dad took me to the unit to get the spare as that was only a couple of miles away too.

while i was waiting for them i ran back to see what i had actually hit and was amazed how far i had actually traveled before stopping! found the hole!


and these were the rocks sticking out of the hole that were actually sticking up, who ever was in front of me must of done the final crack in the concrete and the rocks were all still sitting in the hole like a fruit bowl


so went and got the spare, and because of the monster front brakes i had to put the rear 20" on the front and then the spare on the rear


and wasn't until i took the front off i had actually realised what had happened!!!! :eek:


****ED!! i was speachless! if that had of cracked all the way across it could have been a very different story! i phoned the police and they said they'd call the council to put a sign up :rolleyes: i got on to the highways authority and fed it into them too and put a claim in. it drived a bit dodgy on the way home, but that could be because of the spacesaver and the out of balanced wheel back on the front, not sure if/what suspension damage there is yet.

But now i'm pretty stuck because with a 17 inch space saver and 20 inches on the other three all the warning buzzers and flashers are going mad on the dash and worse the centre diff will be getting terrible wind up. so i'm stranded at home as the biggest Audi wheels i've got are 16inch. pretty unlikely to find a matching single 20 inch wheel, so god knows what i'm going to do! :(