Prawn and BigAls A3 Track Car

Time to test fit the new splitter!

I bolted on the wear bars to try and stop the underside getting damaged when I offered it up.


edit: Worth noting this is NOT the final painted finish. This was just a light coat of black I threw over it before final paint.

I've kept the old wear bars for the minute. They started out at 10mm thick, and were all around 7mm thick still, so plenty of life left in them for now.

The mounting point retaining blocks had worked well on the whole, although due to being scraped I did have to hammer the old bolts out:


I then cleaned up the rough edges of the counter sink with the dremel, and replaced all the bolts for new ones.

The splitter went into place, and got bolted into position. No pics of the test fit as my battery died.


I replaced 2 of the threaded hangers on the outer edges. These had been bent from grounding impacts pushing the splitter upwards. I bolted the splitter into place on all the remaining mounts, then adjusted the hangers to meet the splitter surface. Checking it was level (or falling toward the nose) the whole time.


Next up was the oil cooler mounting. Previously I'd used 2 m6 bobbins, rather roughly drilled through the slam panel edge on a nasty angle. It was never a nice solution, and as expected, the bobbins broke away when I tried to remove them. So I bought a mocal oil cooler bobbin mount which held both fixings in a single rubber block:


I still didn't like how it sat against the slam panel, so I made a metal place to mount the bobbin, which I could then bolt securely to the slam panel.


I routed out the lower edge of the slam panel to allow the oil cooler mount to sit naturally. Painted the plate to stop it rusting, and bolted it up to the plastic panel.


The old drilled and fixed cooler mount made the slam panel flexy at the point where it had been weakened. This new mounting seems to have made the whole area much stiffer.

Sunday ended much as Saturday began. With everything getting utterly soaked!

I tried to crack on working under the gazebo, but the weather got pretty extreme and I spent more time trying to stop the gazebo taking off than actually on the car, so at 5pm I called it a day:

 
Last edited:
  • Like
Reactions: <tuffty/>
Monday - obviously I went to work. We poured this slab for a bus stop.


How exciting! :laugh:

I managed to get home with a little daylight remaining, so decided to make the most of the half decent weather.

New mounting bar for the intercooler made:


And the intercooler hung and reconnected:


Then it was finally time to hook up the lights for the first time:


I fired them up, and thankfully they all worked!


A quick alignment check against the wall showed that one of the projector units wasn’t quite level, and the beam was sitting at quite an angle:


I also found when I tested the main beams, that with the dipped beams set level, the mains were at different heights. I removed the lights, and split the lamp bowls from the bodies yet again, and tweaked the projector units on the adjustable tabs to try and level them up.

Back onto the car, and the beam positions looked much better:


And a quick check with the main beams confirms they’re pretty nice and even now. The projector units on the car are exactly 1m apart, so I tweaked the beams until the cut offs on the wall were also exactly 1m apart, and eyed the line in by standing behind the car and tweaking until I was happy that they ran true.

I’ve not wired up the bi xenon solenoids yet, so the full beam picture is still somewhat short of the final light output, but it’s looking ****** impressive so far, and the cut offs are so precise and sharp there’s absolutely NO glare from them at all until you’re right down at road level.

This is main beam without the bixenons wired up:

 
  • Like
Reactions: <tuffty/>
Last night I finally got the lenses back on too. I'm happy to say this was a MUCH nicer job than removing them.

I warmed the light bodies and lenses up in the oven again, 70 degrees for 10 mins or so, then just pressed them together. They went together very easily, and the glue held immediately. To be sure I fitted the clips top and bottom straight away whilst they were hot. and left them to cool.

They're now nice and solid, and appear to be well sealed.

And, ignoring the worlds most distasteful chopping board, they look great too I think!


I also got sent this image, of something that's on it's way to us as we speak!

 
Last edited:
  • Like
Reactions: jojo and <tuffty/>
Good work on the lights dude seems to be a popular mod these days :D

Mysterious parcel is mysterious....!

<tuffty/>
 
Good work mate looking good! Think you should do some more lights and swing them this way ;)

Is that a new rear wing by chance?
 
man i cant wait to see the car
new lights
new spoiler
its going to he awesome!!!
will look so much more modern with facelift blacked lights mate
ive seen them on black s3's and its miles better!!
 
i know tours isnt black black but its dark enough to be better suited to black lights!
 
Exciting news guys!!!!

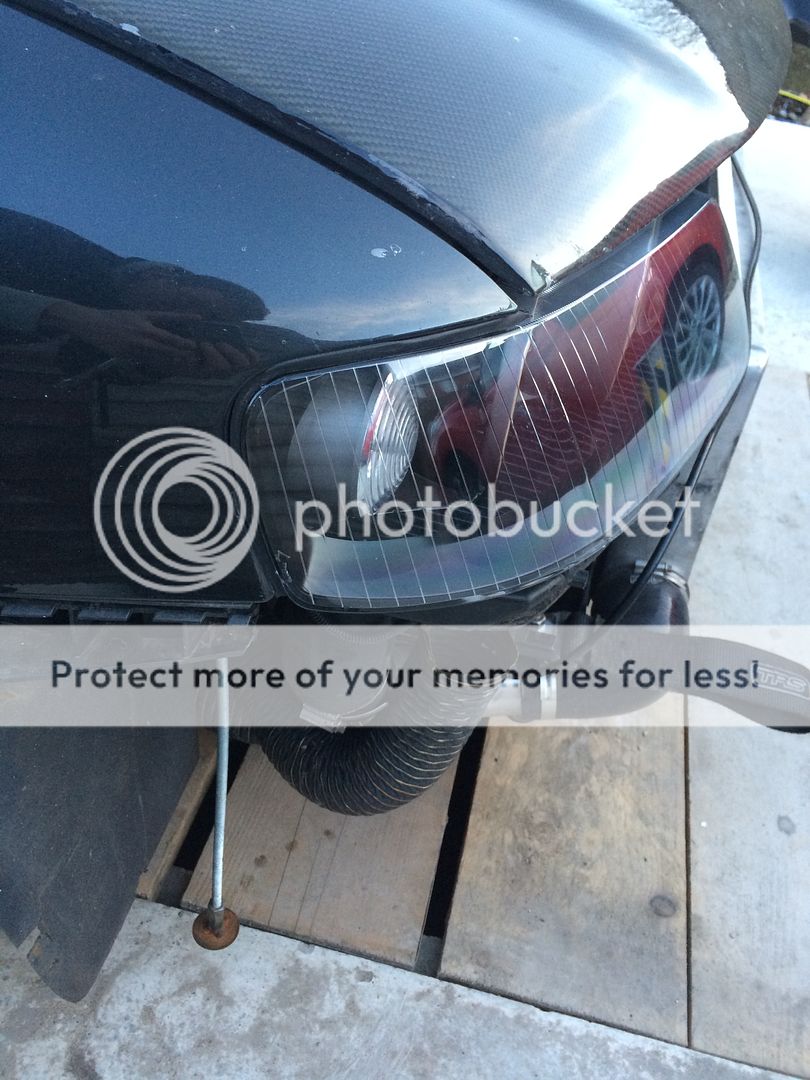
Tonight, I bought new mounting hardware for the facelift lights!


How exciting :laugh:
 
Exciting news guys!!!!

Tonight, I bought new mounting hardware for the facelift lights!


How exciting :laugh:

Found a part number then... Have to post it up as I need to replace mine ;)

EDIT! Ok... Zoomed in in the pic and its there... I assume it's the 8L0 number :)

<tuffty/>
 
That's the one PT :)

Thanks to John Lindsay for help with the part number!

For anyone else needing it:

Captive nut/spacer: 8L0 806 193

Long bolt for the above: SN105 355 02

Shorter bolts on top of the lights: N906 847 01

How do most people convert to facelift lights without the facelift slam panel?

When I test fitted mine using just the top 2 bolts and lower lug the lights wernt securely fixed at all.
 
I suspect the lights flap about and they don't notice/care mate...

<tuffty/>
 
  • Like
Reactions: Prawn
When I test fitted mine using just the top 2 bolts and lower lug the lights wernt securely fixed at all.

But isn't the pre-FL secured pretty much the same way (2 bolts on top and lower lug) and they seem to hold fine? Of course the blinker is secured separately on pre-FL so I guess this makes it overall more secure also since the blinker side of the FL light doesn't have a place to securely fix it on a pre-FL? Just asking because I've wondered about fitting FL lights to my pre-FL (because halogen pre-FL provides absolutely **** lighting) without changing the slam panel.
 
Pre facelift lights have the top 2 bolts, the locating lug on the inside, and a horizontal bolt underneath on the outside to hold the unit solid.

These can't be seen until the bumper is removed

The facelift lights have a vertical bolt down through the slam panel instead, accessed from an inspection hole in the top of the slam panel.

I couldn't see how the 4th mounting point on a facelift light could be secured on a pre facelift slam panel, so when I changed my slam panel I got the later one.

Also worth noting that the facelift slam panel doesn't have the same ball / socket wing guides that the prefacelift ones do. Not that I think these really matter.
 
Ahh yes I forgot about the horizontal bolt, my bad. The securing of the light has always been a question mark, even though I've seen many change the lights probably without doing the slam panel. Thanks for the info though Prawn!
 
Is it possible to add another attachment point by fabricating a bracket, and securing the FL lights properly? I've been looking into doing this upgrade too...
 
I don't seem to recall having any issues when I did the conversion. Being the LightKing(tm), having wobbly lights would have annoyed the **** out of me. I'm sure I only had the 2 top fixings, then the side kinda wedged in.

Was so long now though that I can't really remember!
 
Ok. I've figured it out now.

Previously, ones offering the light bodies in without the lenses fitted. On 3 mounting points alone they wobbled LOTS.

I've just done a test fit with the lenses back on, and is the lenses against the wing that stiffen then up location wise.

Considering these are Cheapo after market units, the fit seems pretty good compared to my previous eBay lights:


Also got my new hid it through. I was so impressed with the h7 lot got last week, I decided I'd replace my other lot and have matching ballasts.

 
  • Like
Reactions: Rainbird and <tuffty/>
That's the one PT :)

Thanks to John Lindsay for help with the part number!

For anyone else needing it:

Captive nut/spacer: 8L0 806 193

Long bolt for the above: SN105 355 02

Shorter bolts on top of the lights: N906 847 01

How do most people convert to facelift lights without the facelift slam panel?

When I test fitted mine using just the top 2 bolts and lower lug the lights wernt securely fixed at all.
Cable tie! This time I'm going to mount it another way.
 
prawny was there any reason why you went for a 5 door golf cage over a 3 door golf cage??
also how much fabricating was needed to fit the golf cage into the a3 or was it the same sort of work involved as fitting it to a golf?


you got any pics of the car front end yet???
and have you driven it at all with the new lights??
 
the cage was only offered for the 5 door at the time mate. I'm not sure if that's changed or not?

The only difference at the time was the position of the B pillar ties that usually mount to the old seat belt anchorage point at eye level on the B pillar. I obviously cut these off my cage as they weren't in even remotely the correct position. I made new gussets tying the cage in further up at roof level.

Fabrication work to install in the A3 was exactly the same as for a golf. Despite the external shape differences, internally they are remarkably similar. If anything the cage fits tighter to the shell in the A3, but it's not an interference fit. OMP supply basic feet which are used, but require trimming and side panels making to close them in properly. it's probably 2 days work for the basic install including all the stripping and fiddly prep work.

I have got some finished pics, and I have driven it yes :) update coming shortly :)
 
thanks man!
i know im sad but i look forward to seeing the pics!! lol
 
Someone needs to get a custom cages cage, so its cheaper for the rest of us lol!
 
Time for a little weekend update.

Saturday morning started off with nothing too stressful. I soldered the bi-xenon solenoid wiring into the main beam loom on the lights, then set about modifying the light covers to accept the HID wiring. Little slots were required in each side of the hole for the largest of the HID plugs to pass through:


All finished the the lights sealed up for hopefully the last time:


Heading outside, I put some conduit on the wiring to the lights to keep it neat and tidy under bonnet:


I offered the lights into place, and strapped the ballasts under the lights this time so as not to clutter the engine bay:


At this point Andy popped round. His work van broke on Thursday, so sadly he had had to borrow a car for the weekend. It was no Berlingo Van, but beggars can't be choosers :laugh:


625bhp of twin turbo W12 power!


I put some wooden runners down, and slid the splitter under the car towards it's final resting place:


I dropped the bumper on, and offered up the old air dam to see what alterations would be needed:


I turned my attention to making the side arch fences. Where previously the bumper is held on with little trim screws in the sides, I wanted a proper reliable thread, so drilled out the bumper guides and fitted M6 riv nuts in their place:


To secure the fences at the bottom, I'd previously used wood screws from underneath, but part of my brief on V2.0 was to use no screws, and replace them all with threaded inserts.

I didn't want a T-nut visable on the top surface as they're messy, so I did a test run on a spare bit of ply and found that when I expanded a riv nut inside a hole, the expansion on the outside of the nut jammed it in place very tightly, giving me a much neater threaded insert on the top surface:


I also added a riv nut mid way down the arch liner in one of the original bumper mounts to make sure the fence followed the curve of the arch: Seen here with the new arch in place:


Bumper and fences off one last time, and it was all finally secured into place:


The air dams on the sides were still in good condition, so got recovered in protective special tape (Duct tape!) and refitted. The centre one needed to be replaced, but I didn't have a long enough piece of foam board left, so I had to join 2 parts:


All joined and smoothed down prior to coating with more 'special' tape:


Finally all refitted for the last time:

 
Last edited by a moderator:
With this done, I was finally able to take it for a drive after a month off the road!

I popped round to see Andy who was working on the S4. Sadly, the Bentley got in the way of this picture :laugh:

I spent a few hours with Andy reassembling his 2.7TT S4 lump. He's ditched the ko3's and fitted some Garrett T25 units instead. These things are HORRIBLE to work on!

The A3 came in handy again, Andy was short of a few inches of vacuum hose, and mine was of fairly generous length so I chopped off a few inches to leave my orange mark on the S4:

Night came, and I was finally able to go and test out these new lights :)
I need to tweak the beams down a fraction, but it's absolutely great driving at night now! And due to the sharp beam cut offs it's not blinding anyone else either.
Dipped beam:

And mains:

The car feels 10x safer now to drive at night. it looks smarter, and I'm really happy with the new splitter too :)
 
  • Like
Reactions: Crazypete00
I need to invest in these projectors! Seem to be becoming quite popular!
 
My life those headlights look amazing mine are just 10 foot in front of me on the road if that absolute tripe, who's gonna do us dummies headlight mod for £50?
 
who's gonna do us dummies headlight mod for £50?

You'd have to pay me a LOT more than £50 to ever do that again!

I really was getting fed up with them mid way through, it just seemed like so much fiddly crap work, and that's not really my thing!

SO glad I carried on with it though, the results are amazing
 
  • Like
Reactions: A3-Lee
I'll see what I can find this evening :)

Drove the car into work this morning as I'm at the office all day.

Still feels quite wrong using it on the road. Having not driven it for ages I always forget how brutal the in gear acceleration is. Many smiles all round :)
 
prawny was there any reason why you went for a 5 door golf cage over a 3 door golf cage??
also how much fabricating was needed to fit the golf cage into the a3 or was it the same sort of work involved as fitting it to a golf?


you got any pics of the car front end yet???
and have you driven it at all with the new lights??
Someone needs to get a custom cages cage, so its cheaper for the rest of us lol!

Sorry prawn don't want to derail your thread to much ;)

Daz if your looking for a cage for the S3 it may be worth looking at golf R32 based cages as the rear floorpans of 4wd and wrong wheel drive cars are different, although I'm not sure about the arch profile where some of them attach on the fwd models may still be the same on 4wd so may get away with it, but definately worth looking into before purchasing anything

Azzzah a custom cages kit for a golf can be made to fit the 8l I've documented most of the info needed in my build thread incase anyone wanted to follow suite :)
 
  • Like
Reactions: Prawn
Spoiler Alert!

Implied Facepalm


<tuffty/>
 
  • Like
Reactions: Alex C, Vex182 and daz-20vt

Similar threads

Replies
26
Views
8K
Replies
6
Views
4K
Replies
10
Views
3K
Replies
166
Views
20K
Replies
40
Views
4K