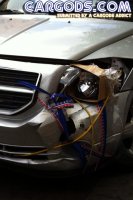
Prawn and BigAls A3 Track Car

no chance :(

If the british weather carries on as it has done recently, I can't see it leaving my drive again until May!
 
shouldn't of bought fwd then!
why is the weather causing you this?
 
can one of the mods change the title to
prawn and big al's A3 road car
 
  • Like
Reactions: A3-Lee
shouldn't of bought fwd then!
why is the weather causing you this?

So, owners of 4wd cars somehow magically don't get rained on when trying to work on them? I think you've missed the point dear boy :laugh:

can one of the mods change the title to
prawn and big al's A3 road car

£20 says it'll still see more track time this year than you, even with our 'reduced programme of activities' :racer:
 
  • Like
Reactions: SamHendry, A3-Lee and Mrharris2
So, in light of the current trend for awful weather (that Daz doesn't get because god pities those with a haldex enough already), I've got 2 little projects on the go at the moment.

When the sun shines, I'm outside on the splitter. When it rains, I'm inside fiddling with these lights.

Splitter progress:

It was incredibly cold on Sunday morning at 0800, but I was feeling strangely motivated, so I put on a few layers, and headed out to brave the -2 weather and try and get started:


Bumper off in about a minute, revealing the mass of stuff to strip off to get to the slam panel:


Intercooler out, lights off, and it's nice to see the Direnza rad looking just as good as it did when it went in:


A few more bolts and a few plugs to disconnect, and I lifted the front end off:


The essential cooling parts that allow me to lap all day long:


Before disturbing the splitter mounts, I took a base measurement from the old mounts. the splitter surface should sit 65mm from the underside of the slam panel in order to sit correctly:


On further inspection, the old slam panel had some additional cracking to the main structure also. I knew that I didn't want to simply replace it with a new one, as it's fate would surely be the same again in a similar time frame. So I set about reinforcing the slam panel, and finding a way to transfer some of the load elsewhere.

the solution, was a fairly light weight box section across the bottom, made from 20x20x1.2mm steel to keep weight to a minimum.

I drilled holes in this, to suit the original splitter mounting holes, and bolted it up to the old slam panel:

[URL=http://s1218.photobucket.com/user/prawn16/media/2015/90824E34-CC57-4A69-9F63-5C93EA0B41D6_zpsb5gaobmn.jpg.html]


I then got cracking with the CAD, and made up a few templates for the idea I'd had, and transferred them to steel. No pics as it started to rain mid way though :(

Soon, it had started raining heavily. We set up the gazebo to offer some shelter, but it was no use and ended up half way down the street! Far too wet to carry on:


Ash had popped over to borrow some tools, and annoyingly, at this point he had no front strut on his LCR, so we had no option but to reassemble it in the pouring rain. Not enjoyable!


I came inside and sulked because I couldn't go for a drive in my car. Tori pointed out that it wasn't all bad, and wrote me a sign to cheer me up :laugh:


Fast forward to yesterday, and I got a bit more time to work on it in the afternoon.

I got my steel plates finished off, and clamped into place on the car:


And tacked up, before being removed for final welding up:


The upper plates bolt directly into the chassis rails via the slam panel mountings, with the drop plates hugging the profile of the slam panel and tying the box section cross member into the chassis rails. It's very tight for room down the sides of the slam panel, with the intercooler sitting very tight against it.

So tight infact, that I've just realised as I type this that I'll have to grind back some of this new piece I've made, and it's only just occurred to me!

that's a shame, because I painted it last night :(


I realise that the brace will have the potential to flex a little, but I don't see that as a bad thing. the original slam panel mounting was also flexible to a degree, and I think this perhaps aided it's long life, despite eventually dying.

This new mount should spread the loads from impacts across the whole slam panel, and also into the chassis rails, as well as increasing stiffness then the splitter is loaded downwards from air pressure.

I wish I'd realised I'd need to trim it down before I spent ages painting it though :laugh:[/URL]
 
  • Like
Reactions: StaceyS3, Nathan Barnes and <tuffty/>
did i touch a nerve????
ill take that 20 quid bet btw
 
no, you just missed the point :laugh:

I'm not not driving it because it's too wet for FWD, I'm not driving it because it's in bits and it won't stop raining long enough to allow me to paint anything to then reassemble it!

£20 bet is on!

How do we quantify it? Miles covered on track? or number of events attended?

:racer:
 
which ever suits me at the end lol
totally mis understood
i know its not cuz u fwd just teasing!!
hopefully this bet will get us both on track more!!!

end date xmas day??
 
no, you just missed the point :laugh:

I'm not not driving it because it's too wet for FWD, I'm not driving it because it's in bits and it won't stop raining long enough to allow me to paint anything to then reassemble it!

£20 bet is on!

How do we quantify it? Miles covered on track? or number of events attended?

:racer:
If it's miles on track. WE WIN.:audibash:
 
  • Like
Reactions: Prawn and Natogreenmachine
;) 100 quid party tent or gazebo till you build the garage .


We actually have a 6x3m steel framed marquee that'd go out there nicely, but I don't think I can bring myself to inflict that upon the neighbours! (And it's in cornwall)
 
  • Like
Reactions: jimmcgee
We actually have a 6x3m steel framed marquee that'd go out there nicely, but I don't think I can bring myself to inflict that upon the neighbours! (And it's in cornwall)

tell the neighbors your a famous racing driver:D and its only temporary till you get your garage built :icon thumright:
 
Do it PT, you'd love it! It's a REALLY good day out, and doesn't take much out of the car at all due to the short run low mileage nature of it :)

Should have cams in by then (and maybe bigger brakes) so I shall see... it does appeal though...

<tuffty/>
 
I quite fancy having a go at Curborough

<tuffty/>

Do it PT, you'd love it! It's a REALLY good day out, and doesn't take much out of the car at all due to the short run low mileage nature of it :)

If Nick doesn't get his car back together in the next week or so and get some money across there may be an opportunity sooner than you think... :lick:
 
  • Like
Reactions: Prawn and daz-20vt
I'll whatsapp you tomorrow Luke :)

Been hard at it again this evening:


Realising be front splitter mount would foul my IC pipe work had been playing on my mind l day. So I set up the lights when I got home and sorted the issue out straight away:


All ground back flush to the all panel. For the more observant of you, yes I have skimmed the panel with the grinder. But it's the old panel that's going in the bin so it doesn't matter :)

I did forget that briefly myself earlier and got really upset when I found a the crack in it though :laugh: then remembered it's the old one still!
 
  • Like
Reactions: jaykay8L and Rainbird
I wish i lived closer to some tracks so i could pop along to some track days and watch... stupid Plymouth, think castle coombe is the nearest, might have to take a trip there at some point.
 
Pretty much. We've hired out Curby as a group from another forum - it'll be the first time on any form of track for a few of us, whilst others have done a considerable amount more and we're spread all over the place so it's a reasonable location but a bit of a trek from Plymouth. Someone needs to buy a load of land nearby for us to plan on...
 
  • Like
Reactions: Lavis89
Time for a post that's not going to be in any way performance related for a change!

Lighting!

About 8 years ago, The car went AWOL in a steep pub car park, and rearranged it's own headlights.

At the time, facelift lights were fetching big money, and things like DEPO copies didn't exist. So wanting a cleaner look, I went for some Ebay angel eyes, with 8k HIDs too, because blue lights were cool when you're 19, right?

They never really lit the road well at all, and have gotten steadily worse with age (or is that my eyesight?), to the point where now, the car is getting dangerous to drive at night.

Unlike many, I use my track car quite frequently, so given how much of the time it's dark in the UK, it was time to sort out the lighting once and for all!

First decision: Slam panel - this defined the type of light fitment I'd be going for. I decided due to the availability of decent quality DEPO headlights in facelift fitment, that I'd go down that route. So I bought a facelift slam panel so I'd be mounting the lights using all 4 factory mounts.

Next up was a set of depo replacement lights: very shiney!


These are very shiney indeed, and would stand out like a sore thumb on my all black car. I've seen many people strip their lights down and paint the (non reflective parts) insides black to tone them down a touch. I decided immediately that I wanted to do this.

The quality of the lenses and light bodies is perfectly good on these, but the halogen projectors aren't the best. Halogen projectors also aren't ideally suited to HID bulds due to a different shape, and a different cut off pattern.

So, if I'm stripping the lights down, and removing the lenses, I may as well go all the way with this!


So I purchased some 2.5'' Mini H1 Bi-xenon projectors on recommendation from George :)

The first light went into the oven at 70 degrees for 10 minutes, and after much struggling, the glue softened, and I was able to prize the lens off:


I then removed the reflector bowl. Here you can see the old halogen projector on the left:


I removed the halogen projector, and offered up the new bi-xenon unit. Obviously none of the holes lined up, but the mounting posts did seem to be at an ideal height, which was a good start!


I drilled a tapped the two upper studs with an m4 thread, then set about making some little alloy plates to mount the units. Seen here roughly cut out to test fitment:


With that working nicely, I needed to make a lower mount for the unit, and also provide the ability to adjust the beam height relative to the main beams.

I decided the lower right hand stud would be ideal, and to add a threaded fixing to the projector unit, I replaced one of the 10mm studs for a 20mm stud, giving me a 10mm threaded lug to attach to:


A bit of work with the grinder and pliers, and I came up with this:


The new projector is now mounted very solidly, and is fully adjustable for angle too! I'll be test fitting the lights to the car and setting up the beam alignment carefully before sealing the lights up again!

With the theory proven, I made 2 more of the tabs for the other light, and radiused off the corners to avoid sharp edges:


Will hopefully be splitting the other light down this evening. Having done the first one now I'm expecting the second time around to be a little easier!
 
  • Like
Reactions: jaykay8L, Mrharris2, Alex C and 1 other person
How much you gonna charge to do mine aswell ;) As mine will turn out like this if I ever attempted them Image :sob:
 
  • Like
Reactions: A3-Lee
Ha that's my car who's done that to it!!!
 
  • Like
Reactions: superkarl
I went round to Nicks last night to drop off the jack, the A3 looked quite happy on the garage floor. All seemed calm and normal.

11037776_10153457846836777_7987137308741729466_n.jpg


Then I went into the kitchen and Prawn was a frantic mess of fiddling with parts and moaning about his lights.

I do believe that when these new lights are turned on for the first time we will have finally discovered an alternative to the actual sun.

And judging by the way he's put them together they'll probably last longer too!

I've ordered some now, I want a go.
 
  • Like
Reactions: Prawn
So, having for my xenons mounted, it was time to paint the inside of the lights ready reassemble:


Sadly, during assembly, the thread in one of the adjusters somehow stripped.


To be expected I guess at £40 per light.

I tried to remove the fitting, and that broke off too!


This was going from bad to worse!

I decided that what I needed was a steel thead to adjust the lights.

What I did. Was dremel out a little slot in the adjuster. To take a small m5 nut:


Then secured that in place using an epoxy jobby:


When that set, I ground it back to be sure that the adjuster would still run cleanly in the guides:


And finally assembled:


  • Like
Reactions: <tuffty/> and Sam_
ahh on my phone
guess its shade,
you manage to get them on today?
they are gonna look awesome!!
much more modern than the old ones.
 
I did absolutely loads over the weekend, yet oddly I appear to have very little to show for it!

The splitter has been on. But is now off again. The lights have been wired up and tested, but are now back in the kitchen.

Lots of jobs at 90%, but nothing currently finished.

It's all taking a bit long. I just want to drive it again!!!
 
  • Like
Reactions: <tuffty/>
stop modding it then !!!! :undwech:


cant wait to see the car with the blacked headlights man!!
 
dude really keen to see if there is a difference with your lights lol if there is you gona need to send me a pair, the link you posted does not ship to me siiiiigggghhhhh
 
Progress report!

Saturday was utterly miserable weather wise:


I spent most of the day in the gazebo, working on Bobs leon.

We did an N249 bypass, PCV delete, catch can install, and the worlds most irritating thermostat change. Someone had rounded off a lower bolt, so we had to remove the alternator to get onto the lower bolt squarely. Only, the alternator was seized on! Argh.

Got it done in the end though, and it drove much nicer:


As a favour, Bob did the soldering on the new light plugs, seeing as he likes all that small fiddly rubbish that I hate!

We plugged in a light, just to test they worked.

Success!


Sunday morning came and the weather was much nicer.

First up I trimmed down the wings to accommodate the new facelift lights. I used my new OMT (Oscillating multi tool) that Mum Dad got me for Christmas - it was great!


I ground that smooth, filed off the edges, and applied some black enamel paint I had to protect the edges.

Next up was a new towing eye mount, seeing as I've done away with the crash bar supports it used to mount to. I ground the bottom of the old towing eye bracket flat to accept the eye plate, and bolted it through. The bolt in there currently is an 8.8. I'll replace this with a 12.9 ASAP though.

the new position also sits much better within the bumper openings too. so double win.


Splitter mounts next.

As shown previously. The old mounts sat exactly 65mm from the slam panel:


The additional support beam I've added is 20mm thick, so I set up the lock nuts on the mounting posts to be 45mm from the mounting faces, taking into account the 1mm washers I was using too.


To be safe, I ran a tap through all of the threads before fitting:


Then I mounted the posts on the slam panel, and made tiny adjustments to get them all sitting perfectly level.

'Make the noise' (prize for anyone who gets the reference!)

 
Last edited:
  • Like
Reactions: <tuffty/>

Similar threads

Replies
26
Views
8K
Replies
6
Views
4K
Replies
10
Views
4K
Replies
166
Views
20K
Replies
40
Views
4K