

mark_S3 Progress Thread
- Thread starter mark_S3
- Start date
You are using an out of date browser. It may not display this or other websites correctly.
You should upgrade or use an alternative browser.
You should upgrade or use an alternative browser.
Cheers.... There 18x8....Like your new wheels, how wide are they? 8.5"?
Thank youvery clean dude!
makes me want to keep spending on this kind of servicing!
It's been a long road to get her in that shape. Alot of love and determination... Regardless of money or time.
Its also one of those slippery slopes that I can't stop.... Lol

So back to work after Xmas hols and on way back home from work, I called into my brothers house.....
But the car didn't get back home on its own 4 wheels....
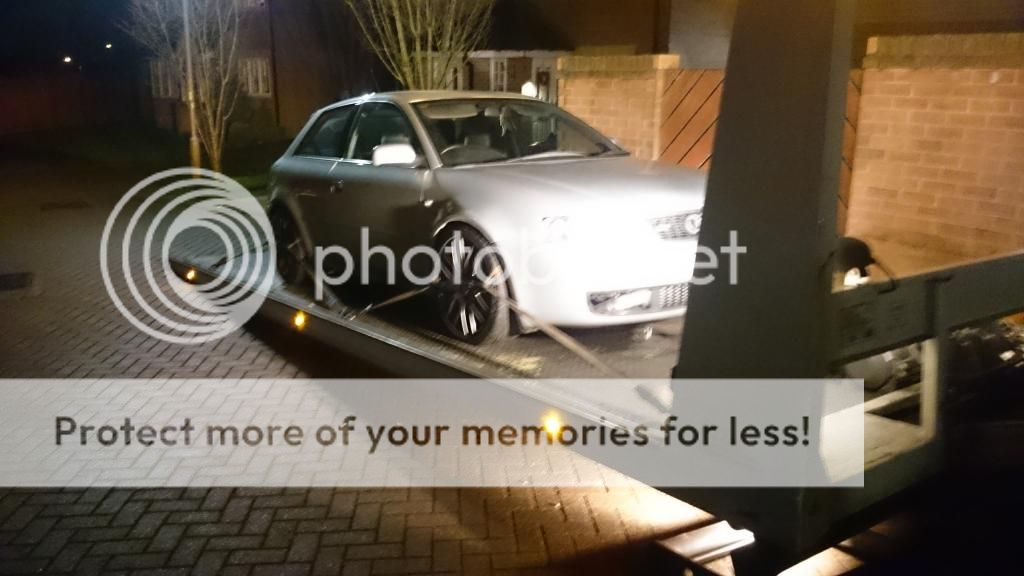
Was manuring and clutch pedal dropped to floor... And didn't return. Doh!
Well it was the dreaded clutch pedal housing that has split apart due to the welds failing.
Tbh... I can't complain after 147k miles and probably a million times of depressing the pedal.

So next day, straight on phone to Audi to order another pedal.

Apon fitting in did find the spring to be the painstaking task to refit. Nevertheless it was fitted...
All good... Pedal feel is alot better. Smoother and lighter.
Most probably due to cleaning and greasing up the metal shaft that the bolt goes through.


And today's task was.... Boost Gauge install.
Managed to source a Stack Mechanical Boost Gauge, and vent holder which was made by someone I know.
Vent holder was sprayed Matt black to blend into interior theme.
Unfortunately I had managed to get Shaun_S3 to order me some Red Lighting gel so I could convert the gauge backlight from white to red, but he was tied up alittle so couldn't get over to me today.
Nevertheless I proceed ahead.


Tapped hosing into here to go through to the compartment under scuttle panel and fed feed through white box into interior.

Took power from ignition feed under relay box

Testing power to gauge

All done....

Boosting to 18psi and looks brilliant. So happy with my new gadget.
Amazing to watch.
Now to find another day to convert over to red backlight.

Last edited:
She owes me lots of beers..... HahahaCar looking awesome Mark. You have earned 1beerx

But yeah she looks awesome... Cheers
So that's me finally upto date with my thread...
Alittle inside to the up and coming months.
* New LUK Clutch and Flywheel (Currently Saving Up) - Still running original clutch. Still feels great but release bearing is slightly noisy.
* Relentless V3 Manifold (Purchased but awaiting delivery)
* Pipewerx 3" Downpipe (Purchased)
* Pipewerx Decat (Needs purchasing)
All of above will be fitted at the same time. Makes sense.
Most likely will happen March time.
Then after will be saving up for custom map at Badger5. (Most likely happen April/May time)
Need to purchase a new fuel pump before I go down to Bills as it seems a common part to swap before you go.
Most likely do a smoke test before hand aswell.
Also purchased SFS Top Boost hoses from Shaun_S3.
Just waiting to get them off him after he's done his custom build.
So looks like some interesting and exciting months ahead.
Btw....
I forgot to say Thank you to Paul (Tuffty) and Matt (AVLO) for the help on my Boost Gauge Install.
I know there probably tired of hearing the same questions answered but after doing research I was still alittle puzzled on a few things.
Turns out I caused a fuss for no reason. Easy peasy!
But once again Thank You for your help and knowledge.
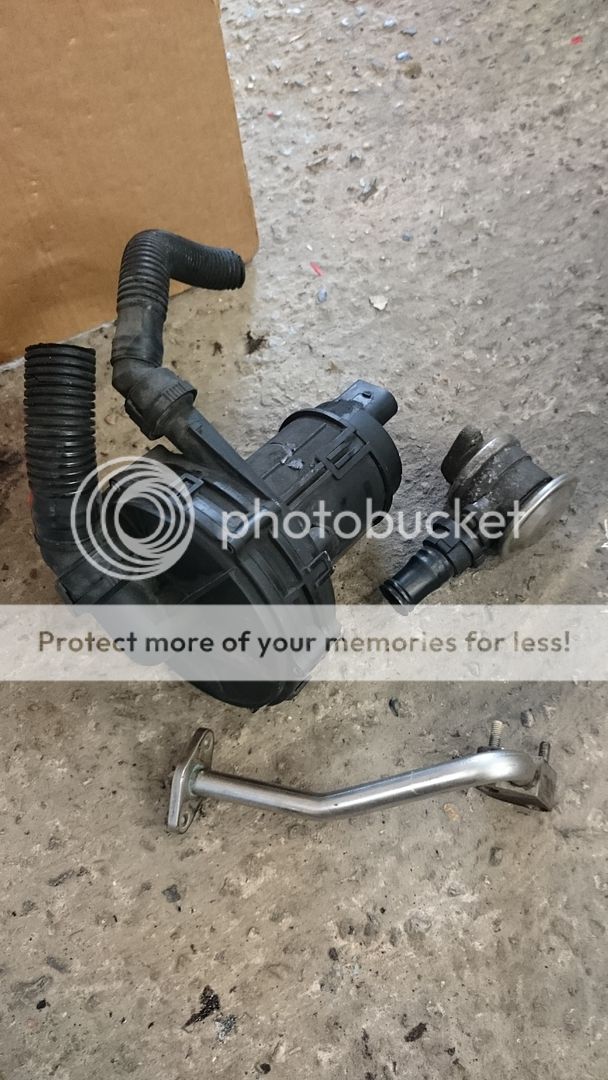
After diagnosing my oil filter housing breather pipe to be the culprit of oil leaking down onto my sump... I finally got round to to changing it.
New Meyle Breather pipe
New Genuine Rubber Seal from Audi (£5.02 to be exact)
Old one off, then inspected pipe to my Saikuo Michi S3-OCC.... The gunk inside which is normally hidden away deterating your PCV system or catch can pipework. So that was cleared out.
New breather pipe back on and rejoined pipework back up.
Time to drain the catch can.
I've been storing my collection of fluid drained since I installed it 10months ago.
Roughly 500-600ml drained in total. As you can see its a liquid based with the oil separating.
Then finally all covers back on and decided to tidy up a few vac pipes.
Not bad for a few hours work on a Wednesday evening.


Brake Service Time
Just in process of cleaning up my Brembo's.
Pads out ready for contact points to be cleaned and surface dirt free.


Once these are done, I'm doing the same to the rear calipers. Strip down, clean up and regrease contact points using Plastilube. Then I'm going to fit springs to handbrake mechanism to aid the release of the cable...

nice work bro great thread.
need to service my Brembos and rear calipers as my hand brake don't work on hills lmao had a new rear caliper fitted not long ago hand brake still crap what would help this
need to service my Brembos and rear calipers as my hand brake don't work on hills lmao had a new rear caliper fitted not long ago hand brake still crap what would help this
Cheers pal....nice work bro great thread.
need to service my Brembos and rear calipers as my hand brake don't work on hills lmao had a new rear caliper fitted not long ago hand brake still **** what would help this
I think the rears hate Winter. Lol
Mine had a new caliper fitted before Xmas as piston seized. This was causing it to bind and squeal when reversing and drag on forward movement.
This cured it, but it sometimes squeals when reversing still. I generally leave handbrake off over night as its parked flat in the garage.
My handbrake feels good though.
I'm fitting the springs to the mechanism to aid release of cable.
Hoping this will cure the squeal, if not it maybe the cable that needs replacing.
I know it ain't the sliders as they both sides have been checked and cleaned since I renewed caliper and all was freely moving.
All I can suggest is to check and clean up calipers, check movement of handbrake cable and adjust if necessary.
If it ain't working good it's more than likely the cables might need replacing.
I'm fitting the springs as they seem to aid the release of the cable and some people have noticed that has fitted them to cure any sticking cable.
Springs fitted to handbrake mechanism on rear calipers
I was expecting them to have more tension but i do believe there's another type that are harder in tension. Eitherway they look like they give the mechanism some extra support and tension.


I was expecting them to have more tension but i do believe there's another type that are harder in tension. Eitherway they look like they give the mechanism some extra support and tension.


Mark that pic just made me realise I fitted my handbrake helper springs wrong Haha I feel a bit simple now Lol
Cars looking awesome mate btw
Steve
Cars looking awesome mate btw
Steve

Lol.... We all make mistakesMark that pic just made me realise I fitted my handbrake helper springs wrong Haha I feel a bit simple now Lol
Cars looking awesome mate btw
Steve
In just followed a few guides I found. Fairly simple to fit.
I do believe there's a another type of spring from a different VAG caliper that has a stronger, more tensile spring.
I've seen part codes somewhere so might order them as these I've just fitted feel like they should have more tension.
A worthy mod for less than a fiver.... Every little helps.

Little update....

Finally collected my V3 Manifold and Relentless DP.
Cars booked in on 27th for new clutch/flywheel along with fitting of Manifold/DP and Decat.
Need to order Decat this week along with gaskets.
Also need to speak to Bill and book my custom mapping. Got a date in mind and will be mid April if available.
Finally got chance to open up my Stack Boost Gauge and cover the backing in red gel film.
Could do with another sheet to make it more red, but overall happy with the outcome whilst giving it the OEM look.


Wasn't happy with road grime and salt covering my bay, so decided to move a few things to get deep with the cleaning....


Unfortunately this happened whilst tightening battery clamp... Just my usual luck whilst doing things...

Temporary fix... Whilst I order a new one

All back together and looking better....


Some more bits collected....
Gasket for Manifold to Head
Gasket for Manifold to Turbo
Nuts and Washers for Manifold to Head
Bolts for Manifold to Turbo
And gasket for turbo to Downpipe, whats the going rate now Mark for all those bits from the stealers? Did you get all OE nuts, bolts and washers
Steve
Yeah all OE from Wakefield Audi.And gasket for turbo to Downpipe, whats the going rate now Mark for all those bits from the stealers? Did you get all OE nuts, bolts and washers
Steve
Paid £56 for it all.
Washers for Manifold to Head cost more than the copper nuts....

Right.... Finally got round to booking my custom mapping at Badger5 on 18th April.
So in the meantime I have clutch/flywheel being replaced on 27th Feb, along with Relentless DP and V3 Manifold. So that's my stage 2 mods completed.
Then it's just time to change fuel pump and service/prepare her for the mapping.
Exciting times to come
So in the meantime I have clutch/flywheel being replaced on 27th Feb, along with Relentless DP and V3 Manifold. So that's my stage 2 mods completed.
Then it's just time to change fuel pump and service/prepare her for the mapping.
Exciting times to come
Quick Update
Relentless V3 fitted with problems seating it smoothly on the Turbo side. Now sorted.
Downpipe fitted with a Custom Decat fabricated.
550 Injectors ordered with a brand new genuine Fuel Pump
Lots of tweaking and cleaning.
Some new VAC lines.
Full SAI Delete with blanking plate.
Coilpack wiring harness replaced with new genuine harness and cover.
Stainless Steel Heatshield for Manifold.
Charge pipe freshly repainted.
And probably some other stuff I've missed.
Smoke Test booked this Saturday in preparation for mapping on 18th at Badger5.
Will load up progress pictures at some point in the near future....
Right some progress pictures from the previous months
New Gaskets and Bolts/Washers, etc for Manifold and Downpipe Install

Standard Manifold v's Relentless V3

Car in bits for new Clutch/Flywheel change and Manifold. Went for LUK Clutch and LUK Flywheel. Really impressed by the lightness and ease.


Oil Change


Custom Decat by AWM Motorsport... Amazing work. At the same time the sub frame was off, I decided to fit a genuine R32 23mm Anti Roll Bar with Superpro Bushes


Decided to do the full SAI Delete

Got to agree, looks so much better with it out of the way. I went for a CM Blanking plate and the time decided to do a coolant change.
After SAL delete, I managed to have some extra time to fit the Rear R32 19mm Rear Anti Roll Bar with Superpro bushes


Whilst Exhaust was hanging low, my OCD kicked in and decided to give the back box some TLC with Britemax Metal Twins Polish/Sealent.


Some heat shielding freshened up.... Used orginal as template then stuck some adhesive sheilding over it.


Managed to source a Manifold Heatshield for the extreme temperatures that the V3 creates.
This heatshield was originally created and manufactured from a member off here.

So proceeded ahead with fitting.

Bay looking much tidier with coilpack wiring harness cover and the freying heat banket removed around turbo elbow as the manifold heatshield protects it.


Charge Pipe Fitted


Engine Covers back on....

As mapping day was nearing (18th April) it was wise to fit a new genuine Fuel Pump/Sender sourced from Audi.


Also wise to fit another fuel filter even though old filter was less than a year old

Days later I had my Bosch 550 Injectors and new NGK BKR7E plugs turn up....
Injectors to be fitted on mapping day and plugs before...


Also wise to fit another fuel filter even though old filter was less than a year old

Days later I had my Bosch 550 Injectors and new NGK BKR7E plugs turn up....
Injectors to be fitted on mapping day and plugs before...
