

Project RS28
- Thread starter Foxmeister
- Start date
You are using an out of date browser. It may not display this or other websites correctly.
You should upgrade or use an alternative browser.
You should upgrade or use an alternative browser.
auroan
Registered User
- Joined
- Jan 28, 2004
- Messages
- 1,671
- Reaction score
- 5
- Points
- 38
- Location
- Bradford
- Website
- www.dkwracing.uk
The single wiper needs to be an aero wiper really. It would look a lot lot better like that then.
I think your car will look great with the RS-style front bumper, especially in red, very remniscent of Missano Red.
The single wiper...no. I was curious to see how it'd turn out, and as I thought, to me, it doesn't suit cars with semi-concealed wiper arms.
Overall, the car's looking good though.
The single wiper...no. I was curious to see how it'd turn out, and as I thought, to me, it doesn't suit cars with semi-concealed wiper arms.
Overall, the car's looking good though.

Foxmeister
Fired Up!
Hmmm... I'm quite liking the single wiper
a) was it hard to do?
b) does it clear the screen okay?
c) was it expensive?
a) Involved some modifying of the linkage i bought supposedly for that purpose, also had to modify centre mount on scuttle of car.
b) Clears screen fine, but as said, maybe an aero blade would be better as the screen curves quite a bit at bottom.
c) Linkage cost around £45 and everything else was my own work, i'd personally look at modifying your own linkage thou, as the unit i bought seemed to be for a different layout, had issues with linkage on wrong side, fouling battery, fouling brake servo etc, but made it fit myself.
Agree it wont be to everyones taste, and find it a bit weird at first myself as usually had them on Escorts etc, but will start to fit in with some more mods later. And will be altering the park position to pass side, just easier to have it there in pic first time. Thanks for comments.
")
Foxmeister
Fired Up!
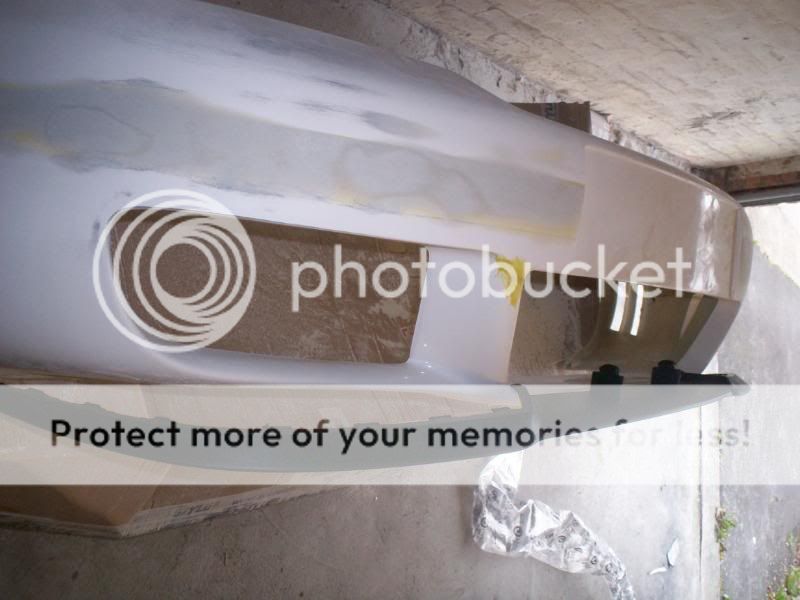
Quick update, started work on the RS bumper today
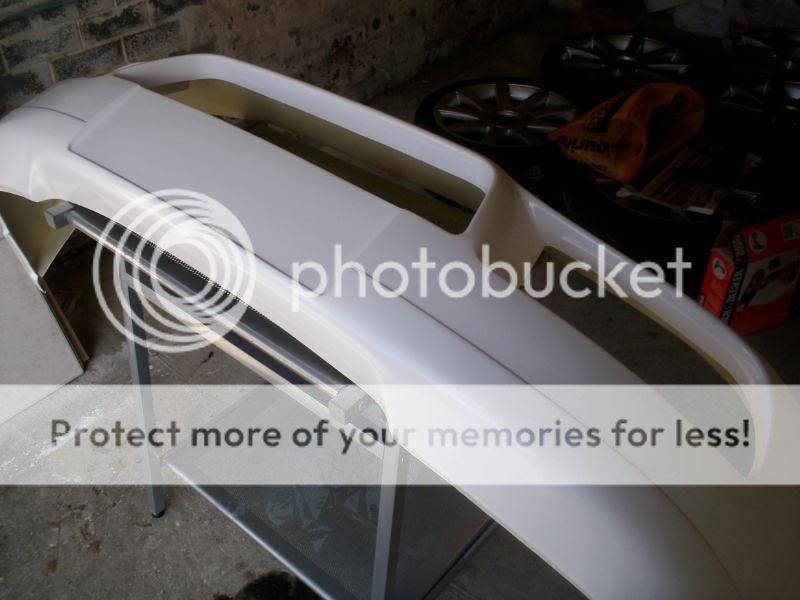
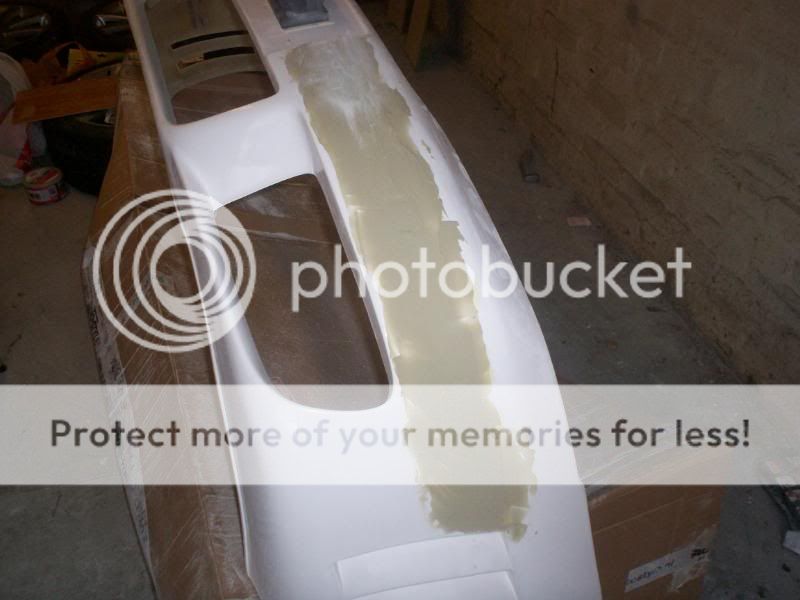
Drew a guide as i want to add fibreglass to remove the swage line

First coat of fibre

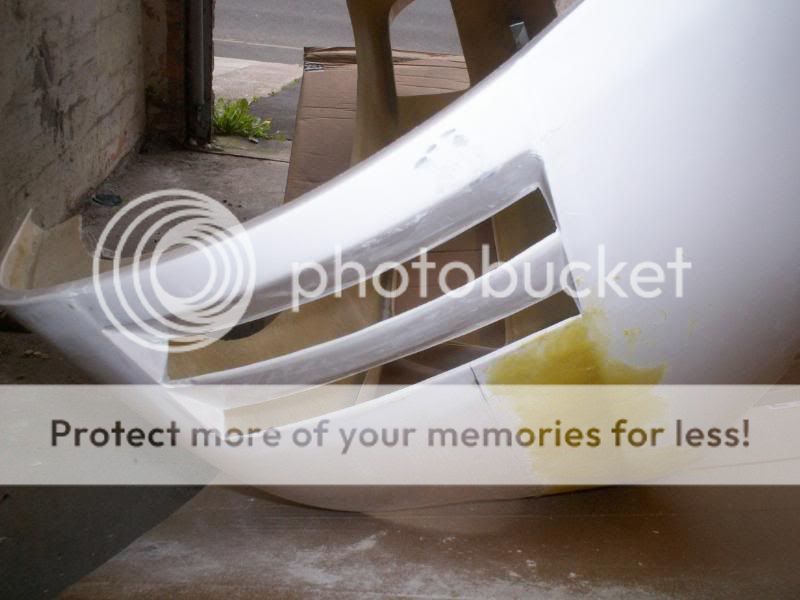
Started cutting out the side vents, starting to look like an RS bumper now
Not enuff time so will carry on next time im back
Also picked up a set of RS4 wheels, these will be a 2nd set for track days etc, gonna strip them back and go for a new colour on them
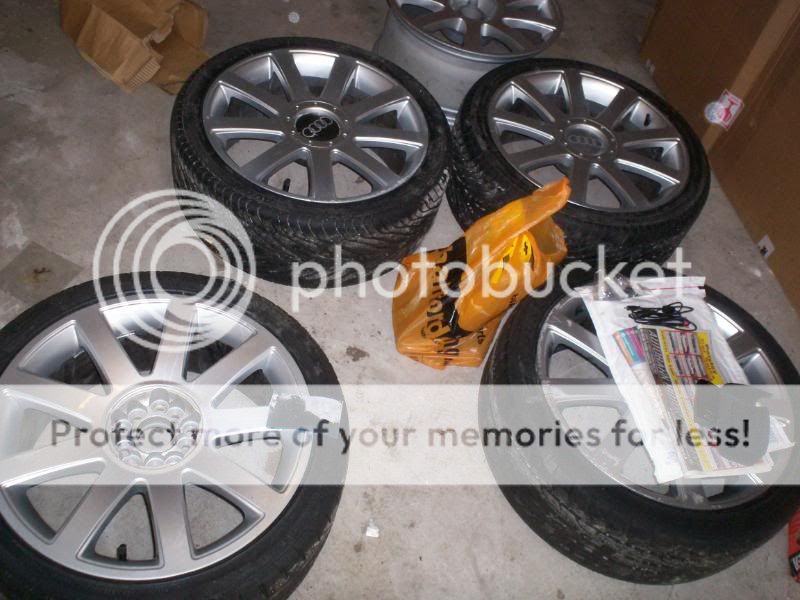
First started but ran out of sandpaper, DOH!!!

Hopefully have a few bits done by time im back next. S4 rear should be here also after mix up with courier, and more carbon fibre kit!!! C ya soon!
Drew a guide as i want to add fibreglass to remove the swage line
First coat of fibre
Started cutting out the side vents, starting to look like an RS bumper now
Not enuff time so will carry on next time im back
Also picked up a set of RS4 wheels, these will be a 2nd set for track days etc, gonna strip them back and go for a new colour on them
First started but ran out of sandpaper, DOH!!!
Hopefully have a few bits done by time im back next. S4 rear should be here also after mix up with courier, and more carbon fibre kit!!! C ya soon!
- Joined
- Dec 12, 2003
- Messages
- 4,079
- Reaction score
- 93
- Points
- 48
- Location
- UK, London, SE
- Website
- hometown.aol.co.uk
Foxmeister
Fired Up!
Thanks guys.
Yep, the mirrors had some lacquer peel on one side so decided to rub them down and plastic prime them then used some Halfords aluminum paint, came up really good for a quick job.
Off for a few days for Sept wkend so gonna get busy next few days, hopefully have all the kit prepped and primed soon, will get some updates by tomorrow probably. S4 rear bumper finally here too, wahey!!!
Foxmeister
Fired Up!
Got some more done with bumper, been taking a while but getting there now.
After fibreglass it was 2 coats of filler to smooth it all out

Then more wet and dry all over to get the shape right

In between all this, i nipped out and picked up a Cupra R splitter to finish it all off when its complete
First coat of plastic primer

Then used red for 2nd coat for base when paint is applied

Then done a quick first coat with some paint i had lying about, i wont be doing the finishing coats, will be getting the lot done professional as i dont have the materials for that kind of finish.

Took up a lot of time aswell so will prep the sideskirts and rear bumper soon ready to go for paint the next fortnight or so due to work again. Will carry on with wheels when i get a chance in between.
After fibreglass it was 2 coats of filler to smooth it all out
Then more wet and dry all over to get the shape right
In between all this, i nipped out and picked up a Cupra R splitter to finish it all off when its complete
First coat of plastic primer
Then used red for 2nd coat for base when paint is applied
Then done a quick first coat with some paint i had lying about, i wont be doing the finishing coats, will be getting the lot done professional as i dont have the materials for that kind of finish.
Took up a lot of time aswell so will prep the sideskirts and rear bumper soon ready to go for paint the next fortnight or so due to work again. Will carry on with wheels when i get a chance in between.
Foxmeister
Fired Up!
Well ive finally managed to start work on the car again and got on with making some carbon fibre parts. Found this site when searching a few months back http://www.carbonmods.co.uk/
So ordered the skinning kit to do my door and dash trims. After buying a set of poverty spec trims to carry out task on, i started by removing the metal front casings

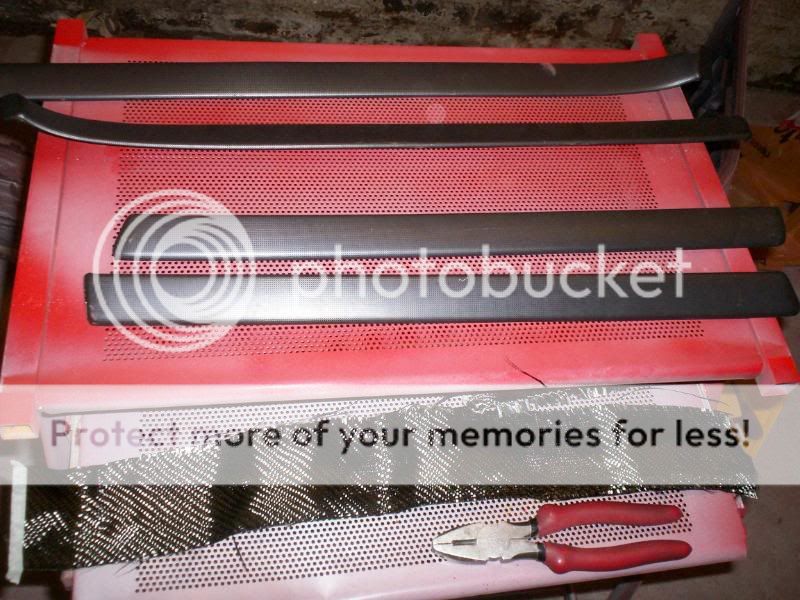
Simple enough using a pair of pliers and bending the tabs on the rear back to remove the metal, which exposes a relatively, flat, smooth plastic trim ready for paint etc as i was originally considering.
Next, i sanded all parts with 120 grit paper to key the base area for a good contact to apply base coat onto.
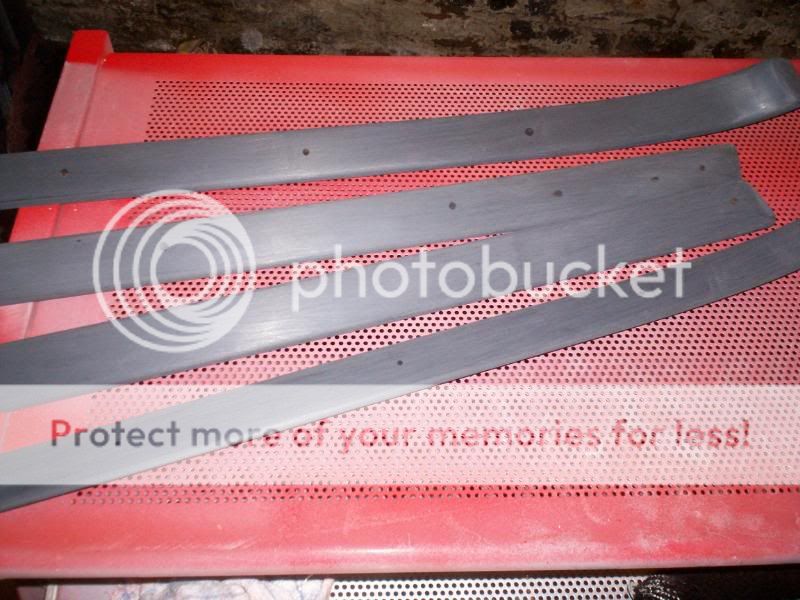
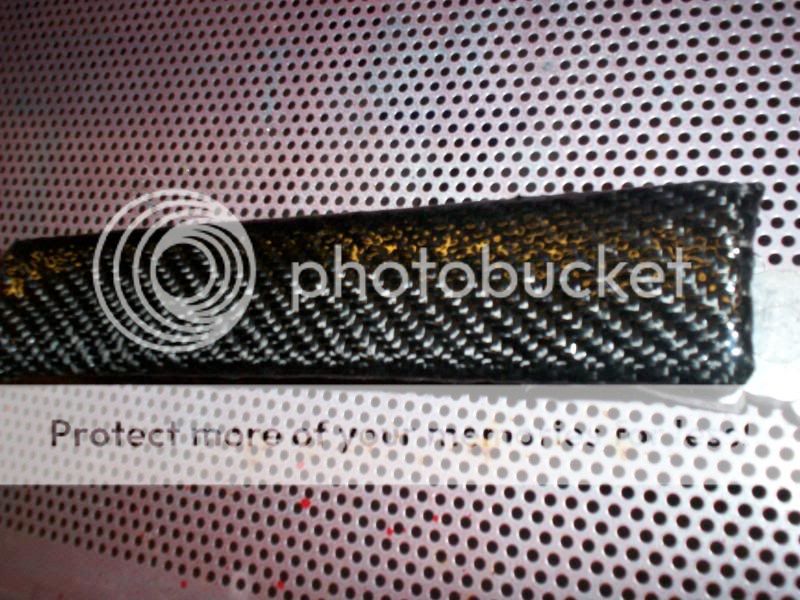
Once every area where the carbon fibre would be applied was keyed, i then mixed up the base coat with hardner and slowly applied a smooth, even coat to all parts
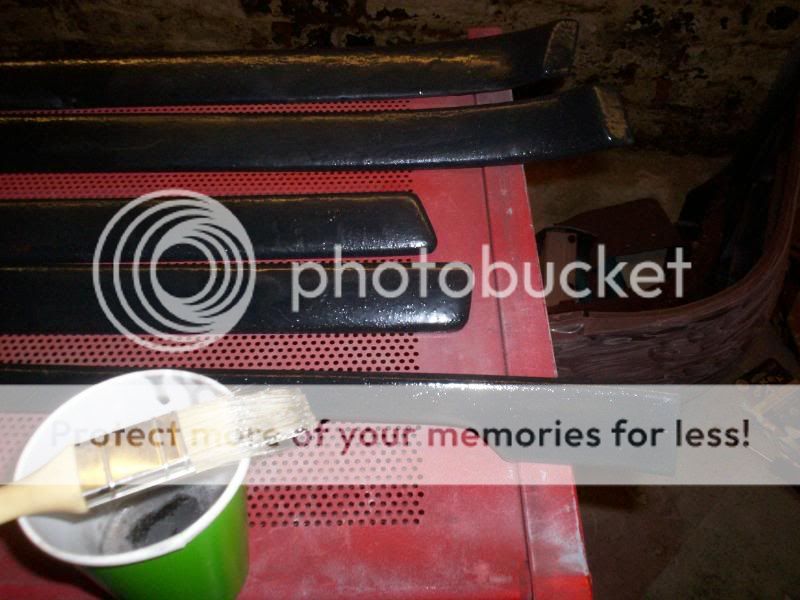
At this stage, the base coat should be left around 3hrs to dry to a tacky finish ready for next stage....cue the Indian menu selection, and a bit of Harry Hills TV Burb!
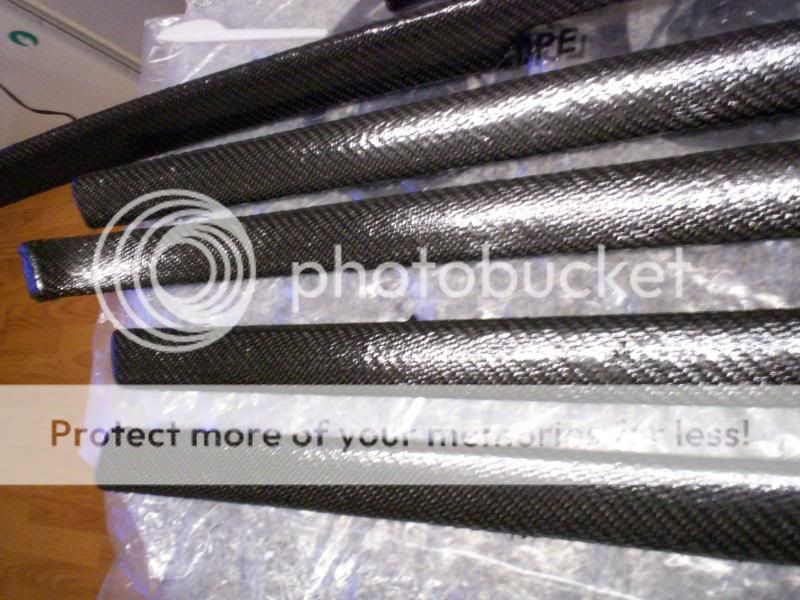
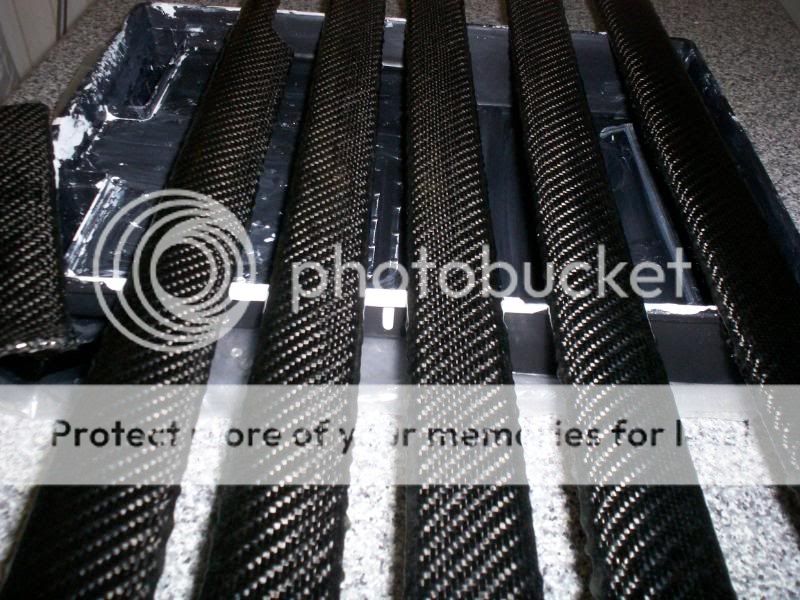
Okay, now well fed and watered, this was the tricky bit. Best idea is to pre cut all pieces of carbon fibre, oversized to each part, before you start. Then, probably needing a 2nd person, you need to lay the carbon fibre slowly, and softly so as not to disturb the weave or open any gaps, then work from the middle out and run your hand gently over all areas to get it to bond. You can then trim the excess at the rear leaving about an inch to fold back and tape onto rear of parts.

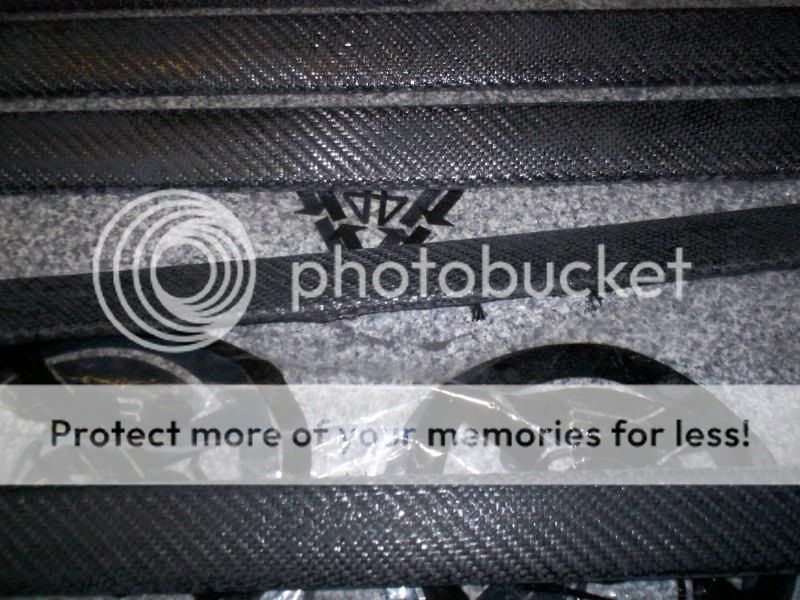
The most tricky part was the large dash piece due to shape where the cut out is.


^^^You can just see the two cuts that i had to make where the trim has the cut out section, this was vital so that the weave would not pull and distort when wrapping this section around the back of the trim.
So now i have all the door and dash trims covered, but one or two had some base coat come through slightly on top of the carbon, so i left these overnight to dry properly and also it was after midnight and the mrs was giving me evils so decided to leave it there for the night
Will continue today with applying the next few layers of top coat before lacquering and polishing to a nice shiny finish, update later on tonight!
So ordered the skinning kit to do my door and dash trims. After buying a set of poverty spec trims to carry out task on, i started by removing the metal front casings
Simple enough using a pair of pliers and bending the tabs on the rear back to remove the metal, which exposes a relatively, flat, smooth plastic trim ready for paint etc as i was originally considering.
Next, i sanded all parts with 120 grit paper to key the base area for a good contact to apply base coat onto.
Once every area where the carbon fibre would be applied was keyed, i then mixed up the base coat with hardner and slowly applied a smooth, even coat to all parts
At this stage, the base coat should be left around 3hrs to dry to a tacky finish ready for next stage....cue the Indian menu selection, and a bit of Harry Hills TV Burb!
Okay, now well fed and watered, this was the tricky bit. Best idea is to pre cut all pieces of carbon fibre, oversized to each part, before you start. Then, probably needing a 2nd person, you need to lay the carbon fibre slowly, and softly so as not to disturb the weave or open any gaps, then work from the middle out and run your hand gently over all areas to get it to bond. You can then trim the excess at the rear leaving about an inch to fold back and tape onto rear of parts.
The most tricky part was the large dash piece due to shape where the cut out is.
^^^You can just see the two cuts that i had to make where the trim has the cut out section, this was vital so that the weave would not pull and distort when wrapping this section around the back of the trim.
So now i have all the door and dash trims covered, but one or two had some base coat come through slightly on top of the carbon, so i left these overnight to dry properly and also it was after midnight and the mrs was giving me evils
so decided to leave it there for the night
Will continue today with applying the next few layers of top coat before lacquering and polishing to a nice shiny finish, update later on tonight!
Drizz
Project Plush
Foxmeister
Fired Up!
Sorry Daniel, my daughters had quite a high temp last few days now, now the mrs has it aswell. Maybe get down to garage at somepoint later to apply last couple of top coats. So far they're looking good, will get sum more pics up as soon as i get a chance.
Did the trims arrive ok? Also, ive just noticed mate, the clips for holding the wood trims and other like plastic, metal ones are different. I still have the clips for the trims if you need them, just let me know. Dont suppose you have any of the other type, metal discs, as i need them for these trims im doing now?
Did the trims arrive ok? Also, ive just noticed mate, the clips for holding the wood trims and other like plastic, metal ones are different. I still have the clips for the trims if you need them, just let me know. Dont suppose you have any of the other type, metal discs, as i need them for these trims im doing now?
Drizz
Project Plush
Drizz
Project Plush
Foxmeister
Fired Up!
From mot ive seen there are 2 types, as Ras says the wood have a rectangular clip that hooks onto the back, and the others are round push on type clips.
Still have the reciept for the postage mate so let me know if they still havent appeared in a day or two and i'll chase it up, typical Royal Mail thou!
Still have the reciept for the postage mate so let me know if they still havent appeared in a day or two and i'll chase it up, typical Royal Mail thou!
I am liking this, it looks nice dude! I am very intrigued to see how the Carbon Fibre parts comes out. How much did you spend on the carbon fibre stuff?
We need pics!!
We need pics!!
Foxmeister
Fired Up!
I am liking this, it looks nice dude! I am very intrigued to see how the Carbon Fibre parts comes out. How much did you spend on the carbon fibre stuff?
We need pics!!
Thanks mate.
Will defo have progress today, been busy lately.
Cost so far around £80 for all parts needed for the carbon fibre, bearing in mind the hardners etc will do more parts so just need some more carbon fibre to continue a few unusual parts which ive got planned for future. Keep watchin!!!

Cool, not too bad at all. Does the £80 include the donor parts you got too, or just for materials? I am tempted, but just don't know if I could do it, ha.
Can't wait for the pics.
Can't wait for the pics.
Foxmeister
Fired Up!
Ok, after applying each top coat, you should use a heat gun (or lovely pink hair drier in my case) to heat the coating so as to help air bubbles disappear as this can cause a "milky" appearance if they dry in the top coat.
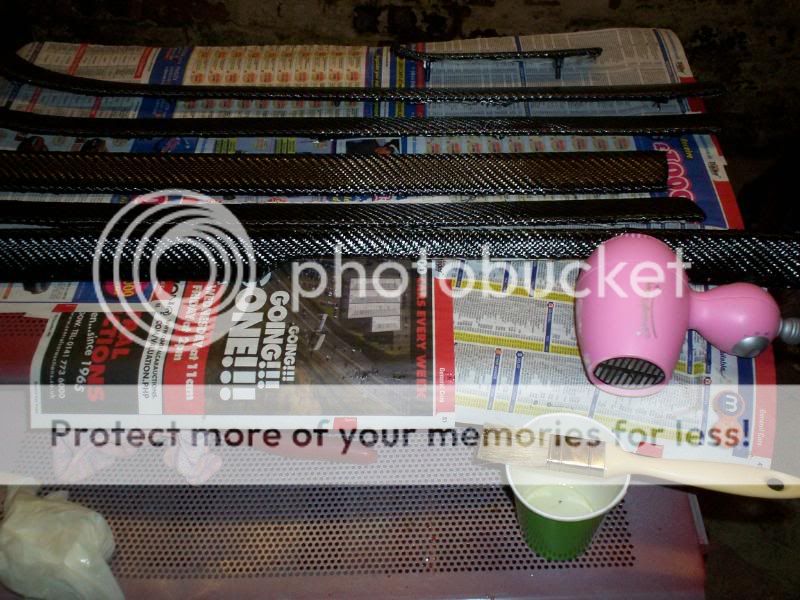

Applying a 2nd layer of the top coat

This coat should take around 3hrs or so to set.
I'll be applying a 3rd, and maybe 4th depending on how thick i build them up, as everything will require flatting down any highspots before ready for polishing and clearcoat.
Applying a 2nd layer of the top coat
This coat should take around 3hrs or so to set.
I'll be applying a 3rd, and maybe 4th depending on how thick i build them up, as everything will require flatting down any highspots before ready for polishing and clearcoat.
Foxmeister
Fired Up!
Appologies for slow progress, still unwell!
Next, after these initial coats, take some coarse (120) paper and lightly scuff over all parts to bring any high spots down a bit and key for final top coats.
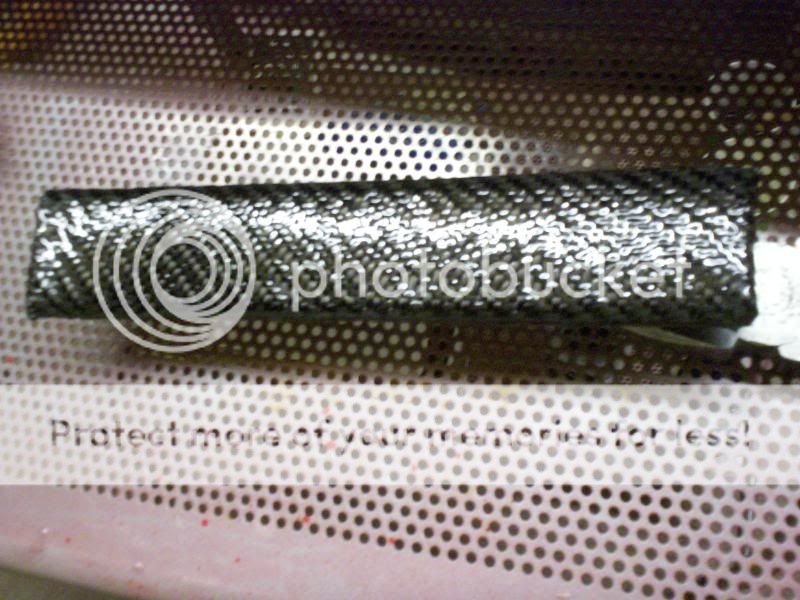
Then after a quick clean, its ready for another, thicker top coat

The pics dont show it great, but its now taking a nice, dark, wet look to all parts and starting to look nearer a finished stage. Currently waiting on this coat to dry before another is applied soon.
Next, after these initial coats, take some coarse (120) paper and lightly scuff over all parts to bring any high spots down a bit and key for final top coats.
Then after a quick clean, its ready for another, thicker top coat
The pics dont show it great, but its now taking a nice, dark, wet look to all parts and starting to look nearer a finished stage. Currently waiting on this coat to dry before another is applied soon.
Foxmeister
Fired Up!
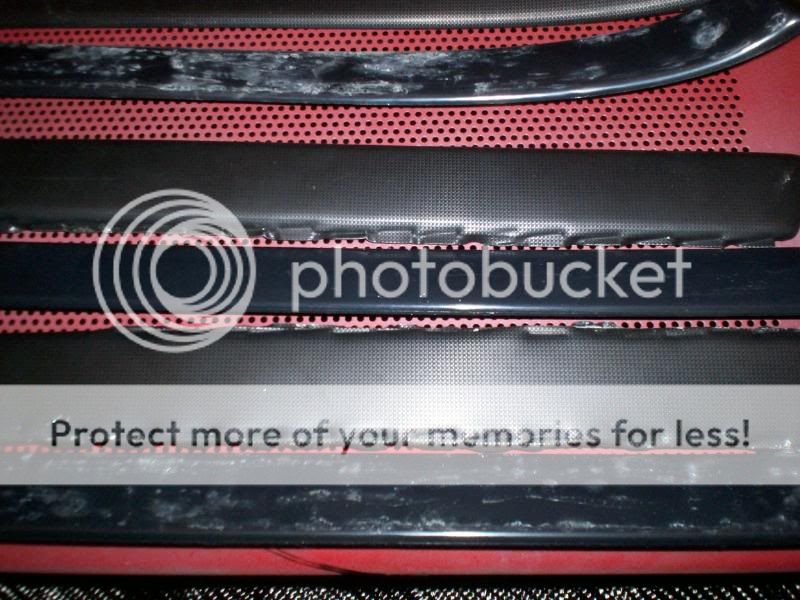
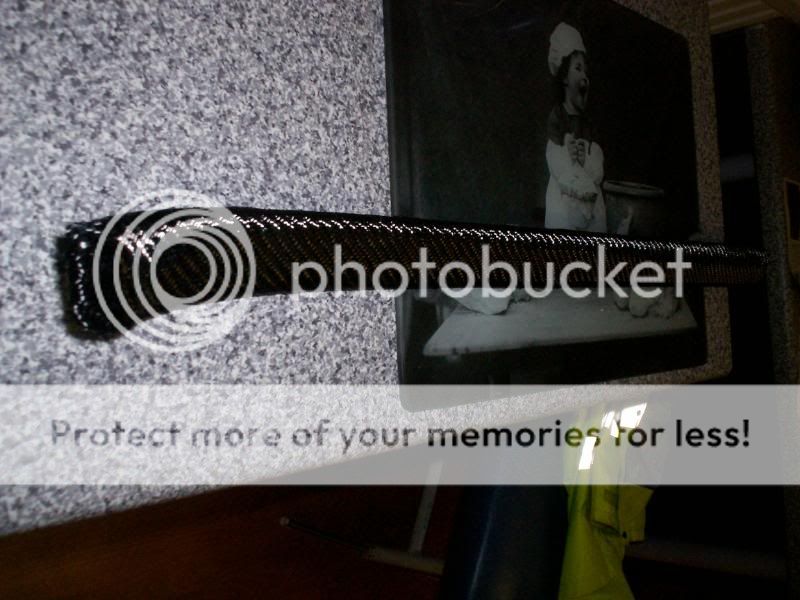
Final top coat has been applied and should be given around 24hrs to fully cure. Mine have been lying slightly longer and are ready for final wet sanding and polishing at some point later today when i get a chance. Look great as they are, but will make a difference with another smooth and polish later.
This is how they look now
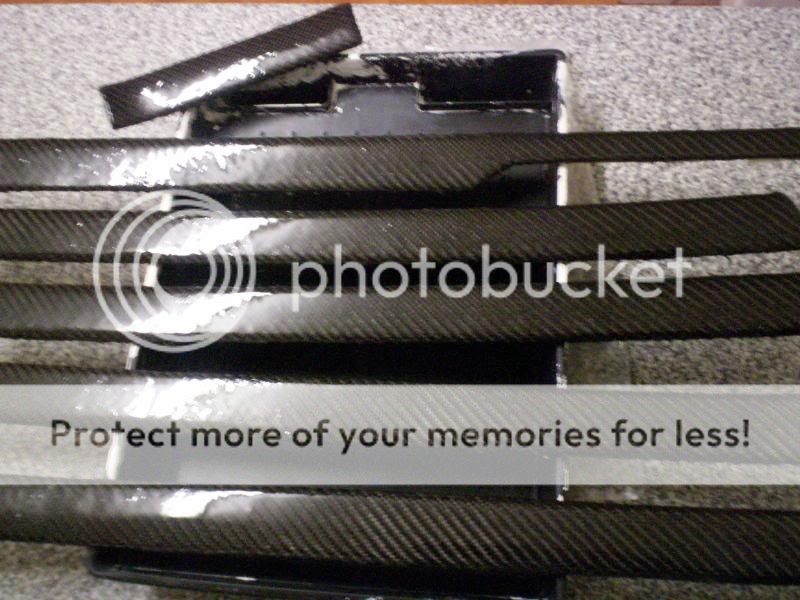

The wet sand and polish will remove the small imperfections on the surfaces and bring them up to a perfect shine. Final pics later on tonight.
This is how they look now
The wet sand and polish will remove the small imperfections on the surfaces and bring them up to a perfect shine. Final pics later on tonight.
Foxmeister
Fired Up!
Wow... they look ace! Bet they're going to look really slick once you've flatted and polished them.
Start a sideline maybe?
Cheers Geeman, looking forward to finishing them off.
Have considered making some parts to sell, but with six pieces to do for these and length etc means you use a bit of materials, although i have a few things im goin to do next, more one off stuff and also the B pillar trims as these are only one or two parts to cover. If there was enuff interest i'd consider making a few parts for people.

Do you think it'd be possible to do the A,B & C pillars in this stuff? I know it'd take a while and use a fair amount of material... but do-able?
Have recovered my Mk3 Golf pillars and headlining in material, but was toying with the idea of carbon... Hmmm...
Have recovered my Mk3 Golf pillars and headlining in material, but was toying with the idea of carbon... Hmmm...
Foxmeister
Fired Up!
Geeman....anythings possible my friend!!!
I'll have a look next time im in the Audi, which isnt very often, but i imagine they are covered in some material or are they plastic???
I'll have a look next time im in the Audi, which isnt very often, but i imagine they are covered in some material or are they plastic???
So, does this not add a lot of material to the original piece then? I have been seriously considering this, but don't want to add too much bulk to them by adding a few coats of the stuff.
And where are the finished pics?
And where are the finished pics?
auroan
Registered User
- Joined
- Jan 28, 2004
- Messages
- 1,671
- Reaction score
- 5
- Points
- 38
- Location
- Bradford
- Website
- www.dkwracing.uk
To be honest, although the out come could be good, I think the kits are more for mould based production rather than wrapping stuff. I'd be interested to see how good the fit is when you put the trims back in the car.
Foxmeister
Fired Up!
auroan-you can buy kits to make your own mould etc then make everything from scratch in carbon fibre, or you can get "skinning" kits also. Or you can buy individual stuff as you need it.
With the back of the trims having pegs to fit them, it would be very difficult to mould complete carbon parts for this, possibly needing 2 moulds for each trim(front and back) so i opted to skin the original trim. If you check at the start i originally removed the metal faces on the trim to reveal matt black plastic behind, so in the build up of carbon and top coats etc it wont be much bulkier than the original metal. Will get pics of them when i fit them, possibly some teething issues but imagine they should sit decent enough with a trim or file if needed.
crazy88-pics cumin my good man!
Foxmeister
Fired Up!
Next i wet sanded from 120 - 1200 grit to remove any small imperfections and flat the surface

Small pitting in the surface of the thicker top coat

After sanding now starting to smooth all these out

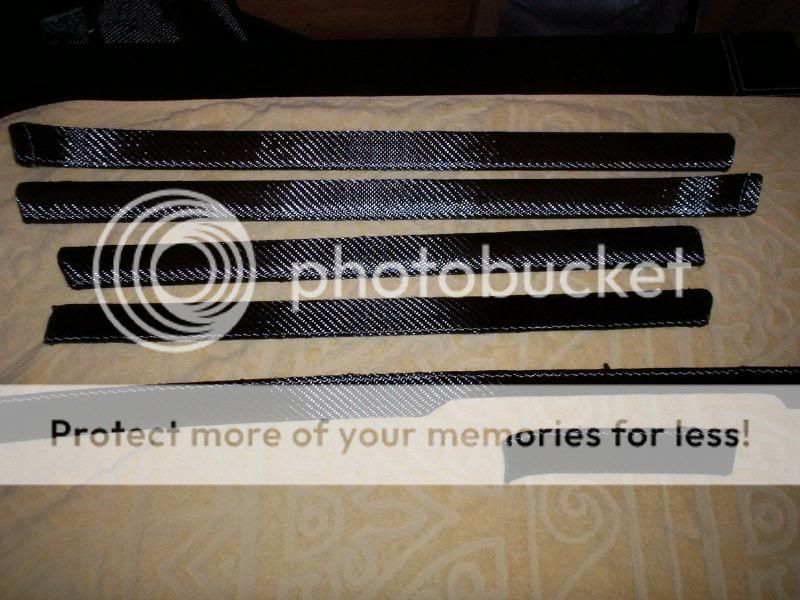
Then it was a couple of coats of clear lacquer and another light rub down with fine grit paper, then final 2 coats of lacquer to give a nice clean finish


Still got 3 trims to finish but thats how they'll turn out, quite pleased with how they look.
Small pitting in the surface of the thicker top coat
After sanding now starting to smooth all these out
Then it was a couple of coats of clear lacquer and another light rub down with fine grit paper, then final 2 coats of lacquer to give a nice clean finish
Still got 3 trims to finish but thats how they'll turn out, quite pleased with how they look.
auroan
Registered User
- Joined
- Jan 28, 2004
- Messages
- 1,671
- Reaction score
- 5
- Points
- 38
- Location
- Bradford
- Website
- www.dkwracing.uk
auroan-you can buy kits to make your own mould etc then make everything from scratch in carbon fibre, or you can get "skinning" kits also. Or you can buy individual stuff as you need it.
With the back of the trims having pegs to fit them, it would be very difficult to mould complete carbon parts for this, possibly needing 2 moulds for each trim(front and back) so i opted to skin the original trim. If you check at the start i originally removed the metal faces on the trim to reveal matt black plastic behind, so in the build up of carbon and top coats etc it wont be much bulkier than the original metal. Will get pics of them when i fit them, possibly some teething issues but imagine they should sit decent enough with a trim or file if needed.
crazy88-pics cumin my good man!
Cool... I only saw the "using a mould" kit video on the link you mentioned. Is there different stuff you need for a wrap kit ? or is it just different techniques ?
Fingers crossed the wrapped trims fit good.

Just thought the metal wrap on the previous incarnation of the trims would be a lot thinner than a few layers of carbon weave.
Foxmeister
Fired Up!
Cool... I only saw the "using a mould" kit video on the link you mentioned. Is there different stuff you need for a wrap kit ? or is it just different techniques ?
Fingers crossed the wrapped trims fit good.
Just thought the metal wrap on the previous incarnation of the trims would be a lot thinner than a few layers of carbon weave.
Have another look, other vids etc for wrapping and vacum methods etc.
Materials are generally the same, other than you would need a mould making kit and release agent if making parts from scratch, everything else is the same really, and it would be different methods for each process.
When skinning you only use one layer of carbon cloth as its really just a cosmetic process, instead of applying the 3-4 layers if making the part from complete carbon fibre.
Stages for skinning; Apply black base coat
Apply 1 layer of carbon cloth
Build up some top coats of clear resin(3-4)
Sand back between some layers then a final flat
Either polish to finish or 2 coats of clear lacquer
The tin that was removed was only about 2mm thick and i expect the build up from wot i have done has increased more than that, but doesnt look too bulky really so overall the fit should be fine. Will get them in as soon as the weather starts to get back to normal, which might be a while here thou!!!
:thumbsup:
Last edited:
how do you polish carbon fibre?
i ask because ive managed to get a genuine gear shift surround cheap on ebay but its covered in scratches
i dont want to wreck it
i ask because ive managed to get a genuine gear shift surround cheap on ebay but its covered in scratches
i dont want to wreck it
Foxmeister
Fired Up!
how do you polish carbon fibre?
i ask because ive managed to get a genuine gear shift surround cheap on ebay but its covered in scratches
i dont want to wreck it
It isnt the actual Carbon fibre you polish, but a build up of clear resin that protects it and gives the smooth finish.
Theres 2 ways to bring your item back up with a great finish.
1-Buy some compound polish, and apply with a soft cloth nice and firmly and polish the part from centre outwards. Spend a bit of time and elbow grease to achieve good results. Finally buff up with another clean cloth. The finish here will depend how deep the scratching is on the part.
2-(This way sounds more wild, but will bring a better finish and shine IMO) For parts that have sustained actual damage or deep scratches, take some fine grade wet n dry paper(again dependant on damage, 1200-2400 range) with soapy water, and keeping the paper wet at all times sand the whole part evenly as possible, checking every so often to see how you progress, until you can see with a light that most of scratches are gone and its smooth to the touch. Dry and clean the part, then use some clear lacquer spray, and give it 2-3 coats. The lacquer also fills any small scratches not visible to naked eye. You can further polish at this point if you want to.
tazzy baby
Welsh & Proud
Looking good butty you should write a ( HOW TO ) book lol
I like the lights alot do u wet and dry them first befor painting or not
Cheers gareth
I like the lights alot do u wet and dry them first befor painting or not
Cheers gareth
Foxmeister
Fired Up!
Looking good butty you should write a ( HOW TO ) book lol
I like the lights alot do u wet and dry them first befor painting or not
Cheers gareth
Thanks mate.
The lights just need a quick buff over with fine grade paper(1200) to key them up ready for spraying. Might be for sale soon as i have a set of facelifts also lying around, maybe change them over.
The CF looks really good mate, think it may be a job to consider towards the end of the year after moving house (hopefully). Will be very intrigued to hear how you get on fitting them, and seeing the pics. Hope it goes well.
Foxmeister
Fired Up!
Sorry lads, had some pc issues which are now getting resolved and should be back by the start of next week, currently using someone elses laptop which i cant upload my pics to.
Took another load of the finished carbon pics, and currently have the 2 worst dash pieces fitted, so just the doors to complete which i'll have done by the time the pc is back. Also some more work done with wheel refurb and colour changed and aero style wiper fitted now, plenty pics to come!
Took another load of the finished carbon pics, and currently have the 2 worst dash pieces fitted, so just the doors to complete which i'll have done by the time the pc is back. Also some more work done with wheel refurb and colour changed and aero style wiper fitted now, plenty pics to come!
