

As all the parts for my BSH True Seal Intake arrived last week I decided to install it at the weekend.
For cars with a K03 turbo or cars using the BSH DV relocation the intake can be installed out of the box. However if you are running an OEM K04 for car like the S3/ED30/K1/Pirrelli then the kit requires a little adaptation for the install so I will detail this as well as the normal intake installation.
BSH's instruction for the intake can be found online here:
http://www.bshspeedshop.com/instructions/fsi_true_seal_intake.pdf
I have referenced these instructions throughout this DIY adding my own comments and pictures.
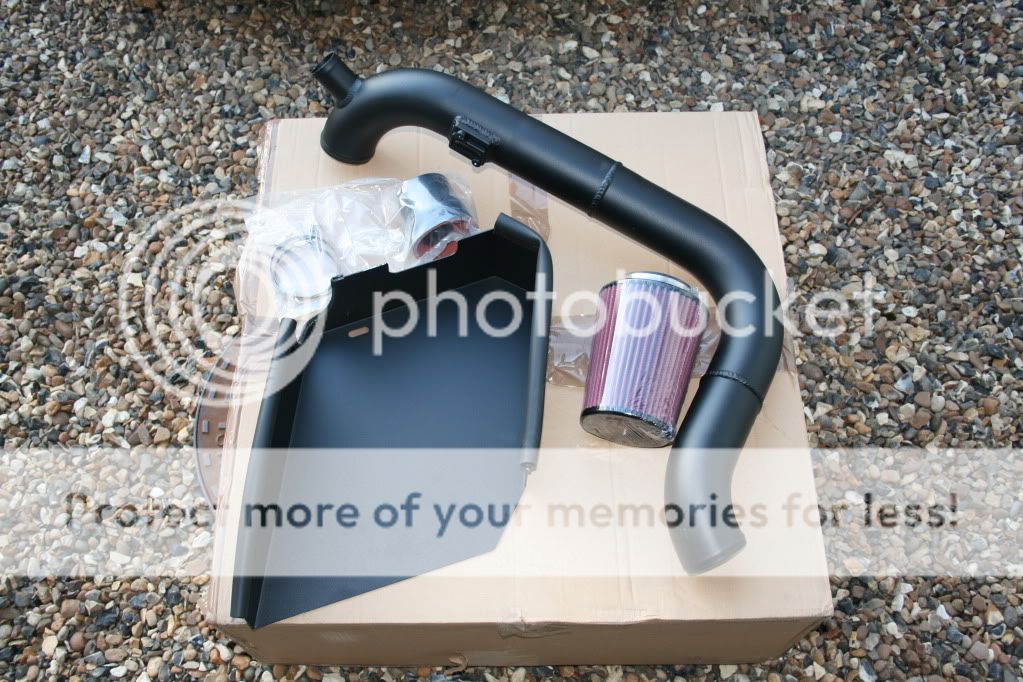
Here is a list of what the intake comes with:
Parts
Intake Pipe (x1)
Airbox (x1)
Bolt and Washer (x1)
Rubber Trim lock(x3)
MAF Screws (x2)
DV Port Blockoff (x1)
Clamp Kit (3 clamps)
Silicone Coupler (x1)
BSH Air Filter (x1)
Here is a list of the tools you will need:
Tools
3/32 Allen Wrench
T15& T20 Torx
Flat Head Screw Driver
Socket Wrench
6mm & 10mm Socket
Hose Clamp Pliers or Channel Locks
In addition to these you will also need the following if installing the intake on a K04 car:
Parts
38mm (1.5) to 25mm (1) 90 degree Silicone Reducer
25mm (1") Aluminium Hose Joiner
Clamps (x3)

These extra parts will come to a total of about £15.
Installation
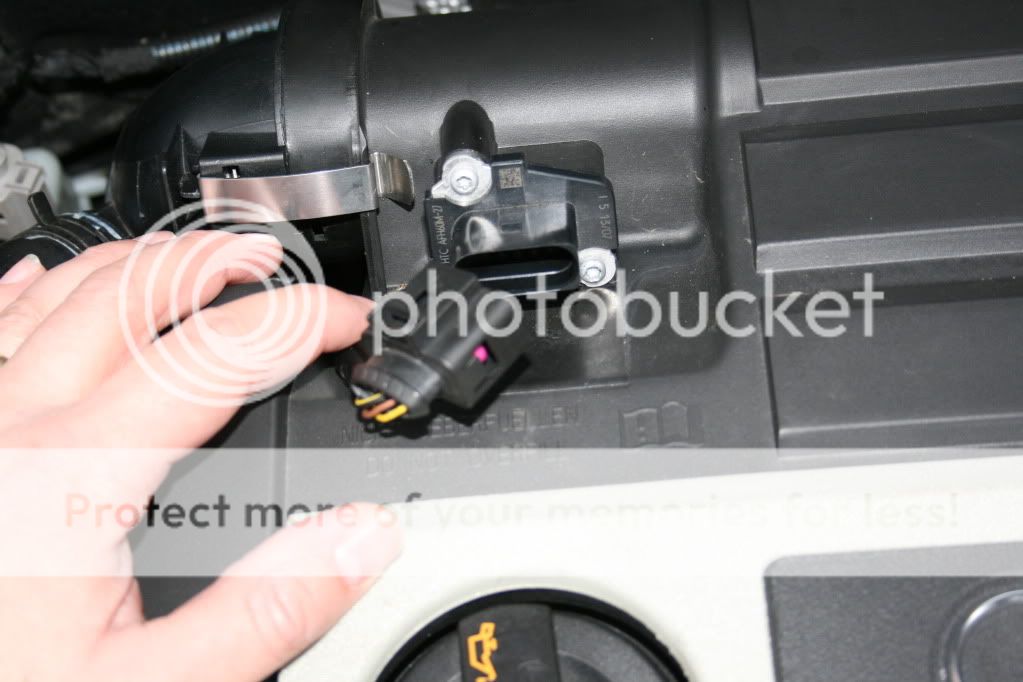
1. Unplug the MAF:
2. Undo the two silver clamps that hold the accordion turbo inlet pipe to the MAF section of the
engine cover. This can be done by hand, if the clamps give you trouble a flat head screw driver will also
work.

3. Now to the front of the engine. Remove the two T15 Torx screws that hold the accordion hose
that is connected to the engine cover and to the factory inlet duct. There is one screw on either side of the
duct.
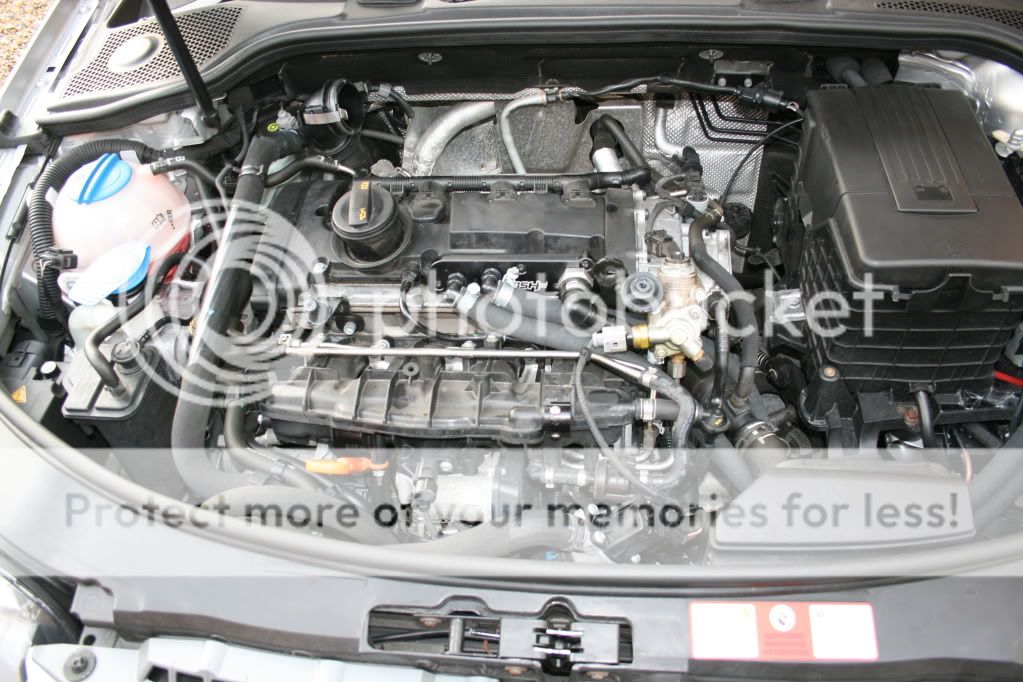
4. Remove the engine cover. This is tricky to do for the first time however there are many DIYs detailing how to do it.
5. Remove the clamp holding the accordion hose to the turbo on the back of the engine. Use your
hose clamp pliers to do this. Remove this hose. There is a rubber grommet inside of this hose, make sure
it comes off with hose. If not you can remove it by hand.
This step is tricky and would be easiest if done by two people one to hold the pliers and the other to remove the accordion hose. It is possible to do yourself (as I did) but will take time and patience

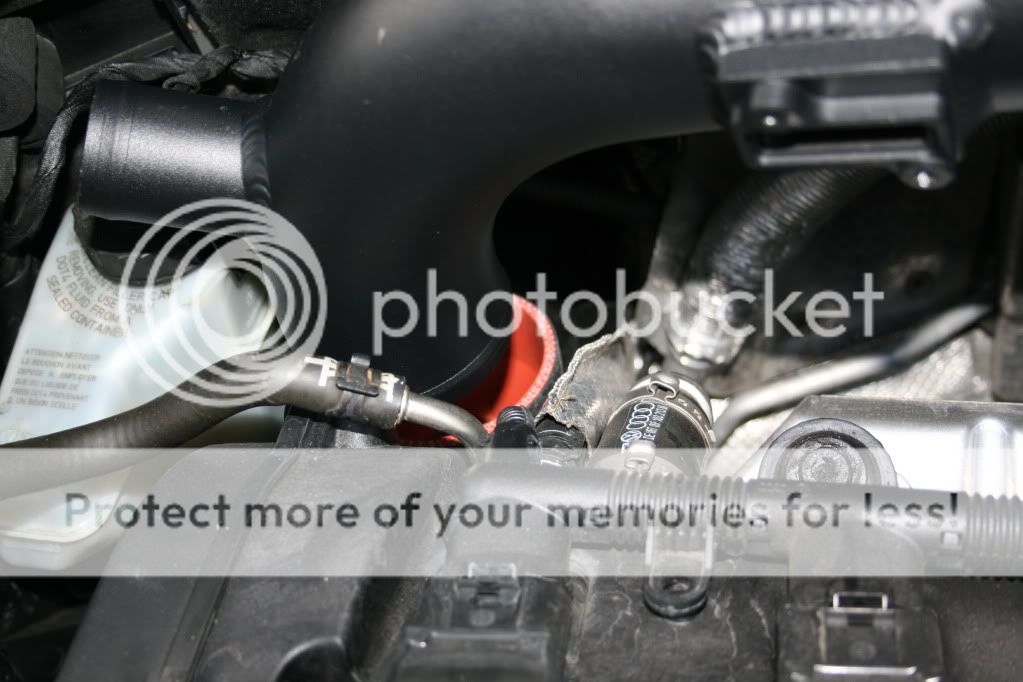
On the OEM K04 you will now need to unclamp the dv port hose from the turb inlet.

6. Remove the factory fresh air duct from the front of the car. This is done by removing the two T15
torx screws holding it in place. With the screws removed the duct will come out very easily. My top tip here is that as you are looking at the car from the front remove the left hand screw first:

Followed by the right hand screw and once the right hand screw is loose leave the torx driver pushed into the screw and remove the airduct. This way you should not loose the screw")

7. Install the rubber lining on the top of the airbox and mount the BSH airbox to the front of the car.
The bolt hole in the box will line up with the threaded eye on the battery box. Use the supplied bolt and
washer to hold it in place. Use your 10mm socket to tighten the bolt down. If the rubber lining pops up, pinch the base of it with a set of pliers. There are metal teeth inside of the lining that will bind the lining to the box.

In this pic you can see that the tray is actually capturing more air from the centre of the grill than the OEM setup does as well.

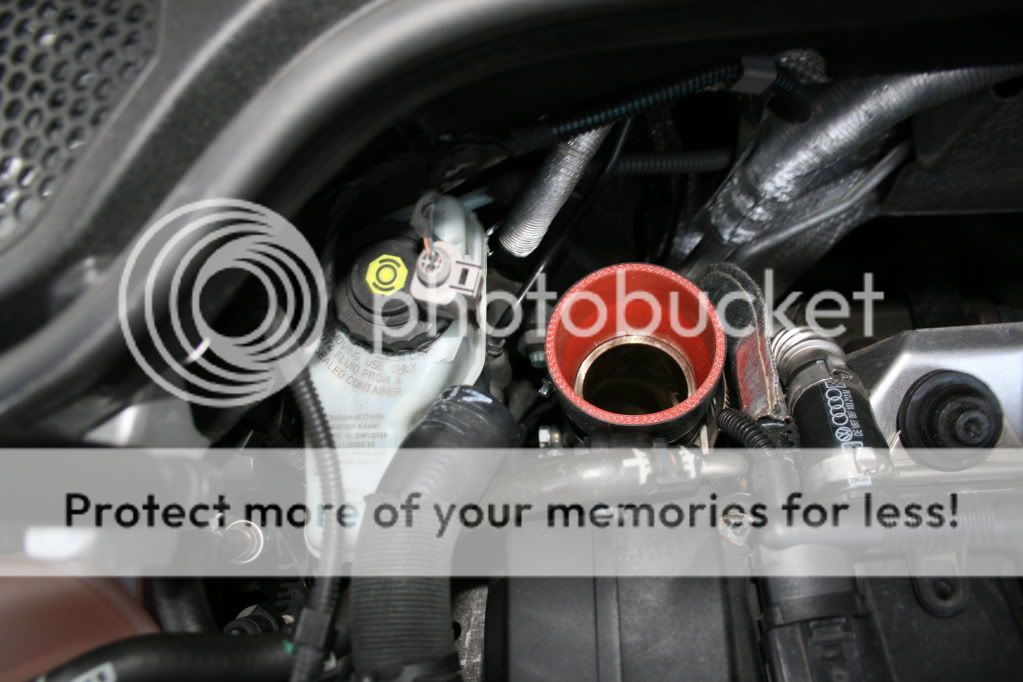
8. Place the supplied silicone coupler on the turbo inlet. Make sure the coupler is on properly. Use
the 50-70mm clamp on the bottom of the coupler to hold it in place.
Make sure the silicone coupler is pushed right down and that the clamp is tightly attached.
9. Place the 60-80mm clamp loosely over the top of the coupler. I found it best to tighten this clamp just a little so it gripped the top of the coupler otherwise it can fall to the bottom of the coupler.
10. Slide the BSH intake pipe into the engine bay and slide it into the coupler. Then put on the filter. With the filter on you will want to position the intake pipe so that the front section is locked into the airbox and so that the bend over the brake fluid reservoir does not touch the reservoir or any of the surrounding lines.
Again here make sure you push the filter down nice and tightly into the coupler.
11. With the intake in position tighten the clamps on the silicone coupler and the air filter.
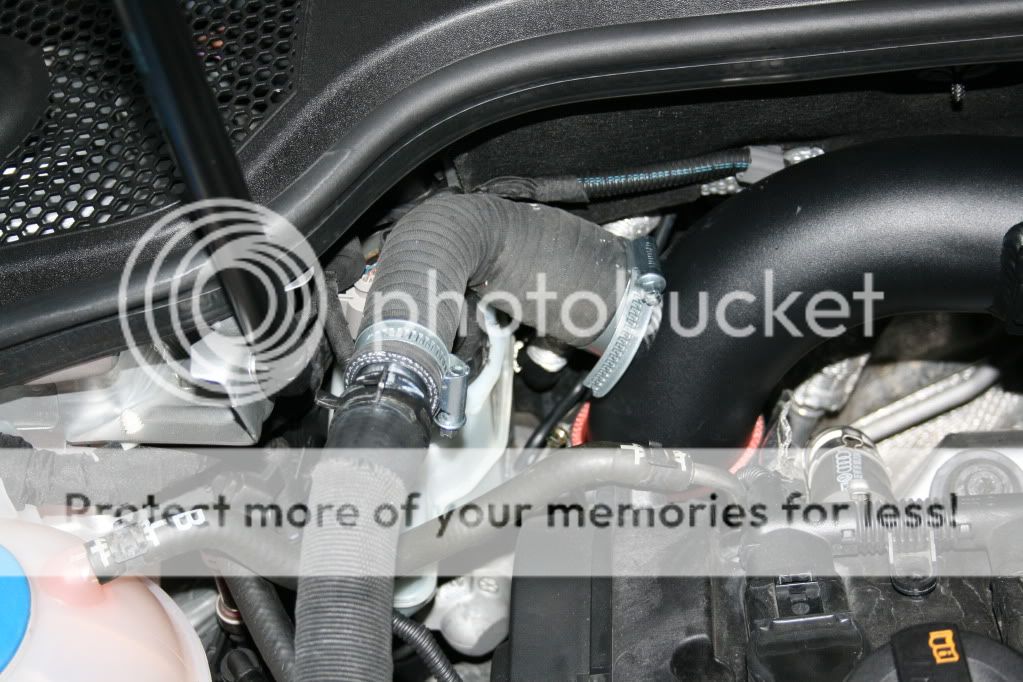
12. Install the 90 degree silicone reducer onto the DV port of the intake tube (extra instructions for K04 cars).
The True Seal Intake comes with 38mm port for the DV however the OEM K04 cars use a 25mm dv port as standard. Therefore to make the BSH intake compatible with an OEM K04 setup we need to use a 90 degree silcone reducer to bring the port size down from 38mm to 25mm.
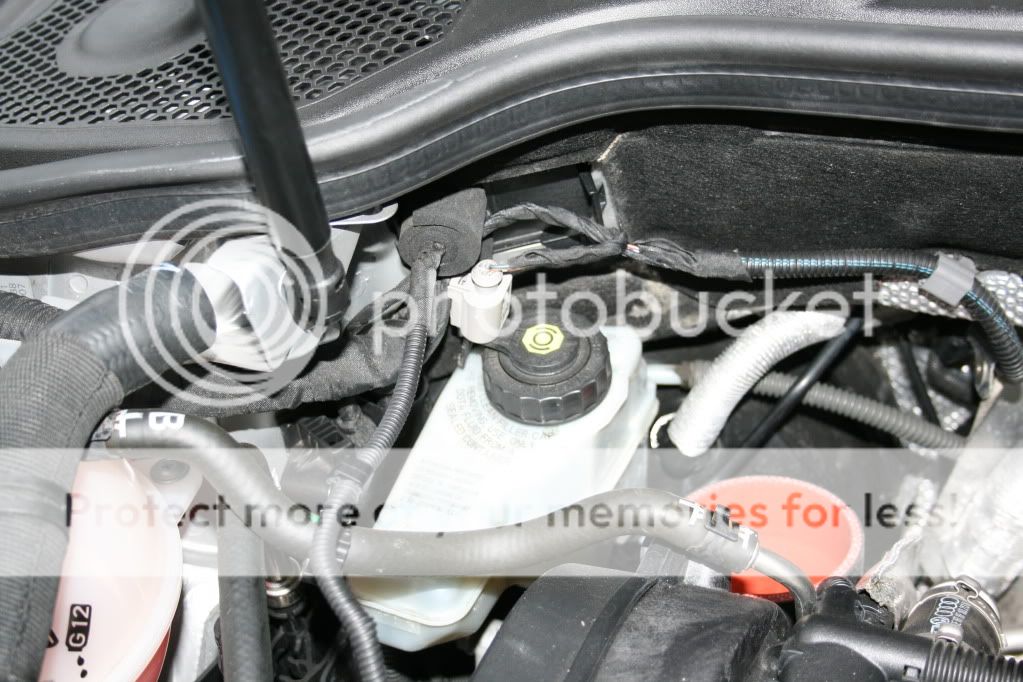
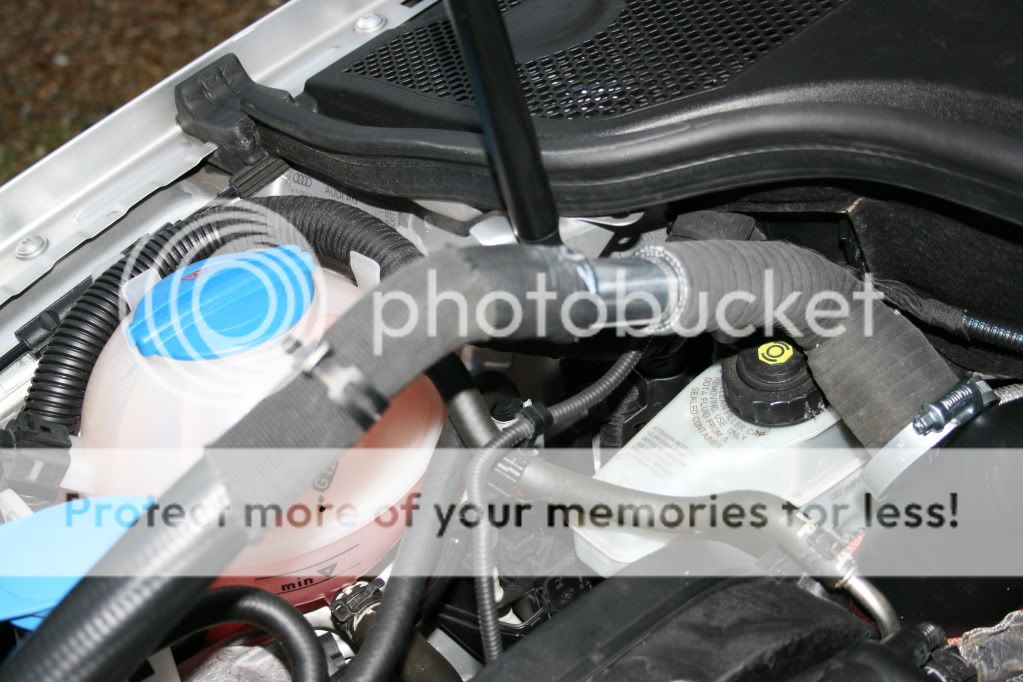
In the S3 space is very tight so first of all I had to move the sensor plug on the brake reservoir to the opposite side This can be done by loosening the cap onto top of the reservoir and then spinning the sensor round to the left hand and then re tightening (note you may need to pull the intake tubing out to do this):
Before

After
Depending on how close to your break reservoir the port is you may need to cut away some of hose on the 38mm end of the silicone reducer. I needed to trim roughly 1 inch off it.
Now you can slide the 90 degree silicone reducer onto the intake tube DV port.

Next you need to install the 25mm aluminium joiner into the 25mm end of the silicone reducer and mate it to the OEM hose.
Now simply clamp down the two ends of the aluminium joiner and the 38mm end of the silcone reducer.
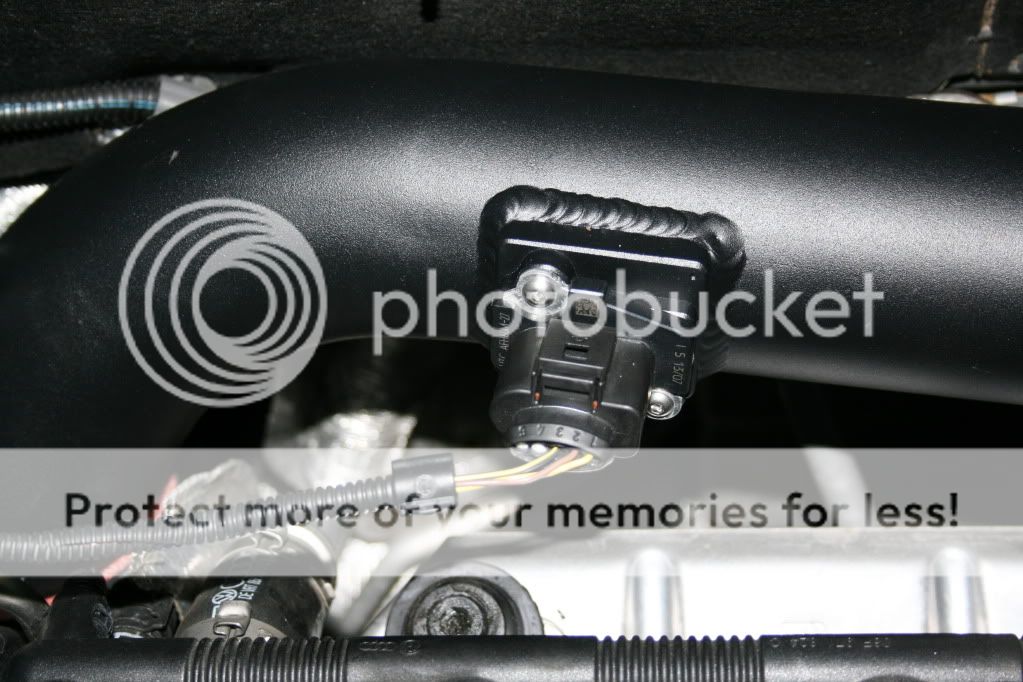
13. Remove the MAF sensor from the factory engine cover using a T20 Torx. Install it into the BSH
intake pipe using the supplied screws and a 3/32 allen wrench. Plug the sensor back in.

Top Tip remember to use the supplied screws from BSH and not the factory ones! The factory ones have a different thread to the BSH so could ruin thread on the BSH MAF holder! I started to use the factory screws and luckily realised before it was too late
Here is a pic of the completed installation. Personally I feel the kit has a high quality finish and suites the engine bay really well.
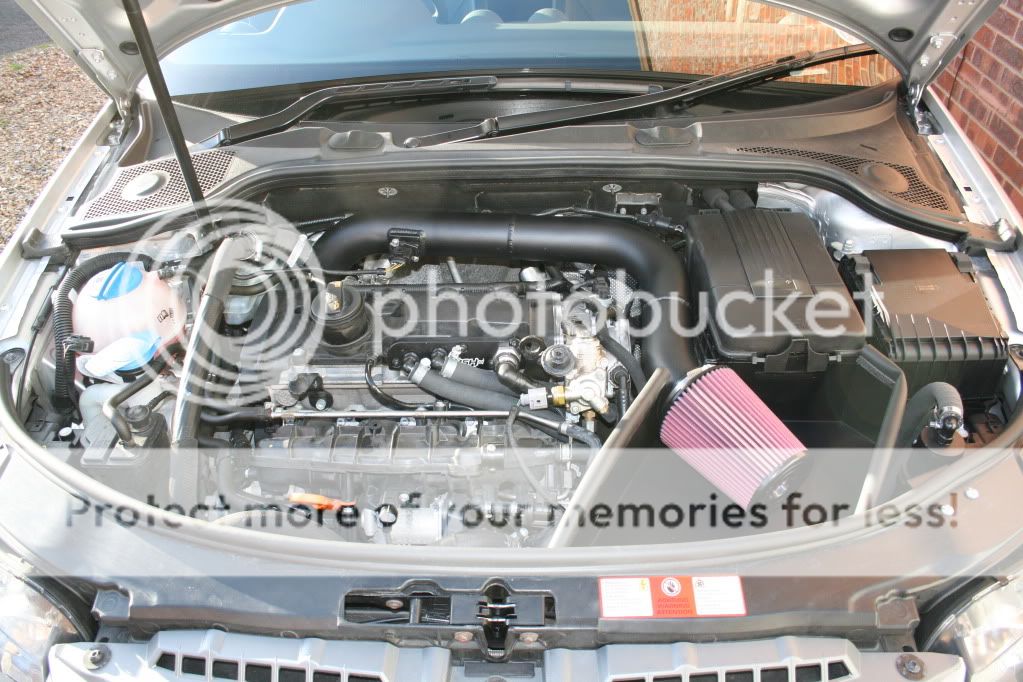
I will post up a product review in due course after I have had some time to get used to the intake and and make a judgement on how it is performing.
For cars with a K03 turbo or cars using the BSH DV relocation the intake can be installed out of the box. However if you are running an OEM K04 for car like the S3/ED30/K1/Pirrelli then the kit requires a little adaptation for the install so I will detail this as well as the normal intake installation.
BSH's instruction for the intake can be found online here:
http://www.bshspeedshop.com/instructions/fsi_true_seal_intake.pdf
I have referenced these instructions throughout this DIY adding my own comments and pictures.
Here is a list of what the intake comes with:
Parts
Intake Pipe (x1)
Airbox (x1)
Bolt and Washer (x1)
Rubber Trim lock(x3)
MAF Screws (x2)
DV Port Blockoff (x1)
Clamp Kit (3 clamps)
Silicone Coupler (x1)
BSH Air Filter (x1)
Here is a list of the tools you will need:
Tools
3/32 Allen Wrench
T15& T20 Torx
Flat Head Screw Driver
Socket Wrench
6mm & 10mm Socket
Hose Clamp Pliers or Channel Locks
In addition to these you will also need the following if installing the intake on a K04 car:
Parts
38mm (1.5) to 25mm (1) 90 degree Silicone Reducer
25mm (1") Aluminium Hose Joiner
Clamps (x3)
These extra parts will come to a total of about £15.
Installation
1. Unplug the MAF:
2. Undo the two silver clamps that hold the accordion turbo inlet pipe to the MAF section of the
engine cover. This can be done by hand, if the clamps give you trouble a flat head screw driver will also
work.
3. Now to the front of the engine. Remove the two T15 Torx screws that hold the accordion hose
that is connected to the engine cover and to the factory inlet duct. There is one screw on either side of the
duct.
4. Remove the engine cover. This is tricky to do for the first time however there are many DIYs detailing how to do it.
5. Remove the clamp holding the accordion hose to the turbo on the back of the engine. Use your
hose clamp pliers to do this. Remove this hose. There is a rubber grommet inside of this hose, make sure
it comes off with hose. If not you can remove it by hand.
This step is tricky and would be easiest if done by two people one to hold the pliers and the other to remove the accordion hose. It is possible to do yourself (as I did) but will take time and patience
On the OEM K04 you will now need to unclamp the dv port hose from the turb inlet.
6. Remove the factory fresh air duct from the front of the car. This is done by removing the two T15
torx screws holding it in place. With the screws removed the duct will come out very easily. My top tip here is that as you are looking at the car from the front remove the left hand screw first:
Followed by the right hand screw and once the right hand screw is loose leave the torx driver pushed into the screw and remove the airduct. This way you should not loose the screw
7. Install the rubber lining on the top of the airbox and mount the BSH airbox to the front of the car.
The bolt hole in the box will line up with the threaded eye on the battery box. Use the supplied bolt and
washer to hold it in place. Use your 10mm socket to tighten the bolt down. If the rubber lining pops up, pinch the base of it with a set of pliers. There are metal teeth inside of the lining that will bind the lining to the box.
In this pic you can see that the tray is actually capturing more air from the centre of the grill than the OEM setup does as well.
8. Place the supplied silicone coupler on the turbo inlet. Make sure the coupler is on properly. Use
the 50-70mm clamp on the bottom of the coupler to hold it in place.
Make sure the silicone coupler is pushed right down and that the clamp is tightly attached.
9. Place the 60-80mm clamp loosely over the top of the coupler. I found it best to tighten this clamp just a little so it gripped the top of the coupler otherwise it can fall to the bottom of the coupler.
10. Slide the BSH intake pipe into the engine bay and slide it into the coupler. Then put on the filter. With the filter on you will want to position the intake pipe so that the front section is locked into the airbox and so that the bend over the brake fluid reservoir does not touch the reservoir or any of the surrounding lines.
Again here make sure you push the filter down nice and tightly into the coupler.
11. With the intake in position tighten the clamps on the silicone coupler and the air filter.
12. Install the 90 degree silicone reducer onto the DV port of the intake tube (extra instructions for K04 cars).
The True Seal Intake comes with 38mm port for the DV however the OEM K04 cars use a 25mm dv port as standard. Therefore to make the BSH intake compatible with an OEM K04 setup we need to use a 90 degree silcone reducer to bring the port size down from 38mm to 25mm.
In the S3 space is very tight so first of all I had to move the sensor plug on the brake reservoir to the opposite side This can be done by loosening the cap onto top of the reservoir and then spinning the sensor round to the left hand and then re tightening (note you may need to pull the intake tubing out to do this):
Before
After
Depending on how close to your break reservoir the port is you may need to cut away some of hose on the 38mm end of the silicone reducer. I needed to trim roughly 1 inch off it.
Now you can slide the 90 degree silicone reducer onto the intake tube DV port.
Next you need to install the 25mm aluminium joiner into the 25mm end of the silicone reducer and mate it to the OEM hose.
Now simply clamp down the two ends of the aluminium joiner and the 38mm end of the silcone reducer.
13. Remove the MAF sensor from the factory engine cover using a T20 Torx. Install it into the BSH
intake pipe using the supplied screws and a 3/32 allen wrench. Plug the sensor back in.
Top Tip remember to use the supplied screws from BSH and not the factory ones! The factory ones have a different thread to the BSH so could ruin thread on the BSH MAF holder! I started to use the factory screws and luckily realised before it was too late
Here is a pic of the completed installation. Personally I feel the kit has a high quality finish and suites the engine bay really well.
I will post up a product review in due course after I have had some time to get used to the intake and and make a judgement on how it is performing.
