I was thinking more about the welding.
Im not having a go. But it looks a bit rough. i know it can be shaven down and polished but... is the inside smooth??
Also. Isnt there an inline restrictor available for "gt" turbos to work on VAG cars??

Its smooth transition inside yes, and given the slightly different tube OD's and angled join, its come out well as a join.
 
I thought it was really neat, isnt it uber hard to weld mild to stainless??

nope it would'nt be hard to weld stainless to mild, but both components are stainless... the stock pipe is certainly not magnetic as a guide. (the silencer outer case is tho)
TIG 316L filler rod stuck just fine. :)
 
Tuffty. Please calm down !
I simply asked.
If i wanted to slate something... i would,
I dont. what im asking was part of an observation. I asked as many people i know fabricate in stainless and can make it quite tidy. That said im told a tidy weld isnt always a strong weld. the penitration ( ive spelt that wrong i know) matters. To be sure you will not have a problem with a crack or anything later down the line.

There are many diffrent ways to do just about any job... dont have a go as soon as i try and work out which route will be best for me.

If you saw 2 x components , cut mid bend, where neither are round, and not round in different planes, and one being slightly larger than the other, then the fit is as good as you will get given whats there. Its a join to OE pipe, as thats the look tufftys after, and when fiish painted and weld linished flat to smooth the transition between the 2 different shaped tubes, it worked out ok. Add some paint and viola, 63mm stainless bendy pipe onto OE charge pipe in just the right spot to pick up the turbo outlet pipe via simple straight reducer.

This will never crack, has full penetration yada yada...

:)

gt30r-s3-1.jpg

gt30r-s3-2.jpg

what pipe was that again?
gt30r-s3-3.jpg

gt30r-s3-4.jpg

gt30r-s3-5.jpg
 
Last edited:
Due to the change in design approach for the TIP, I took a trip to Forge this morning to get a couple of 76mm black elbows then returned to the workshop for another day in the heady world of BT conversions...

Casual day again today, just essentially bolting stuff back on. I have been cleaning bits as I go then fitting it on and putting on pipes etc... One thing I did do was fit the phenolic insulator for the inlet mani.
20090917_CRW_3701.jpg


This stands the mani off a little so the support bracket underneath the mani no longer lines up so I will come up with a fix for that sometime. This will also make the wiring for the injectors appear too short, this extra height coupled with the fact the new injectors are longer will mean I will have to re jig the wiring loom a little to give me the extra reach.

The other prob I had with this was the throttle body hose no longer reached enough to fit properly...
20090917_CRW_3703.jpg


...so I will look at the tomorrow now.

One last thing I did was fit the proper bolts for the bells and rotors as they turned up today.
20090917_CRW_3705.jpg


So here it is so far... you may notice a silver cylinder by the cam belt cover... thats the fuel filter which I am relocating as I want to fit the inline pump where the filter currently is located (see a previous post for more info). Its an Ibiza one as the S3 one is massive... this should tuck away nicely...
20090917_CRW_3702.jpg


<tuffty/>
 
its looking great mate!! good to see your over-coming little problems along the way too. keep it up! be great to see it up and running sometime!
 
DP and TIP fabrication should start when Bill is back from hols in just over a weeks time then all that it left is mapping...

I have a few little jobs left to do... fuel pump and filter relocation, water hoses and I'll make a start on the TIP so hopefully all Bill has to do is weld it as I can't do that :)

<tuffty/>
 
While I would like the car finished I am not going to begrudge Bill having time off... hats off to the man... he has a day job unrelated to cars then he spends his evenings and weekends on cars... thats long hours and dedication and after working during the day and then in the evening and weekends for the past 2 weeks on this project I need a holiday myself and the past 2 weeks was supposed to be time off from work for me :)

I couldn't have done this as well or in the time I have without his help and I owe him a huge debt of gratitude.

I have resigned myself to the wait, it will all be worth it in the end...

<tuffty/>
 
  • Like
Reactions: hydro s3
Not driven anything with that much power so not sure what to expect... I have been a passenger in Mat20vt's A3 which is another one of Bill's conversions and its certainly quick.

The brief always was to have as drivable a car as poss as its my daily driver. Powerwise we are looking at around the 400bhp mark but reliability is key so boost will be kept to an acceptable amount (the GT30 will flow loads) to keep heat generation down and make sure its not being stressed... I am not after extracting the nth degree of power from it or turn it into a race car.

We will see... Bill will wave his magic mapping wand and all will be good :)

<tuffty/>
 
nice, cant wait till its finished, remember when i had my leon and spent alot of time on SC.N someone had a IHI Cupra R which know one had at the time and said it was very good as a daily driver. to be honest i think your setup will be very good, and wont have ny problems, even better that its an S3, get fed up of al these golfs and seats now ;)
 
blimey i was under the impression Bill did this full time!!

Mark im thinking the same!! tis like waiting for the next episode of 24 :)
 
Brilliant work so far mate...

Certainly grabbed the bull by the horns, be interesting to see what a 400bhp S3 goes like...:drool:

Well done again !!
:respekt:
 
Busy day...

Started by finishing off fitting the AP Racing bolts to the other disc as I only got one done last night. Then moved onto the problem with the hose not fitting the throttle body properly.

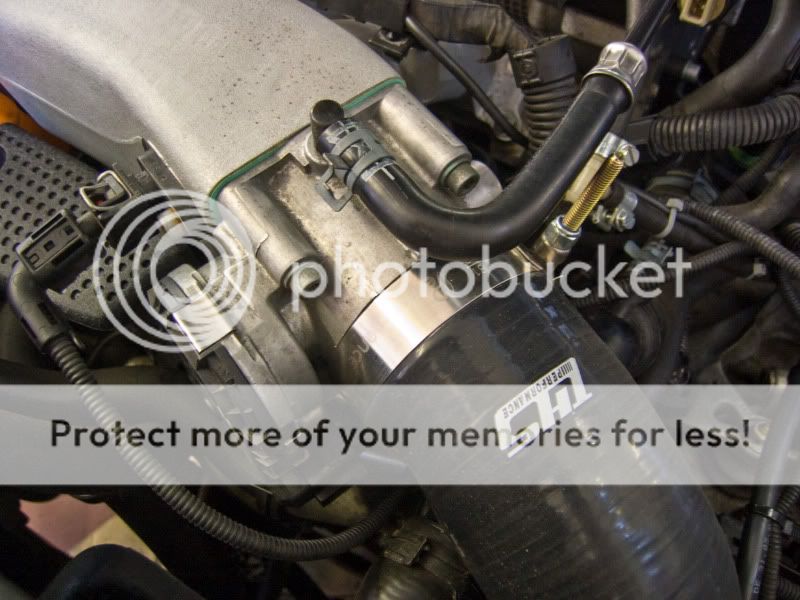
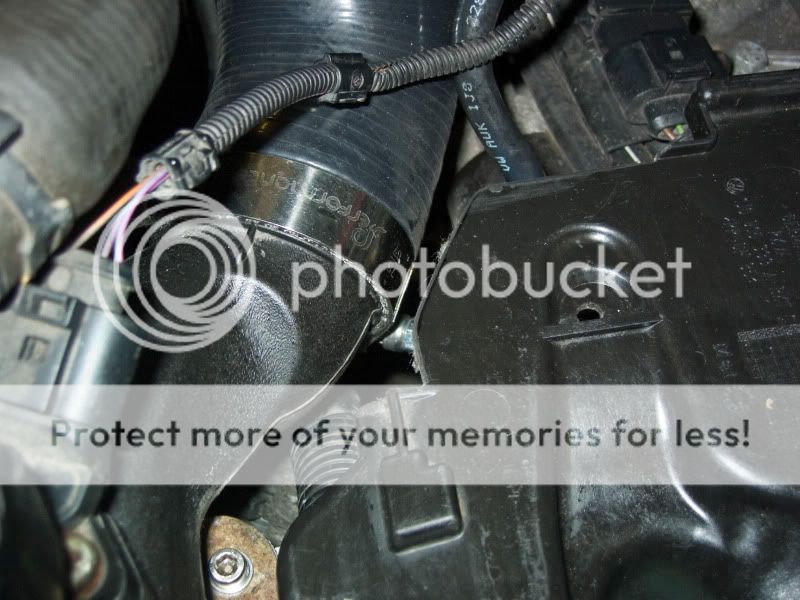
Removed the battery and battery tray, undid the MAP sensor tube bracket and loosened up the hoses lower clamp.. essentially fixed it in placed properly top and bottom before attempting to bolt the MAP sensor tube back down. Spaced the bracket up with a couple of stainless steel nuts and bolted it back down... trimmed a bit off the edge of the battery tray so it would not interfere with the MAP sensor tube and jobs a good un...

20090918_CRW_3706.jpg


20090918_CRW_3709.jpg


20090918_CRW_3712.jpg


Next I fitted the new injectors to the fuel rail

New 630cc injectors top, S3 bottom
20090918_CRW_3714.jpg


Fitted...
20090918_CRW_3716.jpg


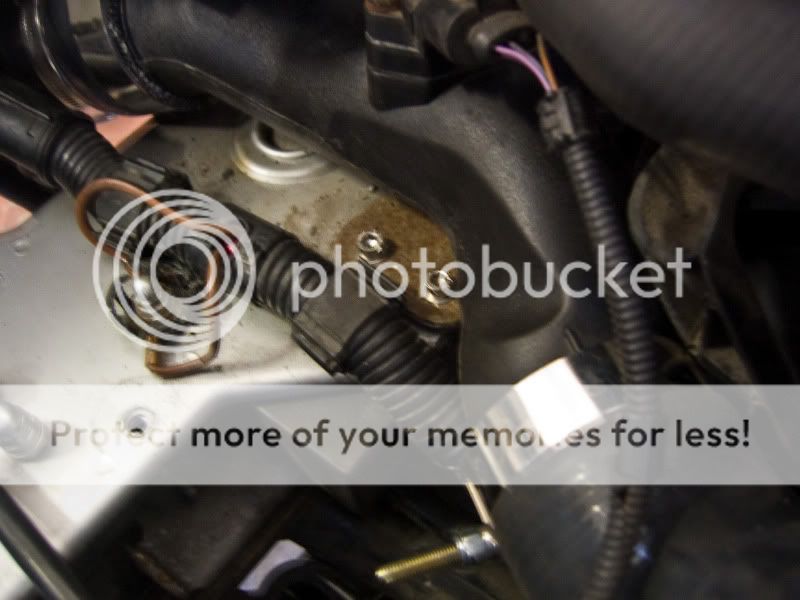
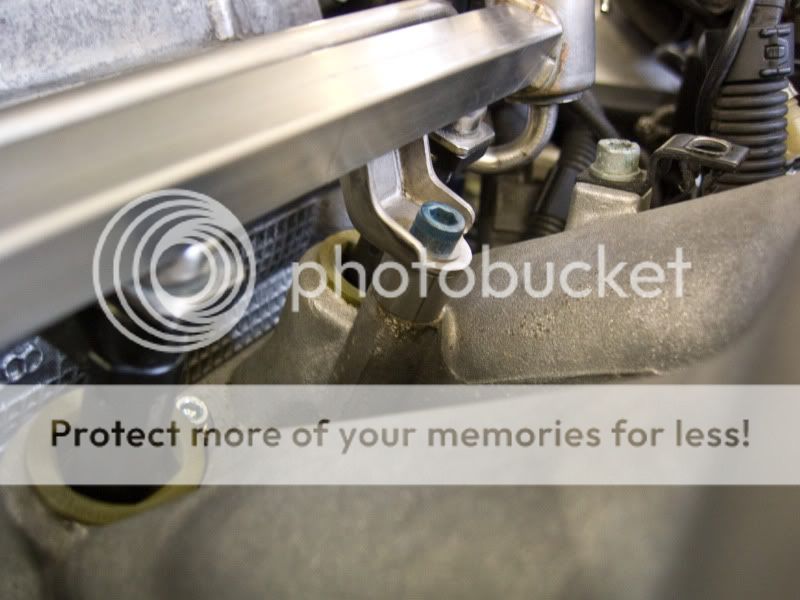
As the 630's are taller, spacers were required to raise the fuel rail...
20090918_CRW_3717.jpg


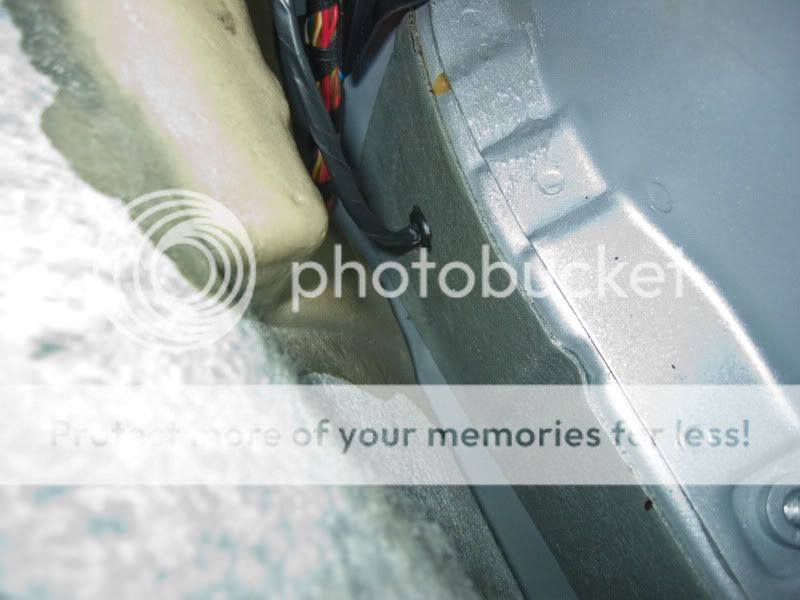
Wiring reached fine so no need to lose the OE fixtures. I did take the opportunity to re-loom the replacement knock sensor 1 wiring I replaced as I was getting fault codes indicating the wiring was at fault and taped it properly into the loom running it through some flexi conduit along with boost gauge hose. All nice and neat... engine bay is coming back together nicely...
20090918_CRW_3720.jpg


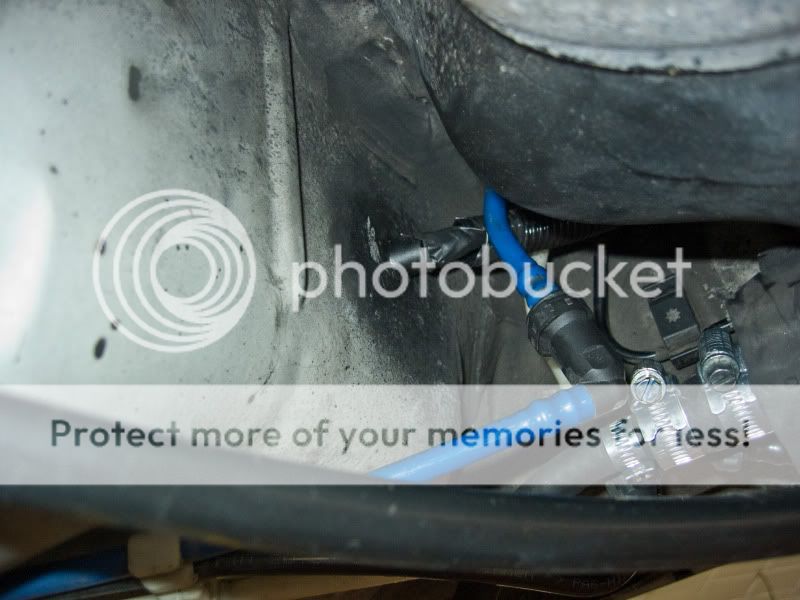
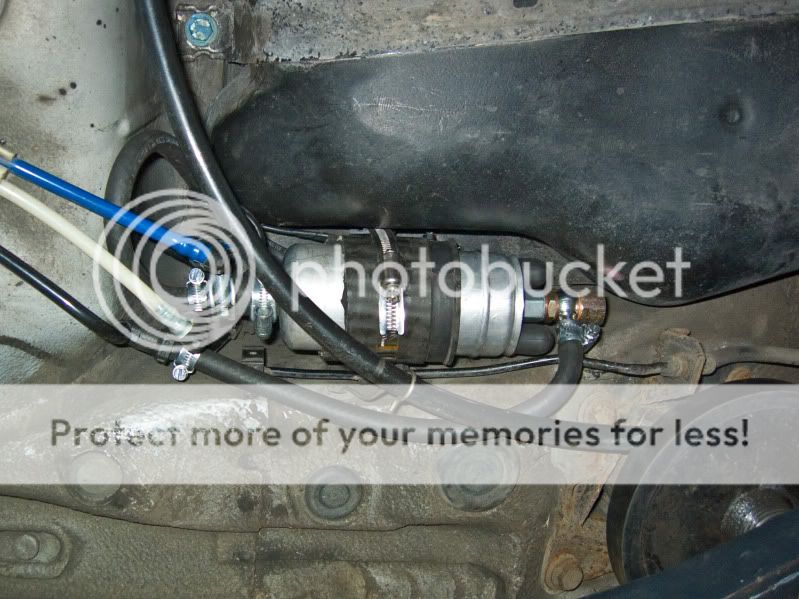
Next job was the fuel filter relocation. Luckily, Bill had a load of hoses he ripped out of his Ibiza so I had a load of OE push fit connectors allowing me to do a neat job of the pipework. Made a bracket and mounted it in..
20090918_CRW_3721.jpg


Test fit...
20090918_CRW_3726.jpg


Used some silicon hose to prevent rubbing etc, final fitment..
20090918_CRW_3727.jpg


I am not 100% happy with this at the moment... I am going to revisit it again once everything else is done with a mind to make a more stable bracket that maybe stands off the engine mount or something... its very tight down there and there are a few hoses in the way so want to make sure its not going to cause any probs being there.

And there we have it. I have one hose clip to refit as I over tightened it (DOH!!) and thats pretty much it for connecting stuff up under the bonnet.

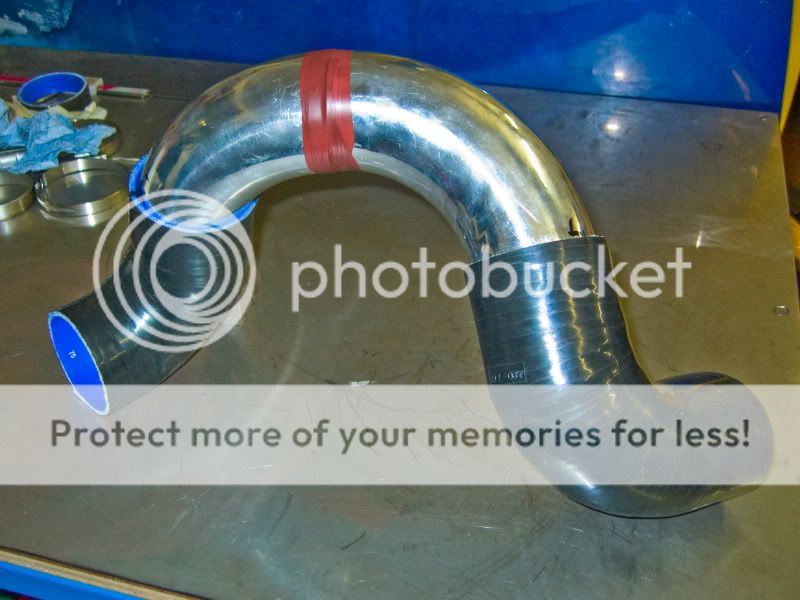
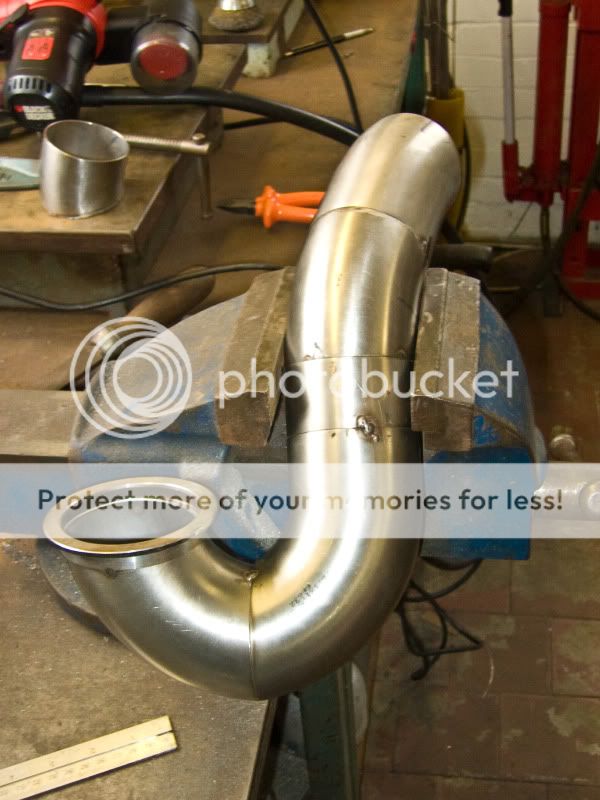
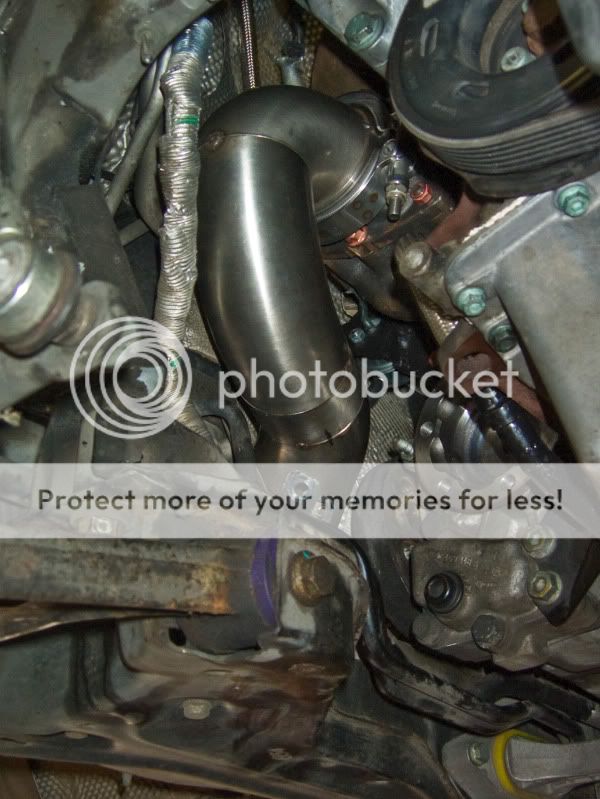
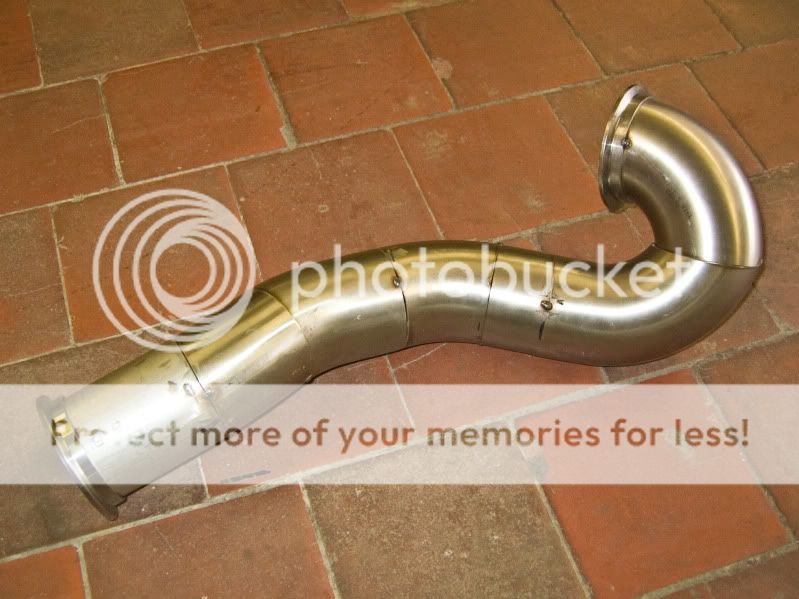
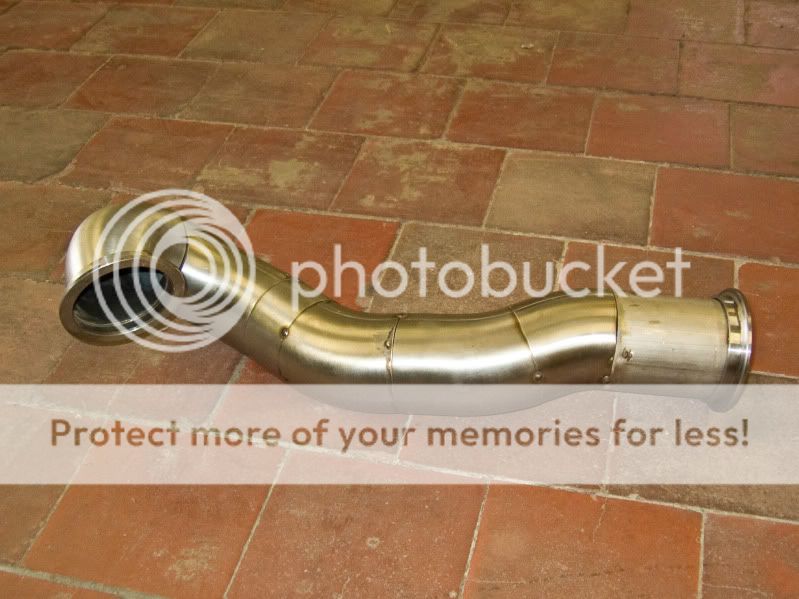
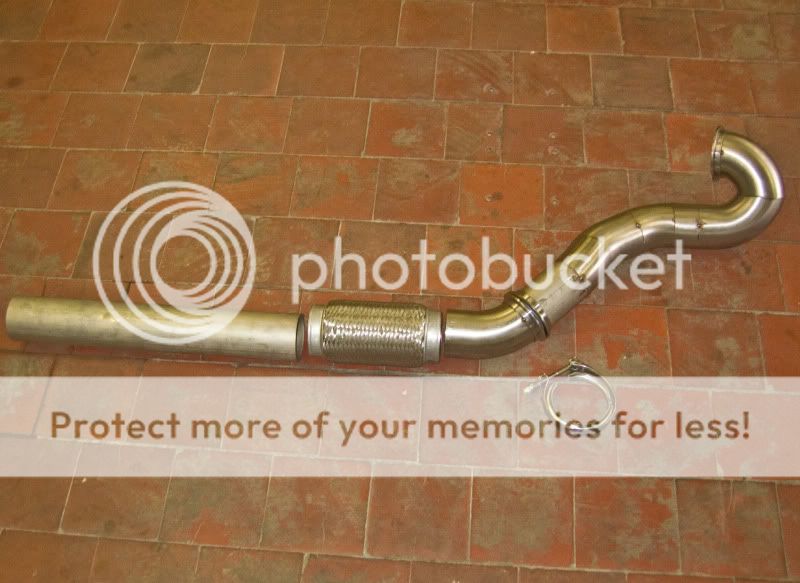
Next job is to wire and plumb in the inline fuel pump, fabricate a TIP, fabricate the DP, rejig the water hose from the block to the turbo as I am not happy with it and look at the oil drain again as it needs a bit of tweaking to ensure it misses the driveshaft.

Bit of mapping to top it off and should all be done :D

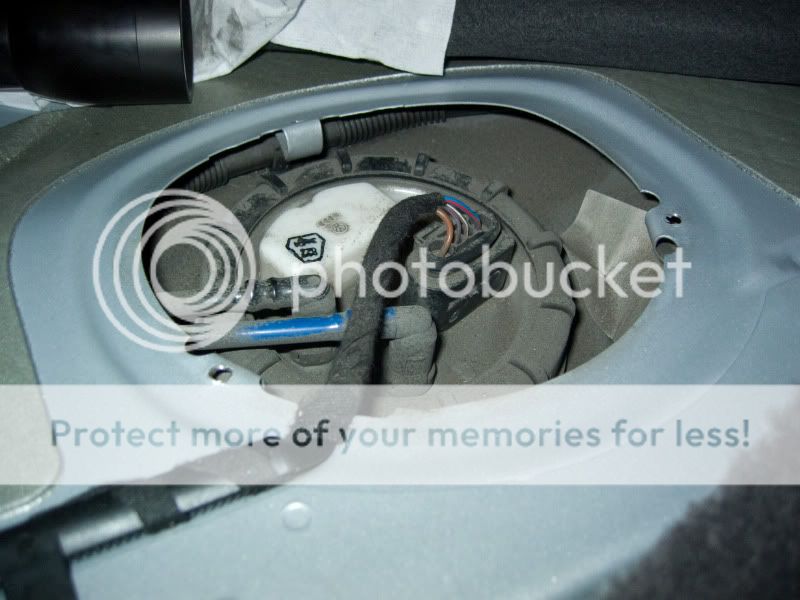
Might be going over tomorrow to remove the rear seats etc for the pump wiring but more likely have a weekend away from it as I am back at work next week and could do with taking some actual time off...

Home stretch now, its been a fairly hectic couple of weeks but nearly done and all is looking good...

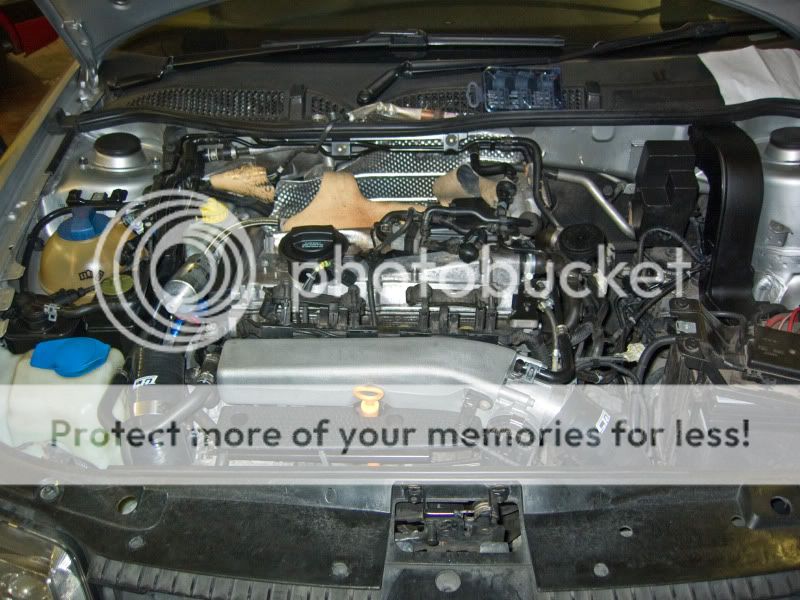
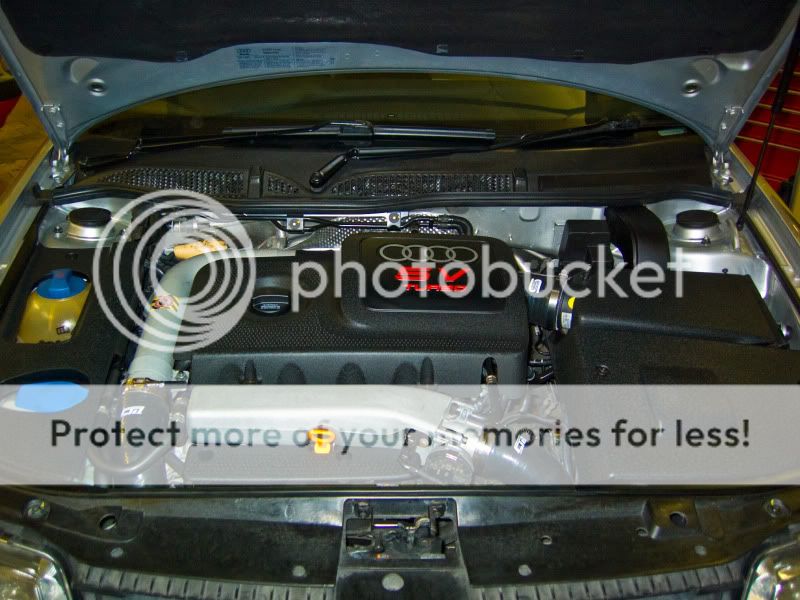
Just as a final comparison... here is a pic of the engine bay before I started..
20090903_CRW_3529.jpg


...and how it is now...
20090918_CRW_3730.jpg


<tuffty/>
 
Last edited:
top job looks really well done but whilst your there can you change the header tank as it all gone yellow'ey maybe then we will notice a difference next time you do a before and after photo lol really good work
 
I thought bill did this full time too. fair play. alot of time and effort gone in there. hats off to ya.:hi:
 
Updates are gonna be a bit infrequent once I go back to work as with Bill off and Tony doing the odd evening I won't get much time to work on the car.

Spent a bit of time with the fuel pump today. I have ordered some new fittings so not going to fit the pump up properly as yet but I did wire it in.

20090919_CRW_3737.jpg

20090919_CRW_3738.jpg

20090919_CRW_3741.jpg


..then wired it off the OEM pump wiring...
20090919_CRW_3739.jpg


Still not entirely happy with the arrangement of the pump fittings. Going to look into getting hold of either VAG style push fittings or at the very least have a chat with APR in the states as they have a pump with the push fit ends on which would be ideal...
tts3_fuel_pump.jpg


If I get a chance I will have a look at the TIP next week.

Getting there...

<tuffty/>
 
top job looks really well done but whilst your there can you change the header tank as it all gone yellow'ey maybe then we will notice a difference next time you do a before and after photo lol really good work

Thanks d00de, however... the whole point is that you can't tell the difference ;P

<tuffty/>

(I did actually consider changing it for a new one but can't be bothered atm)
 
Small update as I have been back at work today so only spent a few hours at the workshop tonight...

Started mocking up the TIP. Used a couple of stainless steel 1D bends that are usually reserved for downpipes but as they are short with a tight bend I reckoned they would be ideal to see what I could do with getting everything to clear.

Mocked up using the bends and a couple of 90 degree silicon elbows. Cut a little off the end of the silicon elbow on the turbo to get it to clear the gearbox cables and not foul anything, then I pushed one of the SS bends in and positioned it so it would clear all the pipework and have a decent gap away from the bulkhead. I fitted the another SS bend to the other silicon elbow and fitted that to the MAF on the airbox... bit of jiggery pokery and it all lined up nicely. I marked where the 2 SS bends joined and pulled it all apart so I could assemble and tape together to see if would go back together OK... result.. it did...
20090921_CRW_3744.jpg


However the SS bends are actually tighter than the alloy ones I had so I marked up the alloy bends carefully and cut them... they were a little out... I had not taken into account the bend on the 90 degree alloy elbow... when placed together they turned in too far... DOH!!

Luckily Bill's right hand man Tony was there at the time and showed me a little trick using a jubilee clip (insert your own gag here)... the clip will follow the bend of the tube and give you a square face to cut along. I only needed to cut a little wedge off and bingo, it all fitted perfectly. (thanks Tony)
20090921_CRW_3748.jpg


Next time I am in the workshop I will be looking at where to position the outlets on the TIP for the DV, N75 and breather system connections. All it will then need is TIG'ing up and that will be the TIP complete.

<tuffty/>
 
Thanks mate... I am pleased with the way its coming together. This install is trickier in different ways than others I have seen Bill do as he prefers top mount manifold/turbo combinations. Been interesting work though...

<tuffty/>
 
Prob some tweaks to the existing setup, uprated clutch, look at what I can do to the gearbox to make it less crunchy in third (think my syncro is going), have a look to see if I can mod the FMIC to run 60mm piping while retaining fogs etc as before, replace the MAP sensor tube with 60mm pipe, 3" or 4" cold air feed into the airbox, replace the inline fuel pump fittings with push fit ones when Bill has got some made up, different bracket arrangement for the fuel filter relocation, ceramic coating of key hot bits such as downpipe, maybe manifold and turbine housing, lots of tyres....

Engine wise I may still look into stroking and going 2ltr but if 1.8ltr gives the power/drivability I want then I may save my money for other stuff. If the power curve looks to be still going beyond the redline then I will consider rebuilding the head with Supertech valves and springs and getting the rev limit raised in the map.

Just a case of playing it by ear. Anything else I do won't have the same bang for buck that the initial conversion did so any future mod will be based around reliability improvements and cheap tweaks like 60mm pipework.

<tuffty/>
 
This is looking really good.

I've done the same type of inlet on 2 A3's now too.... They gearchange cables really get in the way! back and round is really the only way to do it.

good job.
 
Small update... spent a bit of time with the fuel pump tonight but didn't finish it off as I managed to leave the fittings at home... DOH!

Tony has been having a look at the downpipe and boy is it tight!!! new day, new problem... a power steering pump pipe is in the way. I have no pics as I forgot my camera too but its the one that comes out of the reservoir and down past the brake master cylinder. Its a flexible pipe part way down then goes hard pipe just past the MC and down across the subframe. This pipe needs to be moved to allow enough room for the DP to curve back out of the turbo.

Current idea is to remove this pipe and replace part of the hard pipe with hydraulic grade flexible pipe and route it out of the way to rejoin the hardpipe by the subframe. This should open up a nice space for the DP to live in.

Probably wait until Bill is back for a second opinion as I would rather we get this bit right.

<tuffty/>
 
Whats the exacted spec of the turbo?

I'E whats the A/R's, Wheel size's, Trim's and inlet size?

I don't know exactly tbh... All I know is that its a GT3071R, comp housing is a GT28 (I think) with a 76mm inlet that has been machine to take the GT30 compressor wheel and the hotside 0.62 (trim?), T25 fitment and internally gated. Not sure of what any other stuff tbh... I am sure Bill will be able to tell you more about it than me.

Anyhoo... been a casual couple of days, been playing with the TIP a bit to see where I can sensibly place outlets for the DV, N75 etc... Going to have a chat with Bill about this to make sure he is happy with my current train of thought.

Ran a pipe to the actuator and thinking I may leave that until the DP is done as this seems to be very close to everything no matter where I try to run it...

Spent a bit of time trying to avoid doing the fuel pump as I know until I get the push fit connectors I won't be happy with it so I just cleaned stuff for a while and the car is all shiny again...

Put it off as long as I could so went in determined to get a 'solution' in place until the push fit connectors are sorted.

Finally got it somewhere close to where I feel happy enough about it...
20090926_CRW_3767.jpg


Need to stick the battery on charge I think as I want it to be nice and healthy for when I start her up at last :)

Bit more faffing to do on the TIP, I was just going to get the alloy tubes welded together but I am now using the hump hose I bought from Forge to give me a little more adjustment and also as a little extra safeguard against vibrations killing the MAF sensor.

<tuffty/>
 
Running the std clutch for the time being... budget and time have dictated that really.

Gonna see how it fairs, I am not a full on driver so hoping it will last a few months at least then I will have a proper look for one up to spec.

Again I want to see what power/torque my setup produces to make sure I get the correctly rated clutch as its a little bit of a minefield and the prices differences can be silly.

<tuffty/>
 
Good progress made today, drilled the holes in the TIP to fit the outlets for the DV, N75 and breather stuff.... all ready for TIG welding now.

The star that is Tony has pieced together the downpipe too!!! WooHoo!! Didn't have to modify the power steering pipe in the end although it still needs to move a bit but here it is...

Tacking for mocking up...
20090927_CRW_3777.jpg


In situ...
20090927_CRW_3773.jpg


20090927_CRW_3774.jpg


Ready for final welding...
20090927_CRW_3781.jpg


20090927_CRW_3782.jpg


20090927_CRW_3783.jpg


Brilliant :)

Nearly there, will have pics of the TIP hopefully tomorrow night...

<tuffty/>
 

Similar threads

Replies
5
Views
1K
Replies
1
Views
1K
D
Replies
0
Views
709
Deleted member 65282
D