

mark_S3 Progress Thread
- Thread starter mark_S3
- Start date
You are using an out of date browser. It may not display this or other websites correctly.
You should upgrade or use an alternative browser.
You should upgrade or use an alternative browser.

Purchased a new Suspension kit...
Koni SRT-T Shocks with H&R Springs (To be fitted with new few weeks)


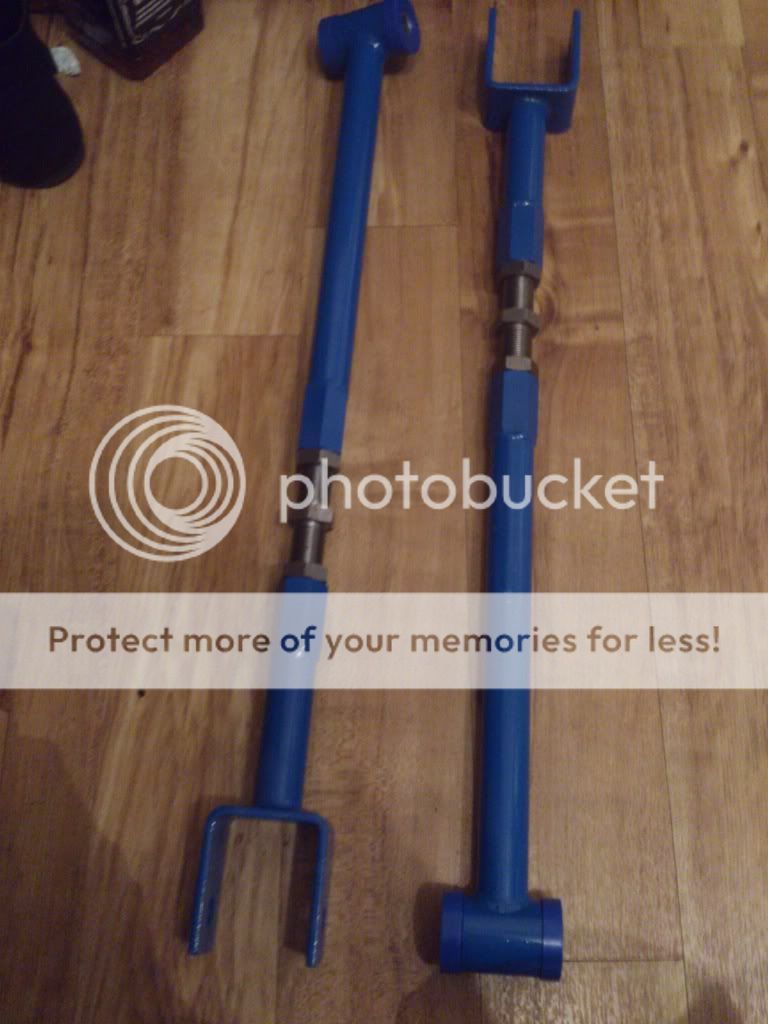
I've also got the late Dave Marshell's Adjustable Rear Tie Arms to go on aswell
Bushes for other standard arms

Also purchased some Hubcentric Spacers... 10mm front and 15mm rear
Koni SRT-T Shocks with H&R Springs (To be fitted with new few weeks)


I've also got the late Dave Marshell's Adjustable Rear Tie Arms to go on aswell

Bushes for other standard arms

Also purchased some Hubcentric Spacers... 10mm front and 15mm rear
Then I had a issue where it would hesitate above 3,000rpm so after checking the basics and doing some logging, it was pointed towards the ignition system.
So after checking the coilpack wiring loom, it was found to be cracked in various places... So a new loom was ordered, along with new NGK BK7RE Plugs and a cheeky upgrade to TFSI Coils.
So these where fitted with a larger gap on the plugs of 0.85.
Well it cured the issue and now running alot better and more responsive.


New Rear Engine mount was purchased and fitted. due to the old one looking abit worse for wear...
Decided to upgrade the bushes with Powerflex Poly. New Bolts where fitted aswell.....


Decided to upgrade the bushes with Powerflex Poly. New Bolts where fitted aswell.....


Going back to suspension..... (End of July 2014) It was overhauled with H&R Springs (-25mm) and Koni Shocks. Adjustable Rear Arms where fitted including new poly bushes in top standard arms. New Rear Drop Links, New Top Mounts and PowerFlex Rear Anti Roll Bar Bushes. Next day followed the replacement of my rear disc and pads with new Pagid Discs and Pads. Day after I had the 4WA done by Gary Tams (Highly Recommend in West Yorkshire).


Sits very well for the set up and drop....


Sits very well for the set up and drop....


New Genuine Coolant Hose from Thermostat to Radiator Replaced due to original rubbing up against PS Cooling Pipe...


As my previous fix to my NS window regulator became a failure, after many months of a non functional window, I decided to buy a replace frame complete with window, regulator, etc. All in great condition. So once again the door card was popped off and the painstaking job of swapping over the frame. Abit tricky lining up the replacement frame to door, but after it was done, I had a fully working window again.....


As you can tell, I had the urge to do a spot of OCD cleaninging... Lol


Yes that's my surname unfortunately.... Lol...Hullah?
I'll presume you mean the Science teacher....?Not heard it since the days of Dr Smith
Not Mr Holmes.....? LolYes mateit's that specky ******* who sat next to you
Oops.... He didn't wear glasses....
I wonder who?
Well the time came to fit my LCR Brembo’s... (September 2014)
LCR Brembo’s, Pagid Disc’s, Brembo Pads, ATE Superblue Racing Fluid, Badger5 Braided Hoses, and unfortunately due to seized unions on my hard lines, I had to purchase new genuine lines from hoses to ABS Pump (which btw the OSF hard pipe to pump, was a b@$tard to replace, due to the access under the arch, brake cylinder/servor and various other pipes and bits in the way).
In terms of braking performance from Brembos to standard is like the difference between day and night. No fade, and instant stopping power.
I do have two piece rotors to refurb and these will be my choice or discs when it comes to my Ring Trip later in 2015.
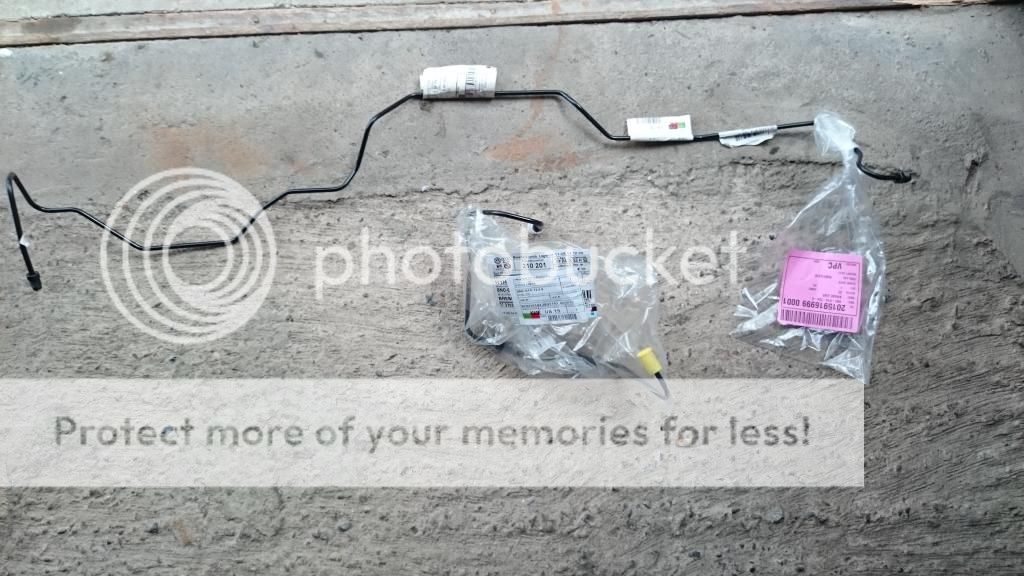
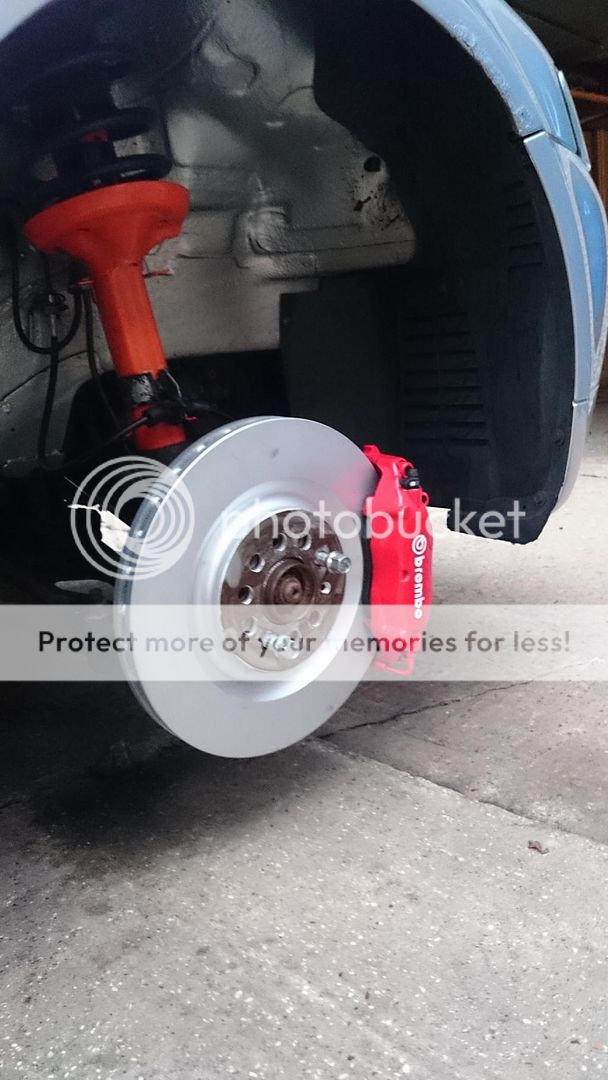


Along came a genuine second hand PS Cooling pipe with the rest of the pipework to the pump. Pretty much like new.
This was replaced as mine looked a little worse for wear and corroded badly. All for a sum of £10 (Thats a bargain considering the price new).


This was replaced as mine looked a little worse for wear and corroded badly. All for a sum of £10 (Thats a bargain considering the price new).


Then after purchasing a Toyosport Cooler (Welly) and associated pipework, I decided to go custom so that I could save my grilles as the end tank exits where originally 76mm and would have obstructed the fitment of the grilles. (October 2014)
So a friend of a friend does custom fabrication so I gave him the task of making the cooler. The end tank exits where cut off. Then new 63mm 90° bends where flared and welded to the ends. Hanging brackets to the crashbar was welded on along with brackets to support the underneath. A long process to do as alot of measuring and tinkering. Finally got there in the end.
Managed to retain my tow bar socket aswell.
Next day the bumper was whipped off, and the horns relocated. Whilst it was off I decided to tidy up the arms to support the crashbar.


Then I slowly started to develop a vibration through the steering and play in the steering.
I decided to have the wheel bearings replaced along with new ball joints and track rod ends.
Unfortunately this didn’t cure any issues apart from the slight play I had....


So after investigating, I found that I had two buckled alloys both on the NS.
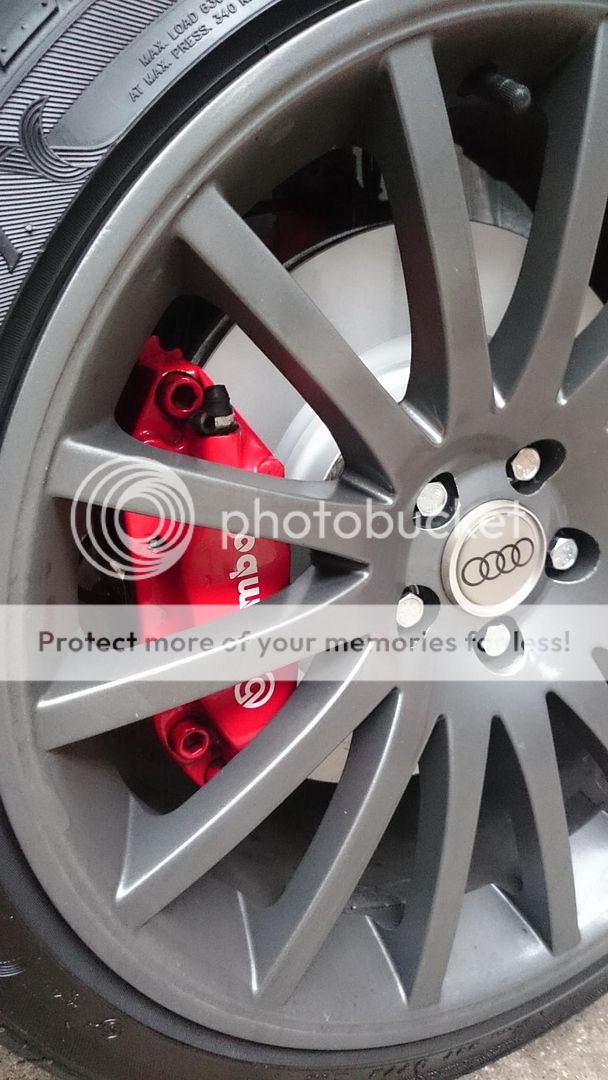
This then lead to me purchasing a new set of 18” Team Dynamics Imolas in Graphite Satin. I did think about having the TT 240 Sports re-straightened and refurbed but I was paranoid about the buckling happening again. These will be kept for the future though.


So along with new wheels and some new Goodyear Eagles F1's, this cured my vibrations and awful drive... Happy Days....
I decided to have the wheel bearings replaced along with new ball joints and track rod ends.
Unfortunately this didn’t cure any issues apart from the slight play I had....


So after investigating, I found that I had two buckled alloys both on the NS.
This then lead to me purchasing a new set of 18” Team Dynamics Imolas in Graphite Satin. I did think about having the TT 240 Sports re-straightened and refurbed but I was paranoid about the buckling happening again. These will be kept for the future though.


So along with new wheels and some new Goodyear Eagles F1's, this cured my vibrations and awful drive... Happy Days....


- Joined
- Mar 28, 2010
- Messages
- 10,073
- Reaction score
- 2,697
- Points
- 113
- Location
- Liverpool/Southport. N west
superb intercooler install.
Thats where i couldve improved with mine, by trimming the end tank outlets down before having the 90's welded on.
This is a great looking car. Well done
Thats where i couldve improved with mine, by trimming the end tank outlets down before having the 90's welded on.
This is a great looking car. Well done

Cheers Karl....superb intercooler install.
Thats where i couldve improved with mine, by trimming the end tank outlets down before having the 90's welded on.
This is a great looking car. Well done
It was a mission but very pleased with the results of the cooler.
It took the best part of 9 hours to complete it all.
It wouldnt of happened without Shaun_s3 help, so a thank you to him.
So.... A few weeks before Xmas I had the dreaded seized rear caliper piston (not the first time either)....
So genuine brand new caliper was sourced and painted red along with a spare carrier....
Swapped over and system rebled using ATE Superblue Racing Fluid....


So genuine brand new caliper was sourced and painted red along with a spare carrier....
Swapped over and system rebled using ATE Superblue Racing Fluid....


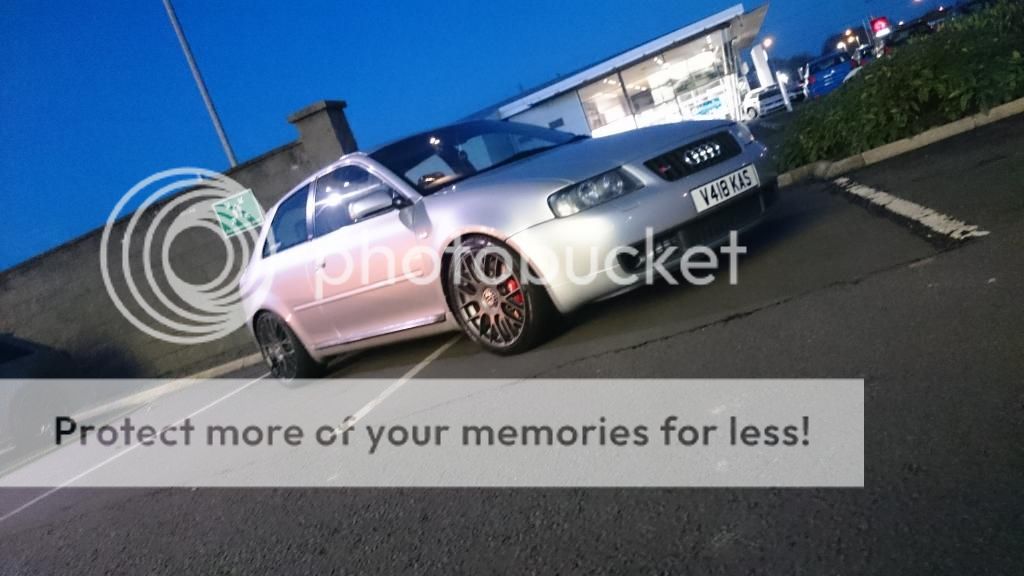
Then the other half decided to buy me a personalised plate for Xmas.(Btw I didn't want my initials)
Always wanted 'S3 CYA', but unfortunately it was taken and after months of looking into decided to go for a similar look.
'S3 CYH'
Nicely done on pressed plates....


Always wanted 'S3 CYA', but unfortunately it was taken and after months of looking into decided to go for a similar look.
'S3 CYH'
Nicely done on pressed plates....


I have never actually read through your build thread Mark, seems strange as we have now known each other for a fair while, since meeting through ASN..... @Sandra will love to hear that!
Whilst the pics show how nice your car is, i still don't think they do your car enough justice as having seen it in the flesh for myself on plenty of occasions, I feel you cant begin to appreciate your car until you are stood in front of it or even sitting in it.
No car of this age comes without its issues but the thing with you is that there is never any expense spared. A very well looked after and sorted car, credit to your passion and determination.
How's that for a comment? Don't forget to reply on my build thread too
Shaun.
Thank you Shaun.....I have never actually read through your build thread Mark, seems strange as we have now known each other for a fair while, since meeting through ASN..... @Sandra will love to hear that!
Whilst the pics show how nice your car is, i still don't think they do your car enough justice as having seen it in the flesh for myself on plenty of occasions, I feel you cant begin to appreciate your car until you are stood in front of it or even sitting in it.
No car of this age comes without its issues but the thing with you is that there is never any expense spared. A very well looked after and sorted car, credit to your passion and determination.
How's that for a comment? Don't forget to reply on my build thread too
Shaun.
I think over time my plans are more to preserve the S3 for the future.
All the money I've thrown at it has been spent wisely with plenty of research first.
The way it has transformed over the past few years has been rewarding.
I can only Thank this group for filling me with valuable information and help.
I've met some great people within here and it's been a pleasure in knowing them.
I should really say thank you to yourself Shaun as some of my progress wouldn't of happened without your help. Never a dull moment when we get our hands stuck into some jobs.
It's been a enjoyment to own, drive and maintain.
Thank you Shaun.....
I think over time my plans are more to preserve the S3 for the future.
All the money I've thrown at it has been spent wisely with plenty of research first.
The way it has transformed over the past few years has been rewarding.
I can only Thank this group for filling me with valuable information and help.
I've met some great people within here and it's been a pleasure in knowing them.
I should really say thank you to yourself Shaun as some of my progress wouldn't of happened without your help. Never a dull moment when we get our hands stuck into some jobs.
It's been a enjoyment to own, drive and maintain.
I think you have got it spot on Mark.
Every time i see your car i am always praising on how well it is maintained and preserved. The original S3 in my opinion is soon to be a classic and a well looked after model like yours even if tastefully modified will be in that group somewhere.
All i will say is that working on the S3's always brings a box of tricks.....shortly followed by lots of laughter. Again, it really is a pleasure working on our cars, bouncing ideas and experiences back and forth in order to get what we want from them and yours is no exception to that.
Pictures really do not do it justice.

So Xmas hols came which gave me chance to tackle by far the most challenging thing I've ever done to the car, nevermind thinking of what happens if I get it wrong....
No experience what so ever in
BODYWORK...... Just advice and watching stuff in the past.
Unfortunately over time rust bubbles have developed on both doors above blades and on OSF Wing where it meets the bumper.
So let's commence.
Wing first which revealed something that I hadn't of expected to happen. As soon as the rust remover disc touch the area, it caved in. Shocked

Then the door
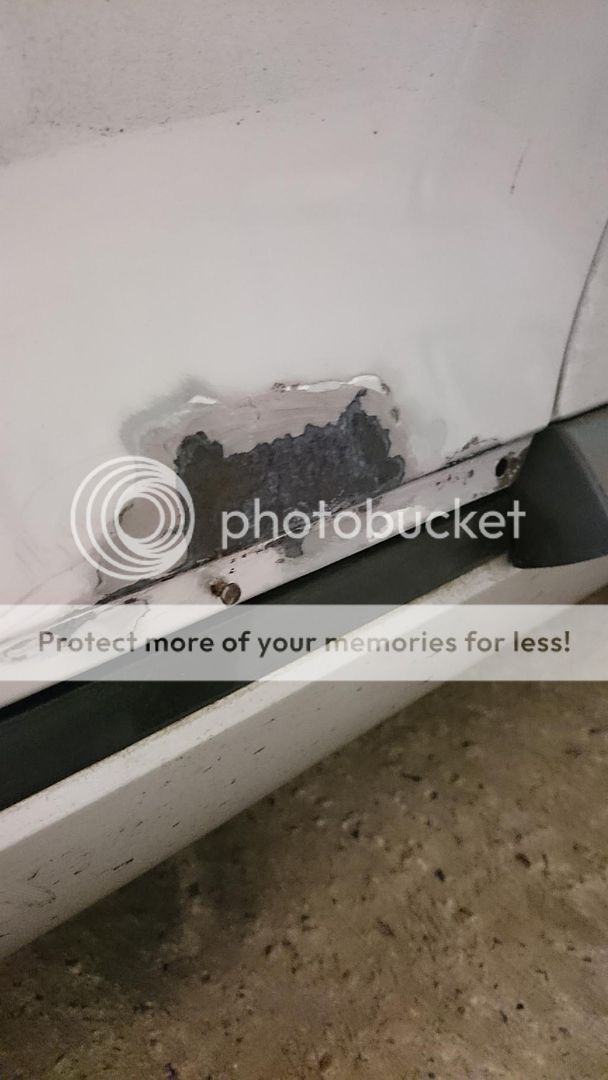
And I'll let the pictures show you the stages....


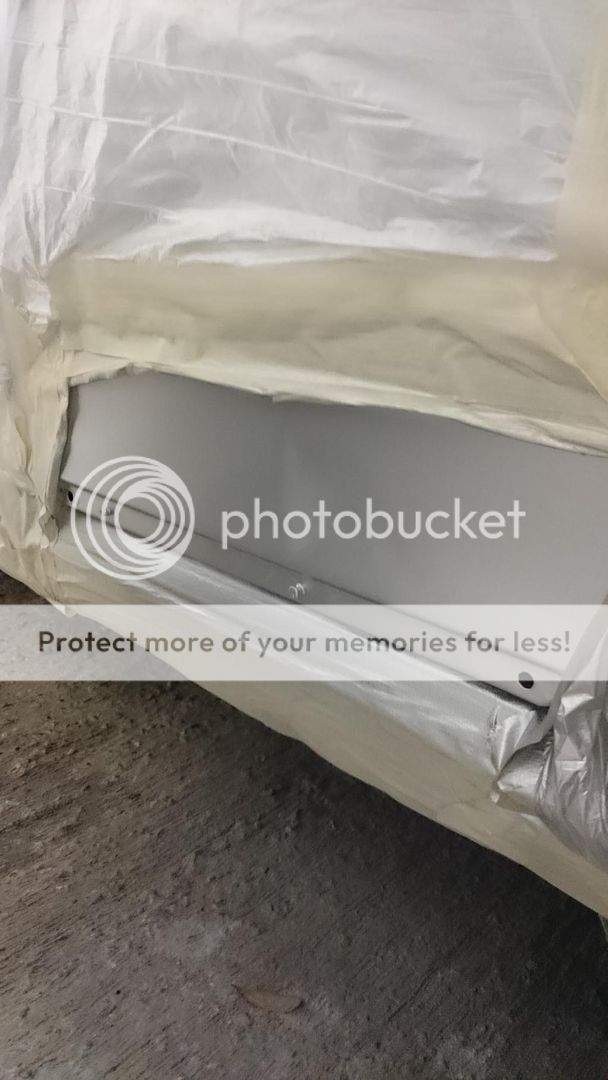
The primer, top coat and lacquer was all stepped and blended into the exsisting...


Unfortunately after wet sanding the to try and blend in, I realised that paint mixed now was slightly a shade darker than paint mixed 15years ago.
I was hoping after it cured and a coat of lacquer it may lighten but unfortunately it didn't.

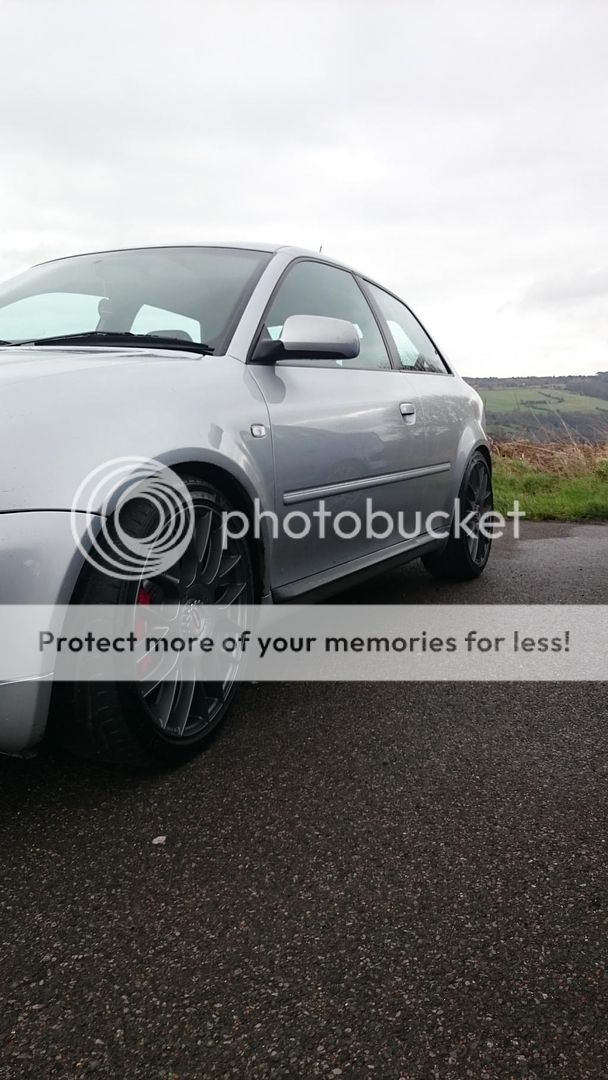
Depending on the angle you look at it, it pretty much matches and blends in.


And finally after a bit of machine polishing....


So that's them all....
Tbh, for a beginner and limited knowledge in reckon I've done a good job overall.
All done in my garage which was nicely warmed up with heaters.
It's a temporary fixed overall as I hated to see the rust bubbles and it always drew people's eyes on it.
Nevertheless it's going in for a full respray towards end of this year.
Not bad hey?


Unfortunately after wet sanding the to try and blend in, I realised that paint mixed now was slightly a shade darker than paint mixed 15years ago.
I was hoping after it cured and a coat of lacquer it may lighten but unfortunately it didn't.

Depending on the angle you look at it, it pretty much matches and blends in.


And finally after a bit of machine polishing....


So that's them all....
Tbh, for a beginner and limited knowledge in reckon I've done a good job overall.
All done in my garage which was nicely warmed up with heaters.
It's a temporary fixed overall as I hated to see the rust bubbles and it always drew people's eyes on it.
Nevertheless it's going in for a full respray towards end of this year.
Not bad hey?
Lavis89
Registered User
- Joined
- Aug 18, 2011
- Messages
- 2,039
- Reaction score
- 825
- Points
- 113
- Location
- Plymouth
- Website
- www.facebook.com
Cheers pal.... Didn't expect it to be perfect but it will keep me happy until it gets resprayed.....cracking job for a beginner, i would be very happy if i could do some touch ups this well!


Then a few of use on here decided to go for road trip, starting at Ferrybridge Services towards Malton, through the Heartbeat village then upto Whitby when we stopped off for a drink and abit of sightseeing.
Then back in the cars to head towards Scarborough where we had fish and chips.....
Then the long drive home.....


Artistic version


Then back in the cars to head towards Scarborough where we had fish and chips.....
Then the long drive home.....


Artistic version


