2004 A3 3.2 V6 S-line DSG - Progress/Build (pic heavy)

Audi-Rog

Six Audi's & Counting!
Joined
Dec 15, 2009
Messages
268
Reaction score
100
Points
43
Location
Buckinghamshire,United Kingdom
Hi and welcome to my on-going progress/build thread.

A bit of history on the car, it's a 2004 3.2 V6 S-line DSG with 115K on the clock, FASH, Bose, parking sensors on rear, Half Leather and 18" RS6 alloys. It's been Superchipped too, adding around 15 BHP.

I bought this A3 with the intention of just cleaning it up and re-selling straight away, as it was mis-advertised as a Sport and was underpriced some-what! But after driving it and loving the engine smoothness and power, I decided to sell the wife's car and keep this! (She has my Octy VRS instead, so she's not complaining!)

I've had to do some mechanical work, replaced the O/S driveshaft, new drop links and put 2 new tyres on the front.

I've had an A3 2.0 TFSIQ previously, which I restored and added many bits to. But on this 3.2, I've decided to do more to the interior, than the exterior, but you never know.

So, over the last 3 months, I've been steadily buying bits and bobs to upgrade or replace old knackered parts. This thread will be quite picture heavy and I'll add more as I do more.

The car on the day I bought it.


Here are few pics of the original condition.


Interior isn't too bad at all, but it was owned previously by a smoker, so I will be giving the interior a full detail and clean and feed the leather to freshen it up.


DSG. Bose Symphony, looking a bit tired, but works well.


RS6 alloys need a refurb, they have been poorly refurbed in the past. Missing centre cap!


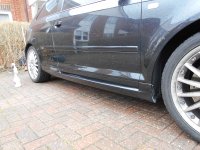
Not too sure if this is original, but it looks ok, but needs repainting and sticking down properly.


Parking sensors, nice.


Aftermarket mirror caps, look ok actually and if someone nicks them I won't be too upset!


Standard pedal set up.


Exhaust tips need a good polish.


Here are some pics of the scratches and defects over the bodywork. These will be corrected at a later stage.

The classic mark where the wiper hits the boot. I've since adjusted the wiper so it doesn't hit it now.


Some minor and more major marks around the car.


This one is a bit nasty.


Top tip...DO NOT scrub at bird lime....this is what you get!


Front wing.


Rear bumper marks.


------------------------------------------------------------------------------------------------------------------------------


So, the first thing to do was to give it a good bath! Boy did it need it!

This is during and after a good exterior detailing.

The alloys were given a good de-toxing, AS Smart wheels first.


Then Iron X


Then onto the bodywork. APC'd all the nooks, crannies, doors shuts and jams etc, then a 2BM wash.


Bodywork decontaminated. First with Tardis, then clayed.

This fallout was just on the bonnet! The rest of the car was just the same.


Then dryed off , cleansed and sealed with Werkstat Acrylic prime, via DA polisher.


Looks better and is protected from the winter elements.


------------------------------------------------------------------------------------------------------------------------------------------------------------------
 
Last edited:
  • Like
Reactions: MrWhItEwOlF
Then I started to replace a few bits. First being the central locking button.


Removed.


Old vs new.


Then replaced.


------------------------------------------------------------------------------------------------------------------------

Next little mod was to upgrade the Pedals to the S3 Aluminium set.

Before.


After! And a dead pedal cover thrown in too by the seller on eBay, nice one!


---------------------------------------------------------------------------------------------------------------------------

Next up was to install a K&N panel filter. Very simple.

[URL=https://imageshack.com/i/7g0w1rj]


------------------------------------------------------------------------------------------------------------------------------

Another detail to fix, was the boot gas struts, as they took forever to raise and made it very heavy to move. So, found 2 new ones for a Tenner each (eBay). Again very simple but an effective fix.


Old struts removed.


New ones installed.


------------------------------------------------------------------------------------------------------------------------

The next upgrade to do, was the Symphony 6 CD Bose HU, it was very tired and had pixels missing! I managed to bag a bit of a bargain. A Symphony II 6 CD Bose HU. I needed to buy a Quadlock adapter and after doing alot of reseach here and other forums, I fitted it!


Cover all, for protection!


The new replacement.


Old unit out.


Re-wiring.


After install, works perfectly too! Sounds alot better than the old one!


------------------------------------------------------------------------------------------------------------------------------
 
  • Like
Reactions: MrWhItEwOlF
So that's some of the interior upgrades.

I've also done a bit of updating to the exterior.

And after searching eBay forever, I finally got very lucky and found these MY11 rear light clusters. £60 for the pair!!


So here's before.


During. 50/50 shot!


After, looking much nicer!


------------------------------------------------------------------------------------------------------------------------------

I also found a genuine Votex front lip, to put on at sometime in the future. The only thing I've done to it, is prep it for painting. I wil get the bodyshop to do that though, I'm not brave enough to do it myself.


--------------------------------------------------------------------------------------------------------------------------------

More interior updates.

As I'm not really a fan of the early DSG gear surround, I decided to change it for the later style version. Here is a little "step by step" of the removal process. THIS IS NOT A FULL GUIDE! Just a little direction if someone else wants to do it too.

These are the replacement parts. Again, very reasonable price on eBay. This is how they came up, after a good clean up and polish.


The original set up. It's ok, but not for me. It's a little over engineered! (well built though!)


Piano surround removed, by pulling up from the ashtray end.


Next pull down the gearknob sleeve.

To remove the knob, pull the button all the way out and pull with all your might, try not to smack yourself in the face when it shoots off!


Then use a small screwdriver to push in 2 black tabs on each side, and ease off the chrome surround.


Which leaves you with this. The lights.


This unplugs from the middle right, by pulling out the cable connector from underneath.


Here's the plug


Then remove the gear "runner" cover by pulling 2 tags at the front and rear and pulling towards you and up gently.


Then re-fit the new surround. This was alot easier then taking it out!


With lights on! Much nicer in my opinion, I may do the S3 knob if I can get one cheap enough!


That's where the cars at, at the moment....

More to come.......thanks for looking

Comments welcome


-------------------------------------------------------------------------------------------------------------------------
 
Last edited:
  • Like
Reactions: MrWhItEwOlF and MorkC68
I cannot believe how much better the car is now looking :D Great Job mate. I'll be looking to get one soon, maybe not a DSG one but still a 3.2 :). I'll be messaging you for tips soon, your cleaning technique is amazing, good luck for the future and keep us updated.
 
  • Like
Reactions: Audi-Rog
Look very good mate . How are you finding the K&N filter ? I was looking at getting a Piper 1 for mine as im sure there not oiled like the K&N
 
  • Like
Reactions: Audi-Rog
I cannot believe how much better the car is now looking :D Great Job mate. I'll be looking to get one soon, maybe not a DSG one but still a 3.2 :). I'll be messaging you for tips soon, your cleaning technique is amazing, good luck for the future and keep us updated.

Thanks Luke, I will be adding things as I go along :)

I'll be quite happy to give you any cleaning tips and techniques you may need mate :thumbsup:

I've really only touched the surface of the exterior restoration. I'll be giving it a full correction detail, when the weather picks up and the wife lets me :laugh:

I may have a go at refurbing the alloys too....we'll see!


Rog
 
Last edited:
Look very good mate . How are you finding the K&N filter ? I was looking at getting a Piper 1 for mine as im sure there not oiled like the K&N

Hi Taroni

Cheers for the compliment :)

I've never had an issue with a K&N filter and I've used them on many a car! As long as you clean the MAF sensor every now and then you're fine.

I find they help the throttle response, increase the exhaust note and they last forever (almost!)

Rog
 
Nice progress mate. Subscribing to this thread.
2 months ago I got a 3.2 manual 04 plate 66k miles (with loads of optional extras), and have similar plans to you, but I cannot be ***** to do anything till the weather picks up abit. All I did since getting it was engine Oil & filter & Haldex Oil & Filter. Next I wanna to the Chain rails and tensioners for peace of mind when I get the time.

What other plans have you got for it?
 
  • Like
Reactions: Audi-Rog
Nice progress mate. Subscribing to this thread.
2 months ago I got a 3.2 manual 04 plate 66k miles (with loads of optional extras), and have similar plans to you, but I cannot be ***** to do anything till the weather picks up abit. All I did since getting it was engine Oil & filter & Haldex Oil & Filter. Next I wanna to the Chain rails and tensioners for peace of mind when I get the time.

What other plans have you got for it?

Cheers mate.

I've had a bit of practice with a previous A3, so some of the upgrades I've done before, or at least researched them. So it hasn't taken me long to do some of the mods.

I'm still learning as I go, for example the install of the Symphony II+, which wasn't too bad, once I understood the wiring. It's very satisfying to accomplish some of these mods, it does make a nice difference to the look and feel of the car.

It's had alot of mechanical work done in it's history, so I don't have to worry about those things for a little while. So, it gives me a chance to concentrate on the superficial stuff! Which is nice.

Other plans....., votex lip will be added, maybe new OEM alloys and I'm on the lookout for an S3 or Votex rear valance (maybe?). I'll continue to upgrade the interior with newer parts. These will all be, as and when I can. (And the wife will allow! ha ha)

The main plan though, is to make it look as good as new!
 
Nice work. Really Interested to see wat you do to the exterior, as mine has a few marks and swirls that I want to get out.
 
  • Like
Reactions: Audi-Rog
Sounds good. I am lucky as to have most of the optional extra, and interior is in really good nick, you wouldn't say the car is 10 yrs old.
The paint needs abit of atention, and it'll get a full detail when weather allows.
Has yours had the chain sorted? Mine has no signs of it, but reading on A3Quattro.de, a technical analysis proved that VR6's on long life service are the ones prone to chain failure, which happens due to worn down rails(they are plastic). Mine was mostly on long life all of its 66k miles life, so I'll be doing the rails and tensioners when time allows.

I haven't got too many extras, but I'm not too bothered, it has enough for me. There's less to go wrong! The interior is great quality, so it doesn't age too bad, does it. It doesn't take too much detailing either, to make it look new again.

I would have thought that with only 66K on the clock, your chain and tensioners would be sound. You could have them inspected first to see if they are worn? They should last the lifetime of the engine. If you maintain the engine properly that is. Personally, I don't spend money unless I have to, but that's just me!

I will change the oil every year in my ownership. I don't do any mileage now anyway, as I have a works van. The chains on mine haven't been changed to my knowledge, there's no record of it. Although, the engine runs and sounds superb. But if I see or hear any symptoms of worn chains, I'll have them sorted. I tend not to read too many forum horror stories these days, as you tend to get paranoid!

Do you detail your car yourself?
 
Thats true, but done research on the car before buying it.
Quite a few 3.2s popped their chains in pre 2006 A3s and Golf R32s (BDB and BUB engine codes mostly).
I like to know what problems to expect with any car I own, especially since a dealer would charge 2k-4k(depending how many valves are bent) to rectify.
 
  • Like
Reactions: Audi-Rog
As I have been looking into these a lot lately and was wondering what you guys paid for your just go have something to go off especially omblad0n as I will be looking something around that year an mileage hopefully a bit lower thanks :)
 
Thats true, but done research on the car before buying it.
Quite a few 3.2s popped their chains in pre 2006 A3s and Golf R32s (BDB and BUB engine codes mostly).
I like to know what problems to expect with any car I own, especially since a dealer would charge 2k-4k(depending how many valves are bent) to rectify.

I did the same research before, i bought my 2.0 tfsi, as originally I wanted a 3.2. But after reading all the issues with the 3.2, I went for the tfsi. Then, I had one of the rarest issues with the tfsi and the oil pump chain failed! Go figure! Got it fixed and it was as good as new, but I couldn't have prevented it.

This time, I've been more relaxed about it, my 3.2 has had an audi health check all the way through its history, so I'm not too worried. But in fairness your approach is the right way to go. :thumbsup:
 
As I have been looking into these a lot lately and was wondering what you guys paid for your just go have something to go off especially omblad0n as I will be looking something around that year an mileage hopefully a bit lower thanks :)


I'm not going to divulge how much I paid :ninja:

But with a good low mileage, high spec example, I would expect you need to pay over £5K - £6K.

There are some bargains out there though, as people want more effecient cars. Keep looking you may get lucky!
 
Last edited:
As I have been looking into these a lot lately and was wondering what you guys paid for your just go have something to go off especially omblad0n as I will be looking something around that year an mileage hopefully a bit lower thanks :)

Il do you a deal on mine. Virtually everything in the engine bay is new. Including the chains.
 
Love all the interior changes you're doing! How hard was the DSG surround?
 
  • Like
Reactions: Audi-Rog
Amazing what you can do with a good clean some well thought mods.
you've done that car proud. Good job
 
Thanks Andy :)

I know, it doesn't take an awful lot to transform the car really, does it.

That is my main aim, just to bring it back to life, show it's been cared for and give it the respect it deserves! Afterall it was a £26K+ car new!

The previous owner had neglected the look of the car, but did add some upgraded brakes and serviced it etc. So he did look after it, but you wouldn't know it by looking at it.

I can't drive around in tired looking premium motor, I wouldn't feel good at all! Afterall, all it takes is a bit of effort, a little know how and a modest amount of money, to turn the clock back a bit. This forum is a godsend for the knowledge too, which has helped me massively over the years.

I'm also trying to do these things for the least amount of money possible, as I get a kick out of finding bargains and making the most out of them.

I'll keep searching for various bits on eBay etc, for the next mod/upgrade.....

I'll keep you all posted..

:icon_thumright:


BTW If you are on FB you can see the full progress pictures by following this link:

https://www.facebook.com/FreemanDet...10151981583166672.1073741843.522406671&type=3
 
Last edited:
  • Like
Reactions: MrWhItEwOlF
*update*

The aftermarket roof spoiler wasn't doing it for me, it wasn't fitted very well anyway, so it had to go!

DSCF8400

So the spoiler just pulled off, easy! Leaving the sad tape, that was trying to hold it on!

DSCF9131

Then on, with an original S-line roof spoiler from eBay, for £60 delivered. It's the same colour code as my car too, so I don't even need to have it sprayed. Awesome!

This is a test fit at the moment, but it will be stuck down properly later.

DSCF9133

Looks so much nicer and it was cheap as..

DSCF9134

More to come...slight change of plan on the DSG surround...

:salute:
 
Last edited:
*update*

I decided I needed the S3 gearknob in my life, as the standard style ones weren't doing for me, so I grabbed myself a used bargain on eBay. The S3 gear knob bad piano black surround.

It took me two attempts at twisting the gear linkage shaft, to get it right. After I damaged the springs the gearknob button, by over stretching them trying put the gearknob on the shaft! I then had to put the old one back on! :keule:

But, after a mountain of faffing, i.e taking apart the whole gear knob, to repair it, and heating and twisting the gear linkage shaft, (again!!) burning my fingers and getting angry! I finally fitted the S3 dsg gearknob :yahoo:

Image

I must say say I love the way it looks and feels. It does make the car feel more sporty somehow. Anywho...

I've now bought the ashtray delete, as the existing ashtray doesn't match the S3 surround. So I'll be fitting that when it arrives.

Another update will putting the front Votex lip on the bumper. It is at bodyshop as we speak...


:thumbsup:
 
Last edited:
  • Like
Reactions: MattKeating
mate that an amazing job on cleaning the car ,, well done it looks awesome
 
This is ****** brilliant. I am subscribing!
 
  • Like
Reactions: Audi-Rog
*Update*

I've had a slightly mad moment, after looking for months, I took the plunge, whilst on eBay and bought some Alloys! I had a nice long trip down to Bath to collect them. So, took the wife and kids and made a day of it! (Kept her reasonably happy!)

Anyway, I haven't mucked about, cleaned them up a bit last night and fitted them at 7.30am this morning!

Here are a few pics :cool:

The alloys I've gone for are genuine BBS Calito 18" split rims, (with Goodyear F1 tyres all round). These are one of my most favourite alloys for the A3, (for this year model). They're a pretty clean, they do need some work on the polished lip and inner rims (worming and laquer lifting), but the centres are in fantastic nick!

DSCF9274

Fitting the alloys.

DSCF9289

Old vs New!

DSCF9290

One side done.

DSCF9292

RS6's, still like them alot (Dumb & Dumber style)

DSCF9295

But, I like these alot better, BBS Calito's:yes:

DSCF9296

DSCF9298

DSCF9293

(The suspension is still settling, after fitting, in the pics above, it's not sitting that high really...)

Took it out for a spin to check for any balancing issues and all is well!

I think it makes the car look a bit more unique, as you don't see these alloys about too much. I must say, they look better than I imagined.....:happy:

What do you guys think?
 
Looking really good, I like the new wheels a lot.

Does ever so slightly look like it's on stilts currently haha, although as the suspension settles it'll look even better.
 
  • Like
Reactions: Audi-Rog
*update*

Votex Lip Installed. This my debut at doing this, but after some good advice from the Merlin Bodycraft, bodyshop guys, I was feeling brave enough to have ago myself. Looks easy, but it aint!

First, I took the bumper off to make it easier for me to seal it down on my own.

DSCF9377

First thing was to clean up the bottom of the bumper, then scotchbrite the area to be glued, to give a better key for the sealant.

DSCF9379

I used 3M window bonding sealant (given to me by Merlin Bodycraft), which once it goes off is bulletproof!! And after a mountain of clean up with Tardis and many adjustments. It looked like this. Taped down at the edge to help it cure in the right place.

DSCF9385

I left it to to cure for a good 4-5 hrs.

DSCF9380

Then back on with the bumper and it's complete!

DSCF9388

Here are some after pics.

DSCF9389

DSCF9390

DSCF9394

DSCF9391

I'm very happy with the result, I think it looks great. Makes the car look more aggressive and desirable (to me anyway!). I think it finishes off the look of the car nicely, without going down the S3 wannabe route (not that there's anything wrong with that!), just not for me.

Next to come......enhancement detail to turn back the clock a little.

Cheers for looking

:icon_thumright:
 
Nice mate, looking good.

Definitely gives it a more aggressive look on the front end doesn't it!
 
This is probably the last update for this progress thread, as I'm pretty much there, in terms of where I want the car to be :yes:

Mechanical updates: The car has had new tyres fitted all round (since these pics) and an interim service, so the car is running beautifully and smooth!

The main update:

I had a small window of opportunity (around 5 hrs), a couple of weeks ago, to give the VR6's bodywork an enhancement detail and soften down or remove some of the larger, deeper scratches and marks around the car. It's not 100% with the time allowed, but it's more than good enough finish, as a daily driver.

Here are a few progress pics.

Before:

DSCI0036

The car had undergone the usual wheel cleaning processes and pre-washes, before the 2BM safe wash.

DSCI0040

I had already clayed and de-contaminated the bodywork previously, so there was no need to repeat that.

Here are some of the defects around the car, that my aim was to remove or reduce.

DSCI0044

DSCI0031

DSCI0032

DSCI0046

The plastics and rubber sills were taped up for protection from the rotary polisher. Then it was treated to a single stage polish using Scholls Concepts S17+ using a Flexipads waffle polishing pad.

DSCI0052

DSCI0054

Bad scratch after polishing, looking a bit better.

DSCI0057

The plastics,tyres and rubbers seals were then dressed.

DSCI0088

The polished finish was then sealed with Auto Finness's Tough Coat, leaving this stunning deep gloss and shine.

DSCI0056

Wheels sealed and tyres dressed.

DSCI0066

The finished result!

DSCF9474

DSCF9468

So here's a reminder of where the car was, when I first bought it. A rather tired and mis-treated premium motor! Waiting for some love and attention!

DSCF8841

This is after a few quid spent, some subtle OEM mods and more importantly, many hours of effort. And after all that, my A3 3.2 VR6 S-line, has been transformed back to somewhere near it's former glory. Hopefully, I've given it a good few more years yet, of tearing up the B roads, which makes all the effort worth while, for me anyway.

DSCF9463

I will continue to work on some other little marks around the car (touch in stone chips etc),coz as we all know, all car care is on-going. But that's it for this thread!

Thankyou for taking the time to read and comment on my thread, I really do appreciate it !

Rog :thumbsup:
 
Last edited:
Absolutely fantastic. Really enjoyed reading all this.
 
  • Like
Reactions: Audi-Rog
*Little update*

It been a while since I updated this thread. So here you go!

The car's MOT is due soon and the front brakes were looking like they needed changing. the pads were very low and the discs were lipped too.

So after seaching eBay for some bargains, I came across these guys, MTEC Brakes .

I managed to get some performance (drilled and grooved) discs and Mintex pads for only £127! (345MM) Which is amazing value. Great quality too, very well made.

So, I had some spare time to fit them, here are a few pics of how I did them. It may be of use to sombody.....who knows :)

DSCF3313

Before. Drivers side
DSCF3293

Old disc condition. Not too good
DSCF3294

New 345MM MTEC Brakes Performance discs, drilled and grooved too 8)
DSCF3295

First up, clean the new disc with brake cleaner to remove any transit oils and contaminants.
DSCF3296

Then loosen the wheel bolts and then jack up and place on an axel stand. Then remove alloy.
DSCF3297

This is what needs replacing, some badly worn discs and pads!
DSCF3298

Not much meat on them pads! Plus very corroded discs!
DSCF3299

To remove the disc, you first need to remove the caliper. To do this you remove the retainer clip.
DSCF3300

Leaving this
DSCF3301

Then very carefully remove this disc hub screw.. These can chew up very easily if you are not carefull!
DSCF3302

Then behind the caliper there are 4 bolts, 2 are the sliders and 2 hold the piston onto the front of the caliper. These are pre-sprayed with WD40, then some brut force and you are left with this!
DSCF3303

The caliper carrier is next to be removed. This is held on with 2 even bigger bolts, happily these came of without any dramas!
DSCF3304

The old disc off.
DSCF3305

The old pads, very low indeed.
DSCF3310

Then fitting the new discs and pads. All the bolts were treated with threadlock to stop them undoing them selves!

All the pads were copper greased, as were the caliper sliders and hubs, before re-fitting.
DSCF3306

Then re-fitted, the reversal of removing!
DSCF3307

Much better!
DSCF3308

New Mintex Pads.
DSCF3309

Drivers side complete.
DSCF3311


Close up!
DSCF3312

Thanks for looking.

Rog
 
Last edited:
Another "little" update!

It seems I can't leave my car alone! I'm always looking out for original parts for my A3. Then I found, via eBay, the holy grail of parts (IMO)....the whole Votex body kit, made for the Audi A3 early Sport models. It came off the same model and year car as mine too.

So, off to Bath to collect them! (2.5hrs away!) Why are all the parts miles away? My Alloys were from there too :rolleyes:

The seller had the front, rear and sides parts of the kit. But I was after only the rear and sides, (as I have the front lip already installed). I managed to bag them for only £100! And I don't even need to paint them, as they are in Ebony Black anyway...winner!

These are the side skirts, which are like "hen's teeth!"...very rare to find.

DSCN0820

This is the rear valance, which I already removed from the rear bumber.
This part is like Marmite...you either love it or hate it....I really like it! (And I like Marmite too so...)

DSCN0823

Before attempting to fit the rear valance, it needed a good clean up.

DSCN0824

It was attacked with APC and a detailing brush, then rinsed off.

DSCN0825

This area needs a little paint.

DSCN0826

First initial painting, just to disguise it a little, I may get it re-sprayed or smart repaired, we'll see how it comes out.

DSCN0827

Ok, so like a man posessed I set about removing the existing valance.
Being clever (or trying to be), I decided I would remove it without taking off the rear bumper....easy I thought...wrong!!
The 2 screws on the inside of each corner of the valance, proved a nightmare to get at and unscrew, without risking rounding them off.

DSCF3673

This was the mess, after deciding I will have to remove the bumper. I stripped the inside to get access. Then changed my mind and percevered with the original plan. After 2.5hrs!! It came off.....at last!

P1040112

The new Votex valance ready to go on.

P1040115

Here is the after pic, please excuse the filthy rear end... Ooer Mrs!

P1040121

Following on from installing the Votex rear valance, it was time to fit the Votex side skirts!

DSCN0932

Warming up in the bucket, the 3M Window bonding sealant (from Merlin Bodycraft in Brackley), as it is a nightmare to use if not soften up. When this cures the skirts won't budge!

DSCN0933

First up to prep the skirts with APC. And all the old sealant removed.

DSCN0934

Before skirt install.

DSCN0938

Everything I need to complete the job. I know this will be messy from putting on the front lip last year!

DSCN0941

The next part is to remove the existing side trim

DSCN0940

Small part at the front removed. It just pulls off, easy!

DSCN0942

Then cleaned up, all old glue residue removed.

DSCN0943

The 3 quarter panel trim, again pulls off, only kept on with sealant.

DSCN0944

Then sized up for test fit.

DSCN0945

I had to cut a piece of plastic to cover over the hole. The new kit would come with a sticker to cover this.

DSCN0946


Then apply the 3M sealant.

DSCN0947


I used tape to keep the skirt in place while the sealant cured.

DSCN0954


And with a little help from my son, the skirts are fitted. This is after the clean up with Tardis.

DSCN0955

So there you have it! One rare Votex body kit fitted by me, all for around £360, including the roof spoiler. Looks factory fitted too, as this was all optional for this year car. Which is why I like it ;)

Here are some after pics. Please excuse the filthy bodywork!

DSCN0957

DSCN0959

DSCN0960

DSCN0963

:cool::rock::blackrs4::thumbs up:
 

Attachments

  • DSCN0952.JPG
    DSCN0952.JPG
    8.5 MB · Views: 249
  • Like
Reactions: enc and manor13
*Another little update*

I managed to find a front ambient interior light fitting, for a bargain price of £25! They seem to have gone up alot since buying the same one for my 2.0T a few years ago, which only cost me £15! Some places asking over £100 :ohmy:

Here are a few pics of before, during and after.

DSCN1121 web

Replacement with map lights and ambient LEDs.

DSCN1122 web

Covers removed.

DSCN1123 web

Undo these screws.

DSCN1126 web

Plug existing wire connectors back in and re-fit.

DSCN1127 web

All back together.

DSCN1128 web

Check ambient lights are all working, which they are!

DSCN1131 web
There you go sorted...

DSCN1133 web

Cheers

Rog
 

Attachments

  • DSCN1133 web.jpg
    DSCN1133 web.jpg
    293.4 KB · Views: 251
Last edited:
Loving this build thread. Also had to add you on Facebook hope you don't mind Im really interested in detailing and love to learn new stuff and read about it.
 
  • Like
Reactions: Audi-Rog
love this thread Rog... my kind of idea to doing it :cool:
 
  • Like
Reactions: Audi-Rog