xnox202
Registered User
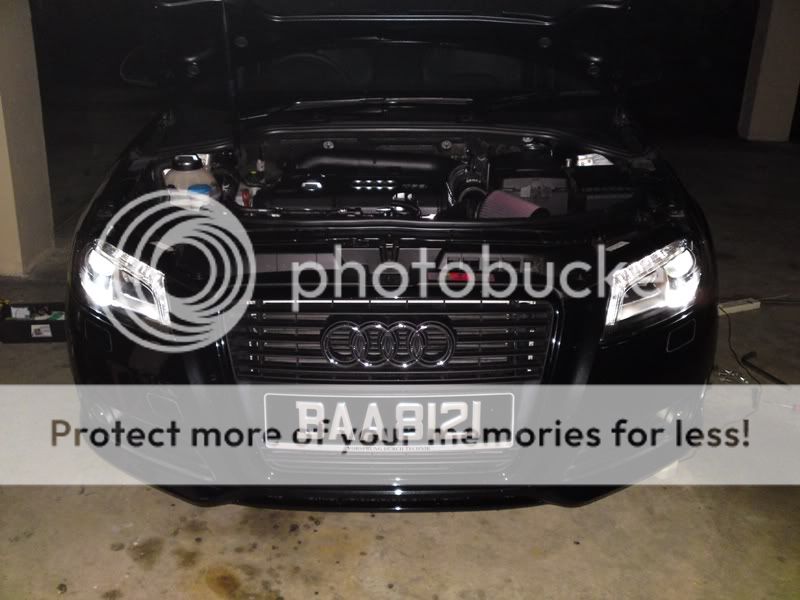
Decided to do a little DIY on how to change the HID Bulbs with DRL Bi-Xenon Headlamps as it was nowhere to be found when I did this.
So what I found out is that you don't have to remove the front bumper in order to get access of the headlamp. It's a little hard though if you have big hands.
Disclaimer: I take no responsibility if in any case you cracked/damaged some parts while following the DIY. If you intend to watch a football or some hockey match in about an hour, then do not proceed with the installation. This DIY could vary from as short as 30 minutes up to 2 or even 3 hours if you don't know what you're doing.
This DIY only applies to Audi A3 Post-facelift with DRL Bi-Xenon Headlamps.
The bulb fitting for this type of headlamp is: D3S, with 4300k Color Temp (OEM Color).
------
So here goes:
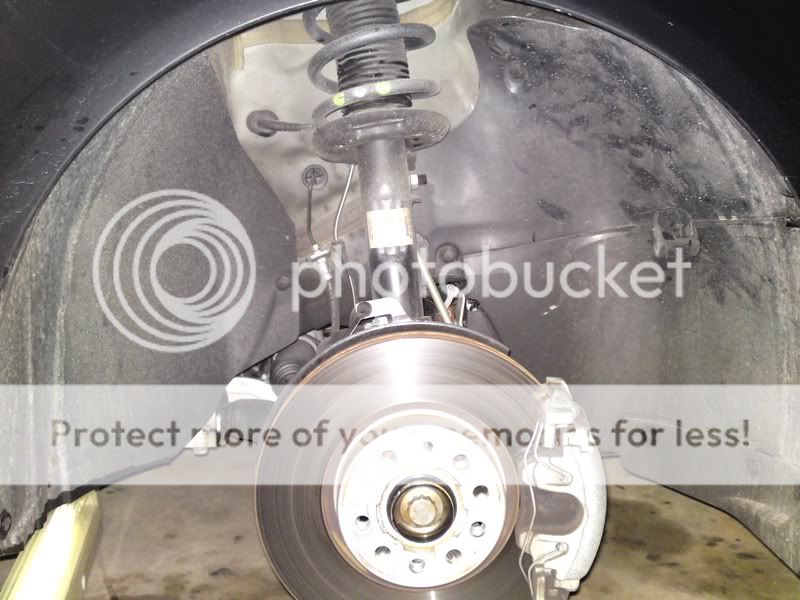
1st) Jack up the car and remove the front wheel to get access of the fender liner.
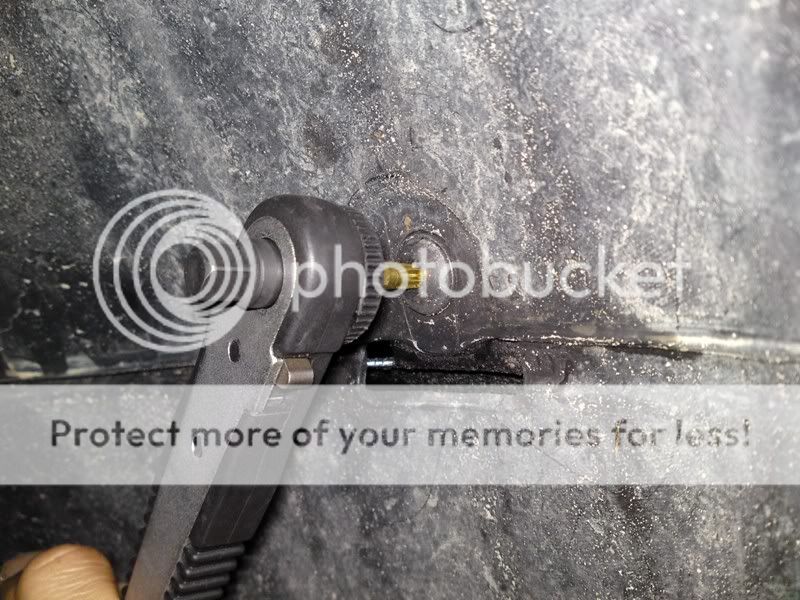
2) Take note of the screws/clips that needs to be removed.
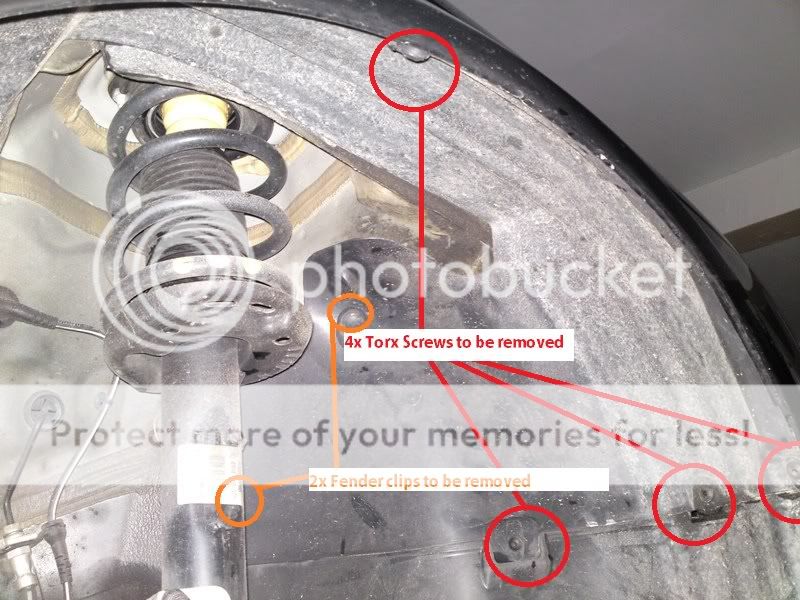
3) Get your handy toolbox bits to remove these.
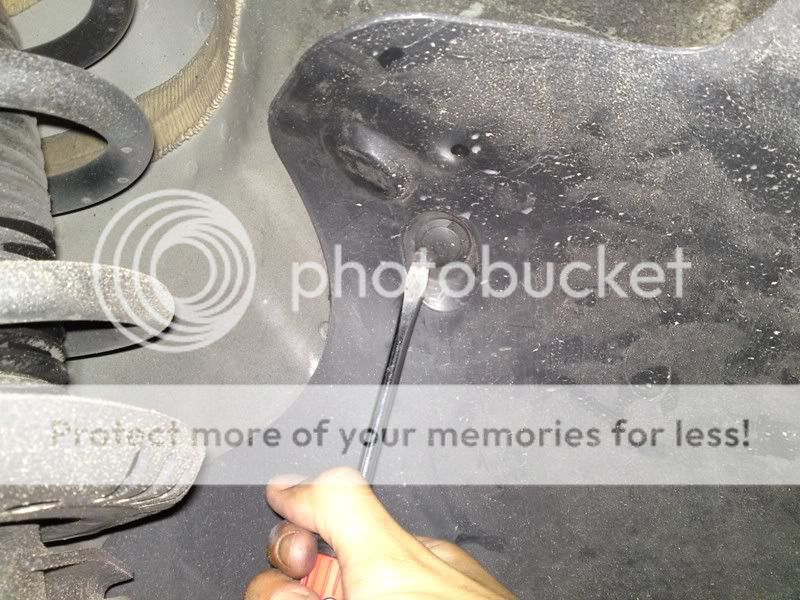
By now, you should be able to pull the fender liner back and reveal the rear recess of the headlamp.
4) Rear recess of headlamp.
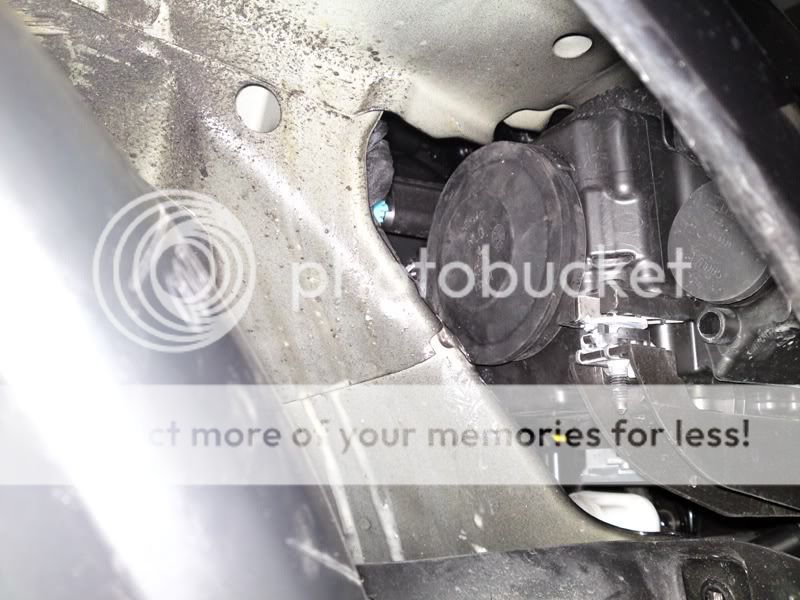
5) Remove rubber grommet. Just pull it off.

6) Remove the wire harness connected to it (Pinch).
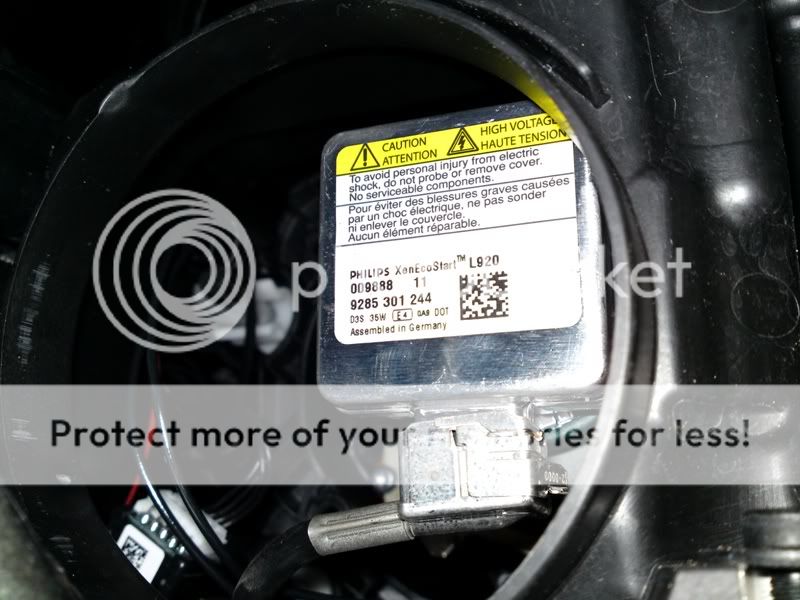
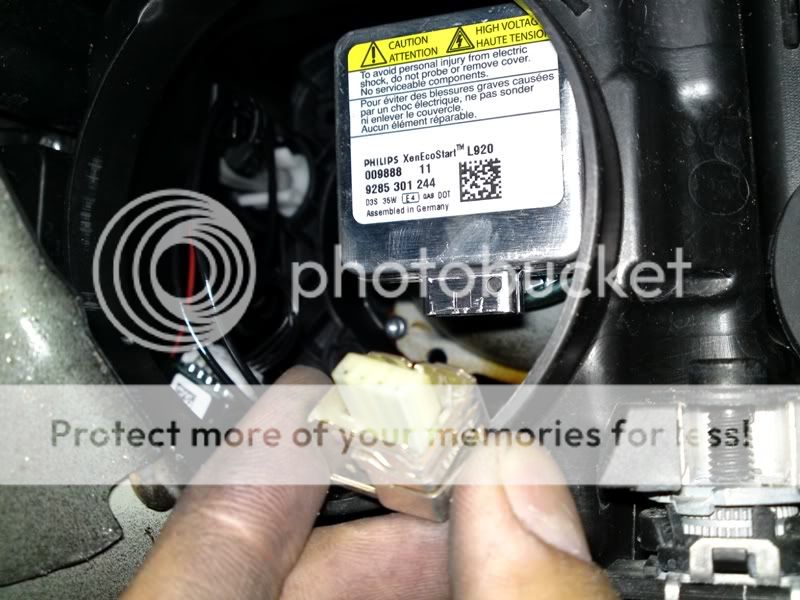
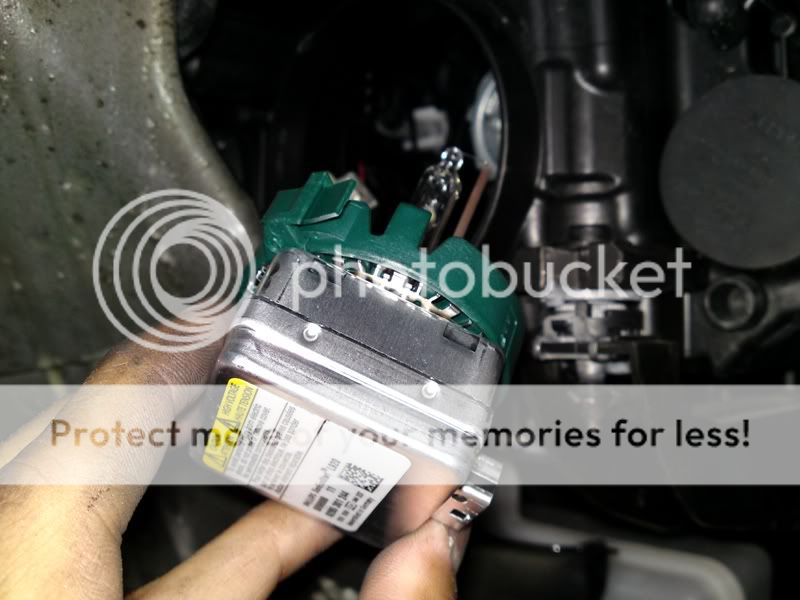
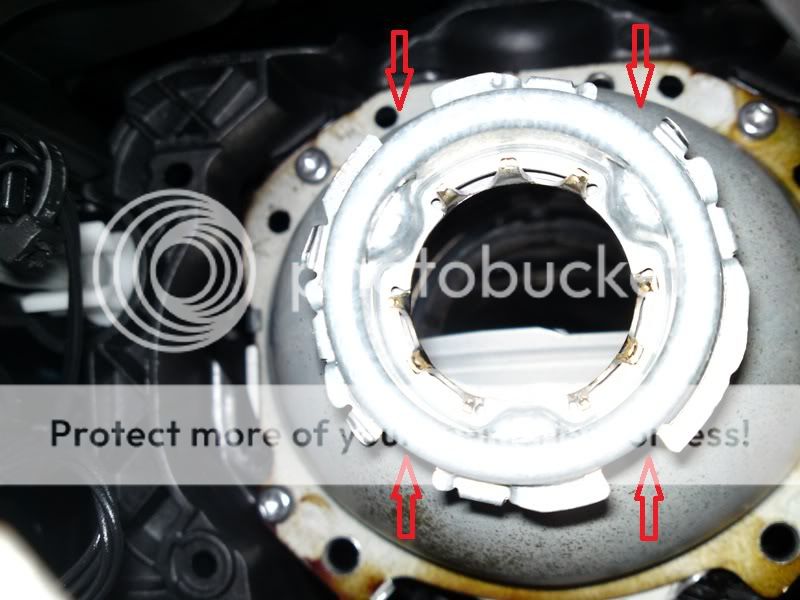
7) After removing it, turn the unit clockwise and carefully remove it.
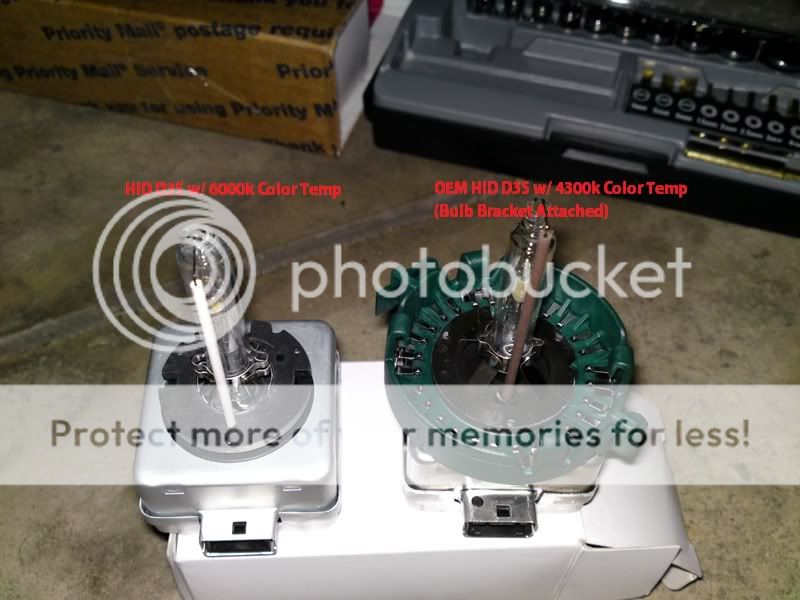
8) Comparing the bulbs.
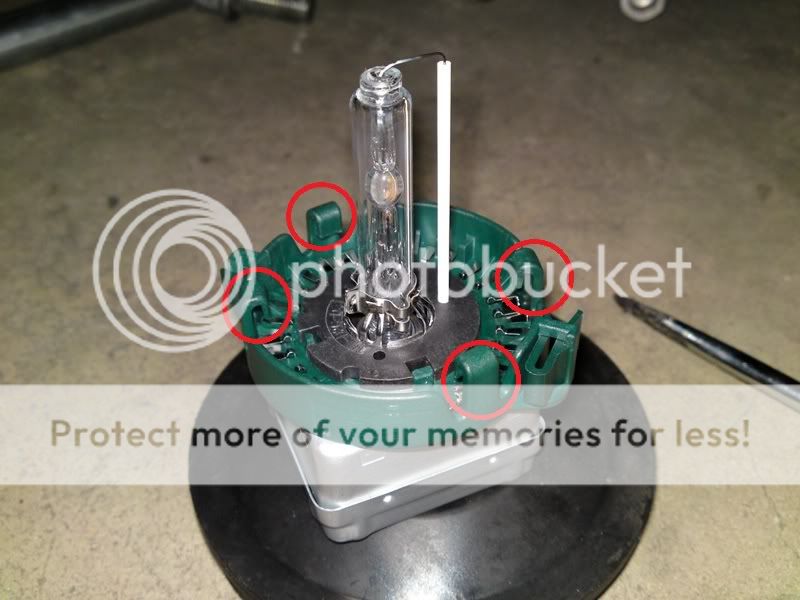
9) Now, remove the Bulb Holder from the OEM bulb to the new bulb. Make sure the markings are aligned.

10) Take note of these. You will need to align in order to attach back to the headlamp and secure it.
Putting things back is the reversal of removing the whole thing. It takes quite awhile to get the bulb back into the headlamp. This was the hardest part, and it took me about 30 minutes trying to figure it out.
Another alternative/easier way to put the bulb back into the housing is get the bulb and the bulb holder installed first without the silver box attached to it.
Now test run the bulb and see if it fires up. You're halfway through the conversion now!
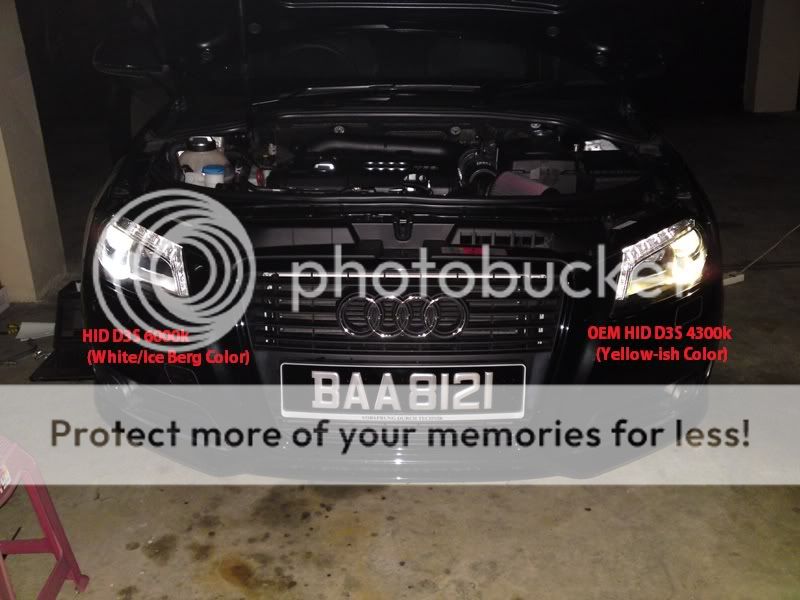
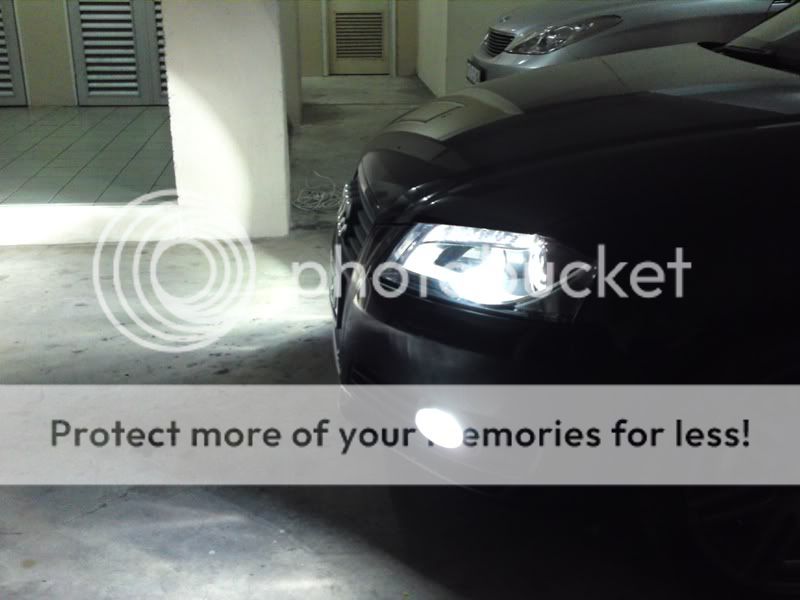
Test: Headlamp turned on with HID D3S 6000k Bulbs.
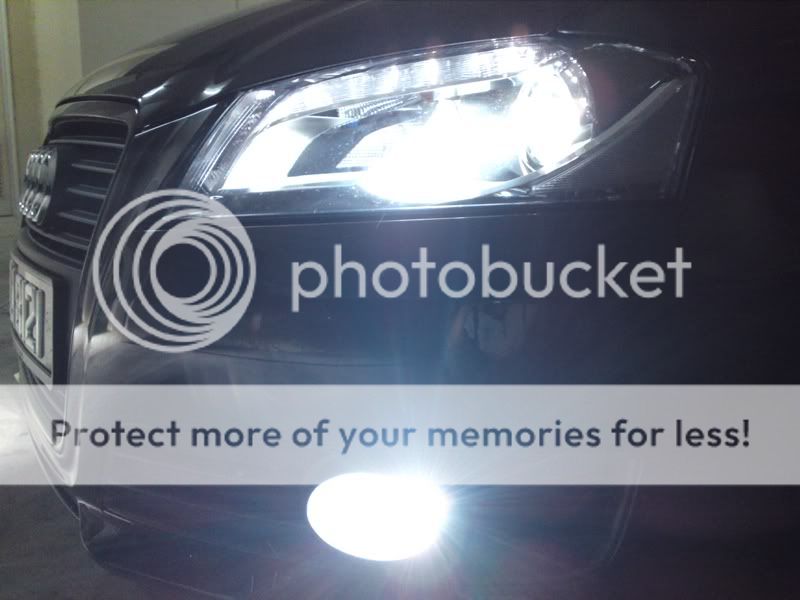
Test: Comparison with the OEM HID D3S 4300k Bulbs.

Side-by-side comparison.
As for the other side of the headlamp, it's pretty much similar to everything else you've done initially on the passenger side.
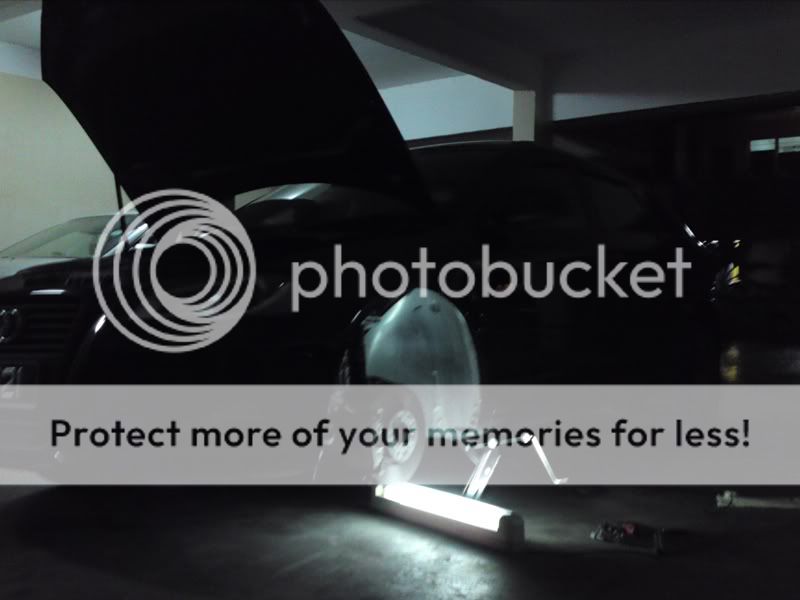
After the conversion, I had to realign my headlamps as it got aligned a little too high which glares oncoming traffic. The following picture was taken after I realigned my headlamps:

------
Here's my result of the whole conversion. I've also got a HID H11 6000k kit fitted in my fogs. It matches well in real life!
A must-do mod for those whose interested in doing this. Pretty much got my back sore after the whole ordeal but everything was worth it in the end.
So what I found out is that you don't have to remove the front bumper in order to get access of the headlamp. It's a little hard though if you have big hands.
Disclaimer: I take no responsibility if in any case you cracked/damaged some parts while following the DIY. If you intend to watch a football or some hockey match in about an hour, then do not proceed with the installation. This DIY could vary from as short as 30 minutes up to 2 or even 3 hours if you don't know what you're doing.
This DIY only applies to Audi A3 Post-facelift with DRL Bi-Xenon Headlamps.
The bulb fitting for this type of headlamp is: D3S, with 4300k Color Temp (OEM Color).
------
So here goes:
1st) Jack up the car and remove the front wheel to get access of the fender liner.
2) Take note of the screws/clips that needs to be removed.
3) Get your handy toolbox bits to remove these.
By now, you should be able to pull the fender liner back and reveal the rear recess of the headlamp.
4) Rear recess of headlamp.
5) Remove rubber grommet. Just pull it off.
6) Remove the wire harness connected to it (Pinch).
7) After removing it, turn the unit clockwise and carefully remove it.
8) Comparing the bulbs.
9) Now, remove the Bulb Holder from the OEM bulb to the new bulb. Make sure the markings are aligned.
10) Take note of these. You will need to align in order to attach back to the headlamp and secure it.
Putting things back is the reversal of removing the whole thing. It takes quite awhile to get the bulb back into the headlamp. This was the hardest part, and it took me about 30 minutes trying to figure it out.
Another alternative/easier way to put the bulb back into the housing is get the bulb and the bulb holder installed first without the silver box attached to it.
Now test run the bulb and see if it fires up. You're halfway through the conversion now!
Test: Headlamp turned on with HID D3S 6000k Bulbs.
Test: Comparison with the OEM HID D3S 4300k Bulbs.
Side-by-side comparison.
As for the other side of the headlamp, it's pretty much similar to everything else you've done initially on the passenger side.
After the conversion, I had to realign my headlamps as it got aligned a little too high which glares oncoming traffic. The following picture was taken after I realigned my headlamps:
------
Here's my result of the whole conversion. I've also got a HID H11 6000k kit fitted in my fogs. It matches well in real life!
A must-do mod for those whose interested in doing this. Pretty much got my back sore after the whole ordeal but everything was worth it in the end.