

You are using an out of date browser. It may not display this or other websites correctly.
You should upgrade or use an alternative browser.
You should upgrade or use an alternative browser.
- Joined
- Sep 14, 2008
- Messages
- 24,836
- Reaction score
- 6,078
- Points
- 113
- Location
- Wibbleton
- Website
- www.tuffty.co.uk
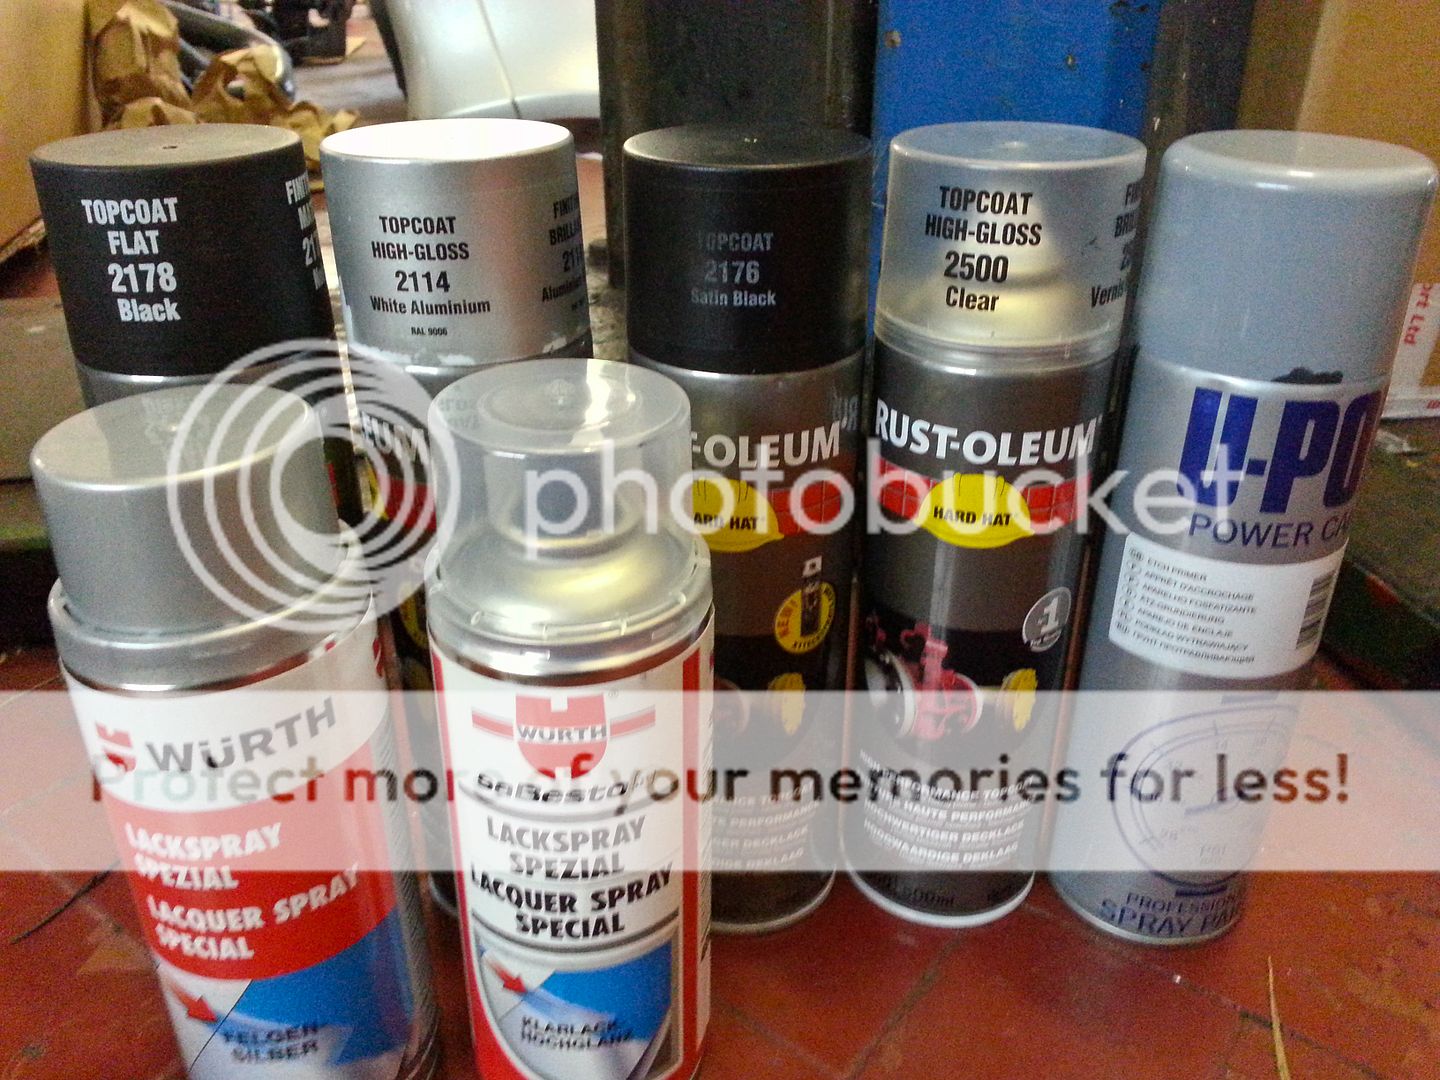
Where did you get your silver paint to tuffty, also isit out of a spray can?
I got the paint from various places, amazon, eBay and locally... yes, all from cans... here is the collection I am currently using...
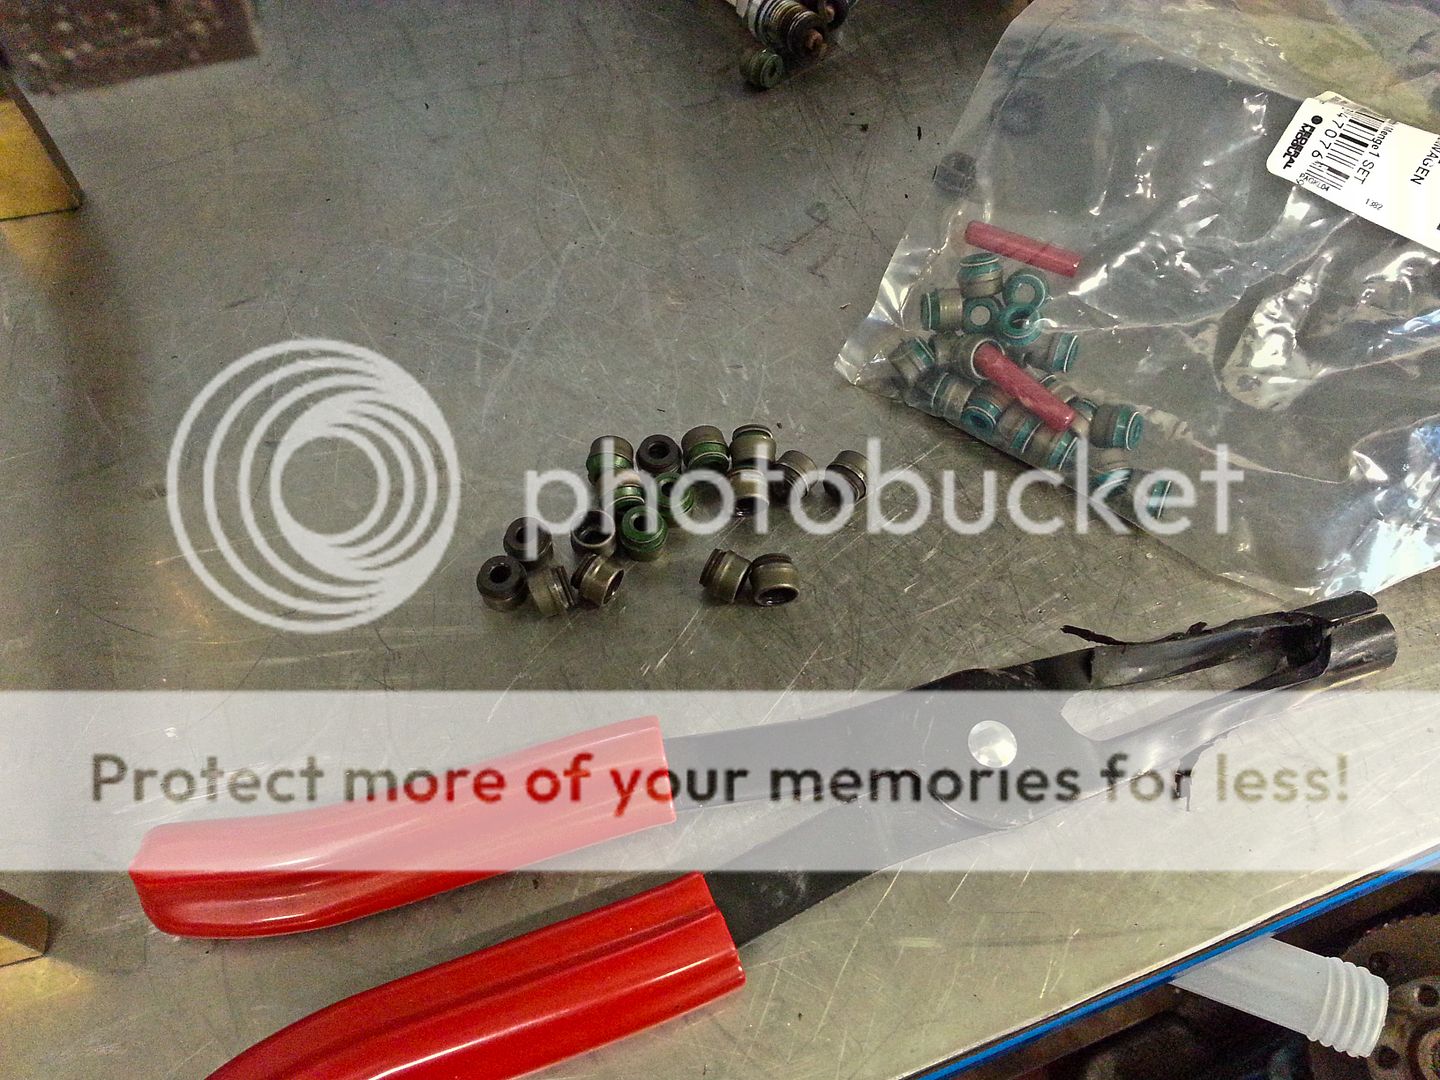
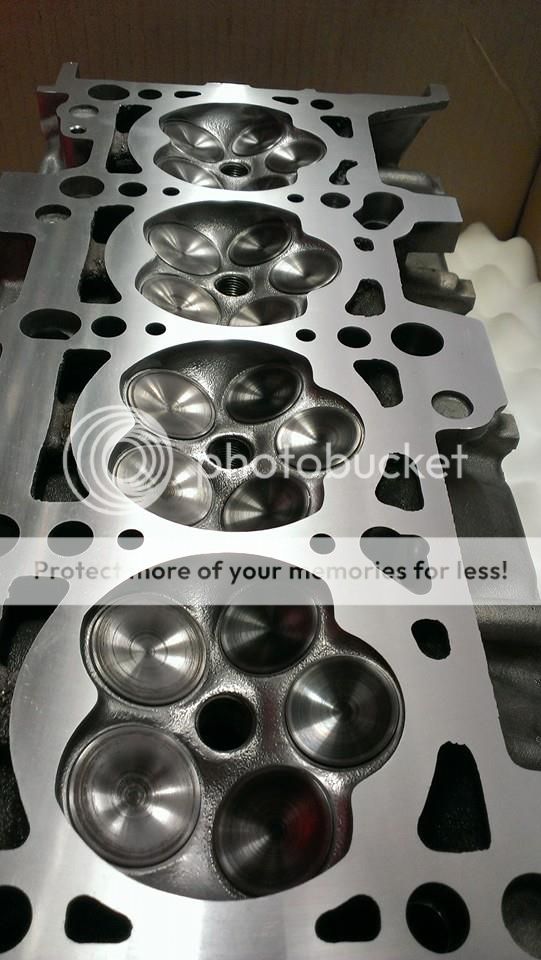
So... started by removing the old stem seals even though they had only done 5k miles or so...
...then set about lapping in the valves... all was going well until I inspected the seats after the second pass of fine cutting paste...
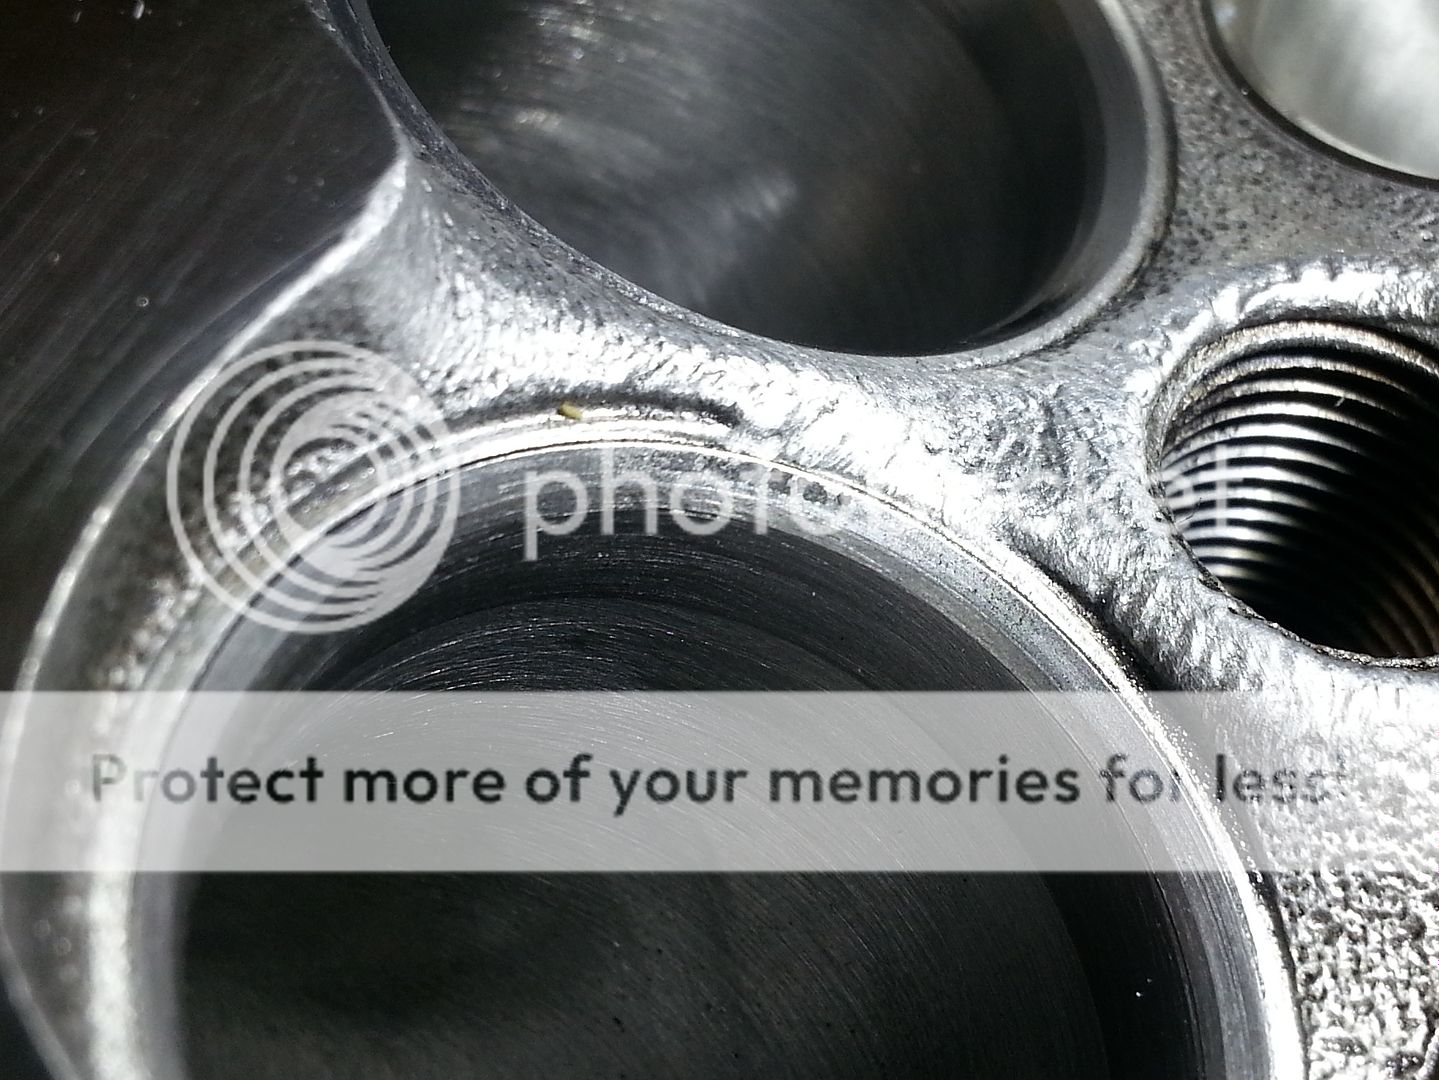
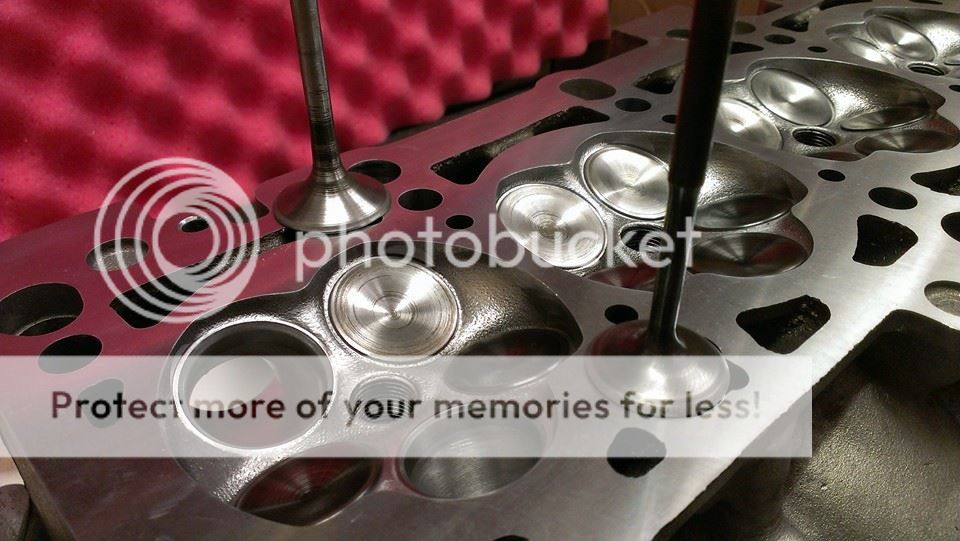
..damnit!!... seats looked pitted.. tried a couple of other valves and had a patch where it looked like the paste hadn't touched the seat... (dark patch in pic)

so, gave up on the exhausts and thought I would see how the inlets fared... not much better as it turns out...

...so I lubed up the valve stems and bunged them back in the head to drop off at the 'head' guy we use for doing guides etc to get the seats 'touched' by the cutter...
A little disappointing by at least I caught it now rather than have issues later... my fault as I didn't send the valves to Andrew with the head and I am sure he would have picked up on this... the seats looked ok until I started lapping the valves in... the grinding paste reveals everything lol...
So... to make me feel a bit better I painted something...
")


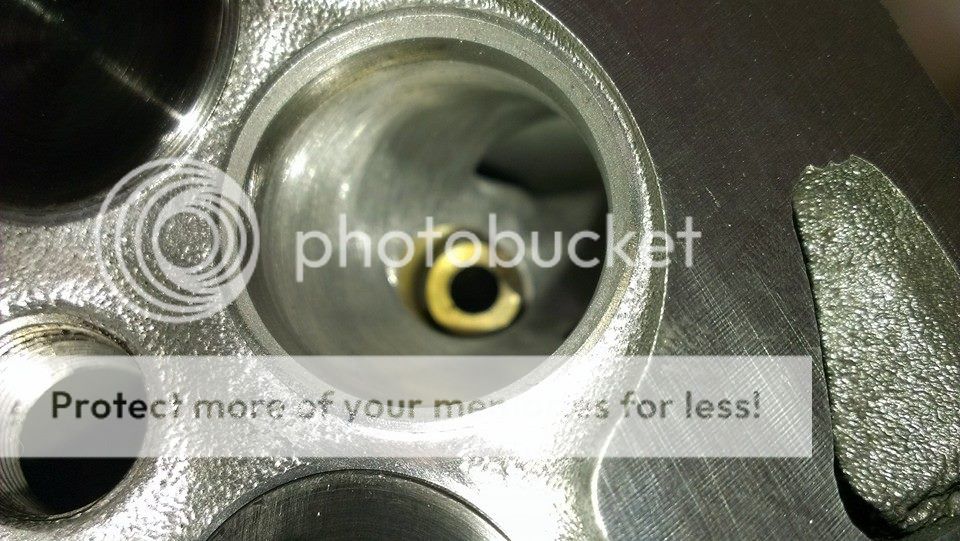
Thats the sump done so I figure I need to get that on really... but before I did that I wanted to convince myself my squirters were ok after Scullies had his little 'incident' with one... broke out the bore scope and had a look...
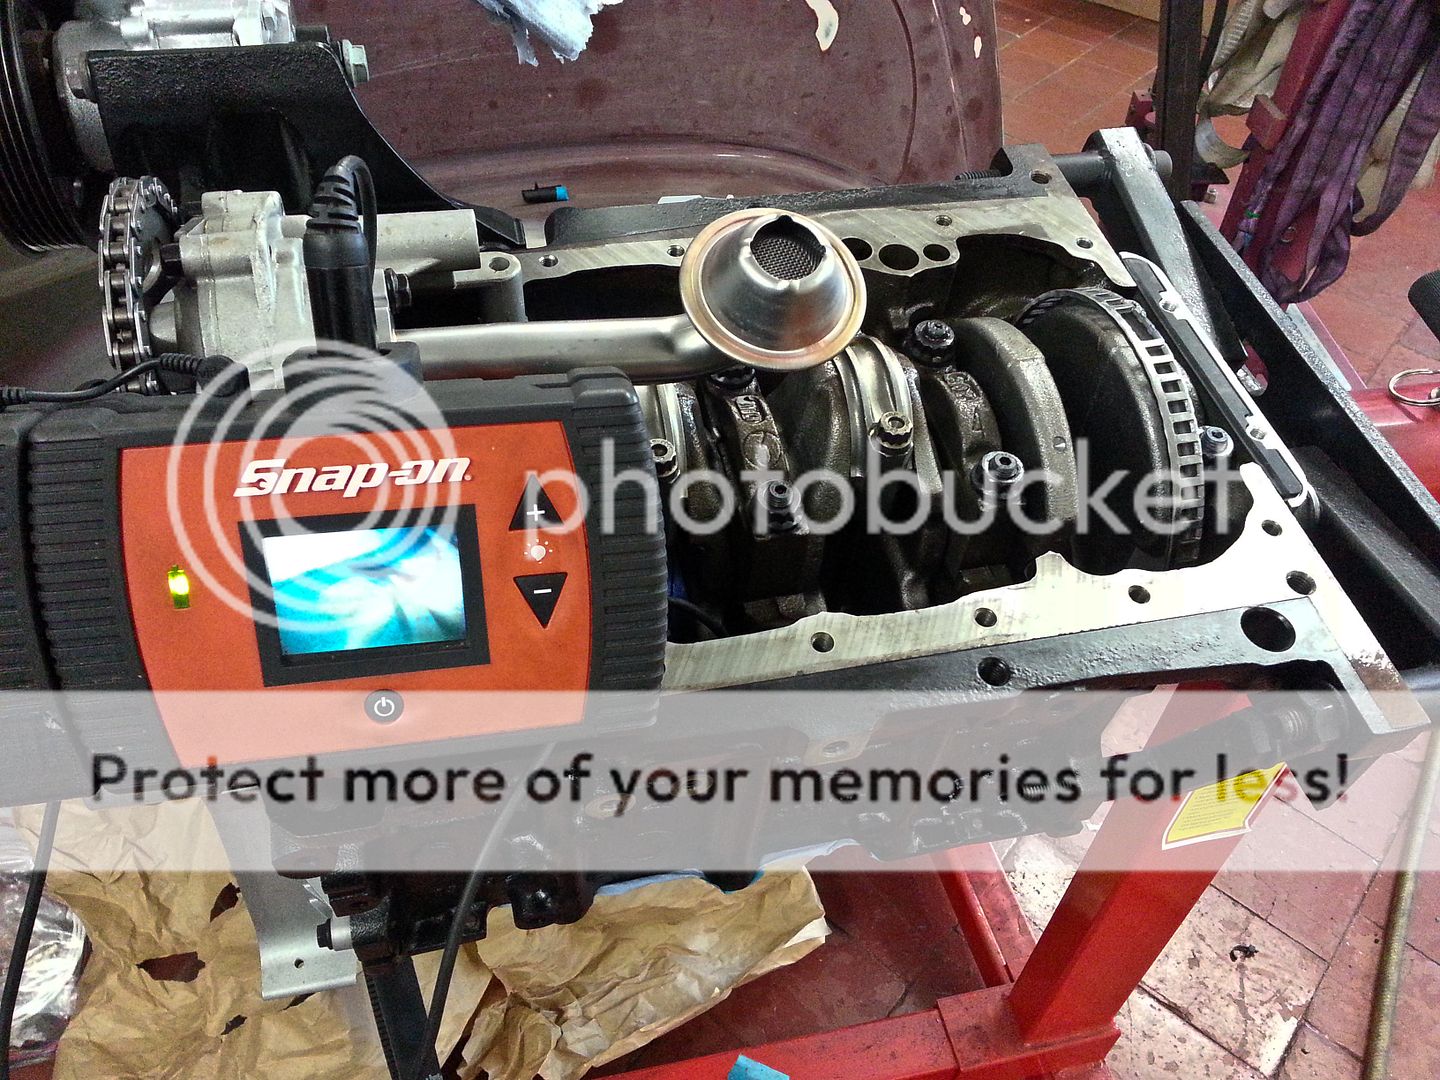
...looks like it should be ok...

So feeling a bit better about that I wanged the sump on...
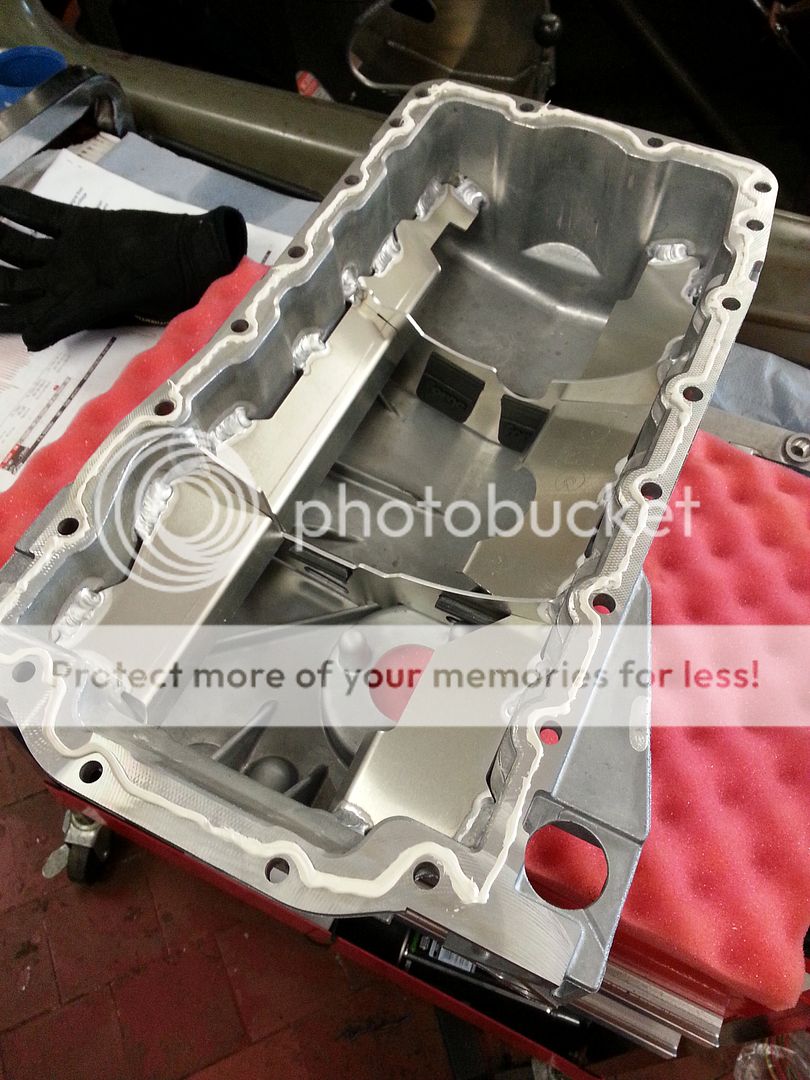
...again all was going well until....
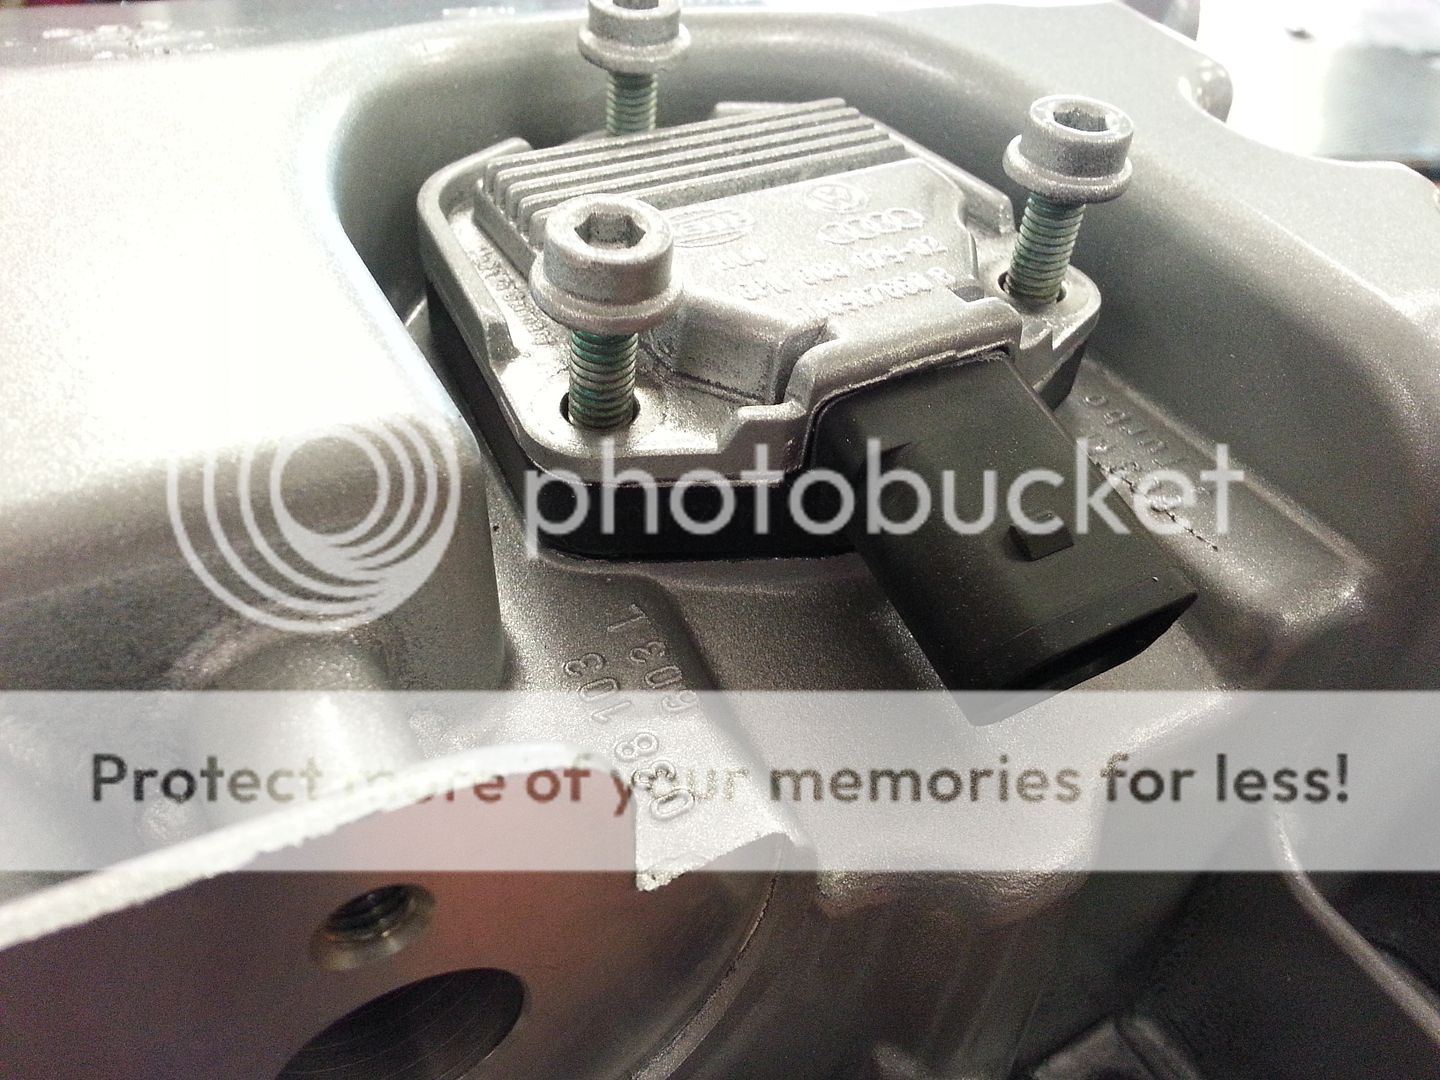
...hummm... thats not supposed to happen!... the problem here was I had used the wrong windage tray!! my old one went off with the bottom end when I sold it... the tray is different depending if you have an oil sensor or not... I picked one up out of Bill's parts bin not realising... the tray at the bottom is the correct one...
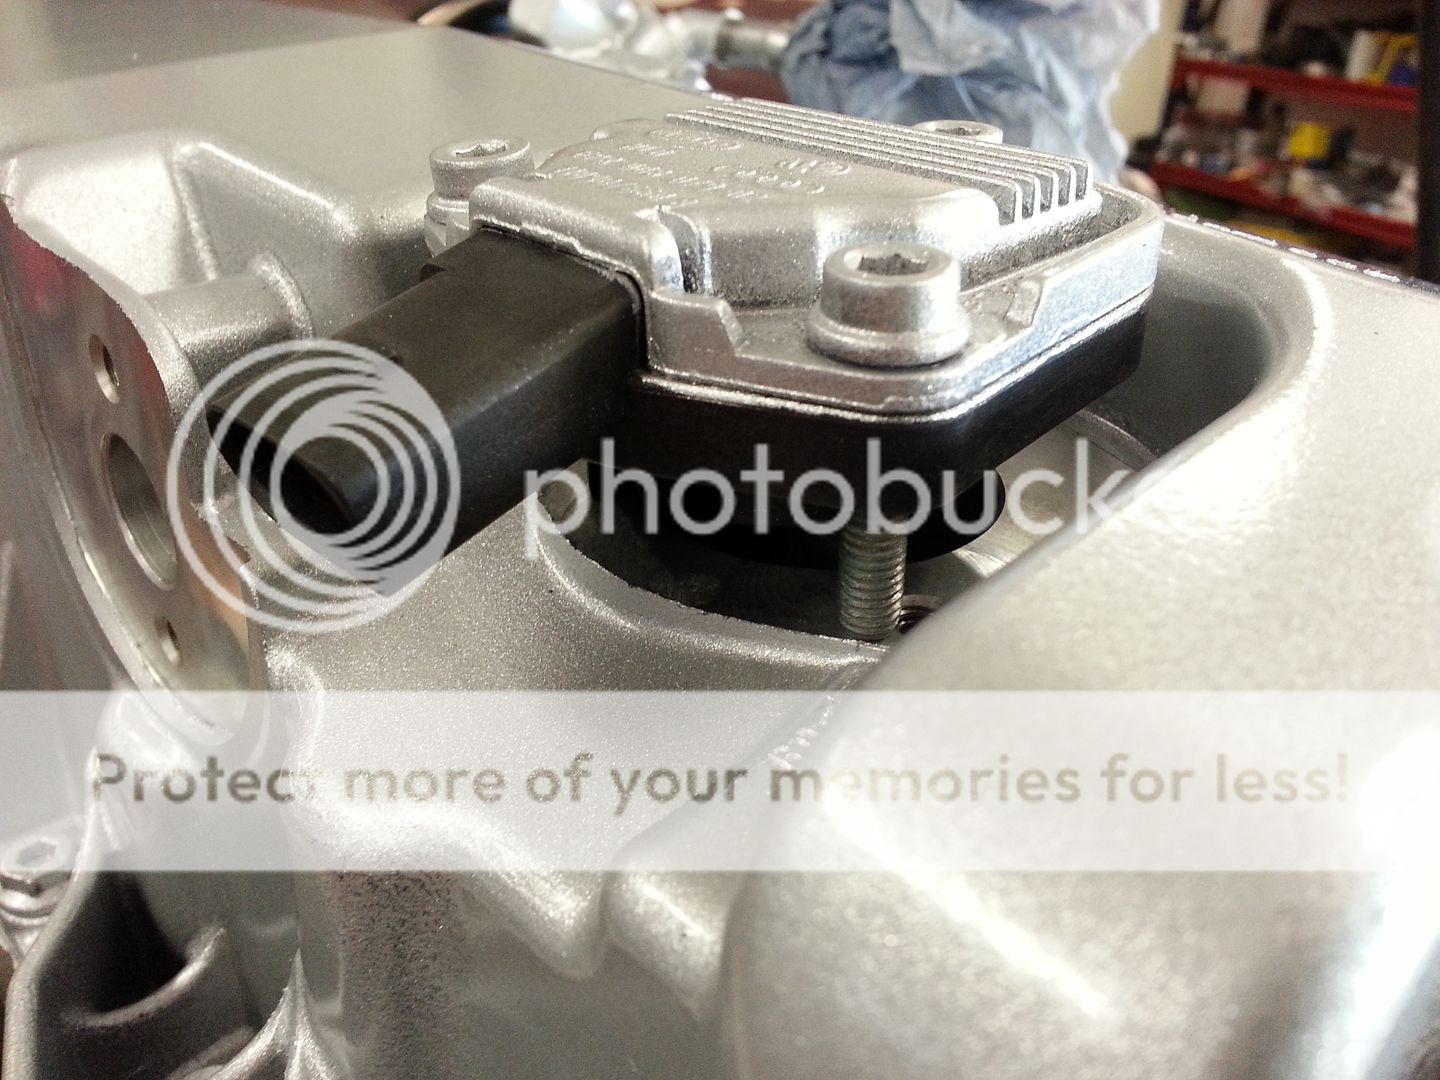
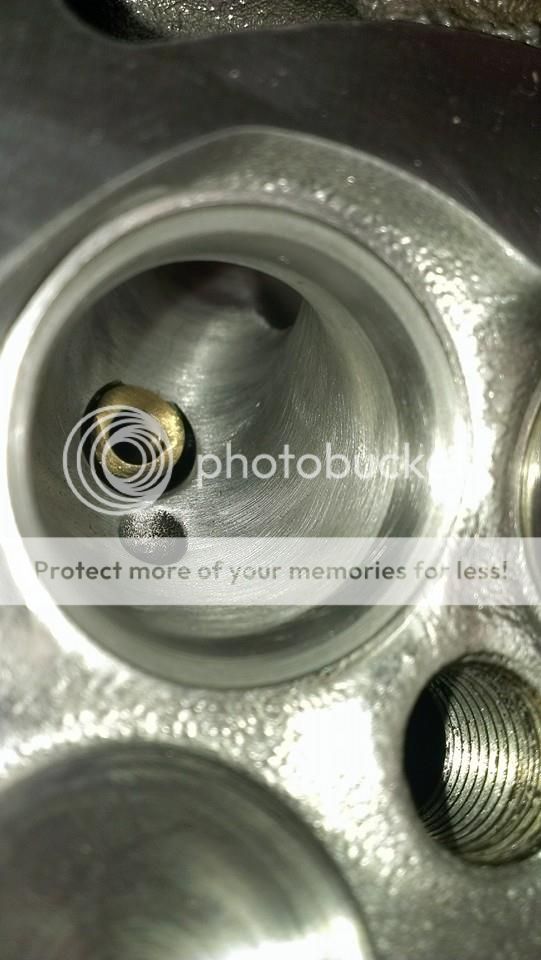
So of came the sump and fitted the correct windage tray.... previous view through the oil sensor hole...

... now with the correct windage tray...

...and of course the sensor now sits in the hole properly!!
...so thats that for the bottom... just need to sort the head out!!
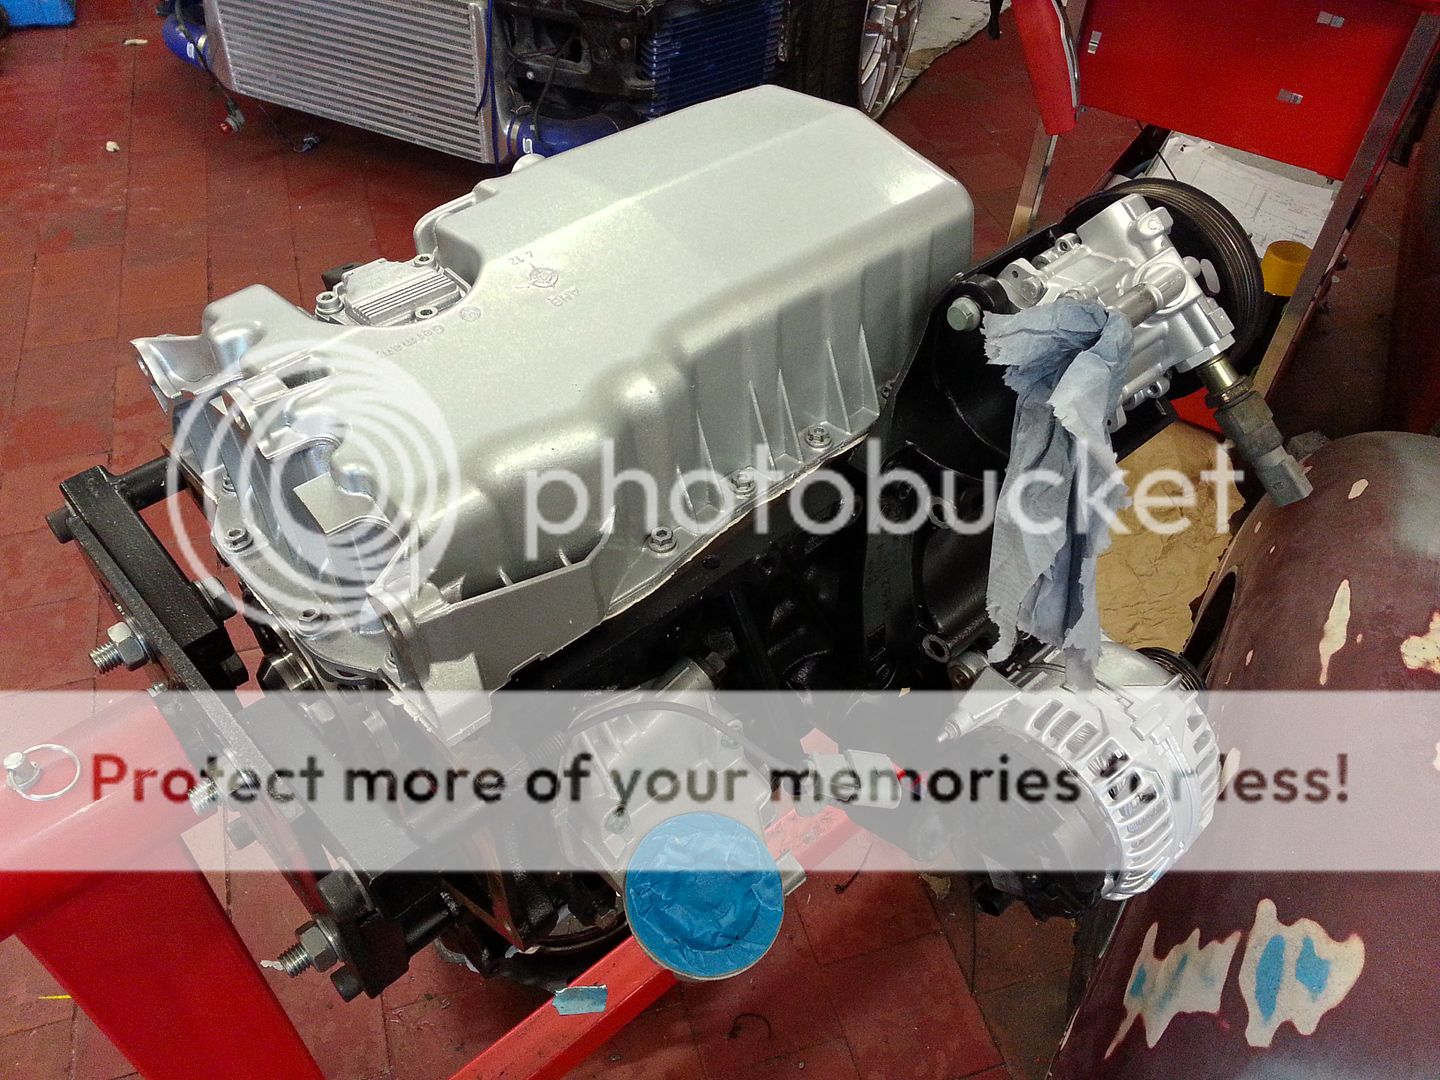
To get over this disappointment I went and painted something
Turbo will be ordered tomorrow, need to work out what I am doing about an exhaust so that can be ordered too... you gotta love modding cars :icon_thumright:
<tuffty/>
- Joined
- Mar 28, 2010
- Messages
- 10,073
- Reaction score
- 2,697
- Points
- 113
- Location
- Liverpool/Southport. N west
Not think to go over the seats with coarse paste and a drill? seeing if they come out ok like that. Can then do the final pass by hand with fine stuff.
- Joined
- Sep 14, 2008
- Messages
- 24,836
- Reaction score
- 6,078
- Points
- 113
- Location
- Wibbleton
- Website
- www.tuffty.co.uk
Not think to go over the seats with coarse paste and a drill? seeing if they come out ok like that. Can then do the final pass by hand with fine stuff.
I did consider this but tbh I need it to be **** on considering where this build is heading so will let our 'head' guy look at it... I have spent more than enough getting it this far... just one of those things...
<tuffty/>
- Joined
- Jun 19, 2009
- Messages
- 3,883
- Reaction score
- 619
- Points
- 113
- Location
- Leeds
- Website
- www.aldevelopments.com
Shame as if i had the valves i would of picked it up myself and would be able to sort the problem Never mind i'm sure you will sort it
Never mind i'm sure you will sort it
- Joined
- Sep 14, 2008
- Messages
- 24,836
- Reaction score
- 6,078
- Points
- 113
- Location
- Wibbleton
- Website
- www.tuffty.co.uk
Shame as if i had the valves i would of picked it up myself and would be able to sort the problem
All good bro...

<tuffty/>
- Joined
- May 28, 2004
- Messages
- 10,217
- Reaction score
- 2,385
- Points
- 113
- Location
- nr Glos
- Website
- www.badger5.co.uk


- Joined
- Jan 30, 2008
- Messages
- 18,708
- Reaction score
- 909
- Points
- 113
- Location
- Glenrothes, Fife, Scotland
- Joined
- May 28, 2004
- Messages
- 10,217
- Reaction score
- 2,385
- Points
- 113
- Location
- nr Glos
- Website
- www.badger5.co.uk
Is that cast?
yes
from their site
Turbo V-Band Merge Collector, 304 Stainless Steel. Due to popular demand, we have release a V-band style merge collector to accommodate Tial and Precision V-band turbine housings. These will fit the small frame V-band style in/out turbine houings from precision from the 58mm, 62mm and 65mm turbine wheel, and the Tial GT28 Gt30 and GT35.
-No welds to crack
-lifetime warranty!
-V Band Flange (Tial or Precision)
-Perfect for Welding 10, 20 or 30 1.5" Schedule Pipe
-Optimized Merge Collector
-Long merge for high flow
Investment Cast 304 Stainless T3 Turbo Merge Collectors. Our castings methods are using the latest in turbocharger-manifold technology with state of the art investment casting processes and CAD based techniques. Designed using Solid Works and optimized for ideal fitment and finish, they benefit from an exclusive investment casting method utilizing extremely durable 304 stainless steel.


- Joined
- Sep 14, 2008
- Messages
- 24,836
- Reaction score
- 6,078
- Points
- 113
- Location
- Wibbleton
- Website
- www.tuffty.co.uk
Just buy a fcn top mount! lol
There isn't any on the market that sits the turbo where I want it...
<tuffty/>
There isn't any on the market that sits the turbo where I want it...
<tuffty/>
yeah cos top mounted underslung manifolds are a paradox,LOL

There isn't any on the market that sits the turbo where I want it...
<tuffty/>
Because you want to keep it hidden and keep your OEM+ obsession in check?
- Joined
- Sep 14, 2008
- Messages
- 24,836
- Reaction score
- 6,078
- Points
- 113
- Location
- Wibbleton
- Website
- www.tuffty.co.uk
Because you want to keep it hidden and keep your OEM+ obsession in check?
Pretty much yeah
<tuffty/>

Sam_
Down under
- Joined
- Dec 8, 2006
- Messages
- 12,100
- Reaction score
- 4,340
- Points
- 113
- Location
- Eastleigh
- Website
- twitter.com
I think we all know what Paul would do.
He would dismantle the picture and frame, and rotate the picture within the frame so the tower was straight relative to the frame, and adjust the border size if required so it still looked OEM at the edges, then rehang it all nice and straight, equidistant from both floor and ceiling, and each adjacent wall

He would dismantle the picture and frame, and rotate the picture within the frame so the tower was straight relative to the frame, and adjust the border size if required so it still looked OEM at the edges, then rehang it all nice and straight, equidistant from both floor and ceiling, and each adjacent wall
- Joined
- Sep 14, 2008
- Messages
- 24,836
- Reaction score
- 6,078
- Points
- 113
- Location
- Wibbleton
- Website
- www.tuffty.co.uk
I think we all know what Paul would do.
He would dismantle the picture and frame, and rotate the picture within the frame so the tower was straight relative to the frame, and adjust the border size if required so it still looked OEM at the edges, then rehang it all nice and straight, equidistant from both floor and ceiling, and each adjacent wall
Close... I'd make a support bracket too as its clearly going to lean over again
<tuffty/>
Lets be honest here, Paul wants go to Italy and put the tower straight, change the name to the tower of Pisa, take a photo and put it in a frame that's been freshly painted.
This way he will know that all future pictures taken of the tower will be straight
This way he will know that all future pictures taken of the tower will be straight
- Joined
- Sep 14, 2008
- Messages
- 24,836
- Reaction score
- 6,078
- Points
- 113
- Location
- Wibbleton
- Website
- www.tuffty.co.uk
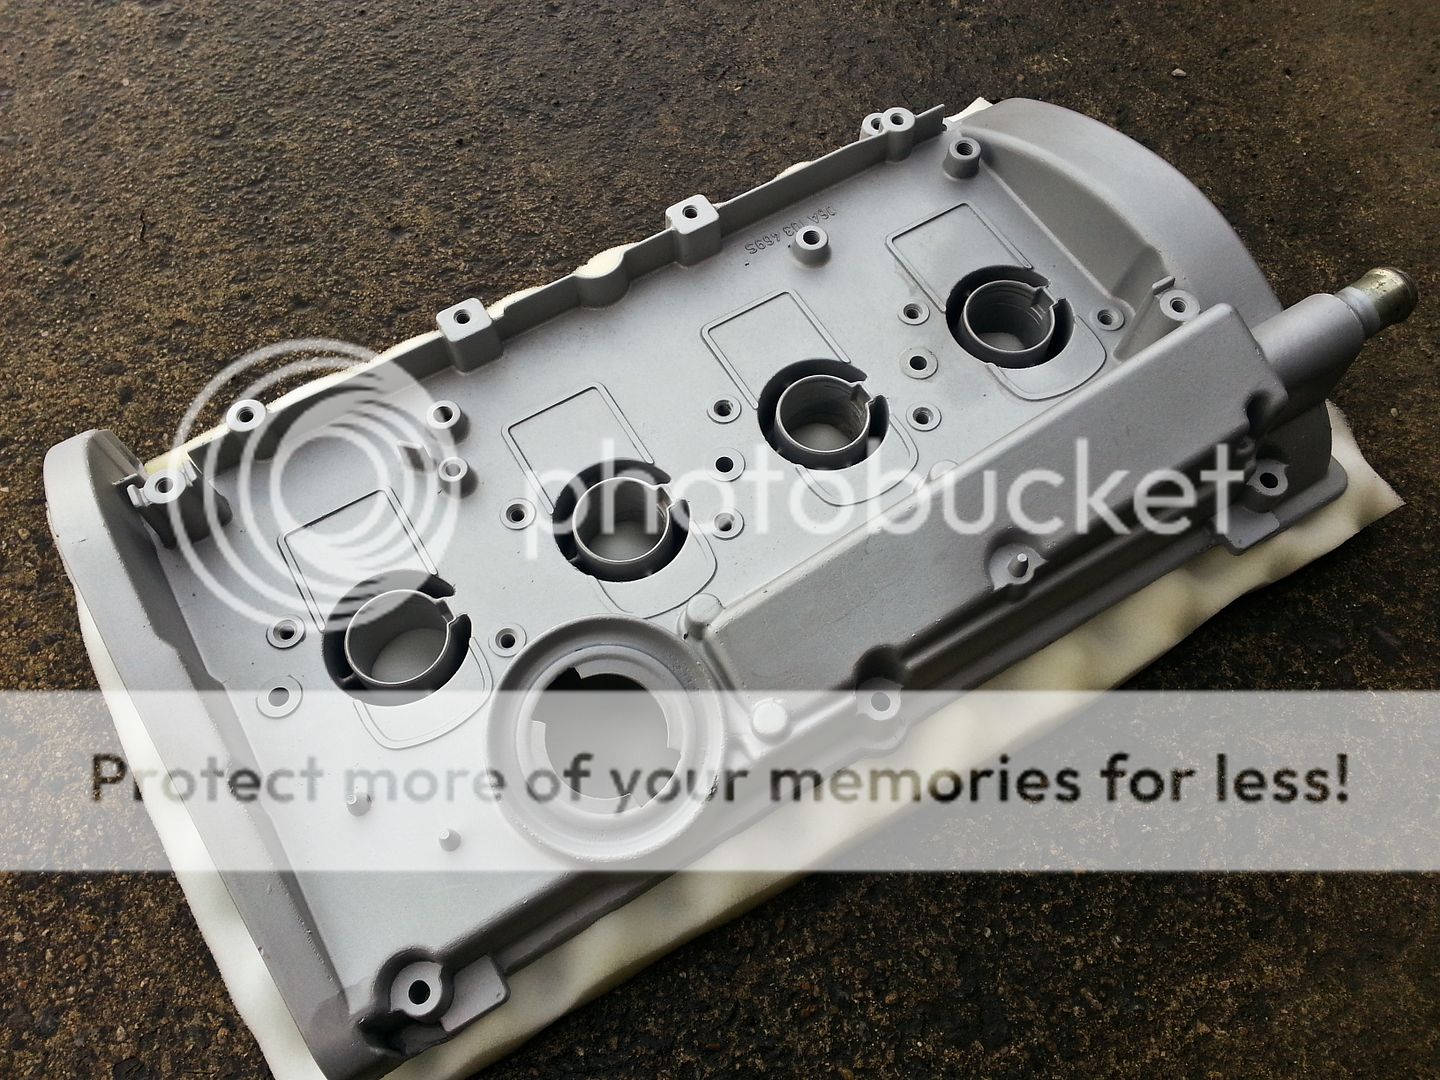
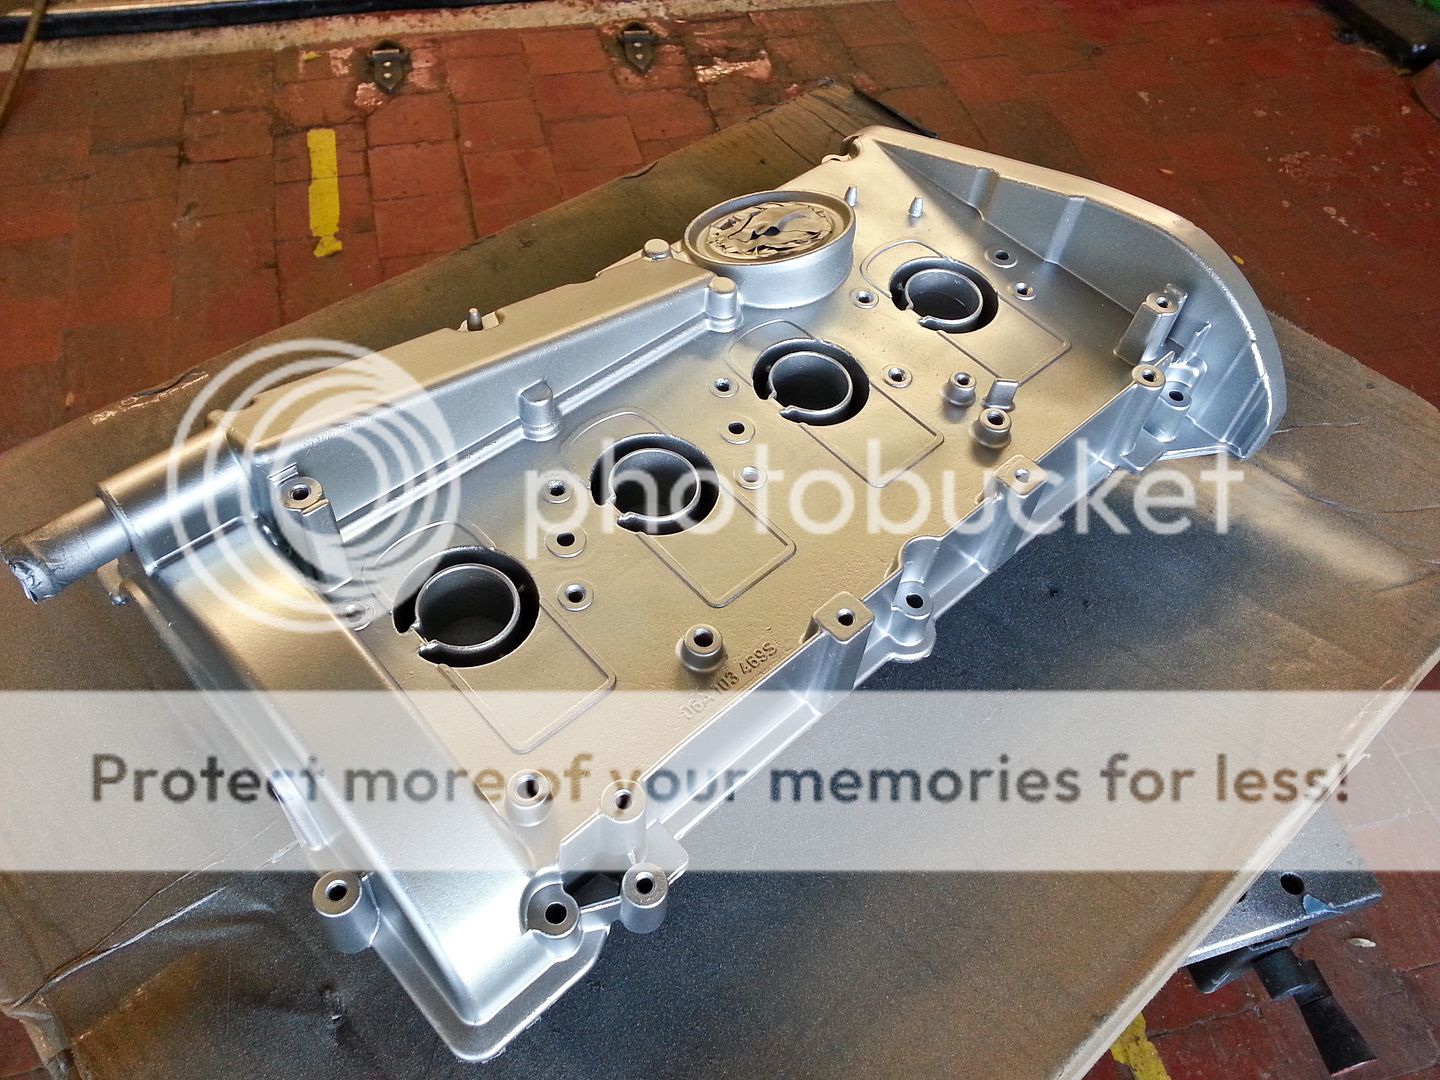
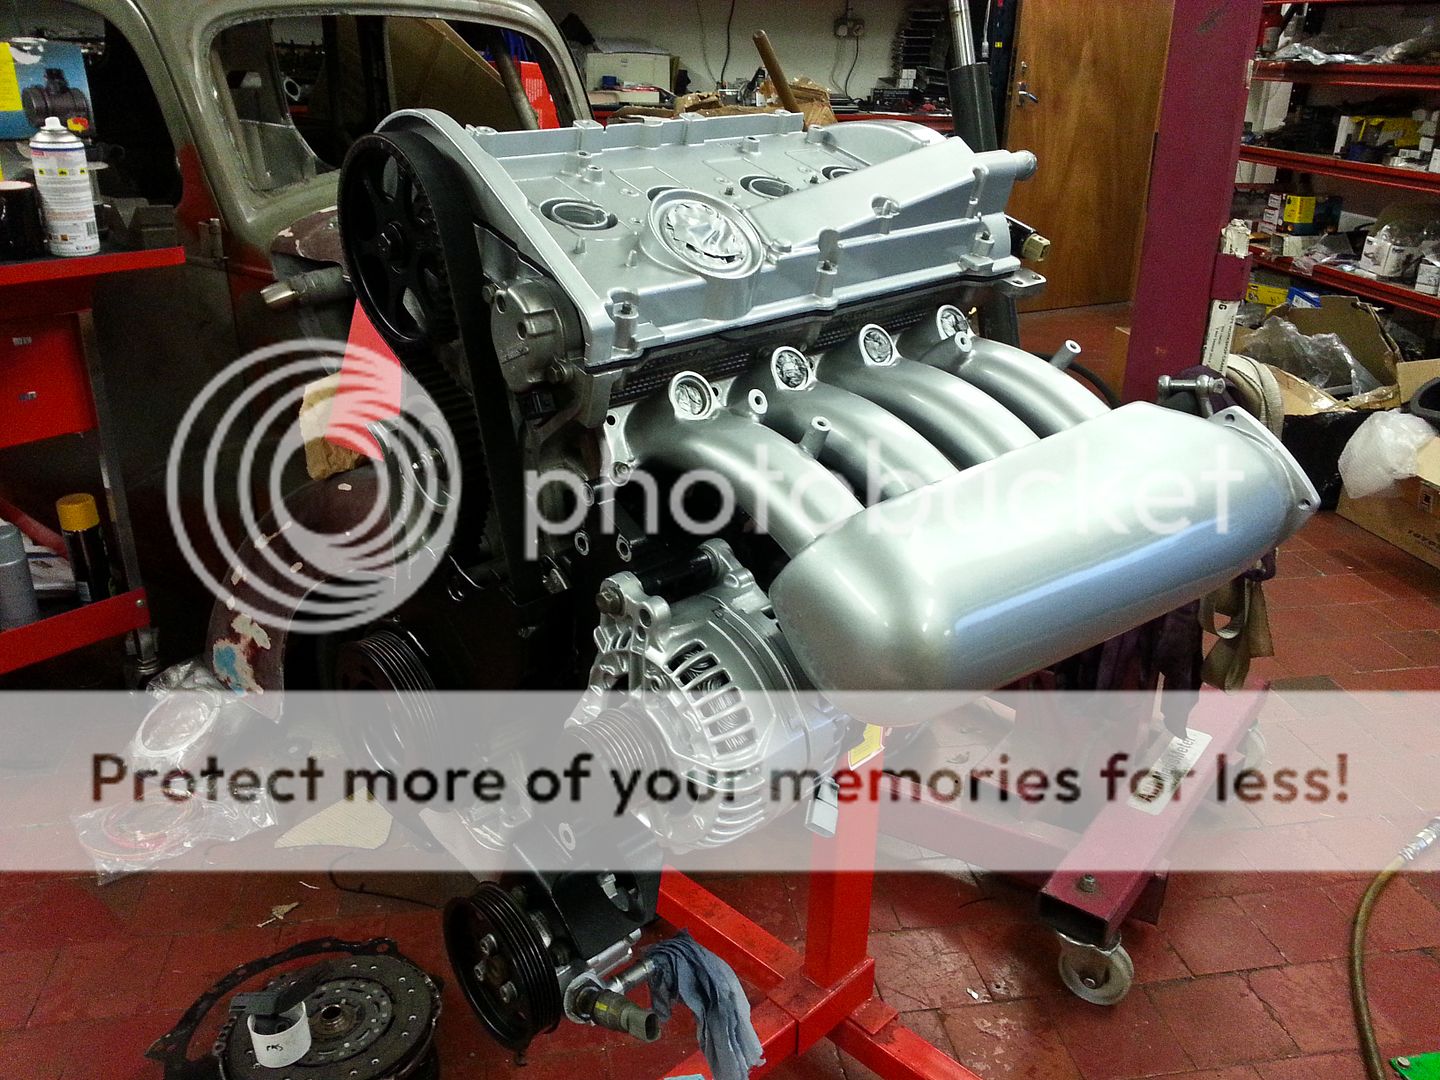
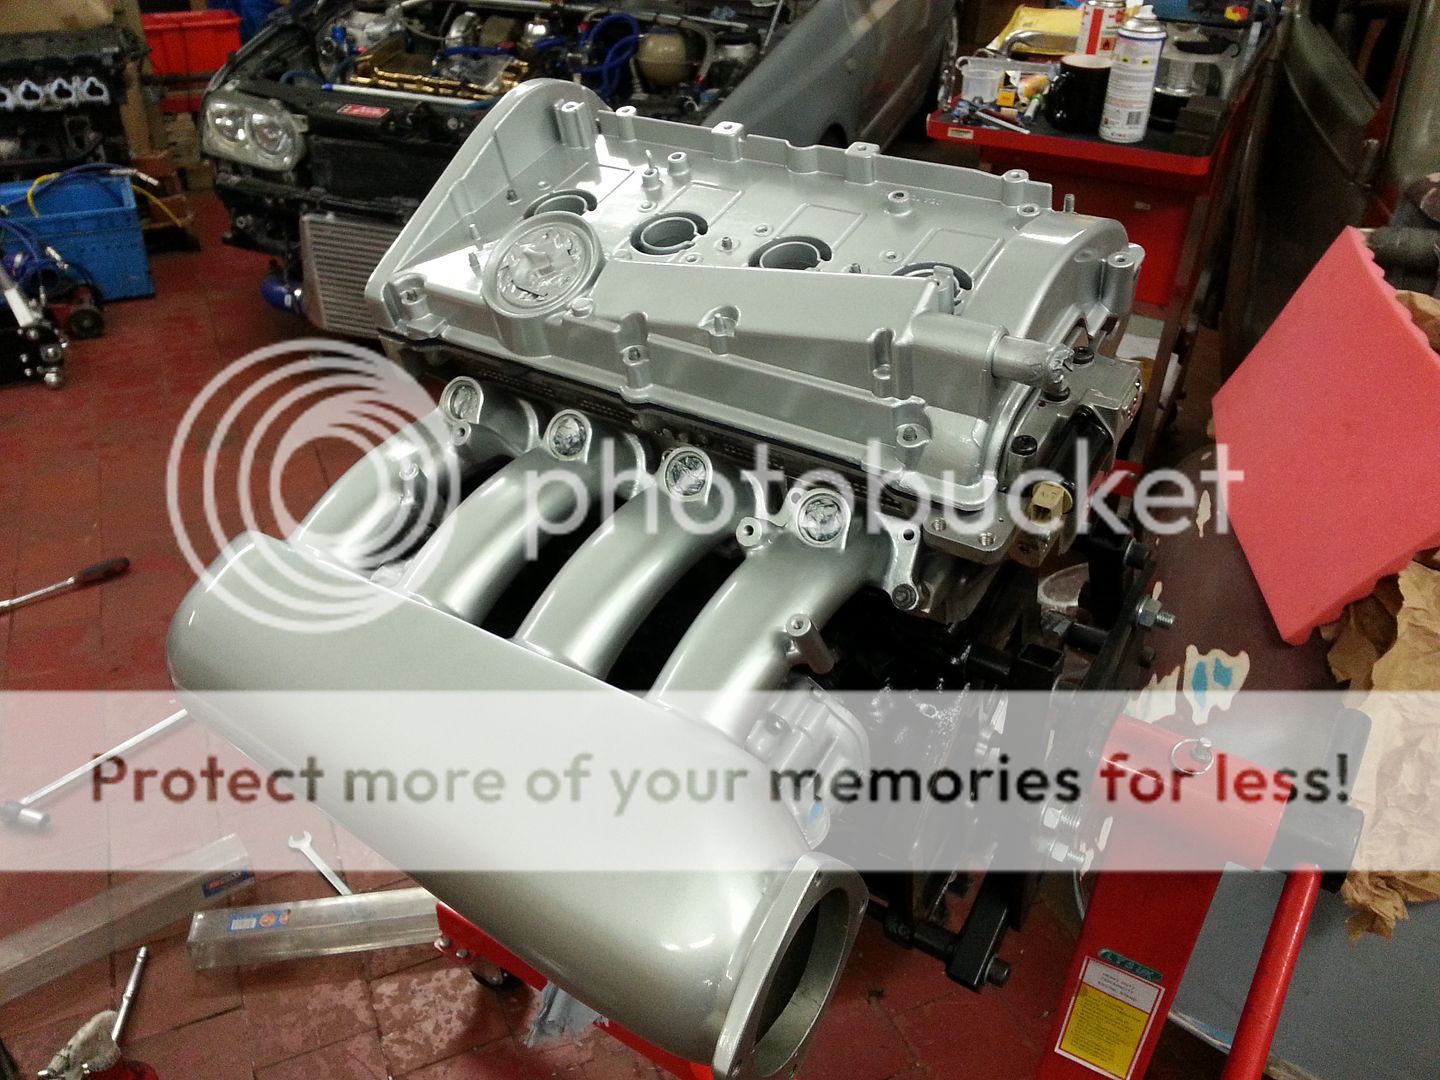
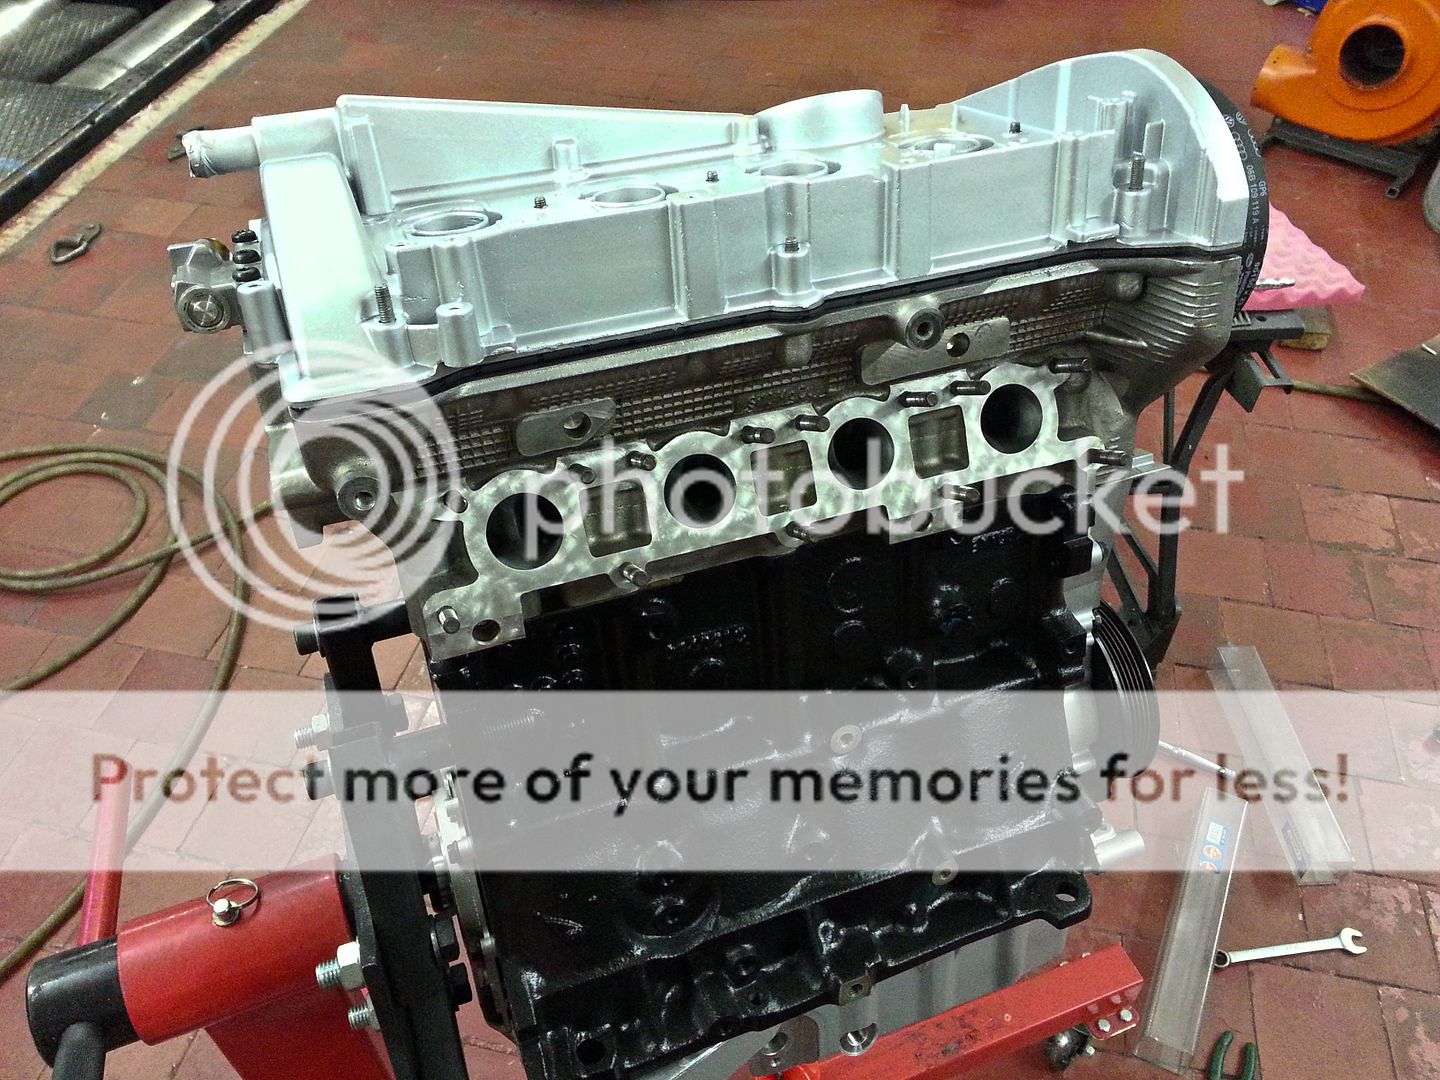
Small update... the head issues are sorted!! w00t!
First of all big thanks to the big man for taking the time to sort this out this week... very very very much appreciated...
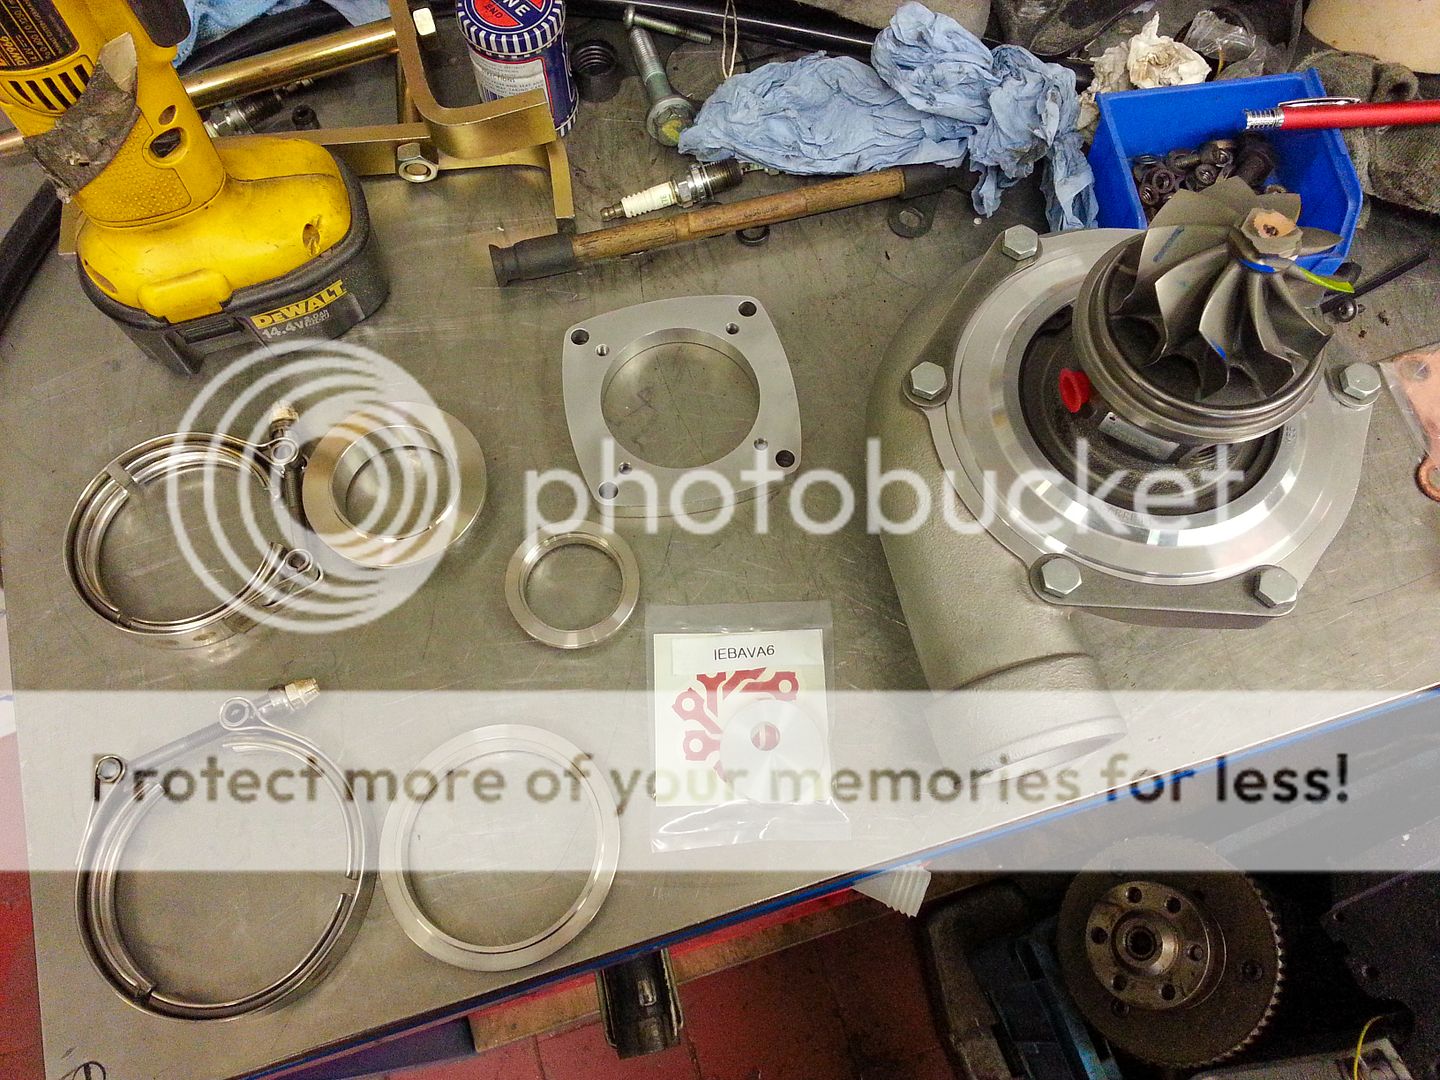
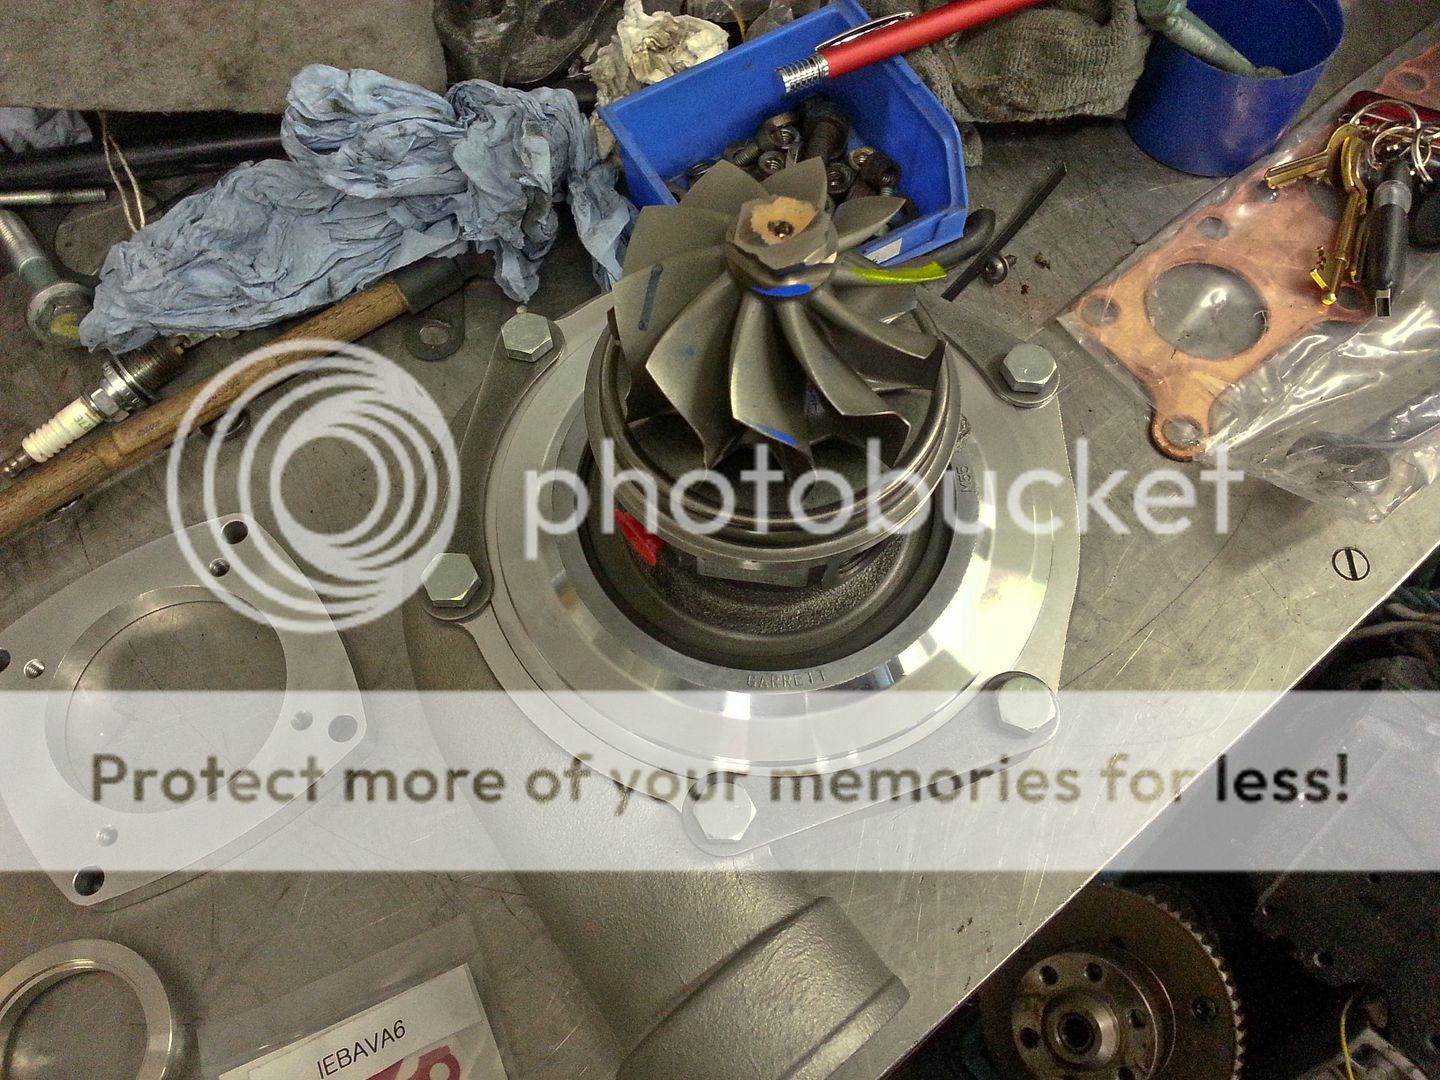
Seats were re-cut and valves lapped in... plus the valves got a bit of a clean too so all is good in the world.. will rebuild it over the weekend but here are a few pics

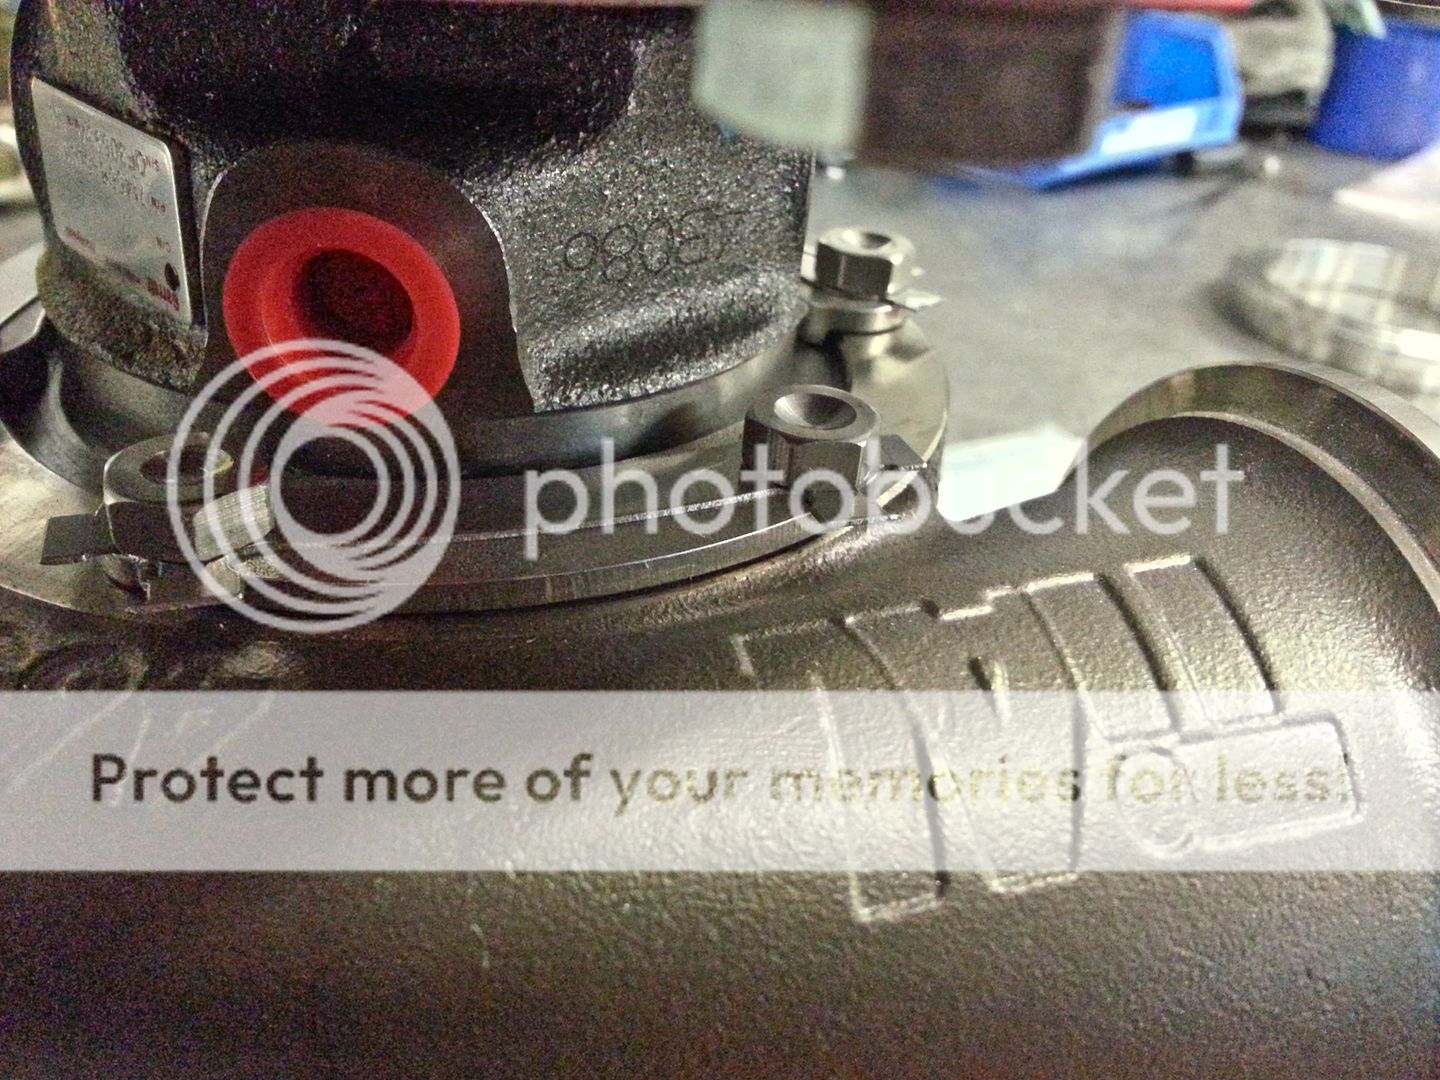
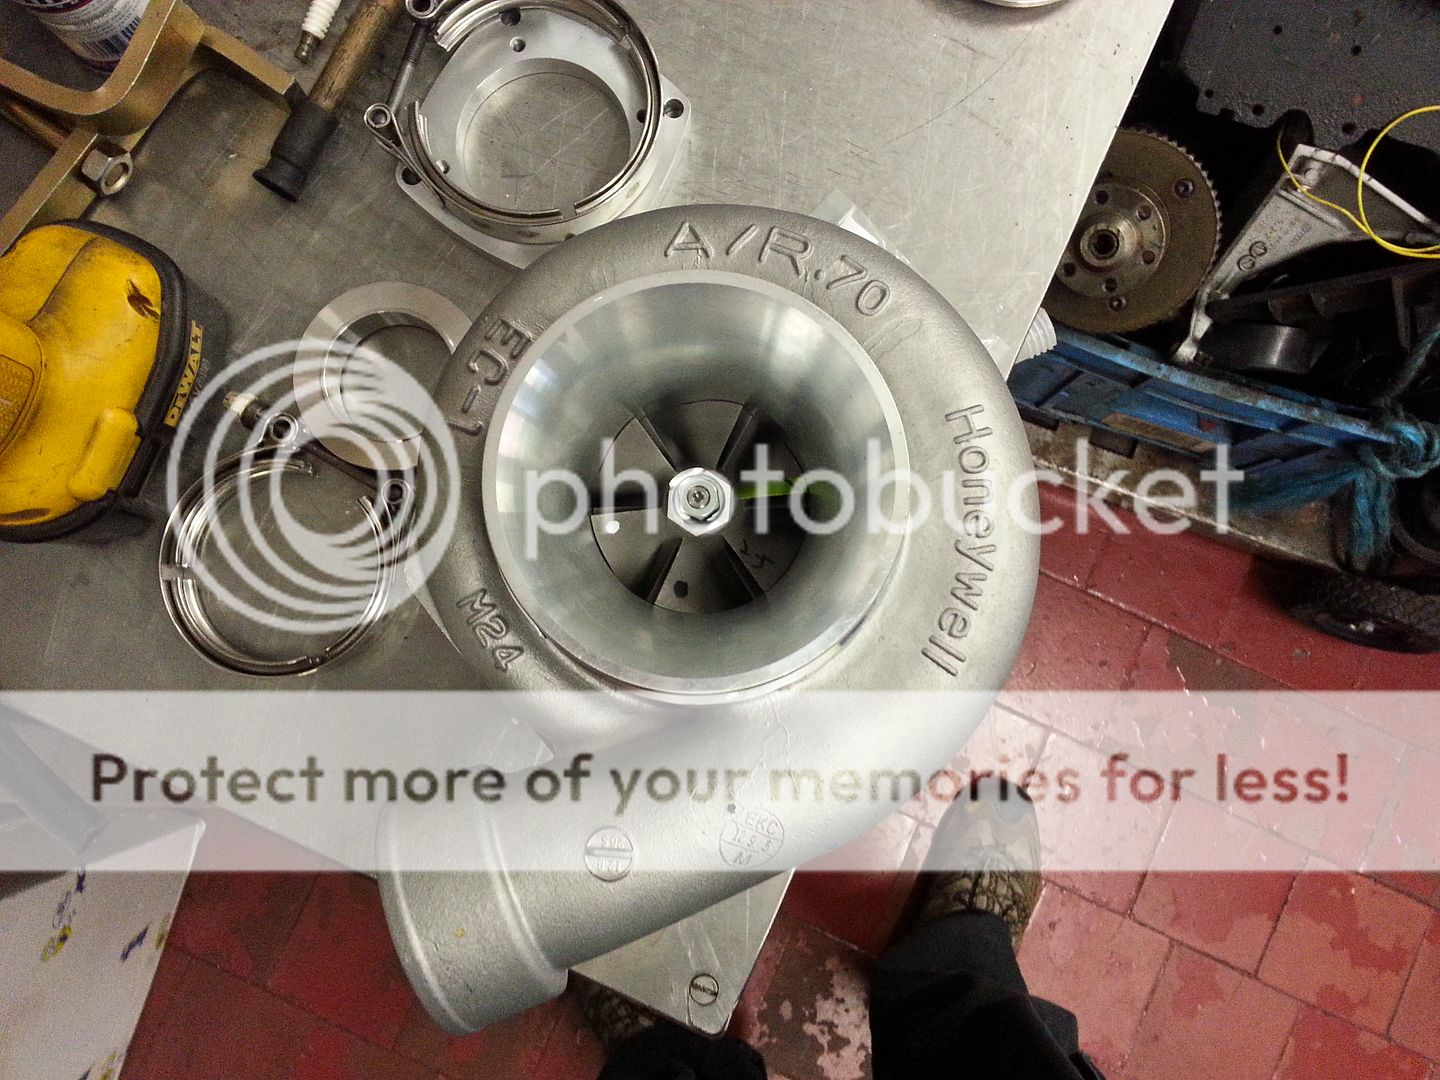
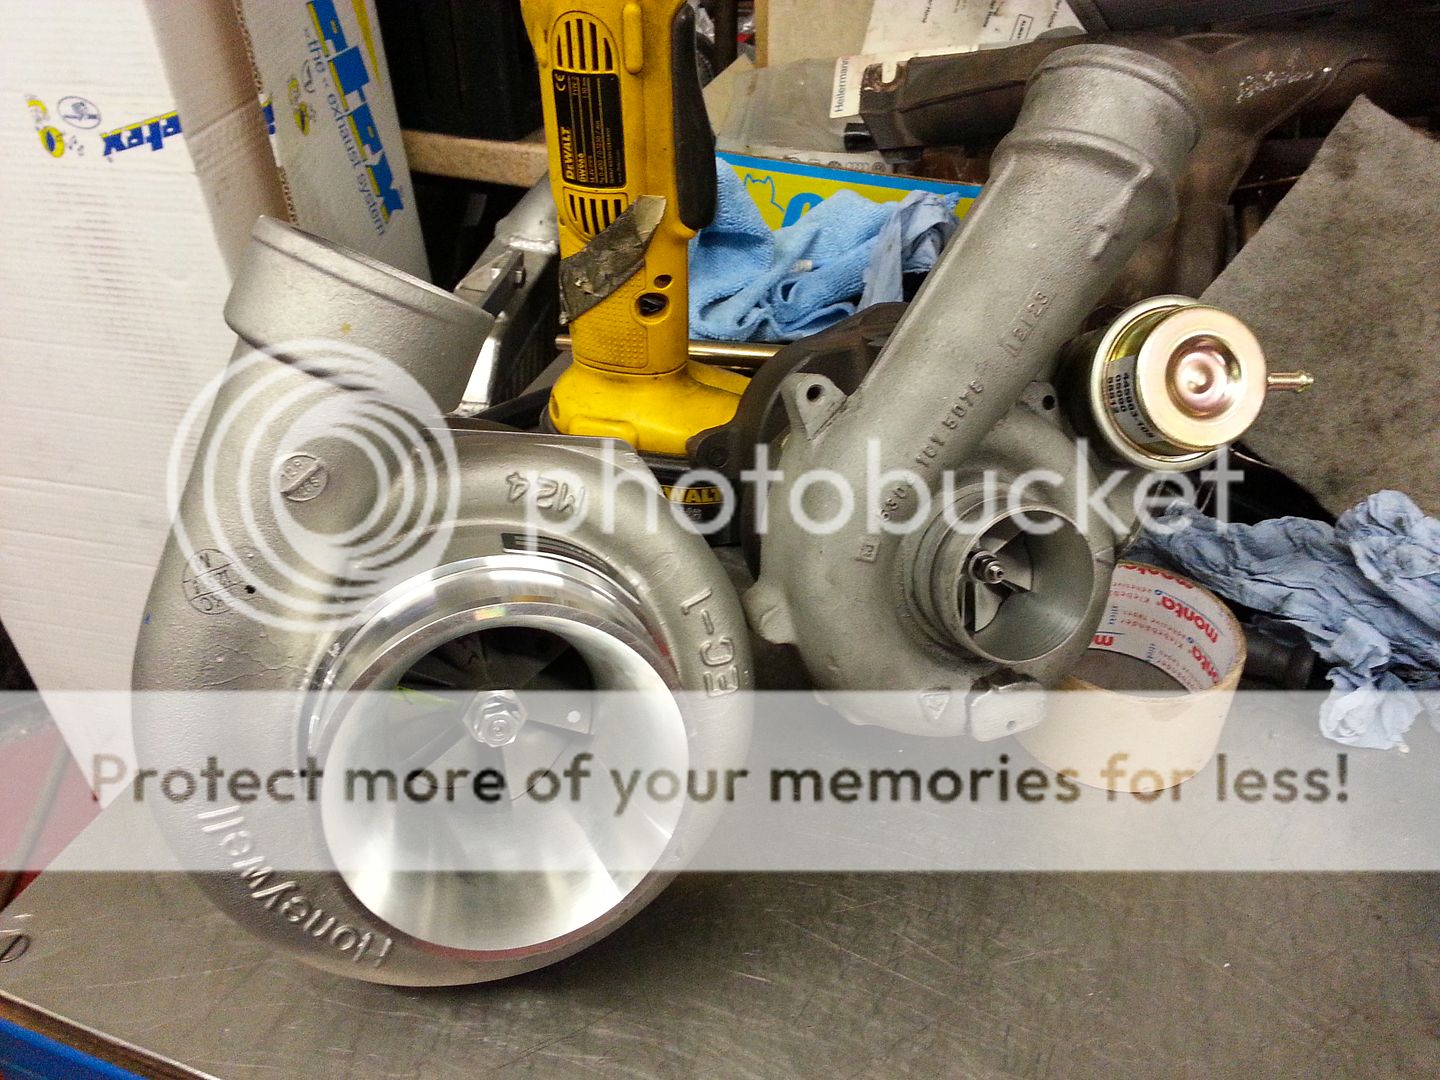
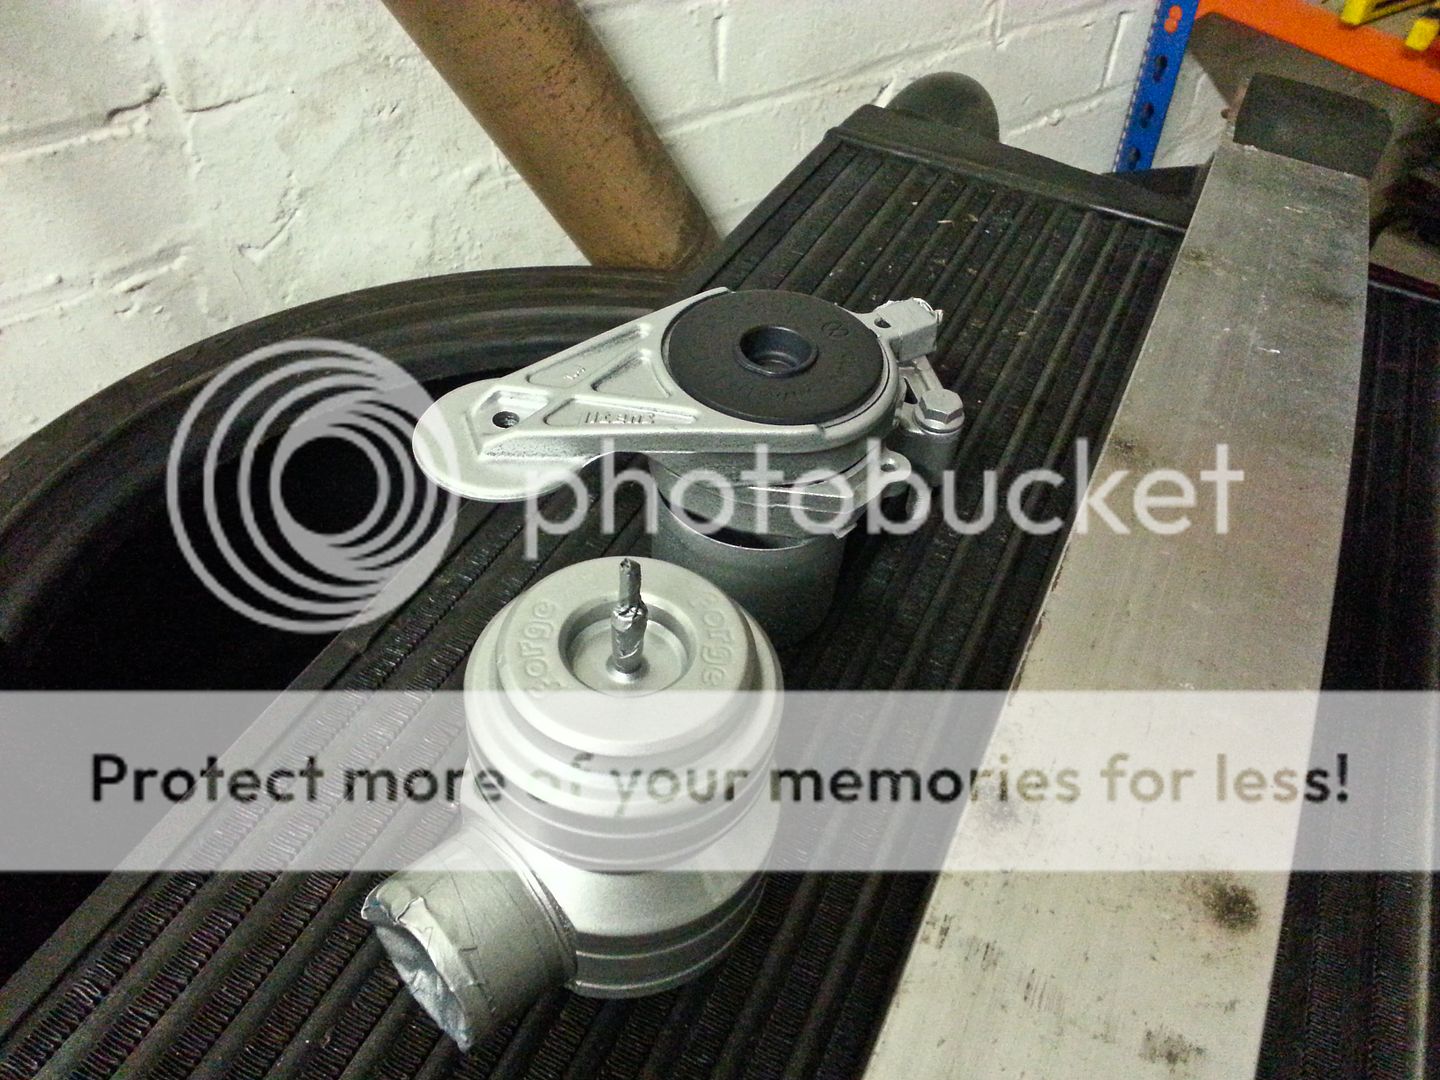
The turbo and all the silly expensive Tial flanges have arrived too... pics at the weekend
<tuffty/>
First of all big thanks to the big man for taking the time to sort this out this week... very very very much appreciated...
Seats were re-cut and valves lapped in... plus the valves got a bit of a clean too so all is good in the world.. will rebuild it over the weekend but here are a few pics
The turbo and all the silly expensive Tial flanges have arrived too... pics at the weekend
<tuffty/>
- Joined
- Jun 19, 2009
- Messages
- 3,883
- Reaction score
- 619
- Points
- 113
- Location
- Leeds
- Website
- www.aldevelopments.com
Sam_
Down under
The Tial clamps or flanges? Wastegate or turbine housing? You could have had my wastegate flanges. The clamps are a bit pricey eh? 034 were cheapest I found.
- Joined
- Sep 14, 2008
- Messages
- 24,836
- Reaction score
- 6,078
- Points
- 113
- Location
- Wibbleton
- Website
- www.tuffty.co.uk
The Tial clamps or flanges? Wastegate or turbine housing? You could have had my wastegate flanges. The clamps are a bit pricey eh? 034 were cheapest I found.
Flanges and clamps for the hotside/mani and hotside DP plus a flange for the wastegate... not cheap as Tial stuff is oddly sized... the buggers...!
<tuffty/>
Sam_
Down under
Ah damn. Had I known, I could have sent the flanges I got with my wastegate (they include them from new)!
V-Band Clamp for Tial Stainless Turbine Housing Inlet, GT28/GT30/GT35 - 034Motorsport | Performance Parts for Audi, Porsche, and Volkswagen
V-Band Clamp for Tial Stainless Turbine Housing Outlet, GT28/GT30/GT35 - 034Motorsport | Performance Parts for Audi, Porsche, and Volkswagen
I'd heard of some people using generic clamps of the correct size (~3" and ~3.5" from memory) but I figured it was best to get the proper Tial ones just in case.
- Joined
- Sep 14, 2008
- Messages
- 24,836
- Reaction score
- 6,078
- Points
- 113
- Location
- Wibbleton
- Website
- www.tuffty.co.uk
vivalacoulter
Registered User
That head work looks amazing mate. I think I'm going to have to give you or Bill a call soon, just gathering my to do list together and will need some guidance... Sometimes I wish I had a clue haha.
- Joined
- Sep 14, 2008
- Messages
- 24,836
- Reaction score
- 6,078
- Points
- 113
- Location
- Wibbleton
- Website
- www.tuffty.co.uk
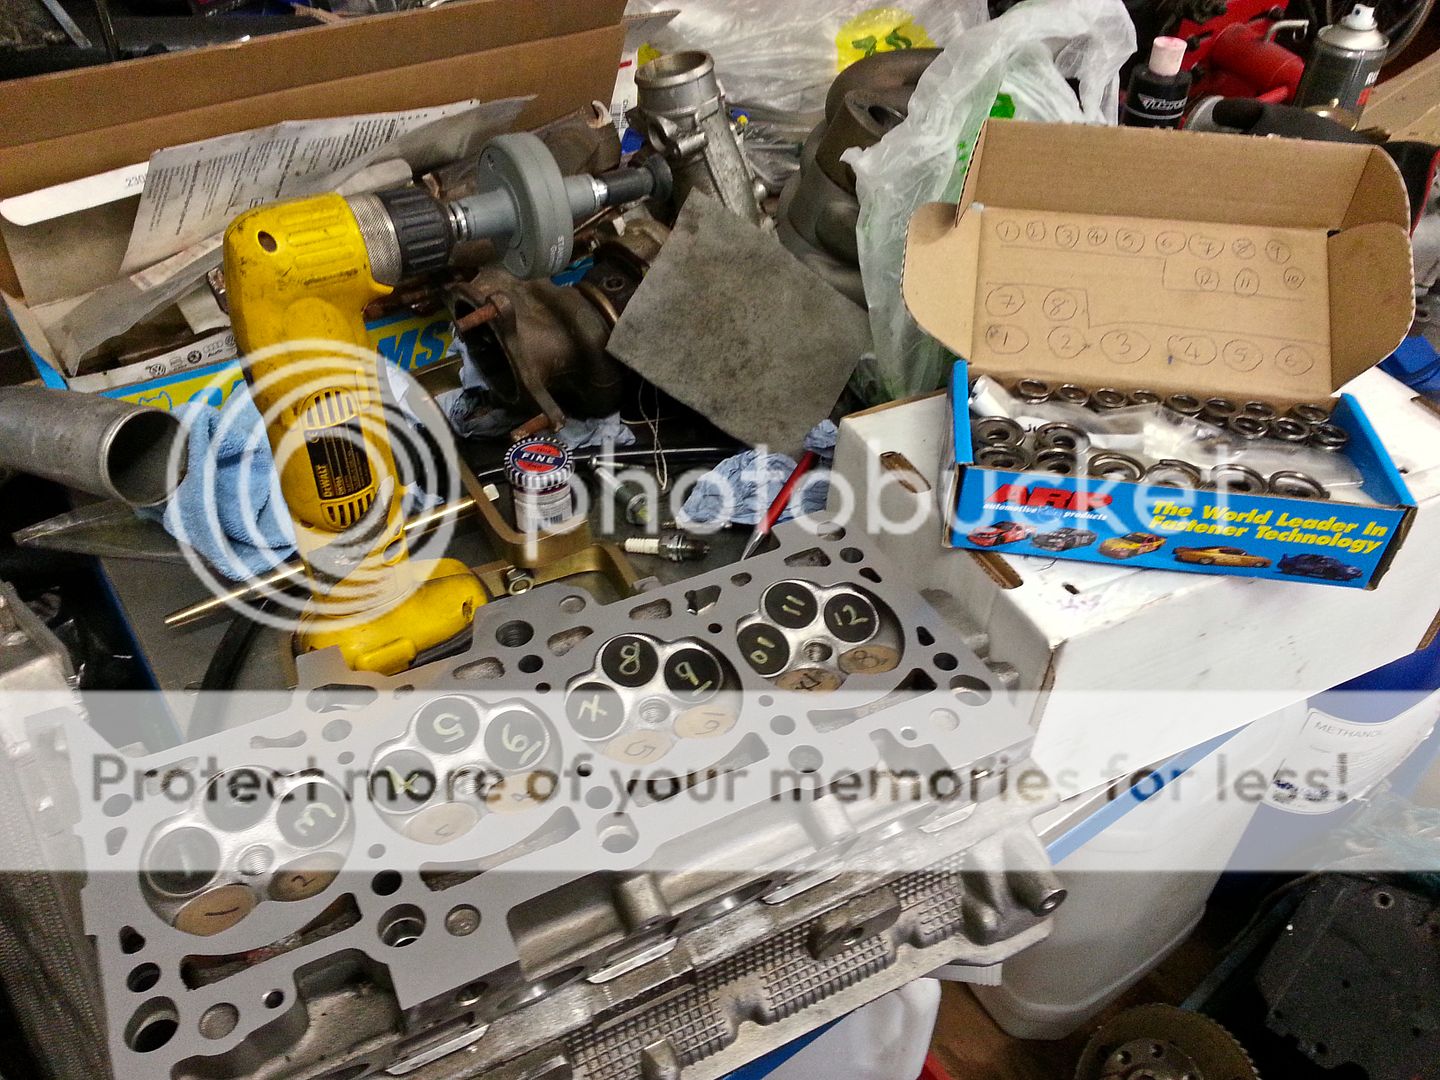
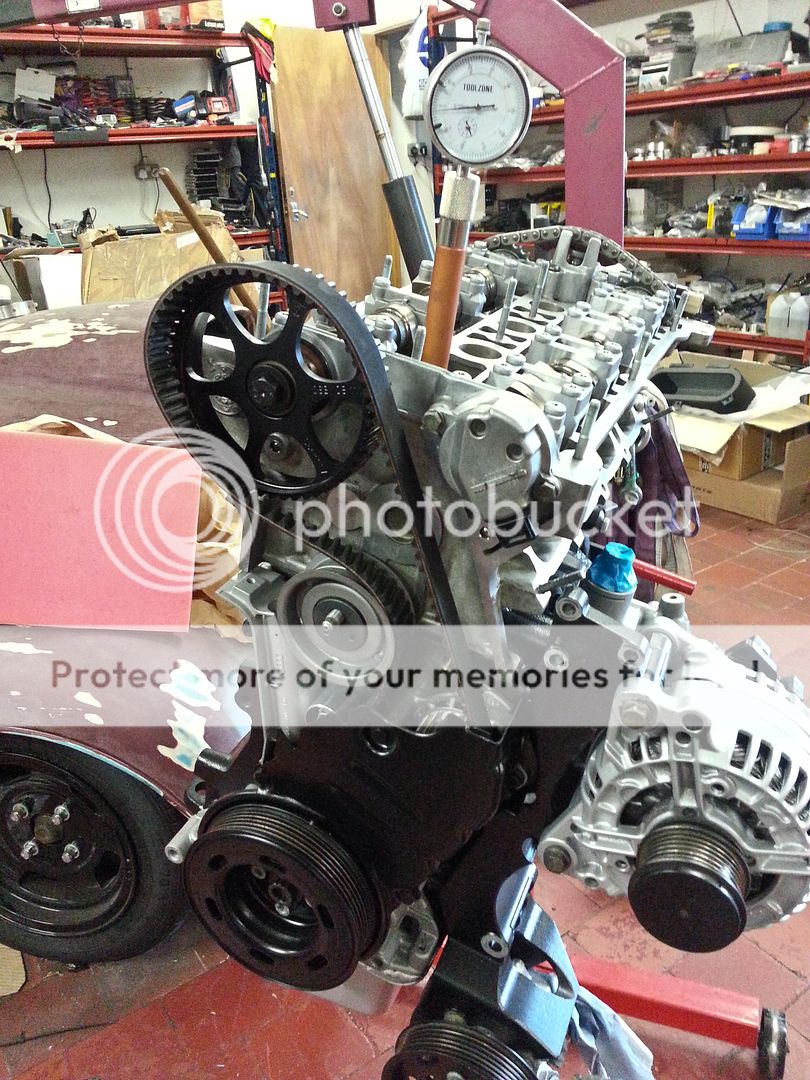
So... the end of a productive weekend...
Valves and springs in...

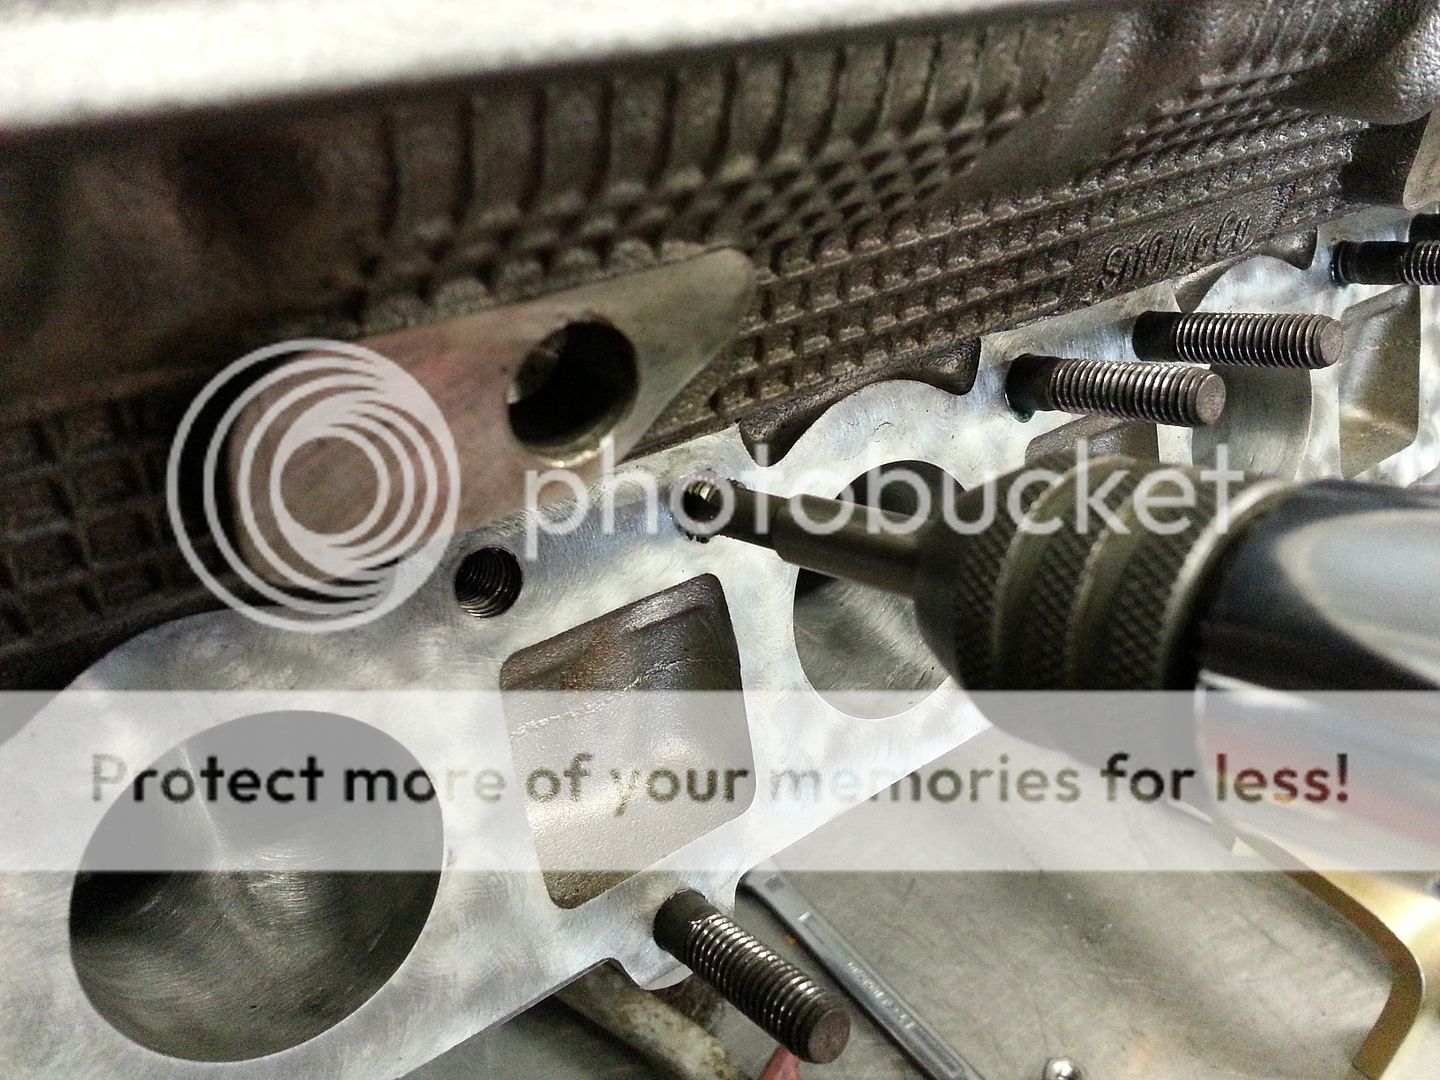
Chasing threads and fitting studs back in...
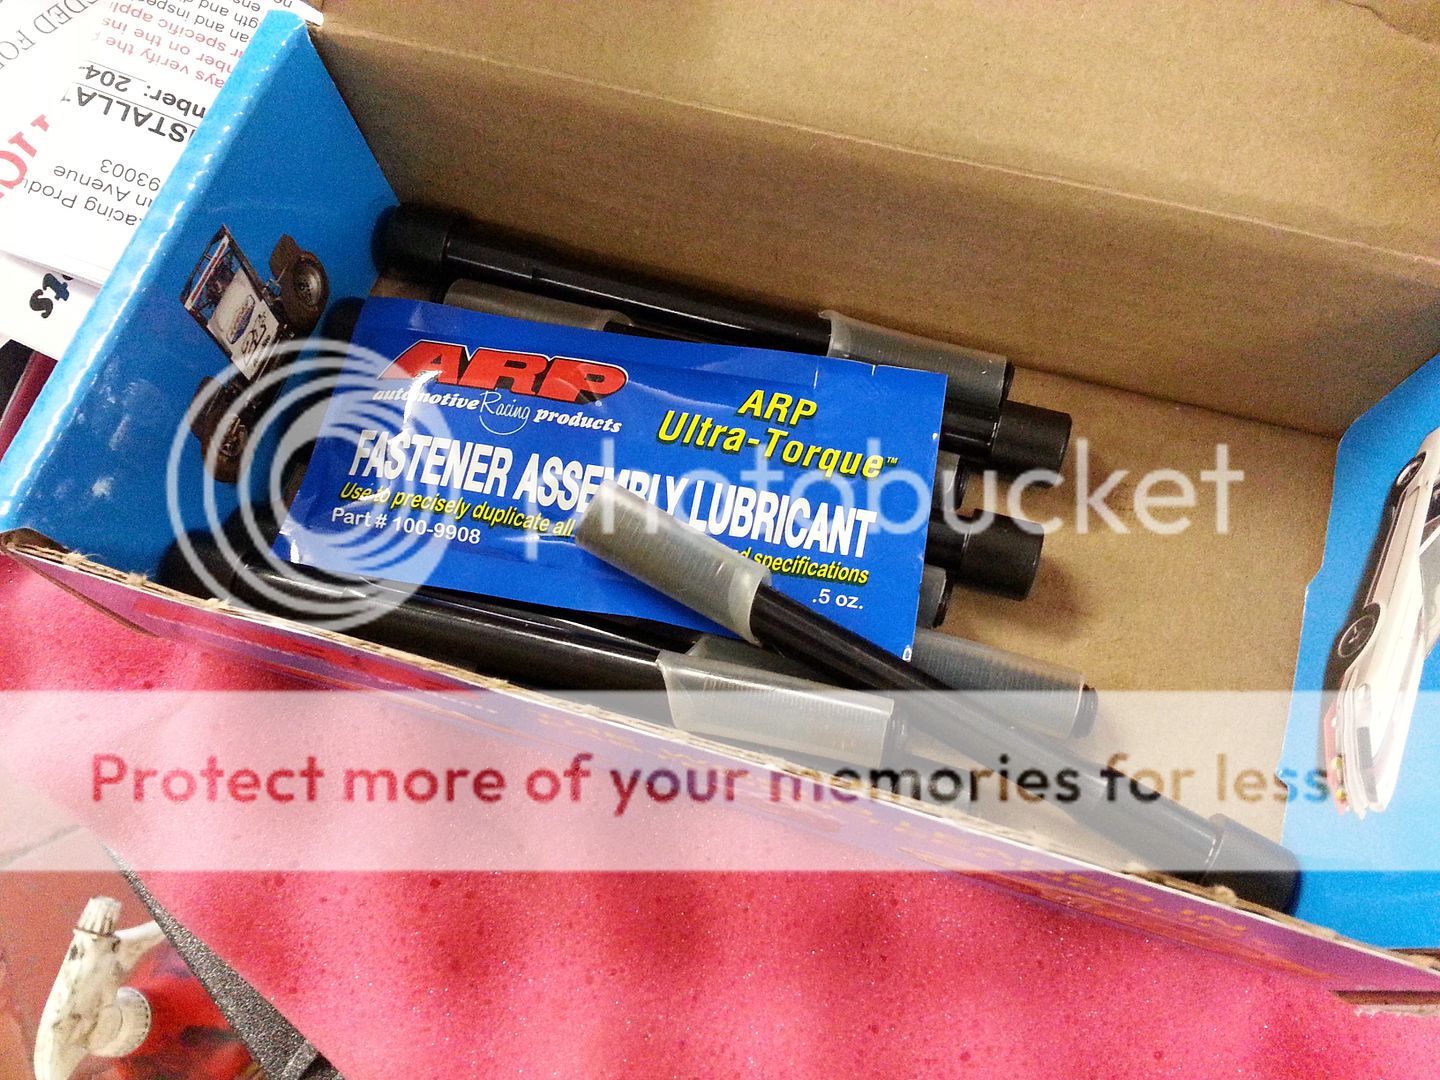
Next up, fitting cam pulley back on using an ARP bolt and EKAGrip shim...
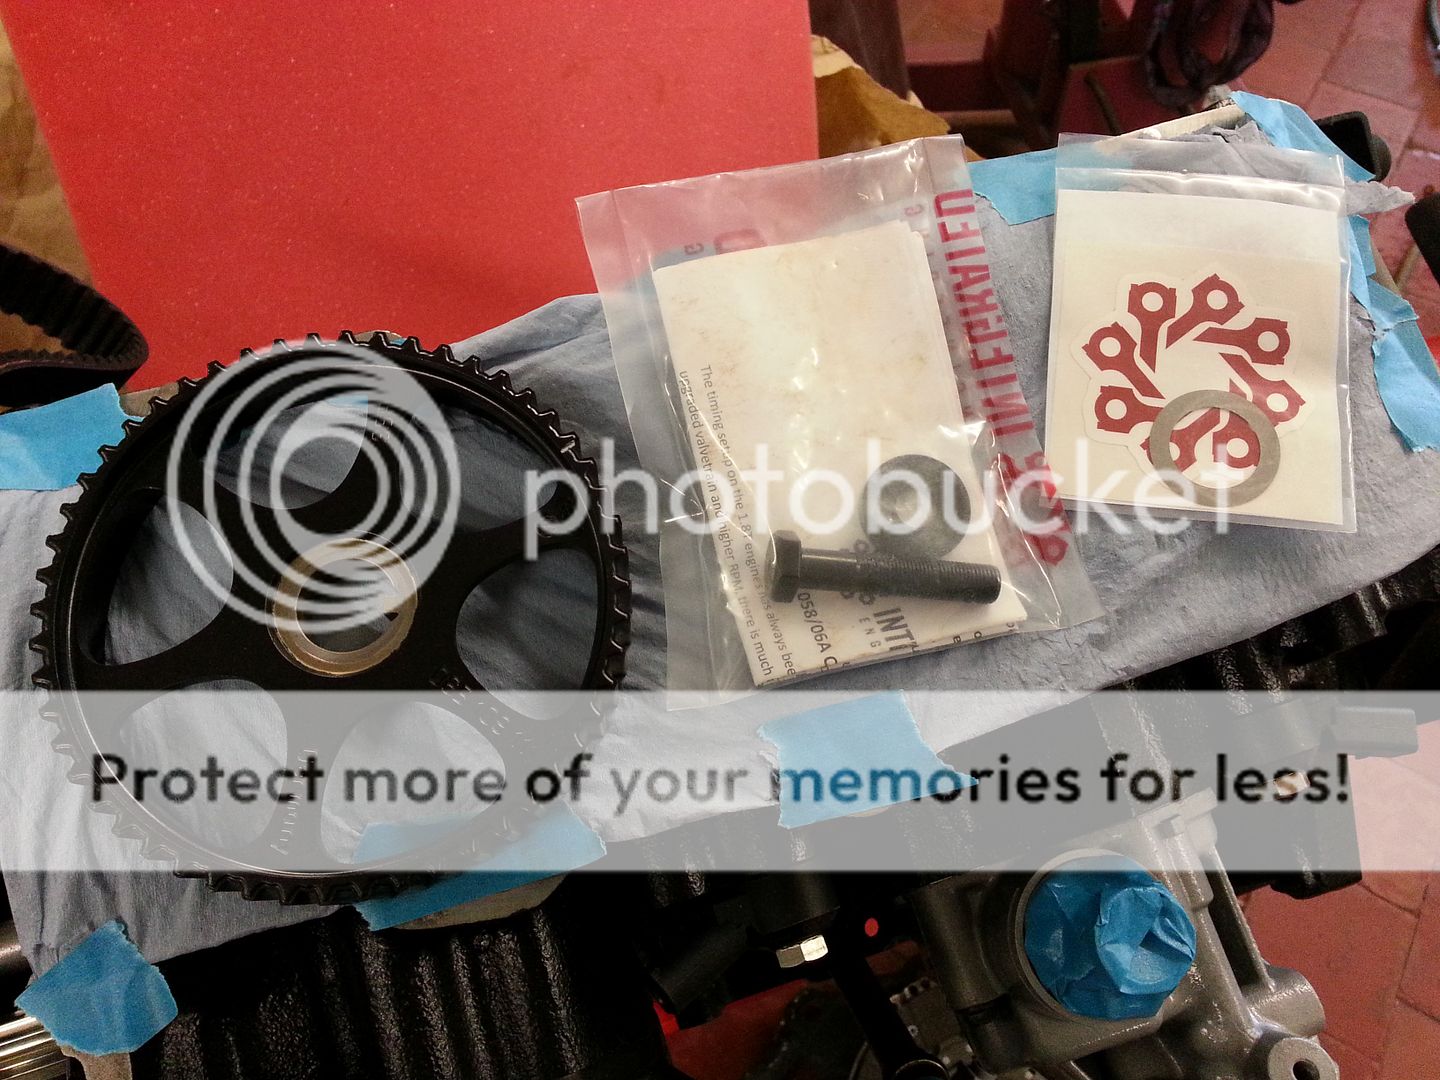
The shim has diamond shizzle on it apparently for increasing friction between cam and pulley... fecking expensive is all I can really say but seemed a good idea..

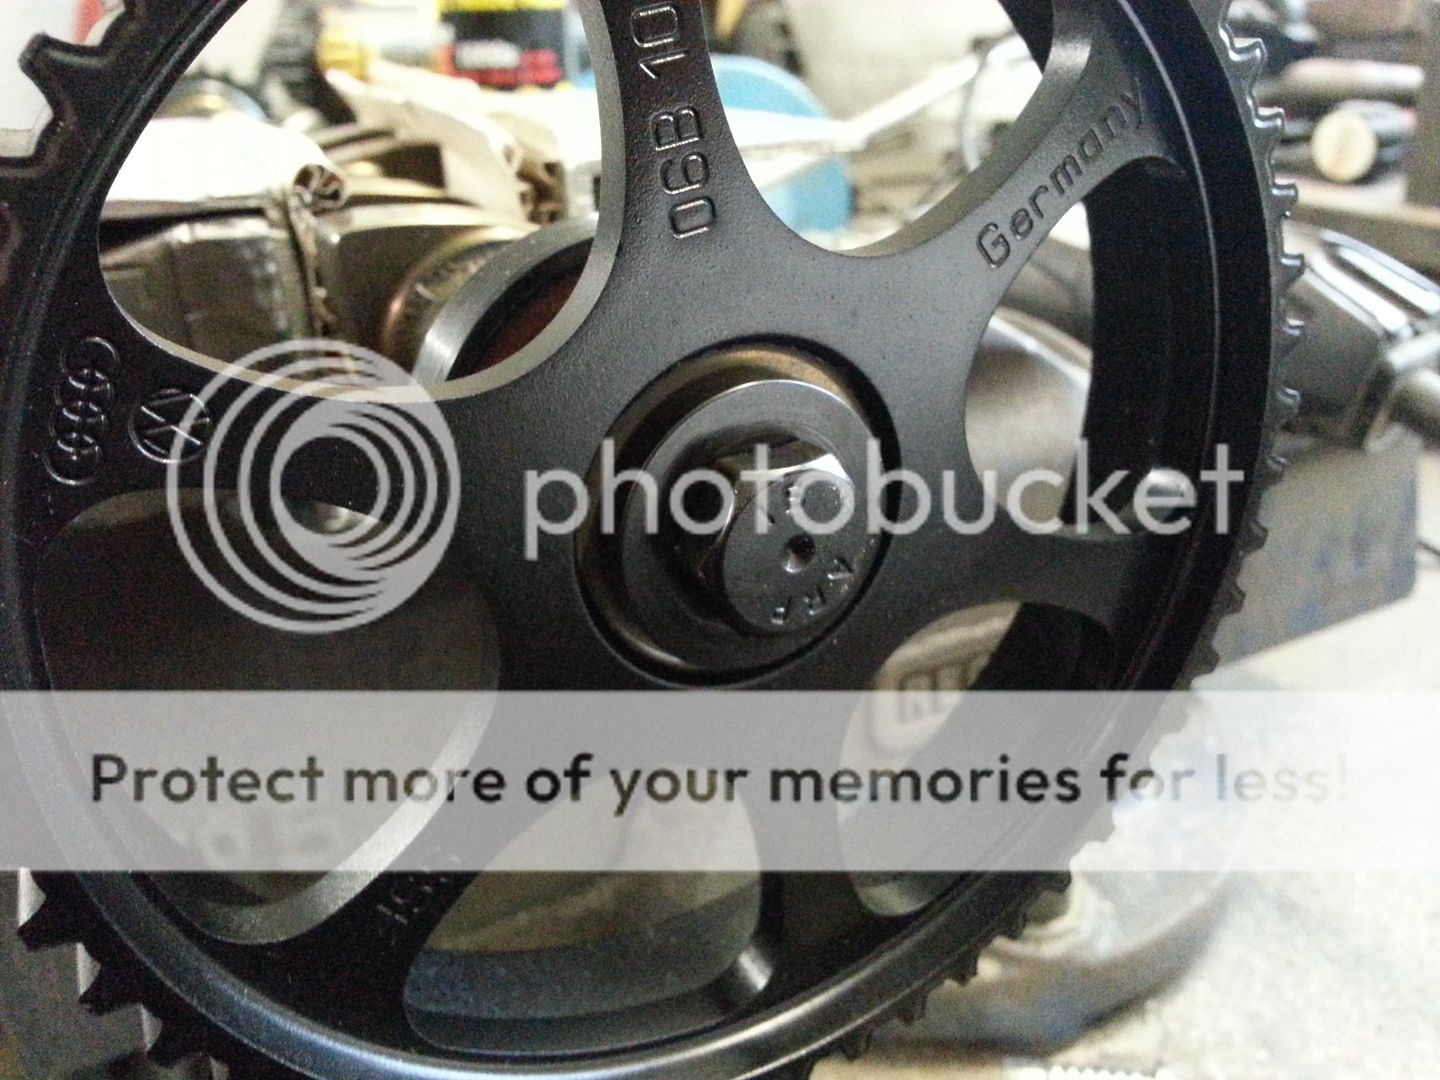
Fitted...

ARP'd up
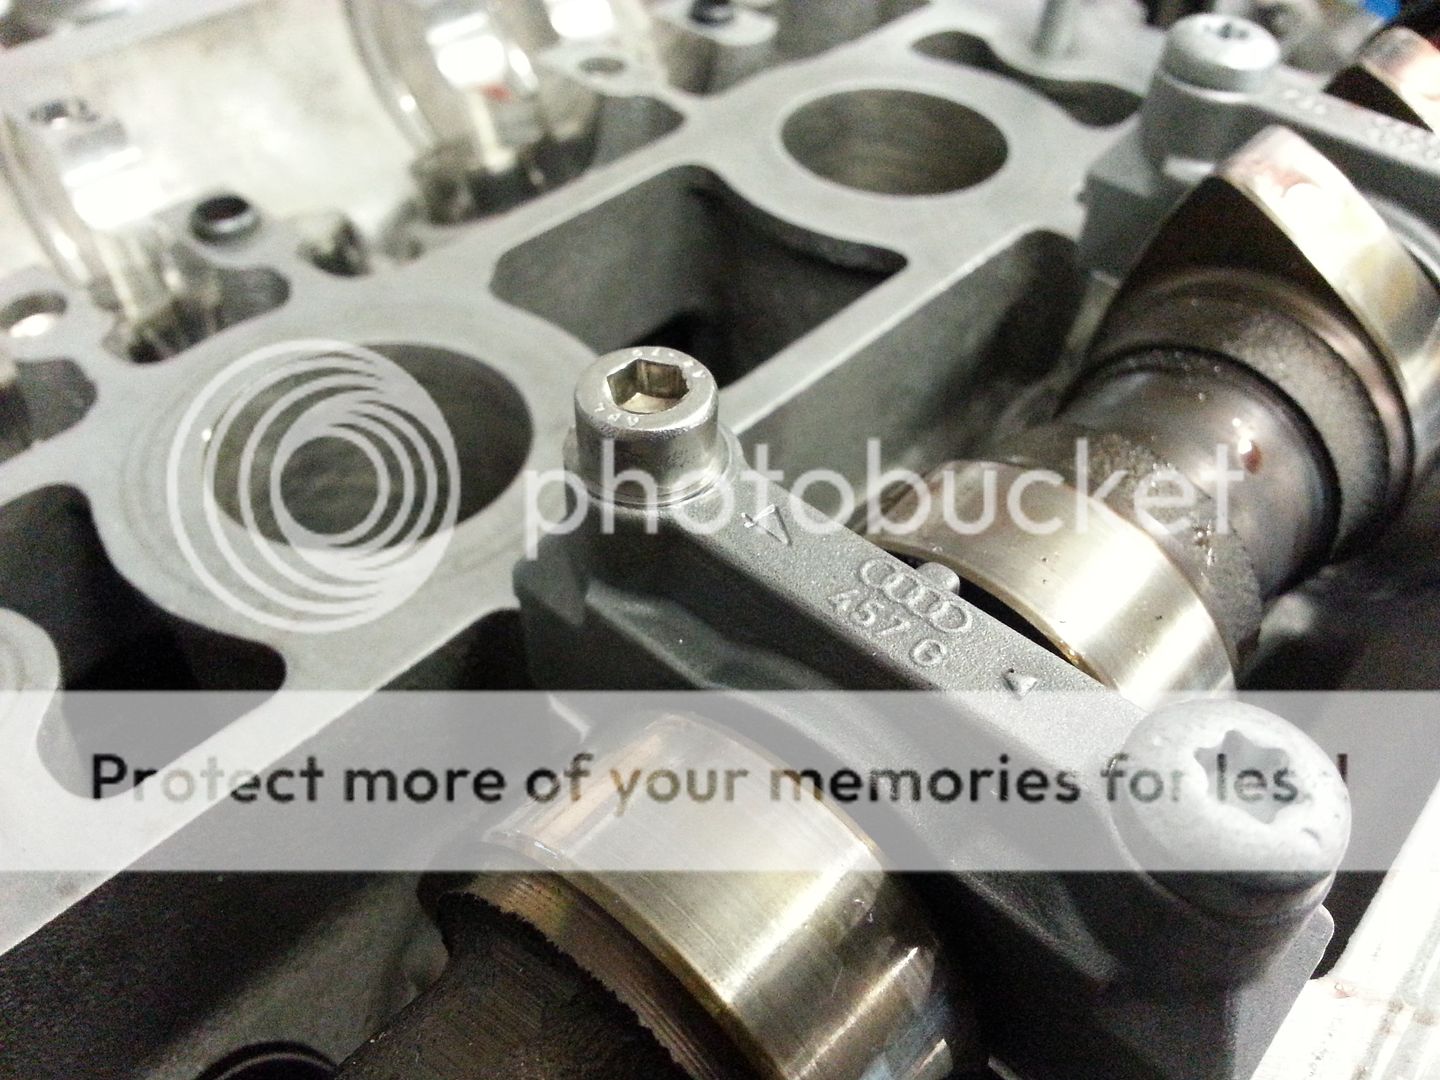
New bolts for the cam caps...

Sadly though on one of the holes where a bolt had snapped off the threads up top were iffy as hell so to be sure I used a longer bolt torqued to 10nm... if this comes loose after the running in period then only other choice is redrill for a large bolt or helicoil... hopefully this will be fine... torqued up ok so fingers crossed...
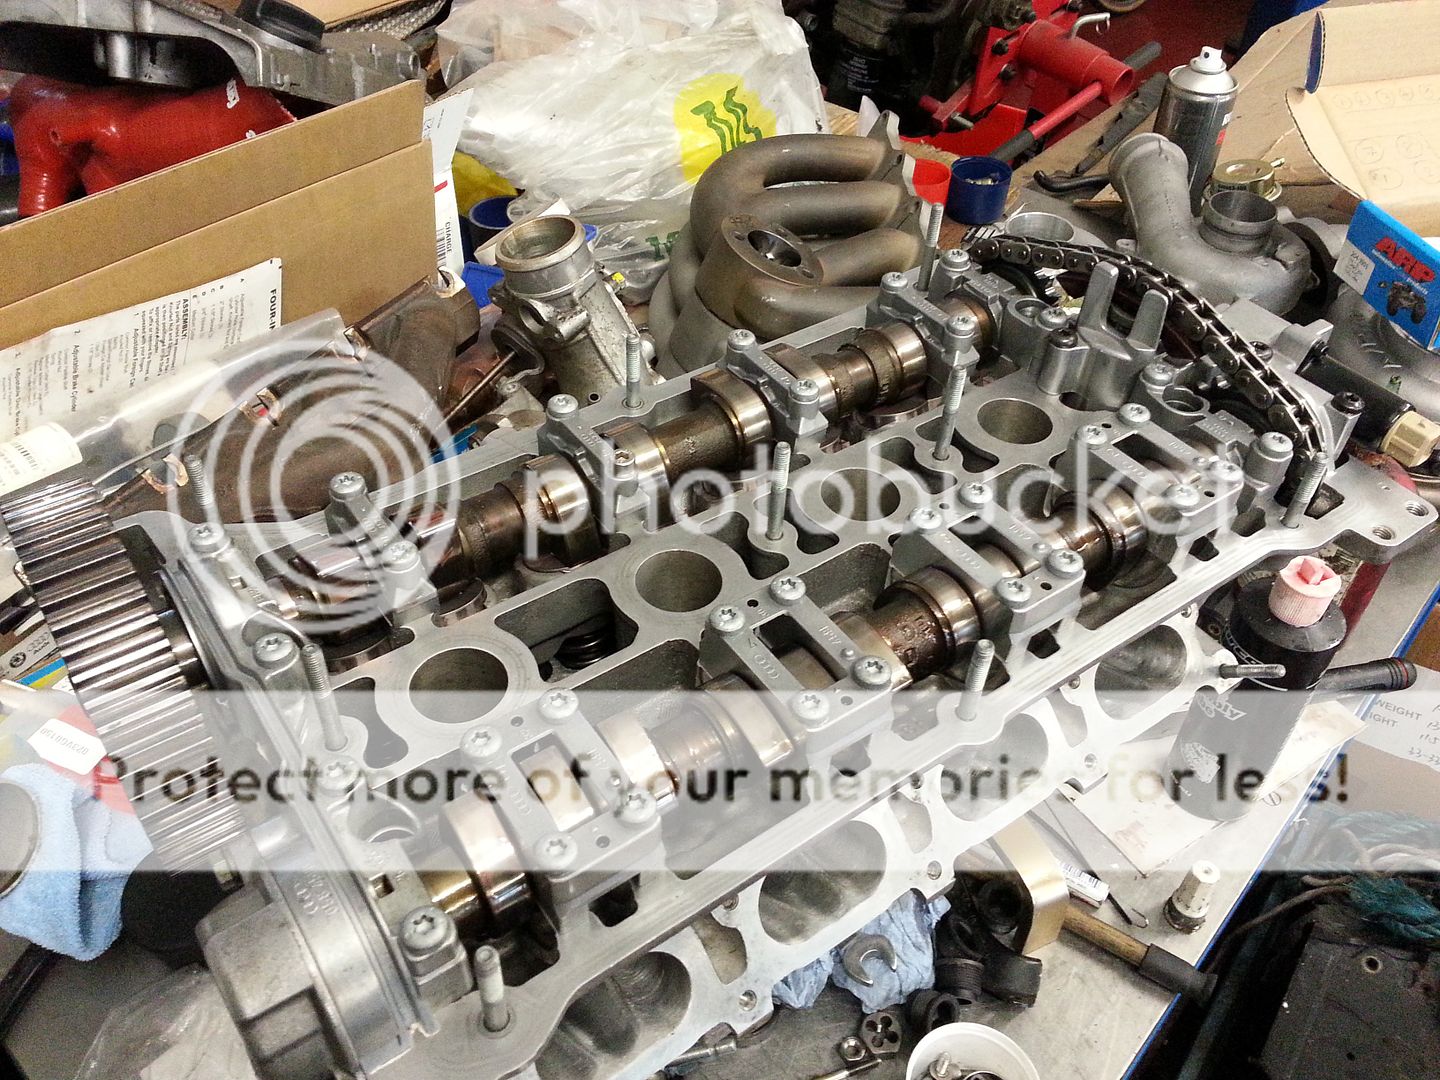
All done ...
Oiled the bores...
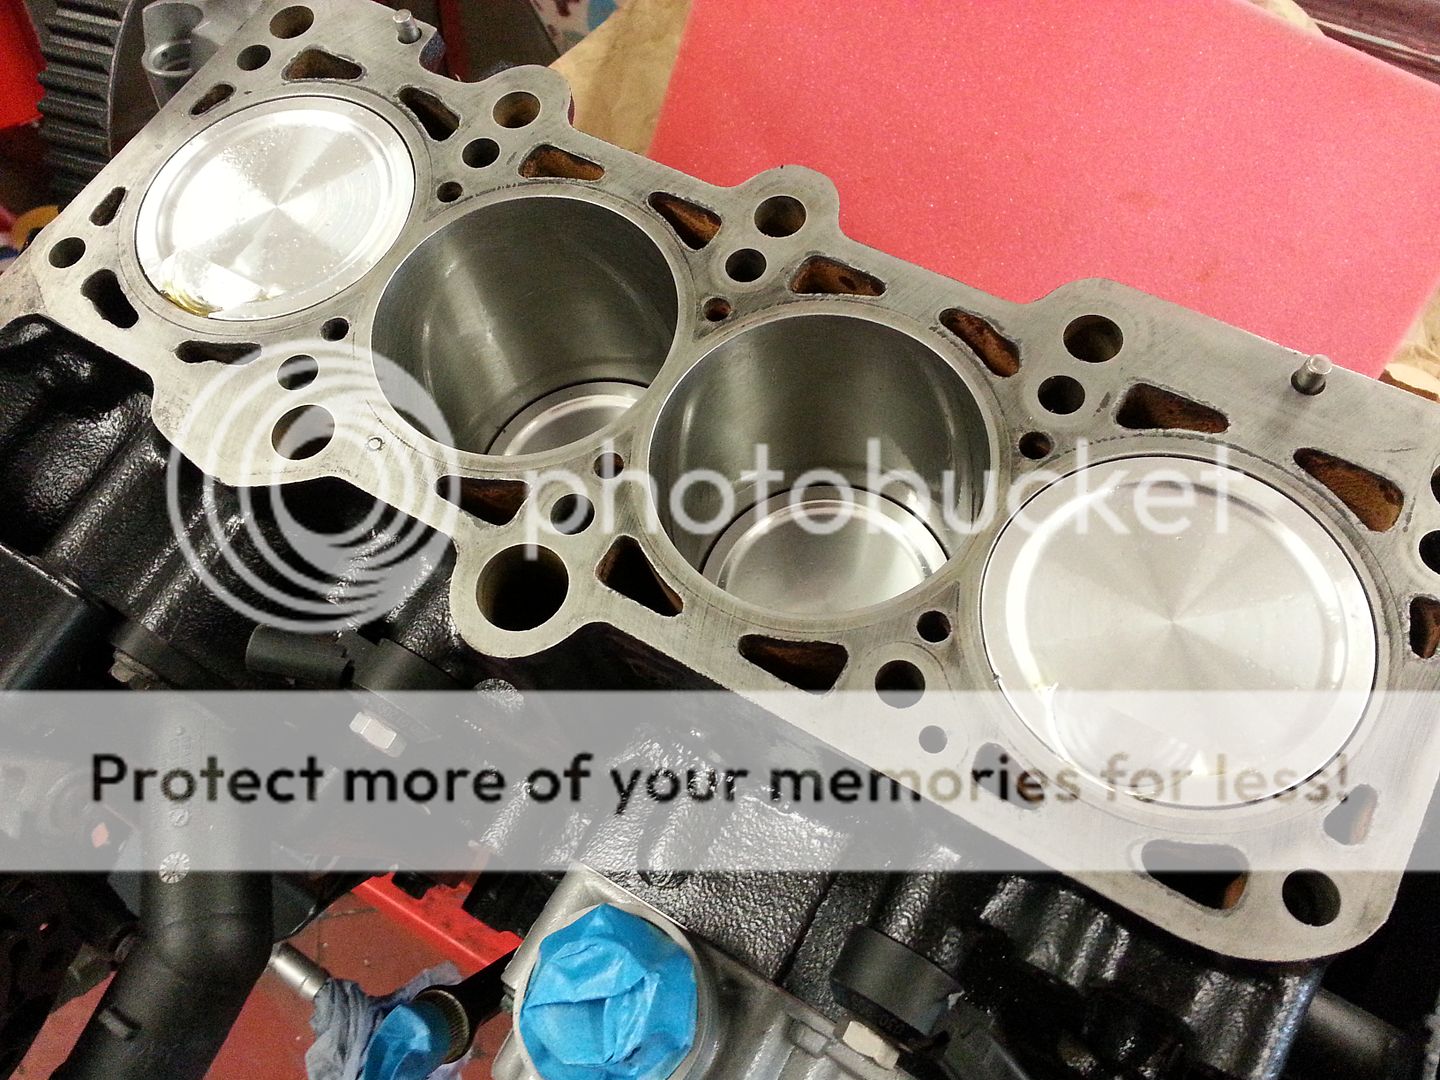
Dropped on the headgasket
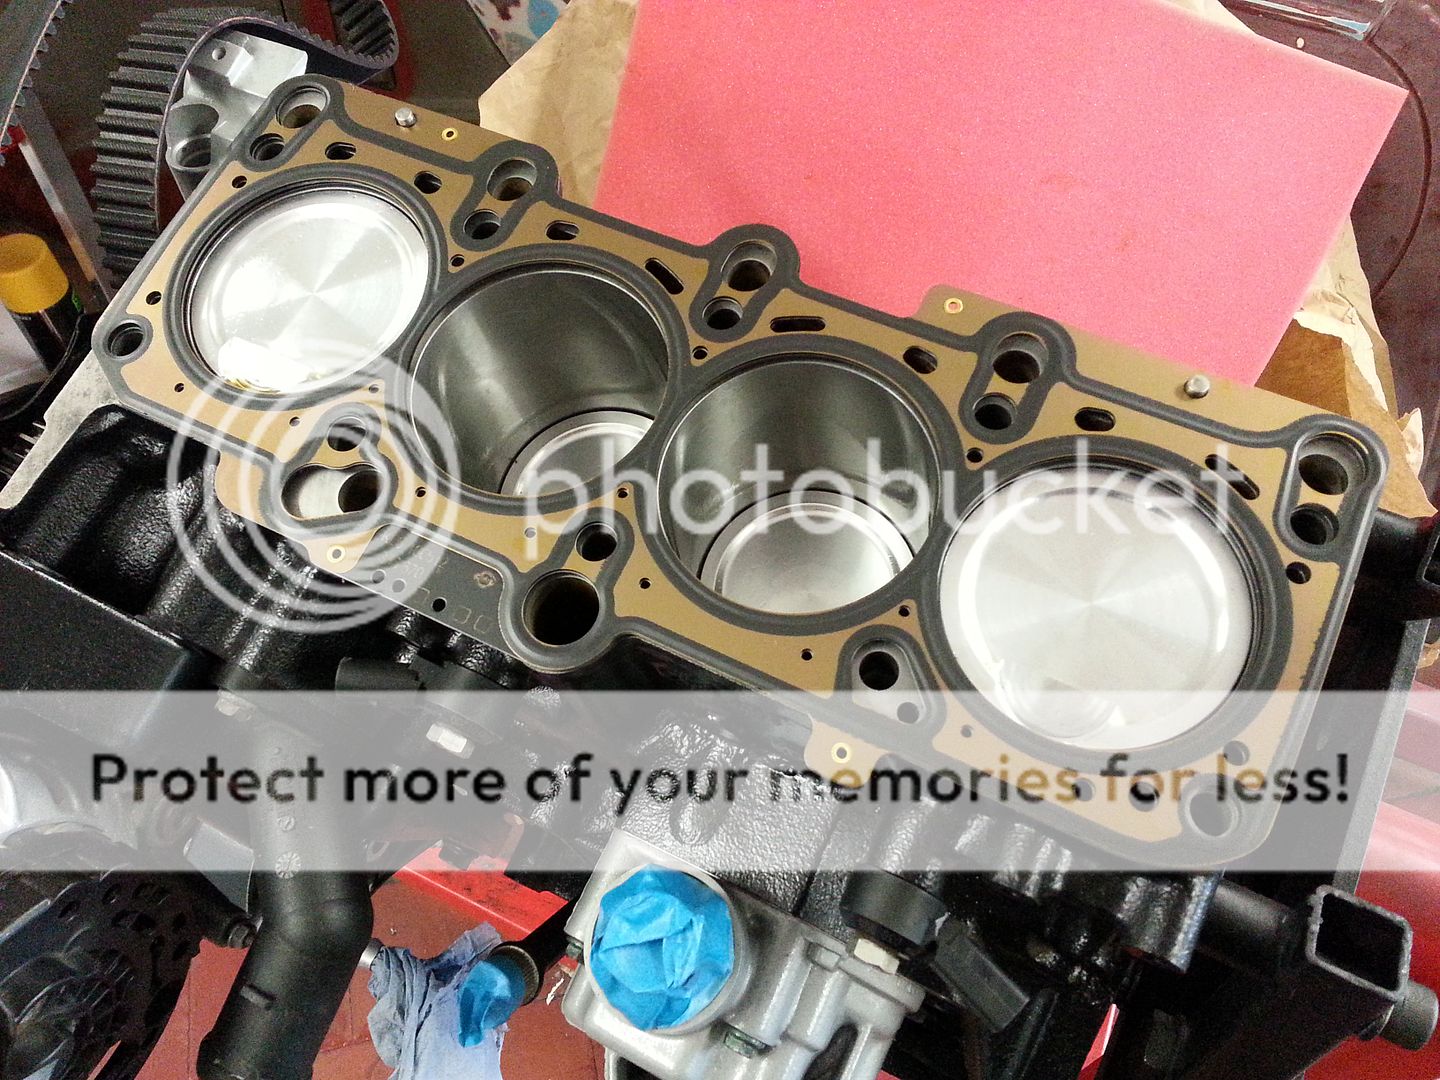
...and dropped on the head...
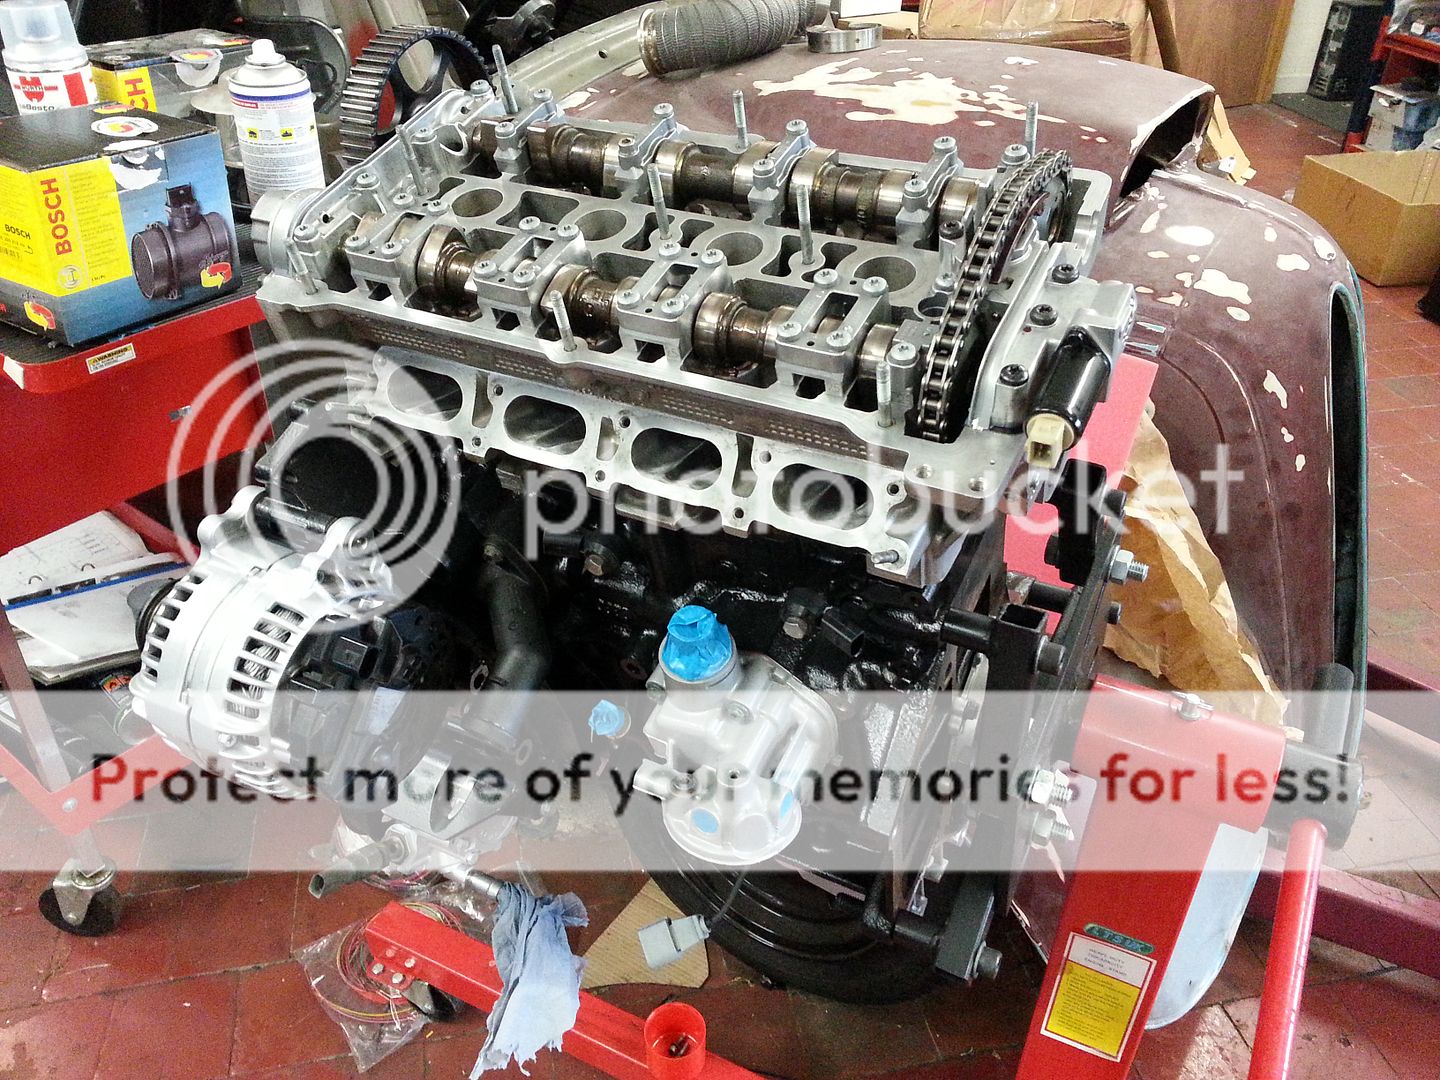
Out with the ARP's...
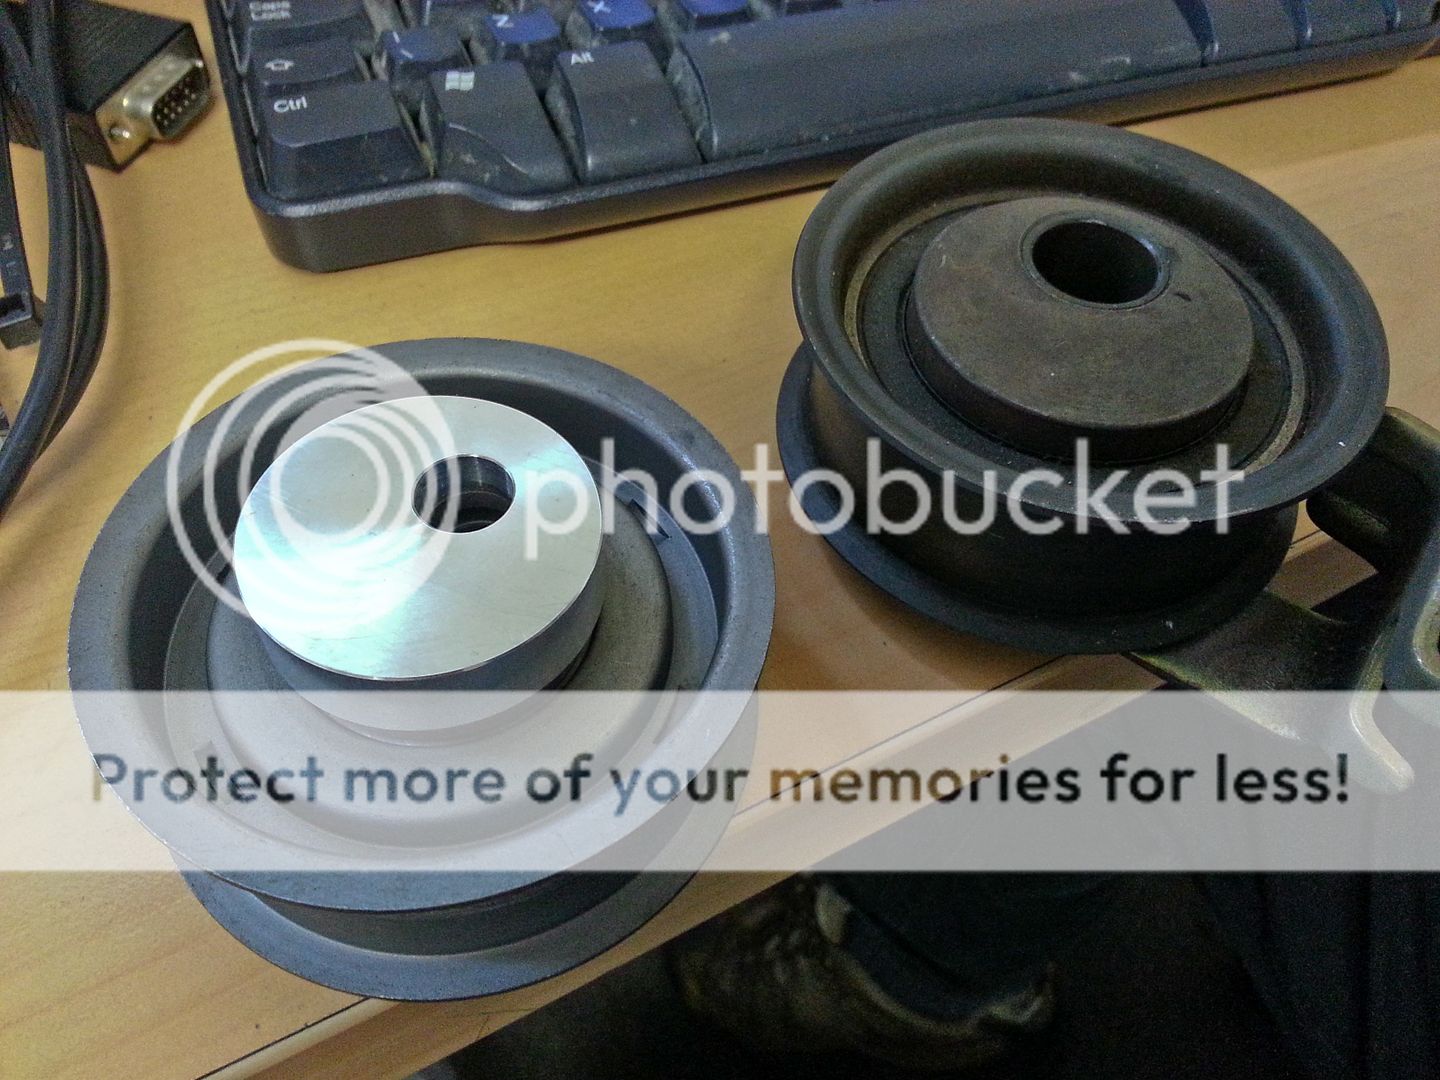
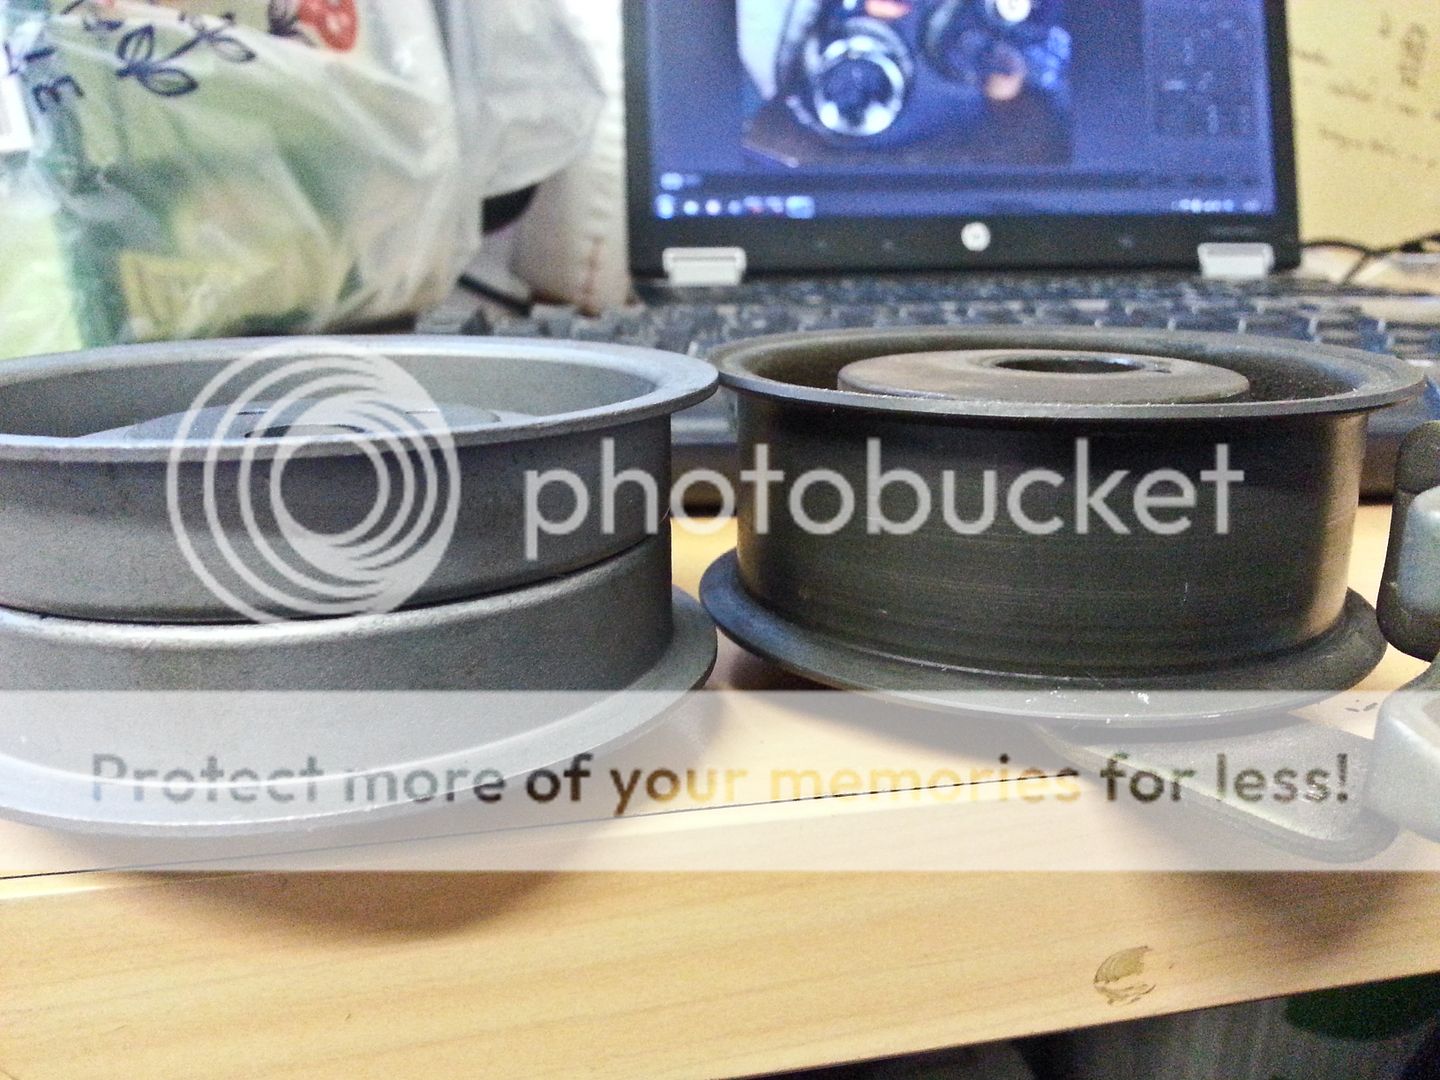
...then hit an issue with the tensioner (I did anticipate this tbh)
The manual tensioner couldn't roll round as the tensioner damper was in the way... this would be an issue going forward as it needs the room to swing to allow the belt to come off/go on etc...
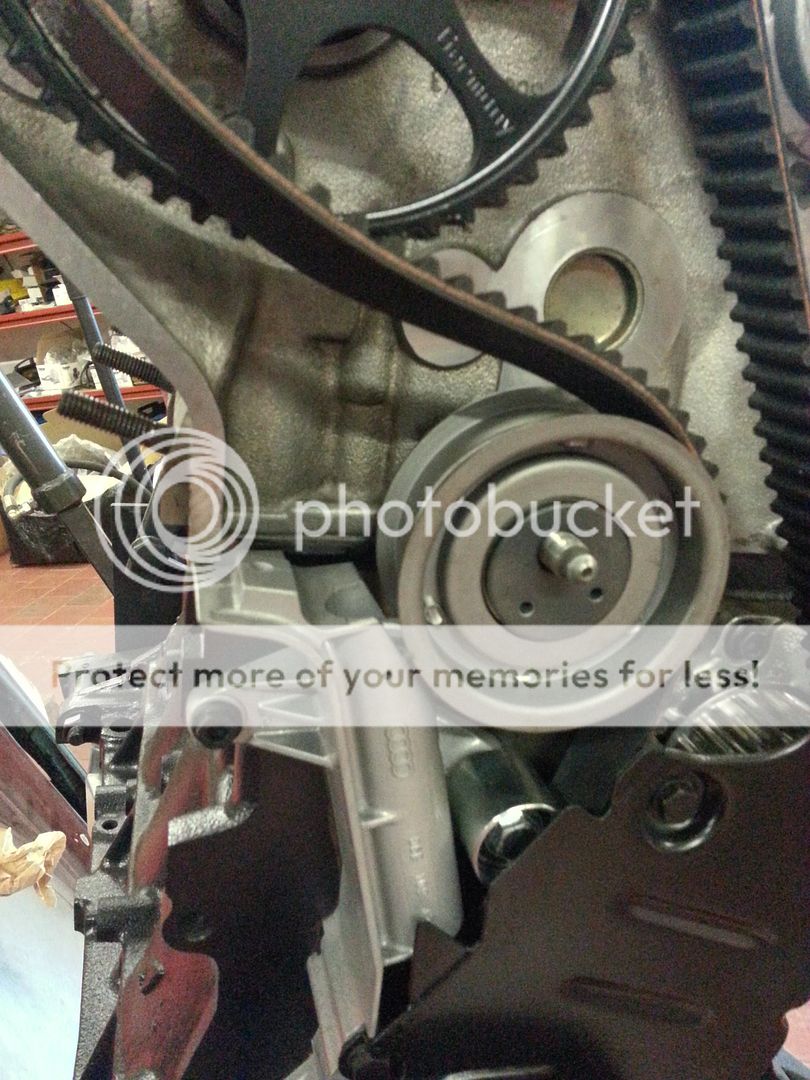
...so I profiled the dampers body and all was good in the world

Added some previously painted/lacquered bits...
Exhaust manifold next
<tuffty/>
Valves and springs in...
Chasing threads and fitting studs back in...
Next up, fitting cam pulley back on using an ARP bolt and EKAGrip shim...
The shim has diamond shizzle on it apparently for increasing friction between cam and pulley... fecking expensive is all I can really say but seemed a good idea..
Fitted...
ARP'd up
New bolts for the cam caps...
Sadly though on one of the holes where a bolt had snapped off the threads up top were iffy as hell so to be sure I used a longer bolt torqued to 10nm... if this comes loose after the running in period then only other choice is redrill for a large bolt or helicoil... hopefully this will be fine... torqued up ok so fingers crossed...
All done ...
Oiled the bores...
Dropped on the headgasket
...and dropped on the head...
Out with the ARP's...
...then hit an issue with the tensioner (I did anticipate this tbh)
The manual tensioner couldn't roll round as the tensioner damper was in the way... this would be an issue going forward as it needs the room to swing to allow the belt to come off/go on etc...
...so I profiled the dampers body and all was good in the world
Added some previously painted/lacquered bits...
Exhaust manifold next
<tuffty/>

- Joined
- Sep 14, 2008
- Messages
- 24,836
- Reaction score
- 6,078
- Points
- 113
- Location
- Wibbleton
- Website
- www.tuffty.co.uk
are you still going top mount or is it going to be oem bottom mount
Top mount if I can get the turbo in the place I want
<tuffty/>
- Joined
- Mar 15, 2010
- Messages
- 954
- Reaction score
- 93
- Points
- 28
I hope Bill has stocked up on his Welding Tapeâ¢. I got through a fair bit when making mine.
When you think you will make start on the manifold Tuffty? Should give me something to anticipate updates on :icon_thumright:
When you think you will make start on the manifold Tuffty? Should give me something to anticipate updates on :icon_thumright:
- Joined
- Sep 14, 2008
- Messages
- 24,836
- Reaction score
- 6,078
- Points
- 113
- Location
- Wibbleton
- Website
- www.tuffty.co.uk
I hope Bill has stocked up on his Welding Tapeâ¢. I got through a fair bit when making mine.
When you think you will make start on the manifold Tuffty? Should give me something to anticipate updates on :icon_thumright:
Need to buy some 1.25" sched 10 straight pipe first then I have 3 days leave left to take so will make a long weekend of it... hopefully should have it ready for welding in that time and then it will be a case of when bill has 5 mins spare to weld a bit at a time...
Will try and order some up this week...
<tuffty/>

- Joined
- Sep 14, 2008
- Messages
- 24,836
- Reaction score
- 6,078
- Points
- 113
- Location
- Wibbleton
- Website
- www.tuffty.co.uk
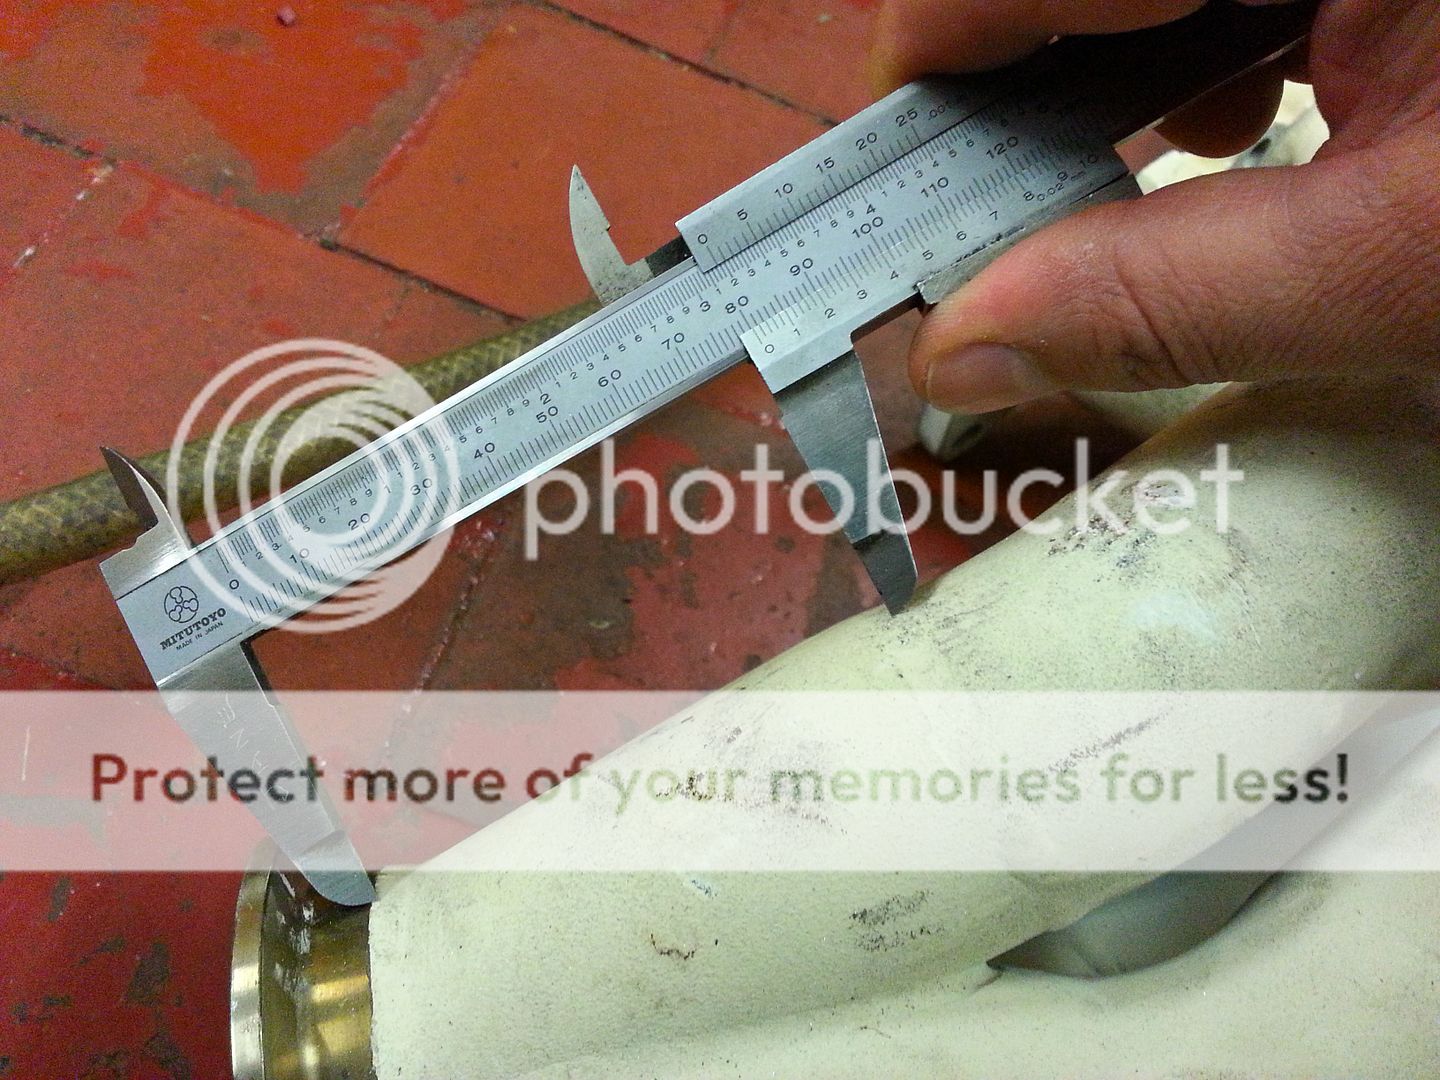
Nothing much to report... basically cleared up all my stuff that was under the car and made the car pushable if the ramp is required... beyond that I have reading up on making merge collectors and after a little thinking and eying stuff up I have come to the conclusion that while I am sure I could make one I am not sure if I can be ar*ed... so...
...either gonna get the Treadstone one or.... I am going to have a chat with a couple of the UK mani builders... the problem is getting the cuts right and accurate to enable lining them up right and stuff... while I am sure I could do it the amount of effort getting it done just for a one off is a PITA and I just want to get things moving on the build... I can't get the build engine/box out of the car until the mani is done... I can't fit the new engine until the heatshielding is done and I want the engine out for that... I can fit the engine until I have sorted the gearbox the build engine is attached to which of course can't come out unitl the mani is done and I can't start the mani until I have the merge collector as this is the bit that dictates the mani build and position of turbo etc blah meh....
Have initially emailed the guys that built the sidewinder mani for the Mk2 Golf we had in a while back... they are great fabricators so this should be no issues for them...

I only need the collector bit as the rest I can do... will drill a hole and create the wastegate take off once I know where its all going
So... as is tradition... I painted stuff...
Hopefully it won't take too long to sort a collector out... I am also now going for 1.5" rather than the 1.25" pipework I was going to do... if spool is affected then so be it but it at least means I shouldn't have to run the turbo hard to get the power which at the end of the day is the end game..
<tuffty/>
...either gonna get the Treadstone one or.... I am going to have a chat with a couple of the UK mani builders... the problem is getting the cuts right and accurate to enable lining them up right and stuff... while I am sure I could do it the amount of effort getting it done just for a one off is a PITA and I just want to get things moving on the build... I can't get the build engine/box out of the car until the mani is done... I can't fit the new engine until the heatshielding is done and I want the engine out for that... I can fit the engine until I have sorted the gearbox the build engine is attached to which of course can't come out unitl the mani is done and I can't start the mani until I have the merge collector as this is the bit that dictates the mani build and position of turbo etc blah meh....
Have initially emailed the guys that built the sidewinder mani for the Mk2 Golf we had in a while back... they are great fabricators so this should be no issues for them...
I only need the collector bit as the rest I can do... will drill a hole and create the wastegate take off once I know where its all going
So... as is tradition... I painted stuff...
Hopefully it won't take too long to sort a collector out... I am also now going for 1.5" rather than the 1.25" pipework I was going to do... if spool is affected then so be it but it at least means I shouldn't have to run the turbo hard to get the power which at the end of the day is the end game..
<tuffty/>
I went for the cast collector just for piece of mind as that's the focus point for all the hotstuff and its a pitFa to get the mani off if the collector cracks
BTW, when are you sponsoring ASN members with oem parts spraying
BTW, when are you sponsoring ASN members with oem parts spraying
- Joined
- Sep 14, 2008
- Messages
- 24,836
- Reaction score
- 6,078
- Points
- 113
- Location
- Wibbleton
- Website
- www.tuffty.co.uk
I went for the cast collector just for piece of mind as that's the focus point for all the hotstuff and its a pitFa to get the mani off if the collector cracks
BTW, when are you sponsoring ASN members with oem parts spraying
I got a quote back from Nortech Performance- High Performance Development for 60+vat which I didn't think was too bad... I just need to double check my measurements as I want to leave enough sticking out past the welded section to allow getting in with the TIG..
I was actually out OCD'd at the weekend by the owner of the S3 Bill mapped with one of Dan's 7+7 hybrids on... he is more anal than me even to the point he pointed out the writing on my cam belt was facing the wrong way... so now obviously I need to change that as its bothering me now LOL
<tuffty/>
- Joined
- May 28, 2004
- Messages
- 10,217
- Reaction score
- 2,385
- Points
- 113
- Location
- nr Glos
- Website
- www.badger5.co.uk
two of you in the room... Damn.... Scarey Mary
lmao
out OCD'd on cambelt.. made me smile
lmao
out OCD'd on cambelt.. made me smile