What if we sponsored you for charity to completely ignore the OEM fettish?
 
Even more head porn

I'm glad as its all done now, just need to get the snapped studs out and give it a super light skim with one of my new diamond tip cutter

You might make out there is another angle to the seat, hard to see as its a iPhone camera.

null_zpsbcbedf66.jpg

null_zpsd21ea996.jpg

null_zps59cb5ec3.jpg
 
  • Like
Reactions: andy1571, Gizmo20VT, badger5 and 1 other person
Do you need to put new valve guides in, or are they ok so use like that?
 
cool, would be a shame if you had to have new ones sticking out and disturbing the air flow.

Awesome work by the way, let me know if you coming to Dubai on holiday. I will take my head off just for you :)
 
  • Like
Reactions: ozzy38
Had a bit of a fail last weekend... started painting the wheels... all was going well...

20130915_134106.jpg


20130915_162922.jpg


20130915_163520.jpg


20130915_165218.jpg


20130915_165225.jpg


..then I lacquered them...
20130915_174257.jpg


:(

Guess I didn't leave adequate drying time... which apparently is supposed to be at least 30mins... clearly 5-10mins is not enough :(

Will have another go at some point later...

So today to get over the fail I painted more engine bits and bolted stuff on to make it prettier...

20130922_143447.jpg


20130922_143501.jpg


...I also collected up all the parts of the 'turbo kit' ready for its new home... quite sad as it marks the end of an era...
20130922_173745.jpg


...but obviously marks the start of a new phase... a phase that has a 600hp capable turbo in it... :D

<tuffty/>
 
  • Like
Reactions: Drue1, Webster2001, Gizmo20VT and 1 other person
Small update...

Forge sump arrived...
20130928_090032.jpg


20130928_090228.jpg


..and of course clearanced for the ARP mains studs...
20130928_104951.jpg


Not fitted it as yet as I need to fit the rear crank seal first requiring me to suspend the engine and remove the engine stand bracket and not had the time this weekend to look at that really...

But... following on from the disaster that was painting my wheel... had another go...
20130929_130655.jpg


20130929_171342.jpg


20130929_173750.jpg


20130929_173736.jpg


The silver worked really well and pops in the sunlight... need to give the lacquer a polish over to bring out the best but feel confident I have sussed this paint packages idiosyncrasies to crack on with the rest later.. I have some more on ordder now as I think I will redo the inlet and new charge pipe work in it ;P

One last parting photo... my trusty GT3071 turbo kit all boxed and ready to go to its new owner...
20130929_173814.jpg


A little sad but necessary to move on the evolution of the car....

...now to compile the parts list for the next stage :D

<tuffty/>
 
  • Like
Reactions: Djordje1 and Gizmo20VT
Nice work on the wheels tuffty, smooth finish.
What silver paint is it? And how many coats of paint and lacquer?
I need to do my 6 spoke TT wheels, and provided i can do a neat job (id be v happy with a finish like yours) i was going to refurb the wheels on the mrs' car.
Would also like rough cost of the materials you'l use for 4 wheelss if you wouldnt mind.

My last wheels were done with a gun, and the paint was v expensive and my prep work was crap so the finish wasnt v good at all. Il hopefully have learnt from that this time around.

I used more than I should on the one wheel due to the **** up but ordered some more so I can paint the inlet and charge pipe that colour too... came to £42 quid for 2 x silver and 2 x lacquer

Wurth German Alloy Silver Wheel Spray Paint 2 CANS NEW DEAL!!! | eBay
Wurth High Gloss Clear Alloy Wheel Spray Lacquer 2 CANS NEW DEAL!!! | eBay

The lacquer is a little dull on the spokes... not sure why but I am gonna leave it to cure properly and then a gentle wet sand with 2000 grit and then a machine polish should sort that... the simoniz lacquer I used on the inlet originally (was supposed to be wheel paint too) was easier to get a decent gloss but just seems to go soft near heat

Have learnt from doing this one... the next wheel I will approach with a bit more confidence now I know the score using the wurth stuff...

<tuffty/>
 
Small update...

One last parting photo... my trusty GT3071 turbo kit all boxed and ready to go to its new owner...
20130929_173814.jpg


A little sad but necessary to move on the evolution of the car....

...now to compile the parts list for the next stage :D

<tuffty/>

Mmm, that is a nice box!
 
Little bit of an update...

Spoke to Andrew last week regarding an update on the head and its all done but obviously I am happy to wait until Andrew is in a better position with his recent injury to organise getting that back to me...

In the mean time I have been accumulating bits...

New 750cc injectors... hopefully these will be as good as the 550cc ones they are replacing and at 4bar will give me 830 odd cc of headroom if it looks like the engine is willing...
20131005_085423.jpg


Identical to the 550's (left) but have 750 scrawled on them...
20131005_085643.jpg


You can see that the holes are indeed larger
20131005_085020.jpg


Also have a 70mm throttle body... this is from the V8 S4... it will need a bead welding on (like the R32 TB) of course...
20131005_104229.jpg


20131005_105337.jpg


60mm std TB actually fits inside this one :)
20131005_104251.jpg


...also need to get my TB adaptor modded as its 60mm (using one of Bill's 60mm TB adaptors thats already 70mm bored for reference)
20131005_105622.jpg


...have also now got a 44mm Tial... its older style (so tested and proven) and purple!!... but it was a good price and I know its only been used for a day on Bill's dyno as it came off a customers car that had boost creep which was fixed fitting a new manifold and 60mm Tial wastegate!!... obviously it will get painted black ;P
20131005_110240.jpg


20131005_131930.jpg


Next to do is get the GT35 CHRA sent off to Beach Buggy Turbos for a new turbine and balance...
20131005_131953.jpg


I have bought some more paint (shocking I know) and looking to change the colour of the inlet mani and cam cover etc to the same silver as the wheels... this was the colour I had wanted originally but has the darker stuff sat on the shelf doing nowt..

Hopefully if Andrews feeling up for it I can get the head picked up next week... then of course ADI on the Saturday (I'll be there with Bill and his Ibiza...) and maybe get the head built on the Sunday :D

<tuffty/>
 
Wouldn't you be better off getting the wastegate anodised again? Not sure paint would fare that well would it? They say even the anodising fades.
 
Wouldn't you be better off getting the wastegate anodised again? Not sure paint would fare that well would it? They say even the anodising fades.

I painted the top of my MVS and it faired ok... did fade to a degree but was still kinda black... not worth the expense of anodising a different colour tbh if all it will do is fade anyway... faded black paint will be better than faded purple and cheaper than faded black anodising

<tuffty/>
 
Good point. Not a fan of the purple then? ;) You sorted a comp cover yet?

I have something on its way which may work if not its gonna be having a nice chat with Owens... and no... not a fan of purple :)

Yep
I plan to pack the head up one handed this sunday

W00t... but don't put yourself out or compromise your recovery though dude... I packed the thing originally and know what a c-unit it was...

<tuffty/>
 
The fading is one of the reasons you can water cool the newer ones apparently, along with supposedly preserving the life of the diaphragm where natural air flow is low.
 
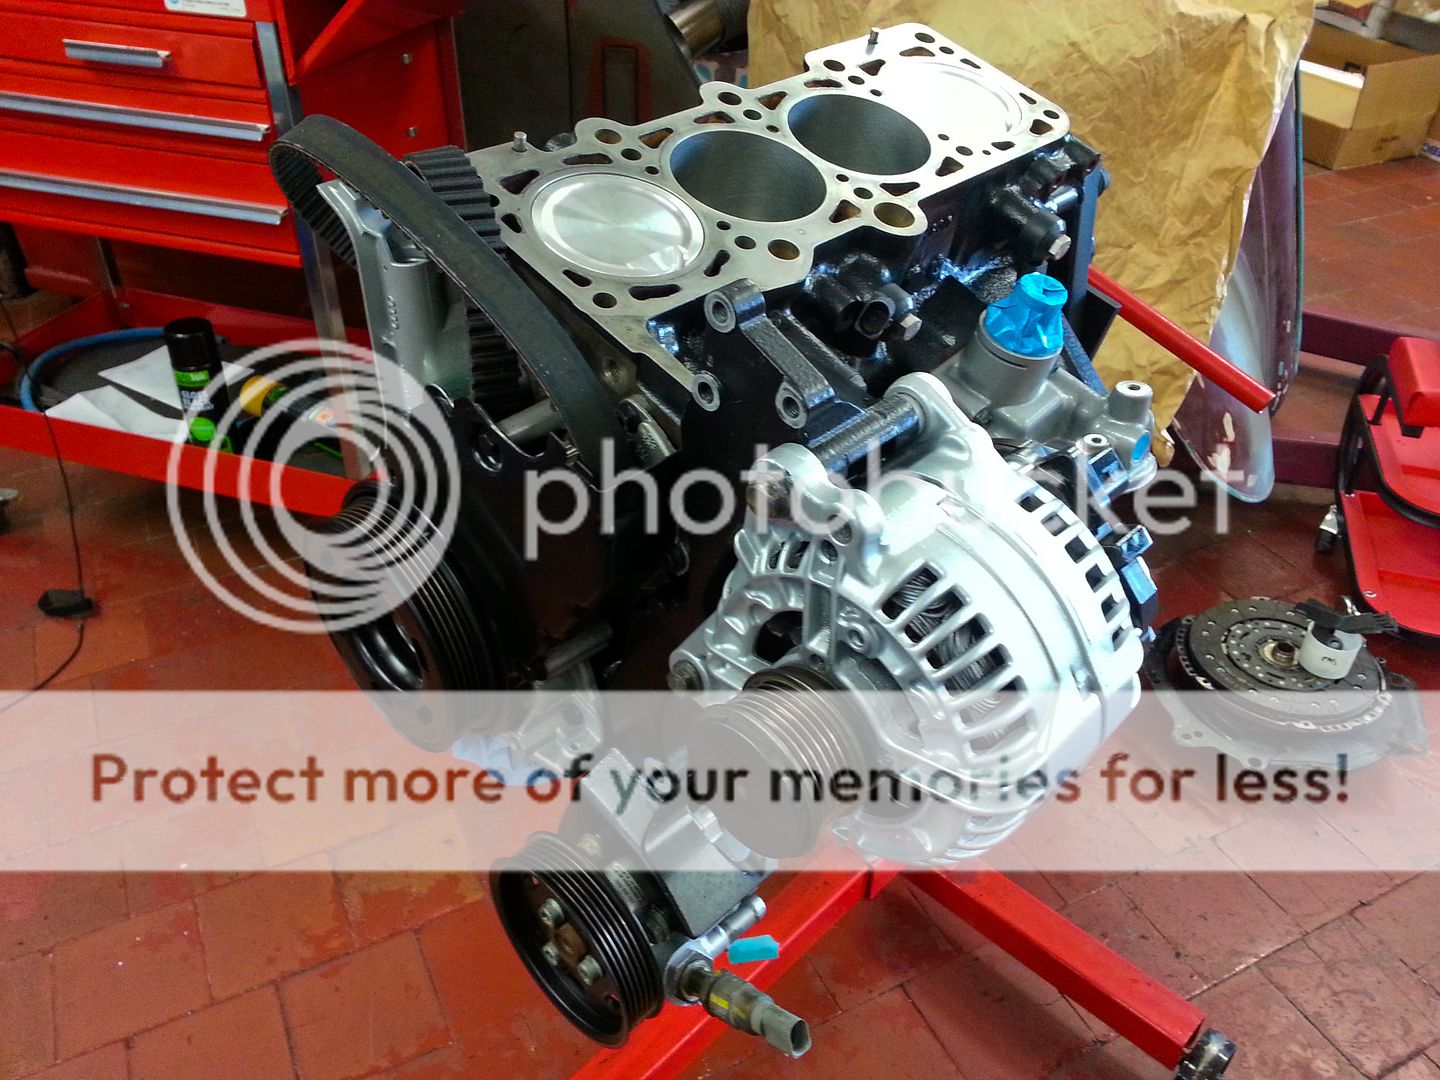
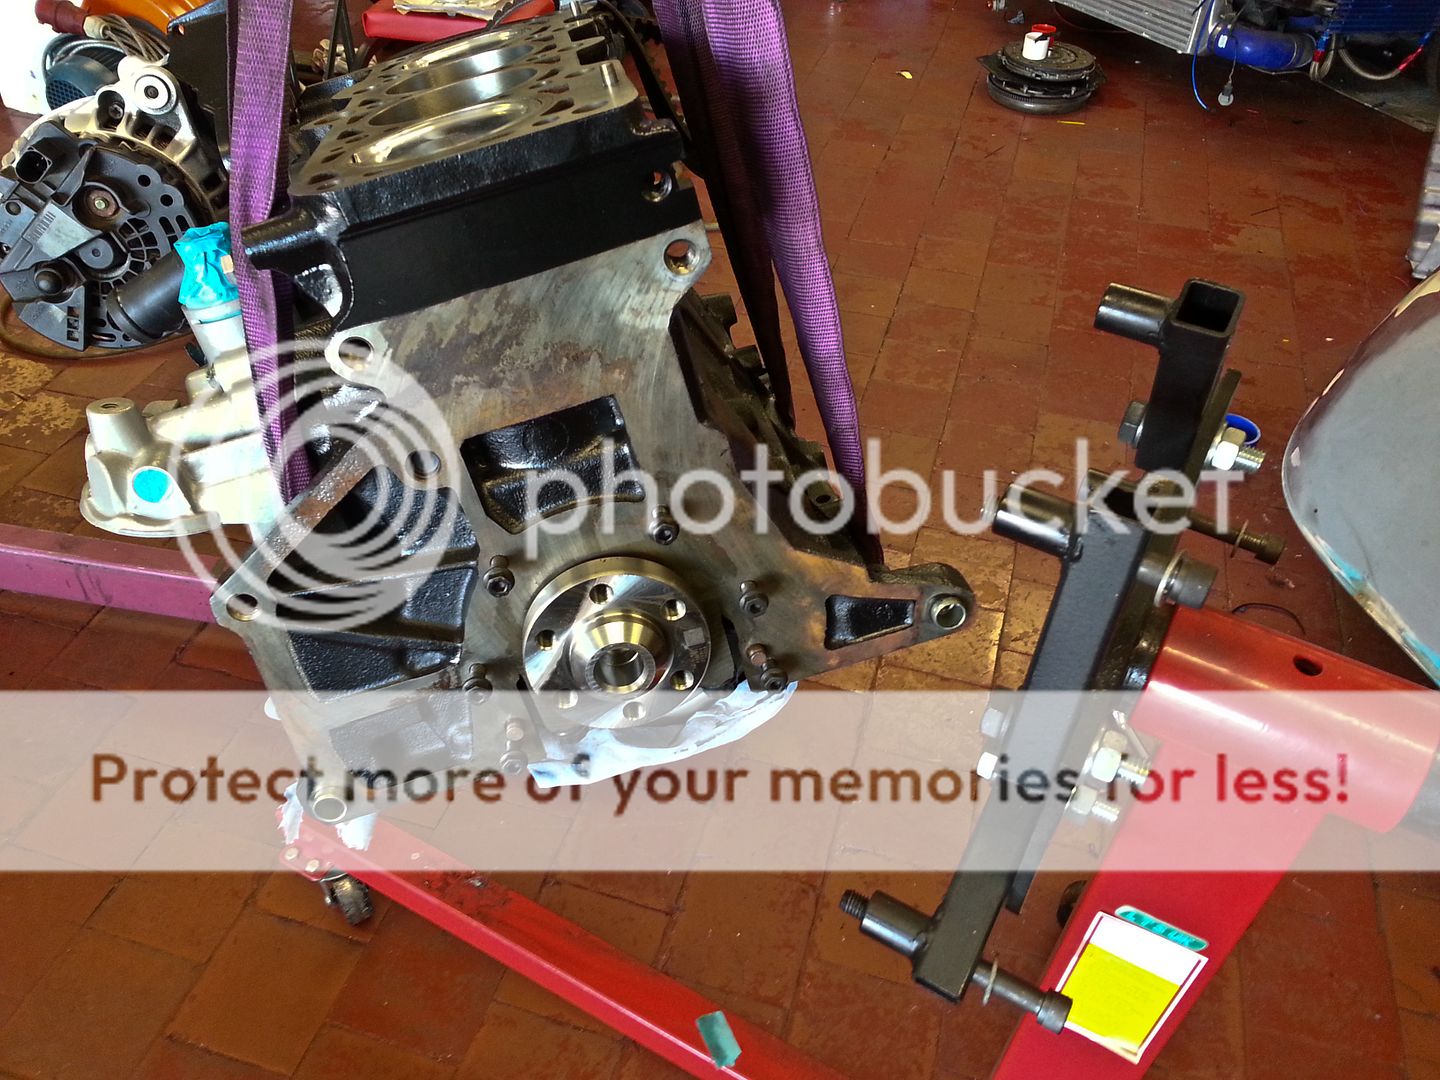
Two jobs I wanted to get out the way today... first was to get the rear crank seal on so that the sump can be fitted (after I have painted it of course:p)... this needed the engine to be removed from the stand so I could get to the back of the engine...

20131006_141329.jpg


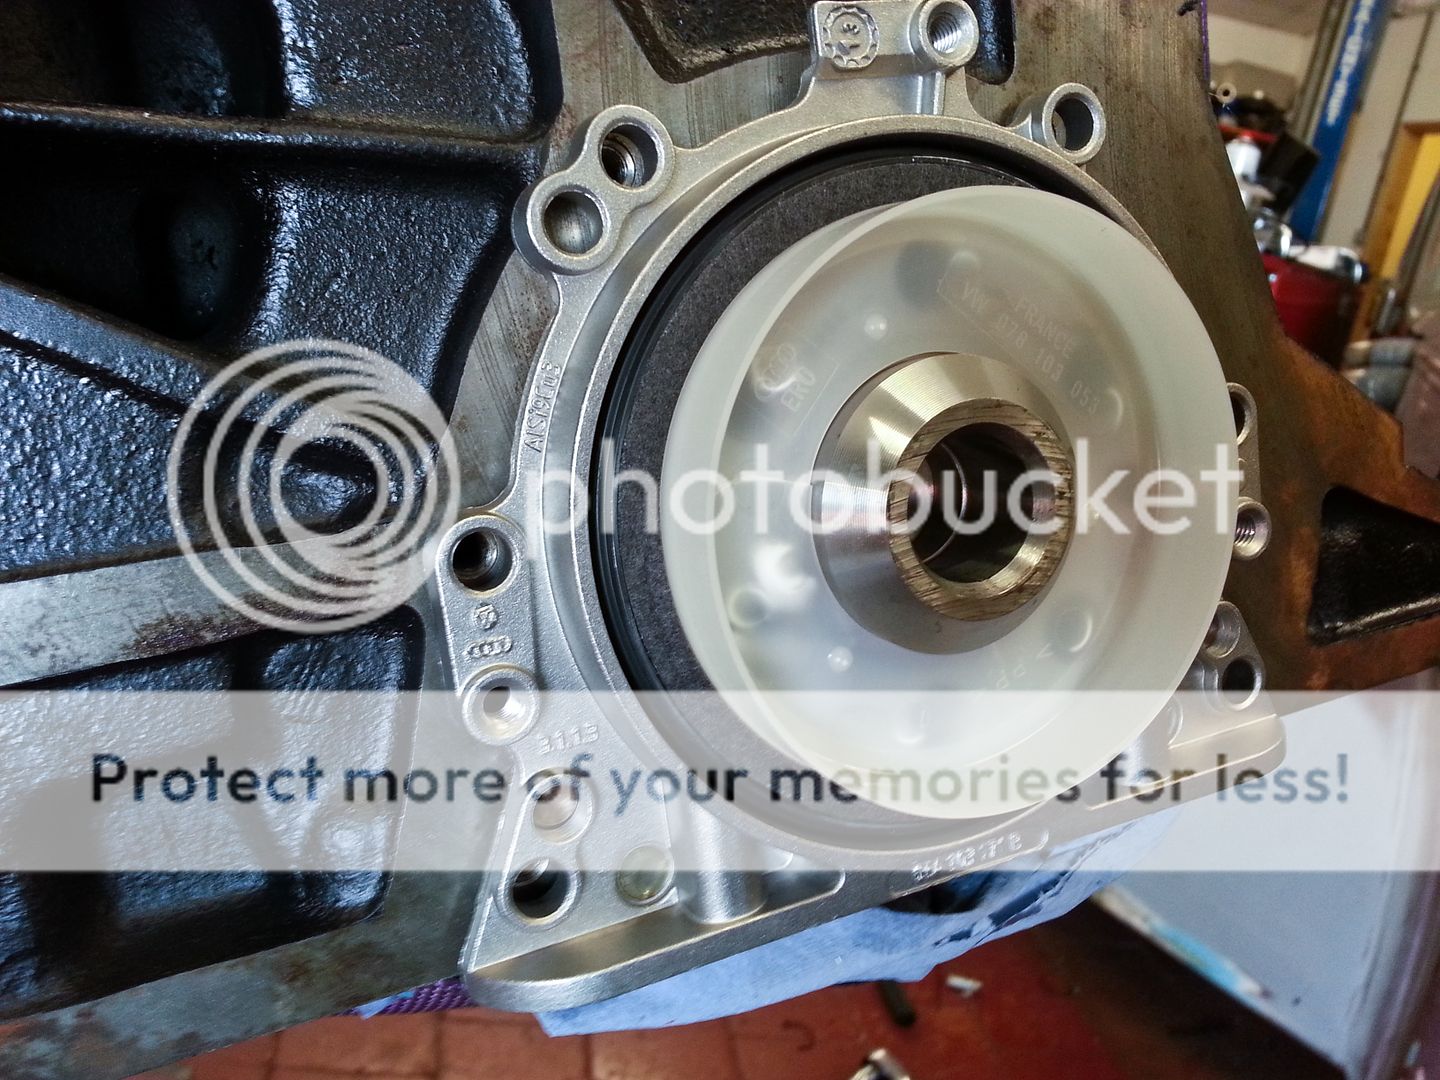
The rear seal is a complete unit, has a rubber seal around it so no need for sealant and has a plastic guide to aid getting the seals lip over the back of the crank... used a little oil on the crank to help the seal slip on and...
20131006_142130.jpg


..job done...
20131006_142740.jpg


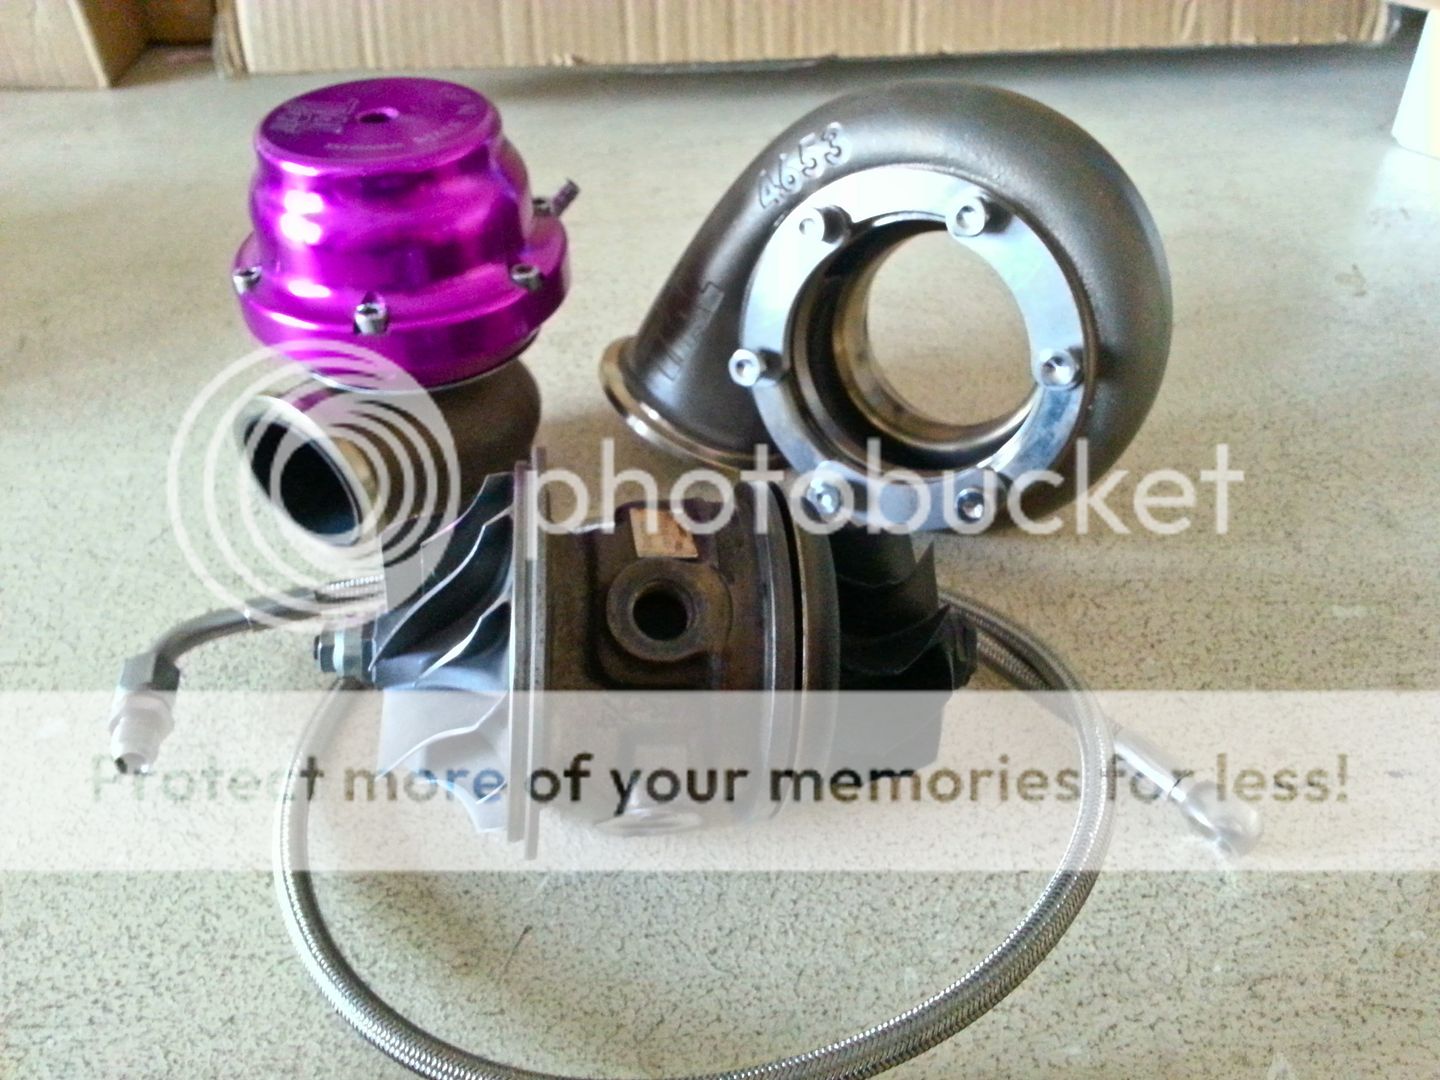
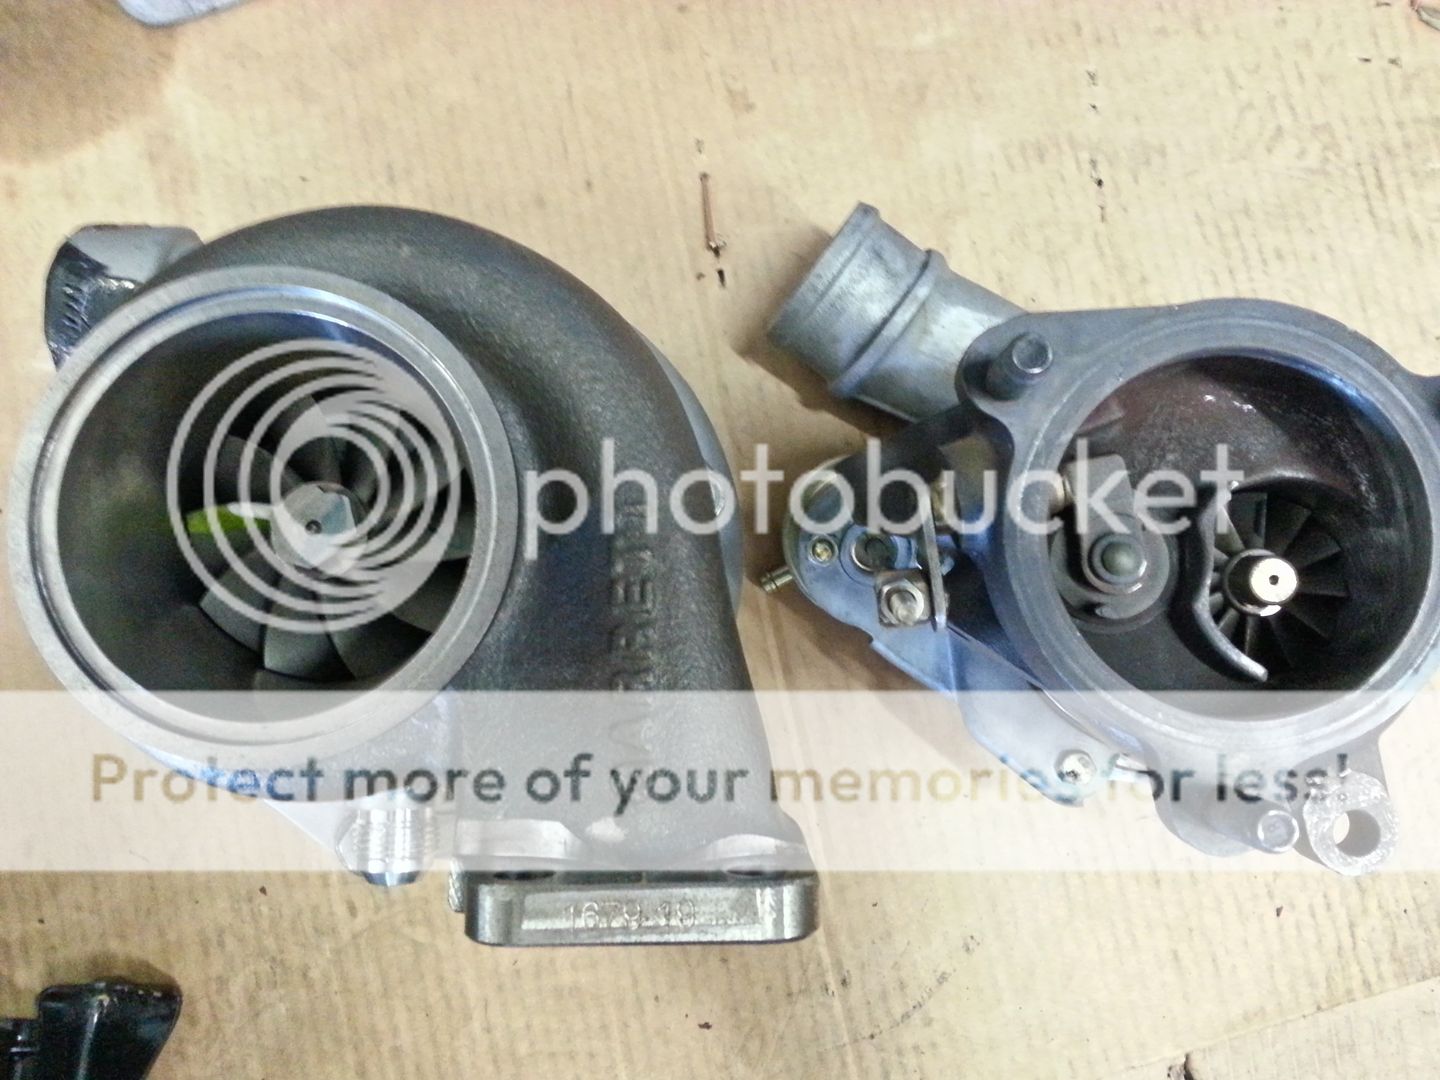
Second job was to pack the GT35 CHRA up to send to Dan for its new turbine... this left me with a bit of an issue as I kinda need the turbo to be able to work out space/fitment and of course design for the exhaust mani... as luck would have it there was a suitable substitute :)

The GT35 on my good friend Tony's pop drag car... ;)
20131006_145114.jpg


With that 'borrowed' I took a cheeky pic of it next to a K04 which of course id the turbo the old girl rolled out the factory with...
20131006_151730.jpg


20131006_151809.jpg


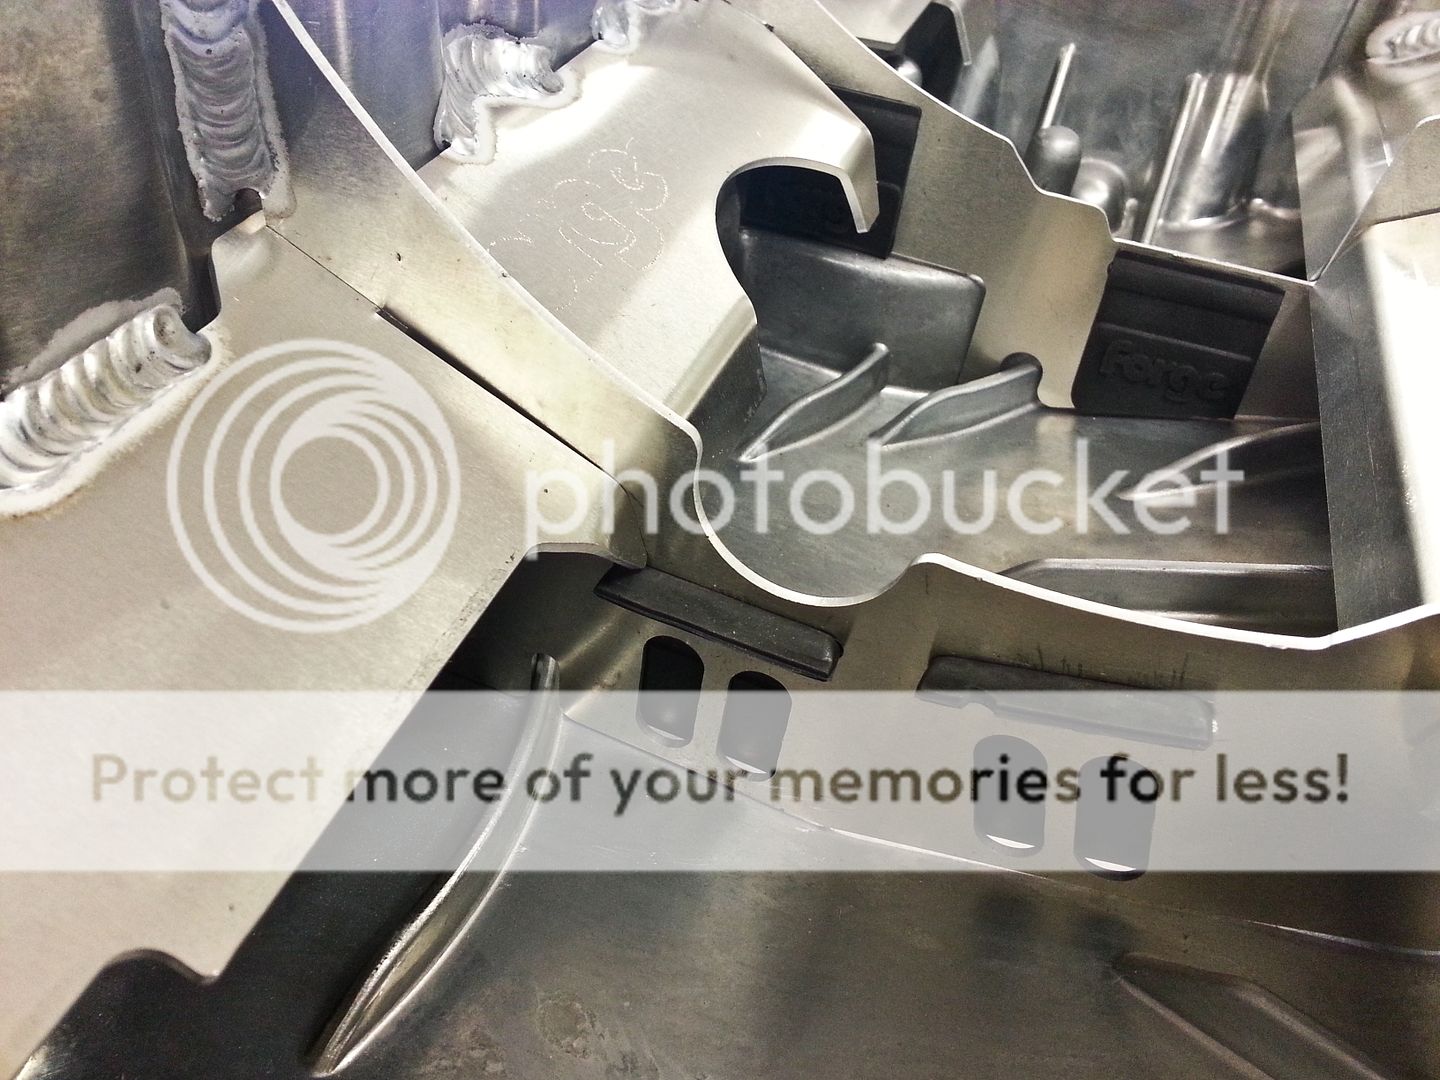
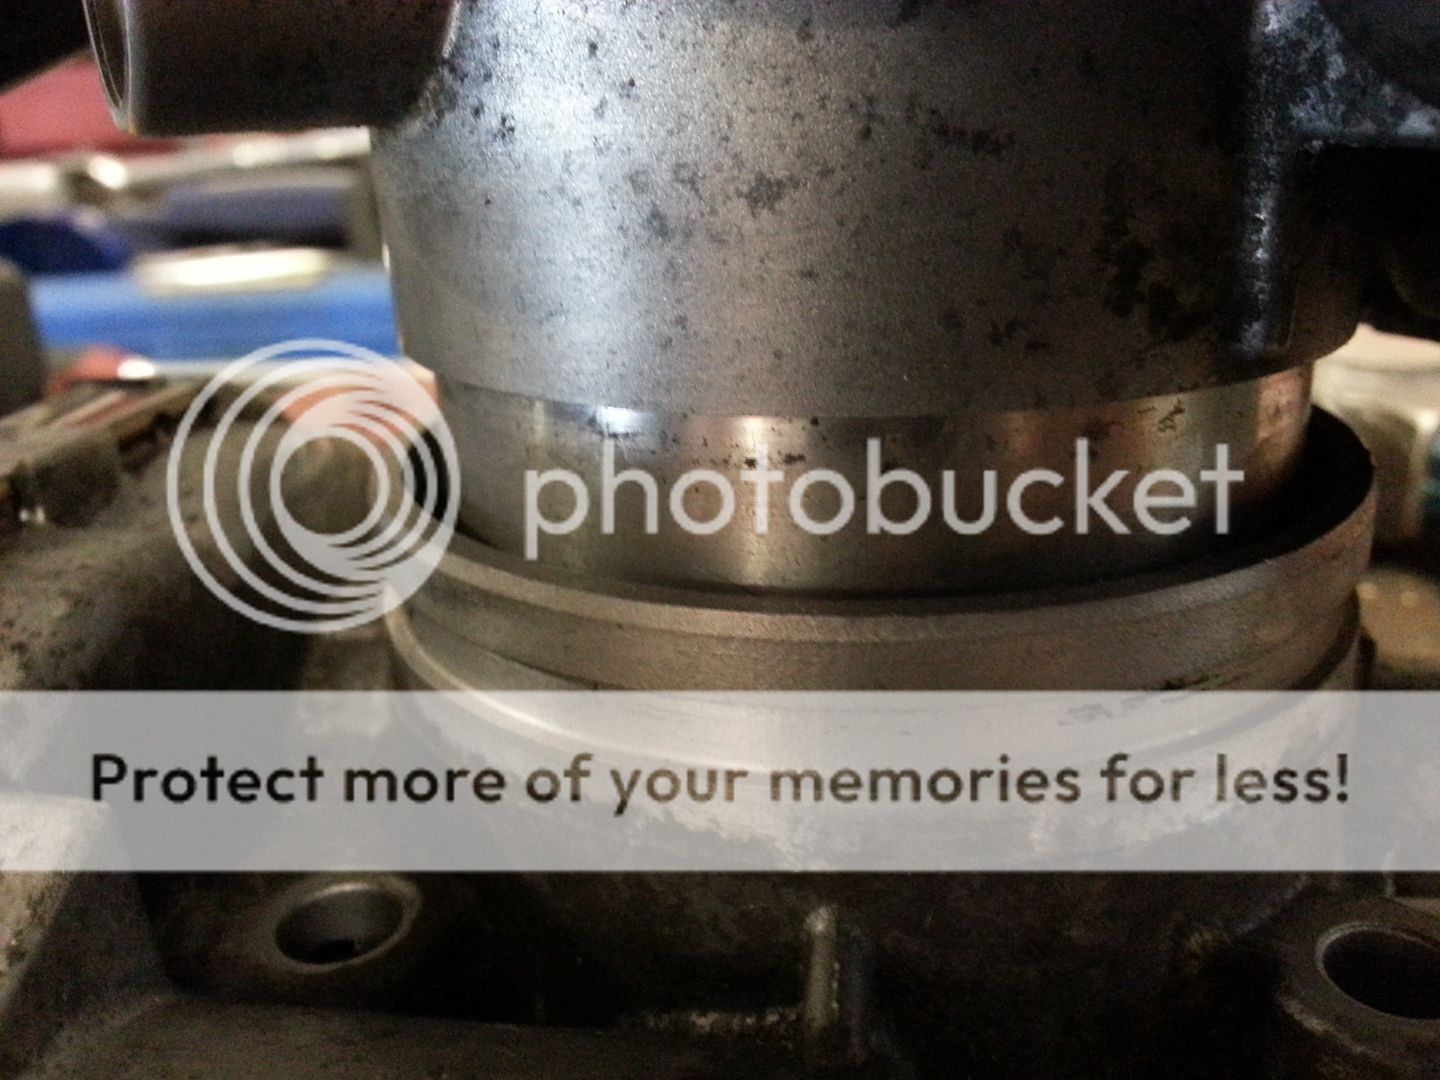
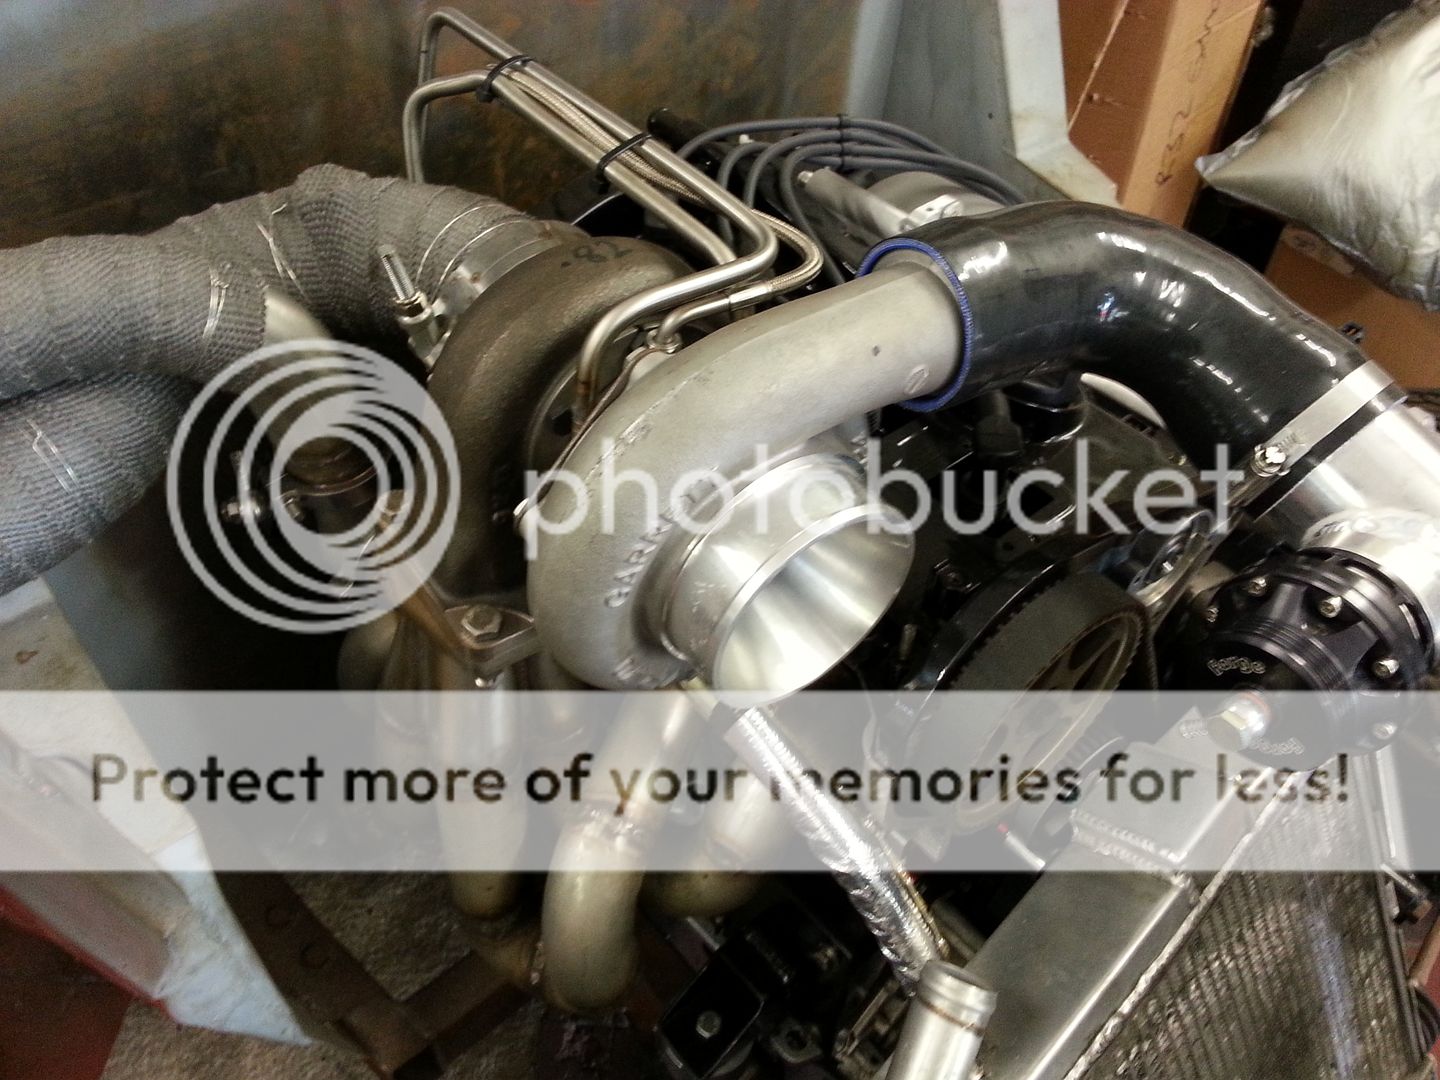
...swapped the hotside over to the Tial for a better idea of fitment... Tony is using a 0.82 T3 housing and looks massive next to the 0.63 Tial... that said, the 0.82 Tial Bill is using isn't that much different to 0.63 in this view... it definitely has more girth to it but both Tial hotsides are physically smaller than the Garrett ones... which is great to help it fit in tight places...
20131006_153130.jpg


Using a T3 collector Bill had kicking around I worked out a minimum height off the transfer box I could go as I want to sit the turbo low than the normal off the shelf manis do...
20131006_161132.jpg


20131006_161236.jpg


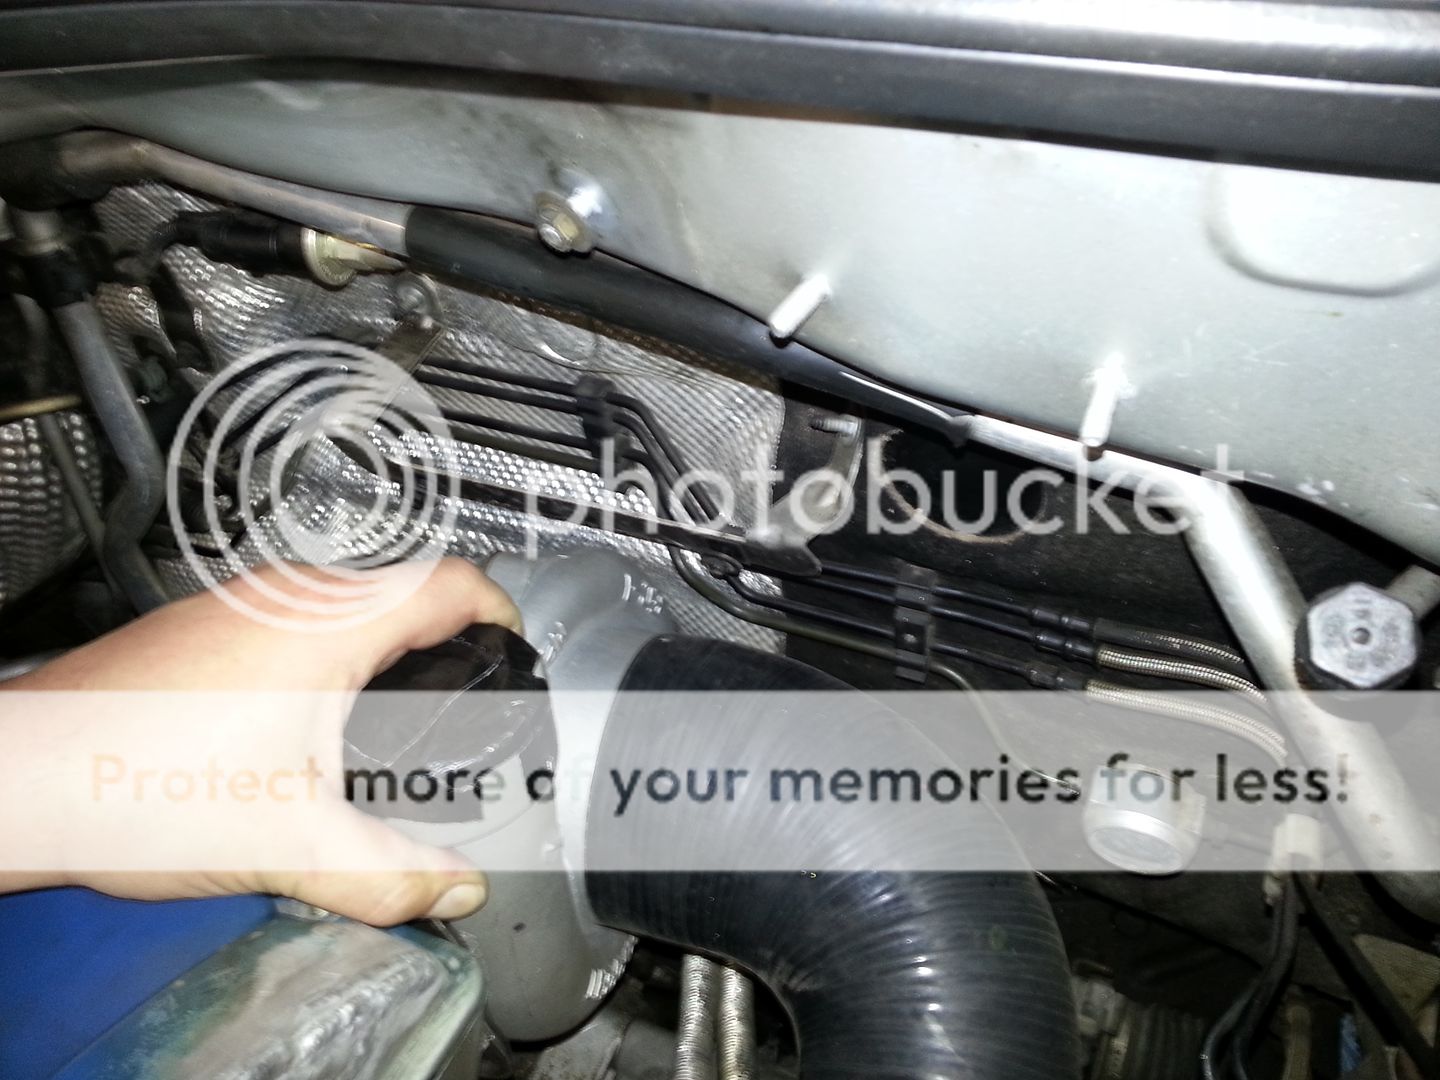
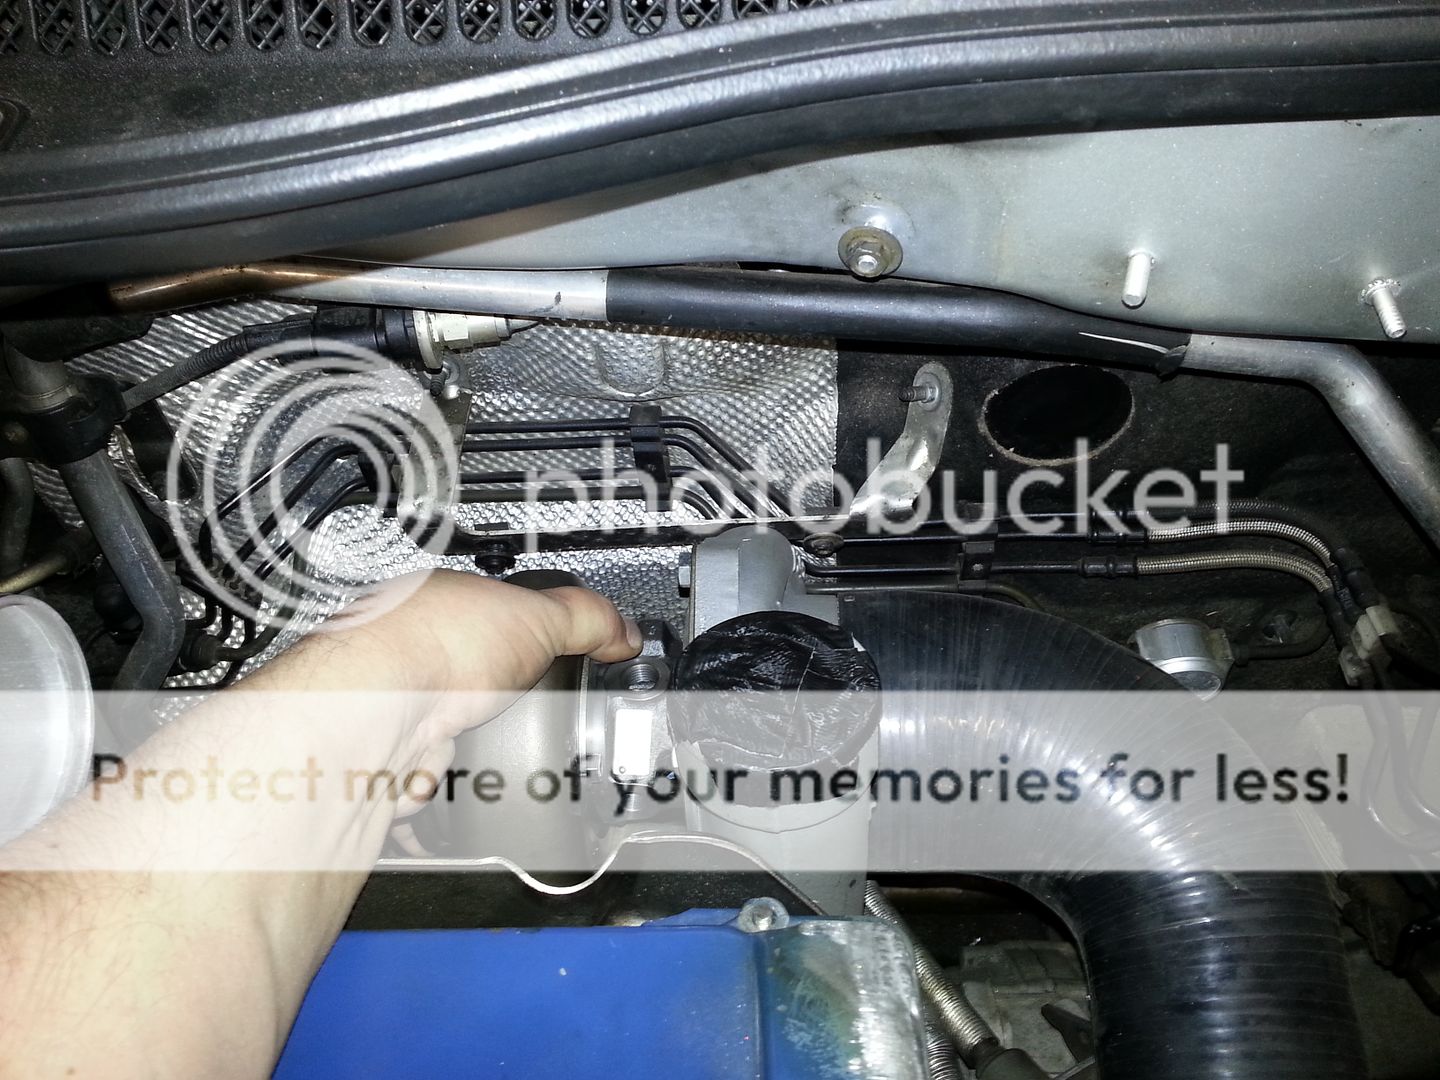
After a bit of faffing I have a rough idea of where I would like the turbo to go...
20131006_161442.jpg


20131006_161550.jpg


20131006_161630.jpg


There will be a little tweaking on the bulkhead as the bracket to stand the OE heatshield will need modding to cater for the larger comp housing... I also need to mod the OE heatshield/bracket that bolts to the back of the head for the charge pipe support... this will need a tweak to let me get the comp housing in where I want...

By having the turbo lower and further over towards the gearbox it gives more room to the downpipe to clear stuff it needs to and allows me to manage the heat better... also makes the heater pipes easier to route...

Next stage realistically is to get the merge collector made up as this will dictate a few things in terms of fitment now I have a rough idea... I will also be bolting a block/head onto my gearbox as its sat under the car atm so I can mock up the mani off the car and then offer it up to the block etc in the car to make sure it fits... hopefully will make things a bit clearer once thats done as to where I can actually fit things... haven't tried to fit the wastegate yet... that will most likely be a game changer LOL...

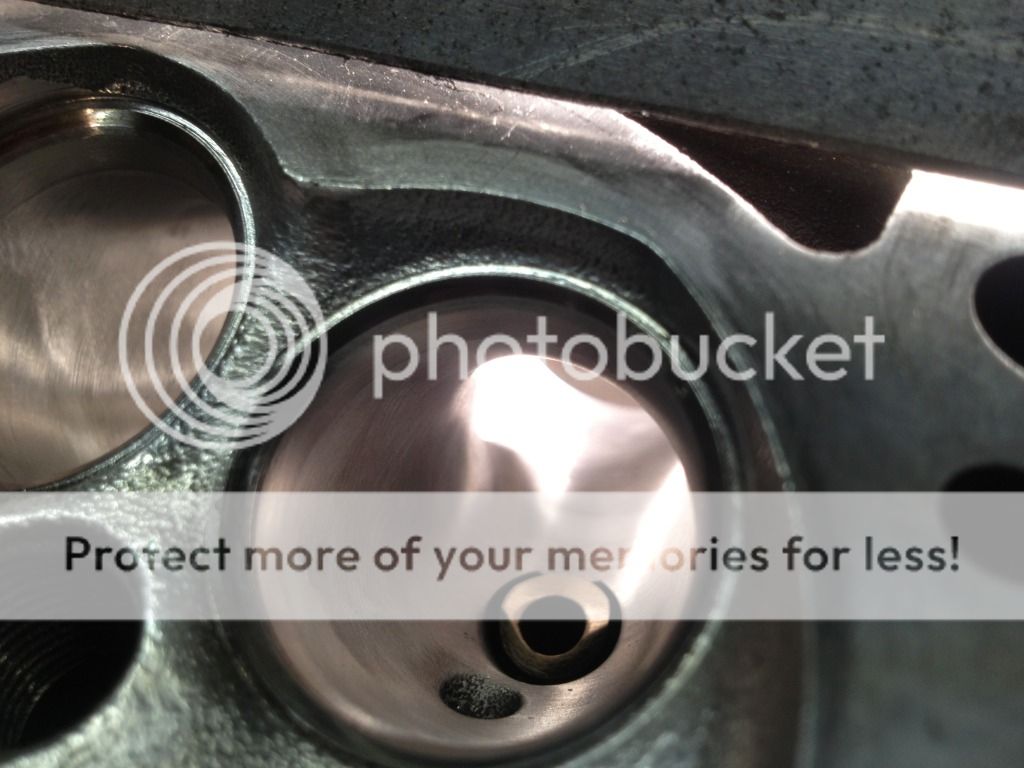
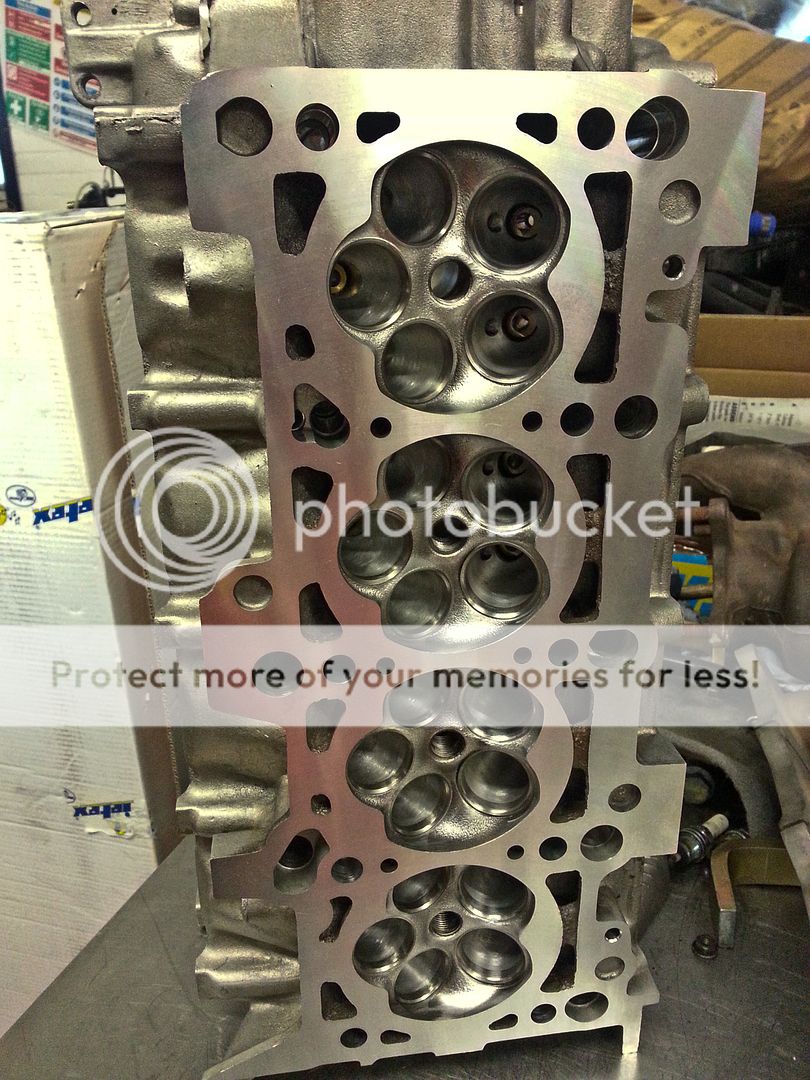
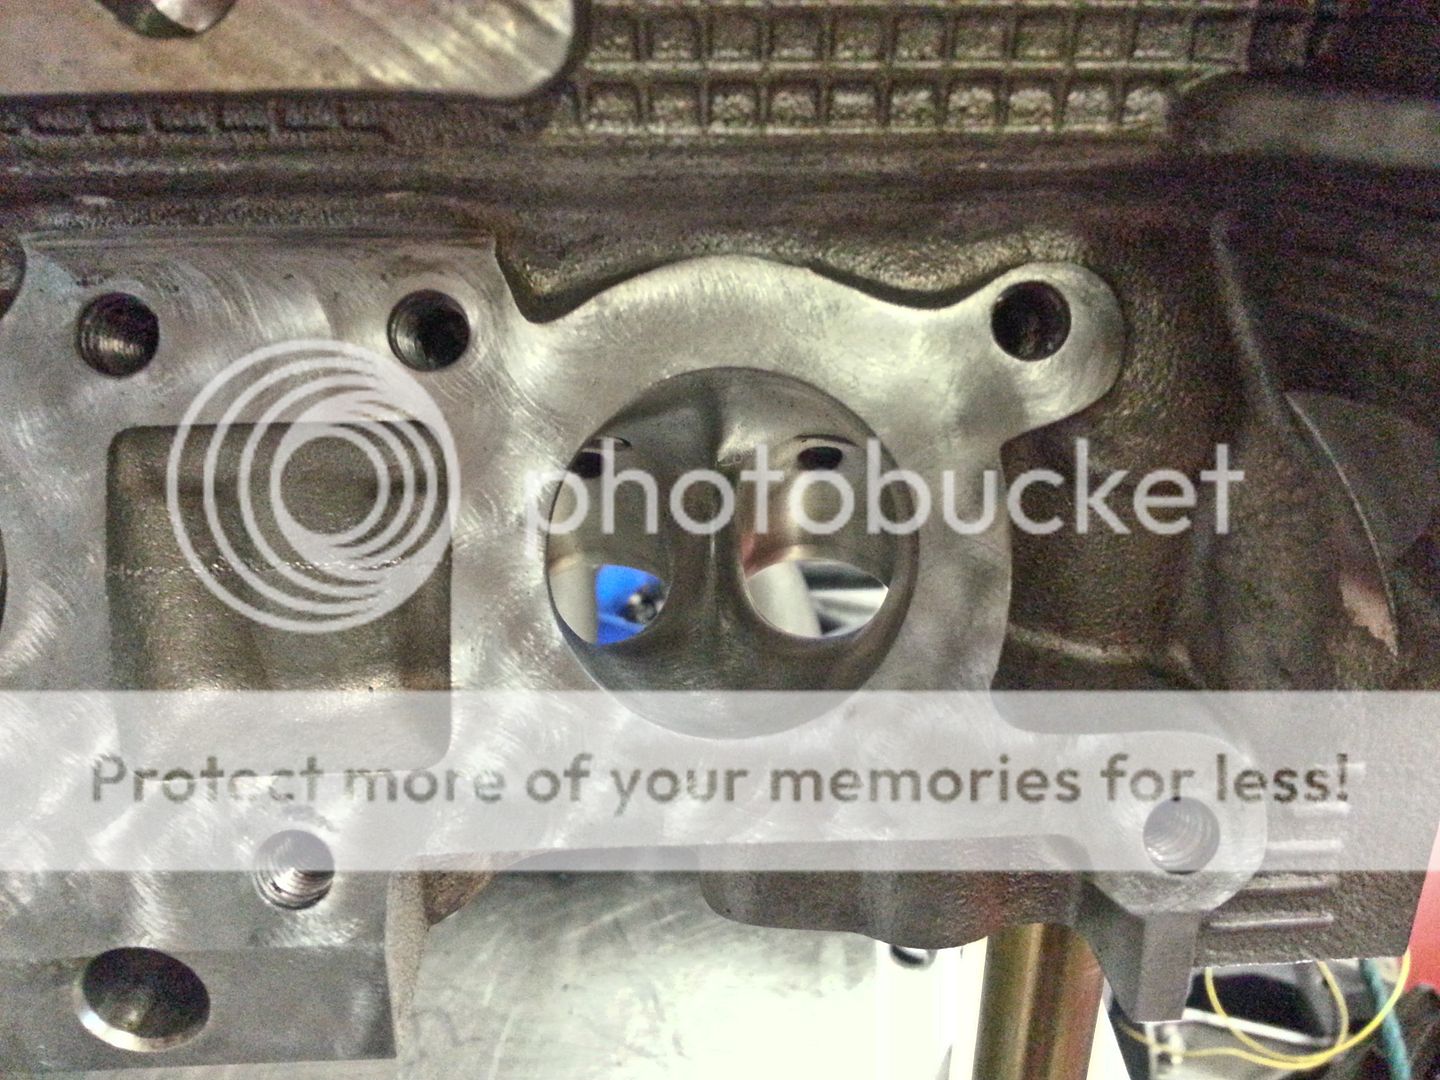
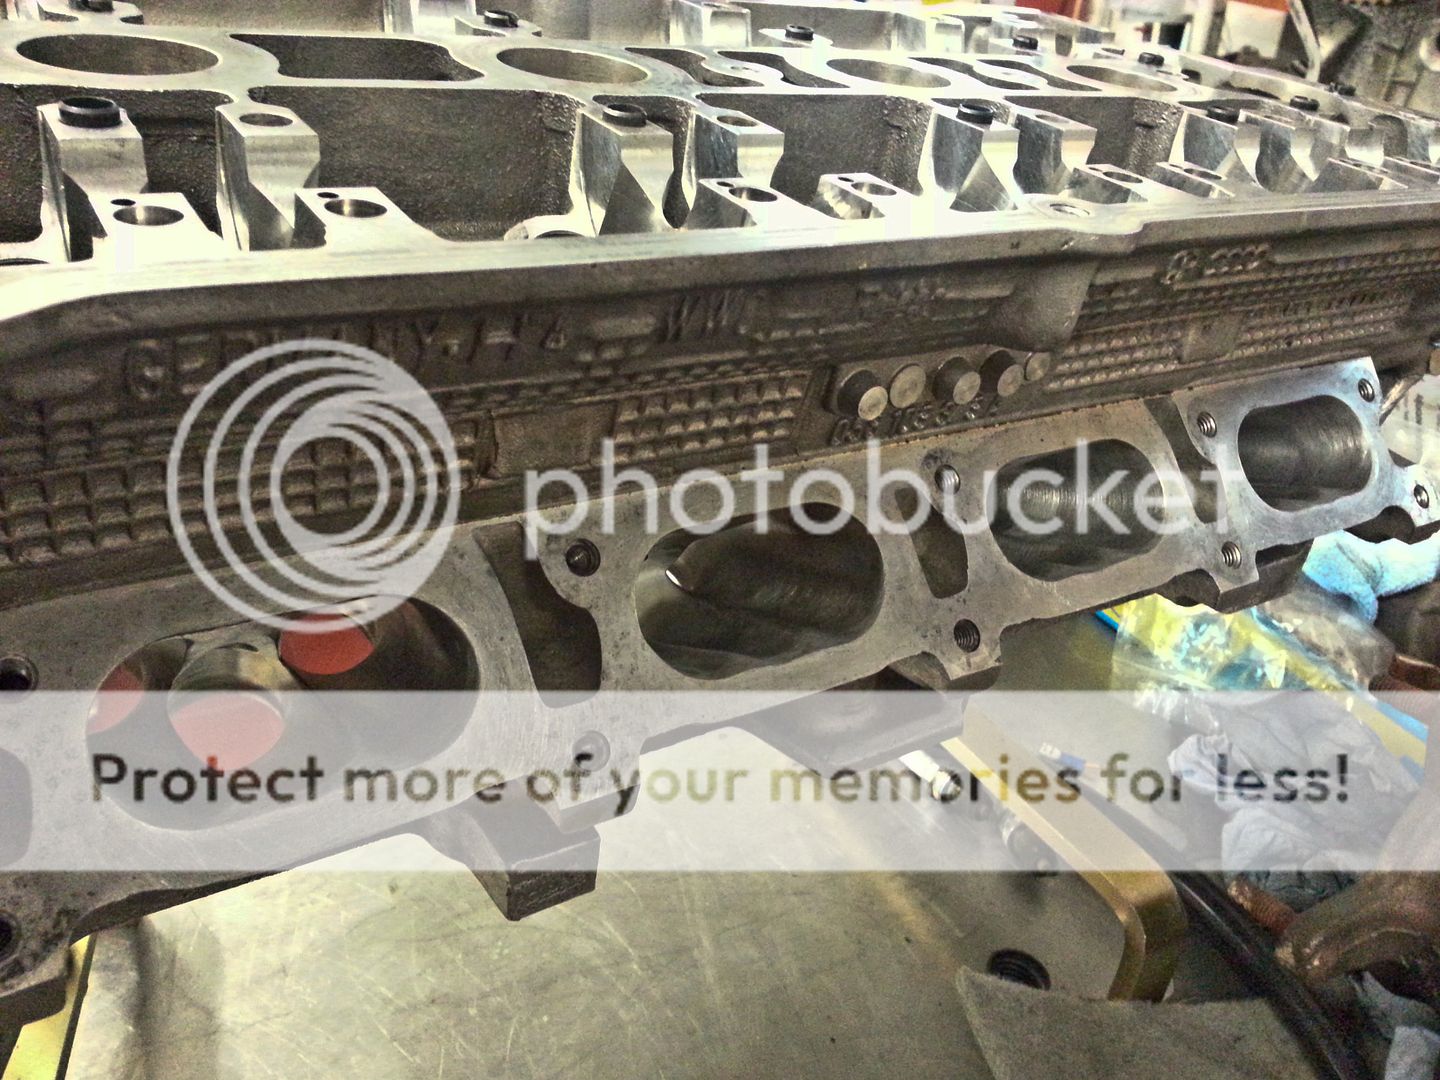
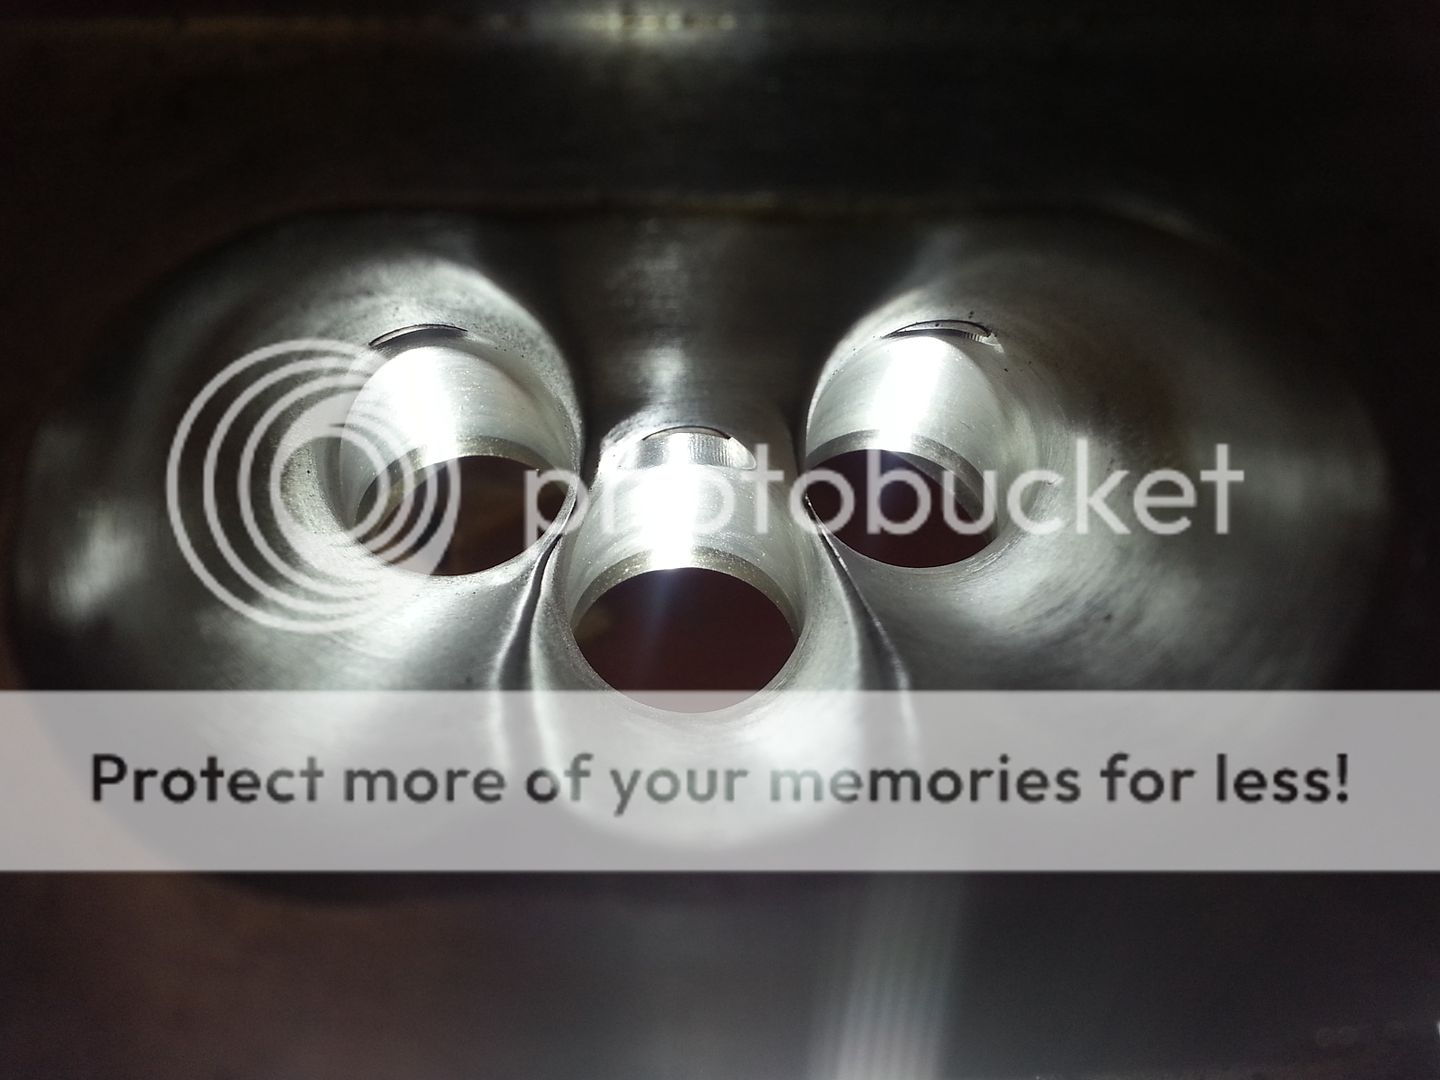
In other news... the star that he is Andrew has got my head ready for pick up so that has been arranged and the head will be with me for the weekend so I can look to get that built Sunday with any luck :D

<tuffty/>
 
  • Like
Reactions: StaceyS3, Gizmo20VT, Sam_ and 1 other person
Excellent work as always Paul, this thread is pure porn!!
 
  • Like
Reactions: Gizmo20VT
So it has taken me the best part of 2 weeks dipping into this thread but I have to say, this is quite possibly the best thread I have ever read on any forum!
Over the past few weeks I have learnt:
Why Tuffty, you are so well respected and such a font of knowledge for all things 8L!
Bill is a Legend and race tuning Guru
The S3 is a potent little motor capable of many smiles per mile but does seem to have a tendency to 'spit the dummy' on occasion!
There is a genuine level of mutual respect and admiration within this community that is rarely found elsewhere in vehicle specific forums

I am now more pleased than ever that I chose an S3 as my newest car recently and can't wait to start my own journey. Tuffty, you are an inspiration to many - including me.
 
  • Like
Reactions: Prawn, Webster2001, S3 Rav and 6 others
Minor update as still waiting on parts to arrive really and of course there was ADI on Saturday...

Have bought some EV14 plugs to replace the adaptors... just because...
20131007_123926.jpg


Bought some new exhaust followers too as there was some odd wear on mine... these were new a couple of years ago so not sure what happened there... inlets were fine thankfully...
20131013_152231.jpg


...odd wear mark in the centre...
20131013_175426.jpg


The obligatory RS4 MAF housing...
20131013_152354.jpg


Right to left, RS4, S3 (or any other K04 turbo'd engine) and an A3 (or any other K03 turbo'd engine) MAF...
20131013_152603.jpg


Couldn't go a weekend without painting something so the inlet was in need of TLC after a small fuel leak stripped some paint
20131013_160943.jpg


...primered
20131013_165635.jpg


...base coat in the same wheel silver as the wheels are going... (was the colour I wanted originally)
20131013_172013.jpg


...learning from the last time I used this paint I am leaving the silver to dry for a bit and will lacquer the mani next weekend when I will be building the head etc and hopefully have the engine put back together properly :D

<tuffty/>
 
  • Like
Reactions: Gizmo20VT
small update.... Andrew managed to single handidly (see what I did there) box up my head ready for shipping back to me... and here it is :D

20131019_091228.jpg


20131019_091316.jpg


20131019_091458.jpg


20131019_091514.jpg


20131019_091704.jpg


20131019_092335.jpg


20131019_092350.jpg


It looks awesome!! he also sorted my snapped bolt remnants too so all good to go for rebuilding tomorrow... which is of course a ballache as its 20 valves... lapping in, assembling with collets etc... just a thankless task that needs to be done so to make myself feel better about it I started painting the sump :D

20131019_162003.jpg


...will finish that and my freshly blasted rocker cover tomorrow...

Dan (beach buggy) sorted me out a compressor cover that his contacts use of a 'GT35' they do... on the face of it the cover looks spot on...
20131019_142549.jpg


...I tried the CHRA and backplate in and it fitted... kinda... and this is where it goes a little wobbly... the back plate sunk in quite far so the securing tabs won't actually grip the backplate when together... second issue is the profile for the compressor wheel is different... I did take some pics but they didn't come out well enough to show the issue... the inducer fitted fine but the curve to the exducer had a massive gap compared to the genuine garrett cover so coupled with some supply problems getting a new turbine for the other CHRA I have I decided just to buy a brand new GT3582r... should arrive next week with all the bonkers expensive Tial v-band bits...

To be honest it makes sense considering all I have done so far to use a new turbo... its not got the metal bearing upgrade at this time for a couple of reasons... 1) my GT30 was fine when I removed it despite running fairly hard to achieve the 400hp figure... as the plan is not to run the GT35 as hard to achieve more then I figured it will do until Dan has found a supplier for the metal bearings and I will get it done later on...2) I have more pressing things to spend the cash on and based on reason no.1 its lower down the list of things to do...

Tomorrow will be head building and painting stuff... I also plan to re-check my oil squirter clearance based on poor old scullies recent event... mine looked to have plenty of room but these pistons do expand a bit and I would rather be safe than sorry...

<tuffty/>
 
  • Like
Reactions: s3dave

Similar threads

Replies
5
Views
1K
Replies
1
Views
1K
D
Replies
0
Views
702
Deleted member 65282
D