

This is my DIY on auto dimming interior and exterior mirrors, before I start retrofitting the mirrors I was a little bit afraid of too much wiring so thats the main reason why I do this DIY is a very easy retrofit that takes no time at all. And it also makes a big difference when driving during night. This is my first DIY so go easy on the criticism.
Parts needed:
Part # 8E0 857 511 A E59 07S (Dimming interior mirror whit compass and without rain sensor)
Part # 4E0 857 535 E 01S (Dimming exterior glass drivers side left)
Part # 4E0 857 536 F 02S (Dimming exterior glass passenger side right)
You also need to crimp wires at connector #4B0 971 833 (interior mirror) and 443 906 231 (On back of mirror glass). The crimps should come in the connectors. If you can't crimp the wires you need to buy the repair wires 000 979 105 and 000 979 003 A (both bags of 5 short wires).
First I purchased the interior auto dimming mirror, its from a A4 and part # 8E0 511 A E59 07S (whit compass) there is two kind of mirrors one for cars whit the raining/light sensor and one without. The right one is whit rain/light sensor and the left is without. My Audi A3 doesnt have any rain sensor so the left one will fits my windshield correctly. Check carefully which one fits your car because Audi dont sell any mounting to the mirrors itself you have buy the whole windshield.
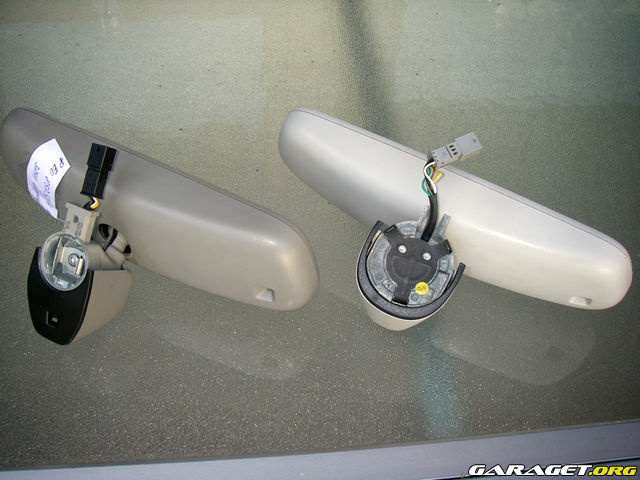
The left one has Part # 8E0 857 511 A E59 07S

The color isnt a 100% match but close enough to not distinguish to much. (The right one is 100% match of A3 interior color platinum grey)

Here is the dimming interior mirror whit compass connected to 12+ battery before retrofitted in the car (checking that the dim and compass works).
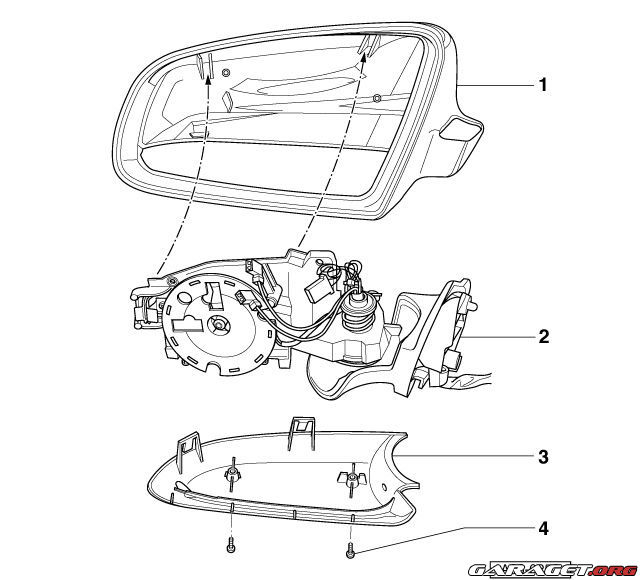
Part # 4E0 857 535 E 01S (Dimming exterior glass drivers side left)
Part # 4E0 857 536 F 02S (Dimming exterior glass passenger side right)

There are about 10 variations of wide angle/flat/warning/arabic/ etc glass, so check whit your VAG shop before buying. But the distinguishing features of auto-dimming glass are the black border on the front and the extra socket and circuitry on the back.
Now lets get it on.
1. First you need to unmount the current mirror by turning it 90 deg to unlatch it while pushing in towards the windshield slightly. I did it on my own but the windshield is very sensitive to vibrations and DO CRACK VERY EASY. Do this on your own risk! I recommend that you take it to a local shop and let them unmount the mirror for you.
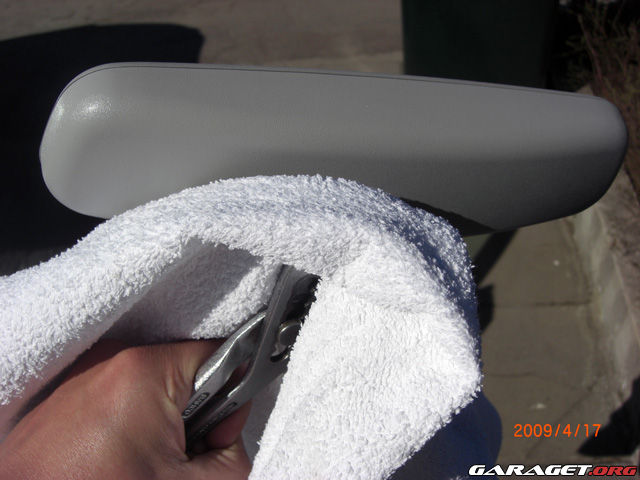
I used a polygrip plier and towel and slowly turned the mirror 90 deg be careful and do not push the mirror towards you instead push towards the windshield.

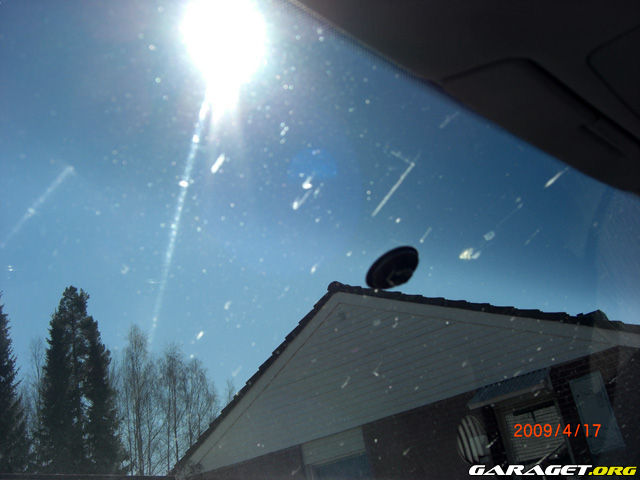
This is the mounting without the rain/light sensor, oh what a dirty windshield.
2. Now run the wires up to the new mirror. I ran my wires (pin1 + and pin2 and pin4 side mirror dimming) up into the headliner as it meets the windshield. Then down the A-pillar to the fuse-box, I push the wires behind the clothing on A-pillar and roof. You need to run pin5 to the passenger side and down to the door. Pin3 you need to run thru the roof into the interior light and connect it to pin1 in the socket of interior lightning. Connecting the mirror to the interior lightning pin1 will stop the mirror from dim when the interior lightning is on.

When you have run the new wires up into the roof, down the A-pillars, and down to the fuse box (not pin5 that one should go to passenger side). Then I connected pin1 + in the adaptive headlights fuse for power (#7) I purchased a littlefuse mini add-a-circuit to wire it to the adaptive headlights fuse. Also check it whit VAG-COM no error codes came from connecting pin1 + into that fuse.
3. Now Ground the mirror, I am grounding mine to the screw near fuse-box.

Now the wiring for the interior mirror is done you should have pin4 down to the drivers side and pin5 down at the passenger side. The interior mirror should dim, you could test it by covering the ambient light sensor on the front and then using a flashlight to simulate headlamps on the rear sensor. You also need to Calibrate the compass. Press and hold the center button to toggle the compass, press quickly to turn the dimming function on and off.

Make a test-fit and then trim the wire cover about .25". I used a dremel to accomplish this.
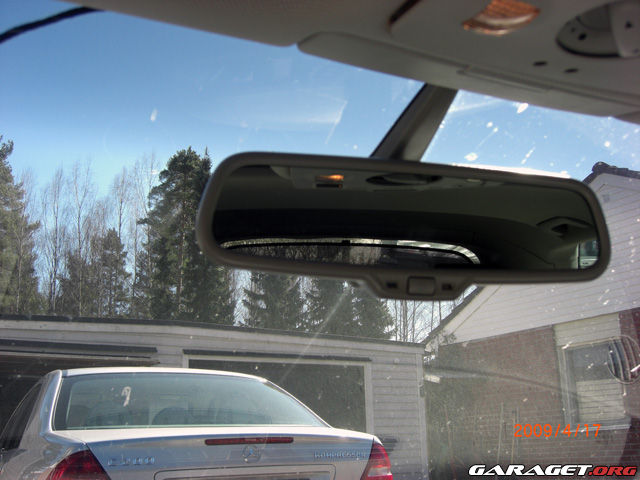
Put the cover on place and the interior mirror is now done.

The compass completes the red interior in the rest of the car very good. And it also automatically dim during night.

One more pic. just to show how it looks from the outside.
-------------------------------------------------------------------------------------------------------------------------------------------------------------------------
Now for the Exterior mirrors DIY
That isent done yet. Will edit the DIY whit new pic and text when I have the time. This is my first DIY so let me know what you think about it. Also I wont to know if anybody wonts the exterior mirrors DIY becuase they cost a lot to buy the auto dim. exterior glass. Maybe it is enough whit interior.
Parts needed:
Part # 8E0 857 511 A E59 07S (Dimming interior mirror whit compass and without rain sensor)
Part # 4E0 857 535 E 01S (Dimming exterior glass drivers side left)
Part # 4E0 857 536 F 02S (Dimming exterior glass passenger side right)
You also need to crimp wires at connector #4B0 971 833 (interior mirror) and 443 906 231 (On back of mirror glass). The crimps should come in the connectors. If you can't crimp the wires you need to buy the repair wires 000 979 105 and 000 979 003 A (both bags of 5 short wires).
First I purchased the interior auto dimming mirror, its from a A4 and part # 8E0 511 A E59 07S (whit compass) there is two kind of mirrors one for cars whit the raining/light sensor and one without. The right one is whit rain/light sensor and the left is without. My Audi A3 doesnt have any rain sensor so the left one will fits my windshield correctly. Check carefully which one fits your car because Audi dont sell any mounting to the mirrors itself you have buy the whole windshield.
The left one has Part # 8E0 857 511 A E59 07S
The color isnt a 100% match but close enough to not distinguish to much. (The right one is 100% match of A3 interior color platinum grey)
Here is the dimming interior mirror whit compass connected to 12+ battery before retrofitted in the car (checking that the dim and compass works).
Part # 4E0 857 535 E 01S (Dimming exterior glass drivers side left)
Part # 4E0 857 536 F 02S (Dimming exterior glass passenger side right)
There are about 10 variations of wide angle/flat/warning/arabic/ etc glass, so check whit your VAG shop before buying. But the distinguishing features of auto-dimming glass are the black border on the front and the extra socket and circuitry on the back.
Now lets get it on.
1. First you need to unmount the current mirror by turning it 90 deg to unlatch it while pushing in towards the windshield slightly. I did it on my own but the windshield is very sensitive to vibrations and DO CRACK VERY EASY. Do this on your own risk! I recommend that you take it to a local shop and let them unmount the mirror for you.
I used a polygrip plier and towel and slowly turned the mirror 90 deg be careful and do not push the mirror towards you instead push towards the windshield.
This is the mounting without the rain/light sensor, oh what a dirty windshield.
2. Now run the wires up to the new mirror. I ran my wires (pin1 + and pin2 and pin4 side mirror dimming) up into the headliner as it meets the windshield. Then down the A-pillar to the fuse-box, I push the wires behind the clothing on A-pillar and roof. You need to run pin5 to the passenger side and down to the door. Pin3 you need to run thru the roof into the interior light and connect it to pin1 in the socket of interior lightning. Connecting the mirror to the interior lightning pin1 will stop the mirror from dim when the interior lightning is on.
When you have run the new wires up into the roof, down the A-pillars, and down to the fuse box (not pin5 that one should go to passenger side). Then I connected pin1 + in the adaptive headlights fuse for power (#7) I purchased a littlefuse mini add-a-circuit to wire it to the adaptive headlights fuse. Also check it whit VAG-COM no error codes came from connecting pin1 + into that fuse.
3. Now Ground the mirror, I am grounding mine to the screw near fuse-box.
Now the wiring for the interior mirror is done you should have pin4 down to the drivers side and pin5 down at the passenger side. The interior mirror should dim, you could test it by covering the ambient light sensor on the front and then using a flashlight to simulate headlamps on the rear sensor. You also need to Calibrate the compass. Press and hold the center button to toggle the compass, press quickly to turn the dimming function on and off.
Make a test-fit and then trim the wire cover about .25". I used a dremel to accomplish this.
Put the cover on place and the interior mirror is now done.
The compass completes the red interior in the rest of the car very good. And it also automatically dim during night.
One more pic. just to show how it looks from the outside.
-------------------------------------------------------------------------------------------------------------------------------------------------------------------------
Now for the Exterior mirrors DIY
That isent done yet. Will edit the DIY whit new pic and text when I have the time. This is my first DIY so let me know what you think about it. Also I wont to know if anybody wonts the exterior mirrors DIY becuase they cost a lot to buy the auto dim. exterior glass. Maybe it is enough whit interior.


