Hi fellow members
... this is how I removed my front bumper...
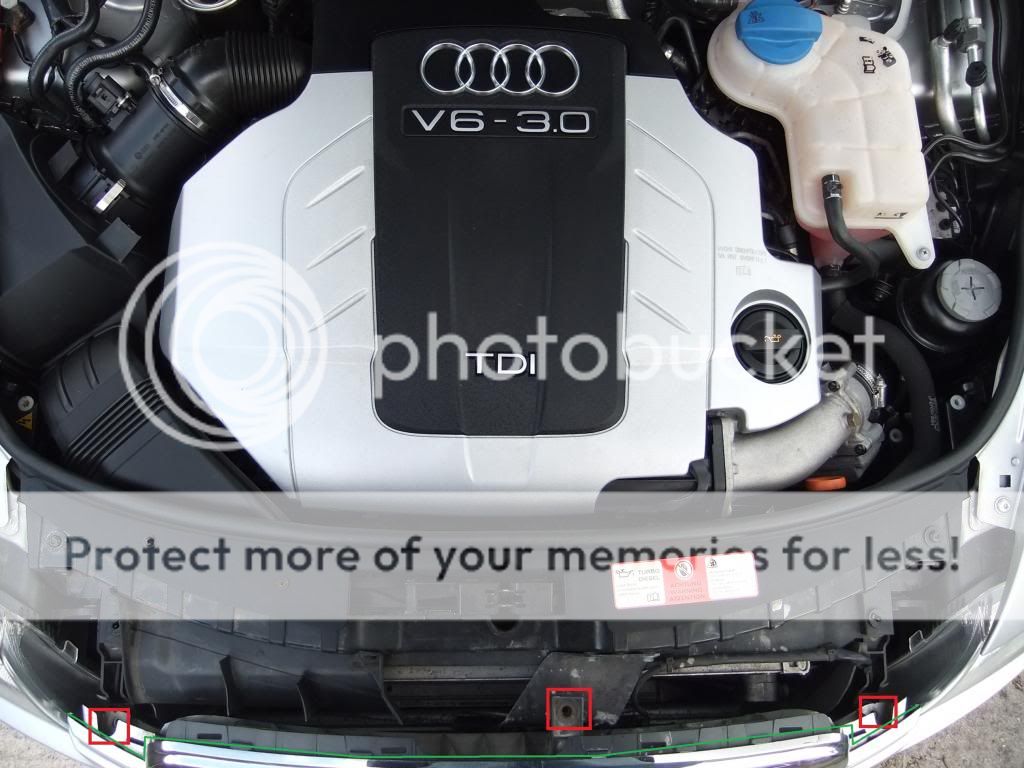
First removed undertray i) first the smaller one, held on my 2x screws (yellow boxes) ii) then the bigger section via 9x screws on lower side and 4x plastic ones in the wheel arches (red, green, blue)...
Then I next removed 1-2 screws in wheel arch to be able to lift the wheel arch liner to access these 3x screws (repeated on other side)...
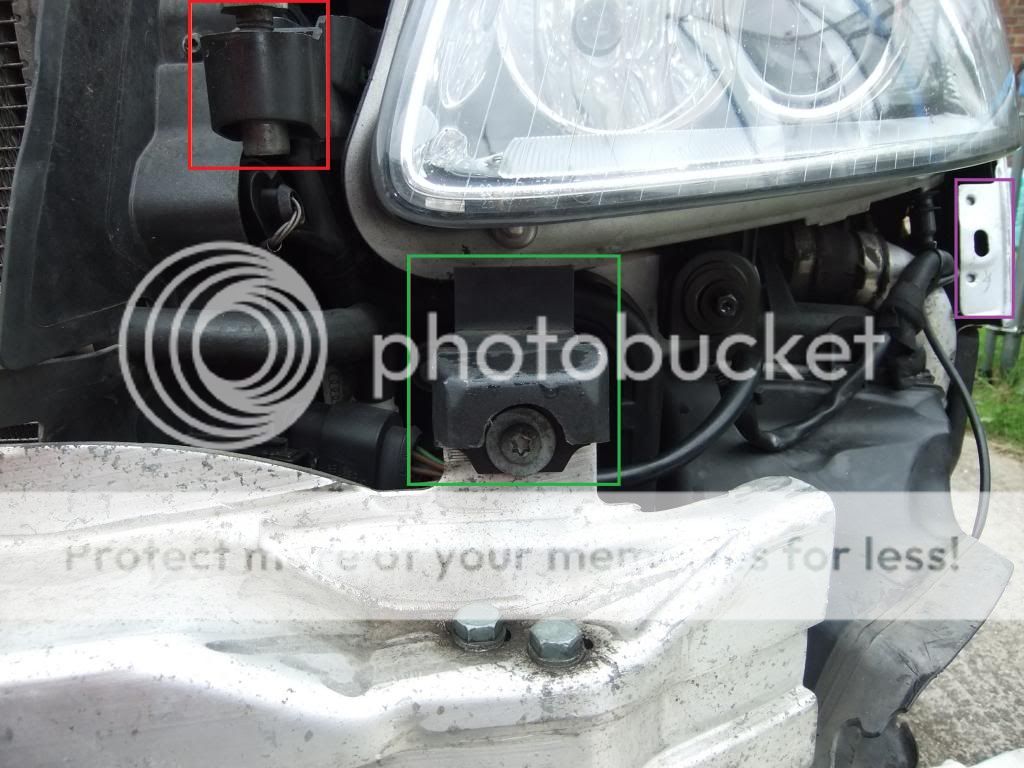
Then I undid nut (red box, 4nm) with standard socket & extension bar, universal joint aided to get correct angle (repeated on other side)... note locating element of bumper edge on wing in blue box...
Next I removed the plastic lock carrier cover, lift at front (note green line below image), then slide/detach towards front of car... then remove 3x bolts (red boxes, 8nm)...
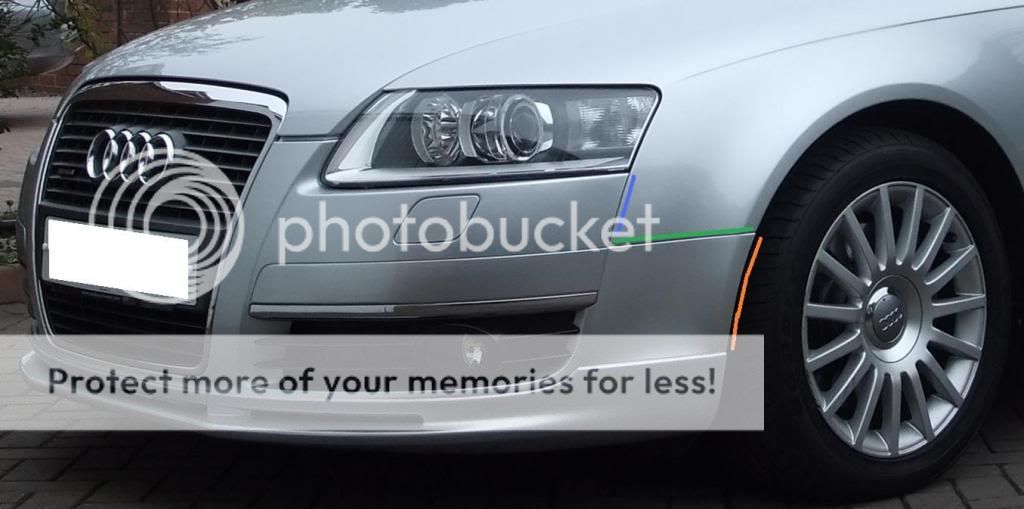
The bumper has a clipping system where green line is on below image, I unclipped it by pulling it outwards at orange line... as I was aligning headlights within body cavity and restoring equal gaps around lights on grill/bumper/wing I found lubricating the clip system on bumper aided repeated removal and refit to get gaps correct... I also placed blu-tack at blue line to stop bolt from scratching wing on removal...
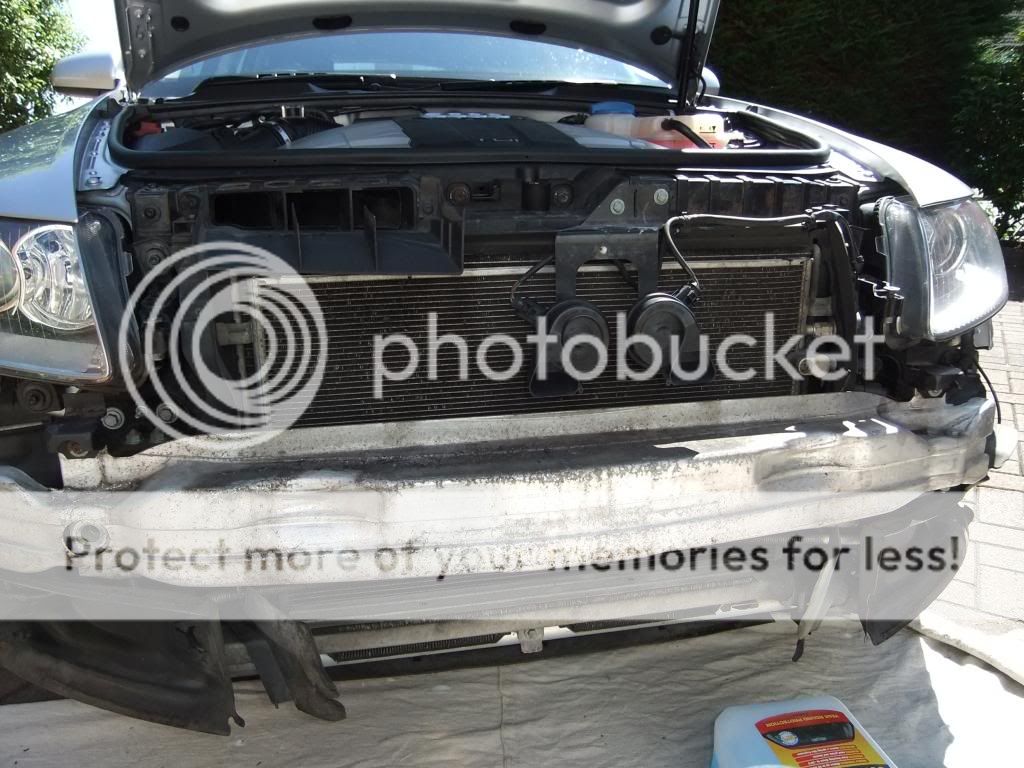
I had placed a sheet on the ground and some empty 5L bottles as cushions under front of bumper... at this point I had a helping hand to remove bumper by sliding it forwards off body... I detached cables for foglights and washer system then put it aside...
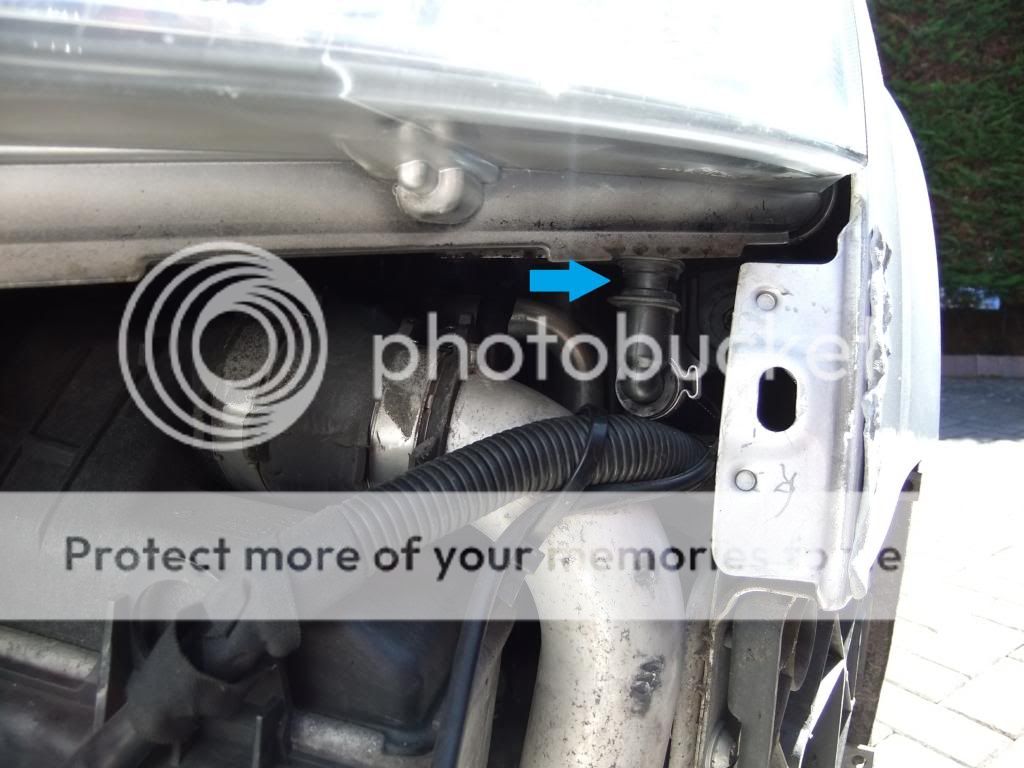
There is a removal clip on washer system located at blue arrow, I angled hose connector upwards and put an ear plug in it to stop screenwash flowing out
...
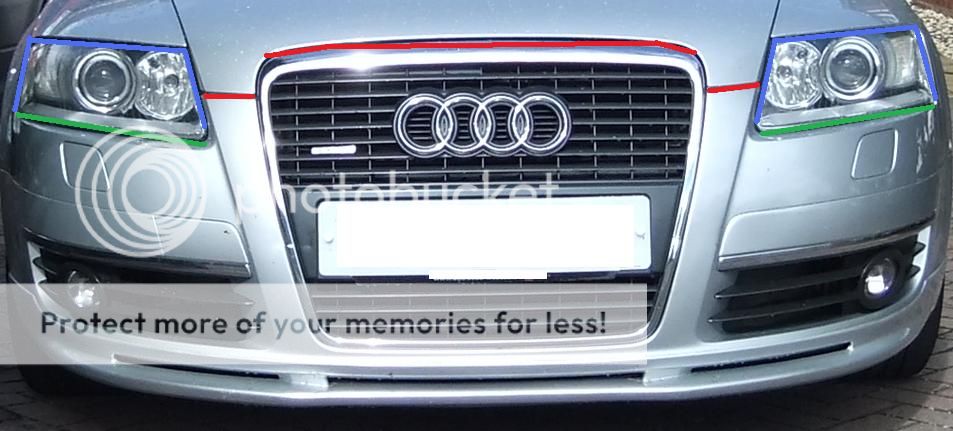
The alignment gaps...
The blue lined ones are taken care of by the 3x bolt/spacer system on headlights... I found that by adjusting headlight to top/side of wing by eye then leaving bolt in blue box slightly loose, refitting bumper and adjusting bolt/spacer in red box and yellow box was quicker/easier, see photo below ... I used plastic topup cards as spacers for gap measuring, they were roughly 1mm thick so taped some together to create 2mm & 3mm spacers and placed appropriately then tighten bolts/spacers... I accessed yellow bolt/spacer through wheel arch whilst bumper was fitted, see second photo below ...
The green lined gaps main adjustment is by the green boxed element, the red lined gaps main adjustment is by the red boxed element... ref image below with text of alignment gaps...
I found if I moved the red element two high the bumper will not fit over the green element they need to be adjusted together but the finer adjustment of each gap is done via each separate element ...
Here's a close up of the red element ...
Unscrewing it upwards closes the gap at red lines, screwing it down does opposite ...
Same principle with the green box element ... here is a close up if that ...
Unscrew move up to close gap, move down to create gap ...
Refit is reverse of removal...
The red lined gap is suggested 5.5 mm ± 0.5 mm
The green lined gap is suggested 1.2mm
(Note: the bottom edge of the headlight must be parallel with the top edge of the bumper)
The yellow lined gap is suggested 2mm
(Note: the headlight curve is flush with wing, the gap is the outer edge of headlight meeting outer edge of wing)
The turquoise lined gap is suggested 2.3mm
(Note: the headlight sits up & under top section of wing, the gap is between there)
The purple lined gap is suggested 2.3mm
These gaps will aid reduction of vibrations from body/engine going to headlight making bulbs/headlight move/resonate...
There is a repair kit for the headlight mounting eyes... 4F0 998 121 for left ... 4F0 998 122 for right ...
My issue was not any fault with lights, etc... I just wanted great gaps ...