- Joined
- Oct 31, 2007
- Messages
- 6,883
- Reaction score
- 1,844
- Points
- 113
Thought I'd post this on here as someone had asked me about it this week. Something I did ages ago and then forgot to post up.
Might be useful if you need to replace your cam lobe or the complete fuel pump on your s3-8P.
The reason I did this change was that my KMD internals had decided to wear the internals of the OEM HPFP unit, so I had to switch the whole pump for a new one. This guide does not show how to swich over to new uprated internals, just the removal and refit of a pump unit.
1) Initial symptoms: Is my cam or fuel pump unit wearing out?
2) Should this bother you?
If you have early generation fuel pump internals from any of the known manufacturers who supply internals (designs and coating have changed in the last year or so), then I'd be preventative maintenance checking your cam follower at least at each service interval once you go beyond 20,000 miles with HPFP upgrade internals fitted.
Supposedly the early pump internals have in some cases worn the internals of the pump housings. Whether this is down to the HPFP internal coatings being too hard for the pump, or design flaws of early units I do not know.
It's a catch 22 really, if you find yourself facing these issues and realise like I did that it's not just cold morning starts or catch can fumes, get your cam follower checked immediately. As it's hard to substantiate the extent of long to mid damage it could cause, and the cost if any damage may be very expensive to remedy. Be viligent and exercise caution when undertaking the checks as fuel is not just flammable!
3) What tools do I need?
> Latex gloves
> Bradawl (or something pointy lie small electrical screwdriver to bleed Schrader pressure valve)
> Torx bits (can't remember whether it was 20/25/30 so have a selection on hand)
> Pin nose pliers for constant tension spring clip removal
> Spanner (13mm / 17mm)
> Flat blade screwdriver> A capture device for fuel when depressurising schrader valve (I used microfibre cloth
 , but you can use a glass pot or something else that can handle fuel).
4) What parts do I need?
> Have some spare jubilee clips on hand for small rubber hoses (10-15mm)
> New fuel pump if required (Part # W06F 127 025 K) @ £177.77
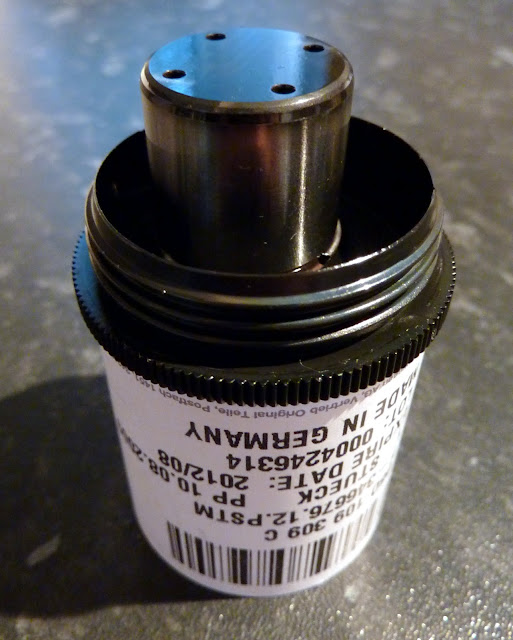
> New camshaft follower lobe (Part no. 06D 109 309C) @ £25.00'ish
> New HPFP uprated internals (KMD / Autotech, but choose the latest - as opposed to older versions as they may not be revised version esp. second hand) - speak to your tuner (approx £350)
> Fresh oil & moly lube - moly lube the cam follower external before refitting to help bed in, then conduct a full oil change if you find fuel ingress into sump oil
> OEM oil filter and sump bung washer
5) How hard was it to do?
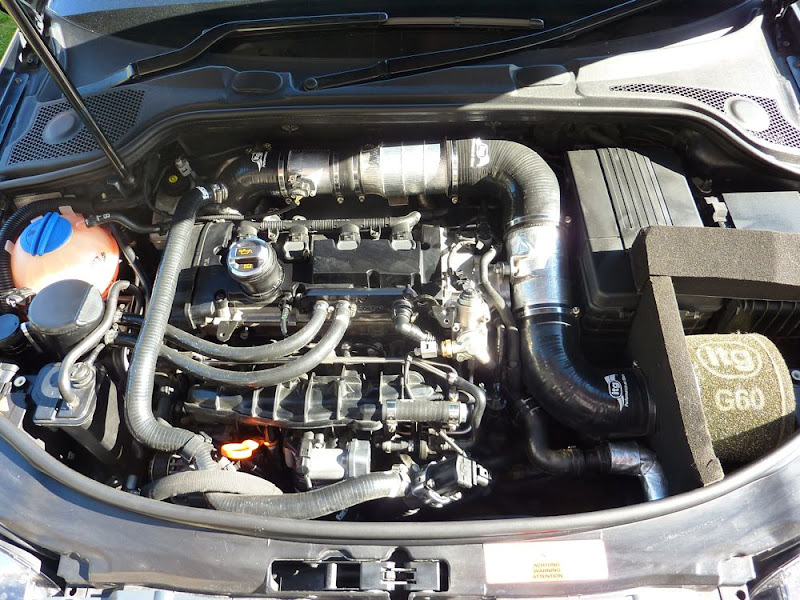
Not that hard (I'm no mechanical Einstein), just problems with limited access to space for tools as there is plenty of pipework in vicinty (injector rails / fuel pump pipework / inlet manifold etc.).
I don't need to tell you that you don't need to be changing the pump with a fag in your gob because you're all too bright for that, but for those that aren't it's been said.
A logical plan for laying out parts is useful as for any job. I just used some clumsy digits and a Halfords Professional Tool Box and I'm pleased to say the car still works after the change of pump.
Here are some photos of the journey through doing the job:
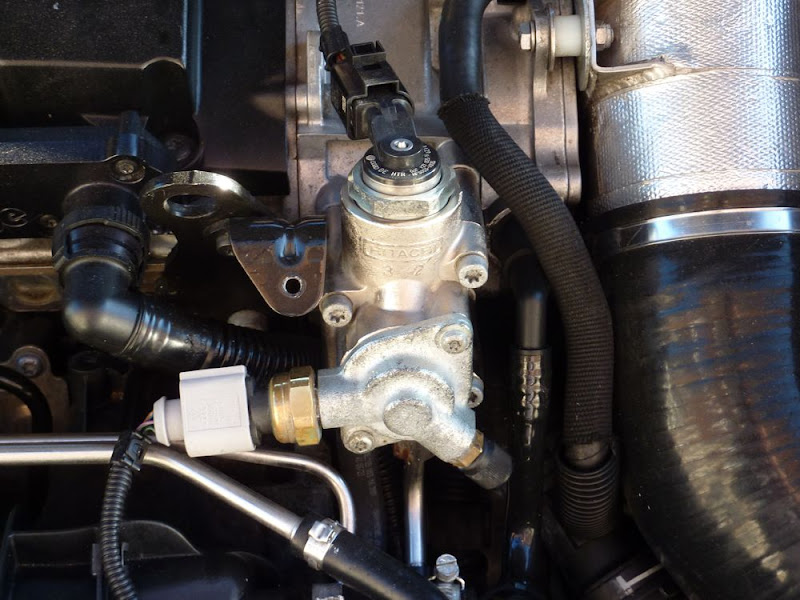
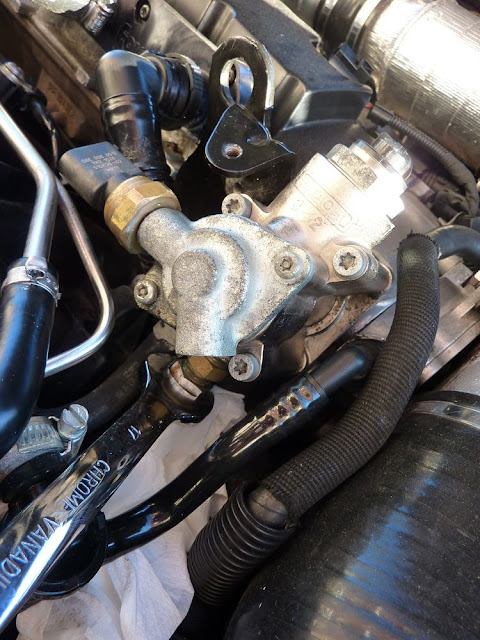
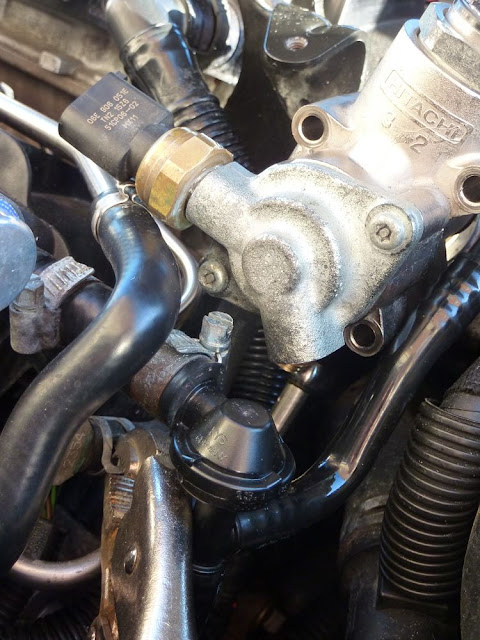
1) The ****** Hitachi fuel pump in question
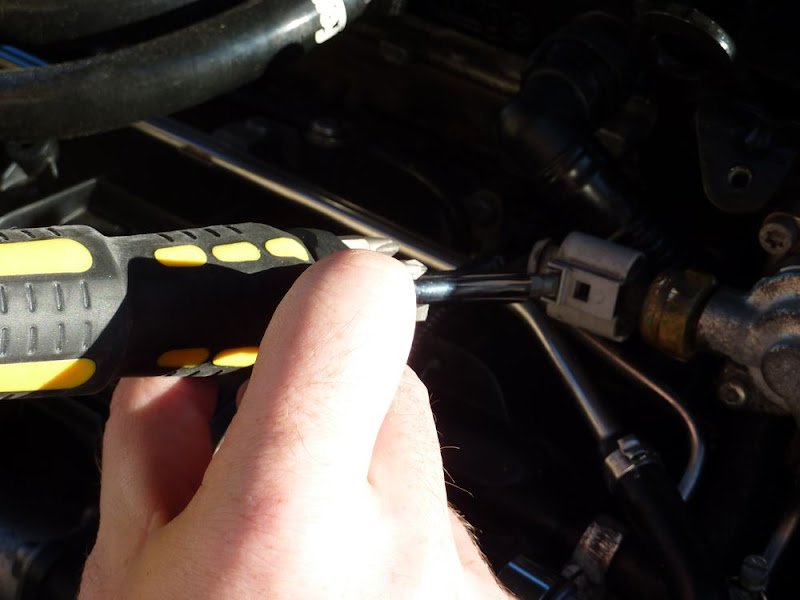
2) Take care disconnecting the clips, if they seem stuck gently prise the clip with a large flatblade screwdriver
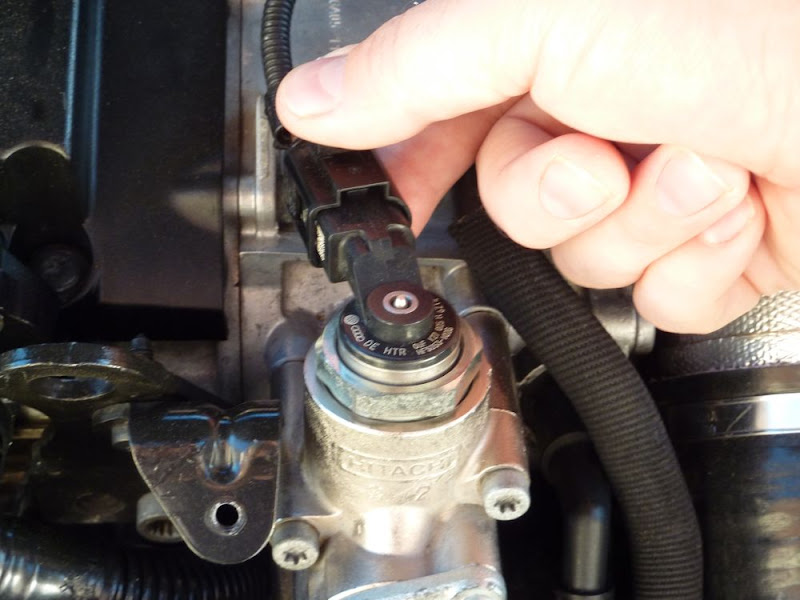
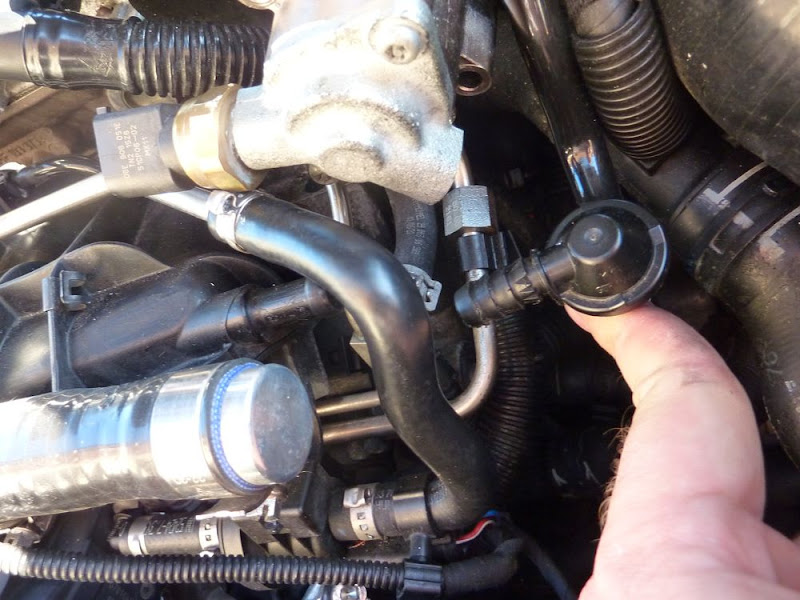
3) This connector is a pain - its clip was fitted facing into the engine so I couldn't get to it - if it is, just undo the brass nut slightly to expose it

4) One of those clips that wouldn't budge!
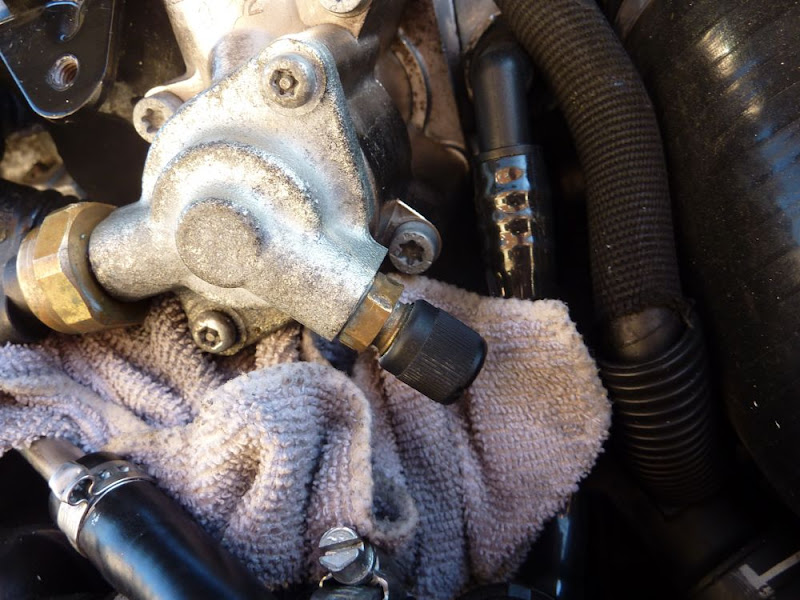
5) Next you need to bleed the fuel system with a bradawl, or an electical screwdriver. Unscrew the plastic schrader cap to reveal the bleed valve
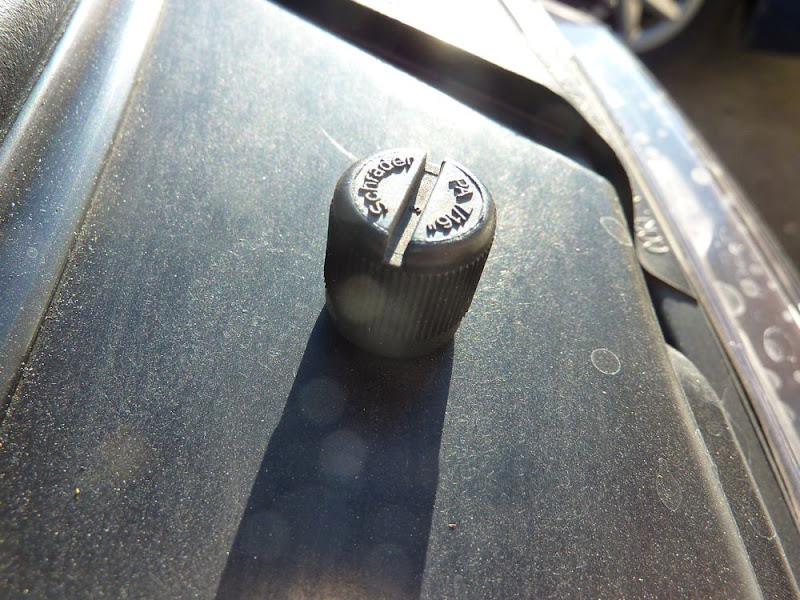
6) Cap off, ready to bleed
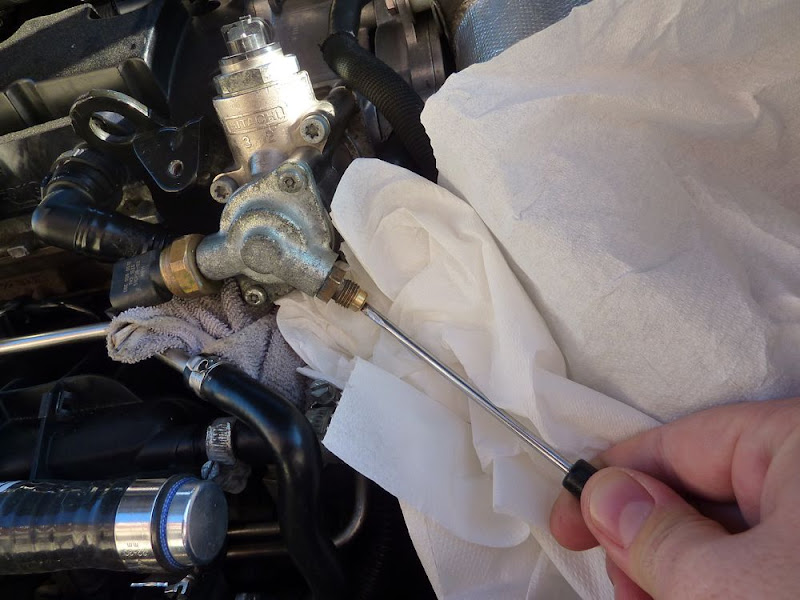
7) get some cloths of a collector and bleed the vale. Fuel will come out as the pressure releases, so best to wear latex gloves / goggles as a precaution for this step - prod in the valve until fuel flow diminishes
8) Undo the rest of the ports to the pump where connectors are attached, starting at the front. You need to remove the brass connector in the photo to get clear access to the rear fuel line

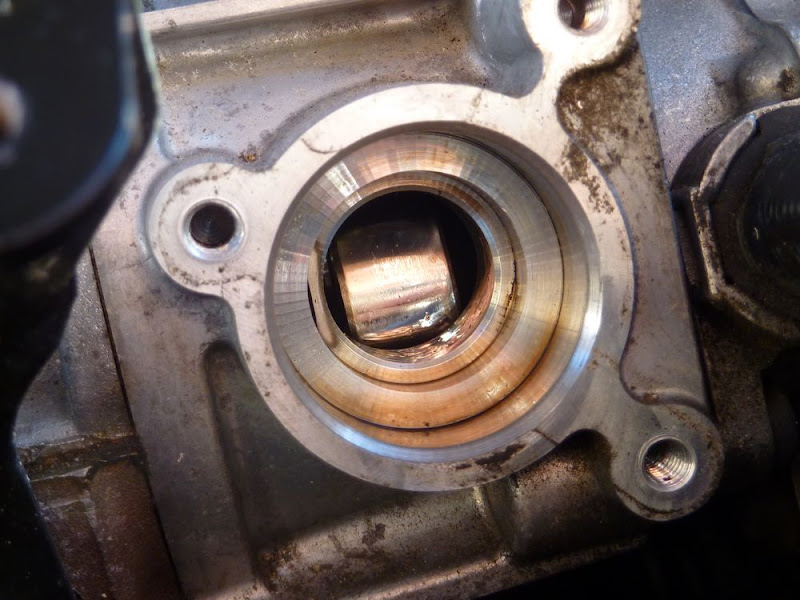
9) You now have access to the rear pipe
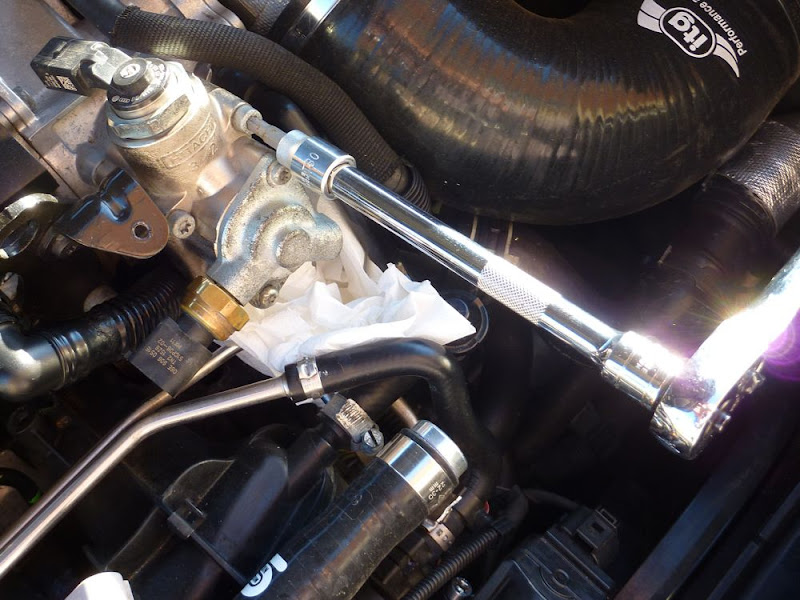
10) Now undo the torq screws (can't remember if there are 3 or 4 of these)
11) Photo kindly provided by Lewis 538 as I forgot to photograph cam follower sat within the engine block!
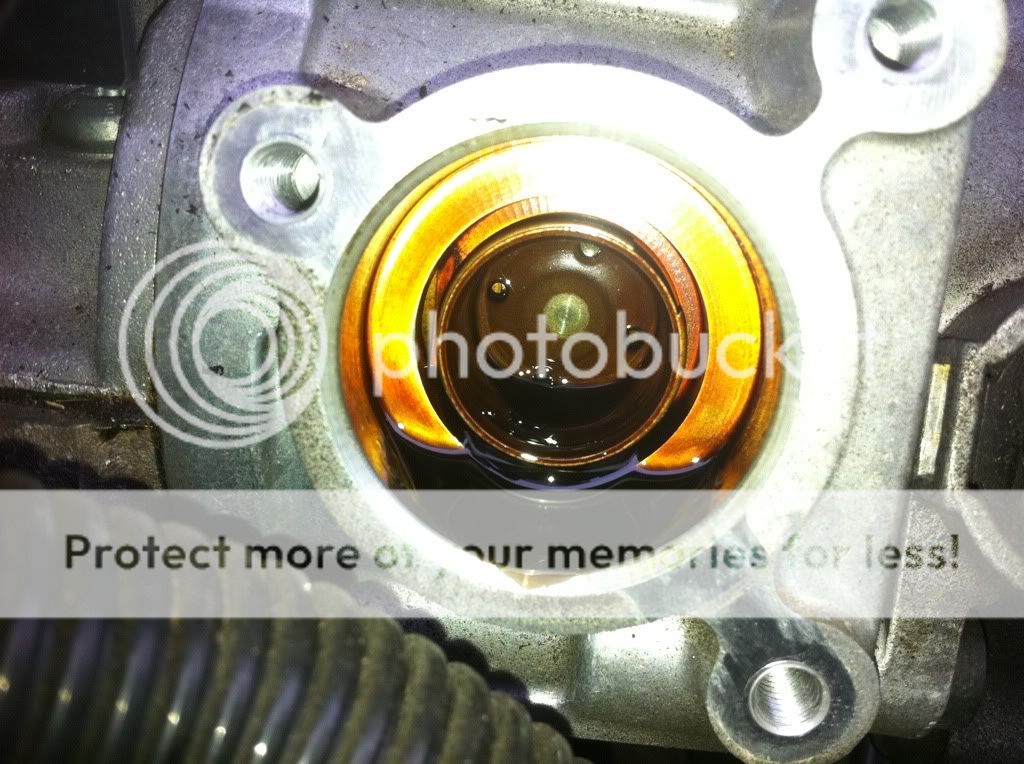
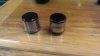
Cam follower removed and all cleaned up!
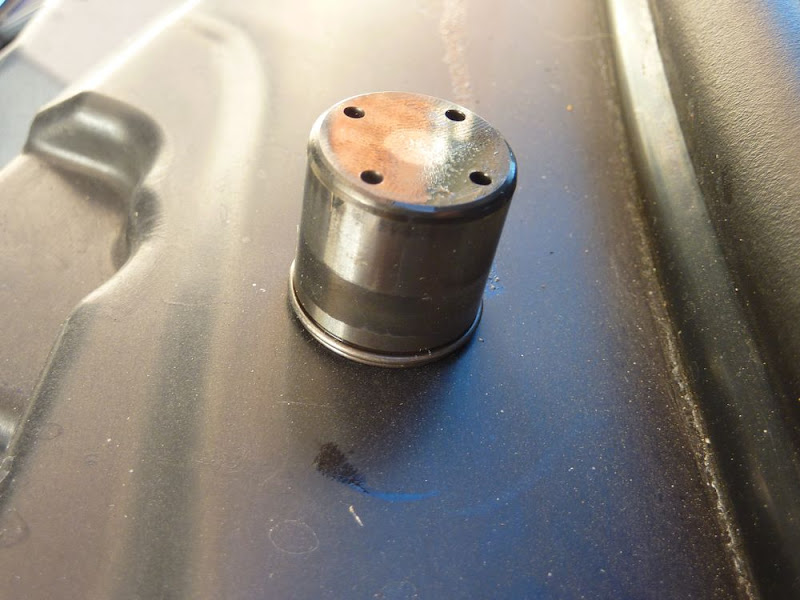
12) Showing some signs of marking at 53,000 miles, but nothing hugely worse than I'd expect
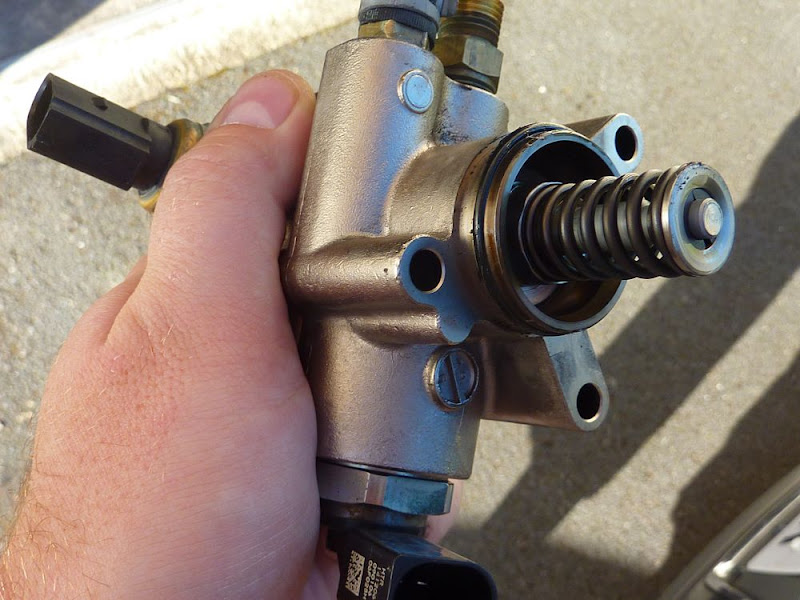
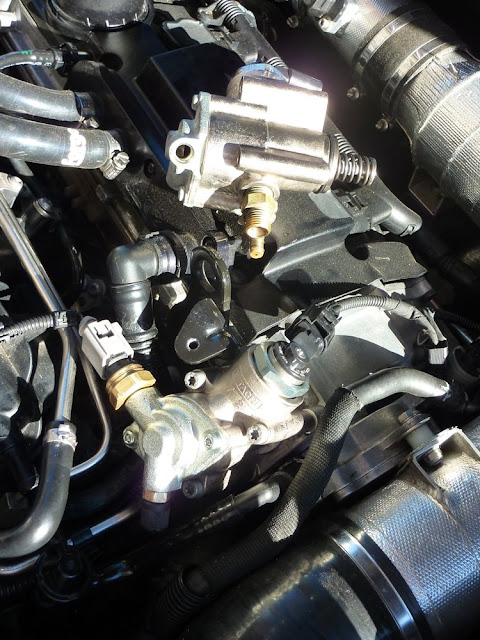
13) Pic of the fuel pump unit / side on

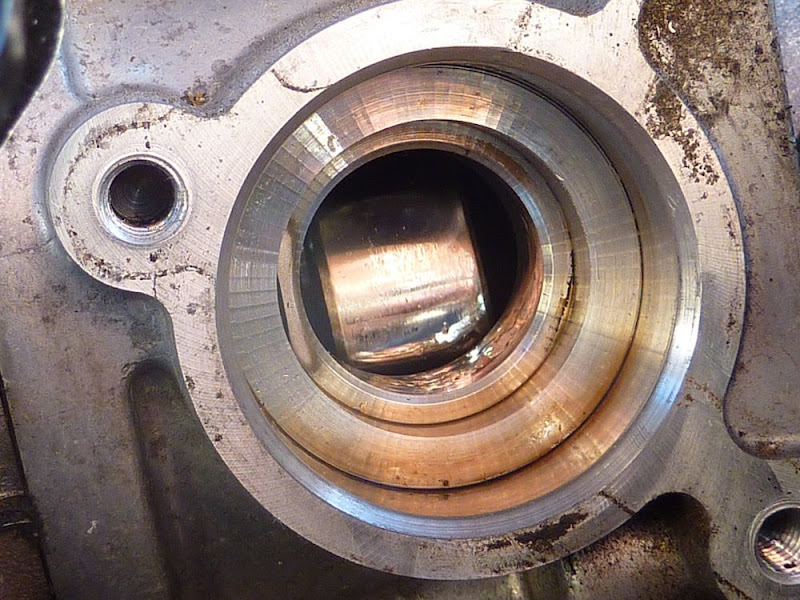
14) Wear on the inner face of the cam follower

15) Now to remove the final parts of the pump
16) I chose to remove thin hose from inlet manifold to DV to give better access to the rubber hose at the bottom of the fuel pump
17) Use pin nosed pliers to get the constant tension hose clip away from the connection point on the hose, then use a flat blade screwdriver to work the hose off the metal connector as its pretty tight

18) Once this rubber hose if off, you can finally take off the fuel pump!
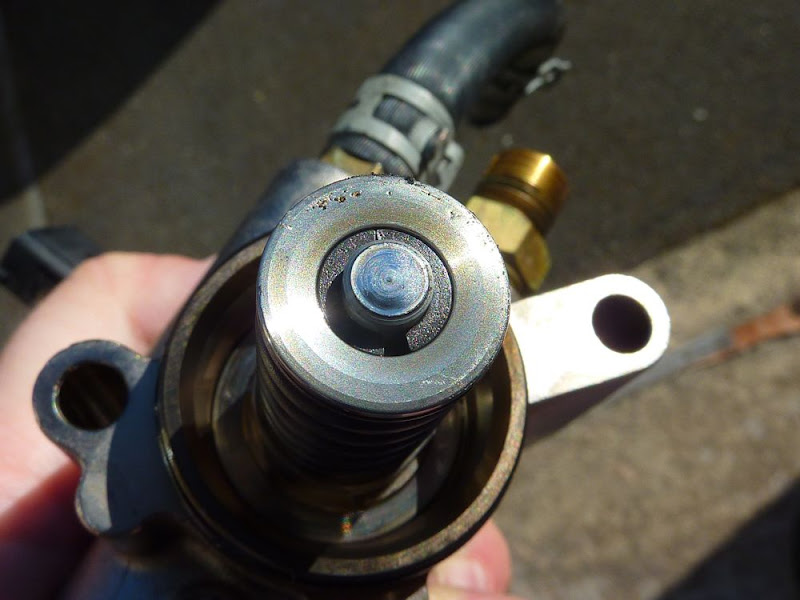
19) View of the tip of the old KMD internals within the old fuel pump
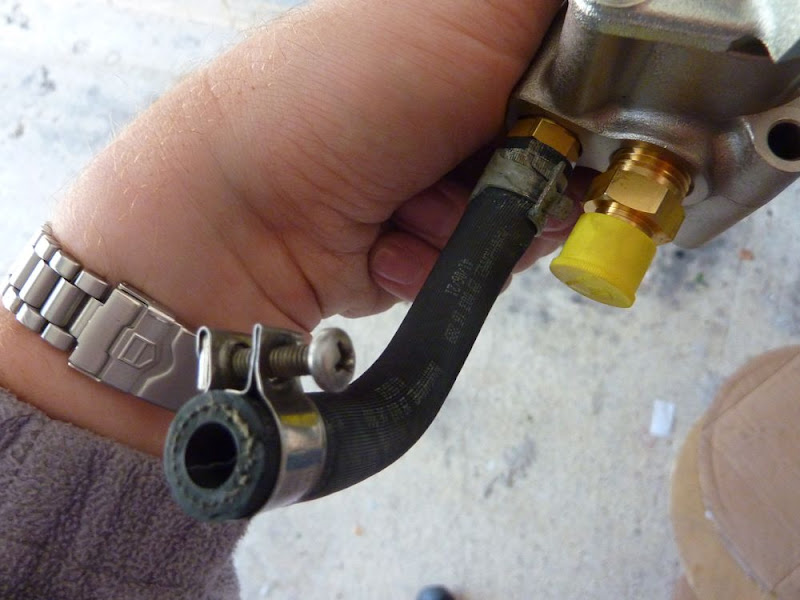
20) Look at your old fuel pump, and you will so a few of the old brass banjo ports will need to be carried over with the old hoses. Identify and remove / refit

21) Replace any jubilee clips you may have trounced in the process of removal (I killed one of the VW fastened clips so had to use the one at the bottom of the photo which I was lucky enough to have floating about in a drawer
22) Cleaned up the brass and refitted

23) To refit, follow the guide in reverse, and voila, if you don't drop anything into the engine apertures it may even work!
24) One newly fitted pump. Shift all the tools and tat out of your bay, ensure you've refitted the schrader cap, and that you don't have any serious puddles of fuel anywhere. Once confirmed, go and start the car up and come back round the front of the bay to ensure you have no leaks. May be worth after a couple of journeys just returning to the connectors and checking they don't need a slight tighten once they heated and cooled.
25) Pic of a new shiny cam follower
5) Net result after changing the fuel pump:
ENSURE you change the oil after doing this job as the fuel that's already in your oil will be doing damage. I did an oil change, then used some Forte oil treatment to supplement and limit any further additional wear.
Any questions fire away.
DISCLAIMER / *** covering statement: These notes are purely a basic guide to show the extent of the work involved in doing a DIY fuel pump / cam follower change, and do not constitute VAG approved approach. I accept NO liability if you to this and feck it up!
Might be useful if you need to replace your cam lobe or the complete fuel pump on your s3-8P.
The reason I did this change was that my KMD internals had decided to wear the internals of the OEM HPFP unit, so I had to switch the whole pump for a new one. This guide does not show how to swich over to new uprated internals, just the removal and refit of a pump unit.
1) Initial symptoms: Is my cam or fuel pump unit wearing out?
- Oil stank of petrol
- Car smelt of petrol when stood outside (worse than normal despite running a catch can)
- Idle very unstable (constantly hunting and blipping)
- Drop off of power at high rpm under heavy load
- Noticeable high frequency ticking sound at very high RPM
- Cam lobe wear marks / scoring around the external barrel edge of the cam - see pic below (not the usual wear signs at the tip where it comes into contact with cams).
2) Should this bother you?
If you have early generation fuel pump internals from any of the known manufacturers who supply internals (designs and coating have changed in the last year or so), then I'd be preventative maintenance checking your cam follower at least at each service interval once you go beyond 20,000 miles with HPFP upgrade internals fitted.
Supposedly the early pump internals have in some cases worn the internals of the pump housings. Whether this is down to the HPFP internal coatings being too hard for the pump, or design flaws of early units I do not know.
It's a catch 22 really, if you find yourself facing these issues and realise like I did that it's not just cold morning starts or catch can fumes, get your cam follower checked immediately. As it's hard to substantiate the extent of long to mid damage it could cause, and the cost if any damage may be very expensive to remedy. Be viligent and exercise caution when undertaking the checks as fuel is not just flammable!
3) What tools do I need?
> Latex gloves
> Bradawl (or something pointy lie small electrical screwdriver to bleed Schrader pressure valve)
> Torx bits (can't remember whether it was 20/25/30 so have a selection on hand)
> Pin nose pliers for constant tension spring clip removal
> Spanner (13mm / 17mm)
> Flat blade screwdriver> A capture device for fuel when depressurising schrader valve (I used microfibre cloth
4) What parts do I need?
> Have some spare jubilee clips on hand for small rubber hoses (10-15mm)
> New fuel pump if required (Part # W06F 127 025 K) @ £177.77
> New camshaft follower lobe (Part no. 06D 109 309C) @ £25.00'ish
> New HPFP uprated internals (KMD / Autotech, but choose the latest - as opposed to older versions as they may not be revised version esp. second hand) - speak to your tuner (approx £350)
> Fresh oil & moly lube - moly lube the cam follower external before refitting to help bed in, then conduct a full oil change if you find fuel ingress into sump oil
> OEM oil filter and sump bung washer
5) How hard was it to do?
Not that hard (I'm no mechanical Einstein), just problems with limited access to space for tools as there is plenty of pipework in vicinty (injector rails / fuel pump pipework / inlet manifold etc.).
I don't need to tell you that you don't need to be changing the pump with a fag in your gob because you're all too bright for that, but for those that aren't it's been said.
A logical plan for laying out parts is useful as for any job. I just used some clumsy digits and a Halfords Professional Tool Box and I'm pleased to say the car still works after the change of pump.
Here are some photos of the journey through doing the job:
1) The ****** Hitachi fuel pump in question
2) Take care disconnecting the clips, if they seem stuck gently prise the clip with a large flatblade screwdriver
3) This connector is a pain - its clip was fitted facing into the engine so I couldn't get to it - if it is, just undo the brass nut slightly to expose it
4) One of those clips that wouldn't budge!
5) Next you need to bleed the fuel system with a bradawl, or an electical screwdriver. Unscrew the plastic schrader cap to reveal the bleed valve
6) Cap off, ready to bleed
7) get some cloths of a collector and bleed the vale. Fuel will come out as the pressure releases, so best to wear latex gloves / goggles as a precaution for this step - prod in the valve until fuel flow diminishes
8) Undo the rest of the ports to the pump where connectors are attached, starting at the front. You need to remove the brass connector in the photo to get clear access to the rear fuel line
9) You now have access to the rear pipe
10) Now undo the torq screws (can't remember if there are 3 or 4 of these)
11) Photo kindly provided by Lewis 538 as I forgot to photograph cam follower sat within the engine block!
Cam follower removed and all cleaned up!
12) Showing some signs of marking at 53,000 miles, but nothing hugely worse than I'd expect
13) Pic of the fuel pump unit / side on
14) Wear on the inner face of the cam follower
15) Now to remove the final parts of the pump
16) I chose to remove thin hose from inlet manifold to DV to give better access to the rubber hose at the bottom of the fuel pump
17) Use pin nosed pliers to get the constant tension hose clip away from the connection point on the hose, then use a flat blade screwdriver to work the hose off the metal connector as its pretty tight
18) Once this rubber hose if off, you can finally take off the fuel pump!
19) View of the tip of the old KMD internals within the old fuel pump
20) Look at your old fuel pump, and you will so a few of the old brass banjo ports will need to be carried over with the old hoses. Identify and remove / refit
21) Replace any jubilee clips you may have trounced in the process of removal (I killed one of the VW fastened clips so had to use the one at the bottom of the photo which I was lucky enough to have floating about in a drawer
22) Cleaned up the brass and refitted
23) To refit, follow the guide in reverse, and voila, if you don't drop anything into the engine apertures it may even work!
24) One newly fitted pump. Shift all the tools and tat out of your bay, ensure you've refitted the schrader cap, and that you don't have any serious puddles of fuel anywhere. Once confirmed, go and start the car up and come back round the front of the bay to ensure you have no leaks. May be worth after a couple of journeys just returning to the connectors and checking they don't need a slight tighten once they heated and cooled.
25) Pic of a new shiny cam follower
5) Net result after changing the fuel pump:
- idle back to normal
- fuel smell stopped
- less soot on back of car????
- performance improved across the range (tested up to 5k rpm as I'm not running uprated HPFP internals at present with Revo Stg2+!)
- very high frequency clicking noise has stopped at high RPM
ENSURE you change the oil after doing this job as the fuel that's already in your oil will be doing damage. I did an oil change, then used some Forte oil treatment to supplement and limit any further additional wear.
Any questions fire away.
DISCLAIMER / *** covering statement: These notes are purely a basic guide to show the extent of the work involved in doing a DIY fuel pump / cam follower change, and do not constitute VAG approved approach. I accept NO liability if you to this and feck it up!
Last edited:

 great write up!


 xx
xx Bump
Bump