Stacey's Belated Yo Yo Build Thread

it gets me looking at bling pulleys and billet goodies on IE's site!

speaking of which, how you gonna set up and use the adjustable cam pulley? how they supposed to be set up? the timing ******* n advances itself anyway as needed doesnt it, so what are the pros of the pulley?
 
I'm with you on that mate. I got told I should have painted this and that but we were doing a massive amoun of work in only 3 days.

That engine looks soooo sexy though. Love the ceramic coated mani and turbo.

Cheers mate it does make a huge difference when you rely on the car and the other half keeps on nibbling on your ear lol

Did for a little while regret spending the money on the ceramic coating but am glad I've done it now as am trying to stop as many little failures as possible and heat related issues have driven me mad on the old setup ;)

To save money the downpipe now won't be getting coated but bill will chuck some wrap on there to aid it
 
even I painted everything on mine :laugh: shouldn't have bothered though. 4k later it's filth.

Looking very very good matey, incredibly excited to see this come together, I think it's one of the ones everyone has been waiting for :)

It had crossed my mind painting it but like your saying it would probably not look pretty once been chipped and knocked about anyway (well that'll be my excuse lol)

Cheers mate am very excited to get it up and running as well as the other half and family will be relieved once its done as promised that this will be it and no more 'playing' lol

Didn't think there was really that many actually following this apart from the main few that I know and have personally met?
 
Cheers mate am very excited to get it up and running as well as the other half and family will be relieved once its done as promised that this will be it and no more 'playing' lol


whhaaahaaahaahaa, you have just dug your own grave :moa: this stuff never ends :wacko:
 
it gets me looking at bling pulleys and billet goodies on IE's site!

speaking of which, how you gonna set up and use the adjustable cam pulley? how they supposed to be set up? the timing ******* n advances itself anyway as needed doesnt it, so what are the pros of the pulley?

Lol I did get a little carried away with one or 2 orders with IE but most of the 'updated' parts were to try and eliminate as many weakness's as possible whether big or small like the billet breather adaptor, I've replaced the oem plastic elbow twice now

Had briefly spoke to bill about possibly having a play with the cam timing but I know Andrew had occasional timing faults and issues due to distance from crank to cam pulley being reduced through head skimming and a thinner gasket, so as I've got both of them and had the block deck machined I thought it would be a sound investment?

It can also help get the most power out of the uprated cams as it can make quite a bit of difference on where the curve is, IE iirc managed to move the curve to the left a good couple of hundred of rpm with no loss's up top so can maybe help optumise the setup

The vvt only changes the inlet timing where as the adjustable cam gear does the whole head in relation to the crank

If you physical it at TDC and adjust the top cams at their relative TDC marks, with vernier pulley you can accomodate the skimming.. How did you time it all up before you put it in the car?
 
Put the bottom end at TDC then lined the cam pulley up to suit with the cam cover marks but since have tightened the belt a tad more as wasn't happy with it and turned it over a couple of times which has left it with the timing retarded a degree or 2

Do you want it back on zero?
 
It can also help get the most power out of the uprated cams as it can make quite a bit of difference on where the curve is, IE iirc managed to move the curve to the left a good couple of hundred of rpm with no loss's up top so can maybe help optumise the setup
this is awesome.
not only will your motor be strong as hell up top. the low and midrange will be epic with the stroker n all
 
this is awesome.
not only will your motor be strong as hell up top. the low and midrange will be epic with the stroker n all

I'm hoping it should be a lot pokier off boost as mines currently iirc 1825cc 82mm but 8.5CR with a turbo that spools around 3k
Which will be compared to 2008cc with 83mm bore and 92.6 stroke at roughly 9.5CR and hopefully turbo will be on full chat by 4k??

Getting really excited now talking about it! can't wait to drive and abuse it lol ;)
 
Put the bottom end at TDC then lined the cam pulley up to suit with the cam cover marks but since have tightened the belt a tad more as wasn't happy with it and turned it over a couple of times which has left it with the timing retarded a degree or 2

Do you want it back on zero?

Physical TDC as in measured and confirm on piston crown or just on the marks..... <<< Significant question <<<<
 
I have made my own marks on the casting by the timing pulley for no.1 TDC (can't really see but did scribe marks as well as felt tip)

F12DC403-0BF3-47D3-A41A-241944C72642-2422-000002EFB7DB5269_zps0debac96.jpg
 
if its physical TDC#1 and exhaust cam is on the cam cap marker and inlet is 16 rollers, it should be fine starting point.. If not you have the vernier to correct it to accomodate the skimming done
 
Yeah made that mark when head was off so was probably as accurate as was going to get?

Got me paranoid about the 16 rollers now and am going to have to go through old pics lol
 
Little update although nothing particularly amazing

Inlet Mani sits rather high and looks pretty tight to the bonnet


Sorry about the iphone quality


Will have to wait and see how it goes and wether it hits the bonnet?

The standard coolant hose's to the bulkhead definatly wouldn't have fitted and neither will the straight AN fittings so have now got some 45 degree fittings on they're way

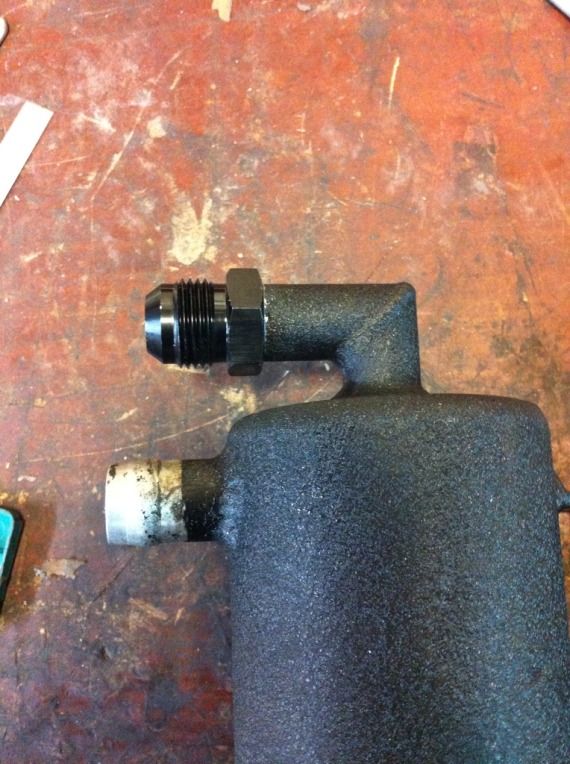
I have played with the hardpipe that runs round the block and its now got a -10 fitting welded on it although i forgot to get pics


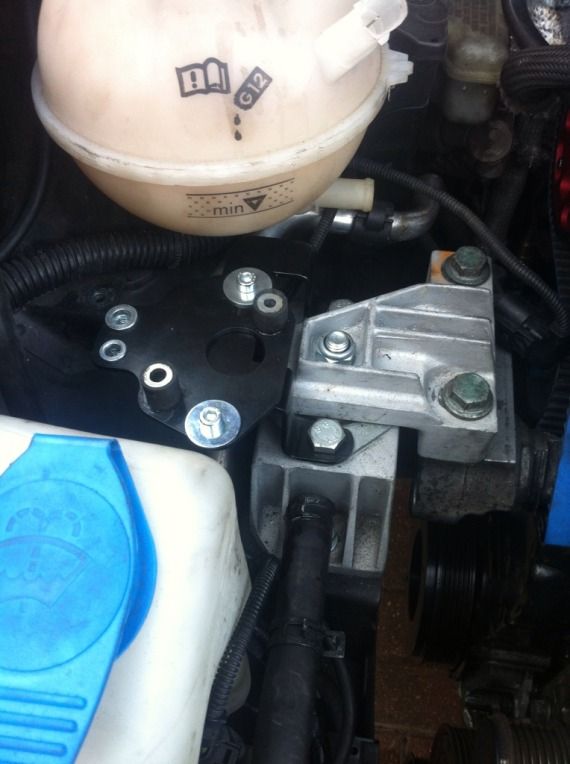
Have now changed the washer bottle for a mk4 golf one to free up some space for the charge pipework due to the inlet robbing some am now hopefully going to move the PAS reservoir over a couple of inches to free up more room


PAS normal position which really shows how much room is gained by the smaller bottle


Somewhere near where i'd like it to end up


Cooler with the elbows welded back on


70mm Outlet


It seems to fit alright but won't really know until i get to fix the bumper on properly

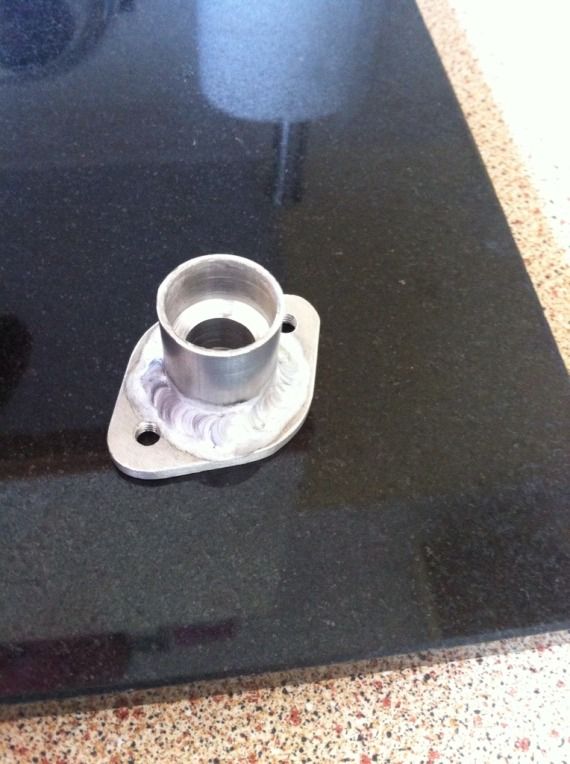
Map sensor boss ready for the charge pipework


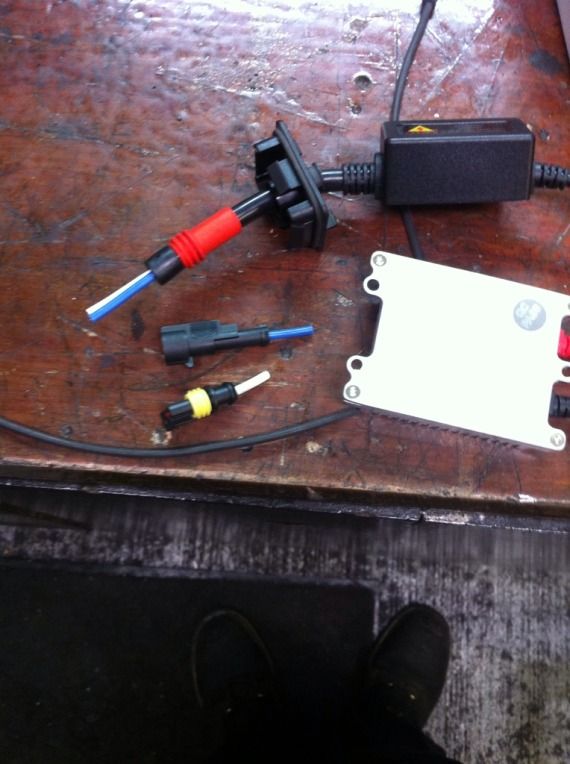
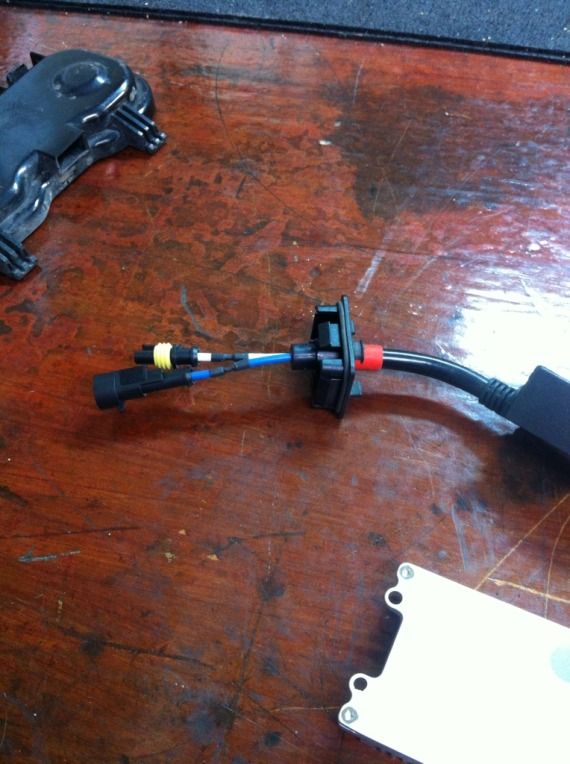
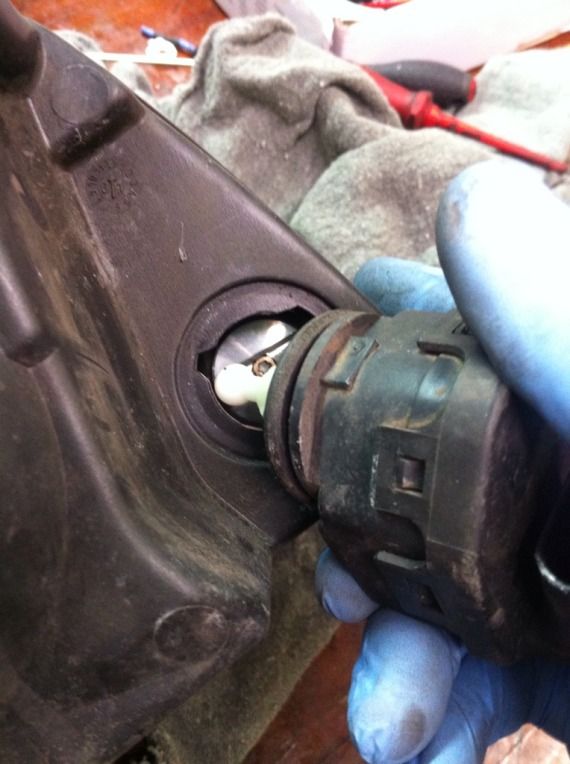
Am hopefully going to be able to tommorrow at work (if to much doesn't break down) make the PAS bracket, replace another headlight ballast and modify my catch can for AN fittings but will have to wait and see?
 
Awesome update dude
With a motor like that who cares about the bonnet leave it off lol

But on a serious note lol does the mk4 bottle fit right in or do you need to mod?
 
Cheers mate just felt like lots of playing about without achieving much since the last update lol

The mk4 washer bottle is a direct fit apart from you loose the headlight washers and the level sensor but that wasn't to much of a worry to me

I can rotate the TB to give me more clearance but the mani itself sits pretty close, am hoping that with the vibratechnics and both dogbone bushes done it will be enough to hold it?
 
Lol I don't have those so that's sweet if its only that. I will get one now I replaced water bottle and the washer bottle looks sad!!!

With my solid mounts the engine does not move on full chat no lift shifting and mine is a DIY so I don't think yours will move much or even at all
 
But he'll be running a fair wack more power. Might get a bit of movement but you can always use a VF Engineering dogbone. They're pretty solid. I've got one on mine. You can feel a fair bit more as a result though.

Looking good Stacey. Well jealous.
 
Cheers guys :)

Is the VF dogbone much different to a rebushed OE mount as have a yellow dogbone and have also replaced the round bush with a powerflex one?

Have managed to get a few bits done this morning

Bracket is all finished and should hopefully be in the right place as only got a couple of quick measurements in the rain yesterday

4700893B-03A8-4046-A9BA-CF3DCC9066C9-5226-00000711214F8BBD_zpsf82b6571.jpg


A pic with the vibratechnic bracket for the PAS reservoir (if only gone for M6 bolts as should allow some adjustment if need be and don't think much more is needed)

FE93704A-2D74-4343-BFA7-4EC3259F58E4-5226-000007111A303C38_zps08d0f841.jpg


Turned down an -10an adaptor to press into the catch can, I also trimmed the inlet down a touch to get rid of the nipple

9E5A9FBB-266D-47DC-8FF2-9B3BB3242AA9-5226-000007103A356854_zps4ee9ea1c.jpg


75F31E8A-531E-4127-9A14-4B28AA81D0E0-5226-0000071041B10119_zps88239e26.jpg


I've had a ballast in need of replacing on my headlights as the ones i got a year or two ago have both now failed :(

Got the new ballast and cut the connectors off to allow to pass the cables through the gland

DF202225-D94D-472A-8041-0399EF5978B6-5226-00000710463AF439_zpsf793b897.jpg


Soldered back on after

2B379C1D-4705-462D-AFE5-B511BAC94D41-5226-000007107A78CF5C_zpsbae55cb0.jpg


Whilst I was at it I thought I'd replace the headlight leveling clips as had them sitting around since the group buy

I only pulled the motor out by twisting it then that gave you access to the clip retaining bolt, it takes a bit of jiggling and shaking the light to get the old ones out and new in but it's more than doable

52B0692A-47CA-4513-89C4-5F9DFFA25B8A-5226-000007104A079AA7_zpsb201b91a.jpg


Once the new clip was bolted in I brought the light towards me using the adjuster and hands then by putting the motor in at an angle you can just about slide it into the end of the channel

C239ACE6-9789-4CA8-BFAA-EDE27744154B-5226-000007104E4A2187_zpsd7ee5714.jpg


Not sure how these were being done but pretty sure I read about people warming them up to dismantle the lens from the body?
 
It was quite a bit different to an OEM one with a red bush and an OEM small bush (low mileage). Not sure how it stacks up to the yellow bush. It's a different design though to the OEM:

vwvfdgmk46.jpg


You do get a bit more vibration but it's always going to be a trade off. I guess the yellow might be similar?
 
Cheers mate looks like it will be less forgiving than my current set up, I expect with that and the vibratechnics the engine would hardly move ;)

Got the bracket in and have to say it fits like a glove....so much so I couldn't get it all to fit at first but a couple of adjustments later and it's sitting sweet

93892E99-BF0B-4BB0-AA4E-AD8A2048F42A-6176-000008352F331E42_zps8ef83134.jpg


26F557AB-EDB7-4A7D-8EB8-08BEF5146F84-6176-0000083528EF9231_zps2f1c2cae.jpg


Have got wed and thurs off this week so will hopefully get some more done then :)
 
Looking awesome dude - leave nothing stock :hubbahubba:

Cheers mate think that's the way it's gotta be lol

Had a few issues getting my top cambelt cover off the other day and got to the point I slackened the engine mounts and barred the engine over to the gearbox side to allow a tiny bit more space

Has anyone modified they're cover at all as I was thinking of taking a couple of mm's off of the back lower part of the cover to allow it to be removed a bit easier due to having the adjustable cam gear and the manual tensioner so suspect it will be of more than usual?

The other thing that have been thinking about and discussed with Bill a while ago was a 3' cat back system, is there any that anyone knows of that are an off the shelf item or is it all custom?

I gave my cover a little trim, also cut a large hole in it to access the pulley without taking the cover off

No off the shelf systems as i looked into it. I'm might be getting Pipewerx to do me a down pipe as well as a system for me
 
Mines modded to feck... just makes it easier to remove in situe... they normally mod themselves as you try to refit the ****** thing anyway... :p

<tuffty/>
 
....The other thing that have been thinking about and discussed with Bill a while ago was a 3' cat back system, is there any that anyone knows of that are an off the shelf item or is it all custom?

All custom dude sorry... its the rear box that the issue.. trying to find a decent 3" box that fits across the back like the oe or miltek... my original little 3" > 2x 2.5" back box was very droney inside the car which will eventually do you head in... this is why I went miltek but seeing as NLS has 'altered' it a little internally the plan is to open it up and replace the internals with 3" stuff to make it flow better...

Bill found some interesting info suggesting 3" is a little on the small side for 400-450hp...
some good info here... | Facebook

I think going larger than 3" is going to be a little impractical on a road car tbh and getting a 4" DP to fit an S3?? its pretty fecking tight as it is lol...

<tuffty/>
 
There's a GTR around here with a 5" system. Pretty large. Might as well use AC ducting haha.

If you're going to go custom, you might as well get it as big as you can I guess? Problem is custom usually means either loud or expensive.
 
I have broken one of the covers previously and had forgotten how much of pita they were to remove until the other day, so will take a grinder to mine to trim a little me thinks ;)

Had been stewing for a while over the exhaust side of things since reading a few threads on vortex etc and had wondered if a 3.5' downpipe was a possibility as did reckon 4' would be near in impossible?

Since seeing your miltek has made me really consider a bigger cat back as last thing I'd want to do is destroy the milltek and don't want to damage its resale value in the mean time

Had spoke to bill in the past about a full system but did say would be quite droney, I would still like something that looks like the milltek though with the twin pipe exit so may try and get some quotes for a cat back and see what people think can be done without making it unbearable?

The other main thing that has been pushing me to try something bigger is have read that people have got quite good gains in spool by going bigger
 
I know this is different to a S3 but my mate ran a 100mm dp (4") down here with only 1 box out, was a stuff up to get it around the axel, he said it was a huge improvement over the 76mm dp, and it did not drone that more then the previous system. Also it was his daily
 
There's a GTR around here with a 5" system. Pretty large. Might as well use AC ducting haha.

If you're going to go custom, you might as well get it as big as you can I guess? Problem is custom usually means either loud or expensive.

5' is absolutely insane lol, is it a justified 5' system or is the car pretty standard?

I expect will want a couple of boxes in the system but still not sure what the outcome will be?
 
I know this is different to a S3 but my mate ran a 100mm dp (4") down here with only 1 box out, was a stuff up to get it around the axel, he said it was a huge improvement over the 76mm dp, and it did not drone that more then the previous system. Also it was his daily

Ahh that's good to know, I got to admit though I think the milltek back box probably currently tones it down compared to what it would be like with another 2.75' cat back?
 
Possibly look into a 3" system with a normal backbox, have a box in the standard location and also look to fit in a bullet type resonator as far forward as possibly. You could probably fit in a box where the standard cat was. The further forward the box the more noise it`ll take out.
 
Possibly look into a 3" system with a normal backbox, have a box in the standard location and also look to fit in a bullet type resonator as far forward as possibly. You could probably fit in a box where the standard cat was. The further forward the box the more noise it`ll take out.

Will be 3" or 3.5" I currently have a resonated milltek and I presume a bullet resonator is the same sort of thing as the milltek center resonator?

I suppose putting one in the cats position would be a win win as will quieten it down and could always say I thought it was a cat lol

Might have a ring around for some quotes and see what people can do? Reconmend anywhere in south east area as search's keep bringing up Hayward and Scott