Starting my build

Andie0

Registered User
Joined
Aug 28, 2012
Messages
489
Reaction score
13
Points
16
Location
NULL
Right I have had my audi a4 for about 3 months and am loving it. It's a 1.8t s line, and I no I can squeeze a lot more bhp out of it with a few bolt on modifications and a good remap.

I am thinking of going for a spec a little something like this but would like to no where I can buy really quality parts from:

manifold
sports ccat
straight through exhaust (miltek, blue flame)
bigger injectors and fuel pump if needed
Standard turbo if capable of pushing 250 bhp if not ko4
induction kit
remap

If there are people on here who have already done these sort of builds can you just help me with a little information on where best to source these bits as I don't want any cheap crap.
also I have engine code wqu is this a strong engine as I no the BAM is the best but can these engines still take more power?

All info you could supply me would be great thanks alot
 
I would also add a front-mount inter-cooler to that list.
 
Thanks mate I forgot about that, I have been looking and reckon the ones on eBay look ok for what I need and not to bad price either.
 
Good manifold but they are for an S3 Bam my mate had one before his engine blew up and he put an R32 in it,
 
So what manifold can I get with a ko4 for my car that bolts straight on and is decent! Was it the bam engine that blew up he must of been running some big power
 
Right I have been looking into it and because I have a bex engine I must have the bex mani right! So I could just port that and then buy a ko4 which should bolt straight on!, am I correct?
 
Right I have started the upgrades... (The start of a long road I reckon)

today I upgraded all the interior lights including boot and number plate lights think I used 22 bulbs in the end. All Bright white and have really made the inside a lot brighter and yes yellow!!

tints have now been done went for 50% all round and am happy with the outcome.
had to fit a set of team heko wind deflectors just to finish off the windows.
debadged all except the audi rings and looks a lot more classy, I hate badges especially chrome ones tackkyyyy!
k&n panel filter also went in to add a slight bit more grunt.


no problems as of yet but I suppose I've done only easy stuff so far!

next mods to come are coilovers which I think I'm going to try buy a set of racelands as I only use the car some weekends so not worth it for me to buy expensive ones! And then a exhaust system but may go and get a custom one built from cat bk!

Any information you guys have on decent exhausts but not miltek as are very expensive would be highly appreciated cheers will post pics soon!!
 
Next things ordered today and can't frickin wait..

BSR optiflow kit from Sweden £134.00 delivered
stainless tip from America evolution werks £142.00 delivered
forge dv 008 from eBay £124.00

Once these are fitted I will be taking the car down to tx autosport in Essex to get a stainless system fitted seen some decent exhausts come out of that place. The man I spoke to there told me all in fitted with downpipe for 425.00 so I'm grabbing it up.

i think this will take me to after Christmas so I will let you guys no what happens next! Will put some pics up of build thread when fitting items = )
 
The BSR optiflow intake sounds interesting just had a look at some of the video. Be good to see it on a BEX have they said how long to deliver
 
They've said a 2-3 week wait as there all made to order!
Though the tip I ordered will be here in 10 days!
 
Very tempted to buy one it looks really good for the money and from the videos it sounds awesome, might be an early Christmas present for me
 
Very tempted to buy one it looks really good for the money and from the videos it sounds awesome, might be an early Christmas present for me,
 
Ill let you no what its like when i have fitted, feeling maybe making a custom lid for it though as the mototec and apr ones do!
 
Received forge DV 008 today and fitted it to my bex engine in literally around 15 mins really easy job and something everyone should do themselves!


No noticeable sound difference as fitted in correct way round as want it to operate as oem would.

only difference is that I seem to be holding my boost better and feels stronger in 2nd and 3rd, maybe my valve was leaking ever so slightly!

Just waiting on the out of uk items to arrive now!

right I haven't got a real indepth right up but this may help a little!

tools=
1. 8mm socket for new jubilee clamps
2. Wire snips for breaking off one use clips
3. Flat head screwdriver to remove under tray
4. Jack
5. Axle stands

step one is to get the car jacked up and get an axle stand under it! Make sure car cannot move as you will be underneath and it's only going to end in a cartoon style pancake face but without the laughter!!
once you have done this and car is secure you want to drop the under tray off of the car I have a pic off the car so you can see better where all half turn bolts are located


upload


Now you have the belly off you want to look at the drivers side between the bumper it's self and engine block!

you should see a valve that looks like this, this is your diverter valve


picture sharing


you need to get the two large one use clips off and to do this the best way I found to remove was to get some wire snips and get at the end lip of the clip between the two layers to force them apart worked really well and came off easy! Again this is a pic off the car so you can see better


pic hosting

now once you have all clips of this includes the small vac line on the end of the DV you should be able to pull the DV away being careful not to scrape your elbows all over the floor revealing your skeleton... How do I no this, lets just say I went thru packs of antiseptic wipes...errr well the mrs told me too I could hack the blood she just quivered!

You will now be left with the gap in which the DV once stood and from now should be self explanatory but for you who are special here is the finished article.. just fit the new valve in the same place in the same manner using the new jubilee clamps provided and tighten with the 8mm socket or flathead (i always use socket as hate slipping and stabbing myself with flathead).you can reverse the way in which you fit it but it isn't going to gain you any performance just noise if that's what you like! Any way I went for the oem way of fitment and looks good and works perfect! The spring setting all depends on what boost you run so revert to forge website for guidelines on correct spring for your application!


free photo hosting

hope this helps you guys and girls out that are attempting this, trust it is a really easy job and you don't have to no much about mechanics to do this!
 
Last edited:
Stuff just keeps rolling in, I received my bsr opti flow kit today and thought I'd just show you guys what components actually arrive In the kit!

Theres a two part heat shield, which is a very decent powder coated black and looks the buis!

Two filters one for intake and one for secondary air pump!

fixing kit with all necessary clamps and ties!


pic upload

I will fit it soon and do a write up of how it went for you guys to use!
 
That was quick delivery, have you got it fitted yet. Looks a good bit of kit
 
That was quick delivery, have you got it fitted yet. Looks a good bit of kit

yer you no that, seems they have a depot in Leicestershire! So I'm more than happy because ain't had to wait forever!!
i will put a pic up once fitted but I. At work all week so won't be doing it until sat! Just to dark when I gt home and got no garage god Dahm it!!!
 
Going to fit thos thursday pabs so will take pics and make lil walkthrough!
 
Right guys i thought id show you guys how i tackled the replacment of my standardnair box for my bsr optiflow kit.
Contents of box are as above in previous post...

Right first off heres a pic of what yours should look like to start off if your standard!


online photo sharing

you need to remove the ducting to the airbox by removing the two screws holding it on as in this pic


image sharing


You then need to remove the egr harness which is located at the rear of airbox on top!


image ru

next remove the maf harness from the sensor, clips are self explanitory to remove very easy!


photo sharing sites

now remove the magnetic harness too, this clip is a lil tricky but you just need to open the spring clip with a flat head or something similar and it just pops out allowing the harness to pull away!


upload pic


Now undo the turbo intake pipe by loosening the jubilee clamp with a 7 or 8 mm socket and then pull it away from the airbox also pull away the secondry air pump by squeezing the clip and pulling it away too as i have here.


free image hosting

now you need to release the one use clips from the silicone pipes where the hard pipe of the egr meets top and bottom. Both clips need to be thrown away after and replaced with the jubilee clamps provided in the kit! The first is located at the top right hand corner of the airbox


picture sharing

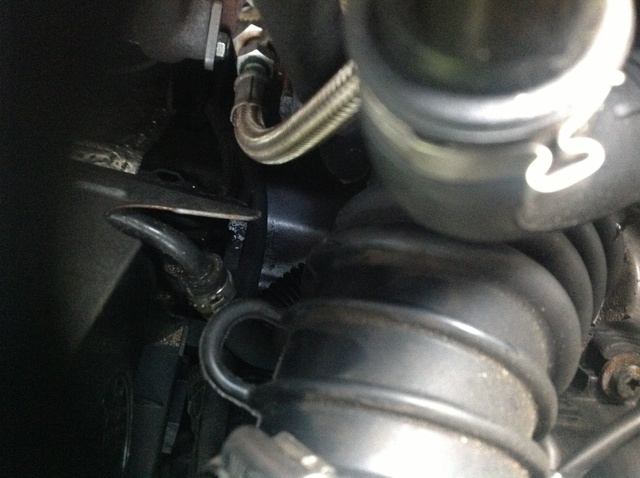
and then the bottom one which is located behind the turbo intake pipe, the clips need to be removed with electrical snips and cut between the meeting layers for easy removal, as prying with a flathead can damage pipes and other parts in close proximity if you slip!


upload foto


Now you have removed the hard pipe pull all the remaining hoses and harness out of the way so you can pull the airbox to the right so it comes away from the fender mount and then straight up and out! Once tou have done this you should be left with the open gap which airbox once stood. Now you can prepare the first part of bsr kit by fitting the harness holders and egr hardpipe cable ties which all clip in via the clips attached to items supplied! You can now drop the first part of heat shield into the mouting bushes which you will be able to see in the open gap! Once in just push all harness into place on clips as pic


photo uploader

Now go back to the airbox and remove the maf sensor and housing off of the unit! Now you can fit this to the second part of the heat shield with the plugs and screws provided! Then fit the second part into the bay and connect via the 3 bolts provided to secure together and also fix to fender using the L bracket and bolt provided!


photo uploader


pic hosting


photo uploader

once this is done and secure you are nearly there. Now fit the turbo intake pipe back onto maf and plug in harness making sure its neatly passed through box, same goes for magnetic harness also passed neatly through box. Then plug in egr harness also left neat and conncet up the two egr pipes you removed earlier nipped tight with the new jubilee clamps provided. May want to do the hard pipe first. Once everything is fitted back as should be you can now fit the two filters first little secondry pupmp filter is to be passed through and fitted to pipe using new clamp, you may have to snip off old connector to get the new clamp around! Now fit the larger filter to the maf inside the box and nip up tight but being carefull not to split rubber. Once this is all done replace your old intake duct by replacing both screws you removed at first and run in gap supplied on top of box should be neat and fit well! Once this is complete check all connections and harnesses before turning over vechile or you may get an error which you will have to get cleared! You should end up with this


photo sharing

remember to clean everything up so you leave no greasy marks all over your engine


image ru

Now this is fitted it really does make a difference sound wise as gives that distinctive whooshh that i love! Hasnt made any noticable gains in throttle response but neither has it lost any so isnt really making any difference as of now except for the noise which i prefer to have! Sounds really good and is quite loud actually! Now need to replace the turbo intake pipe which i am still awaiting! As alwawys will show you guys how i tackled it when inget to it. Ohhh and also fitted replacment led number plate units and are rwally worth the money much better than led bulbs in standard cases look great!
 
I personally think you will loose power rather then add power.

The reason I say this is because its way to exposed to the heat build up from the turbo plus you have now lost the ram air effect by removing the air box.

This type of airlifter setup have been proven on many occasion to take away power rather then add when fitted to an A4.

Agreed, any induction kit that sits in the engine bay, with a heat shield or not is still sucking in hot air.
 
Yea you guys are probally right but i havent noticed any difference what so ever in performamce, if anything when i took her on motorway earlier this evening felt ever so slightly more quick to respond! But put the car on a dyno it may prove you guys right!
 
In this cold weather it may not be so noticeable but come the warmer weather and with a red hot engine things may change so what.

The biggest gain will be made with exhaust, sports cat, turbo and remap (remap with stock turbo would yield good results) , with supporting mods FMIC, Intake pipe, try a N75 J valve and DV you have.

Also checkout the Frankenturbo as this would be the K04 I would go for if I was looking for another K04 FrankenTurbo | F21 Hybrid Turbocharger for Longitudinal 1.8T
 
Yer we shall see, im hoping it wont be too much of a problem! If it is it will be changed back! I am having the exhaust made custom on the 18th jan which is going to be using a 200 cell sport cat so should be good also am still waiting on a new turbo intake pipe from america atm! Im going to be doing the ko3s conversion to rs6 turbine as i am hoping beach buggy is going to do it for me in febuary! Then as you say will be getting a fromt mount and hopefully can find someone who can map my standard n75 to support my power! Im hopeing to end up at about 260 that would be nice as dont want to kill my engine and forging this engine is a no no for me as my old starlet when i forged just ate all my pound notes!!! Im just going to go for my idea and let you all no what works and what dont then others can use that knowledge!
 
Andie where are you located? 260bhp is more than achievable.
 
I am in bromley in kent! Yea will definetly want you to do the conversion for me in febuary just got to pay for all the other mods first then get the cash for you 650 you quoted me on private message! Also i would like to get a heat jacket for it, is that something you no wherw to get? Thanks
 
Heat jacket really? If you want just wrapping it up with exhaust would do the trick, personally keeping the heat enclosed around the turbine housing is going to make things worse ! You want to get rid of the heat not store it. If you worried about hot air getting into the intake then getting the air filter enclosed and supplied with fresh air is a far better option. I can also sort the map out for you if you need.
 
When i used to fit the k+n cone kits to my rs turbos years ago they allways come with cold air feed corrigated ally pipe from grill or wherever to the filter to suply fresh cool air you would think one would come with it eh
 
Bromley...... I'm Catford your on my door step.

By the way the engine good for 350bhp before internals need doing oh and you will need to add a upgraded clutch to that lot of goodies as K04's pull hard from the get go top end is where they die off.
 
Heat jacket really? If you want just wrapping it up with exhaust would do the trick, personally keeping the heat enclosed around the turbine housing is going to make things worse ! You want to get rid of the heat not store it. If you worried about hot air getting into the intake then getting the air filter enclosed and supplied with fresh air is a far better option. I can also sort the map out for you if you need.

How much is a custom map these days?
 
When i used to fit the k+n cone kits to my rs turbos years ago they allways come with cold air feed corrigated ally pipe from grill or wherever to the filter to suply fresh cool air you would think one would come with it eh

They say to use the original feed that comes with the air box but i will be definetly feeding another pipe into the gap to ensure more airflow
 
Bromley...... I'm Catford your on my door step.

By the way the engine good for 350bhp before internals need doing oh and you will need to add a upgraded clutch to that lot of goodies as K04's pull hard from the get go top end is where they die off.

what clutch did you go for docurley amd how much you get charged or did you fit your self?
 
Heat jacket really? If you want just wrapping it up with exhaust would do the trick, personally keeping the heat enclosed around the turbine housing is going to make things worse ! You want to get rid of the heat not store it. If you worried about hot air getting into the intake then getting the air filter enclosed and supplied with fresh air is a far better option. I can also sort the map out for you if you need.

so your saying dont use my bsr kit for intake i just bought go back to airbox? Can i not just run a secondry air feed to the box to get a good spurce of cold air in! I will be fitting a intercooler shortly so will these erase the whole cold air situation?
 

Similar threads