A3Kent
Registered User
- Joined
- May 16, 2012
- Messages
- 1,572
- Reaction score
- 261
- Points
- 83
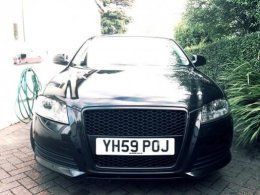
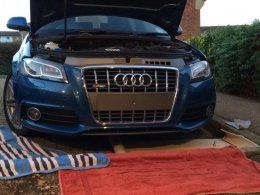
I thought i'd share the following intructions I produced when I decided to replace the front grille on my Facelift A3 with the Black Edition version (in this case). I hope they are helpful.
If you want the Black Edition/Optics front grille, PM me and I can help.
Tools Used
Short/Stubby Phillips Screwdriver
Torx 20 & 27
10mm Socket with long extension (pref flexible)
Stage 1
Remove 3x Torx 27 Screws as highlighted with red circles below:

Stage 2 -
Tip: Lay out an old cloth sheet on the ground for comfort and also to put the bumper onto when removed.
Remove 7x Phillips Screws from underneath bumper (Note that these have self-tapper threads for plastic so keep them separate) â The picture below shows 2x screws from one side, you will need to remove 2x from the other side too and then 3x from the front spoiler location (no need to remove the actual spoiler though).

Stages 3 and 4 describe how to remove screws from within one front wheel arch lining, you will need to do exactly the same for the other front wheel arch lining too.
Make sure you have your steering at full lock to access the front section of the wheel arch.
Stage 3
Remove 4x Torx 20 Screws from locations highlighted with a red circle below

Stage 4
You will need to hold the wheel arch lining away with your other hand to remove these 2 fixings. Remove the Torx 20 Screw from the location with the red arrow pointing upwards (Note that this screw is longer than the others screws removed from the wheel arch lining). Now remove the 6mm nut with the 10mm socket located in the higher of the 2 red circles. You may need a torch to locate this nut and then you will need a fairly long extension on the end of your 10mm socket.

Now do the same on the other front wheel arch.
Stage 5
Your bumper should now come away from your car with a bit of easing it off in tighter areas. The grab strip at the end of the bumper where it joins the wing needs a little coaxing away by hand only - do not use any metal tools. You will need to disconnect your Fog Lights. Place the bumper/grille assembly carefully on the sheet on the ground. Now remove the expanded polystyrene section from the rear of your bumper by simply pulling 2 plastic sections on either end away enough so that the polystyrene can be removed.

Stage 6
You may choose not to do this stage at your own risk as you may think the part has no use. It is a radiator cover although it doesnât cover the entire radiator, just the top section.
This item is permanently heat staked to the old grille, but can be removed and re-used. Remove the radiator cover from the rear of the grille highlighted below. You will need to drill all the plastic sections (circled) so that it can come away from the grille.

Stage 7
Now remove 11x screws from locations circled below and keep these screws separate. You can now remove the grille from your bumper by unclipping the 4 sections near the top of the grille.

Stage 8
Remove your number plate from the grille.
Stage 9
If you have done Stage 6 you can now re-attach the radiator cover from your old grille to your new grille. There are small plastic posts already on your new grille for the cover to fit onto although you may have to tidy up the cover so that the plastic posts can come up through your radiator cover. There are numerous ways to fix this section onto the plastic posts, notably by using a large soldering iron to melt the plastic posts or by finding small enough nuts (M3.5 works well) that can be tightened down cutting a thread on the small plastic posts. Be careful not to over tighten.
Stage 10
You may choose to re-attach your number plate at this stage but it can be done right at the end too.
Now re-attach your new grille to your bumper by clipping the 4 sections back into the top section of your bumper and then screwing in the 11x screws that were removed in Stage 7. You will also need to re-insert the polystyrene section onto the back of your new grille.
Stage 11
Make sure you have plugged your fog lights in before easing the bumper back onto your car. If available, it is easier to perform this task with two people, guiding each side of the bumper. Ensure bumper/wing junction mates up well before pressing home the grab strip fixing.
Now put back all the screws and bolts removed in Stages 1 to 4 starting with Stage 4 and working your way back to Stage 1. Make sure you use the 7x plastic screws underneath the bumper and the 2 longer screws to the area in Stage 4 with the arrow pointing upwards.
From this:

To This:

If you want the Black Edition/Optics front grille, PM me and I can help.
Tools Used
Short/Stubby Phillips Screwdriver
Torx 20 & 27
10mm Socket with long extension (pref flexible)
Stage 1
Remove 3x Torx 27 Screws as highlighted with red circles below:

Stage 2 -
Tip: Lay out an old cloth sheet on the ground for comfort and also to put the bumper onto when removed.
Remove 7x Phillips Screws from underneath bumper (Note that these have self-tapper threads for plastic so keep them separate) â The picture below shows 2x screws from one side, you will need to remove 2x from the other side too and then 3x from the front spoiler location (no need to remove the actual spoiler though).

Stages 3 and 4 describe how to remove screws from within one front wheel arch lining, you will need to do exactly the same for the other front wheel arch lining too.
Make sure you have your steering at full lock to access the front section of the wheel arch.
Stage 3
Remove 4x Torx 20 Screws from locations highlighted with a red circle below

Stage 4
You will need to hold the wheel arch lining away with your other hand to remove these 2 fixings. Remove the Torx 20 Screw from the location with the red arrow pointing upwards (Note that this screw is longer than the others screws removed from the wheel arch lining). Now remove the 6mm nut with the 10mm socket located in the higher of the 2 red circles. You may need a torch to locate this nut and then you will need a fairly long extension on the end of your 10mm socket.

Now do the same on the other front wheel arch.
Stage 5
Your bumper should now come away from your car with a bit of easing it off in tighter areas. The grab strip at the end of the bumper where it joins the wing needs a little coaxing away by hand only - do not use any metal tools. You will need to disconnect your Fog Lights. Place the bumper/grille assembly carefully on the sheet on the ground. Now remove the expanded polystyrene section from the rear of your bumper by simply pulling 2 plastic sections on either end away enough so that the polystyrene can be removed.

Stage 6
You may choose not to do this stage at your own risk as you may think the part has no use. It is a radiator cover although it doesnât cover the entire radiator, just the top section.
This item is permanently heat staked to the old grille, but can be removed and re-used. Remove the radiator cover from the rear of the grille highlighted below. You will need to drill all the plastic sections (circled) so that it can come away from the grille.

Stage 7
Now remove 11x screws from locations circled below and keep these screws separate. You can now remove the grille from your bumper by unclipping the 4 sections near the top of the grille.

Stage 8
Remove your number plate from the grille.
Stage 9
If you have done Stage 6 you can now re-attach the radiator cover from your old grille to your new grille. There are small plastic posts already on your new grille for the cover to fit onto although you may have to tidy up the cover so that the plastic posts can come up through your radiator cover. There are numerous ways to fix this section onto the plastic posts, notably by using a large soldering iron to melt the plastic posts or by finding small enough nuts (M3.5 works well) that can be tightened down cutting a thread on the small plastic posts. Be careful not to over tighten.
Stage 10
You may choose to re-attach your number plate at this stage but it can be done right at the end too.
Now re-attach your new grille to your bumper by clipping the 4 sections back into the top section of your bumper and then screwing in the 11x screws that were removed in Stage 7. You will also need to re-insert the polystyrene section onto the back of your new grille.
Stage 11
Make sure you have plugged your fog lights in before easing the bumper back onto your car. If available, it is easier to perform this task with two people, guiding each side of the bumper. Ensure bumper/wing junction mates up well before pressing home the grab strip fixing.
Now put back all the screws and bolts removed in Stages 1 to 4 starting with Stage 4 and working your way back to Stage 1. Make sure you use the 7x plastic screws underneath the bumper and the 2 longer screws to the area in Stage 4 with the arrow pointing upwards.
From this:

To This:

Last edited:


 )
) .im sure all the members appreciate it very much. Praise where its due.


