vrbob
Thats no Moon, Thats a space station!
Sorry to go off topic in your thread Paul.
I had the same problem on mine, Bill tried to tweak mine, can't communicate?
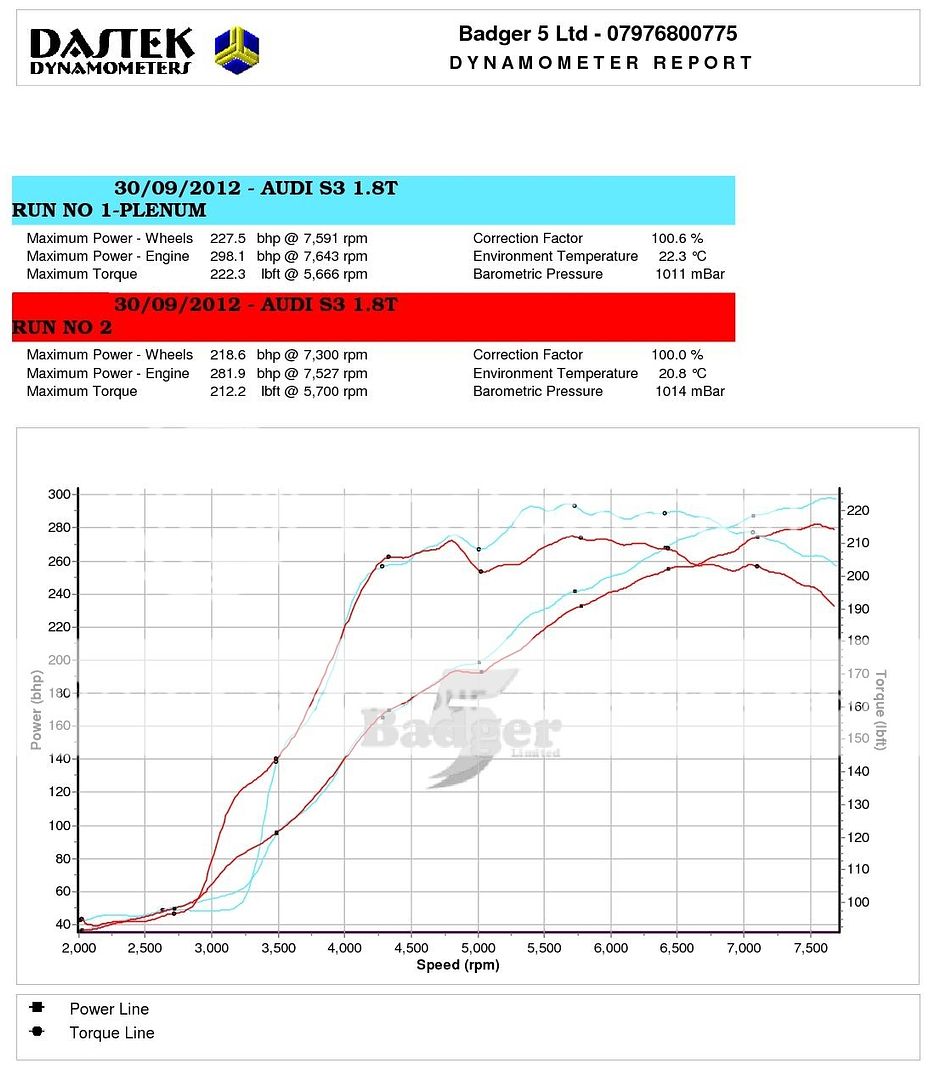
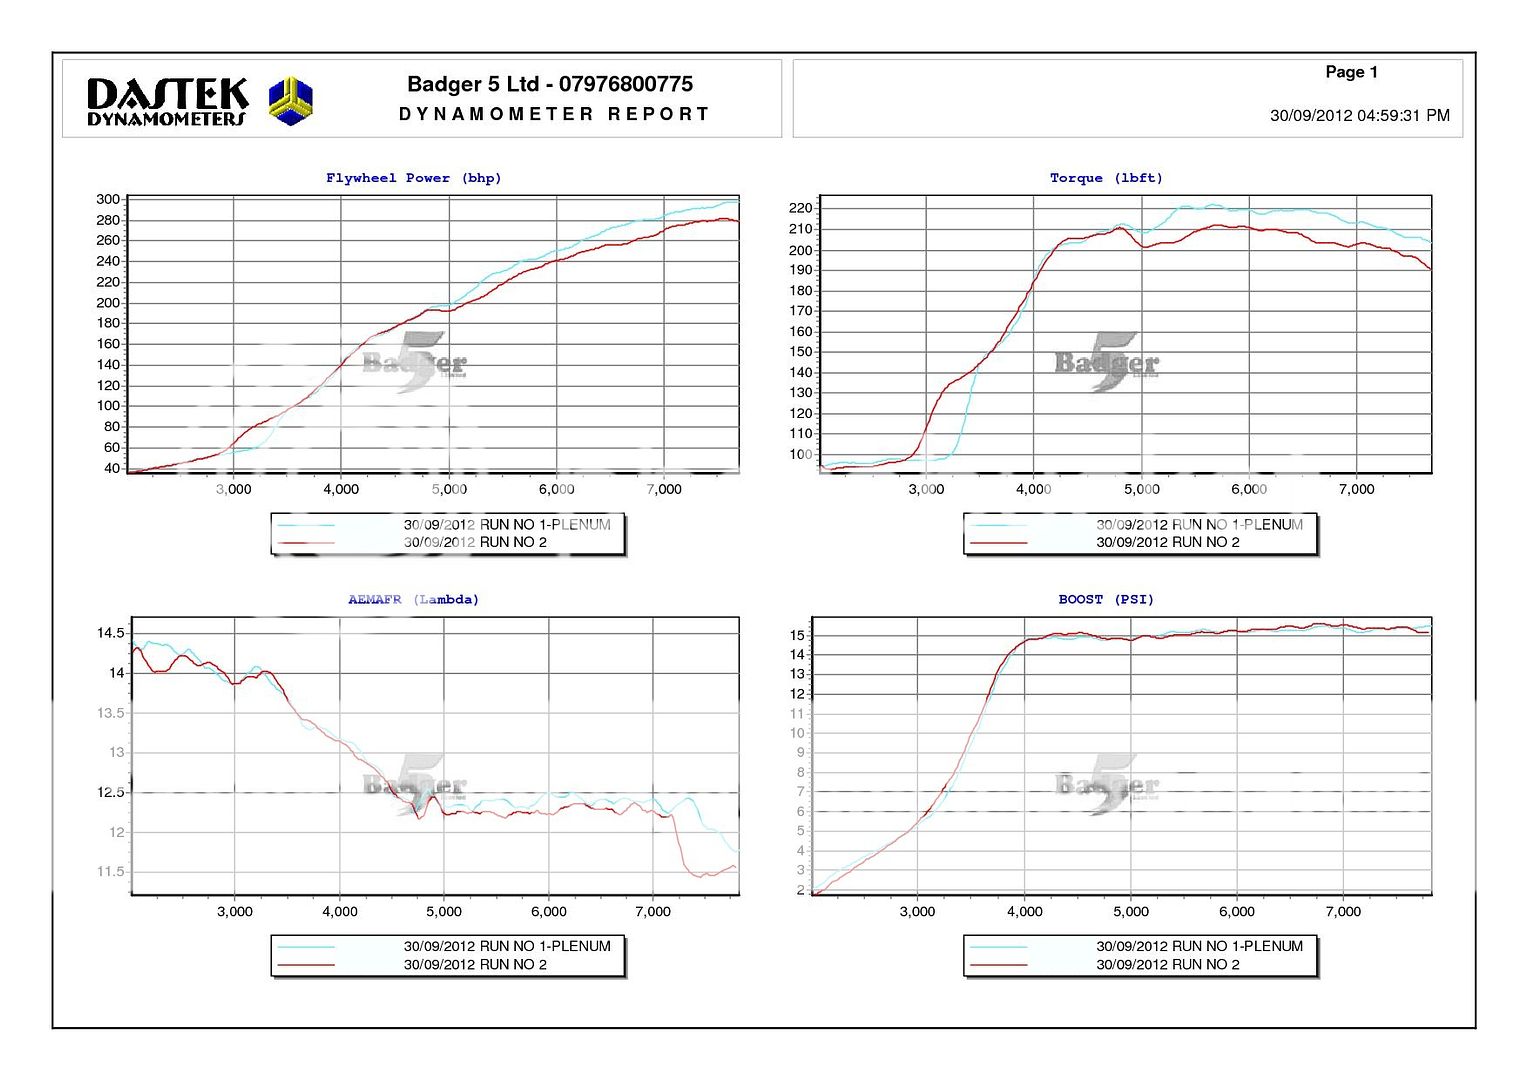
Toms S3 is an early pre facelift with no ESP but has a digital clock we guessed it was narrowband but couldnt work out if it was me7 or 7.5.
His car happily communicates using my Official Ross-tech hex can USB cable and VCDS and unisettings happily picked up the cable but just wouldnt read the ECU. We found a guide to using unisettings and follwed that eg have the ignition on etc but still no worky