Prawn and BigAls A3 Track Car

I re did the outlet hose from the pump on Saturday. It was in a loop around the pump and I wanted to try and have a more direct route for the fluid as it was a bit like one of those crazy straws you can get :)
 
Cheers Bill :) I'm not home until thursday night so I'm sure it'll be waiting for me at the post office :)

Can't wait to get this fitted now, do you think it's likely I'll notice a difference fitting it? Niki reckons the map is linked directly to timing and it'll add more timing as the IAT's drop with WMI, so I'm keen to see if it's a noticable amount.

Would increased power from more timing be apparent in airflow logs? or would airflow remain the same because it's making more of from the air it's getting?
 
Cheers Bill, I thought as much :)

Will do some logs anyway and see if they tie in with where I think they should power wise, my MAF is 38% over sized from stock, the stock MAF maxes out at 189g/s, which equates to 236bhp, x1.38 = 326bhp, which is pretty much bang on where Niki said the maf was clipping anyway, so very roughly speaking, my current maf reading /0.58 should be roughly 290-300bhp.

If it's miles off I'll forget it, but it's reading ~170g/s then that'll tie in with what the dynos say :)
 
Rods cough cough.....

I'm sure you'll be alright,better sooner rather than later. Will you be getting wmi mapped in once rods are done in the long run?
 
It's kinda of mapped in already Marty, in that Niki has linked the timing map directly to the IAT's, so when WMI reduces IAT's, and the sensor sees it, timing will increase all by itself. It also works as a fail safe should WMI fail, IAT's rise, and it pulls timing straight away.

Rods are being sorted this summer to go in that new engine you so kindly delivered to me :)

I like the sound of that mapping.
 
That sounds a awesome idea, is that part ofthe custom map nik offers?
 
Sorry for the late reply dude

To get the XS manifold on you have to remove the turbo and downpipe, otherwise there is simply no room to get it in, or do up any of the bolts. I'm sure you've figured that out by now though!

I found, to get it in with the head on, I turned it so the flange faced upwards, and slid it down behind the engine that way, then lowered it until the flange was below the head studs, and rotated it back upwards so it's in the right orientation, then lifted it back and up onto the studs.

Not easy, but it will go.

If you've not already done it, don't try hacksawing the studs in place, it'll be a nightmare, you'll get swarf down the ports which you don't want going through the turbo, and it'll be difficult to repair the thread. Just whip them out! 2 manifold nuts wound onto the stud, lock them together with two spanners, then wind out the inner nut and it'll pull the stud. Trim them down, then refitting is the reverse of removal (in true haynes style!)

Don't pull the head off, I really don't think it's worth the effort when a bit of patience gets it on without disturbing the head.

A tip for spanner access to the hidden 3rd turbo nut too: Remove the top downpipe stud from the exhaust housing. taking the top downpipe stud gives you a much better angle of attack for getting a spanner in to tighten the final nut. Worked a treat for me on both occasions :)
Top man thanks, yeah i guessed turbo out is a must. I was contemplating removing the heat shielding to get it in position. I'll probably get back on it the weekend but i'm in no rush. I'm a bit nervous of winding the studs out but i'll give it a go, how much force is required and is blue thread lock of adequate strength upon refitting. Sorry for crashing your thread and looking forward to seeing the final figures when you complete your build as by the sounds of it Welly's crown may be in trouble. :icon_thumright:
 
It's kinda of mapped in already Marty, in that Niki has linked the timing map directly to the IAT's, so when WMI reduces IAT's, and the sensor sees it, timing will increase all by itself. It also works as a fail safe should WMI fail, IAT's rise, and it pulls timing straight away.

Do you know what software Niki uses for his maps? Is this type of mapping something he tends to do so that the timing adjust automatically from the AITs?
 
Prawn:1576630 said:
It's kinda of mapped in already Marty, in that Niki has linked the timing map directly to the IAT's, so when WMI reduces IAT's, and the sensor sees it, timing will increase all by itself. It also works as a fail safe should WMI fail, IAT's rise, and it pulls timing straight away.

Rods are being sorted this summer to go in that new engine you so kindly delivered to me :)

Very welcome for the block bro,nick is a genius with mapping. I'm going to fit my wmi but wasnt sure of the safety if the wmi was to fail. Question answered :D
 
Do you know what software Niki uses for his maps? Is this type of mapping something he tends to do so that the timing adjust automatically from the AITs?

you cant readily compare me3.8 to me7.5 like yours westy
there are compensation maps as std which do this function......... its failsafe generally. access to the map tables which do it and you can set it how you want.... The threshold for wmi ait temps alone however are a small one... wmi ait's vs non wmi ait's, vs ambient conditions..... winter vs summer... You get the drift?
 
****** weather! Started work at 6am, work cancelled at 8am due to bad weather, tonights shift cancelled, so I'm home today, and have to be back tomorrow. Grrrrrrrrrrrrrr.

So, as it was raining I started on my Tank mount.

I obviously don't have boot trim like everyone else, so couldn't mount it in the usual place. I also didn't want to be extending any wires I didn't need to, simply because I HATE electrics, so I looked for somewhere better to mount my tank....

Started with two bars to mount the tank on, cut to length and drilled:

2ae5c670.jpg


Then used some super fancy ultra high tech Circular clamping system as a way of mounting it to the cage:

ad11d360.jpg

(definitely not 2'' exhaust clamps)

Bolted into place and it's incredibly stiff, I expected there to be a little flex in the mount, but there's none at all, so very happy with it. it's also height adjustable! (not that I can think of a use for this feature)

af1da745.jpg


490c1b87.jpg


9c4f7cb8.jpg


Then onto pump location, I looked for a few various places to mount it, the easiest option being here:

e974cb2a.jpg


But it just didn't look right to me somehow, I wasn't happy with that location, and felt it would look better if if was mounted vertically on the upright of the seat squab. I had discounted this location at first thinking the fuel tank was in the way.

Jacked the car up, and to my surprise found the tank is biased to the RHS (I've never cared enough to notice before), and there was easy access to the back of the panel.

Happy days:

155be69d.jpg


Will make a start on wiring in the controller and tubing to the front tomorrow. I'm a little concerned about finding a decent route through the bulkhead for the water pipe, so I might end up taking the wipers and scuttle panel off to have a nose.
 
I’m looking at buying a cheap car and I think prawny is good for me and I can afford this car.
 
Did you win the Photoshoot?

At the risk of sounding bitter, no. I didn't. :sob:

I won the round I was in, of which there were 3. Winners of each round were my track car, Mylos Lairy Florescent wheel'd Leon cupra, and a 4 door silver mk4 golf (europes most common car?) with a hugely distasteful badboy bonnet.

These were all shown to drivebyshooters, and they picked the winner. which wasn't me :crying: ^^^

Thanks to everyone who voted though, thanks to you guys I won the round I was in by a far greater margin than any of the other rounds, and I'm fairly sure I had the most votes of any of them from the 3 rounds too. So that's good enough for me!


I’m looking at buying a cheap car and I think prawny is good for me and I can afford this car.

oi, it's not for sale, go get your own :moa:
 
boo!

good thinking on the exhaust clamps I like that!
 
Cheers Dane

It's ****** muddy out there today!

7de31922.jpg


I'm still paranoid about this exhaust manifold :( Every little sound I hear I convince myself it's cracked, or something's come loose. I check it over and all seems fine, but I just don't know, it's very hard to trust.

it's made worse, by the fact that the car will just compensate for and leaks by upping the N75 DC to meet target load. On the ko3S running flat out you knew if there was a problem, because performance fell off, but this just goes and goes!

Still love it, just going to take a while before I can be fully confident in it's reliability, hence not bolting it together and taking it straight to the Ring!
 
It's a shame really, you'll blast through the back roads care free thinking its the best thing on the planet, then you'll pull up at some lights in town, and hear the tiniest noise as you pull away with no throttle, and you're convinced it's broken again!
 
It's a shame really, you'll blast through the back roads care free thinking its the best thing on the planet, then you'll pull up at some lights in town, and hear the tiniest noise as you pull away with no throttle, and you're convinced it's broken again!
We're all the same though mate, like car hypochondriacs. The thing to take confidence from is if it breaks you can fix it and all it costs is your time (which is still precious ). Better you give it a thrashing off the track first so if it goes belly up at least you don't loose an expensive day on the track.Your wmi should help with longetgevity. Enjoy the car mate and have confidence.
Do you have an egt probe in your turbo, one reason i ask is that manifold failure rates do seem to favour the cars without this basic protection. If not would you consider adding it so that timing is reduced or boost killed back to actuator pressure if for instance 920 degs plus is realised.
 
Last edited:
Do you have an egt probe in your turbo, one reason i ask is that manifold failure rates do seem to favour the cars without this basic protection. If not would you consider adding it so that timing is reduced or boost killed back to actuator pressure if for instance 920 degs plus is realised.


Unfortunately my ME3.8 has no facility for EGT probes or protection, although my ko4-023 housing does have an EGT hole. The plan is to fit a combined AEM or similar AFR / EFT guage so I can keep an eye on things on track.

another variant of that question is "Is 920'c std egt protection on egt protected cars the right number?"

Bill, does my ME3.8 have theory models for EGT even though it doesn't have a probe? I'm not aware of it ever fuel dumping at all on a dyno when it's being logged. I wouldn't expect it on Nikis map at on there at the mo, but on the old custard code map I'd expect things to be all over the shop!
 
I dont know enough of the me3.x to comment.... but I dont think so... is the answer
egt measurement and wideband gauge will be your friend..
Zeitronix is whats in my ibiza.. does boost,wideband also, rpm,s logging etc etc
 
Cheers Bill, I'll look into that, it sounds good :)

Check out these 3 Misfits I saw on TV earlier:

25695e85.jpg


RHS in the background!
 
So, enough buggering around, on to todays progress!

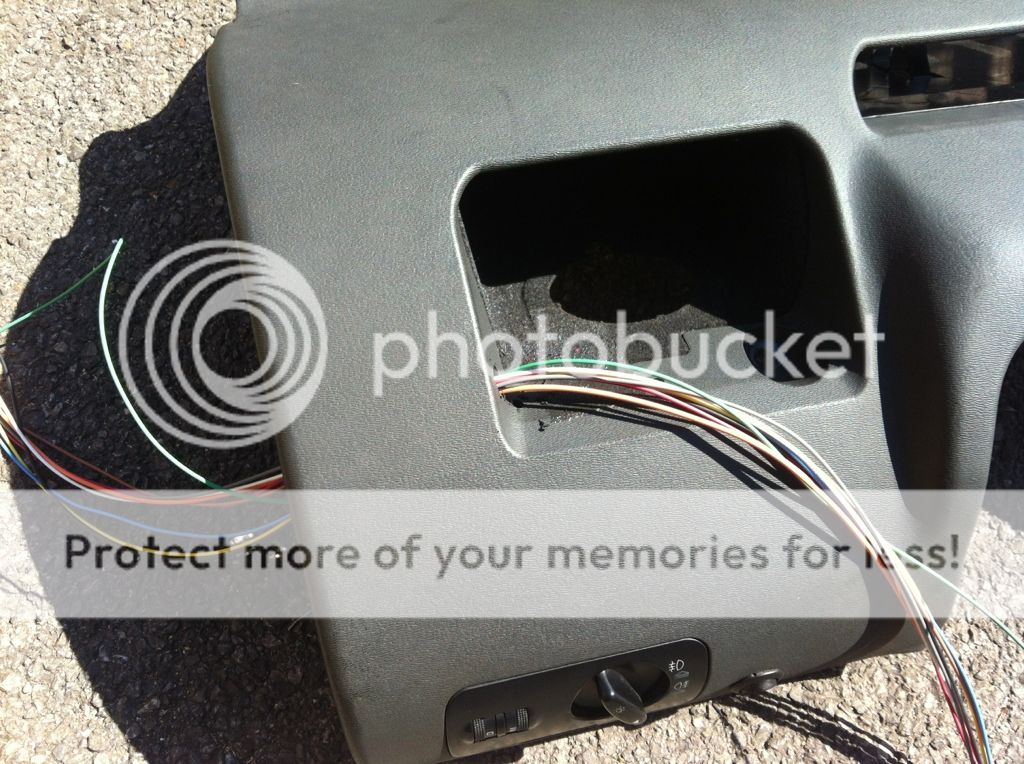
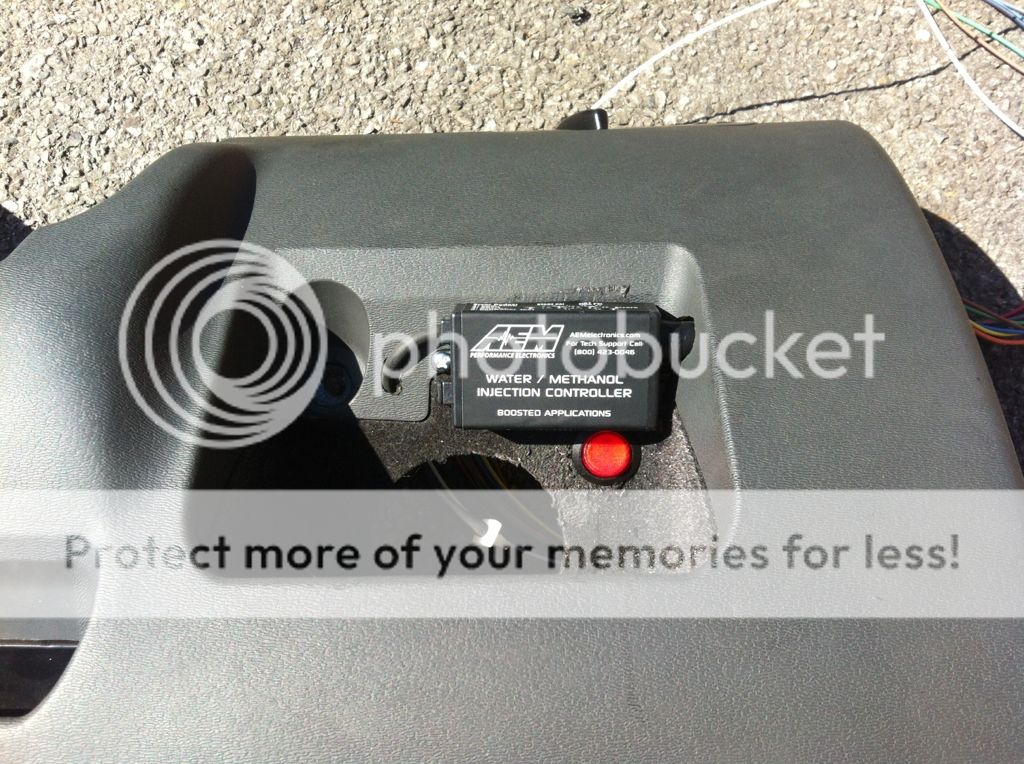
I started today with mounting the controller. Due to the way the wires come out the side of the controller, they'd usually be on display, but I didn't want this, as it'd look messy. So I set about making a cut out into the side of the cubby hole to hide the wires:

6182424f.jpg


With that done and the wires fed through, I could slide the controller right over to the side and the wires went in through the hole I made, I also didn't want to just run the map sensor through the big round hole, as I was worried I might snag it when I frequently stock up the pocket with redbull cans!, so I made another hole and chamfered it in at an angle for the MAP pipe:

04da97a3.jpg


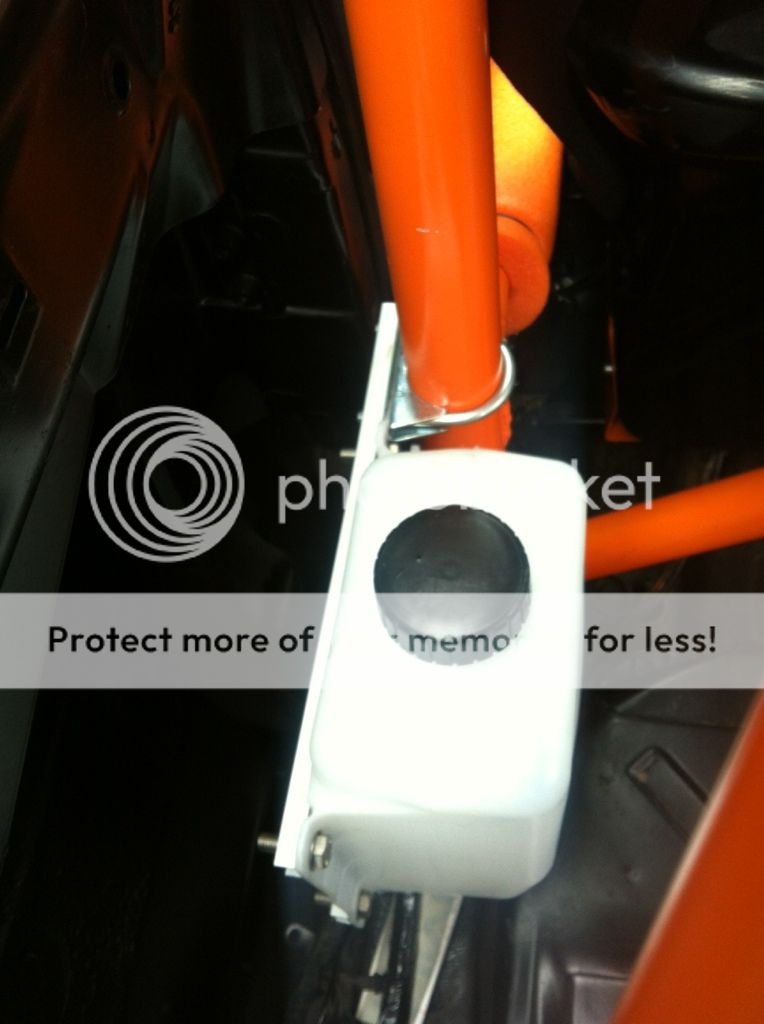
I also added a rocker switch into the 'ARM' circuit, so that I can turn the WMI system on and off depending on what I'm doing. I see no real need for it if I'm cruising down the motorway and want a few seconds of power to overtake someone. That would just be a waste of meth!

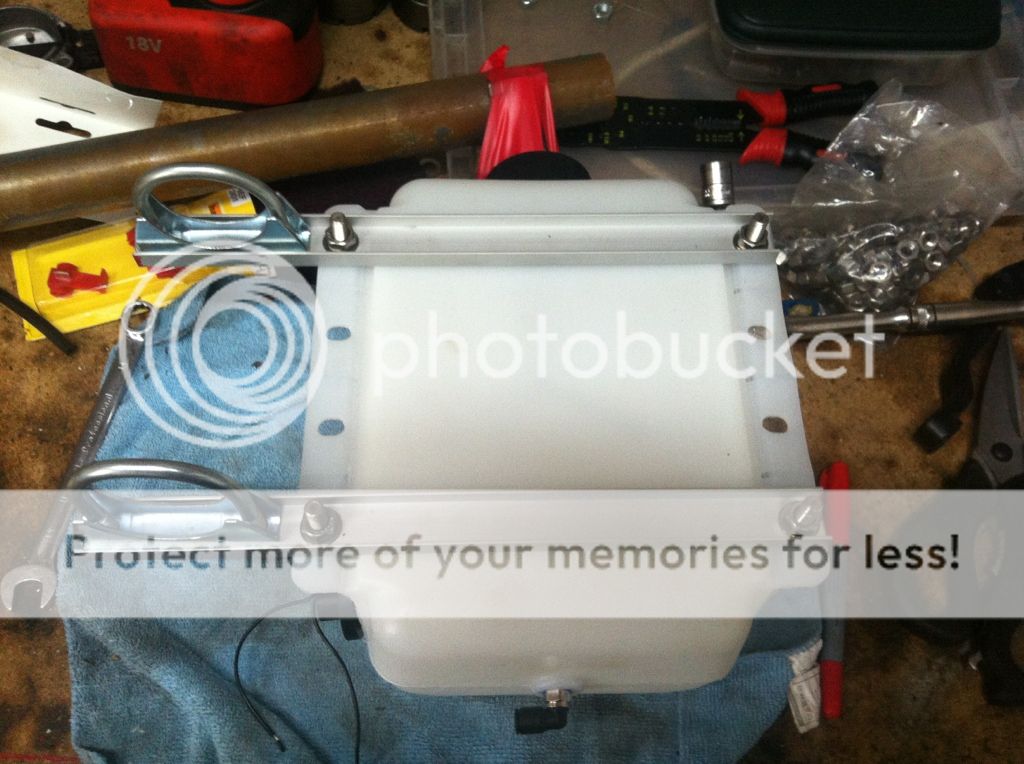
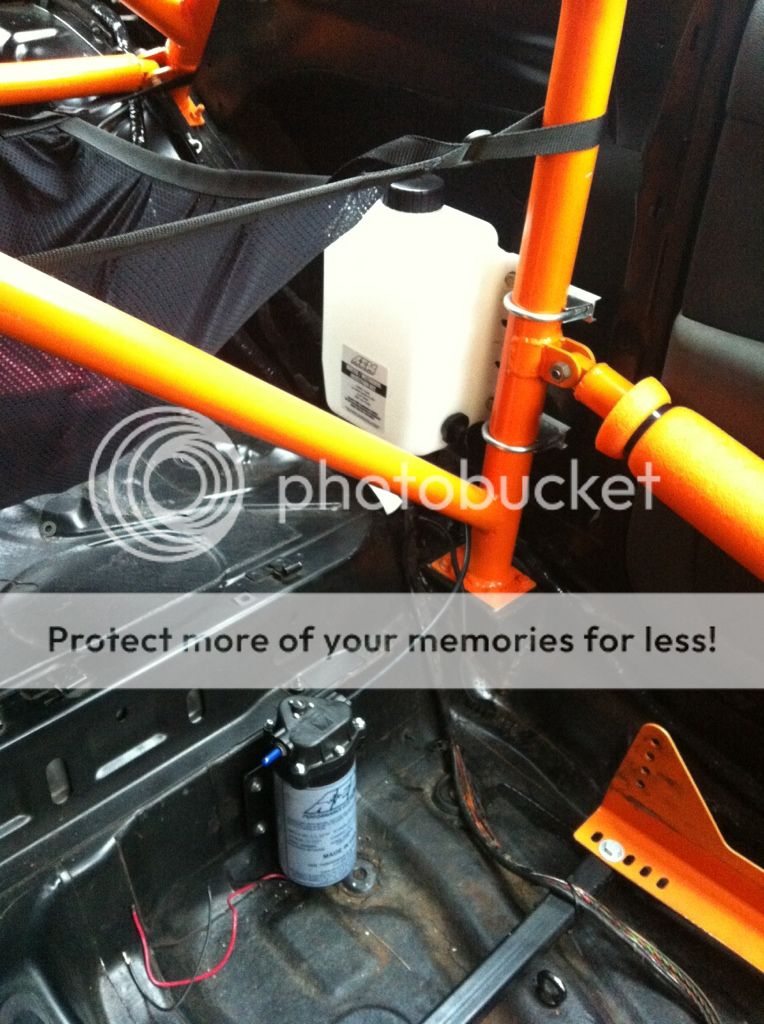
Then, seeing as I hate electrics so much, I thought I'd do a really simple task, and earth the pump:

4cb4a22b.jpg


Then after I'd done it, I realised that the pump didn't need earthing, as it's triggered by a short to ground on the controller. D'OH!

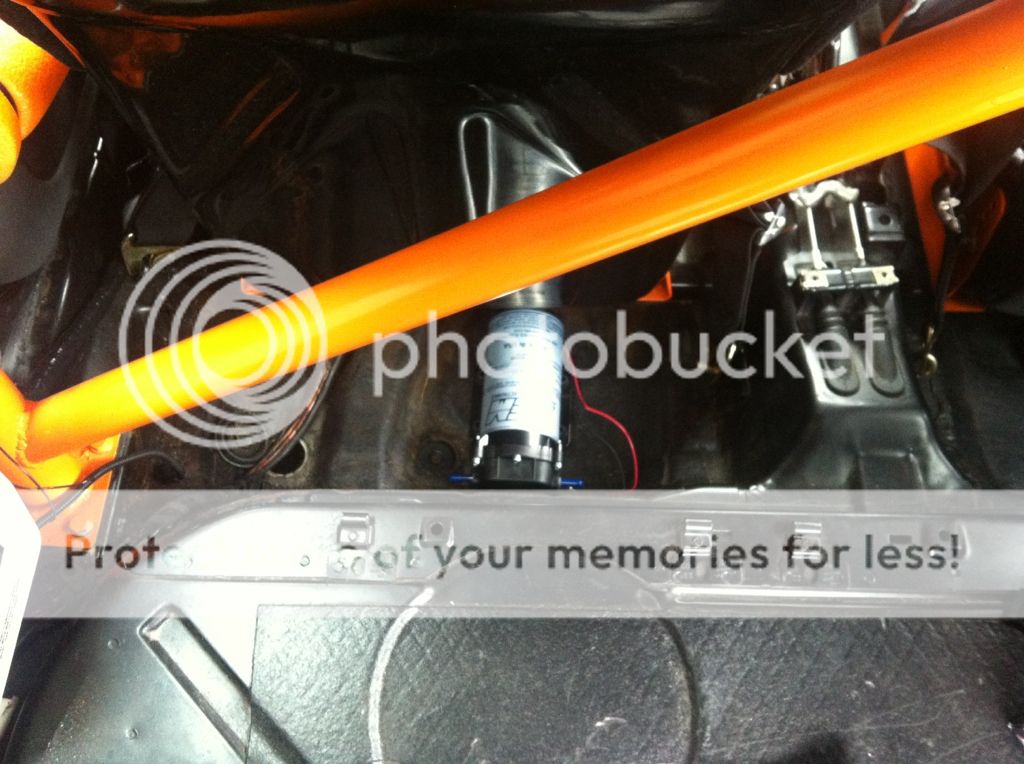
So, still avoiding electrics, I moved onto the FMIC pipes and WMI boss fitment.

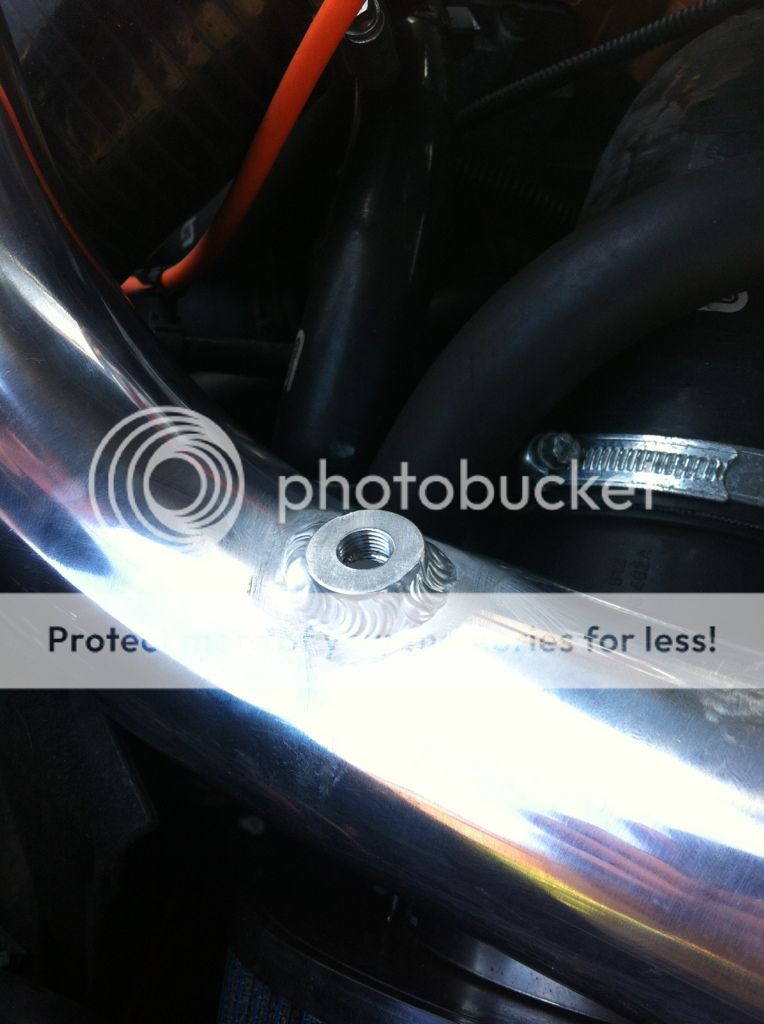
One WMI boss welded into a new pipe from Bill. Lovingly beaded by our very own Tufty whilst Bill prepared his race car for Combe on bank holiday Monday. Absolutely beautiful welding!

ea8fb8c1.jpg


AEM small nozzle and check valve screwed on:

e2ae8e48.jpg


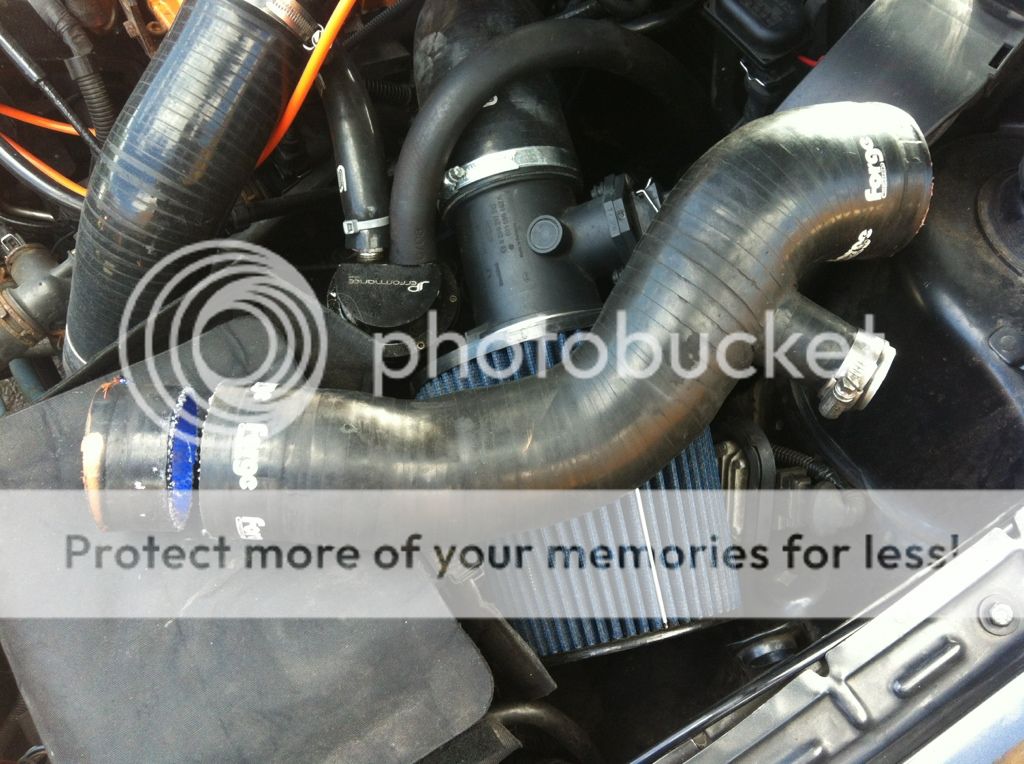
This was my old cold side charge pipe routing:

54e20217.jpg


The new pipe from Bill was a tad longer than the old one, and the minor change of layout threw it all inboard at tad, so my throttle body hose needed trimming down 30mm:

a1ecc18b.jpg


With that done, it fitted perfectly, here's the new charge pipe layout, only 3 bits swapped around, and it's all still nice and neat:

3f15d3aa.jpg


After searching for a place to bring the nylon hose through the bulkhead on the drivers side, I gave up, and went for the hole Dave told me about on the passengers side. I've now routed the hose from the pump, down the passengers side sill, through the bulkhead and down the pass. side wing, then across the top of the crash bar and down to the injector.

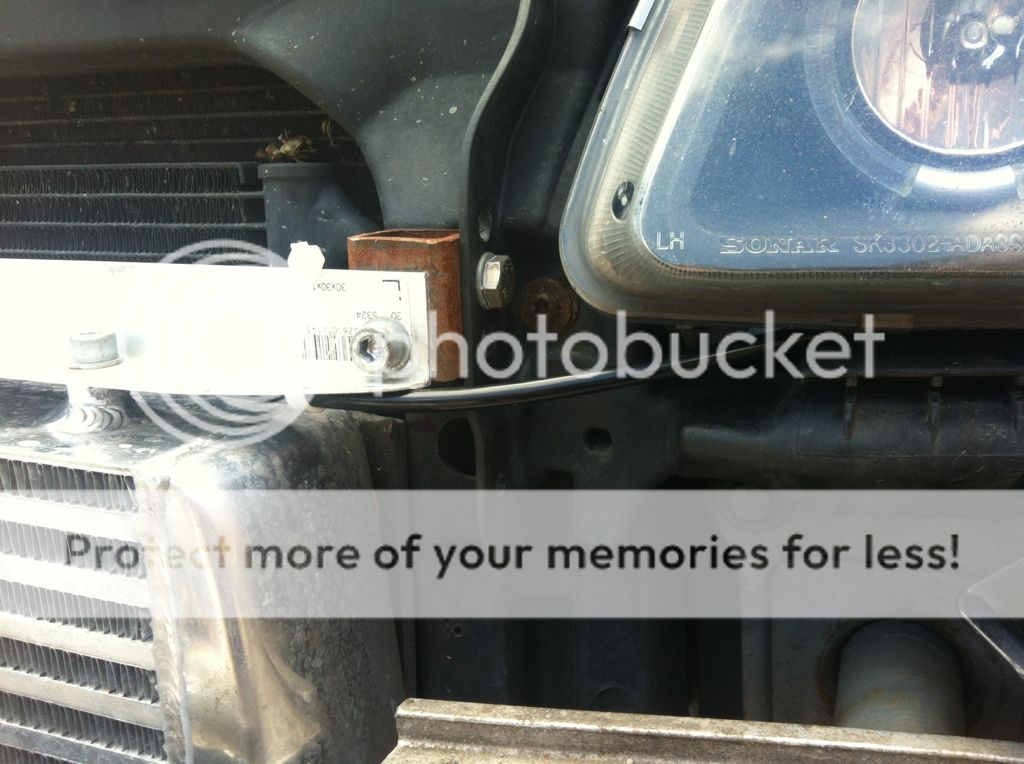
it pops out under the pass. headlight:

316a5ee1.jpg


Then down to the injector on the other side:

6d679a54.jpg


Cracking job of avoiding the electrics side of it so far, but I'd run out of things to do before wiring it in, so I had to start!

Simple bit first, the earth on the controller, bolted with an eyelet onto one of the main earthing points under the dash:

bc0cbd2a.jpg


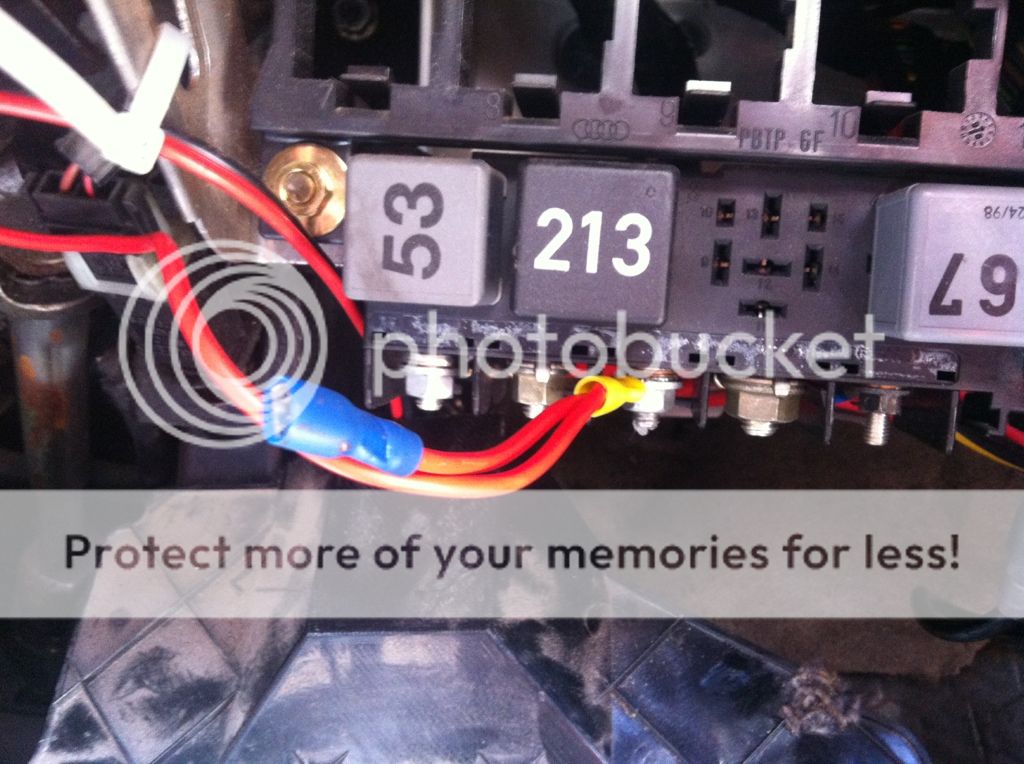
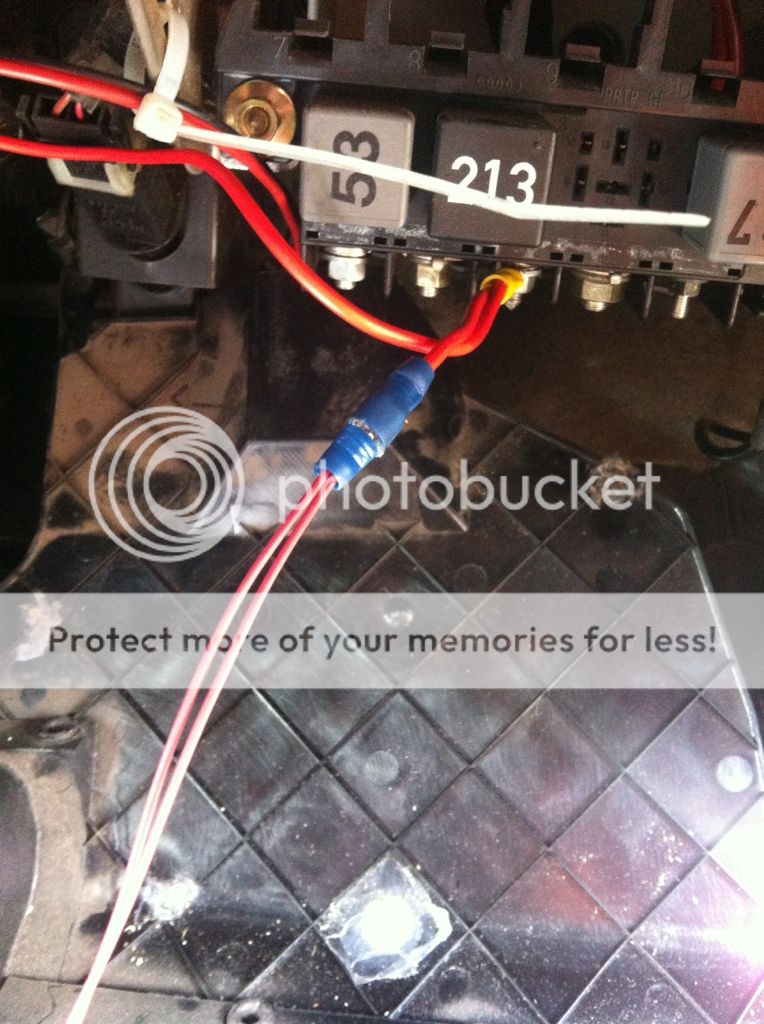
Then the main power feed onto the pump, onto one of the main power lines in from the battery:

62d40459.jpg


As the lower dash panel might be removed from time to time, I joined the two controller power feeds (controller power and LED) and put them on a spade connector. The last thing I want it everything tied together so I can't remove individual panels in the car:

2bce9b35.jpg


The rest was simple, just follow instructions, join colours together. I was going to solder all the joints, but I've heard lately that people are moving away from soldered joints in motorsport due to the potential for them to crack and dry out, so instead I've crimped all the joints, and given them all a liberal coating of Petroleum jelly to aid conductivity :)

All back together:

60d81ef2.jpg
 
So, time for a drive!

The results are very promising indeed :)

I did 3 runs, through 3 gears, starting at the exact same point and same speed, and pulling to the same point.

So, 3 gears, 20 seconds flat out.

Without meth:

After 2nd gear, IAT's were at 18 degrees.
After 3rd gear, IAT's were at 24 degrees.
After 4th gear, IAT's were at 30 degrees.

With WMI on:

After 2nd gear, IAT's were at 15 degrees.
After 3rd gear, IAT's were at 18 degrees.
After 4th gear, IAT's were at 21 degrees.

So, on the first pull, IAT's are 17% lower
On the second pull, IAT's are 25% lower
Then on the third pull, IAT's are 30% lower.

Pretty conclusive that it's working well I think. It was ****** hot here today as well. I'm not sure how warm, but I'd say it was at least 20 degrees.
On the first pull, when there is no beat build up in the IC, the difference is lower, but after 20 seconds flat out, the difference is becoming more apparent.

Real world, it definitely feels stronger with the WMI turned on, I logged timing and it's up by a degree or two on average when at WOT with WMI, but I'm sure there's scope for much more. Timing figures are generally around 19-20 degrees at the moment.

I did a few back to back pulls, WMI on, then off, then on, and it's definitely better. it's also not used too much mix (50/50) on my 30 minute test drive, so that's good news.

I've put a marker on the tank after my drive so I can check if I'm getting any syphon issues like Westy and Stacey did:

c04c423c.jpg
 
Not sure if I mentioned these at the time, more tyres bought by Dad, we agreed we wouldn't buy these as we had enough, then he went and bid on them anyway! Sonhe's on his own on these ones :)

Dunlop direzza 03g track tyres in 225/45/17 :)

420dc81c.jpg


Thats us now stocked up on tyres for probably the next 2 years!
 
"On my own again". Well there's something new. My father always said,"a bargains not a bargain unless you have a use for it". Well in this case the Dunlops were a bargain and we DO have a use for them.
 
Direzza's come in S1, M1, R1 and H1. These are H1, so the hardest compound but still feel soft to the touch. It will be interesting to compare them with the 048. In theory they should last a little longer, lets hope the grip is good. They only come with 4mm of tread to start with so a little extra life would be a bonus

Does anyone have any experience with the Direzzas.:readit:
 

Similar threads

Replies
26
Views
8K
Replies
6
Views
4K
Replies
10
Views
4K
Replies
166
Views
20K
Replies
40
Views
4K