Calling all xneon / halogen headlight experts !

mattyboy199

Registered User
Joined
Nov 13, 2005
Messages
1,996
Reaction score
49
Points
48
Location
UK
So after one of my xneon units being replaced after an accident the remaining 10year old unit is looking a little bland even after a lense polish, it seems the internals also fade & £550 replacement is not an option. The plan is to remove the current xneon internals & install them inside a new halogen unit (oem item). What i need is some help from you guys with the following:

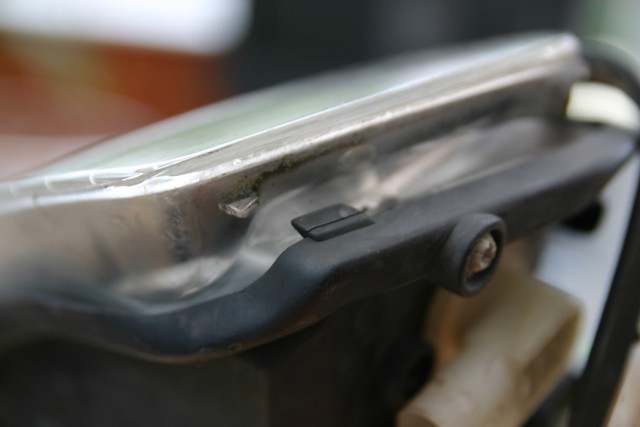
I need to dismantle the halogen unit first, looks like a lense off & oven job so...
1. Baking tray or grill ?
2. how long for ?
3. what tempreture ?
4. re-installation of the lense do i need adhesive ?
5. I assume the rear cover stay on ?

Xneon unit removal.
1. After bolt removal is it simply plug & play ?
2. I will need to repeat the baking process on this unit


This is as far as i have got, i havent compared internals but assume that Audi designed the xneon internals to fit inside the halogen casing, to look at the units are identical, if anyone knows different please let me know.

Thanks

Matt
 
Defo tray, i put the temp up to 100 and left for 15 mins then checked every few minutes until the lense was easy to pull away.

Reassembling, i heated the main body and lense up seperatley , then ran clear silicone around the edges and fixed together, that way you know its 100% sealed.
 
I'm looking at doing a similar thing with my s3 lights, I have some A3 facelift lights and I'd like to put my xenons into them...Is it that simple? Remove electrics, bake and split them, re-assemble, plug and play?! If this works you'll have made me very happy as I've looked at them for two weeks now and got nowhere...
 
I'm looking at doing a similar thing with my s3 lights, I have some A3 facelift lights and I'd like to put my xenons into them...Is it that simple? Remove electrics, bake and split them, re-assemble, plug and play?! If this works you'll have made me very happy as I've looked at them for two weeks now and got nowhere...

i think this work be even more difficult going from prefacelift to facelift units
 
Prefacelift xenons to a3 halogen facelift will not work.
 
My intention was to move the xenon bulb reflector unit from the s3 unit into the facelift a3, then shift the ballast over, move the 4 pin plug wiring from one to the other and hey presto.... Theory being a wonderful thing. I don't see that it won't work, only that it'll be a right PITA!
 
So do you have pre or post s3 lights slowcoach?
 
Pre....but I prefer the post, as I have some A3 facelift lights in the shed I was thinking of surgery....
 
Hi,

I'm interested to see how you get on with this. My S3 has the facelift Xenons but the lenses are *seriously* oxidised/faded/degraded/f****d.

I have polished one by hand: used a bit of wet dry and then Meguiars Plast-RX - and the difference is amazing, close up you can still see the surface pitting although you can actually see through the lens now.

I plan to attack the them with increasing grades of wet and dry, 1500 then 2000 then 2500. In an attempt to remove all the surface damage and then use Plast-RX to polish on a drill attachment.

Your idea occurred to me today as a lady parked her 52 plate facelift A3 next to my S3 today and her headlights are perfect.

Liam
 
You probably need to start coarser than 1500 if they're heavily pitted. 600 or 800 perhaps.

Anythings possible, but you may find the projector mounting points are different between PFL and FL internals. If thats the case, you might need to fabricate some bracketry.
 
You probably need to start coarser than 1500 if they're heavily pitted. 600 or 800 perhaps.

I did buy some 1000 too, but I'd like there to be some of the lens left :)

I'm a bit worried about taking coarser sand paper to it, but then the lights are in a **** state already so it even if I left them sanded they'd be better than they currently are. Doh!

Liam
 
Just as a foot note to the thread I managed to switch all the electronics from my prefacelift s3 xenons in to my facelift a3 non xenons and fit them to the s3!! Facelift front end without spending super cash for the s3 lights, If I can there'll be a how to to follow if anyone is interested
 
Pics and guide would be good mate, didnt think itd be possible.
 
I'll get on it tomorrow when I do the other side...where theres a will ( and a lack of budget due to fixing everything on the car ) there is a way!
 
Hi

Just to let you guys know, I successfully attempted the cracking two headlight units in half this weekend. Apart from being scary and amusing my housemates it worked fine.

I turned two broken HID units into one working HID unit.

It IS possible to remove all the wiring from an HID unit before cracking the unit in half or breaking it.

I didn't use any new sealant, my method seems to work without needed it, I didn't heat the units up so much that the sealant turn to liquid. and any that came off attached to the lens was recovered and put back in the housing in the correct location. (I assume if you use silicon sealant you will find it difficult to crack the unit in half again.)

I would like to find out what the correct sealant is, it obviously becomes less viscous with increase in temperature but doesn't fix like an epoxy or silicon sealant.

Two methods: First one for splitting an old unit was to use a hair drier, took about 20 mins - I dismantled an old halogen unit. Second was to use a fan assisted oven preheated at 75 degrees C - I used the oven method for taking apart and reassembling the HIDs.

I cleaned and removed everything possible from the lights and the took out ONE torx screw on the outside edge of the indicator and all 4 metal clips holding the case together.

In the oven: every 5 mins I checked the lamp. Use oven gloves!

Once open, use a clean microfibre cloth to remove finger prints and dust that you leave behind. DO NOT use paper towels, it will scratch everything it touches.

I wore clean nitrile gloves while handling everything. Use common sense when doing whatever with the insides.

For reassembly I pushed the original sealant back into the groove a bit. Then warmed that base in the oven (vertically) for a few mins. I pushed the lens and base back together and squeezed until I could get the metal clips back on. Put it back in the oven for 5 mins, then allowed it to cool.

Hope this helps.

Liam
 
so if i m gonn attempt this i should really dismantle the halogen unit i have waiting to be fitted. Then remove the xneon ? Why could you not use the hairdryer in all instances ? hoping to do this in the next few weeks.
 
so if i m gonn attempt this i should really dismantle the halogen unit i have waiting to be fitted. Then remove the xneon ? Why could you not use the hairdryer in all instances ? hoping to do this in the next few weeks.

I don't know what you're trying to do?

You can use the hair drier / hot air gun method. I just found it a faff so I went for the oven method. I erred on the side of caution with the oven temperature.

Liam
 
You can buy a headlight restoration kit from a good online detailing store that will bring your lights up like new I use Waxamomo for all of my detailing stuff.
 
thought i t was obvious what i wanted to do, as i started the thread. Anyway no worries see below.

So after one of my xneon units being replaced after an accident the remaining 10year old unit is looking a little bland even after a lense polish, it seems the internals also fade & £550 replacement is not an option. The plan is to remove the current xneon internals & install them inside a new halogen unit (oem item). As the chrome paint is also faded, i have used a restoration & although works will never match a brand new item.


:slapped: sorry i was be'in a bit thick there. I lost the original plot of the thread.

1. Baking tray or grill ? A: on a baking tray in a fan assisted oven with no direct heat from a grill. I would shield the plastic from any direct IR heat source - you just want lots of hot air.
2. how long for ? A: I did 5 mins then checked then left for another 5 mins.
3. what tempreture ? A: I did this at 75 deg C.
4. re-installation of the lense do i need adhesive ? A: I didn't. But I was careful to replace sticky stuff that came away on the lens.
5. I assume the rear cover stay on ? A: I removed the rear cover so hot air could get inside.

Xneon unit removal.
1. After bolt removal is it simply plug & play ? A: It should be but I haven't done this.
2. I will need to repeat the baking process on this unit A: I baked the unit vertically for 5 mins to soften the existing adhesive. I then replaced the lens, squeezed and reattached the metal clips and the one screw. I then baked for another 5 mins to allow it to settle.

If you're completely swapping the internals then I don't see why you couldn't strip both units and bake them in the oven. Otherwise take your time with the hair drier.

I found when I cracked the head lights apart it took a bit of to break the seal. Maybe a bit more heat will make it easier. I found most of the sealant stayed on the main body, any sealant that stayed on the lens can be removed with your fingers and rolled into a sausage and replaced into the groove on the main unit. You may want to push some of the sealant back into the groove so the lens seals properly when you rebuild it.

Note that the halogen unit is blanked where the HID wires enter, these will need to be opened up with a dremel or something.

You'll obviously swap the HID cone from the old reflector unit to the new reflector.

When you're rebuilding make sure you DON'T touch the inside with ANYTHING. Use a micro fibre cloth to remove any marks you do get anywhere. Maybe get an aerosol duster to clean any dust. Unless you have a clean room or laminar flow cabinet you will be getting dust on the inside. Live with it.
Where do you live, if you're not far I can offer moral support. :beerchug: Otherwise ****** good luck!

Liam

PS - I'm an amateur and have been known to **** things up and I was prepared to deal with the outcome and cost of my stupidity.

PPS - If you're going to throw away the old bits once you're done I'll take them off your hands.
 
so no matter what i need to remove both lenses this is what i m unsure about ?
 
Er... yes I think so.

The key is removing/swapping the reflector cones for dipped beam. You can get to the nuts which hold it on but I don't think it will come out through the hole. Try it! It might be possible. Given a few days I can have a look at my units, I have a dismantled HID & halogen which I can compare.

Liam
 
Liam,


If you could this would be very helpful before i start messing about removing lenses.

Er... yes I think so.

The key is removing/swapping the reflector cones for dipped beam. You can get to the nuts which hold it on but I don't think it will come out through the hole. Try it! It might be possible. Given a few days I can have a look at my units, I have a dismantled HID & halogen which I can compare.

Liam
 
How can I change the bulbs on my Xeon headlight to brighter ones.

Brighter doesn't necessarily mean better. I think about 4300k is the 'OEM' rating, you can get all the funky white and blue colours at 6000k and 8000k etc but the wavelength of the light is obviously different and won't penetrate certain weather conditions or reflect off the road / hedges trees in the same way. i.e. it might look nice when you stand in front of the car look at the headlights lights from 3 meters away, but you might not get much light reflected back from objects 300 yards away which is what counts in my book.

Changing them is easy, 1) buy new bulbs, 2) take out the old bulbs 3) put the new bulbs in.

Make sure that your lenses aren't foggy/oxidised first as this make a *huge* difference to the quality of the light coming out of your headlamps.

Liam
 
Hi

If you could this would be very helpful before i start messing about removing lenses.

I'd go start warming the oven/hair drier up. There's no way on earth will the projector cone come out without splitting the head light unit.

Liam
 
so today i had a go at spliting the halogen unit i have so its ready for when i split the HID unit. Epic fail i dont know how you guys have done it but i started at 100degrees i regularly checked the unit to see if the lense was ready to pop & after 40 minutes i decided to up the tempreture which only softened the casing at which point i just gave up. Either i m doing something wrong or the sealant in my headlight differs from others (its black in colour & there is a lot of it).
 
Hi

Wow 40 mins at 100 deg ... that's overkill.

... It's not just going to fall apart in your hands. Well obviously it might at that temperature for that long.

75 degrees for about 10 mins gave me good results. I suppose if it's been cracked open once before and stronger glue used you might be in trouble.

Make sure you've removed the clips and the screw which holds it together.
7006708636_932c935773_n.jpg


Once it's heated there are some points (on the ends) where you can carefully lever (I used a combination of flat bladed screw drivers to get purchase and start it splitting) the lens from the casing - you can do this without prying and damaging the lens.

It does require some forceful pulling to break the adhesive seal but once it's started it's not too bad.

Liam
 
Last edited:
Undo this torx screw and use a bar or the shaft of a long screw driver to lever it apart at this end.

7152749217_b524224241_z.jpg


BTW - make sure you've cleaned and removed absolutely everything possible from the headlamp i.e. bulbs, covers etc. (well I did incase anything accidentally melted.)

And you'll hopefully end up with this ... (btw - at the temperature I used the adhesive came away cleanly from the lens and stayed in the headlight body which makes reassembly really easy)

7152767317_62cde5b546.jpg


7152766087_72b8f90fbf.jpg


7006675618_d68c3245d9.jpg
 
Either i m doing something wrong or the sealant in my headlight differs from others (its black in colour & there is a lot of it).

Hi

Update: You're right. Just been trying to split another light and it seems Hella (in their infinite wisdom) have changed, at some point, from the black sealant which goes soft with heat to a black silicon sealant which DOES NOT soften when heated.

I'm going to try and get hold of some chemicals to break down the silicon and see what's possible.

:sob:

Liam
 
I think you will find that you have to cut some metal on the wings behind the lights to get the facelift lights to fit a pre facelift car, there was a thread on here that someone did the job, with pictures and info on how to do it, but well worth the effort as the facelift lights are much nicer looking, good luck.
 
Hi

Thanks. Yes you do. But this thread is, mostly, about splitting and rebuilding the facelift head light units rather than retro fitting them to older models.

Liam
 

Similar threads

I
Replies
6
Views
913
imported_Tariq
I