

Prawn and BigAls A3 Track Car
- Thread starter Prawn
- Start date
You are using an out of date browser. It may not display this or other websites correctly.
You should upgrade or use an alternative browser.
You should upgrade or use an alternative browser.
- Joined
- Dec 2, 2008
- Messages
- 17,400
- Reaction score
- 1,104
- Points
- 113
Just searched my garage and I can't find the clips. This make me think that I didn't get a new pair cos I wouldn't have thrown away the old ones unless broken.
Let me ask Jason if he can find the part number. If not, I know that Scott B5 is heading round 5 different knackers yards on Friday so I can ask him to have a look for you.
Let me ask Jason if he can find the part number. If not, I know that Scott B5 is heading round 5 different knackers yards on Friday so I can ask him to have a look for you.
...or be a man and ditch the heating
Waaoooohhhhhhhh there Nelly, who the **** are you?!

LOL Westicles, Scott isn't going round the breakers looking for bits. He is getting offers on the A4 he covered in Sikaflex and drove through Comet!

- Joined
- Nov 24, 2010
- Messages
- 15,084
- Reaction score
- 1,131
- Points
- 113
- Location
- Plymouth
- Website
- wheelsnwires.blogspot.com
Waaoooohhhhhhhh there Nelly, who the **** are you?!
LOL Westicles, Scott isn't going round the breakers looking for bits. He is getting offers on the A4 he covered in Sikaflex and drove through Comet!
What?
PENIS!!
Fkn Jardo.
Prawn, Fred is right. I'm off round the breakers yards on friday.
Put your want list in here.
http://www.audi-sport.net/vb/a4-s4-forum-b5-chassis/144235-dismantlers-run.html
On ETKA nothing for the matrix is listed seperately. The pic Westy posted up is correct although it is the same pic for say a 98 plate A3 but on that age there are a few chassis breaks. The later chassis numbers say the quick acting couplers are included but the early numbers have no mention.
On the first pic Westy posted of coolant hoses for the S3 it shows them at a right angle but then funnily enough if you look at the AGU and so on pics it shows them straight but they`re the same part number for both S3 engines and A3 engines. Joys of ETKA`s pictures being f*cking useless! lol.
On the first pic Westy posted of coolant hoses for the S3 it shows them at a right angle but then funnily enough if you look at the AGU and so on pics it shows them straight but they`re the same part number for both S3 engines and A3 engines. Joys of ETKA`s pictures being f*cking useless! lol.
beachbuggy
Registered User
- Joined
- Dec 8, 2006
- Messages
- 12,100
- Reaction score
- 4,340
- Points
- 113
- Location
- Eastleigh
- Website
- twitter.com
Thanks for looking Jason, I've told the bloke at TPS what I'm after and he said he can sort it! So lets see.
from what I have seen, all ko3 based cars have right angled couplings, and ko4 based cars have straight couplings. I'll see what the TPS man can manage!
Dan- just read your text, I somehow missed it! Will reply now
from what I have seen, all ko3 based cars have right angled couplings, and ko4 based cars have straight couplings. I'll see what the TPS man can manage!
Dan- just read your text, I somehow missed it! Will reply now
VW love their beloved TPS branches so they get away with more. I could order in the couplers and see how they come but i wouldnt be able to send them back if no good. TPS probably get special privaledges so get away with doing stuff we cant. Benders! lol.
Didn't Mush have problems here too ??? i seem to remember him using Golf ones ..... or it could have been something totally different,,, i've just woke up lol
I think he was making some custom pipework http://www.audi-sport.net/vb/a3-s3-forum-8l-chassis/115484-mush-developments`-s3-2.html
Right reading the thread he had the straight S3 ones but they got in the way of his HUGE turbo so he found some angled ones... meaning he has some straight ones going spare maybe ??
- Joined
- Dec 8, 2006
- Messages
- 12,100
- Reaction score
- 4,340
- Points
- 113
- Location
- Eastleigh
- Website
- twitter.com
He may well do infact, you are correct!
I'll see what the TPS man comes up with tomorrow, and if there's no joy then I'll drop Nick a PM about his!
Cheers folks.
I'll see what the TPS man comes up with tomorrow, and if there's no joy then I'll drop Nick a PM about his!
Cheers folks.
- Joined
- Dec 8, 2006
- Messages
- 12,100
- Reaction score
- 4,340
- Points
- 113
- Location
- Eastleigh
- Website
- twitter.com
Straight connectors sorted from TPS today, as well as a few diff shims for Jonny to try in the box this weekend.
Sadly no WellyCooler this weekend due to an issue with Toyosports not being able to find my address on the system! I'm absolutely gutted, as this puts me back a whole week in theory! I needed to mount the core this weekend, to be sure of exactly what hoses I needed to pipe it up next weekend and get the car running.
As it stands now, it looks like I won't be able to mount the core until next weekend, when I've also got to fit my gearbox, driveshafts, downpipe, exhaust, and EBC. Yay, not that much then.
Pretty fed up with it now, as I've not got enough stuff to keep my busy this weekend!
ARGH.
- Joined
- Dec 8, 2006
- Messages
- 12,100
- Reaction score
- 4,340
- Points
- 113
- Location
- Eastleigh
- Website
- twitter.com
Well, I managed to ocupy myself yesterday afterall, as it often the case, nothing goes exactly to plan!
it was minus 3.5 when I went outside to work on the car, it didn't look like fun at all!

And it wasn't! First job was to fit my new metal water pipe.
I offered it in, with plenty of washing up liquid on the rubber O-ring to help it into the block, and it just fell into the hole. O-ring clearly past it. ******. I also noticed that the pipe had been bent when it was removed. again, not cool.
A trip to two motorfactors came up with nothing, so I went to Wickes and bought a pack of assorted O-rings. One was a close match, but it wasn't as tight on the fitting as I'd like, so another trip to Halfords, and Bingo! A perfect fitting O-ring
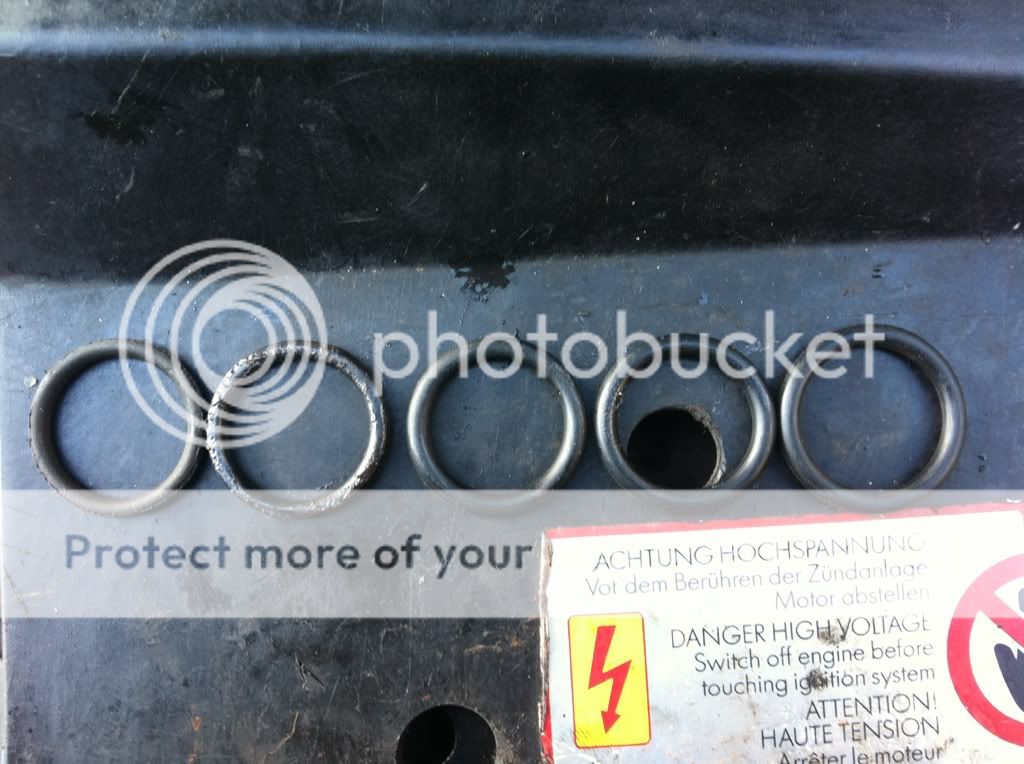
2 old perished ones on the left, 2 new halfords ones in the middle, fractionally larger Wickes one on the right.
This worked well, I had to lube it up and use a bar to lever the pipe into the hole in the block, so I'm confident it'll seal nicely, unlike before.
I came up trumps with the heater connections at TPS too, so I chucked them on for a quick win
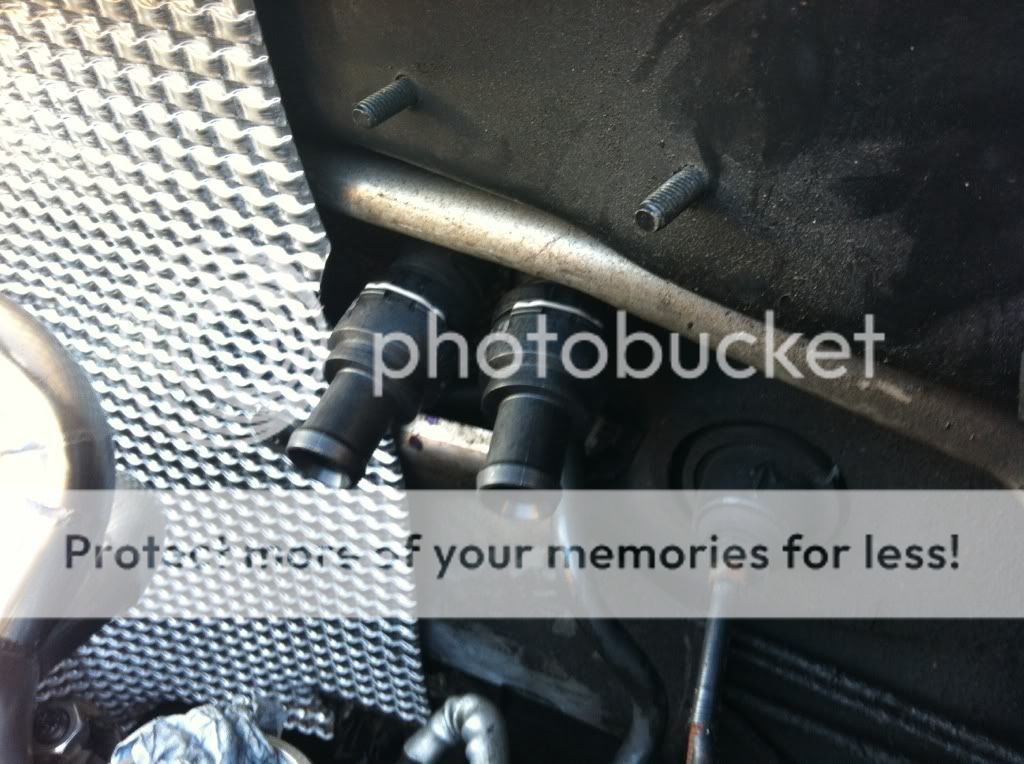
Many years ago, when I paid someone else to fit a turbo for me, a hose above the alternator had split and was leaking, so for the past 3 years it's been bodged with some slightly kinked blue silicon. I've now replaced that with a 90 degree 16mm bend, and it's all a lot more sound now:
Cooling system sorted. Happy days.
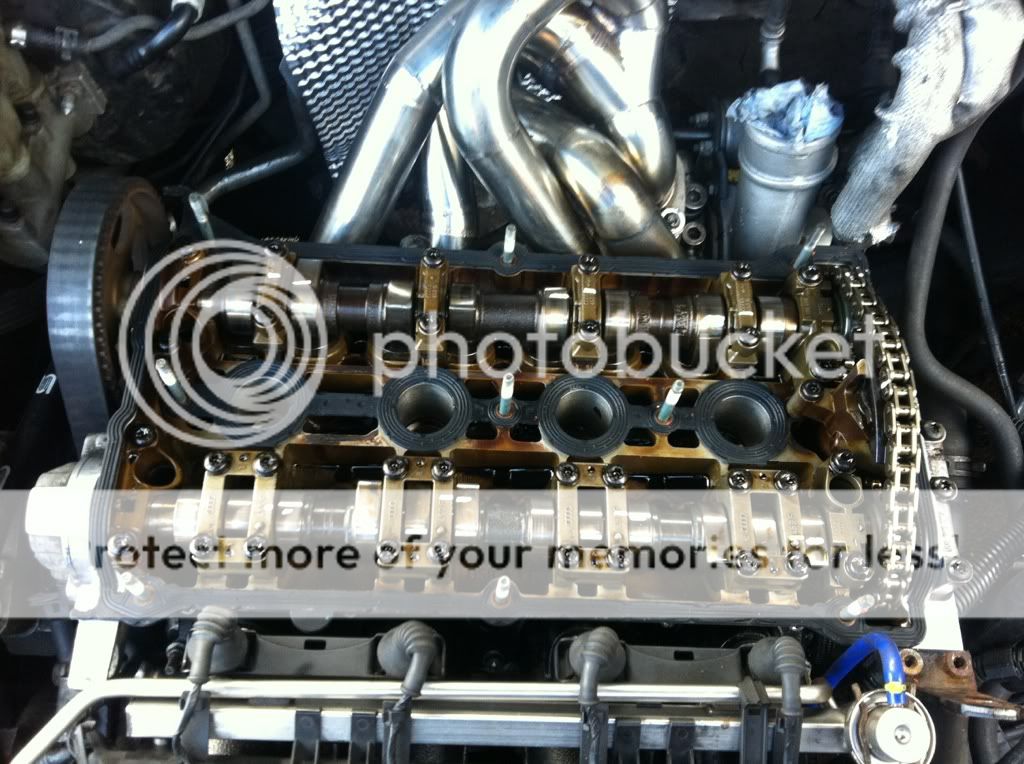
Now for the dodgy bit
I had to replace the gasket and half moon under the cam chain tensioner, for which I bought a hand Sealey tool that Tufty told me about.
I tested this out on my spare head and it worked perfectly, so I moved onto my head to do the same
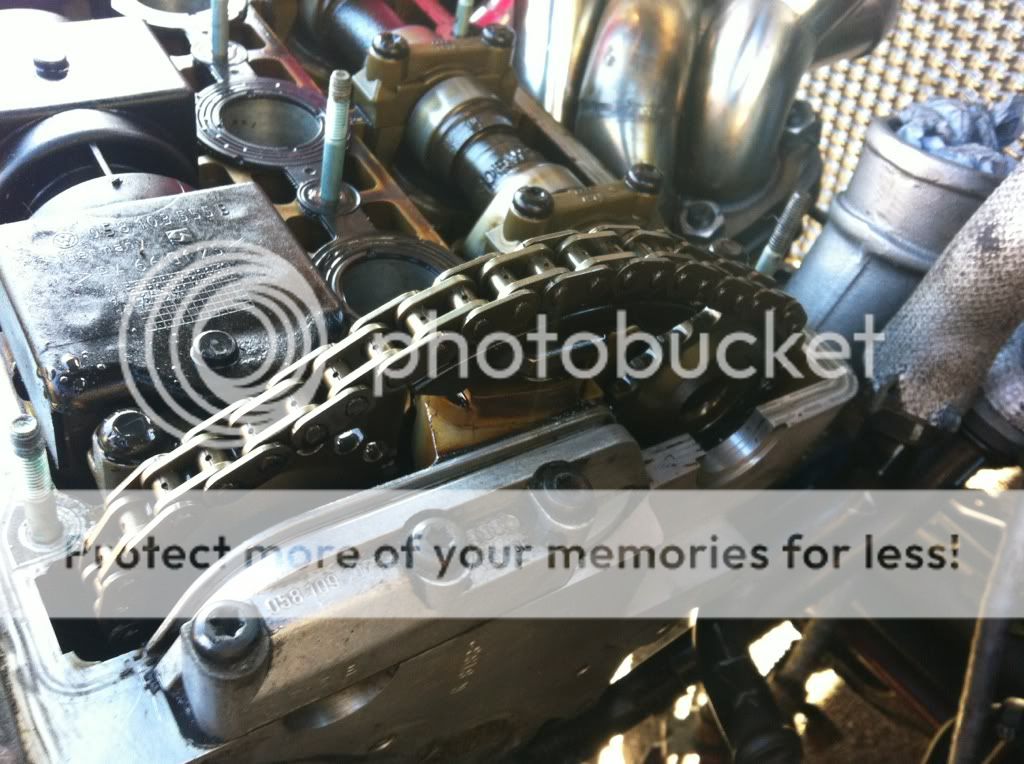
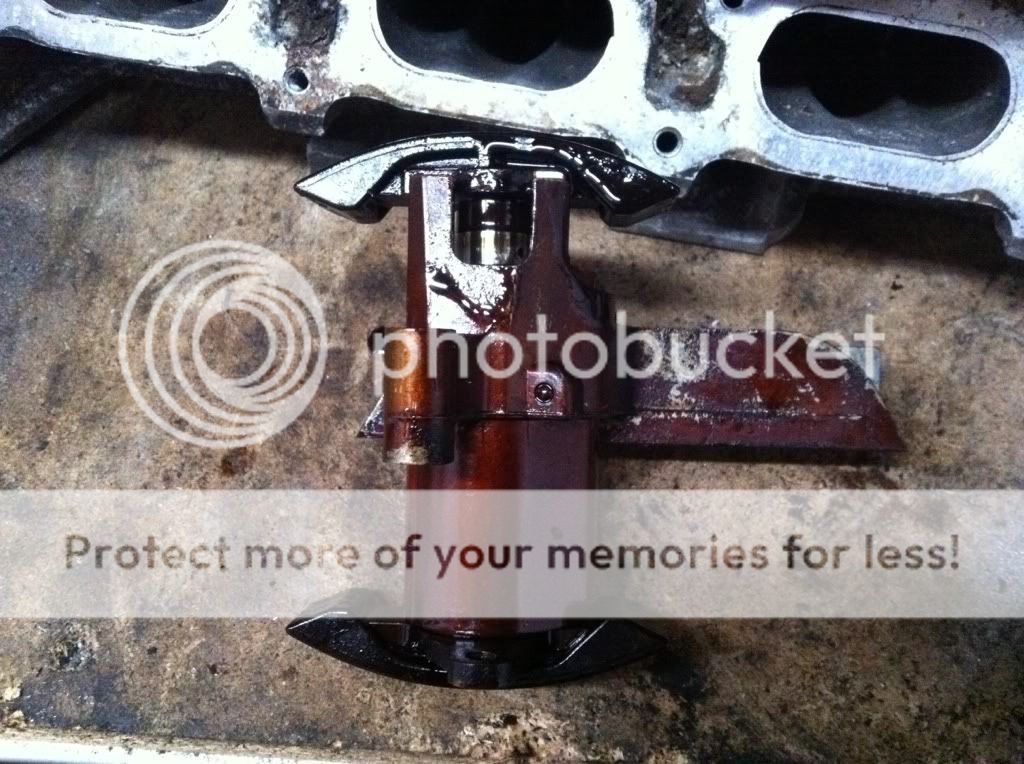
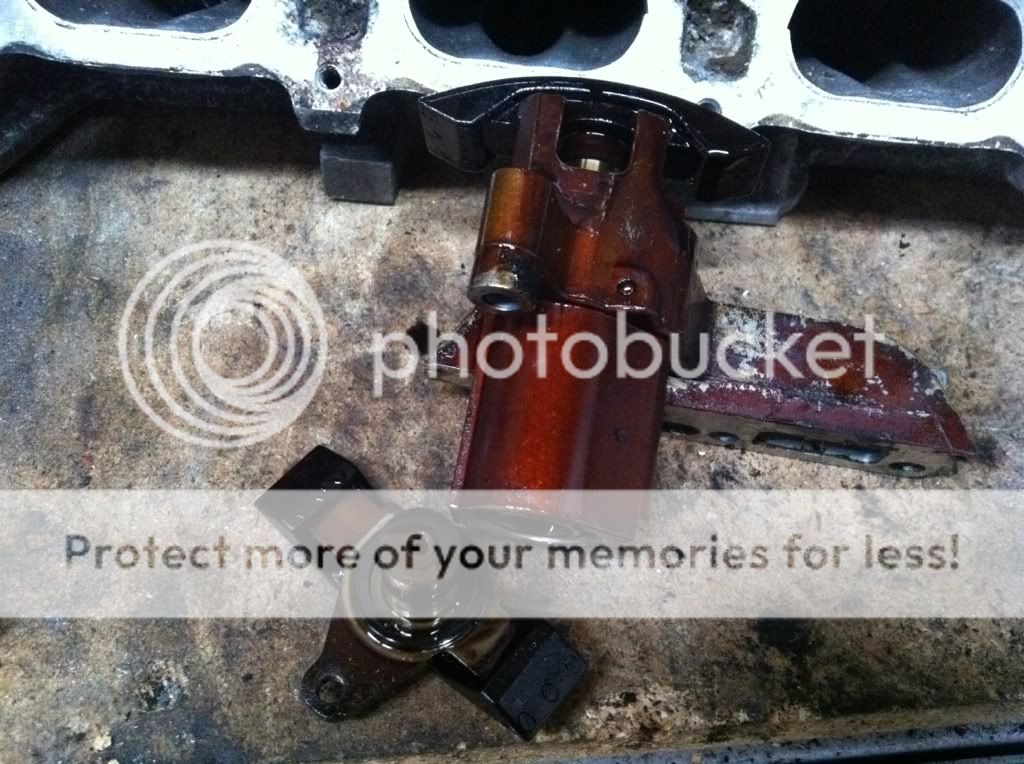
Now the bad news:
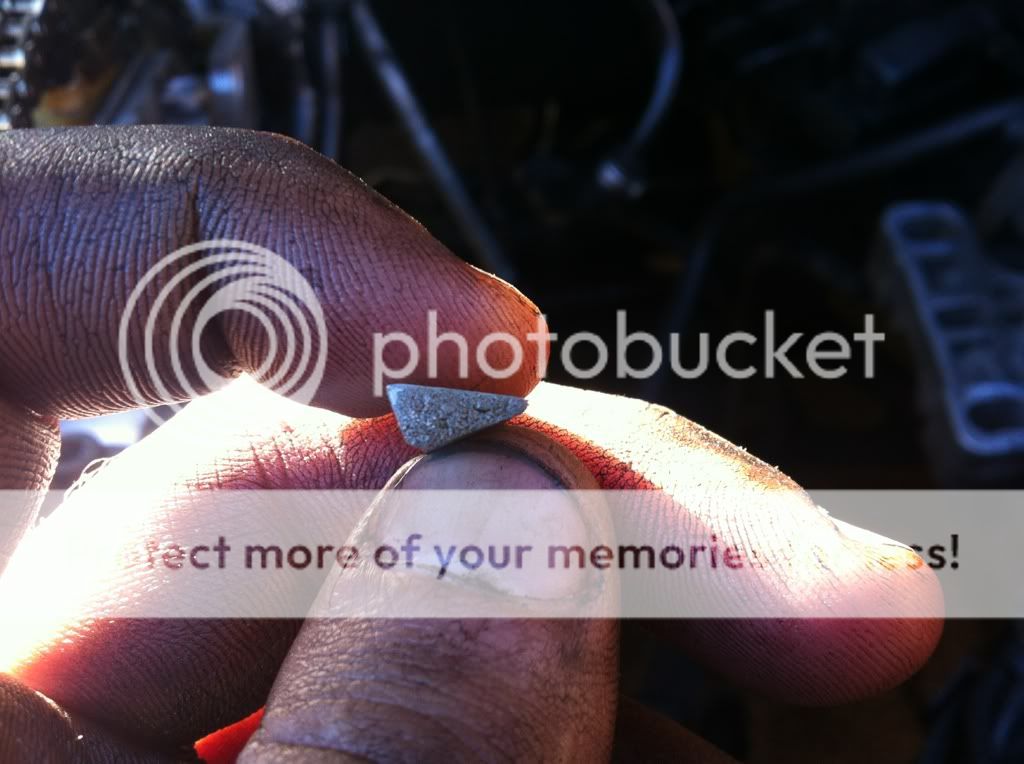
This bit snapped off the tensioner!
ARGH!
I have no idea why this happened, I was VERY careful to make sure the tool went down inside the two tabs, yet half way through tightening the tool up to compress the tensioner, it just fell off!
Is this is serious problem? It doesn't look like the tensioner touches this tab during operation, and I'd think from looking at it that it'll be fine to continue without replacing it.
Anyone got any thoughts on that?
I decided to carry on anyway, on the grounds that it's 2 minutes to whip the rocker cover off if I DO have to do anything about the broken tab, so.....
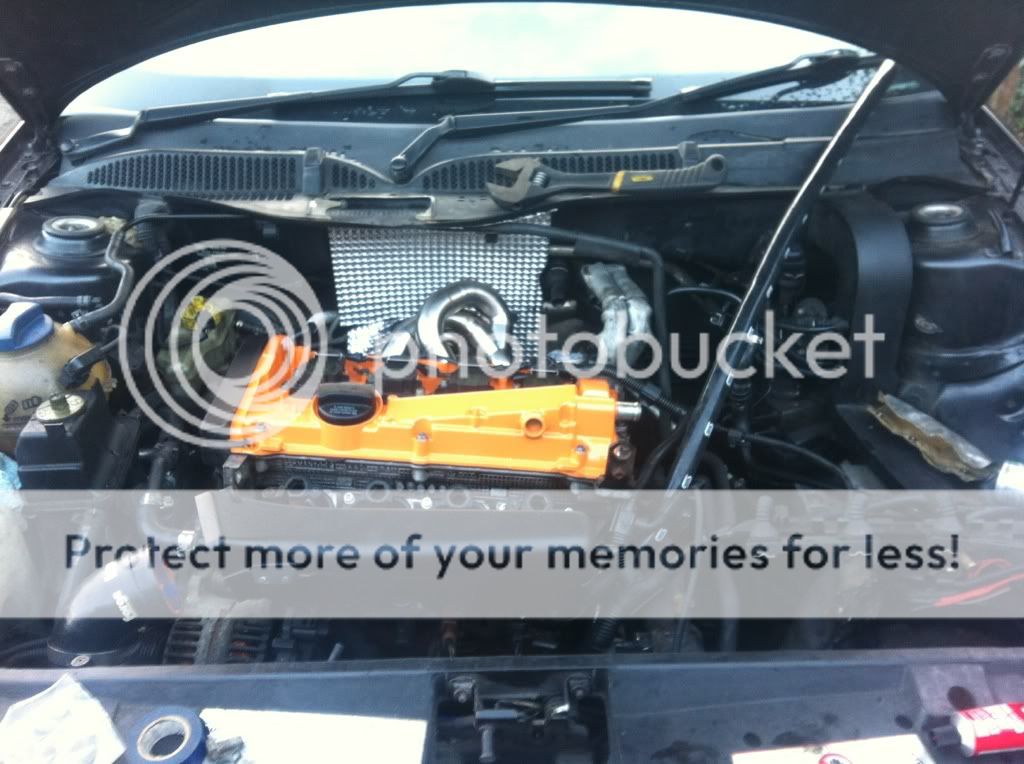
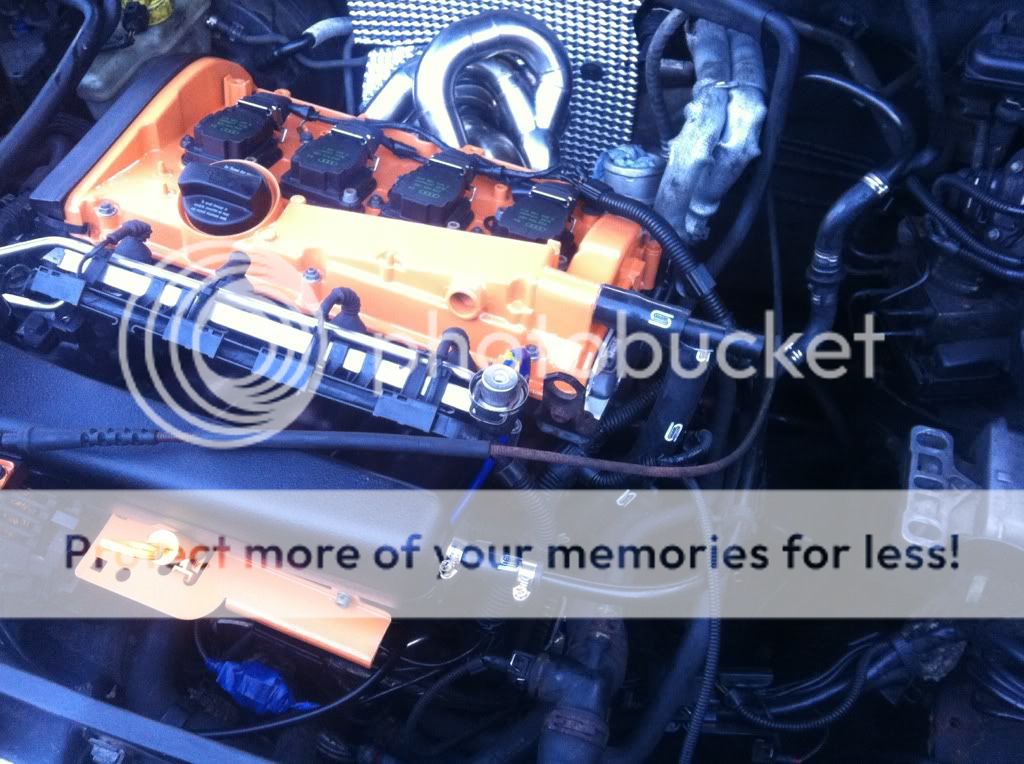
Cam cover went back on:
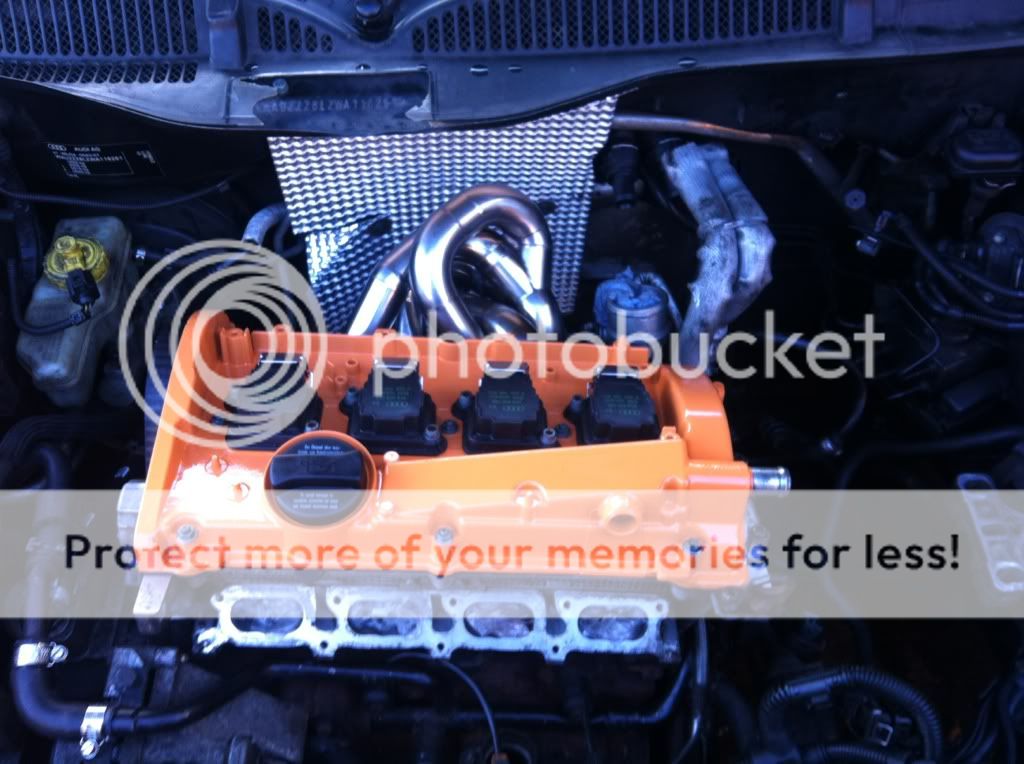
Billet adapter went on with some RTV to seal it, and threadlock on the grub screws:

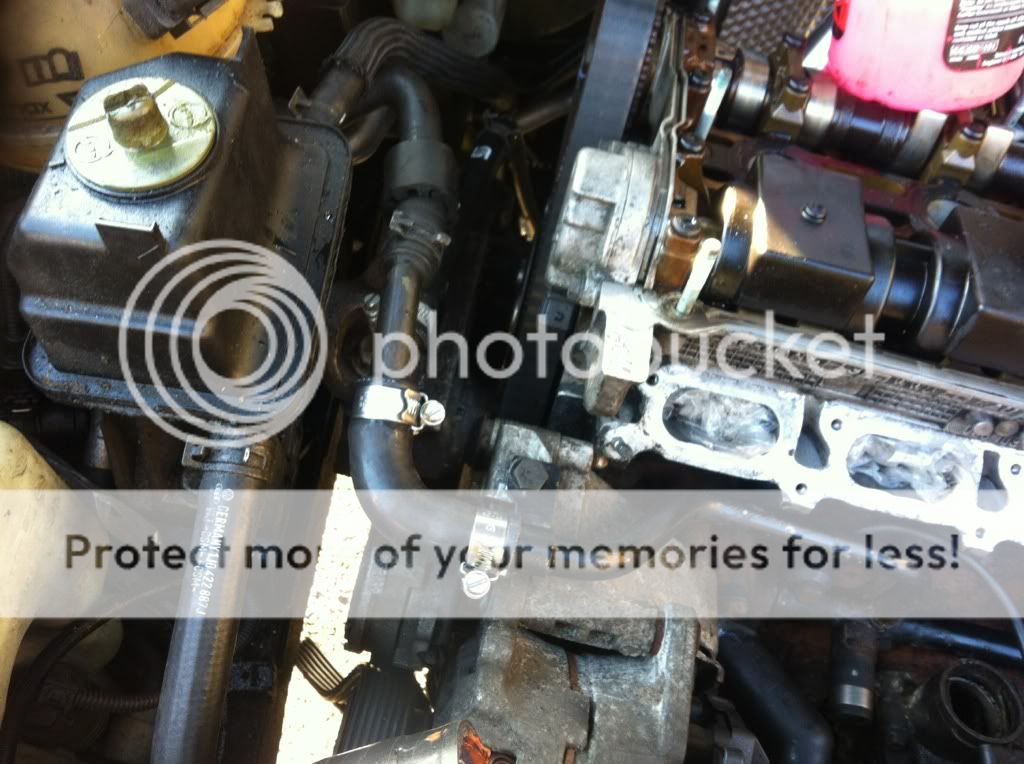
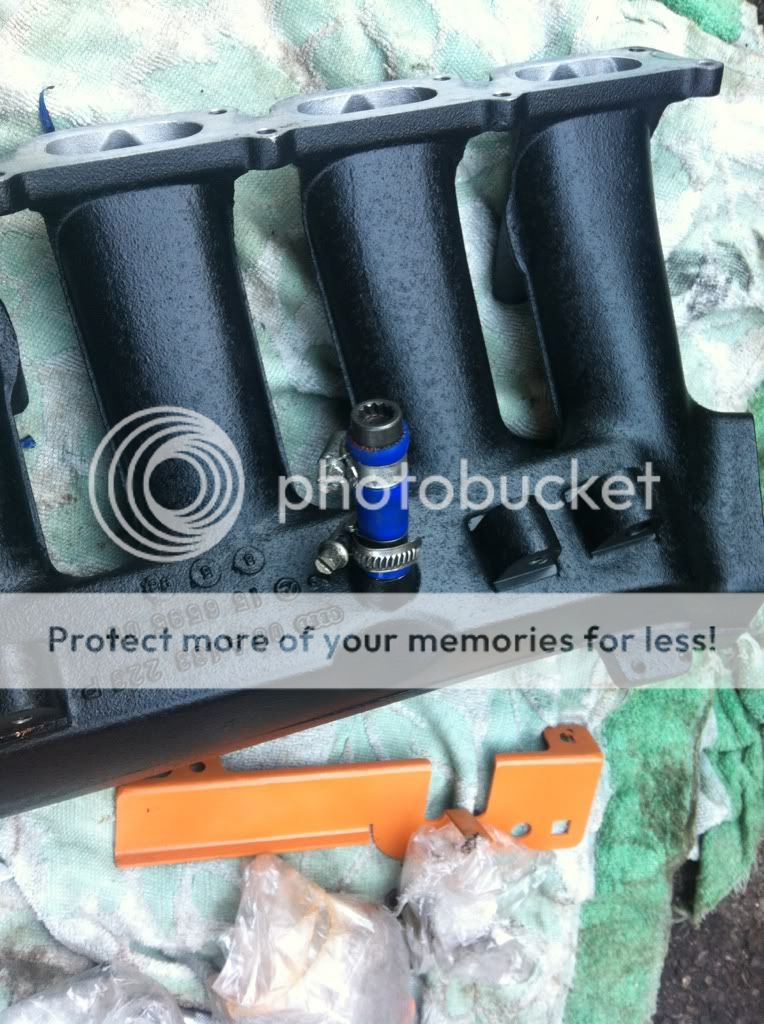
Finished piping up the final bits of the cooling system, all connected and done now:
I had to make up a new plug for my deleted PCV port under the inlet, when I took it all apart I found the cheap hose I'd used before had split, so this time I used some 3 ply silicon, with a fine thread M10 bolt smeared in RTV to seal it.
I went to look for my little 1/4 drive screw driver tool from my socket set, and couldn't find it anywhere. Most annoying because it's perfect for doing up all the jubilees on the inlet. Spent almost an hour searching to no joy.
ARgh.
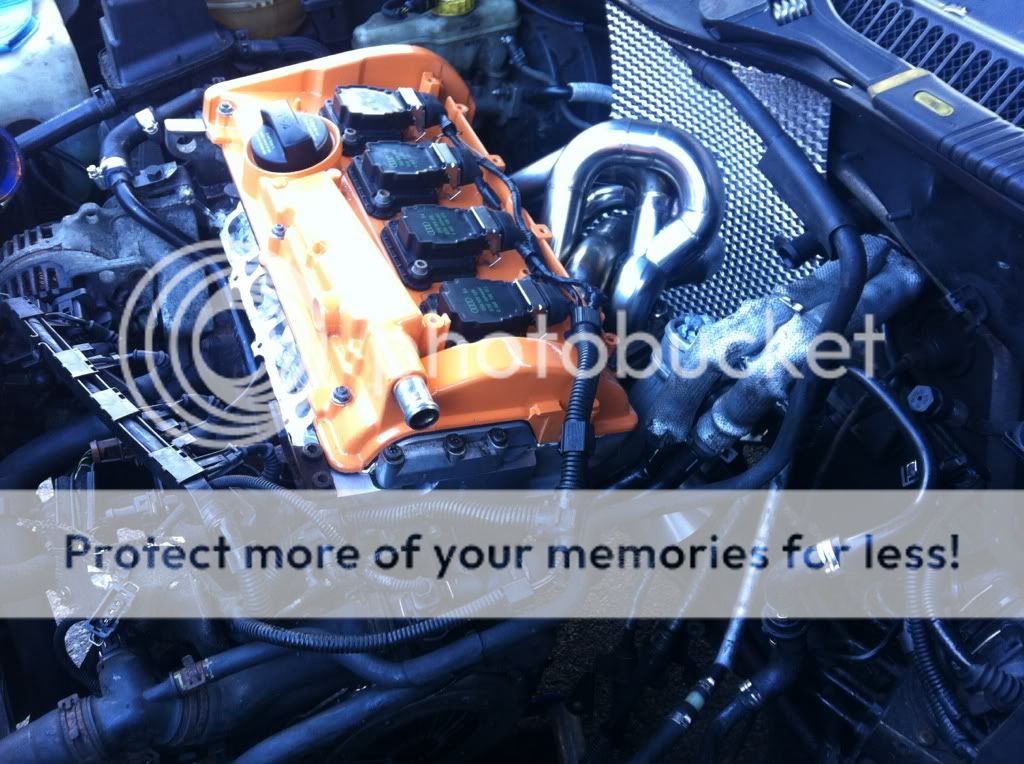
Bolted the inlet up:
Then found this ****** hiding inside the fan!

Fitted the throttle cable, but it looked properly scabby:
So I decided to wrap the whole outer sheath in heat resistant Loom tape, so it now looks like new. DIdn't get pics at this stage, as it got dark!
More to come later hopefully. If anyone could give me a sensible opinion on that tensioner I'd be very grateful!
it was minus 3.5 when I went outside to work on the car, it didn't look like fun at all!
And it wasn't! First job was to fit my new metal water pipe.
I offered it in, with plenty of washing up liquid on the rubber O-ring to help it into the block, and it just fell into the hole. O-ring clearly past it. ******. I also noticed that the pipe had been bent when it was removed. again, not cool.
A trip to two motorfactors came up with nothing, so I went to Wickes and bought a pack of assorted O-rings. One was a close match, but it wasn't as tight on the fitting as I'd like, so another trip to Halfords, and Bingo! A perfect fitting O-ring
2 old perished ones on the left, 2 new halfords ones in the middle, fractionally larger Wickes one on the right.
This worked well, I had to lube it up and use a bar to lever the pipe into the hole in the block, so I'm confident it'll seal nicely, unlike before.
I came up trumps with the heater connections at TPS too, so I chucked them on for a quick win
Many years ago, when I paid someone else to fit a turbo for me, a hose above the alternator had split and was leaking, so for the past 3 years it's been bodged with some slightly kinked blue silicon. I've now replaced that with a 90 degree 16mm bend, and it's all a lot more sound now:
Cooling system sorted. Happy days.
Now for the dodgy bit
I had to replace the gasket and half moon under the cam chain tensioner, for which I bought a hand Sealey tool that Tufty told me about.
I tested this out on my spare head and it worked perfectly, so I moved onto my head to do the same
Now the bad news:
This bit snapped off the tensioner!
ARGH!
I have no idea why this happened, I was VERY careful to make sure the tool went down inside the two tabs, yet half way through tightening the tool up to compress the tensioner, it just fell off!
Is this is serious problem? It doesn't look like the tensioner touches this tab during operation, and I'd think from looking at it that it'll be fine to continue without replacing it.
Anyone got any thoughts on that?
I decided to carry on anyway, on the grounds that it's 2 minutes to whip the rocker cover off if I DO have to do anything about the broken tab, so.....
Cam cover went back on:
Billet adapter went on with some RTV to seal it, and threadlock on the grub screws:
Finished piping up the final bits of the cooling system, all connected and done now:
I had to make up a new plug for my deleted PCV port under the inlet, when I took it all apart I found the cheap hose I'd used before had split, so this time I used some 3 ply silicon, with a fine thread M10 bolt smeared in RTV to seal it.
I went to look for my little 1/4 drive screw driver tool from my socket set, and couldn't find it anywhere. Most annoying because it's perfect for doing up all the jubilees on the inlet. Spent almost an hour searching to no joy.
ARgh.
Bolted the inlet up:
Then found this ****** hiding inside the fan!
Fitted the throttle cable, but it looked properly scabby:
So I decided to wrap the whole outer sheath in heat resistant Loom tape, so it now looks like new. DIdn't get pics at this stage, as it got dark!
More to come later hopefully. If anyone could give me a sensible opinion on that tensioner I'd be very grateful!
- Joined
- Dec 2, 2008
- Messages
- 17,400
- Reaction score
- 1,104
- Points
- 113
Do you ever see your girlfriend? I'm just wondering because I love the amount of time you get to spend on your car
- Joined
- Dec 8, 2006
- Messages
- 12,100
- Reaction score
- 4,340
- Points
- 113
- Location
- Eastleigh
- Website
- twitter.com
Do you ever see your girlfriend? I'm just wondering because I love the amount of time you get to spend on your car
Yea man, every evening after work, we went out for Lunch in guildford last Sunday, we went out for a meal again last night, I see her lots. I'm just a VERY busy person. never stop working!

- Joined
- Dec 8, 2006
- Messages
- 12,100
- Reaction score
- 4,340
- Points
- 113
- Location
- Eastleigh
- Website
- twitter.com
Wooooohooooo.
Another **** update for you!
Turns out the great new box wasn't so great, or so new.
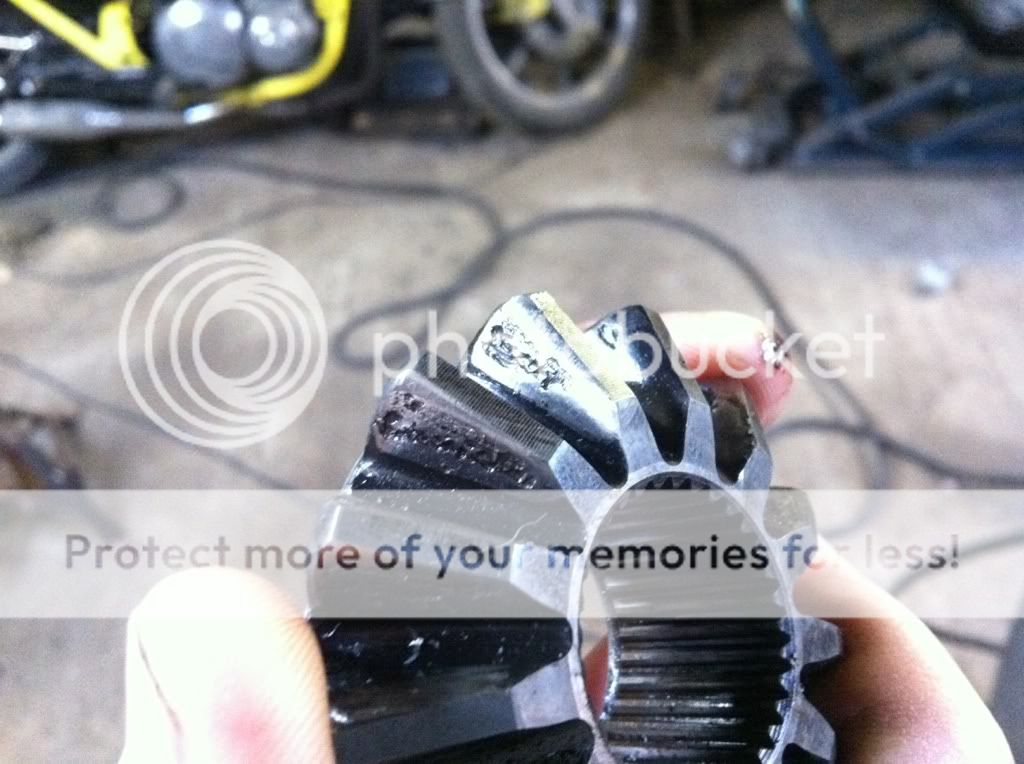
Diagnosis on the old box, 2nd gear missing two teeth:
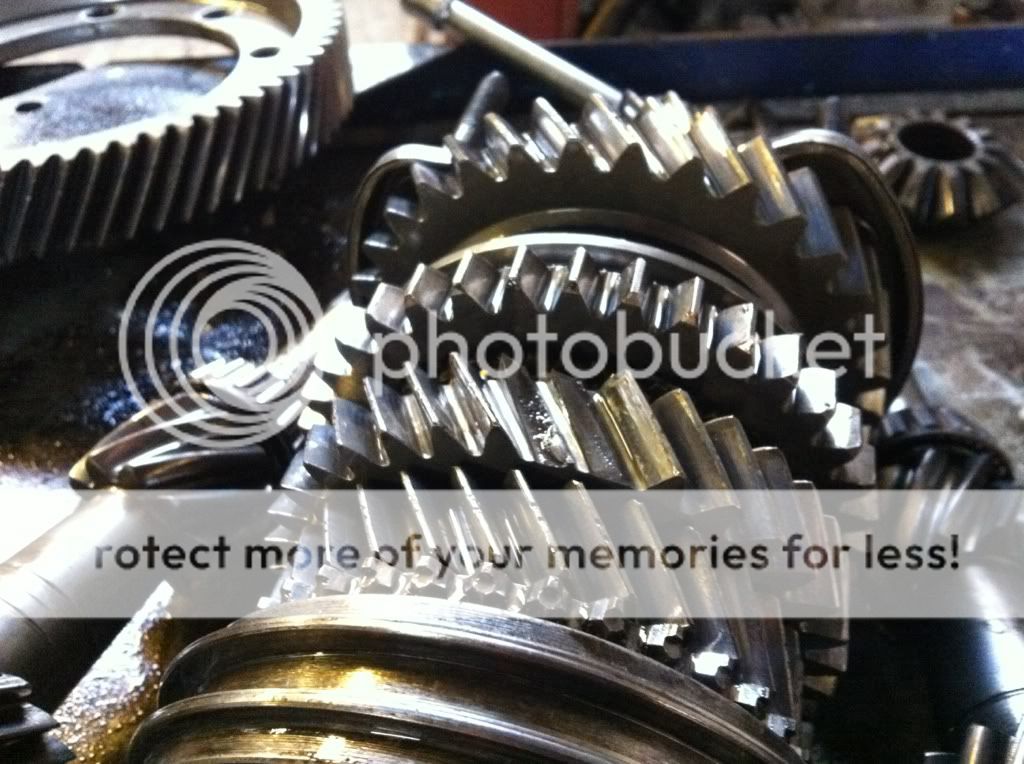
(how does a ko3S manage to do that?)
At least my shiney Quaife diff is OK:
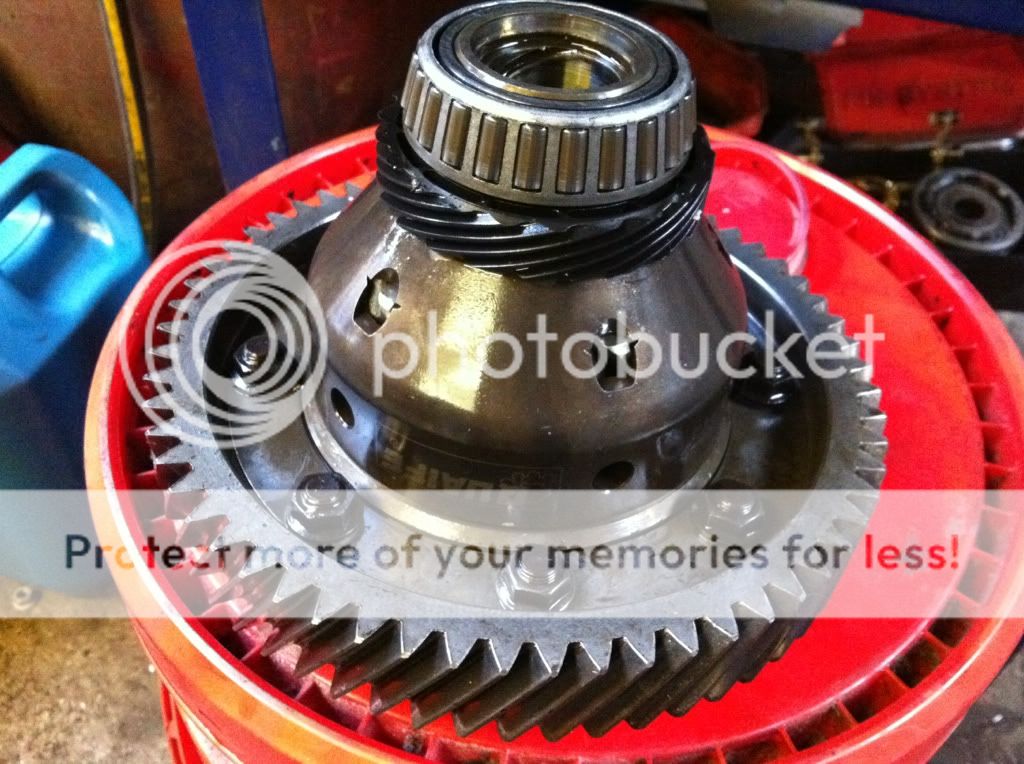
Jonny drilled the rivets out of the old diff/crownwheel ready to bolt up the Quaife:
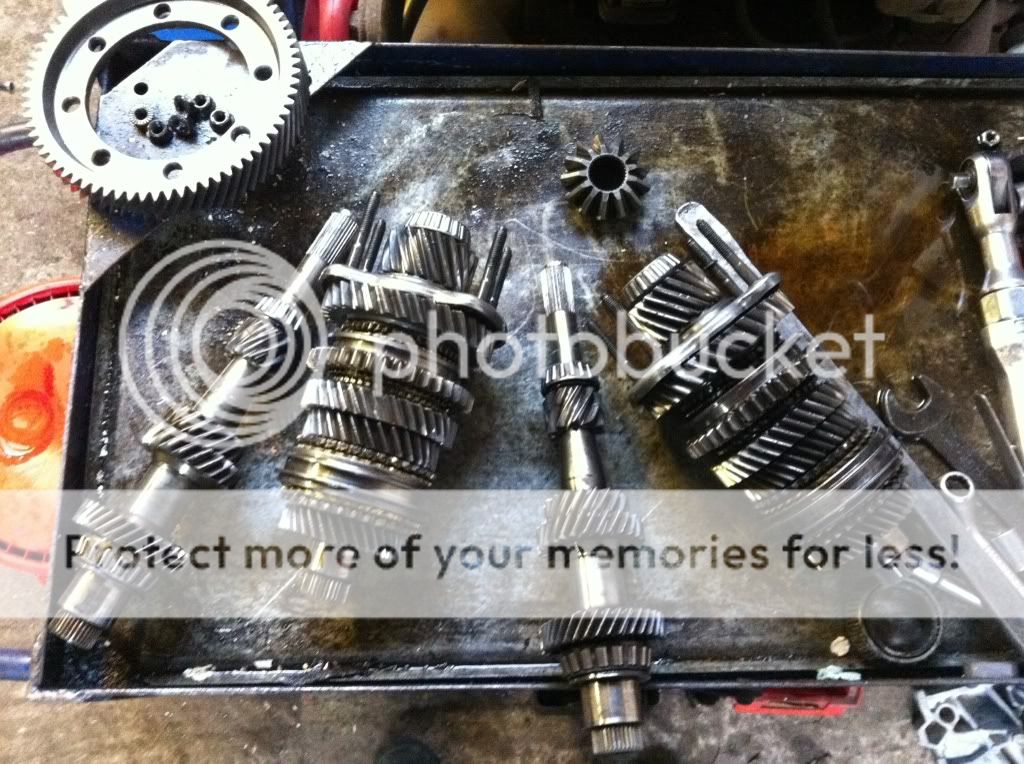
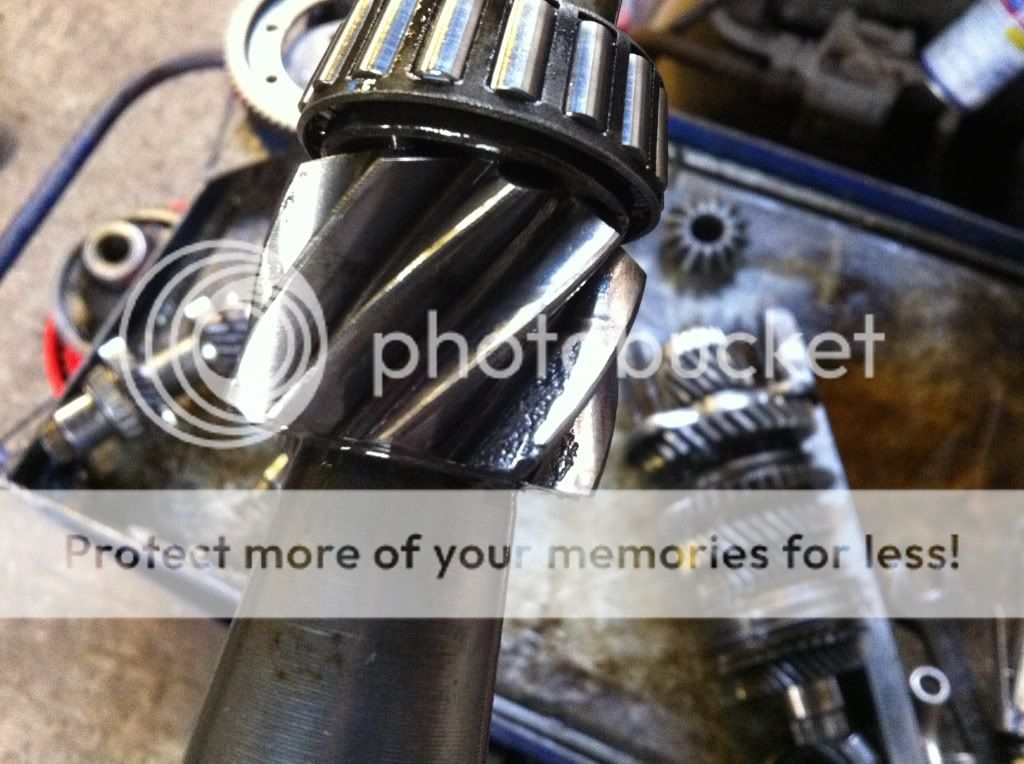
However, upon inspection, the case hardening on 1st gear on the layshaft of the new box isn't in good shape at all:
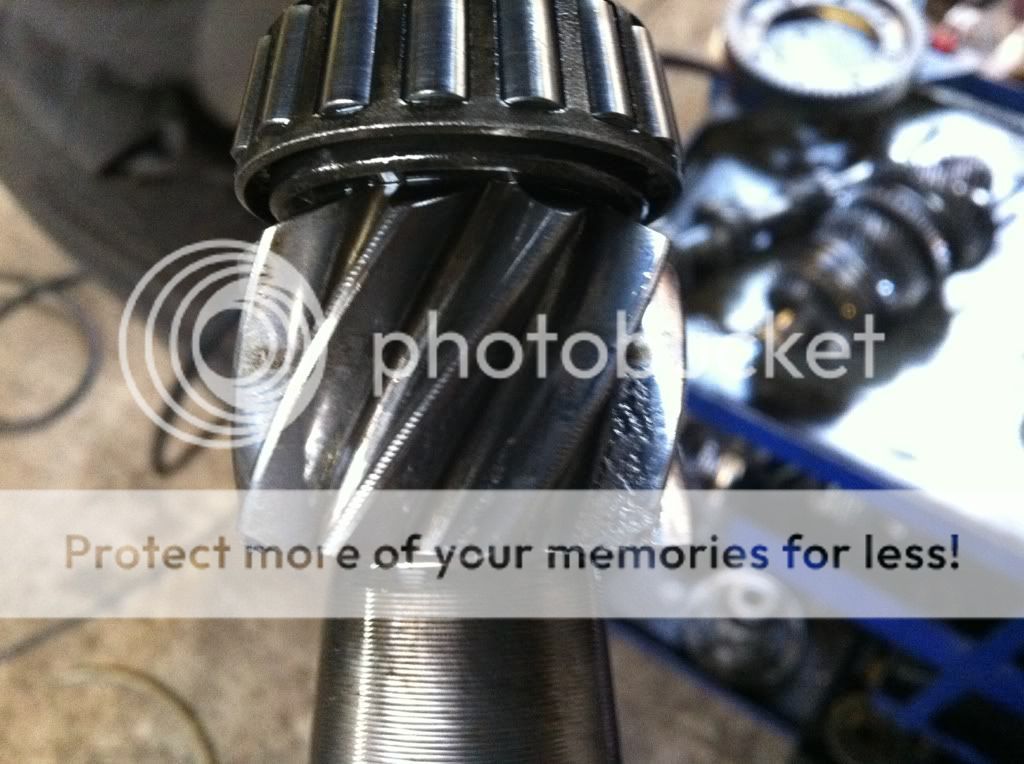
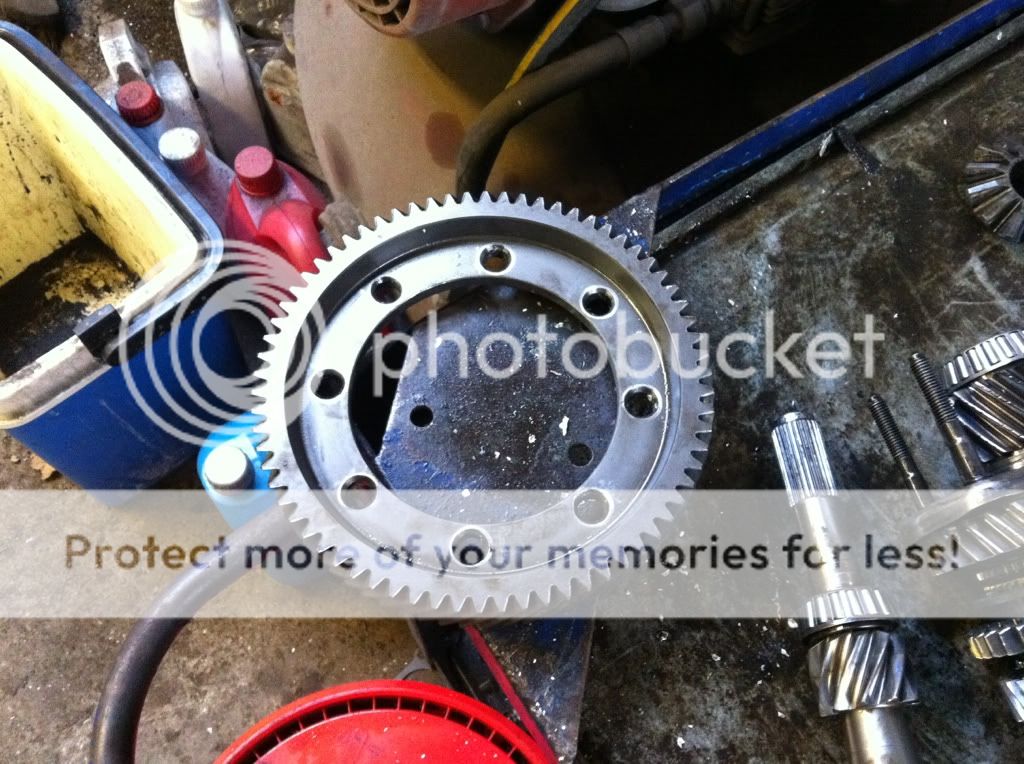
And the old standard diff which we're bining is in similar condition:
****** wonderful. not what I wanted to find at all.
We can't swap the layshafts over either, as ones and ibiza box, and ones a golf box and the ratios are slightly different.
Still, as it was a working box when removed, we're going to go ahead and assemble it for now anyway. it'll work, but I'll have to be very wary of the fact that 1st gear is pretty worn. It might whine a bit too. we'll have to see.
I guess I'll start looking out for ANOTHER gearbox in the mean time
Another **** update for you!
Turns out the great new box wasn't so great, or so new.
Diagnosis on the old box, 2nd gear missing two teeth:
(how does a ko3S manage to do that?)
At least my shiney Quaife diff is OK:
Jonny drilled the rivets out of the old diff/crownwheel ready to bolt up the Quaife:
However, upon inspection, the case hardening on 1st gear on the layshaft of the new box isn't in good shape at all:
And the old standard diff which we're bining is in similar condition:
****** wonderful. not what I wanted to find at all.
We can't swap the layshafts over either, as ones and ibiza box, and ones a golf box and the ratios are slightly different.
Still, as it was a working box when removed, we're going to go ahead and assemble it for now anyway. it'll work, but I'll have to be very wary of the fact that 1st gear is pretty worn. It might whine a bit too. we'll have to see.
I guess I'll start looking out for ANOTHER gearbox in the mean time
- Joined
- Dec 2, 2008
- Messages
- 17,400
- Reaction score
- 1,104
- Points
- 113
Mate you have no luck at all with gear boxes!
Does your gearbox man not have anything laying about that would work for you?
Does your gearbox man not have anything laying about that would work for you?
Paradox1
Registered User
not good news,feel for you man.
once its all sorted, ie New box you should be more than happy
once its all sorted, ie New box you should be more than happy

- Joined
- Dec 8, 2006
- Messages
- 12,100
- Reaction score
- 4,340
- Points
- 113
- Location
- Eastleigh
- Website
- twitter.com
My gearbox man is Jardos Dad! he works with Mercs and plays with British 60's classics and Bikes. He just happens to have done a load of these in the past so knows a lot about them.
Old box was showing similar signs of wear too, but the 'transmission specialist' didn't care to tell me about it!
Old box was showing similar signs of wear too, but the 'transmission specialist' didn't care to tell me about it!
- Joined
- Dec 2, 2008
- Messages
- 17,400
- Reaction score
- 1,104
- Points
- 113
My gearbox man is Jardos Dad! he works with Mercs and plays with British 60's classics and Bikes. He just happens to have done a load of these in the past so knows a lot about them.
Old box was showing similar signs of wear too, but the 'transmission specialist' didn't care to tell me about it!
Wow that's handy then. Gear boxes scare me when they're all in parts like your photos above.
I suppose it's quite difficult to find a mint box nowadays due to the age and miles on them! I'm sure you'll have it sorted in quick time like every other issue you've come across
- Joined
- Mar 28, 2010
- Messages
- 10,073
- Reaction score
- 2,697
- Points
- 113
- Location
- Liverpool/Southport. N west
Regarding the chain tensioner, it could be ok, but it MIGHT not be. Just think what if. It's a big thing to go wrong.
Great dedication in minus conditions anyway, glad I'm not the only idiot!
Great dedication in minus conditions anyway, glad I'm not the only idiot!
- Joined
- Mar 28, 2010
- Messages
- 10,073
- Reaction score
- 2,697
- Points
- 113
- Location
- Liverpool/Southport. N west
I guess when it comes to gearboxes mileage does matter.
is there any specialist box oil you can use thats more track/hooligan friendly?
is there any specialist box oil you can use thats more track/hooligan friendly?
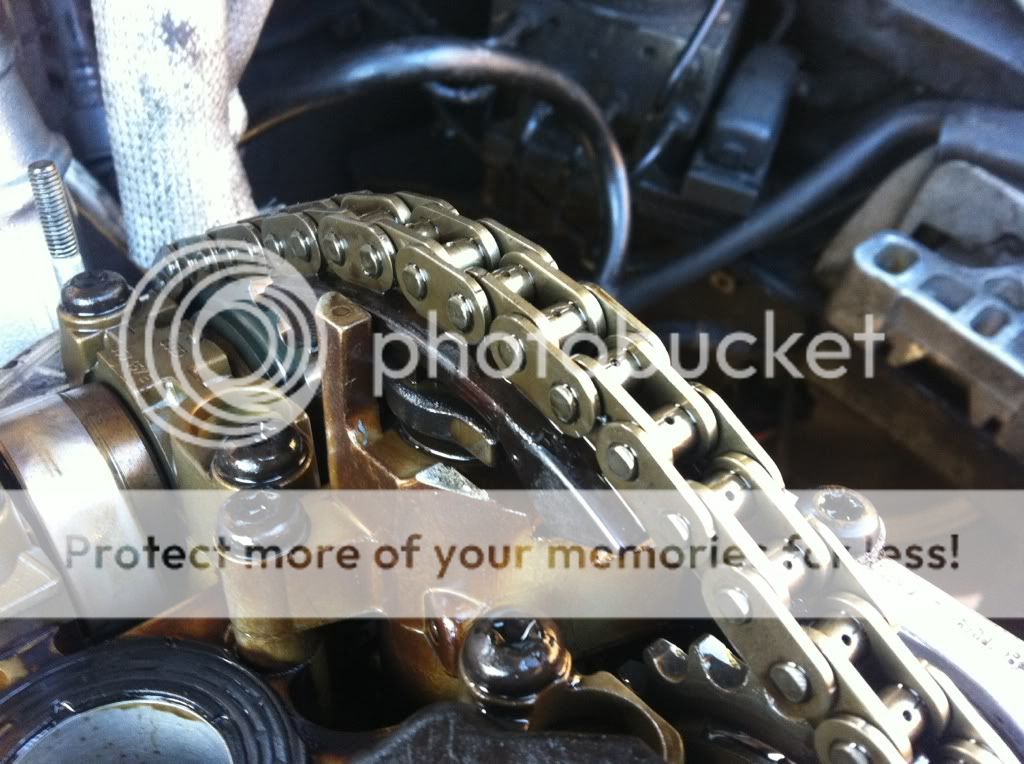
I would change the cam chain tensioner as them to prongs stop the half moon on the tensioner from spinning
Both of them on mine got broke in transit from bills on my large port head and it was blatantly obvious that yodel had dropped the box as could see that the 2 prongs in question had pierced the box
I have got a spare one from the Aeb head and if its the correct one you can have it for a small fee and postage (mates rates)
- Joined
- Dec 8, 2006
- Messages
- 12,100
- Reaction score
- 4,340
- Points
- 113
- Location
- Eastleigh
- Website
- twitter.com
Cheers Stacey, I've got a spare one on my AEB head here as well! But changing it over it a massive job isn't it? Cambelt off, cams out, the whole works surely?
I knew that it stopped the tensioner face from trying to spin, but there's a fair groove in the tensioner after 210k miles, and the side of the plate showed no signs of having touched the guide pin at all, so I wondered if it'd be OK.....
If not, does anyone know what exactly is involved in changing? am I right in thinking it's basically a full cambelt + cams out and new seals job?
I was told just inlet cam had to be taken out but had to take both cams out when I done mine but I didnt know at the time that there was a tool to compress the tensioner so was a pita
Pretty certain that with the tool you only have to take the inlet cam out which means can leave the cambelt on, pretty sure it was bill that told me it was possible to do this way??
Pretty certain that with the tool you only have to take the inlet cam out which means can leave the cambelt on, pretty sure it was bill that told me it was possible to do this way??
Wow that's handy then. Gear boxes scare me when they're all in parts like your photos above.
I know everybody says/thinks their dads are the best, but literally my dad IS the best haha. He can't read, he can't write, he never played any sports and as far as fathers go he wasn't exactly the best. BUT I've never found anything he can't do or doesn't know on anything with an engine!
Just got off the phone to Prawn, I can't wait for this to all be back together!!!!
- Joined
- Dec 8, 2006
- Messages
- 12,100
- Reaction score
- 4,340
- Points
- 113
- Location
- Eastleigh
- Website
- twitter.com
Pretty certain that with the tool you only have to take the inlet cam out which means can leave the cambelt on, pretty sure it was bill that told me it was possible to do this way??
Yep thats right, inlet cam only so its a piece of p. 5 min job with the rocker off.
You boys are awesome
Thanks lads, I've just been down to the garage and tested out your theory on my AEB head, it's dead easy.Few tipex marks on the chain and sproket on both cams, and a few extra marks on the lobes and covers to be safe, and it took 5 minutes to whip the cam out and remove the tensioner.
Only thing I'm uncertain of is whether to use this old AEB tensioner, or to get a new one, are they expensive?
The bottom plate of the tensioner just sits fully inside it's bore, and has no 'spring' in it at all. Are these oil pressure fed? or is it just broken?
I've never found anything he can't do or doesn't know on anything with an engine!
Jonny is pretty cool, thanks to him I now have a built gearbox back with my Quaife diff fitted. 1st gear is showing wear I know, but it's never used in anger in 1st, and you never end up 1st on the track except for the very few ULTRA tight hairpins you sometimes find.
I'll just have to bare it in mind and drive it accordingly, and in the mean time we might start looking for yet ANOTHER box. We'll see.
beachbuggy
Registered User
. eBay cam chain tensioner pad £15 for 2. Definitely worth changing if you're in any doubt.They're the bit that wears as chain runs over them.
- Joined
- Dec 8, 2006
- Messages
- 12,100
- Reaction score
- 4,340
- Points
- 113
- Location
- Eastleigh
- Website
- twitter.com
hmm. Replacement pads into my AEB tensioner sounds like an idea Dan!
You got a link mate? I had a search but can't find them!
Thanks for the bracket too mate! I picked it up, but had such a manic day I forgot to text you to say thanks!
You got a link mate? I had a search but can't find them!
Thanks for the bracket too mate! I picked it up, but had such a manic day I forgot to text you to say thanks!
- Joined
- Dec 8, 2006
- Messages
- 12,100
- Reaction score
- 4,340
- Points
- 113
- Location
- Eastleigh
- Website
- twitter.com
Would an APY tensioner fit my agu Ben? Being non VVT I assume it would.....
Where abouts are you dude?
Where abouts are you dude?

Would an APY tensioner fit my agu Ben? Being non VVT I assume it would.....
Where abouts are you dude?
It would fit yeah. Same part no iirc. This one does have a spring in it and pads are in good condition. I'll either be at my workshop TN22 or at home BN5. If that's not a million miles away from you.
beachbuggy
Registered User
No worries, pleasure and glad I could help.
Here you go
Vw Audi ect Cylinder Head Chain Tensioner Pads X2 | eBay
I probably will take that inlet adapter off you as well if that's ok.
Here you go
Vw Audi ect Cylinder Head Chain Tensioner Pads X2 | eBay
I probably will take that inlet adapter off you as well if that's ok.
- Joined
- Dec 8, 2006
- Messages
- 12,100
- Reaction score
- 4,340
- Points
- 113
- Location
- Eastleigh
- Website
- twitter.com
Finally, after a week of waiting, I got some time on the car today!
Had to work this morning, which was highly annoying, but I got home at about 1pm, and Bob came up to give me a hand with getting back on track!
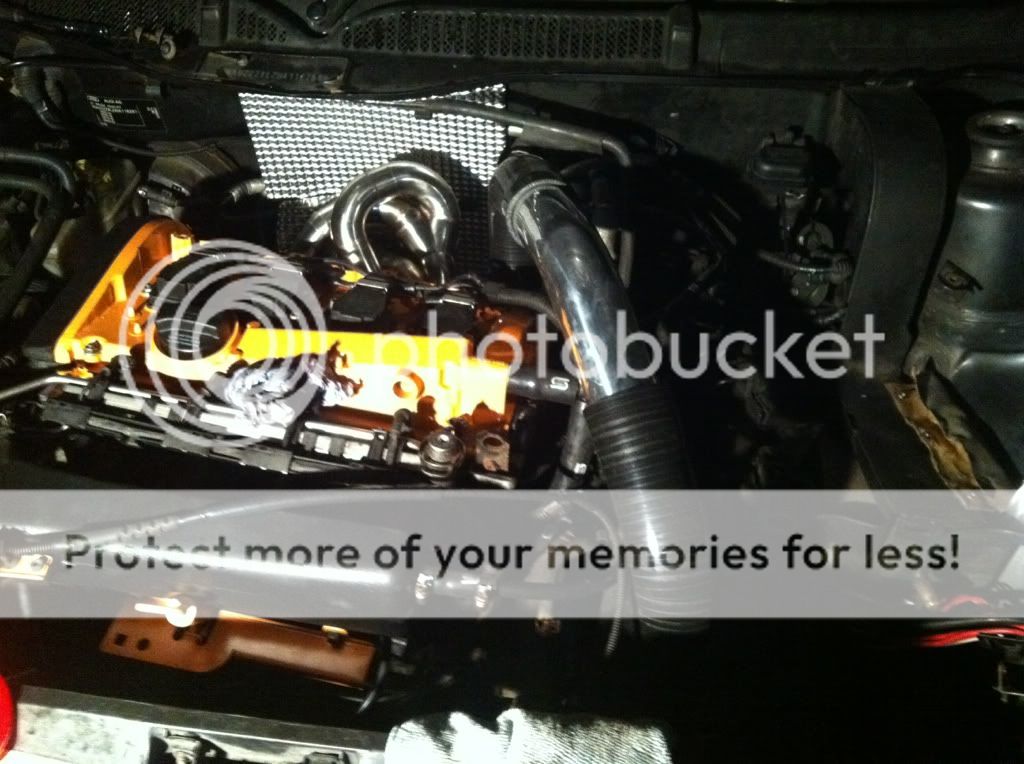
I started the day greeted with this:

ANd sadly had to go backwards, to fix the tensioner issue:
Rocker cover off, ready to remove the inlet cam to change the chain tensioner.
Meanwhile, Bob was cleaning up the gearbox ready for a coat of paint:
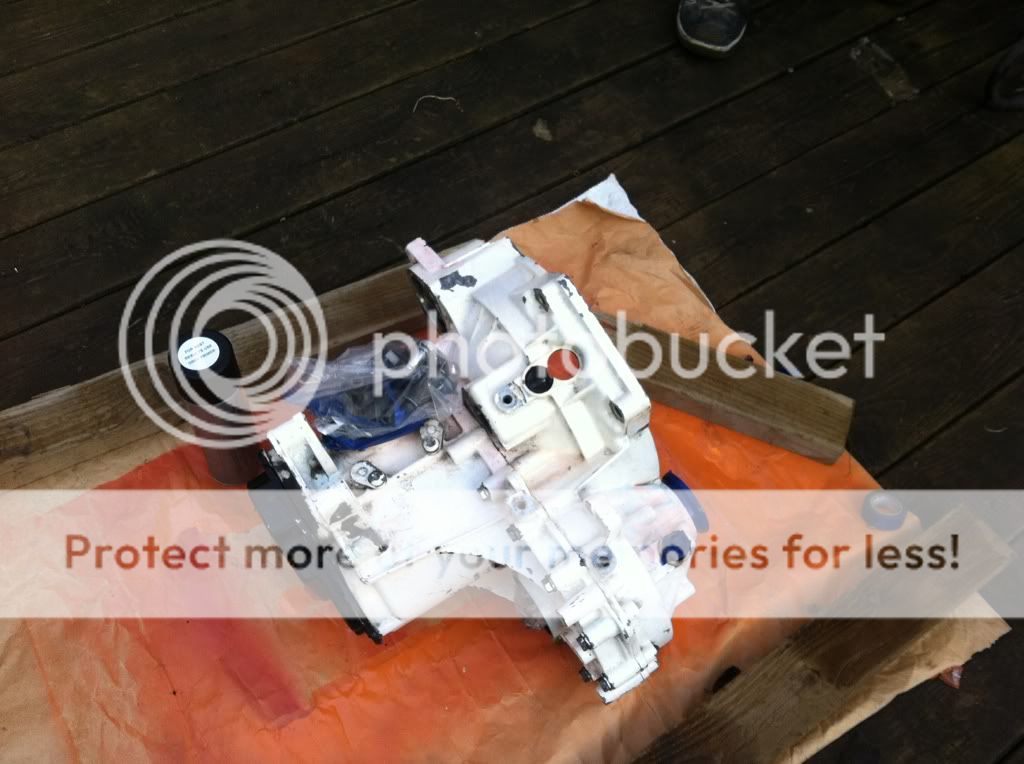
I wouldn't usually paint a box at all, but sadly, the previous owner had painted it white! It looked terrible, and would look so stupid in my black/orange engine bay, it had to go black as an easy fix.
I pulled out the inlet cam, which allowed my to change the chain tensioner, massive thanks to Ben for sending me the new tensioner!
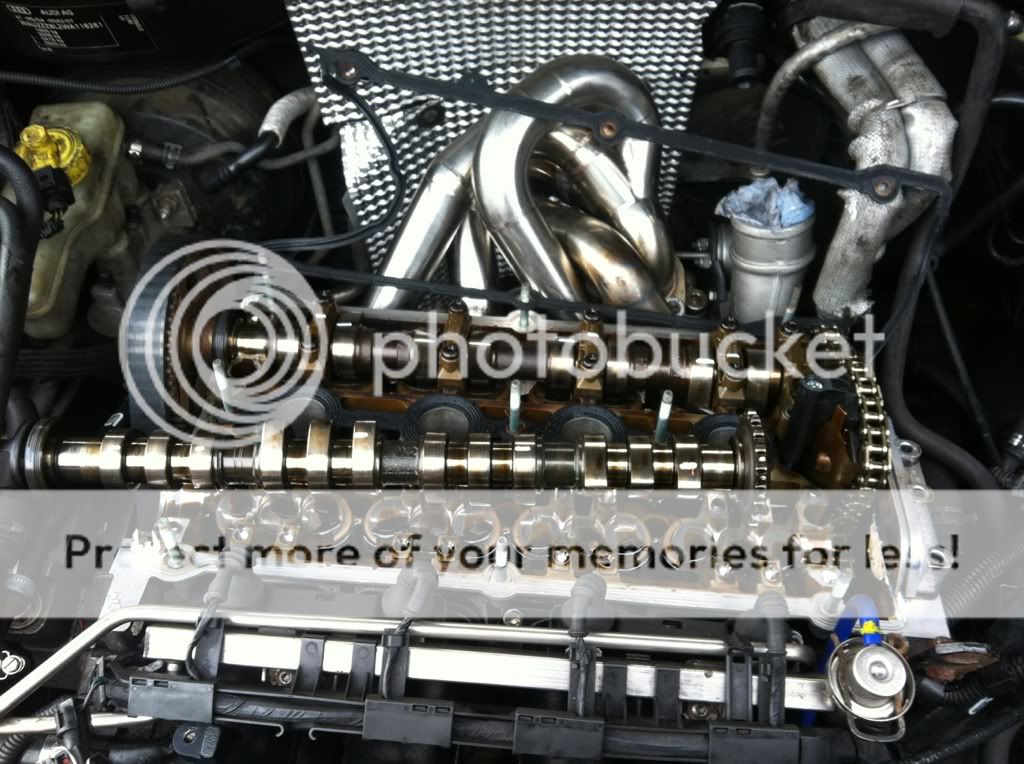
Was very careful to remove all the cam caps in the right order, having been warned by tufty that it's possible to damage the bearings if you just unbolt the cam and let it come out off square.
After that, we decided to let the box paint dry (forgot to get a pic), and got on with installing the wellycooler!
Old FMIC before removal:

Forgot to take pics during, but we decided to hang the cooler off a section of angle alloy.
We pretty quickly found that when mounting the angle section to the rad surround, it sat too far back, and it also looked hard to get any nuts/bolts in behind the surround to tighten, So I decided to space the angle section out with some 30mm box I had.
We ended up mounting the spacer blocks via the side of the rad surround, and tapped a thread into the box section to bolt it up, we did the same into the front of the box section to mount the alloy across the front, then hung the cooler from that:
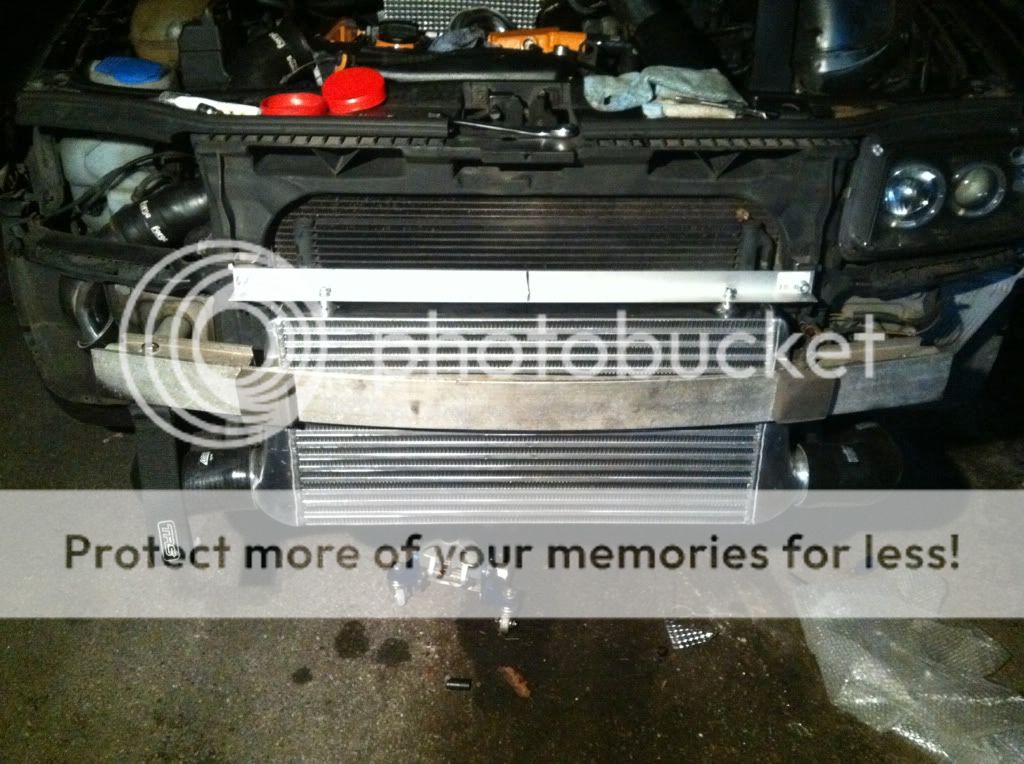
Happy with how it was sitting, I got out the pipes and offered them up for a test fit. Much to by delight, it all fitted perfectly!


More to come tomorrow
Had to work this morning, which was highly annoying, but I got home at about 1pm, and Bob came up to give me a hand with getting back on track!
I started the day greeted with this:
ANd sadly had to go backwards, to fix the tensioner issue:
Rocker cover off, ready to remove the inlet cam to change the chain tensioner.
Meanwhile, Bob was cleaning up the gearbox ready for a coat of paint:
I wouldn't usually paint a box at all, but sadly, the previous owner had painted it white! It looked terrible, and would look so stupid in my black/orange engine bay, it had to go black as an easy fix.
I pulled out the inlet cam, which allowed my to change the chain tensioner, massive thanks to Ben for sending me the new tensioner!
Was very careful to remove all the cam caps in the right order, having been warned by tufty that it's possible to damage the bearings if you just unbolt the cam and let it come out off square.
After that, we decided to let the box paint dry (forgot to get a pic), and got on with installing the wellycooler!
Old FMIC before removal:
Forgot to take pics during, but we decided to hang the cooler off a section of angle alloy.
We pretty quickly found that when mounting the angle section to the rad surround, it sat too far back, and it also looked hard to get any nuts/bolts in behind the surround to tighten, So I decided to space the angle section out with some 30mm box I had.
We ended up mounting the spacer blocks via the side of the rad surround, and tapped a thread into the box section to bolt it up, we did the same into the front of the box section to mount the alloy across the front, then hung the cooler from that:
Happy with how it was sitting, I got out the pipes and offered them up for a test fit. Much to by delight, it all fitted perfectly!
More to come tomorrow
- Joined
- Dec 2, 2008
- Messages
- 17,400
- Reaction score
- 1,104
- Points
- 113
Good work mate. I'll need some of that info for removing cams as I need to swap mine over to the new head and fit new seals too.