superkarls overhaul

Aw fair enough. That was where I was planning on venting mine to not get any smells. But as you say it still gets a wif il have to vent it somewhere else.

Karl - let us know how you get on when you change where its vented too.

Just wondering is your catch can baffled as I emailed the seller and he said yes but some people say its not.
 
Last edited:
Catch can is not baffled, i have mine packed with wire wool, I have no idea what difference it makes lol, I tend to get more condensation than oil, but ot serves its purpose just fine.
Welly I think came up with the idea of venting the breather into the wing where the standard airbox duct goes, which is good idea bit mine has 3 inch duct pipe in it so that's a no for me

I didn't bother in the end, I used a metre of silicone vac hose (19mm) to vent it down to the back of the subframe.
 
here's pics of the clips for the headlight xenon adjusters....
P1010054.jpg

P1010050.jpg

P1010051.jpg

hope they work. going to trial fit one to my car. then il have 1 left, and whatever others i can acquire.
 
From lastnight, for some reason i did click the stop button at 6200rpm but it stopped early....ah well, i'm surely we'll do another log once the F23 goes on...ha ha ;)

 
Thanks sandip. and thankyou lee!
Anyone's thoughts welcome on these logs.
Standard map, makes standard boost request, and airflow is beyond i expected so im very happy its healthy.

One fault tho, 16395/P0011/000017 - Bank 1: Camshaft A (Intake): ****** Setpoint not Reached (Over-Advanced)
so need to address this ASAP!

Also, after being made up with my logging, on the way home i get a horrible vibration under the car, like directly under the handbrake area, and now i swear ive lost drive to the rear :( so must be prop related. Waiting to get home and get the car in the air.
 
Il start with a question: when i spin one back wheel, should the other spin the opposite direction??

I'm guessing it should. In which case the diff has shat itself. Hence the vibration last night, the loss of rear drive, and the contact marks on the prop.
So, gonna change the haldex and diff oil, which was on the to do list anyway.
Been looking at rear diffs on eBay, not badly priced tbh. But, I dont have alot of confidence in the haldex seeing as the pre charge pump is going mental, so im looking for a diff and haldex together.

Any thoughts??
 
Marks on the prop shaft where it has hit the downpipe after the vibration of the diff dying. Like a rub on the dp and all the way round the prop.

Haldex fuse pulled and fwd for now :( its horrid!!
 
Marks on the prop shaft where it has hit the downpipe after the vibration of the diff dying. Like a rub on the dp and all the way round the prop.

Haldex fuse pulled and fwd for now :( its horrid!!
 
Well guys, what i should be saying is 'chapter 2:rebushing the rear' however it didnt quite go to plan today.

I've got so many jobs to do especially before the track at adi and i finally decided to pull my finger out on sunday.
I ATTEMPTED to fit my stainless tie arms, poly bushes for all the tie arms, new drop links and poly bushes for the rear wishbones, however on the first side whilst fiddling around with the wishbone/hub I managed to twist my brake line and split it DOH!
So, no car for me and this week il mostly be making a new brake line.
I did manage to fit one stainless arm, inner arm bushes and drop link on one side. But the wishbone bush is going to be one big job in itself, an absolute barsteward!
Anyway, hopefully everything will be sorted and fitted by next weekend, and il have a proper write up with pics.
 
my latest additions to my superide:

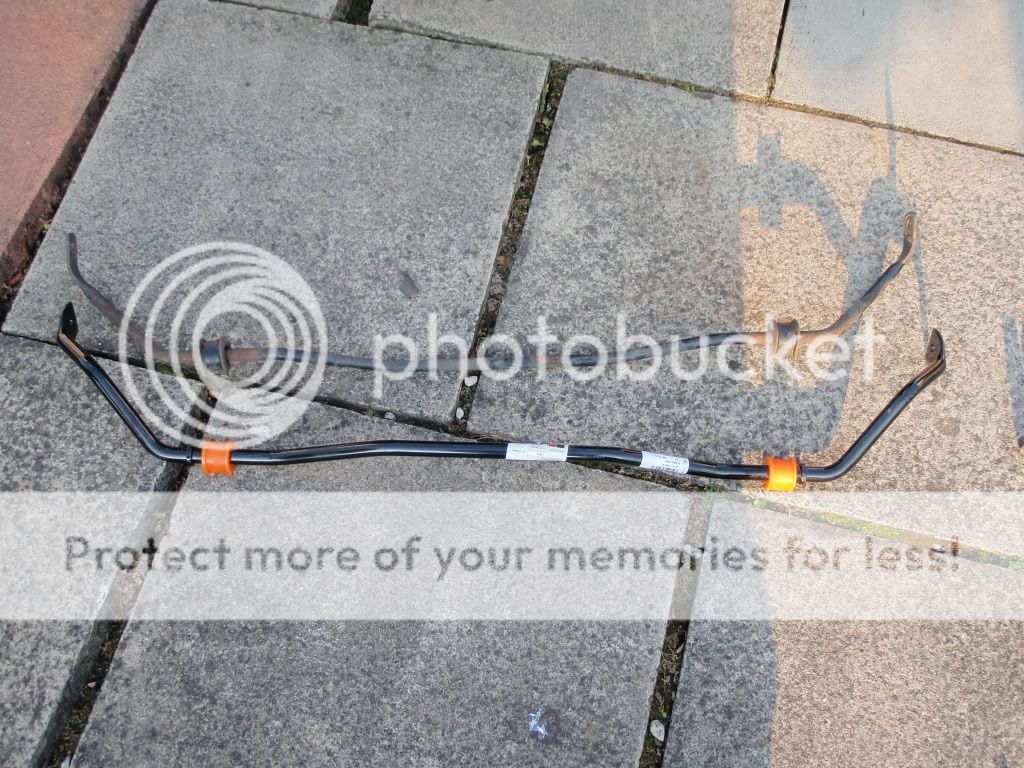
R32 rear anti roll bar. part no: 1J0511409K price: £108.86

with 19mm poly bushes. ebay. £10.95

P9150142.jpg

P9150144.jpg


this difference this makes is unbelievable. less roll (obviously) and now i've not had understeer in the dry since, its just planted, more chuckable.

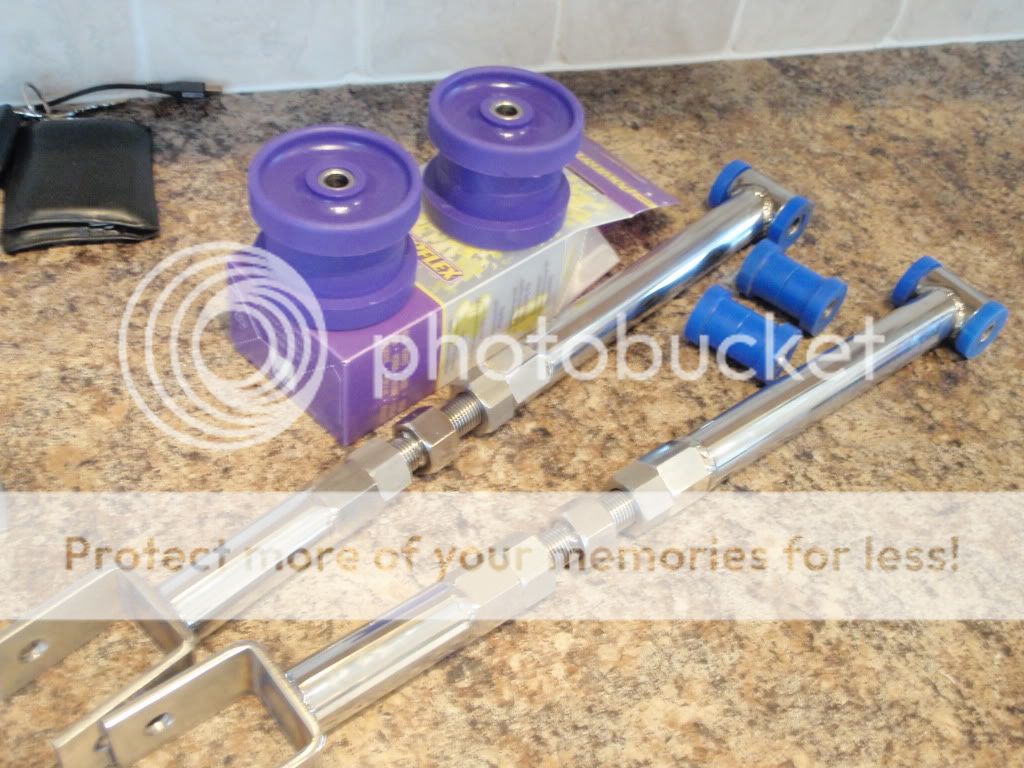
next up i recieved stainless adjustable tie bars from the harbour master AKA s3dave. complete with poly bushes for the two stainless arms, and poly bushes for the remaining two arms.
i also got powerflex bushes for the rear wishbones.
P9200147.jpg

P9200148.jpg

the quality of these bars is just superb. why pay for forge i do not know!!

i also bought new drop links as mine were absolutely ******** (thanks solly), even though the car felt great after fitting the roll bar i had nocking on rough bumpy roads

so, quite a bit to fit, and i hoped to do it in one day. how wrong was i.
mate was busy on his sx so i though id join on mine for company.
P9250149.jpg


car jacked up, started to basically undo everything.
P9250154.jpg


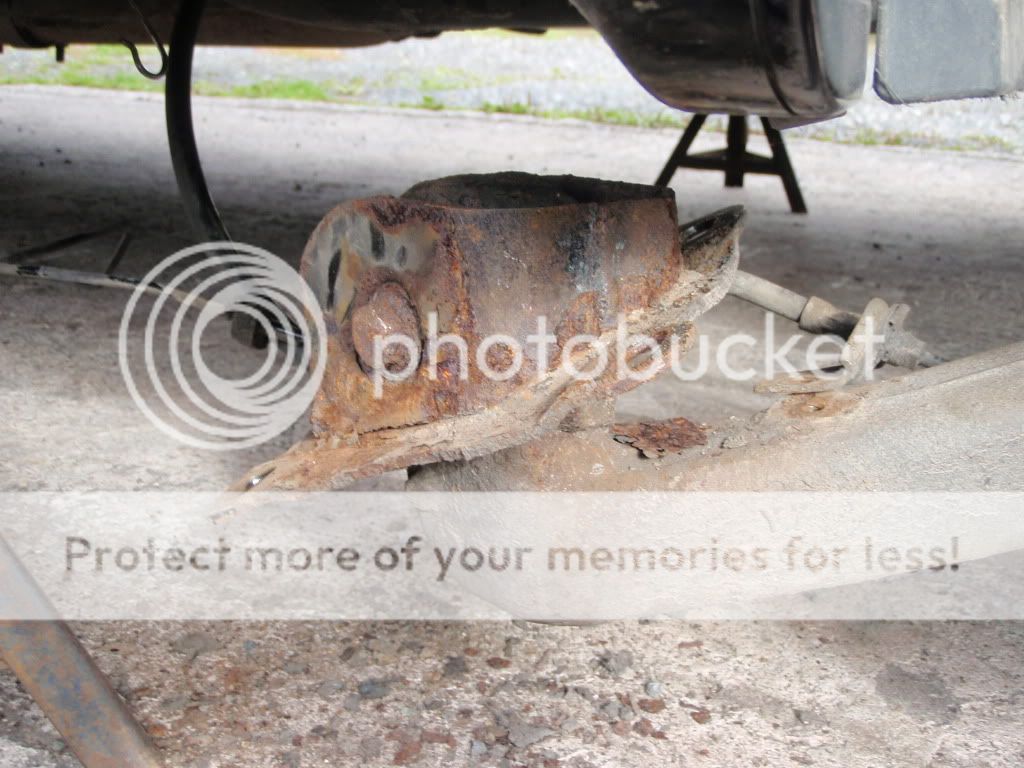
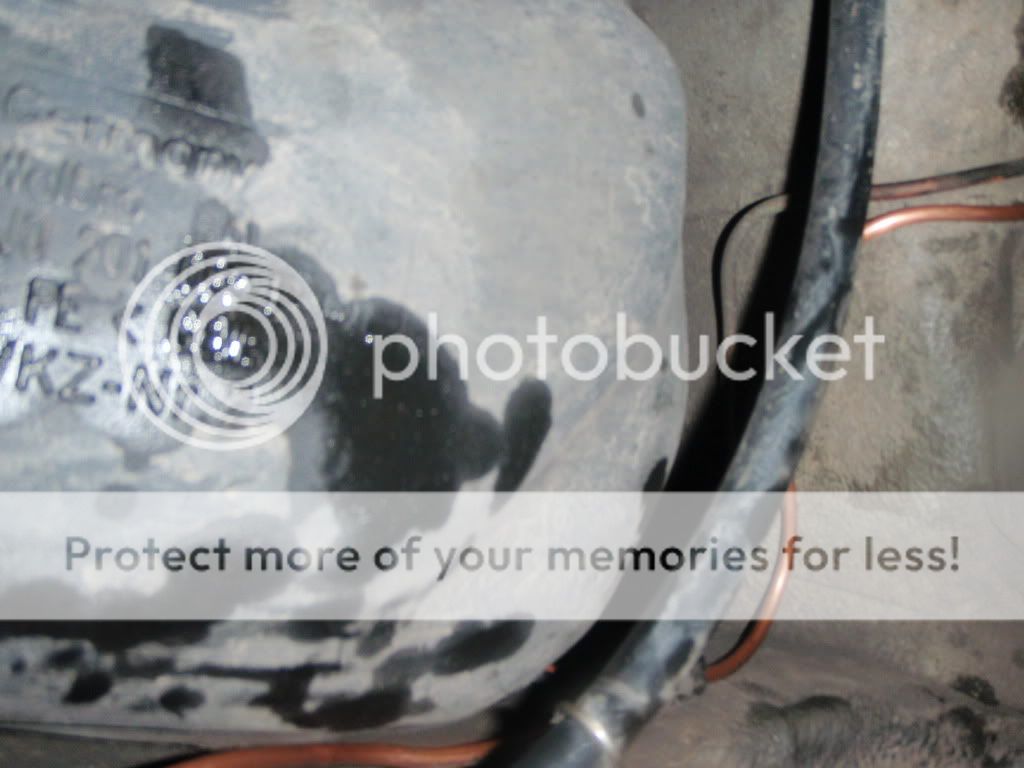
heres where the rear wishbone bolts to the body under the car, four bolts
P9250150.jpg


notice the bush sits in a cup like thingy majig
P9250151.jpg


s out and matching them up in size to the originals, i later made them half a turn, 180 degrees longer, to reduce some of my silly camber.
P9250159.jpg


its at this point with the two bars removed and the hub assembly and wishbone is held on by the driveshaft only, that i decided to unclip the brake line to give me some movement
P9250152.jpg


anyway regardless of having the brake line unclipped i was fannying around with the wishbone trying to take a good look at that bush when this happened:
P9250156.jpg

******

only twisted the line and split it, i ran to the garage me and my mate found a screw and put that in the end to bung it up for now.
what id advise is, dont attempt fitting of that bush with the brake line attached. split it, bung the end, then you have the freedom to move it around, you'l need to top up fluid and bleed that brake, but at least you wont break anything.

i proceeded to fit my arms back in after this.
only problems were i had to prise the subframe end open to allow the fat poly bushes to fit, a hammer helped.
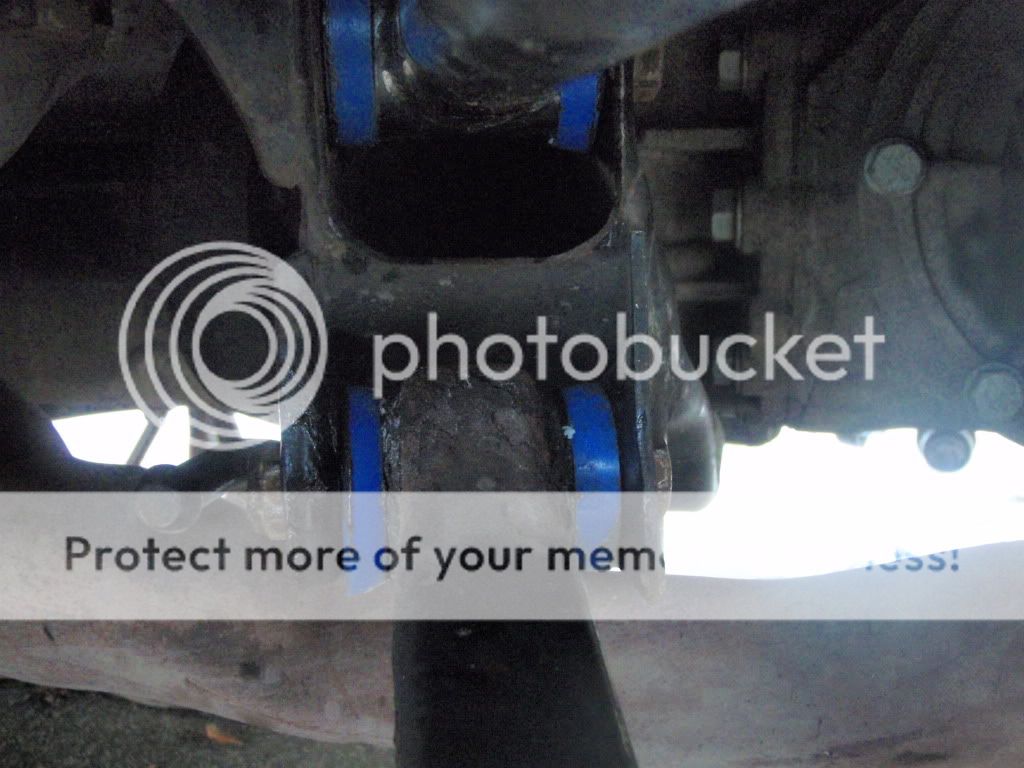
arms fitted, everything lined up (difficult) and bolted together and we have this:
P9290165.jpg

P9290166.jpg


the inner bushes did seem to crush when tightened, but it seems fine
P9290168.jpg


at the end of the day i managed to limp home, the following day superdad fitted a new piece of brake line and we bled them, all is fine
P9260163.jpg


end results are a much more solid car, just feels new, back rides alot better, especially after adjusting the camber.
im leaving the big wishbone bushes for another time when i have a whole day to do them, il need a grinder to cut the bolt that holds the bush in, its that corroded!!
 
now. tonights work.

how to baffle a none baffled cheap catch can.

i currently have a cheap toyosport catch can thats completely hollow. bougfht from ebay for £20. it does the job well and isnt bad quality, but it breathes heavily and fumes and liquid can pour out of the outlet.
this is why baffled cans are better and more widely used.
so, i set out to modify mine like so:
catchcancrosssection.jpg

(thanks westy)
these saikoumichi cans are good quality, reasonable price, and do the job very well.

so this is how i modified mine....
i took the lid of my can with its 2 outlets, and unscrewed one, to allow another outlet i had to screw in the other side
P1010373.jpg

P1010374.jpg


next i jubilee clipped an old piece of hose that came off the car to the inlet
P1010376.jpg


i drilled it to allow for breathing when the can is filling up
P1010377.jpg


next is my filter, its a thick piece of foam, its still breathable and easily blown through, i found this in work and though ahhhh il have that
P1010378.jpg


used my can to cut out a circle, and trimmed on the outside using a stanley knife so that it fits snug inside the can
P1010379.jpg

P1010381.jpg


then put a hole in it so the tube could go through to the bottom of the can, and sealed it all up
P1010382.jpg

P1010383.jpg


i can honestly say that this has reduced the amount of fumes and liquid that would nortmally pour out, it still breathes a little obv, and it can be seem slightly when revving the car, but it works, and should filter well in the same principle as the saikoumichi can.
job done!
#one thing to add, i know the pipe i screwed on the inside is small, im going to put the two big ones together, leaving the small one for outlet/breathing, as i think it might be quite important it has sufficient size to flow.

all in all im really proud of this pikey mod! made up. so give it a go! its free!!!! (if you have the random parts around)
 
Nice idea on the catch can mate. Keep an eye on that foam as the fumes and liquid are very nasty! I emptied my catch can into an off water machine cup (the flimsy plastic ones) and left it on the side. Came back to find the cup had melted!
 
Nice idea on the catch can mate. Keep an eye on that foam as the fumes and liquid are very nasty! I emptied my catch can into an off water machine cup (the flimsy plastic ones) and left it on the side. Came back to find the cup had melted!

I was going to say the same.
The chances are the fumes might melt/disolve the foam.

You want me to try and get some exhaust baffels and bring them up with me on saturday?


Looks good mate. Liking the adjustable bars. Did dave make them?
Sucks bout the break line good old super dad. :)

Screen+shot+2010-06-19+at+1.46.17+PM.png
 
Last edited:
Yeh I'm going to keep a close eye on the can for that reason.
Putting wire wool in was bad enough, it destroys it!

Scott if youve got somwthin you think might work I'm up for trying it.
 
Or just leave it as it is and not pay the extorsionate price for a fancy can lol. Any can is going to be better than the standard set up.
 
I aint buying another. im gonna be a tight **** until after Christmas now.
So far the can does a good job, if I have to replace the foam wvery now and again then that's fine, gives me a job to do.
 
Karl you know the rear wishbone bush housing, is it just the 1 bolt and nut that holds the cup in place? Im having mine rebushed thursday and wondered if this needs replacing!
 
4 bolts bolt the housing to the body. then when its lowered there is one bolt going all the way through it.

best of luck! it will be corroded to **** like mine above.
i still havent done mine. but i reckon it will make a hell of a difference, especially seeing the standard bush, its pathetic.
 
Dont happen to know the part number for the large bolt and nut?
 
Neil you not had a w*** today haha. Is ETKA in the stickies to download? Had a look but couldnt find it.
 
Ooh, ok mate.

It's ok i wouldnt bother, cars going in first thing in the morning, ill phone the smack head stealers up now, see if they give me a bag or wrong nuts and bolts again haha.
 
Sod you all i phoned the stealers and got the part number :). Too late though as cars in, in the morning haha.
 
Will do karl, havent bothered telling them about the brake line incident haha. Hopefully they should be fine, their a porsche specialist so going to see what their like, first time ill have used them.
 
update.

my top mounts that i fitted in like march or something are ****e. front right is knocking really bad. i knew i shouldnt have fitted them, they were softer than oem. so LCR topmounts next when i can be bothered finding a seat dealer.

massive coolant leak, lost half a litre this morning going the bank about 3 miles away.
the plastic pipe that houses the coolant temp sender on the right hand side of the head has a massive crack in it. it will probably be something like £953.99 from the steelers, thats getting done asap as i cant use the car. have to carry 1 litre of water with me and have a bottle of g12 in the boot anyway.

pics of the bust pipe and part numbers up soon to help anyone out
 

Similar threads

Replies
24
Views
5K
Replies
10
Views
1K
Replies
7
Views
947
Replies
2
Views
719