

More problems.... Prop Shaft (with pics)
- Thread starter Welly
- Start date
You are using an out of date browser. It may not display this or other websites correctly.
You should upgrade or use an alternative browser.
You should upgrade or use an alternative browser.
Thats erm FUBAR
I like the hovercar idea tho no tyre wear, no road tax game on............

Welly, just wondering were did you get your knocking noise and when, like on gear changes or bumps etc.
Im going to try what you did, removing the haldex fuse to see if I still get my knocking sound. I only get my knocking on gear changes and sometimes when driving very slowly, rocking the engine by dipping the clutch. It sounds like it comes from around the gearbox area.
Nathan
Im going to try what you did, removing the haldex fuse to see if I still get my knocking sound. I only get my knocking on gear changes and sometimes when driving very slowly, rocking the engine by dipping the clutch. It sounds like it comes from around the gearbox area.
Nathan

Welly, just wondering were did you get your knocking noise and when, like on gear changes or bumps etc.
Im going to try what you did, removing the haldex fuse to see if I still get my knocking sound. I only get my knocking on gear changes and sometimes when driving very slowly, rocking the engine by dipping the clutch. It sounds like it comes from around the gearbox area.
Nathan
That's where my noise was coming from also mate, I had my money on the dog bone mount, but it wasn't to be.
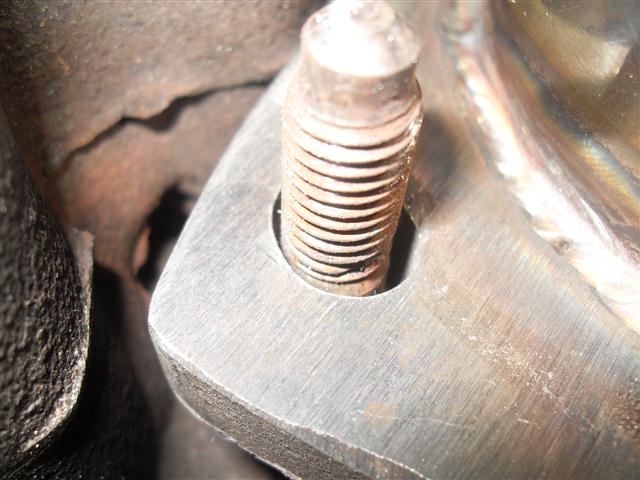
That bolt missing out of the doughnut has done such a gargantuan (ding ding - 2 points) amount of damage to that shaft it's unreal.
My new one has just this minute arrived at the office - looking forward to getting that home. But waiting for the downpipe's delivery anyway so meh.
Plus I feel rubbish today so not feeling the working on the car in the rain vibe....

hmm.. that prop damage looks exactly like the tt one i changed at work ages ago. bolt had fallen out of that one too.
you thought about thread locking them in?
This is a historic problem I've had since buying the car mate to be fair.
I will be thread locking them in believe me....
Im a little confused now to what my problem could be. Just took the haldex fuse out and when for a little drive and the knocking is still there. My knock seems to be related to the rocking of the engine because I can make it know when the cars stationary by dipping the clutch. Ive also had this knock since ive bought my car lol
Nathan
Nathan
- Joined
- Nov 11, 2009
- Messages
- 10,099
- Reaction score
- 739
- Points
- 38
- Location
- west yorks
- Website
- www.stainless-engineering.co.uk
I have a poly bush though. When I installed it the knocking was the same.
Nathan
**** - Thats a hard one then - drive shafts possibly - most likely an inner CV.
- Joined
- Nov 11, 2009
- Messages
- 10,099
- Reaction score
- 739
- Points
- 38
- Location
- west yorks
- Website
- www.stainless-engineering.co.uk
is your exhaust sitting ok? (downpipe)
Yeah, thats a good shout too - not uncommon to have a little knock from the 3" pipes.
Could be the inner cv as you say welly, but not sure. I get very clunky gear changes sometimes. Nothing got brought up for my MOT so I think it would fail if the inner cv was dead. It maybe the flywheel but im completely stumped now. Inner cv will be changed next.
I have a standard downpipe so not sure that would be it.
Nathan
I have a standard downpipe so not sure that would be it.
Nathan
Morning all.....
A good work's night last night all in all.
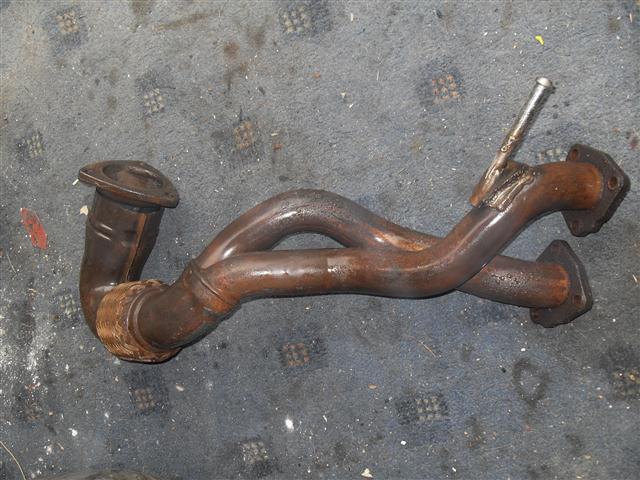
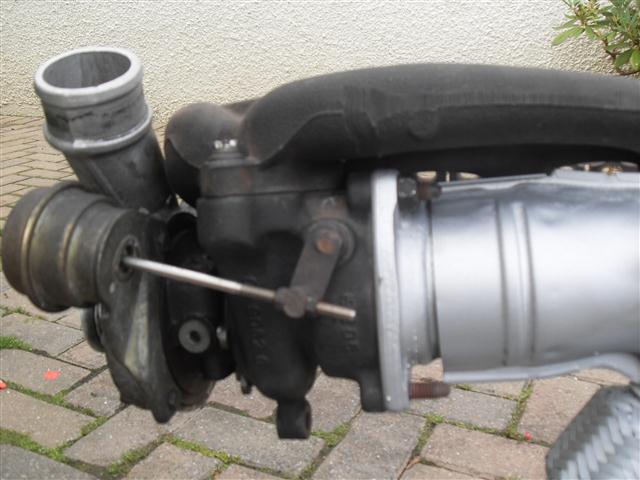
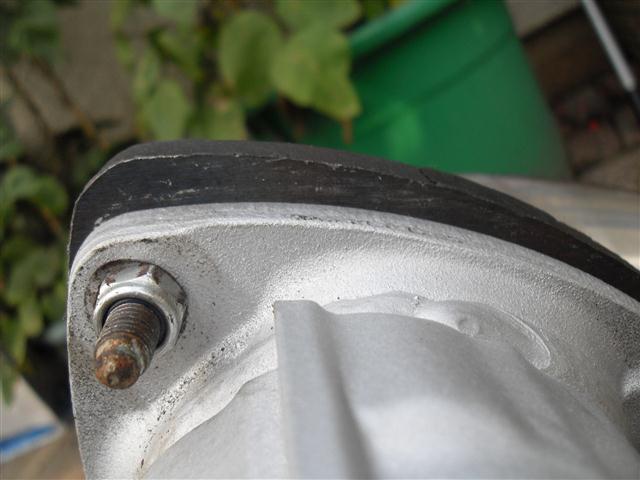
New prop arrived yesterday. The prop and the doughnuts are in excellent condition, however, sadly, the UJ Gaiter has got a split in it. I am going to silicone over it and hope for the best.... lol. Pictured below.


It came in two parts and has now been re-greased and reassembled ready to fit.
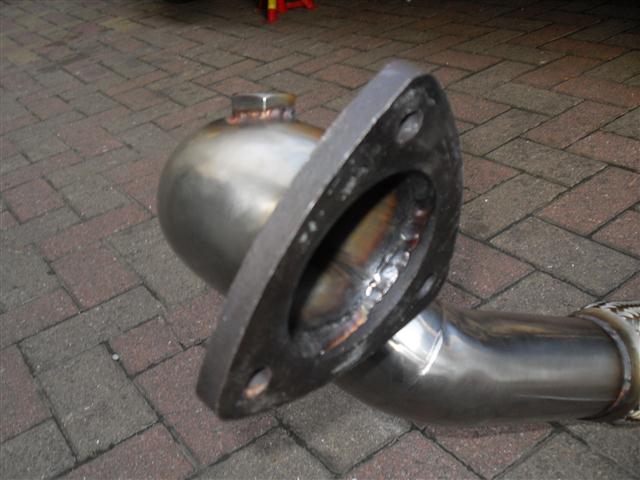
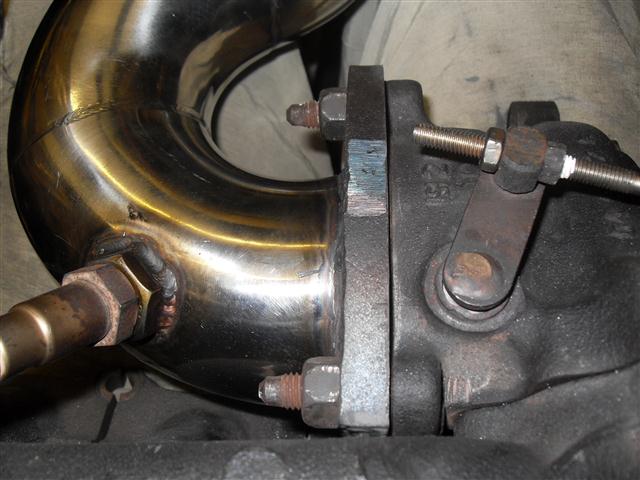
The downpipe is also off the S3. Contrary to popular belief, the subframe did not have to be dropped to get it out. Much easier with the prop out of the way though to be fair, so not sure how easy it would of been with the prop in situ.
I did have to remove the hanging bracket on one of the lower pipes to give me enough room to manoeuvre the pipe out - which we have welded back on again as I plan to sell....
Pictures...

Then, as I was bored with nothing to do now as downpipe not arrived - I started on other things.
Firstly, I removed my porous compressor switch from behind the heat shielding on the bulkhead. When I had the car regassed it was leaking out of this.
A bit of research has found that they are around the £40 mark new from Audi, which seems a bit much. Any ideas on a cheap replacement? Got my eye on this: Audi A6 2005-2008 Air Con Pressure Switch Brand New on eBay (end time 05-Sep-10 10:21:06 BST) but not sure if it will fit the S3.
Then I decided I was going to paint my charge pipe matte black. I have a ton of paint left from the wheels. Rubbed it all back and removed all the damage - then masked it up to paint.
It's not finished yet, as it needs to be colour sanded and repainted - BUT - I really like it anyway, even though it's not the finished product.
Last but not least, my dog bone mount Powerflex bush arrived this morning....

The project continues....
A good work's night last night all in all.
New prop arrived yesterday. The prop and the doughnuts are in excellent condition, however, sadly, the UJ Gaiter has got a split in it. I am going to silicone over it and hope for the best.... lol. Pictured below.
It came in two parts and has now been re-greased and reassembled ready to fit.
The downpipe is also off the S3. Contrary to popular belief, the subframe did not have to be dropped to get it out. Much easier with the prop out of the way though to be fair, so not sure how easy it would of been with the prop in situ.
I did have to remove the hanging bracket on one of the lower pipes to give me enough room to manoeuvre the pipe out - which we have welded back on again as I plan to sell....
Pictures...
Then, as I was bored with nothing to do now as downpipe not arrived - I started on other things.
Firstly, I removed my porous compressor switch from behind the heat shielding on the bulkhead. When I had the car regassed it was leaking out of this.
A bit of research has found that they are around the £40 mark new from Audi, which seems a bit much. Any ideas on a cheap replacement? Got my eye on this: Audi A6 2005-2008 Air Con Pressure Switch Brand New on eBay (end time 05-Sep-10 10:21:06 BST) but not sure if it will fit the S3.
Then I decided I was going to paint my charge pipe matte black. I have a ton of paint left from the wheels. Rubbed it all back and removed all the damage - then masked it up to paint.
It's not finished yet, as it needs to be colour sanded and repainted - BUT - I really like it anyway, even though it's not the finished product.
Last but not least, my dog bone mount Powerflex bush arrived this morning....
The project continues....
OK, back after a (unproductive) Sunday afternoon's work....
As the downpipe didn't arrive as hoped - I have had to busy myself with other stuff and let the daughter get on with the car....
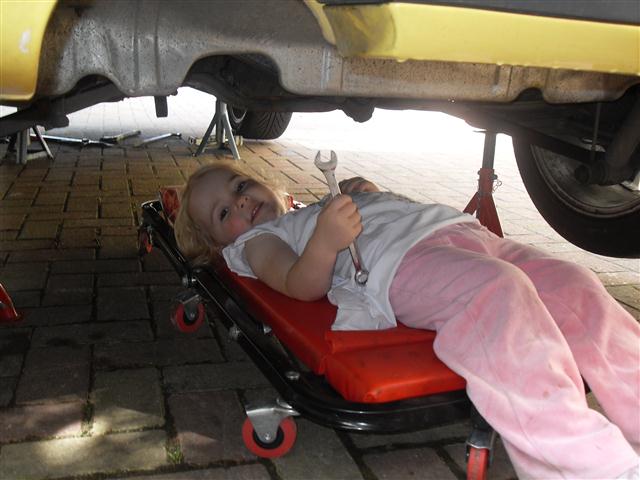
I was trying to get her to change the diff oil for me - but no joy.
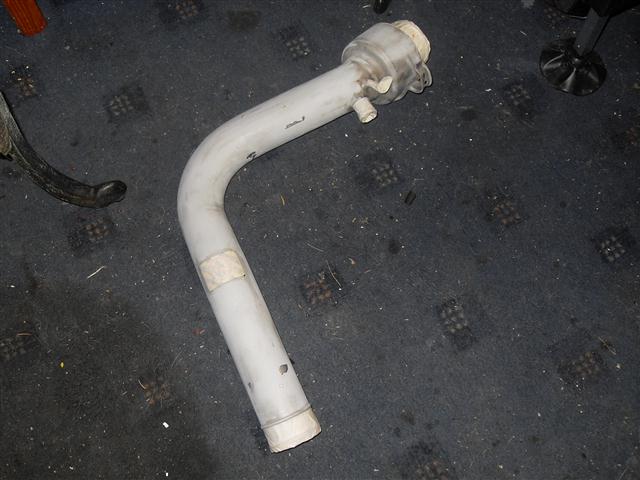
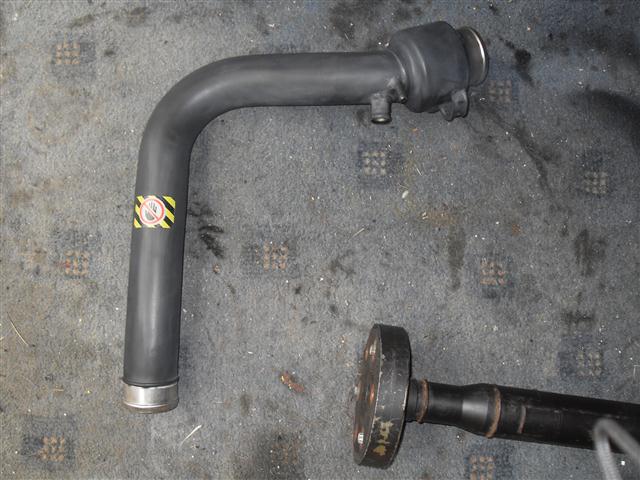
For openers, I have fitted my downpipe and spare turbo to the exhaust system off the car. It's quite weird actually to see it complete, but not attached to a car in any way.


Yes - I have also painted the old downpipe silver in boredom....
The idea behind this is that when the downpipe does arrive, I can use this to marry it all up outside of the car. Much easier than getting in and out of the car to marry it up each time.
I bolted it all up together with a K04 mani I borrowed from Bill (thanks Bill :thumbsup to see how close things were to the manifold on the standard downpipe.
Answer = Pretty damn close to be fair.


I will be interested to see the fitment of the downpipe when it arrives, and how much is going to be required to be removed. I have seen Andrew@A.L.D's post about that, so I have an idea of what to expect...
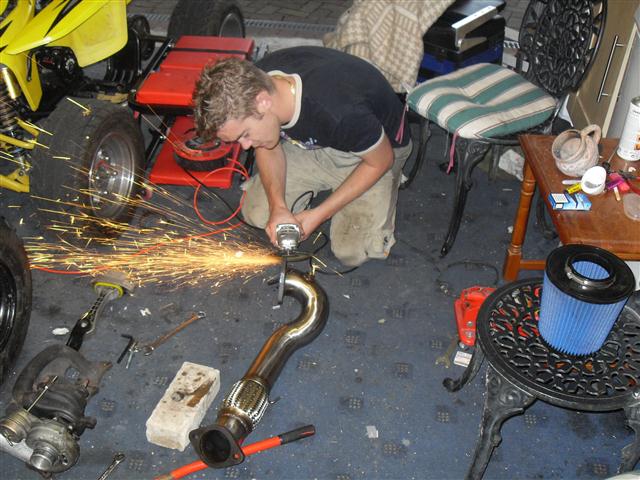
Then I moved on to the removal of the strap bar across the lower subframe. Bolts on this are shot, and will not come out. Have tried EVERYTHING to get them out, but the metal is simply spinning around inside the bush.
So - cutting was the only way sadly.

This had to be removed to actually remove the dog bone mount to then fit my new poly bush. What a royal pain - whatever those bolts are made of, it's pretty damn hard... lol.
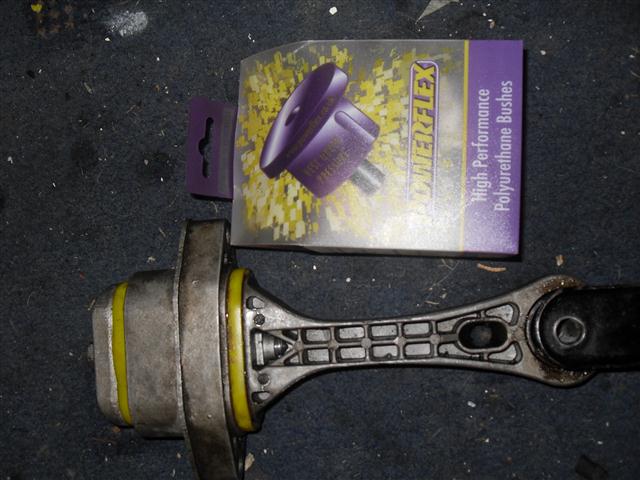
Poly bush was a bit of a ****** to fit since I unfortunately snapped my G-clamp a while back. This has at least been a catalyst for me to order a new one!
Hopefully, the downpipe will be here tomorrow, and then I can continue with this.
Dying to get the downpipe in, and all bolted up, so I can re-fit everything else and get the motor back out on the road....
Welly, Out.
As the downpipe didn't arrive as hoped - I have had to busy myself with other stuff and let the daughter get on with the car....
I was trying to get her to change the diff oil for me - but no joy
.For openers, I have fitted my downpipe and spare turbo to the exhaust system off the car. It's quite weird actually to see it complete, but not attached to a car in any way.
Yes - I have also painted the old downpipe silver in boredom....
The idea behind this is that when the downpipe does arrive, I can use this to marry it all up outside of the car. Much easier than getting in and out of the car to marry it up each time.
I bolted it all up together with a K04 mani I borrowed from Bill (thanks Bill :thumbsup
to see how close things were to the manifold on the standard downpipe.Answer = Pretty damn close to be fair.
I will be interested to see the fitment of the downpipe when it arrives, and how much is going to be required to be removed. I have seen Andrew@A.L.D's post about that, so I have an idea of what to expect...
Then I moved on to the removal of the strap bar across the lower subframe. Bolts on this are shot, and will not come out. Have tried EVERYTHING to get them out, but the metal is simply spinning around inside the bush.
So - cutting was the only way sadly.
This had to be removed to actually remove the dog bone mount to then fit my new poly bush. What a royal pain - whatever those bolts are made of, it's pretty damn hard... lol.
Poly bush was a bit of a ****** to fit since I unfortunately snapped my G-clamp a while back. This has at least been a catalyst for me to order a new one!
Hopefully, the downpipe will be here tomorrow, and then I can continue with this.
Dying to get the downpipe in, and all bolted up, so I can re-fit everything else and get the motor back out on the road....
Welly, Out.
Welly, the lower strut brace doesnt need to come off to remove the dogbone mount.
Have you ever thought about coating your new downpipe when it arrives. DLC or ceramic coating would help reduce the exhaust gas temperatures, something you could consider before you fit it.
Nathan
Have you ever thought about coating your new downpipe when it arrives. DLC or ceramic coating would help reduce the exhaust gas temperatures, something you could consider before you fit it.
Nathan
Welly, the lower strut brace doesnt need to come off to remove the dogbone mount.
Have you ever thought about coating your new downpipe when it arrives. DLC or ceramic coating would help reduce the exhaust gas temperatures, something you could consider before you fit it.
Nathan
Thinking about wrapping it mate, ceramic coating is a little out of budget at the moment to be honest.
Trust me mate, the lower brace did have to come off - PAS pipes is the way and removing the lower brace was (believe it or not) easier than moving them.
Not sure about how the facelift models are laid out down there, but if you can get it off on mine without removing the lower brace, then ****** me with a fishfork....

Ye perhaps they changed it slightly for facelift cars. Mine take 10 minutes to remove and didnt have to remove anything first.
Nathan
Grrrrr. Jealous..... lol.
ikbenben
Belgium S3 driver
- Joined
- Dec 6, 2009
- Messages
- 105
- Reaction score
- 1
- Points
- 16
Ye perhaps they changed it slightly for facelift cars. Mine take 10 minutes to remove and didnt have to remove anything first.
Nathan
²
Evening all.
XS Power downpipe arrived today as expected.
That has been my work for this evening....
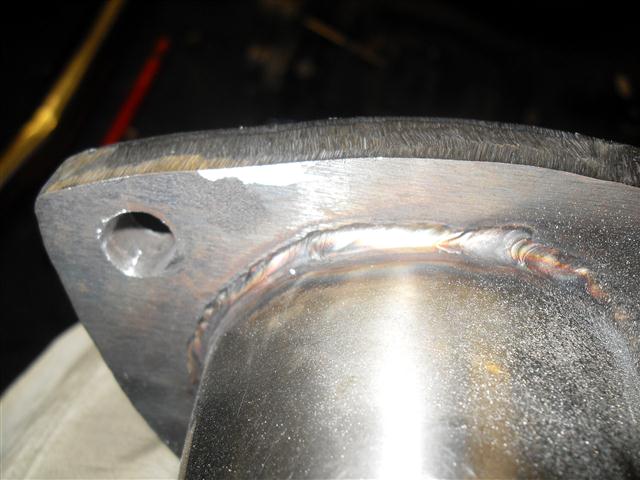
Initial look suggests that it is well made to be fair. Nicely welded together.
Removal from the box and comparison with my standard downpipe showed that, as expected, the flange was a spot large to fit. At the point that the flange touches the manifold, approx 4mm of metal needed removing, which then tapered down to none down the flange.
I then tried fitting it to my K04 Turbo & Mani assembly. No chance.

So, I started the process of making it fit. Much easier having the turbo and manifold assembled off the car for test fitting, rather than test fitting to the actual turbo.
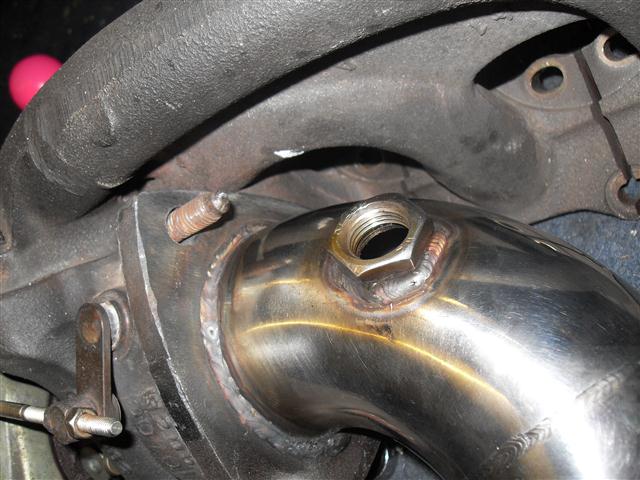
Ground away the metal that was causing the issue allowing the flange to pass the manifold. At this point, the bolt holes needed enlarging to allow the manifold to fit the studs. The holes were slightly out of place and needed changing.


The finished product genuinely fits like a glove. Flange is the perfect fit to the turbo, lambda hole is in the correct place. I test bolted it to the turbo with a gasket and the finished product gets the thumbs up...


I have some test fitting to do to the actual turbo on the car, and ensure that the downpipe and decat fit in the correct place and at the correct angles.
At the point I am happy with it, I will be sending it back to XS Power for them to replicate the changes and then produce new downpipes to this spec.
XS Power downpipe arrived today as expected.
That has been my work for this evening....
Initial look suggests that it is well made to be fair. Nicely welded together.
Removal from the box and comparison with my standard downpipe showed that, as expected, the flange was a spot large to fit. At the point that the flange touches the manifold, approx 4mm of metal needed removing, which then tapered down to none down the flange.
I then tried fitting it to my K04 Turbo & Mani assembly. No chance.
So, I started the process of making it fit. Much easier having the turbo and manifold assembled off the car for test fitting, rather than test fitting to the actual turbo.
Ground away the metal that was causing the issue allowing the flange to pass the manifold. At this point, the bolt holes needed enlarging to allow the manifold to fit the studs. The holes were slightly out of place and needed changing.
The finished product genuinely fits like a glove. Flange is the perfect fit to the turbo, lambda hole is in the correct place. I test bolted it to the turbo with a gasket and the finished product gets the thumbs up...
I have some test fitting to do to the actual turbo on the car, and ensure that the downpipe and decat fit in the correct place and at the correct angles.
At the point I am happy with it, I will be sending it back to XS Power for them to replicate the changes and then produce new downpipes to this spec.
Speedy Steve
Registered User
so by looking at the downpipe do you think its worth a punt on the manifold?
I'm going to be getting one myself shortly mate, so I can tell you with no guesswork....
Sound good? lol
OK, sorry for the lack of updates here - but it's all done.... Yay!
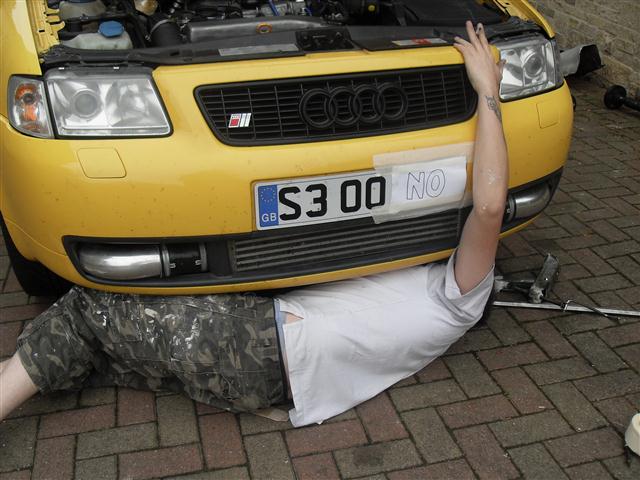
Had a few small (massive) issues. For example - it turns out that a TT prop and an S3 prop aren't the same. The TT prop is about 4" shorter that the S3 one. Shame I didn't notice this until I had bolted the front end in to the transfer box.
******.
Photo for illustration purposes....

Anyway, I swapped the back end of the shafts over and now fits as good as gold. Using the front half of the TT prop, the TT UJ, the S3 rear end, and the TT's rear doughnut bush.
Anyway, all bolted up. and on. Managed to get all this done - including fitting the 3" downpipe without dropping the subframe. Not easy I grant you, but it can be done.
Car is back on the road now, and I'm very happy with the results. Knocking and banging is all gone - no more vibrations through the car at 60.
Happy days.
3" downpipe has made an impressive difference. I enclose a section of text from my other thread...
Had a few small (massive) issues. For example - it turns out that a TT prop and an S3 prop aren't the same. The TT prop is about 4" shorter that the S3 one. Shame I didn't notice this until I had bolted the front end in to the transfer box.
******.
Photo for illustration purposes....
Anyway, I swapped the back end of the shafts over and now fits as good as gold. Using the front half of the TT prop, the TT UJ, the S3 rear end, and the TT's rear doughnut bush.
Anyway, all bolted up. and on. Managed to get all this done - including fitting the 3" downpipe without dropping the subframe. Not easy I grant you, but it can be done.
Car is back on the road now, and I'm very happy with the results. Knocking and banging is all gone - no more vibrations through the car at 60.
Happy days.
3" downpipe has made an impressive difference. I enclose a section of text from my other thread...
OK. Downpipe fitted for testing purposes.... Interesting.
Took it out, and immediately there was a noticeable gain in performance. Liquid showing gains of ~20 bhp (before: 262 after: 283) and similar amounts of torque gain.
However, I then discovered that there was an issue with the car. As soon as I took it out, revs dropped right down when rolling in neutral, and would then come back and stabilise. Very strange. Anyway - this got progressively worse. Turns out that the stub for the DV off of the TIP had torn clean away. I 'fabricated' it back on, but wasn't the best....
Saturday morning, I took the car up to Bill's to the dyno and had a run. Car wasn't producing any more power than before - around the 260 mark - however torque was up by about 20 lb/ft. At this point, the car was visibly hunting like crazy on idle, and short term fuel trims indicated an air leak. Also, the air flow readings, and the BHP output didn't really match up - I have put this down to the air leak in the TIP pulling in unmetered air.
Bill lent me another TIP for testing, and I fitted that - now all fine again. No hunting. Also - this TIP is stronger than the one I had on, and the noise of it cavitating has now gone.
I have done some liquid runs since fitting the new TIP, and am now getting air flow readings of up to 229 g/s. Liquid confirms 287 BHP and 280 lb/ft of torque.
I am hoping to get back on the dyno as soon as I can to see what's what.
To be honest, I am happy enough with the improvement in drive ability - it drives so much better. :thumbsup:
Here are some shots of Liquid at it's best....


- Joined
- Sep 14, 2008
- Messages
- 24,836
- Reaction score
- 6,078
- Points
- 113
- Location
- Wibbleton
- Website
- www.tuffty.co.uk
....For example - it turns out that a TT prop and an S3 prop aren't the same. The TT prop is about 4" shorter that the S3 one....
Would not have expected that.... what year TT was it from mate? would suggest a TT is a shorter wheelbase to the S3... I would imagine then that the R32 propshaft would be the right length...
<tuffty/>
- Joined
- Dec 2, 2008
- Messages
- 17,400
- Reaction score
- 1,104
- Points
- 113
Would not have expected that.... what year TT was it from mate? would suggest a TT is a shorter wheelbase to the S3... I would imagine then that the R32 propshaft would be the right length...
<tuffty/>
Nor did I to be fair, the confused look on my face must of been a picture when I went to connect the tail end of the prop shaft to the rear diff.
The 4 inch gap there confused me very much..... and then the penny dropped.
And then I swore. Lots.
I think it's about time you orded up an Autobahn TIP mate!
I'm ordering one as we speak mate.... lol.
Welly, weres all the pics gone dude, I need them lol.
Can you buy a U/J separately as I want to sort out my knocking noise which I believe is this but dont want to change the whole shaft.
Nathan
Can you buy a U/J separately as I want to sort out my knocking noise which I believe is this but dont want to change the whole shaft.
Nathan
- Joined
- Sep 14, 2008
- Messages
- 24,836
- Reaction score
- 6,078
- Points
- 113
- Location
- Wibbleton
- Website
- www.tuffty.co.uk
...Can you buy a U/J separately as I want to sort out my knocking noise which I believe is this but dont want to change the whole shaft.
Nathan
VAG supply the shaft complete IIRC.... no bits...
<tuffty/>
Working to find a good write up prop shaft repair ( u-joints and donuts) this looks like it was comprehensive ,too bad the pictures are in a black-hole of internet history.. 
