[FONT=arial, geneva]This page shows the European projector headlights that I installed on my 1998.5 Audi A4. The original lights were plain U.S. halogen headlights. I purchased the new lights from Greedspeed for $629 plus shipping charges. These are European-specification halogen projector beam headlights. They are NOT xenon headlights. These lights were made by Valeo.
The pictures on this page will attempt to show the new lights, the modifications that were necessary, and the finished product. This page is for informational purposes only. The addition of these lights to an older A4 requires permanent irreversible modifications. Any changes that you make to your car are at your own risk.
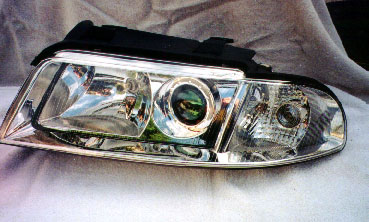
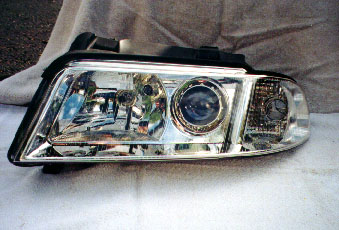
[FONT=arial, geneva]These first few photos show the new Euro headlight (driver-side light) before installation.
Notice they don't have the orange triangle in the corner that the U.S. lights have. There is also a cylinder around the yellow corner light which hides the yellow bulb. The round lens is the projector for the low-beam driving light. The Euro lights have "
city lights" which are little low wattage bulbs used in Europe but not in the U.S. The city lights don't really project any usable light on the road.
[/FONT]
[FONT=arial, geneva]What they do is light up the light housing on your car, so that it is visible to other drivers. I think the idea is that in a well-lit city, you don't need to use your driving lights to see, but you want some sort of light so that other drivers can see you. This is the city light concept as I understand it. The city lights are visible and are in the high beam light housing. In this picture, in the high beam part of the housing is a black dot at about two o'clock. That is the city light bulb. The high beam bulb is in the center of the housing. [/FONT]
[FONT=arial, geneva]The vendor has attached some connectors to the wires in the back. The long green wire is for the city lights. We decided to cut off these cheap connectors and removed the wiring harness/connector from the original headlights, and soldered it to these lights. These lights can now be removed just like the originals by unplugging the connectors (not shown). Here is the
Wiring Instructions document that Greedspeed gave me. It is an MS Word document.
[/FONT]
[FONT=arial, geneva]Next we move on to the fenders. These first two pictures show the driver-side fender with the corner light removed. The part of the fender that is hidden by the original corner lights needs to be modified to allow the new lights to fit. Specifically, most of this metal must be removed (by cutting or grinding).
[/FONT]
[FONT=arial, geneva]This next picture shows the passenger side fender after the modification. Here you can clearly see the part of the fender that has been cut. I used touch-up paint to cover the edges after cutting the fender. We used a cheap 4 1/2" grinder from Harbor Freight (which can be had via their website) and a cut off wheel to grind away the part of the fender that must be removed. We started out trying to cut out the metal to be removed, but found that grinding it away was easier and quicker. Originally I intended to use a Dremel tool to cut away the metal. This would have worked, but would have taken much, much longer to finish the job.
[/FONT]
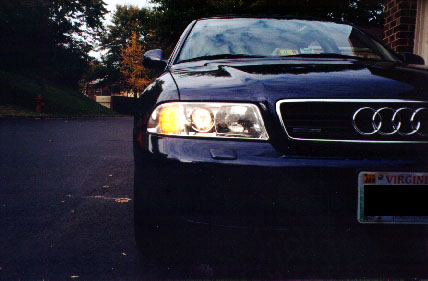
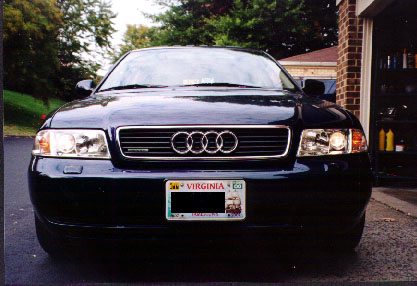
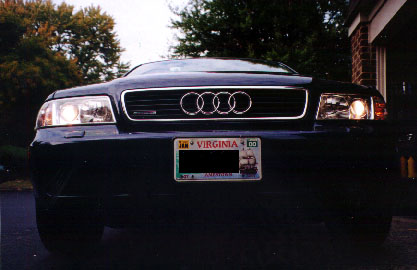
[FONT=arial, geneva]Finally, I have several pictures showing the lights as they are now installed. There's not much I can say here. These pictures pretty much speak for themselves. The first picture shows the passenger side turn signal when it is lit up.
[/FONT]
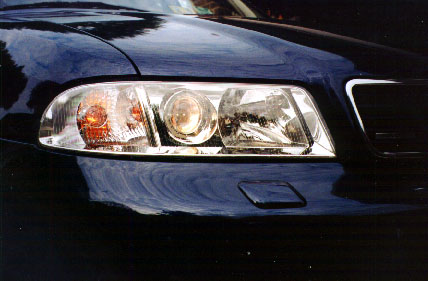
[FONT=arial, geneva]Previous Euro lights had a glass lens in front but these Euro lights have a plastic face to them. [/FONT]
[FONT=arial, geneva]I have looked at 99.5 lights on cars in parking lots and the corner lights are different in a small but perhaps significant way. On the U.S. lights, you can see the orange bulb inside the housing. On these Euro lights, the bulb in mounted inside a cylinder that focuses the light through a forward lens, and also backwards into the light housing. The bulb itself is not seen (from the front or side). When the Euro lights flash, the view from straight on is quite bright. [/FONT]
[FONT=arial, geneva]From a perpendicular side view such as in the picture above, it seems to me that you can't see the turn signals in the housing when they are blinking. But, since the A4 has sidemarkers, I think this isn't much of a problem.
[/FONT]
[FONT=arial, geneva]The new lights came with bulbs for the low and high beams, since these lights are part of the overall assembly. The corner light socket and bulb screw into the new lights just as they did in the old corner lights. Therefore, I did not get new corner bulbs with the new lights. The issue of bulbs is really inconsequential because the new lights use all of the same bulbs as the old lights. So you can use your existing bulbs if for some reason your vendor doesn't provide new bulbs.
[/FONT]
[FONT=arial, geneva]I am very happy with my new lights. I was nervous about making the fender modifications, but now that I've had the lights installed for a while, I am over my anxiety.
[/FONT]
[/FONT]


")
 oh dear! lol. I did it on my Golf so should be ok :thumbsup: