Requirements:
1) 2006 A3 - Possibly work on 2007 as well
2) DSG... sorry MT folks
3) Access to Vag Com
4) Balls...
Parts:
1) Multifunction Wiper Arm - Part # -> 8P0 953 519 A 9B9 - $115
2) Terminal Wire - Part # -> 000-979-009 A - $3-$4
3) Assorted Hex toolset from T20 - T40
4) Various Metric Socket Wrenches
5) 12mm "Internal Wrench" -> used for taking steering wheel off. Hard to find.
6) Small Handtowel
NOTE!!! I am not responsible for anything explalined/outlined here. Please do at your own risk
NOTE!!! Before proceeding to the sections 2 and 3 outline below. Be sure to let your car sit for 30 mins, then dissconnect the battery, wait for 10-15 mins, then proceed with the instructions. Failure to do so will set off airbag codes and may also DEPLOY THE AIRBAG!
Section 1 - Vag Com - 5 minutes
1) Plug and prepare the vag com through your cars diagnostics port
2) Go to section 'Steering Column --> 16' and change your coding to 0012142.
3) Go to section 'Instrument Cluster --> 17' and change your coding to 0000262.
4) Once changes have been made, dissconnect the vag com, take the key out of the ignition and wait 10-15 sec.
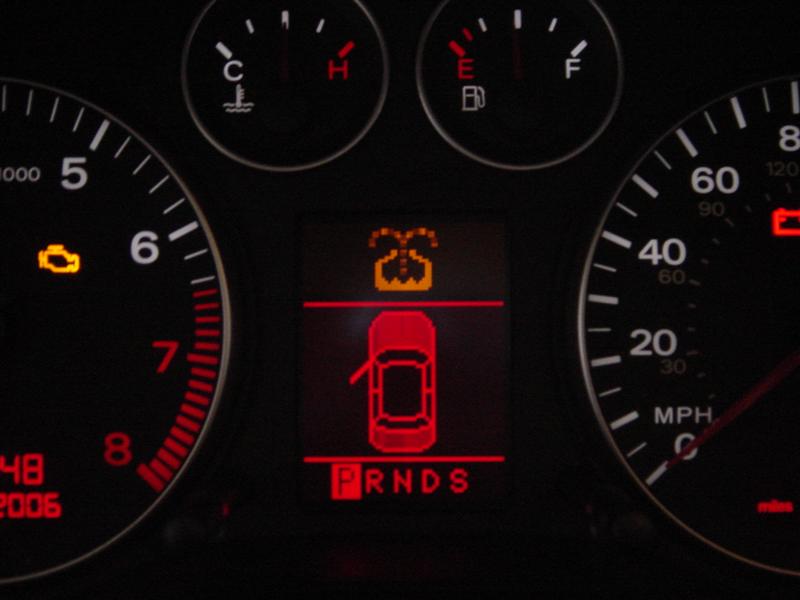
5) Turn the ignition on and wait for the idiot message to go away. You should now see the following screen shown below. NOTE that
performing Section 1 will result in two things. One, the washer fluid empty icon will appear since our A3s do not have the sensor. Two,
you will get the distance to empy readout. Section 2 will outline how to get rid of the washer fluid empty icon.
Section 2 - Installing Terminal Wire - 30 mins
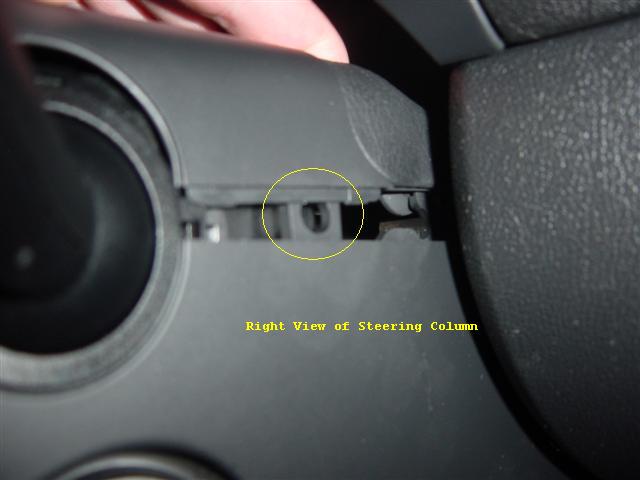
1) Locate the top of the steering wheel column.
2) In the space between the top steering wheel column and instrument display, lift the plastic column piece in an upward direction.
3) The picture below shows where the clips are for the steering wheel column
4) Now remove the plastic trim piece between the instrument cluster and steering wheel column. This piece should be gently pulled toward
the driver seat to remove.
5) Once the upper steering wheel column plastic and the trim piece is removed, two bolts will be revealed that hold that cluster in place.
6) Remove these two bolts
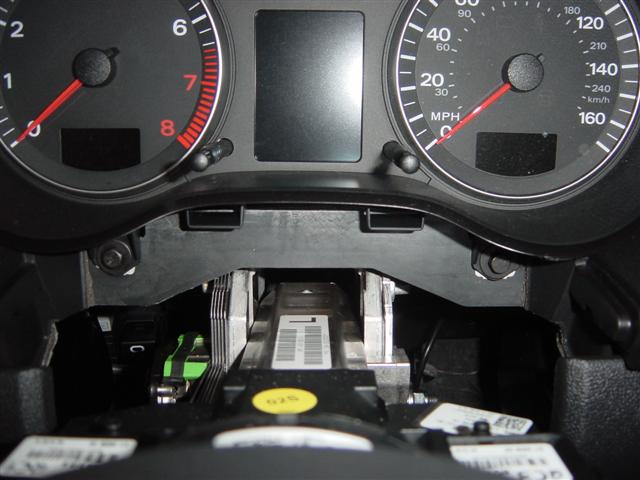
7) Once these bolts have been removed gently slide out the cluster. Note that the cluster only has one terminal connected to the back and
has a lot of slack.
8) Locate the terminal on the cluster and remove.
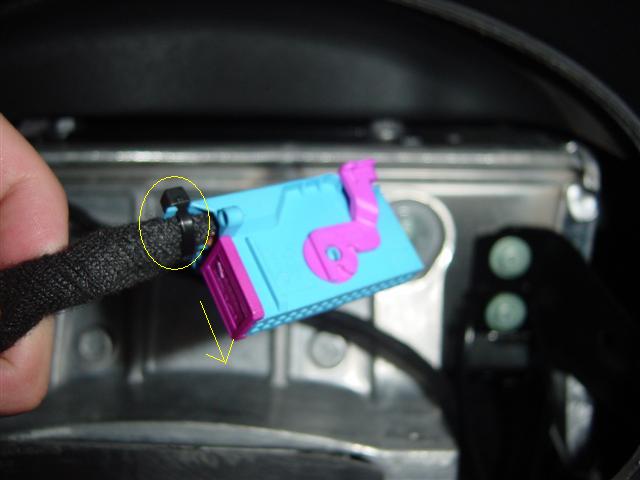
9) Remove the zip tie and slide the pink retention clip in the direction shown below.
10) Once the clip and zip tie are removed, remove the terminal from the casing by simply sliding it out.
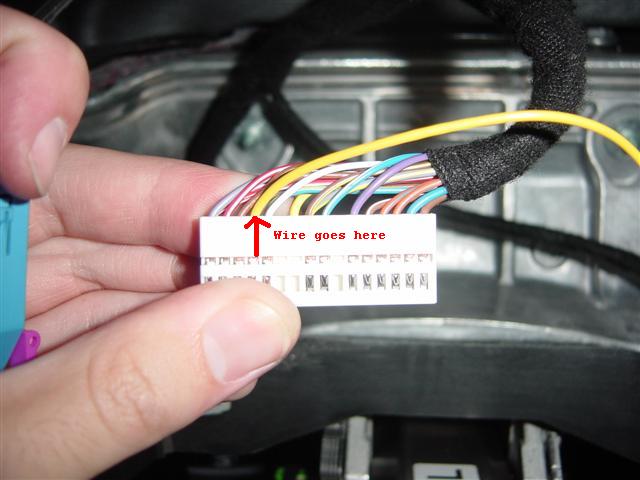
11) Install the terminal wire part # 000-979-009 A into terminal #20 as shown below.
12) Once the wire is installed ground the other end to the chassis as shown below
13) Note that performing Section 1 and Section 2 will give you Distance to empty and radio output as shown below. If you do not feel
comfortable removing the airbag/steeringwheel/and computer modules, please reverse the procedure in section 2 and have fun with your DTE and Radio
features. For those who are more adventerous, proceed to Section 3
Section 3 - Wiper Arm Install - 1 hour
Be sure to let your car sit for 30 mins, then dissconnect the battery, wait for 10-15 mins, then proceed with the instructions. Failure to do so will set off airbag codes and may also DEPLOY THE AIRBAG
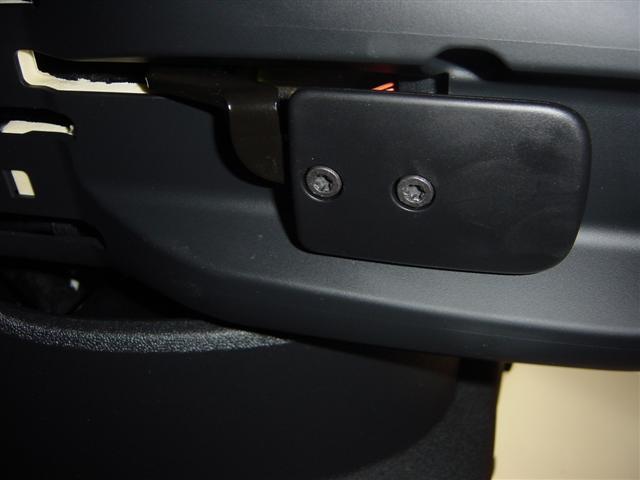
1) Locate the steering Wheel telescope/tilt lever and remove the two hex bolts on the lever (pic shown below).
2) After removing the two hex bolts on the lever, the plastic lever should slide out.
3) Locate another hex bolt in the steering column directly under the lever and remove.
4) Follow the lines of the column enclosure along the back of the steering wheel. You will find two hex bolts holding this enclosure in place (shown below). Roatate the steering wheel to gain access to these bolts and remove.
4) Remove the lower steering column enclosure.
5) Locate two plastic covers on the 3 o'clock and 9 o'clock and remove. One location is shown in the picture above in RED.
6) Loosen the two torx bolts behind these covers. Note that the bolts will not come out but will eventually loosen enough so that the airbag will be removable from the steering wheel.
7) The airbag unit should feel loose. Gently pull the airbag out and rotate it 90 degrees and place it in the steering wheel cavity. Note you may want to place a towel in the cavity so you dont scratch the airbag facia.
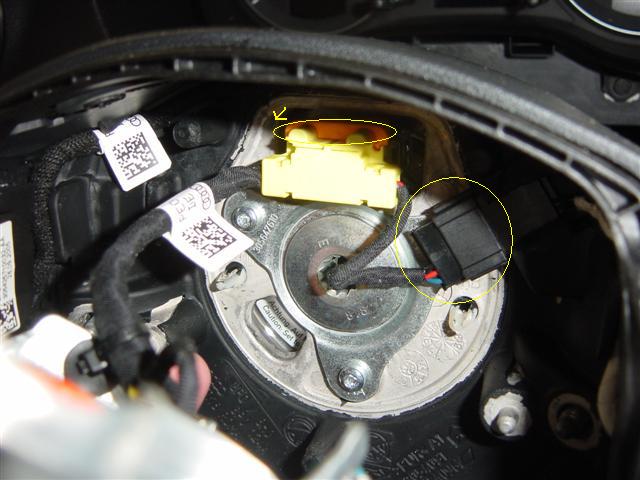
5) Located directly behind the airbag are two connectors. Remove the yellow connector by unlocking it by pulling the orange clip away from the steering column followed by pulling the yellow connector away from the steering column (shown below). Next remove the black connector (shown below)
6) Once the terminals are removed, you should have an emtpy cavity as shown below. Remove the bolt shown in yellow with a 12mm Internal Wrench. Note that you do NOT need to remove the bolts shown in red unless you want to.
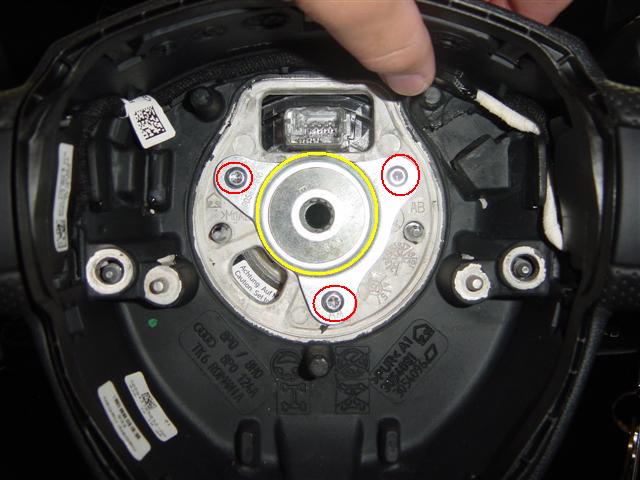
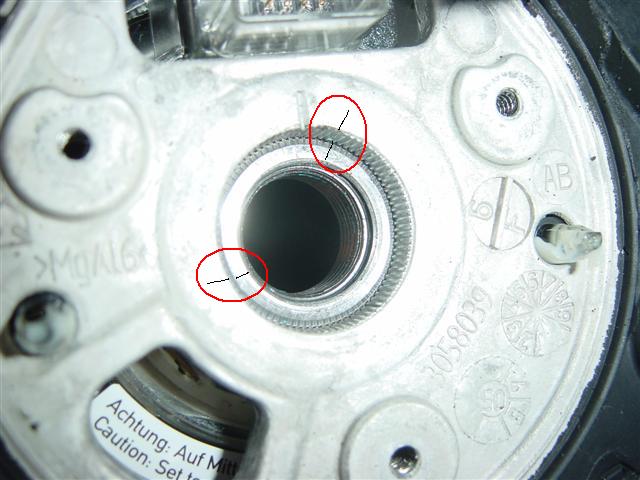
7) Once you completed step 6, you will see the following shown below. Be sure to mark positions of your steering wheel as shown below circled in red otherwise your steering wheel will become forever offcentered.
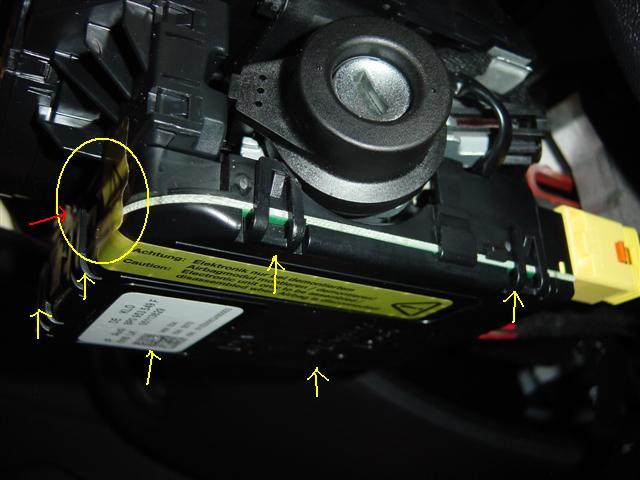
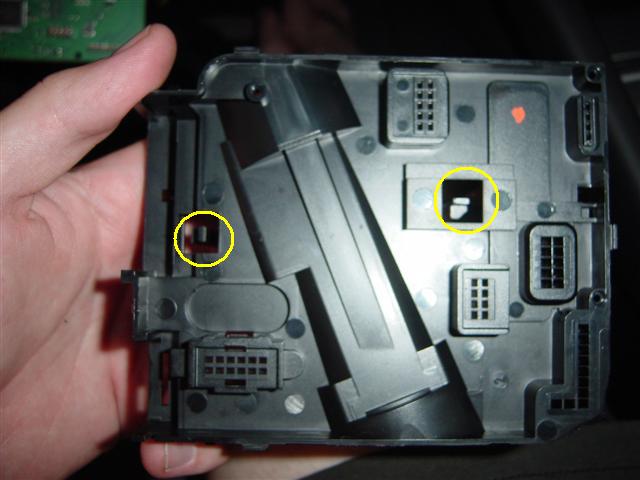
8) Below is a view of the column without the steering wheel. The next steps will show how to remove the items circled in yellow.
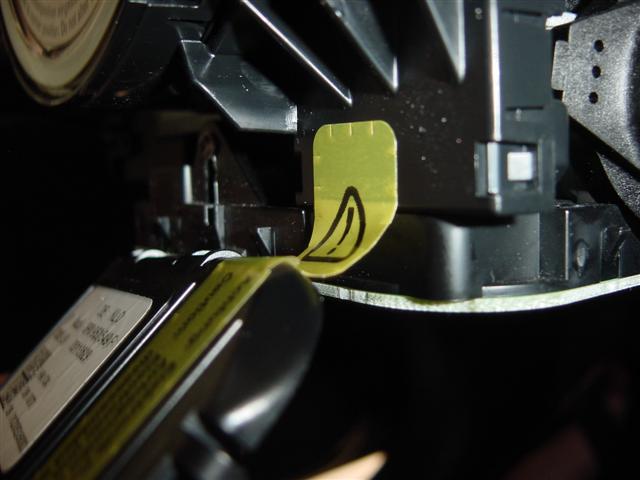
9) Remove the steering wheel control module plastic backing plate by removing the bolt shown in red and the clips shown pointed by yellow arrows below. NOTE to be careful with the "I know you F*cked with it tape. If your good, you can tilt the backing plate without destroying the tape... like me
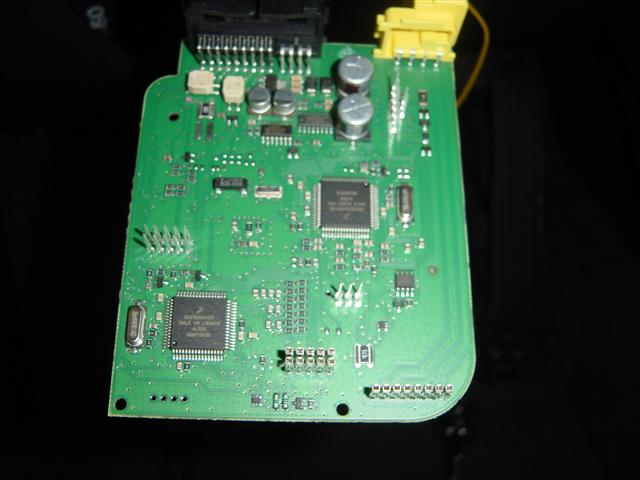
10) Now, once the backing plate is removed, grap the sides of the PC board that the plate concealed and pull directy down slowly and VERY CAREFULLY. There are pins (shown below) that can bend and break if you try to work it side to side. This is the step that you should take the most time on.
11) Once the board is out (you can leave it hanging as I did. Remove the the top portion of the steering wheel control module housing. The below images shows where the two clips are located.
12) Next we need to remove the clock spring. Shown below are 3 tabs. Pull up on them and remove the clock spring.
13) Remove this small piece that lies directly below the steering shaft and directly in front of the washer stalk.
14) Remove the washer stalk clip shown below and slide the washer stalk out.
15) Install the new stalk and put back everything together by reversing all steps.
THATS IT! The hardest part was figuring how everything comes out by seeing it the first time. But with pictures and intructions, this is an easy install. The hardest part for my was trying to remove the steering wheel control module board. Other than that this is an easy mod