Clark@Polishedbliss
Professional Detailer
- Joined
- Feb 4, 2007
- Messages
- 226
- Reaction score
- 0
- Points
- 16
- Location
- Aberdeen
- Website
- www.polishedbliss.co.uk
Well this was a testing detail to say the least, and i'll say now, the pictures do not do this car justice - both with the before's and afters!
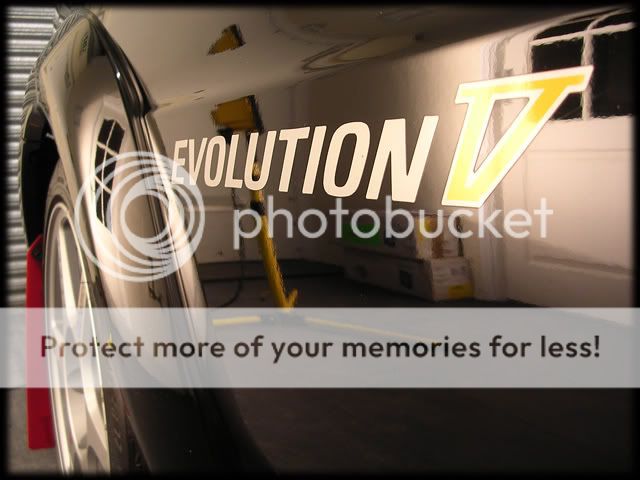
The Car - A Mitsubishi Evo V:


The owner had come in past last month for us to view the car with a view to detailing it so i knew what was in store for me when it arrived this week, i didnt remember it being quite so bad though, more on this in a bit") The Customer had just recently bought the car, and the previous owner had let the car sit for a long time under trees on his driveway as he couldnt afford to get the car through its various tests to make it road legal in the UK - this resulted in the paint looking tired and felt very rough, with signs of oxidization on the roof and bonnet. The paint was also stained in places with what looked like streaky shampoo but it refused to
The Customer had just recently bought the car, and the previous owner had let the car sit for a long time under trees on his driveway as he couldnt afford to get the car through its various tests to make it road legal in the UK - this resulted in the paint looking tired and felt very rough, with signs of oxidization on the roof and bonnet. The paint was also stained in places with what looked like streaky shampoo but it refused to
shift during the wash/clay stage.
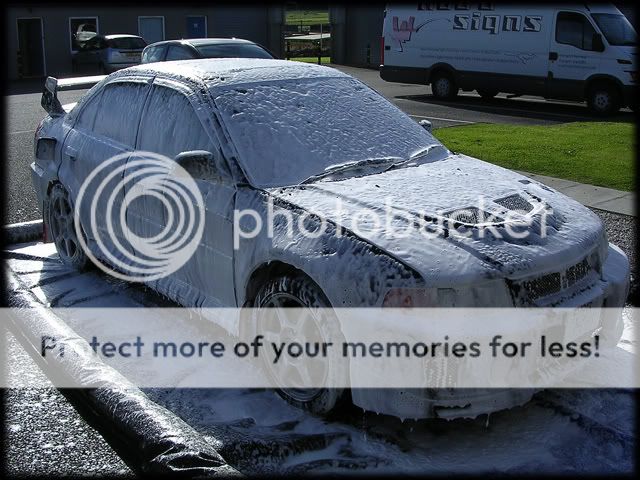
Firstly the car was foamed with a mixture of P21S Autowash and Megs Safe Degreaser in the AB Lance:

The arches/shuts/petrol cap etc were all de-greased and the car was then foamed again, rinsed at high pressure then washed with the 2 bucket method and Megs Shampoo Plus. The lower halfs were then soaked with Autosmarts Tar & Glue remover and wiped off with a Mf. The entire car was clayed with Megs Aggressive Detailing Clay, this took over an hour and a half as the paintwork was incredibly rough - as was the glass.
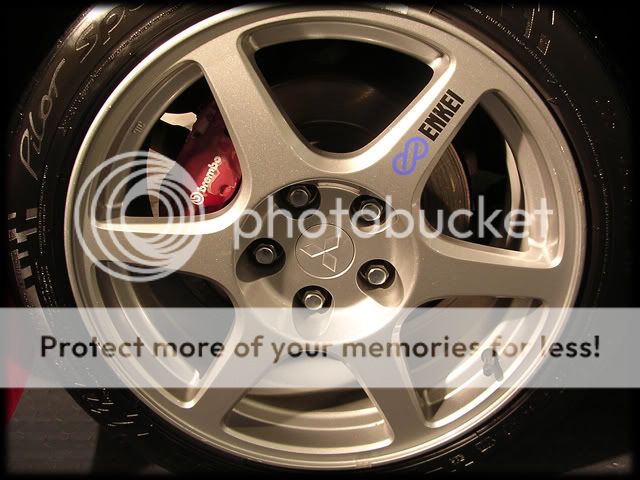
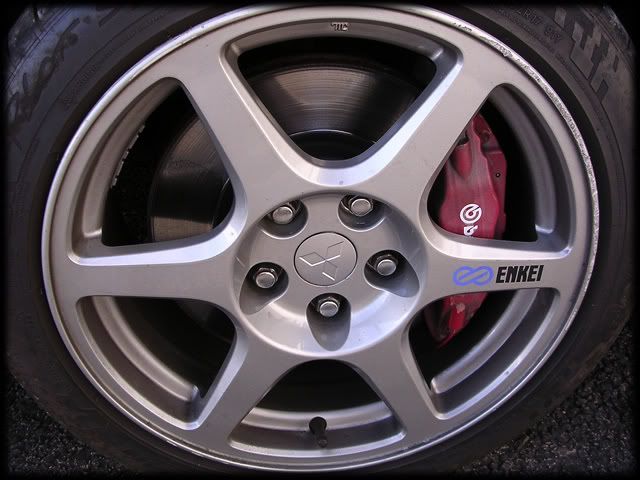
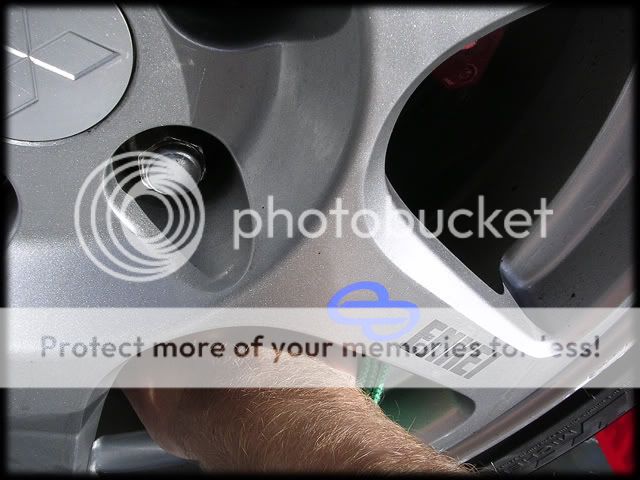
The wheels were cleaned with Menzerna's 7.5 Tyre and Wheel Gel:

I then sprayed the wheels with the Tar and Glue remover and made sure i got every last bit of tar removed from the inner rims also:

I then foamed the car with hyper wash, rinsed off and then dried it with the leaf blower.
The wash/clay process took nearly 3 1/2 hours in total.
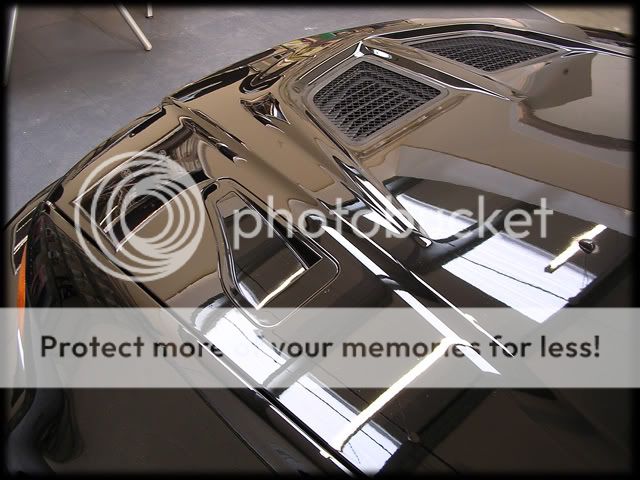
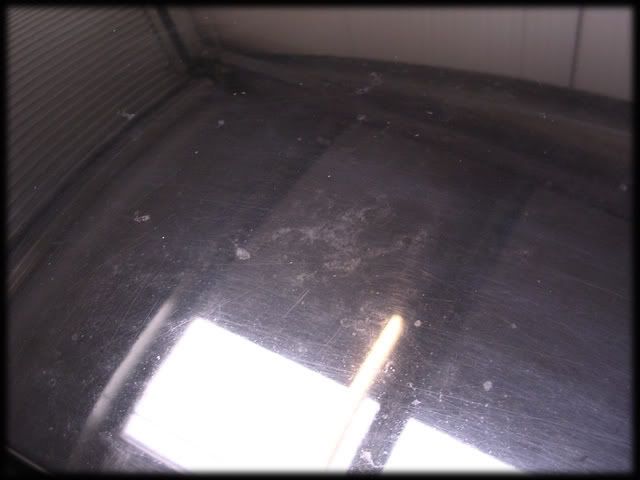
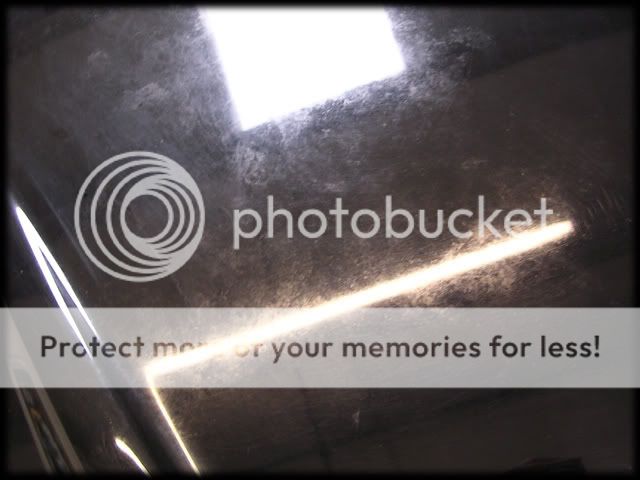
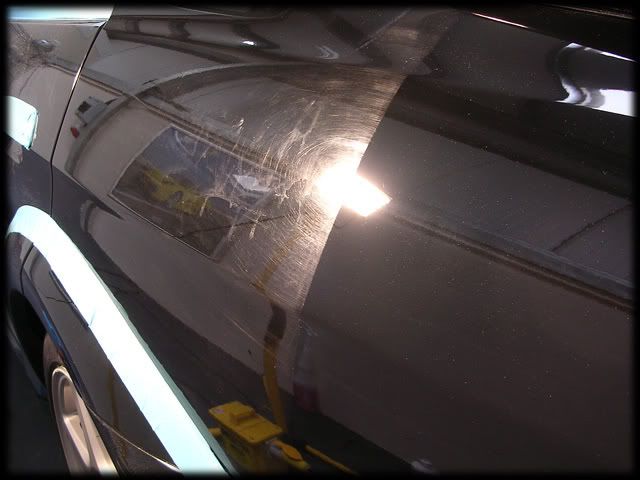
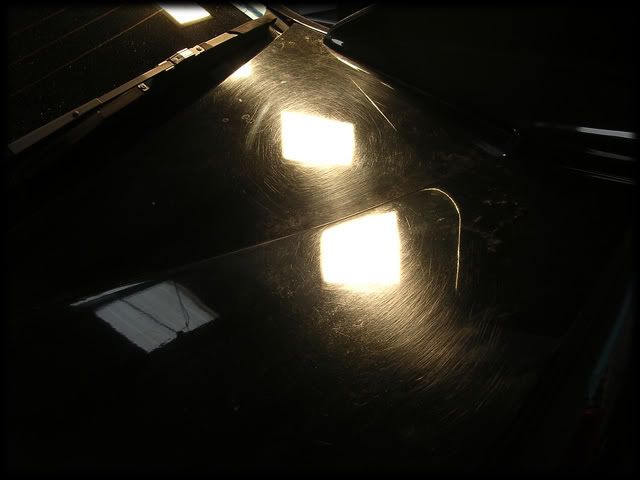
Here you can see the oxidization on the roof now that it was clean:

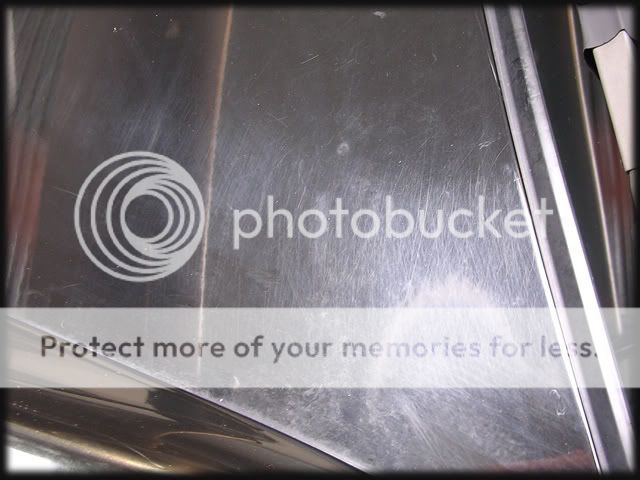
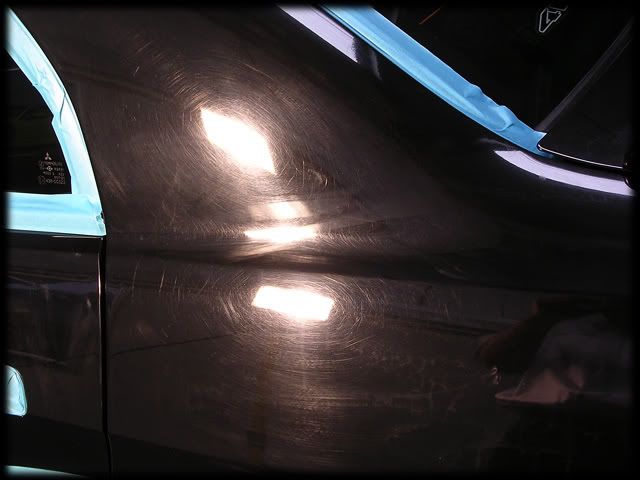
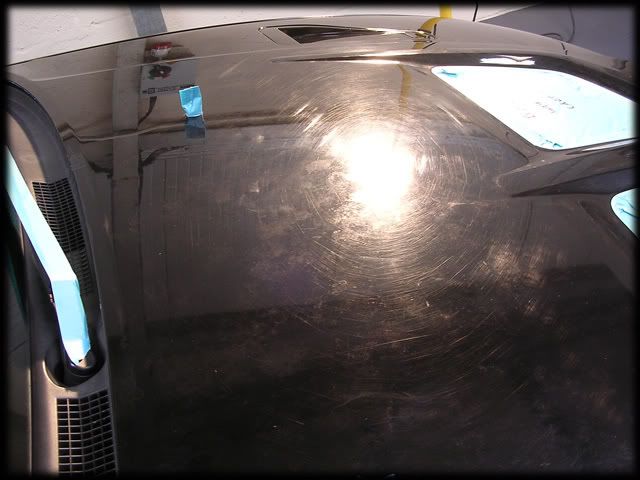
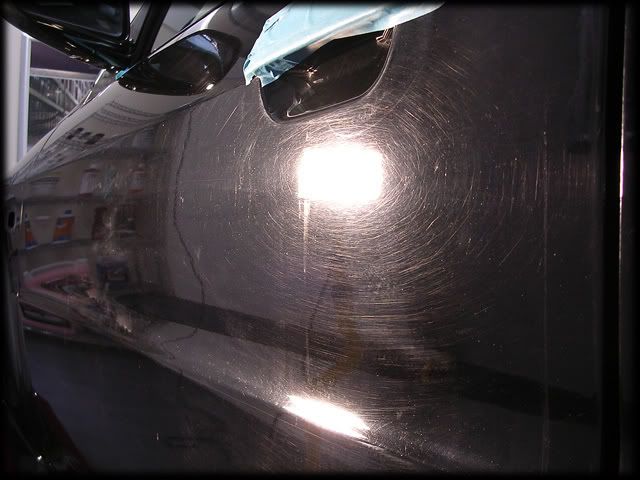
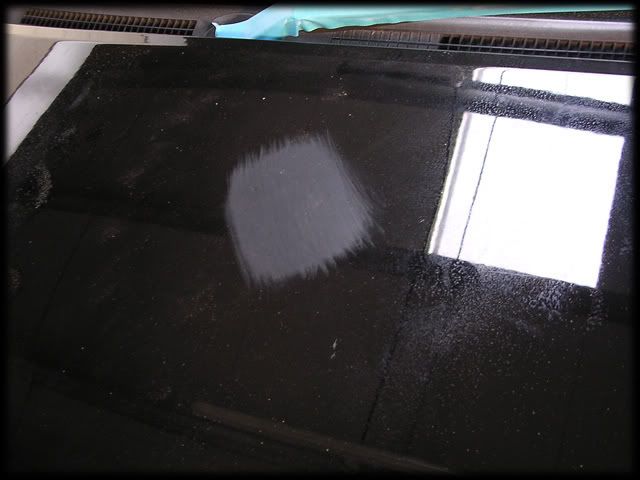
Once inside this was when it hit me just how big a job it was going to be, no need for halogen shots to show the defects.....


On closer inspection, it wasnt oxidization at all, but actually a mass of bird crap etchings! :doublesho
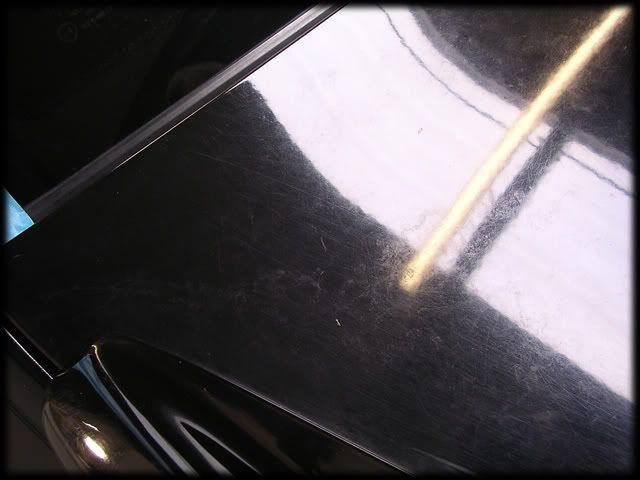
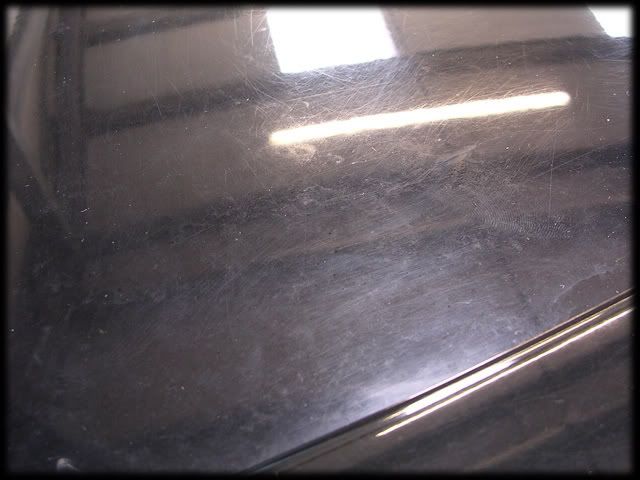
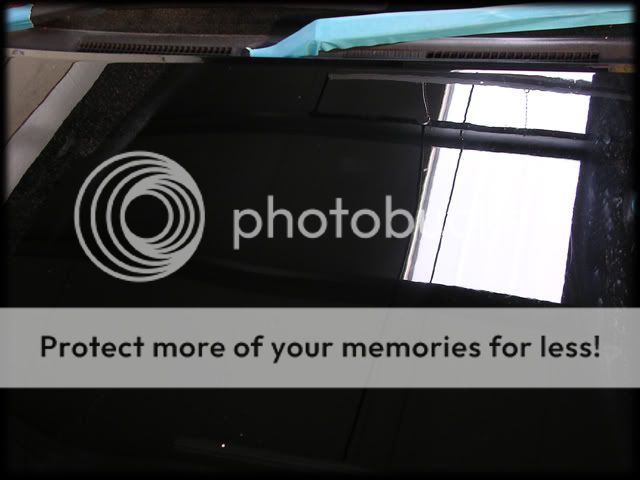
Here's a few halogen shots anyways!


Luckily, the car showed a healthy 130 microns of paint on average and it was incredibly consistant. Only once did i get a reading below 100, the rest were all in between 115-135, including the plastics
Weapon of choice was Menz IP3.02 and a Megs Polishing pad - and this was where the trouble began, on my first set of passes the polish dried up instantly and welded itself to the paint, but not in the usual way to how it reacts when it "plays up". I then tried 106FA - same result. 106FF - same result. Chemical Guys Diamond Cut - same result. Even though i've stopped using them, i tried the 3M polishes out of curiosity but even they reacted funny. The only polish that half worked was Menz IP PO9L but even this was causing the pad to "stick" and it was generating alot of heat quickly and dusting like mad - very strange as this ALWAYS works and 99% of the time 3.02 works in the surroundings of our premises where its generally quite warm.
Already pi$$ed off and time ticking by, i decided to continue with PO9L at low speeds (1200rpm's) moving the rotary quite quickly to avoid building up too much heat and stopping as soon as i could see the paint had corrected, obviously this was leaving feint holograms so i was going to have to go back over the car with the PC afterwards
I eventually de-swirled half the car and the bonnet before i'd decided enough was enough, i was going to have to switch to the PC as the rotary just didnt want to play ball at all - this would happen on the car with the worst defects i'd seen in a long time! its just aswell that the paint wasnt too hard.
I changed to the PC and used a Megs Burgundy Cutting Pad (4" Orange LC pad for the tighter areas) with IP 3.02 @ Speed 6, lots of pressure and multiple hits. This was when Rich and Myself came to the conclusion that it probably wasnt the polishes playing up but infact something weird going on with the paint because even by PC the polishes still didnt work 100% - dusting like crazy and proving to be quite difficult to buff off, i had to use a healthy amount of Menzerna's Top Inspection to remove them.
I had no other choice though so i just gritted my teeth and got on with it, as i de-swirled Rich followed up with his PC,a Megs Finishing Pad and a combination of PO85RD & Blackfire Gloss Enhancing Polish (Rich finds this helps darken the paint ever so slightly) here's a couple of 50/50's during the polishing stage:


Whilst Polishing the bonnet with the Rotary, 99% of the bird etching was removed but there was still one stubborn stain that was annoying me, so this was sanded with Megs 3000 unigrit...

...and then polished out with the PC and a 4" Cutting pad:

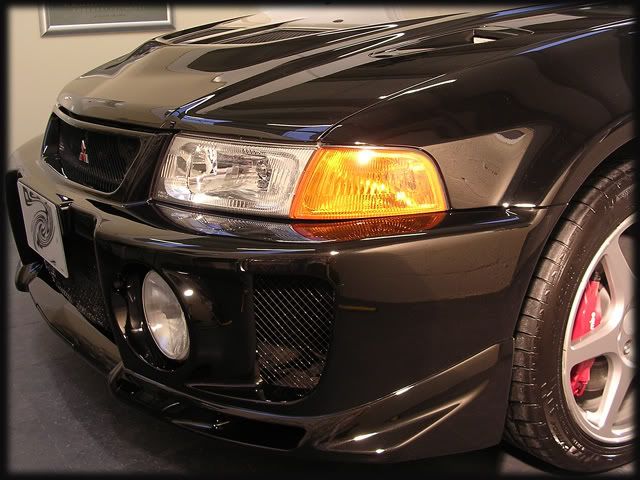
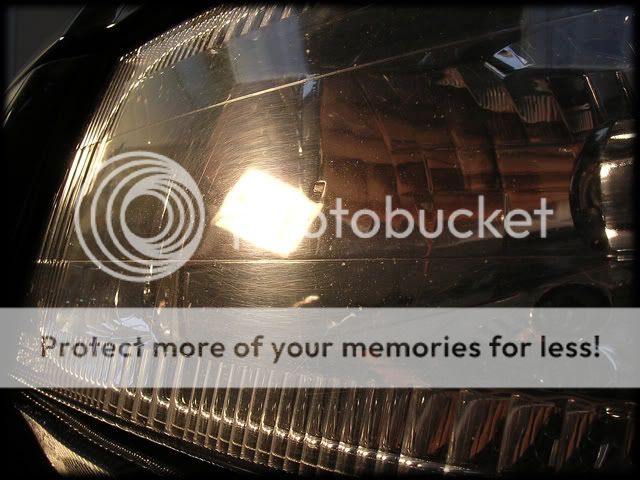
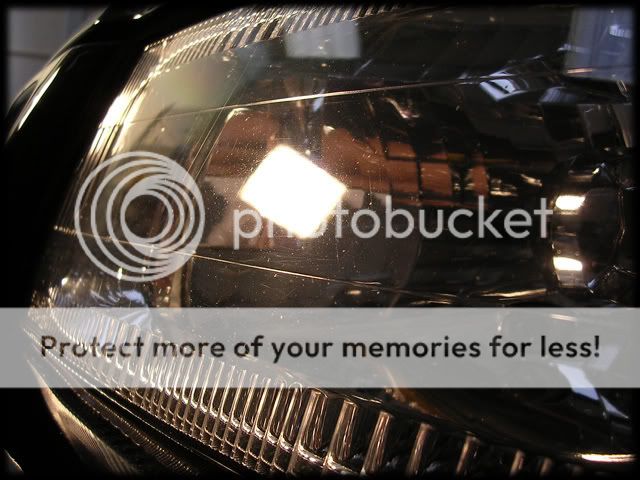
Luckily the owner had the front bumper re-sprayed just recently so it hadnt much time to gather too many swirls, so this was de-swirled fairly easily, as were the headlights:
before:

after:

Onto the rear of the car, the centre section of the spoiler was removed so i could gain easier access to the bootlid...

...which was just as fecked as the rest of the car...

I'd anticipated more wet sanding was going to be needed, but after 2 or 3 hits with the 4" pad this was the result:

Smooth as glass now :thumb:

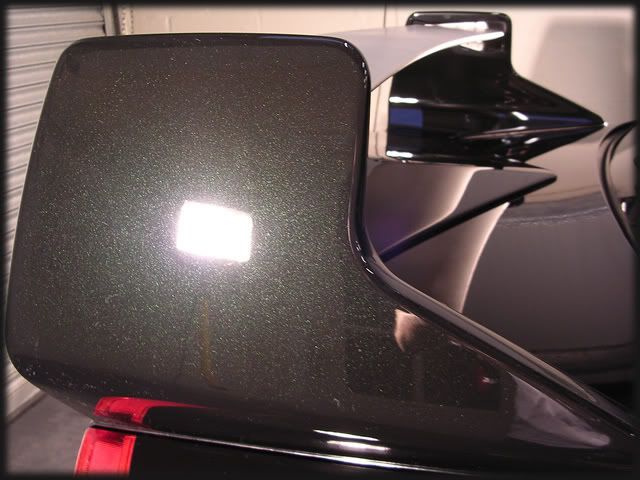
Before the spoiler section was re-fitted, i cleaned it up with a 4" cutting pad and Blackfire Fine Cut Metal Polish:

I've never been so glad to have been finished the machining stage of a detail, this car seemed to take forever and i never realised just how much i hate using the PC!!
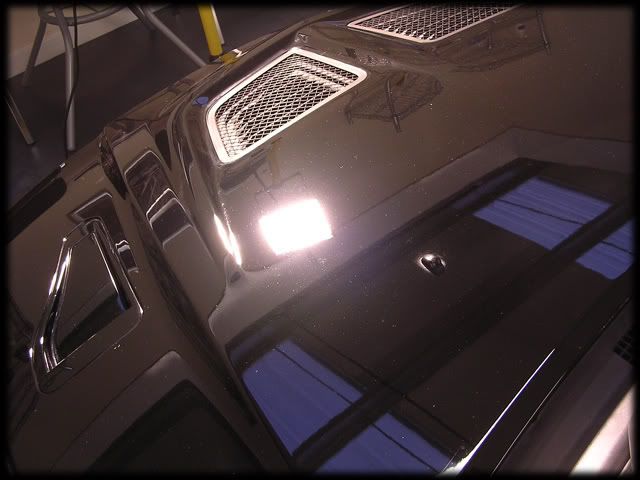
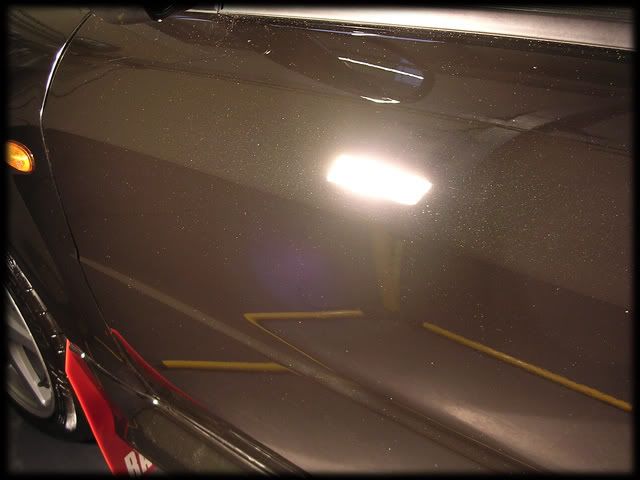
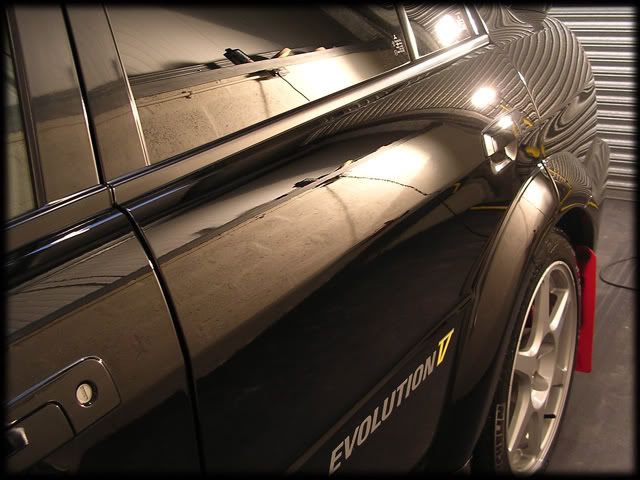
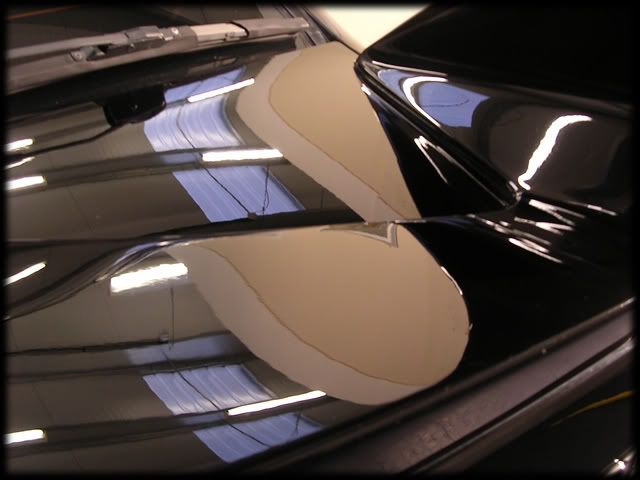
Never mind, the hard bit was done, so after all the dusting had been done, Blackfire's Wet Diamond Paint Sealant was applied, followed by its Ivory Carnauba Wax. The wheels were sealed with PB Wheel Sealant, tyres dressed with Blackfire Long Lasting Tyre Gel, Arches dressed with Megs All Season Dressing and the exhasut tip was done with Blackfire's fine cut metal polish.
The interior was also done but it wasnt bad in the first place and to be honest i wasnt in the mood to take any!
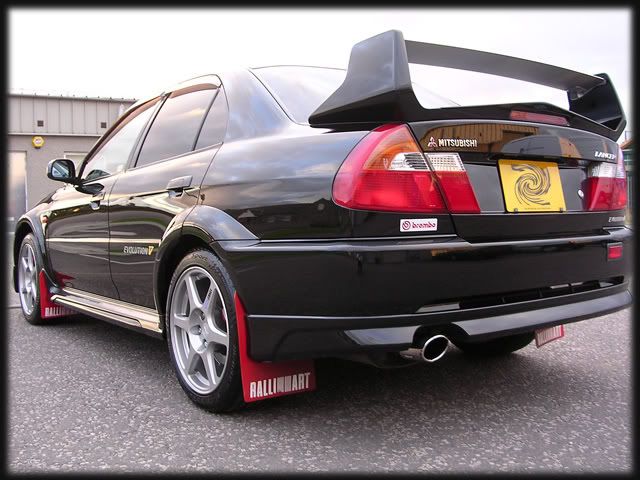
So the car was rolled outside for the after pics before it got dark.....
The Car - A Mitsubishi Evo V:

The owner had come in past last month for us to view the car with a view to detailing it so i knew what was in store for me when it arrived this week, i didnt remember it being quite so bad though, more on this in a bit
The Customer had just recently bought the car, and the previous owner had let the car sit for a long time under trees on his driveway as he couldnt afford to get the car through its various tests to make it road legal in the UK - this resulted in the paint looking tired and felt very rough, with signs of oxidization on the roof and bonnet. The paint was also stained in places with what looked like streaky shampoo but it refused to shift during the wash/clay stage.
Firstly the car was foamed with a mixture of P21S Autowash and Megs Safe Degreaser in the AB Lance:
The arches/shuts/petrol cap etc were all de-greased and the car was then foamed again, rinsed at high pressure then washed with the 2 bucket method and Megs Shampoo Plus. The lower halfs were then soaked with Autosmarts Tar & Glue remover and wiped off with a Mf. The entire car was clayed with Megs Aggressive Detailing Clay, this took over an hour and a half as the paintwork was incredibly rough - as was the glass.
The wheels were cleaned with Menzerna's 7.5 Tyre and Wheel Gel:
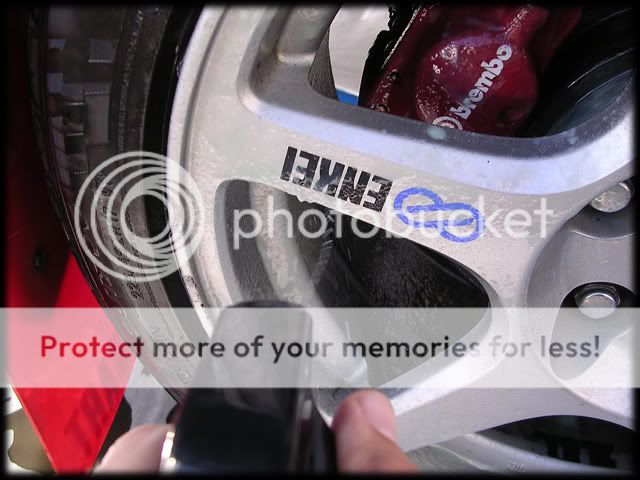
I then sprayed the wheels with the Tar and Glue remover and made sure i got every last bit of tar removed from the inner rims also:
I then foamed the car with hyper wash, rinsed off and then dried it with the leaf blower.
The wash/clay process took nearly 3 1/2 hours in total.
Here you can see the oxidization on the roof now that it was clean:

Once inside this was when it hit me just how big a job it was going to be, no need for halogen shots to show the defects.....
On closer inspection, it wasnt oxidization at all, but actually a mass of bird crap etchings! :doublesho
Here's a few halogen shots anyways!
Luckily, the car showed a healthy 130 microns of paint on average and it was incredibly consistant. Only once did i get a reading below 100, the rest were all in between 115-135, including the plastics
Weapon of choice was Menz IP3.02 and a Megs Polishing pad - and this was where the trouble began, on my first set of passes the polish dried up instantly and welded itself to the paint, but not in the usual way to how it reacts when it "plays up". I then tried 106FA - same result. 106FF - same result. Chemical Guys Diamond Cut - same result. Even though i've stopped using them, i tried the 3M polishes out of curiosity but even they reacted funny. The only polish that half worked was Menz IP PO9L but even this was causing the pad to "stick" and it was generating alot of heat quickly and dusting like mad - very strange as this ALWAYS works and 99% of the time 3.02 works in the surroundings of our premises where its generally quite warm.
Already pi$$ed off and time ticking by, i decided to continue with PO9L at low speeds (1200rpm's) moving the rotary quite quickly to avoid building up too much heat and stopping as soon as i could see the paint had corrected, obviously this was leaving feint holograms so i was going to have to go back over the car with the PC afterwards
I eventually de-swirled half the car and the bonnet before i'd decided enough was enough, i was going to have to switch to the PC as the rotary just didnt want to play ball at all - this would happen on the car with the worst defects i'd seen in a long time!
its just aswell that the paint wasnt too hard.I changed to the PC and used a Megs Burgundy Cutting Pad (4" Orange LC pad for the tighter areas) with IP 3.02 @ Speed 6, lots of pressure and multiple hits. This was when Rich and Myself came to the conclusion that it probably wasnt the polishes playing up but infact something weird going on with the paint because even by PC the polishes still didnt work 100% - dusting like crazy and proving to be quite difficult to buff off, i had to use a healthy amount of Menzerna's Top Inspection to remove them.
I had no other choice though so i just gritted my teeth and got on with it, as i de-swirled Rich followed up with his PC,a Megs Finishing Pad and a combination of PO85RD & Blackfire Gloss Enhancing Polish (Rich finds this helps darken the paint ever so slightly) here's a couple of 50/50's during the polishing stage:

Whilst Polishing the bonnet with the Rotary, 99% of the bird etching was removed but there was still one stubborn stain that was annoying me, so this was sanded with Megs 3000 unigrit...
...and then polished out with the PC and a 4" Cutting pad:
Luckily the owner had the front bumper re-sprayed just recently so it hadnt much time to gather too many swirls, so this was de-swirled fairly easily, as were the headlights:
before:
after:
Onto the rear of the car, the centre section of the spoiler was removed so i could gain easier access to the bootlid...
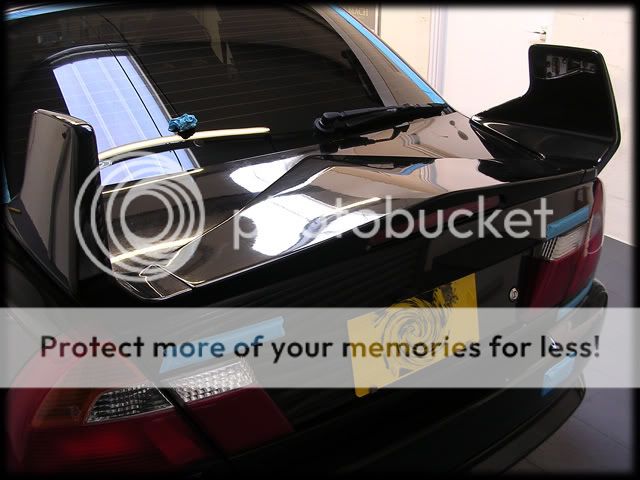
...which was just as fecked as the rest of the car...
I'd anticipated more wet sanding was going to be needed, but after 2 or 3 hits with the 4" pad this was the result:

Smooth as glass now :thumb:
Before the spoiler section was re-fitted, i cleaned it up with a 4" cutting pad and Blackfire Fine Cut Metal Polish:
I've never been so glad to have been finished the machining stage of a detail, this car seemed to take forever and i never realised just how much i hate using the PC!!
Never mind, the hard bit was done, so after all the dusting had been done, Blackfire's Wet Diamond Paint Sealant was applied, followed by its Ivory Carnauba Wax. The wheels were sealed with PB Wheel Sealant, tyres dressed with Blackfire Long Lasting Tyre Gel, Arches dressed with Megs All Season Dressing and the exhasut tip was done with Blackfire's fine cut metal polish.
The interior was also done but it wasnt bad in the first place and to be honest i wasnt in the mood to take any!
So the car was rolled outside for the after pics before it got dark.....