

jr001
Registered User
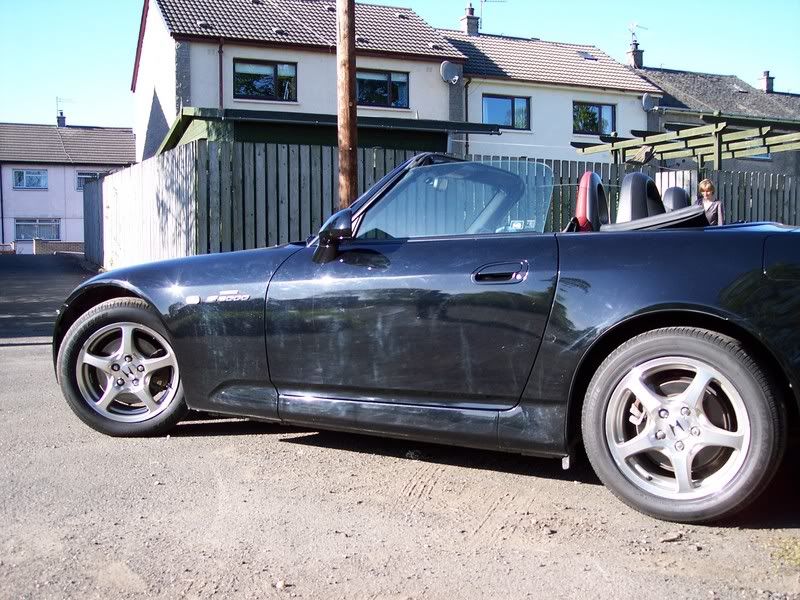
An old acquaintance came to visit a couple of months ago and I couldn't help notice that this beautiful car needed to be restored back to a worthy condition. The owner knew it had to be better for the next track day at Knockhill.
I wanted this one for a long time, and as it turned out I was not the only one chuffed with the outcome.
Here's some befores to give you an idea of how the car had come to be:
[URL="http://i134.photobucket.com/albums/q116/jr001_2007/JULY%20DETAILS/100_1499.jpg"] [/URL]
[URL="http://i134.photobucket.com/albums/q116/jr001_2007/JULY%20DETAILS/100_1778.jpg"] [/URL]
[URL="http://i134.photobucket.com/albums/q116/jr001_2007/JULY%20DETAILS/100_1808.jpg"] [/URL]
Wash and Clay
Foamed with Megs APC through superspray.
Megs APC foamed through Superspray
Rinsed with hose
Autobrite tar and glue remover applied to lower panels.
APC'd again, followed by TBM-wash with Megs Lambswool and MF mits, CG Extreme Body Wash and Wax.
Rinsed with hose.
Claying carried out using Sonus green with Megs Last Touch as lube 1:1.
The car had been clayed a few months ago and was relatively free of majorly-bonded contaminants.
Machine Polishing
Sonus White Polishing pad used in conjunction with Menzerna 106 FF polish
Spread for 2 passes at speed 2. Polish broken down with 4 passes at speed 4-5, followed by 2 passes at speed 3. Residue wiped with Poorboys work towels.
The doors, all of the rear end, and the bonnet all required two hits.
All PCing carried out with only touch pressure on each panel.
Most panels required two hits.
Cleansing and Protection
Body was HD Cleansed followed by Carbon wax, Field Glaze.
Wheels cleansed with JEFFS Acrylic Prime and topped with Acrylic Jett (3 coats).
All windows, inside and out, were cleansed and protected with JEFFS ACrylic Prime.
Arches and tyres dressed with Poorboys Bold and Bright.
Tailpipes given a 10 minute hand polish with Megs NXT Polysh.
Door shuts and jambs cleansed with Megs APC 4:1, followed by Jeffs Prime again for more cleansing and protection.
I started with the rear O/S quarter and achieved the following.
BEFORE
[URL="http://i134.photobucket.com/albums/q116/jr001_2007/JULY%20DETAILS/100_1776.jpg"] [/URL]
AFTER
[URL="http://i134.photobucket.com/albums/q116/jr001_2007/JULY%20DETAILS/100_1790.jpg"] [/URL]
DRIVER'S DOOR BEFORE
[URL="http://i134.photobucket.com/albums/q116/jr001_2007/JULY%20DETAILS/100_1778.jpg"][/URL]
DRIVER'S DOOR AFTER
[URL="http://i134.photobucket.com/albums/q116/jr001_2007/JULY%20DETAILS/100_1783.jpg"] [/URL]
The difference in clarity between the corrected driver's door and the original O/S front quarter is visible here:
[URL="http://i134.photobucket.com/albums/q116/jr001_2007/JULY%20DETAILS/100_1788.jpg"] [/URL]
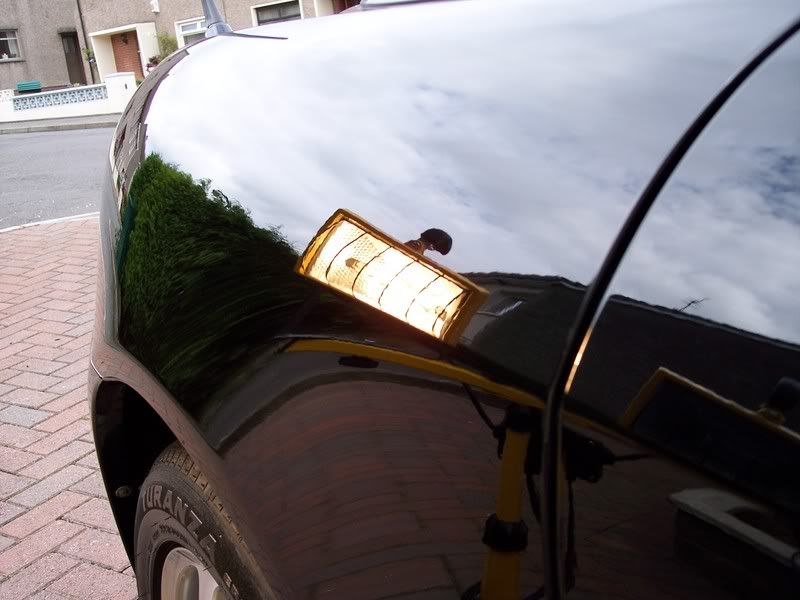
Upon correction of the O/S front quarter, the driver's side now loked like this:
[URL="http://i134.photobucket.com/albums/q116/jr001_2007/JULY%20DETAILS/100_1825.jpg"] [/URL]
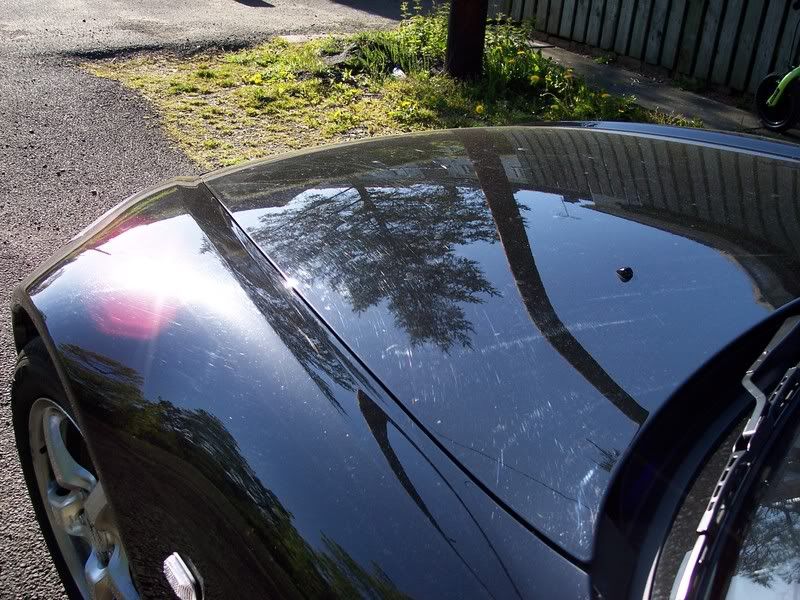
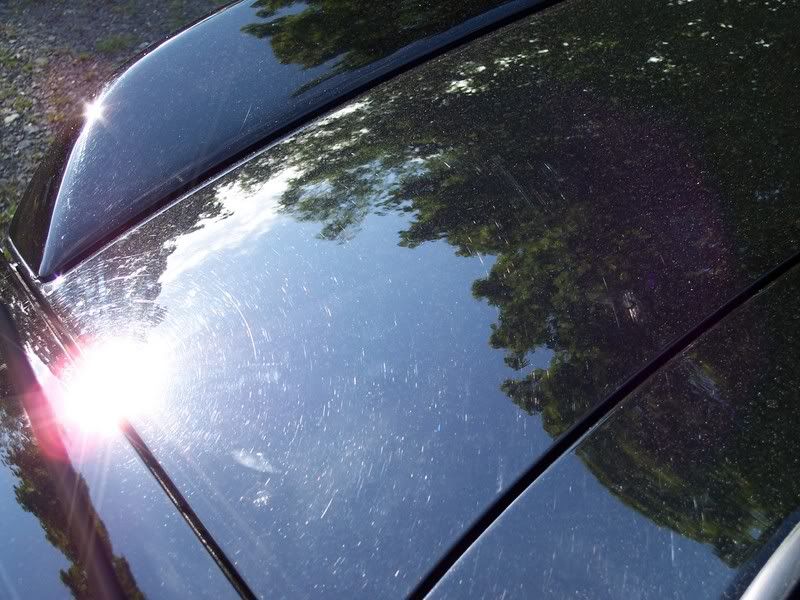
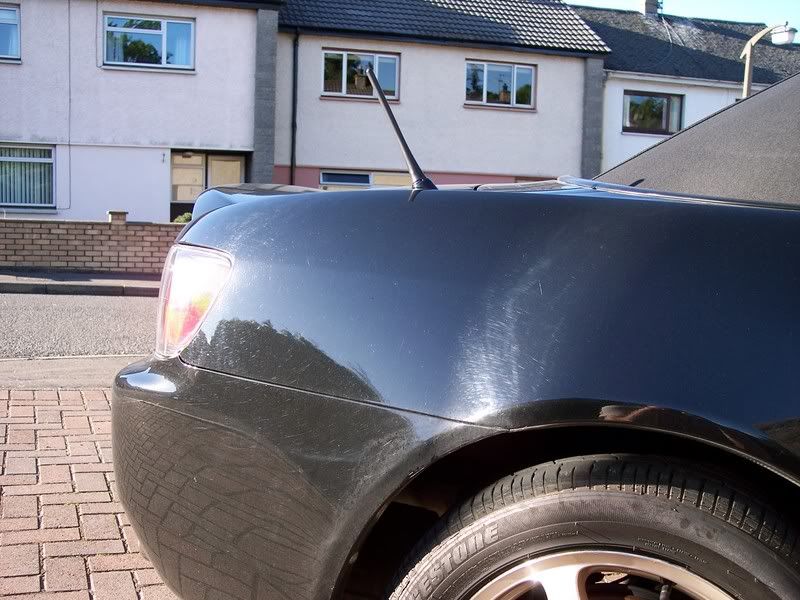
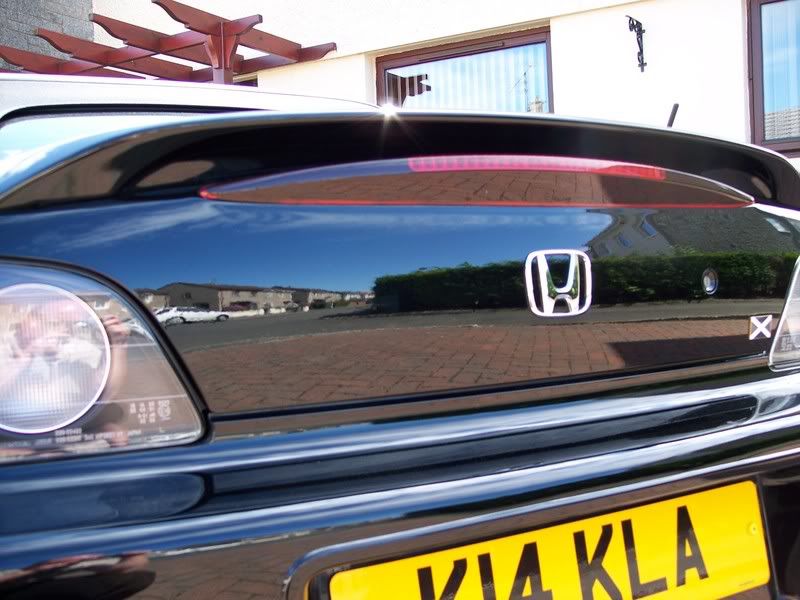
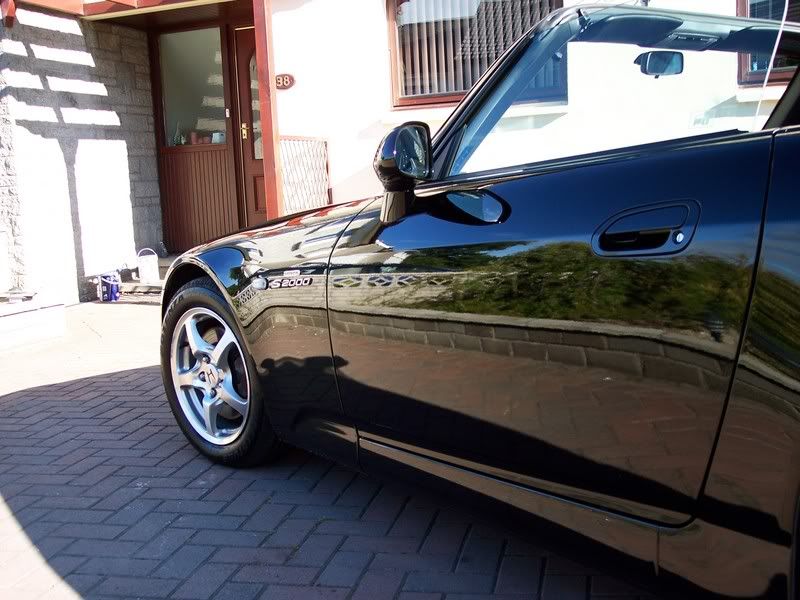
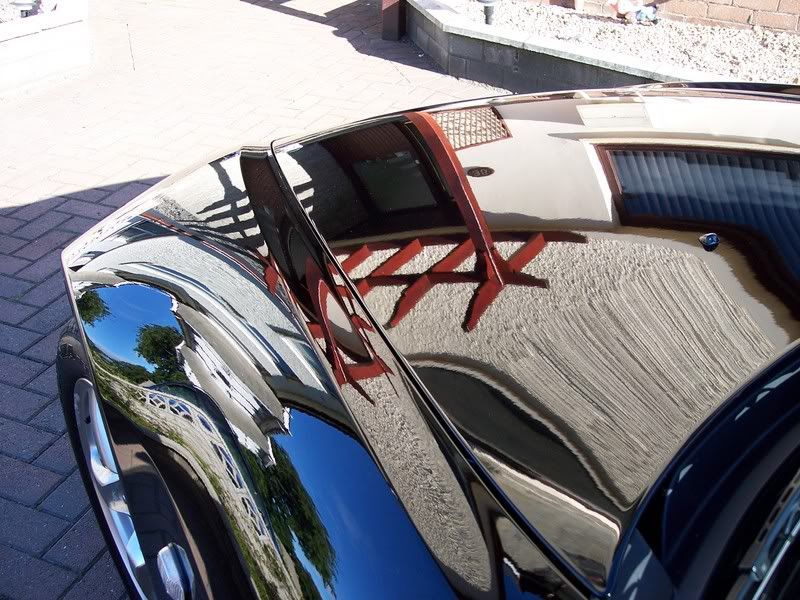
BONNET BEFORE
[URL="http://i134.photobucket.com/albums/q116/jr001_2007/JULY%20DETAILS/100_1499.jpg"][/URL]
BONNET AFTER
[URL="http://i134.photobucket.com/albums/q116/jr001_2007/JULY%20DETAILS/100_1819.jpg"] [/URL]
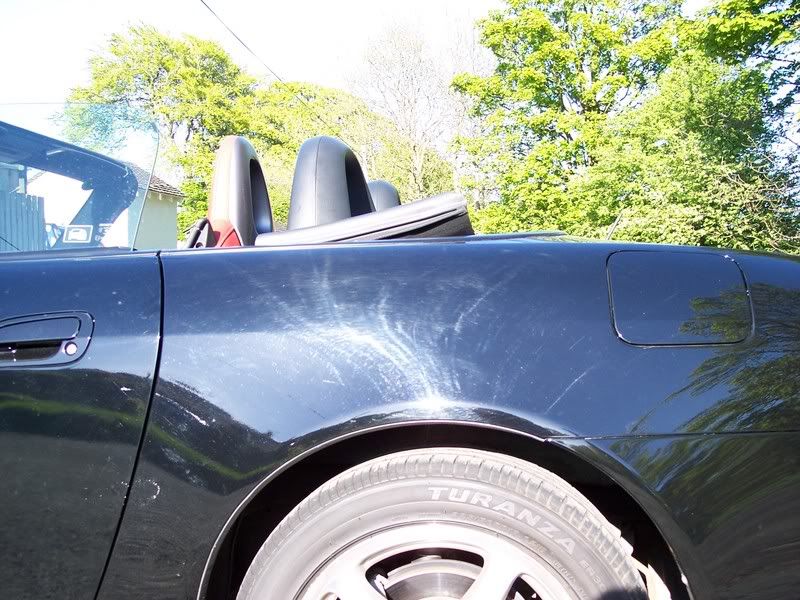
N/S FRONT QUARTER BEFORE
[URL="http://i134.photobucket.com/albums/q116/jr001_2007/JULY%20DETAILS/100_1502.jpg"] [/URL]
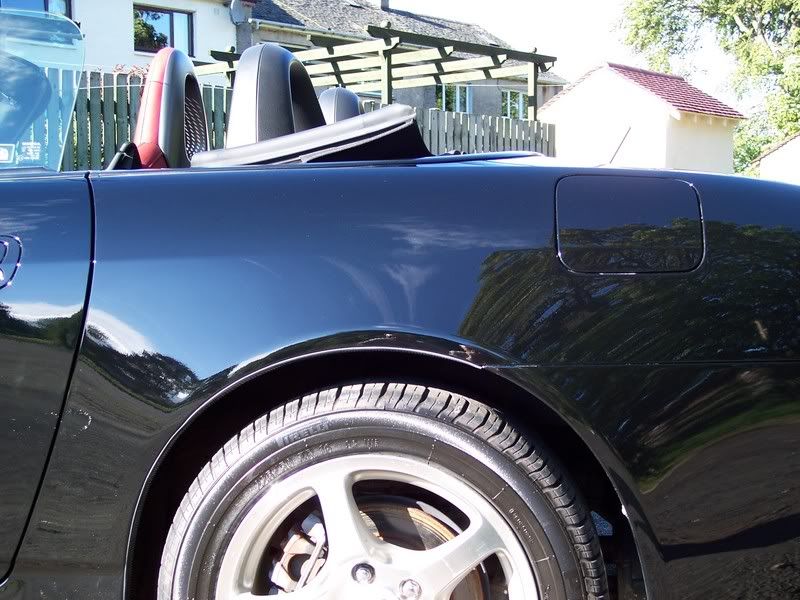
N/S FRONT QUARTER AFTER
[URL="http://i134.photobucket.com/albums/q116/jr001_2007/JULY%20DETAILS/100_1823.jpg"] [/URL]
N/S REAR QUARTER BEFORE
[URL="http://i134.photobucket.com/albums/q116/jr001_2007/JULY%20DETAILS/100_1500.jpg"] [/URL]
N/S REAR QUARTER AFTER
[URL="http://i134.photobucket.com/albums/q116/jr001_2007/JULY%20DETAILS/100_1822.jpg"] [/URL]
REAR END BEFORE
[URL="http://i134.photobucket.com/albums/q116/jr001_2007/JULY%20DETAILS/100_1810.jpg"] [/URL]
REAR END AFTER
[URL="http://i134.photobucket.com/albums/q116/jr001_2007/JULY%20DETAILS/100_1818.jpg"] [/URL]
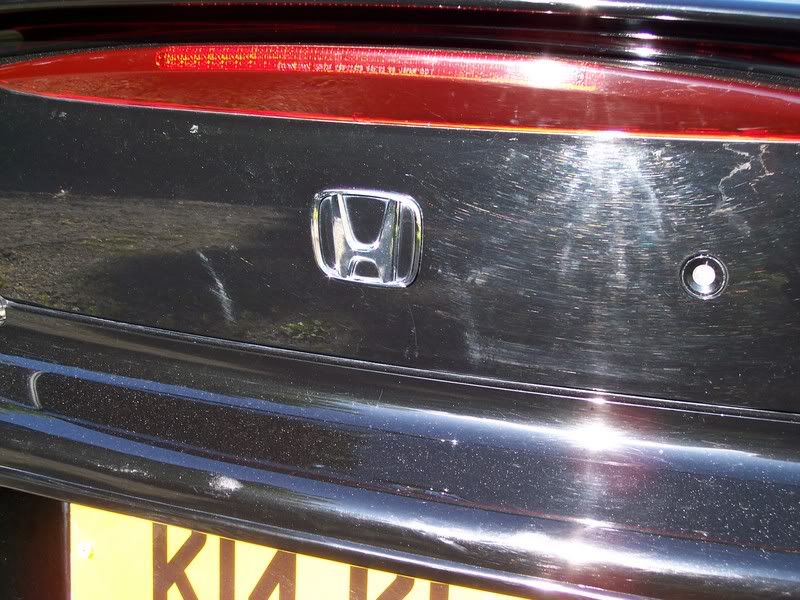
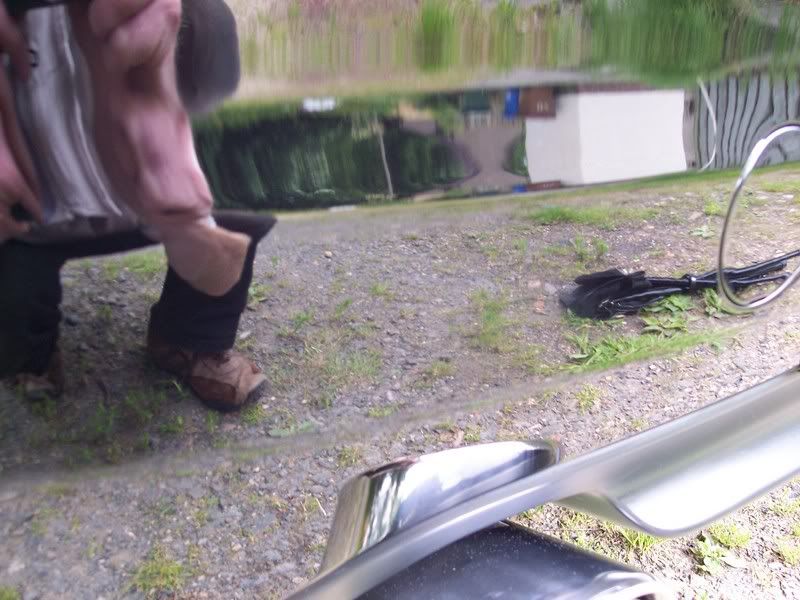
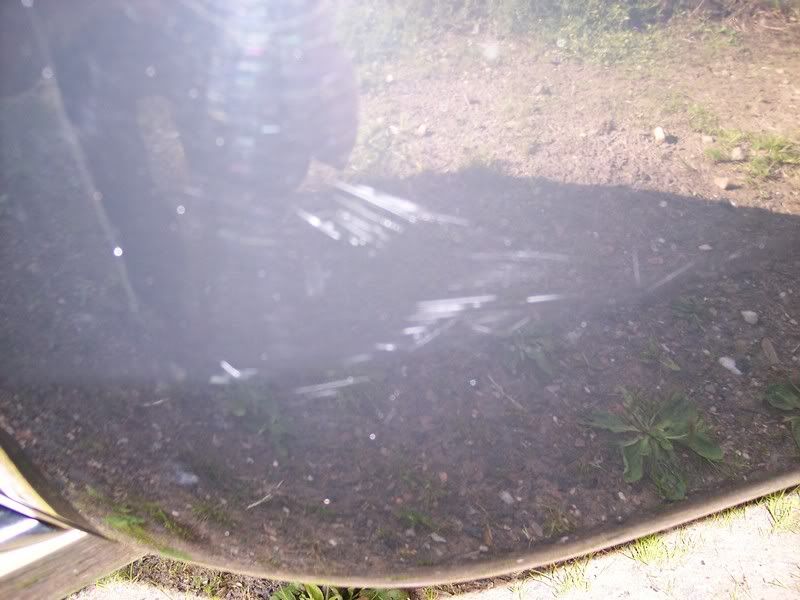
It was at this point I noticed some deeper scratches spread around the rear bumper and lowers. Wet sanding was about to solve these little ones.
BEFORE
[URL="http://i134.photobucket.com/albums/q116/jr001_2007/JULY%20DETAILS/100_1804.jpg"] [/URL]
AFTER
[URL="http://i134.photobucket.com/albums/q116/jr001_2007/JULY%20DETAILS/100_1816.jpg"] [/URL]
The others:
[URL="http://i134.photobucket.com/albums/q116/jr001_2007/JULY%20DETAILS/100_1806.jpg"] [/URL]
[URL="http://i134.photobucket.com/albums/q116/jr001_2007/JULY%20DETAILS/100_1812.jpg"] [/URL]
[URL="http://i134.photobucket.com/albums/q116/jr001_2007/JULY%20DETAILS/100_1814.jpg"] [/URL]
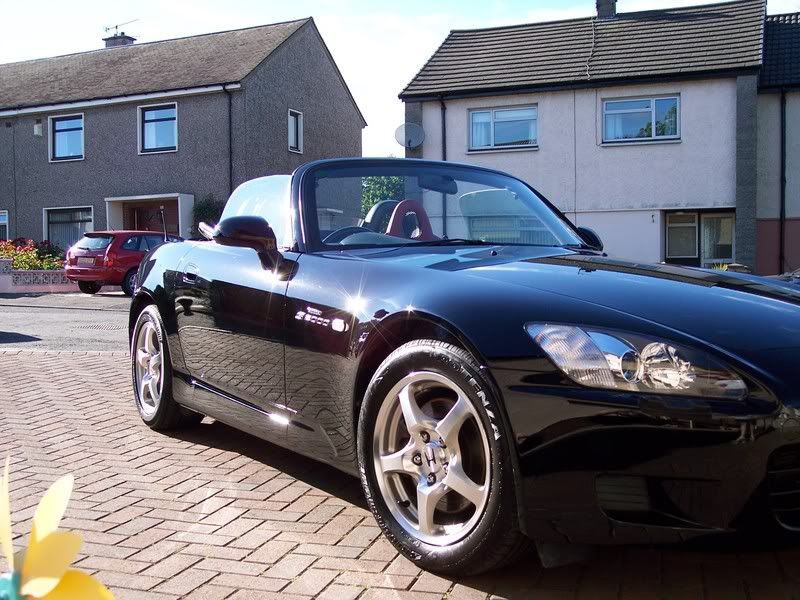
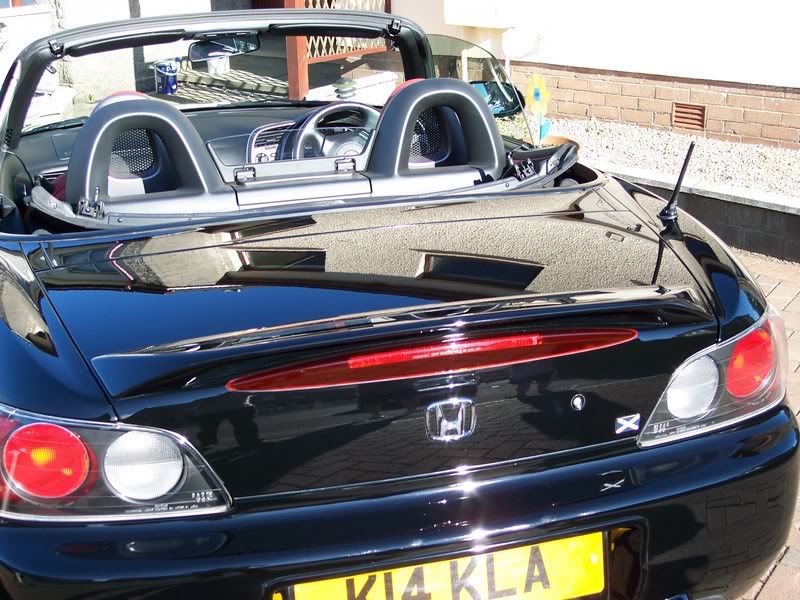
The last two pictures show, for me anyway, the utter transformation that this cracking car has went through. This has to be my favourite detail to date.
SOME OF THE GENERAL AFTERS
[URL="http://i134.photobucket.com/albums/q116/jr001_2007/JULY%20DETAILS/100_1827.jpg"] [/URL]
[URL="http://i134.photobucket.com/albums/q116/jr001_2007/JULY%20DETAILS/100_1828.jpg"]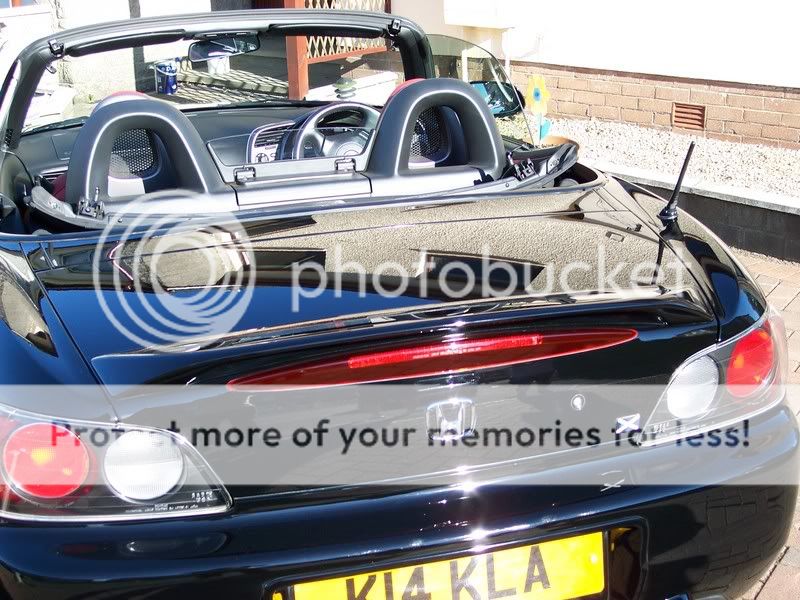 [/URL]
[URL="http://i134.photobucket.com/albums/q116/jr001_2007/JULY%20DETAILS/100_1826.jpg"] [/URL]
[URL="http://i134.photobucket.com/albums/q116/jr001_2007/JULY%20DETAILS/100_1831.jpg"] [/URL]
[URL="http://i134.photobucket.com/albums/q116/jr001_2007/JULY%20DETAILS/100_1830.jpg"] [/URL]
[URL="http://i134.photobucket.com/albums/q116/jr001_2007/JULY%20DETAILS/100_1829.jpg"] [/URL]
THE TRANSFORMATION
From this:
[URL="http://i134.photobucket.com/albums/q116/jr001_2007/100_1501.jpg"] [/URL]
to this:

I absolutely loved this detail due to the condition the car was in to begin with. The paint was soft and strange and required great delicacy in dealing with the defects.
All in all, a good end to a busy week.
Thanks,
JOHN
I wanted this one for a long time, and as it turned out I was not the only one chuffed with the outcome.
Here's some befores to give you an idea of how the car had come to be:
[URL="http://i134.photobucket.com/albums/q116/jr001_2007/JULY%20DETAILS/100_1499.jpg"]
 [/URL]
[URL="http://i134.photobucket.com/albums/q116/jr001_2007/JULY%20DETAILS/100_1778.jpg"]
 [/URL]
[URL="http://i134.photobucket.com/albums/q116/jr001_2007/JULY%20DETAILS/100_1808.jpg"]
 [/URL]
Wash and Clay
Foamed with Megs APC through superspray.
Megs APC foamed through Superspray
Rinsed with hose
Autobrite tar and glue remover applied to lower panels.
APC'd again, followed by TBM-wash with Megs Lambswool and MF mits, CG Extreme Body Wash and Wax.
Rinsed with hose.
Claying carried out using Sonus green with Megs Last Touch as lube 1:1.
The car had been clayed a few months ago and was relatively free of majorly-bonded contaminants.
Machine Polishing
Sonus White Polishing pad used in conjunction with Menzerna 106 FF polish
Spread for 2 passes at speed 2. Polish broken down with 4 passes at speed 4-5, followed by 2 passes at speed 3. Residue wiped with Poorboys work towels.
The doors, all of the rear end, and the bonnet all required two hits.
All PCing carried out with only touch pressure on each panel.
Most panels required two hits.
Cleansing and Protection
Body was HD Cleansed followed by Carbon wax, Field Glaze.
Wheels cleansed with JEFFS Acrylic Prime and topped with Acrylic Jett (3 coats).
All windows, inside and out, were cleansed and protected with JEFFS ACrylic Prime.
Arches and tyres dressed with Poorboys Bold and Bright.
Tailpipes given a 10 minute hand polish with Megs NXT Polysh.
Door shuts and jambs cleansed with Megs APC 4:1, followed by Jeffs Prime again for more cleansing and protection.
I started with the rear O/S quarter and achieved the following.
BEFORE
[URL="http://i134.photobucket.com/albums/q116/jr001_2007/JULY%20DETAILS/100_1776.jpg"]
 [/URL]
AFTER
[URL="http://i134.photobucket.com/albums/q116/jr001_2007/JULY%20DETAILS/100_1790.jpg"]
 [/URL]
DRIVER'S DOOR BEFORE
[URL="http://i134.photobucket.com/albums/q116/jr001_2007/JULY%20DETAILS/100_1778.jpg"]
[/URL]DRIVER'S DOOR AFTER
[URL="http://i134.photobucket.com/albums/q116/jr001_2007/JULY%20DETAILS/100_1783.jpg"]
 [/URL]
The difference in clarity between the corrected driver's door and the original O/S front quarter is visible here:
[URL="http://i134.photobucket.com/albums/q116/jr001_2007/JULY%20DETAILS/100_1788.jpg"]
 [/URL]
Upon correction of the O/S front quarter, the driver's side now loked like this:
[URL="http://i134.photobucket.com/albums/q116/jr001_2007/JULY%20DETAILS/100_1825.jpg"]
 [/URL]
BONNET BEFORE
[URL="http://i134.photobucket.com/albums/q116/jr001_2007/JULY%20DETAILS/100_1499.jpg"]
[/URL]BONNET AFTER
[URL="http://i134.photobucket.com/albums/q116/jr001_2007/JULY%20DETAILS/100_1819.jpg"]
 [/URL]
N/S FRONT QUARTER BEFORE
[URL="http://i134.photobucket.com/albums/q116/jr001_2007/JULY%20DETAILS/100_1502.jpg"]
 [/URL]
N/S FRONT QUARTER AFTER
[URL="http://i134.photobucket.com/albums/q116/jr001_2007/JULY%20DETAILS/100_1823.jpg"]
 [/URL]
N/S REAR QUARTER BEFORE
[URL="http://i134.photobucket.com/albums/q116/jr001_2007/JULY%20DETAILS/100_1500.jpg"]
 [/URL]
N/S REAR QUARTER AFTER
[URL="http://i134.photobucket.com/albums/q116/jr001_2007/JULY%20DETAILS/100_1822.jpg"]
 [/URL]
REAR END BEFORE
[URL="http://i134.photobucket.com/albums/q116/jr001_2007/JULY%20DETAILS/100_1810.jpg"]
 [/URL]
REAR END AFTER
[URL="http://i134.photobucket.com/albums/q116/jr001_2007/JULY%20DETAILS/100_1818.jpg"]
 [/URL]
It was at this point I noticed some deeper scratches spread around the rear bumper and lowers. Wet sanding was about to solve these little ones.
BEFORE
[URL="http://i134.photobucket.com/albums/q116/jr001_2007/JULY%20DETAILS/100_1804.jpg"]
 [/URL]
AFTER
[URL="http://i134.photobucket.com/albums/q116/jr001_2007/JULY%20DETAILS/100_1816.jpg"]
 [/URL]
The others:
[URL="http://i134.photobucket.com/albums/q116/jr001_2007/JULY%20DETAILS/100_1806.jpg"]
 [/URL]
[URL="http://i134.photobucket.com/albums/q116/jr001_2007/JULY%20DETAILS/100_1812.jpg"]
 [/URL]
[URL="http://i134.photobucket.com/albums/q116/jr001_2007/JULY%20DETAILS/100_1814.jpg"]
 [/URL]
The last two pictures show, for me anyway, the utter transformation that this cracking car has went through. This has to be my favourite detail to date.
SOME OF THE GENERAL AFTERS
[URL="http://i134.photobucket.com/albums/q116/jr001_2007/JULY%20DETAILS/100_1827.jpg"]
 [/URL]
[URL="http://i134.photobucket.com/albums/q116/jr001_2007/JULY%20DETAILS/100_1828.jpg"]
 [/URL]
[URL="http://i134.photobucket.com/albums/q116/jr001_2007/JULY%20DETAILS/100_1826.jpg"]
 [/URL]
[URL="http://i134.photobucket.com/albums/q116/jr001_2007/JULY%20DETAILS/100_1831.jpg"]
 [/URL]
[URL="http://i134.photobucket.com/albums/q116/jr001_2007/JULY%20DETAILS/100_1830.jpg"]
 [/URL]
[URL="http://i134.photobucket.com/albums/q116/jr001_2007/JULY%20DETAILS/100_1829.jpg"]
 [/URL]
THE TRANSFORMATION
From this:
[URL="http://i134.photobucket.com/albums/q116/jr001_2007/100_1501.jpg"]
 [/URL]
to this:
I absolutely loved this detail due to the condition the car was in to begin with. The paint was soft and strange and required great delicacy in dealing with the defects.
All in all, a good end to a busy week.
Thanks,
JOHN

 lol
lol