Clark@Polishedbliss
Professional Detailer
- Joined
- Feb 4, 2007
- Messages
- 226
- Reaction score
- 0
- Points
- 16
- Location
- Aberdeen
- Website
- www.polishedbliss.co.uk
Firstly apologies for not being on so much lately, we've still been mega busy and only now are we slowly getting into a routine at the new premises, but this is the first of a good few write up's to come in the next few weeks ")
Todays detail was on this Audi S3:

The customer wanted full paint correction and finished with something he could then easily maintain.
Wash Process:
The car was foamed with Meguiars APC through the foam lance after i'd sprayed the door shuts/arches/boot surround/petrol cap etc with Meguiars Safe de-greaser - this was then left to dwell for 5 mins before being rinsed off with the Karcher at high pressure. I then foamed the car again with Meguiars Hyper Wash and washed with the 2 bucket method and Poorboys Super Slick & Suds. This was then rinsed off and the wheels were cleaned with a combination of Meguiars Wheel Brightner and autosmart Tar & glue remover with a MF Mitt.
The paintwork itself was very smooth as the owner had clayed it previously so i just treated the lower halfs to the Tar & Glue remover to get rid of any small pieces of tar and fall out, the car was then given a final rinse and then dried with the leaf blower
Polish Process:
Once inside and taped up i could see moderate/heavy swirling and cob-webbing all over, with the odd random scratch that i knew wasnt going to come out fully.
Here's a couple of defect pics, not great but they kinda give you an idea :


Paint readings showed a healthy amount of paint all round, including the plastics - which was a nice change as too many details recently have prevented me being able to fully de-swirl the bumpers especially due to thin paint!
I decided on the usual compound (Menz IP 3.02)with a Meguiars Polishing Pad @1800rpm's after the finishing polishes didnt really have much effect on the defects, using the Zenith technique i was able to completely de-swirl each section in one go so this made for quite a relaxing detail, which was nice.
The bumpers were polished at 1500rpm's, with faster passes and less pressure than the metal panels to ensure heat build up was kept to a minimum.
Rear 1/4 before:

Rear 1/4 after:

Tailgate before:

Tailgate after:

The tail lights were also de-swirled as usual, using the same compound as the paint:
Before:

After:

As the Headlights were plastic, they were also machined
As i applied the LSP, Rich polished up the tailpipes - which were pretty bad:
before:

Using a combination of 1000 and 3000 unigrit sand paper, followed by Blackfire Fine Cut Metal Polish, they came out not to bad considering what they looked like before:

LSP of choice was the Jeffs Werkstatt Acrylic Kit as this offers decent durability, is dead easy to use and really gets the metalic flake "popping"
The Acrylic Prime was applied to a Black Glazing pad on the PC after a few spritz's of Glos worked at speed 2 for a few passes. Spritzing the pad with Glos greatly aids in the removal of the prime as it still remains wet when buffing, all that is needed is a final wipe with a dry side of an MF to remove any smears
This was then followed by Werkstatt Acrylic Trigger and a plush MF.
The Glass was cleaned inside and out with Zymol HD Cleanse, the wheels were sealed with PB wheel sealant, tyres dressed with Blackfire Long Lasting Tyre Gel, Arches with Meguiars All Season Dressing and the door shuts etc were polished/protected with Jeffs Werkstatt Prime Strong.
Job done!
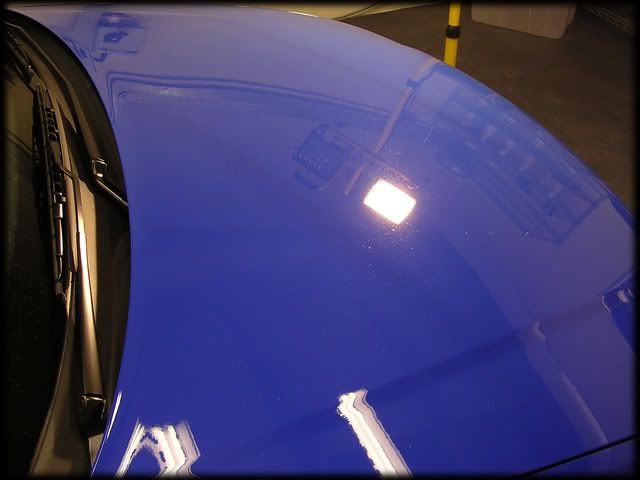
After Pics:


Todays detail was on this Audi S3:

The customer wanted full paint correction and finished with something he could then easily maintain.
Wash Process:
The car was foamed with Meguiars APC through the foam lance after i'd sprayed the door shuts/arches/boot surround/petrol cap etc with Meguiars Safe de-greaser - this was then left to dwell for 5 mins before being rinsed off with the Karcher at high pressure. I then foamed the car again with Meguiars Hyper Wash and washed with the 2 bucket method and Poorboys Super Slick & Suds. This was then rinsed off and the wheels were cleaned with a combination of Meguiars Wheel Brightner and autosmart Tar & glue remover with a MF Mitt.
The paintwork itself was very smooth as the owner had clayed it previously so i just treated the lower halfs to the Tar & Glue remover to get rid of any small pieces of tar and fall out, the car was then given a final rinse and then dried with the leaf blower
Polish Process:
Once inside and taped up i could see moderate/heavy swirling and cob-webbing all over, with the odd random scratch that i knew wasnt going to come out fully.
Here's a couple of defect pics, not great but they kinda give you an idea
:

Paint readings showed a healthy amount of paint all round, including the plastics - which was a nice change as too many details recently have prevented me being able to fully de-swirl the bumpers especially due to thin paint!
I decided on the usual compound (Menz IP 3.02)with a Meguiars Polishing Pad @1800rpm's after the finishing polishes didnt really have much effect on the defects, using the Zenith technique i was able to completely de-swirl each section in one go so this made for quite a relaxing detail, which was nice.
The bumpers were polished at 1500rpm's, with faster passes and less pressure than the metal panels to ensure heat build up was kept to a minimum.
Rear 1/4 before:

Rear 1/4 after:

Tailgate before:

Tailgate after:

The tail lights were also de-swirled as usual, using the same compound as the paint:
Before:

After:

As the Headlights were plastic, they were also machined
As i applied the LSP, Rich polished up the tailpipes - which were pretty bad:
before:

Using a combination of 1000 and 3000 unigrit sand paper, followed by Blackfire Fine Cut Metal Polish, they came out not to bad considering what they looked like before:

LSP of choice was the Jeffs Werkstatt Acrylic Kit as this offers decent durability, is dead easy to use and really gets the metalic flake "popping"
The Acrylic Prime was applied to a Black Glazing pad on the PC after a few spritz's of Glos worked at speed 2 for a few passes. Spritzing the pad with Glos greatly aids in the removal of the prime as it still remains wet when buffing, all that is needed is a final wipe with a dry side of an MF to remove any smears
This was then followed by Werkstatt Acrylic Trigger and a plush MF.
The Glass was cleaned inside and out with Zymol HD Cleanse, the wheels were sealed with PB wheel sealant, tyres dressed with Blackfire Long Lasting Tyre Gel, Arches with Meguiars All Season Dressing and the door shuts etc were polished/protected with Jeffs Werkstatt Prime Strong.
Job done!
After Pics: