The following is a detailed procedure on how to remove the amber inserts found in North American Audi's. It involves removing the headlamp assembly's from the car, taking out the turn signal bulb, the low beam halogen bulb and removing the projector lens out of the assembly. Then you will be required to drill out two small tabs that hold the amber insert in place freeing the insert that can then be removed thru the large hole that the projector lens was mounted in. This is on a set of halogen headlamps, not xennon lamps which may be different.
Unlike the procedure for doing this modification on 96-01 A4's, this does not require destroying the insert to get it out. (A plus for people that lease) However because of the little plastic lens covering the turn signal bulb it's not as easy to perform.
The design of the headlamps is in such a way that all the components inside are very closely spaced, because of this, you will need to purposely misalign the internal lamp assembly in order to be able to remove the projector lens. You will need to realign both headlights afterwards. The procedure is the same for both sides.
Perform this at your own risk. This involves cutting and drilling and some level of mechanical skill. If you have never attempted a project like this or are uncomfortable with drilling into your brand new Audi's headlights I suggest you take a moment to think about this and consider asking someone for help. Please read this entire how-to before beginning. I did my best to explain everything in detail but it does not cover basic mechanical skills.
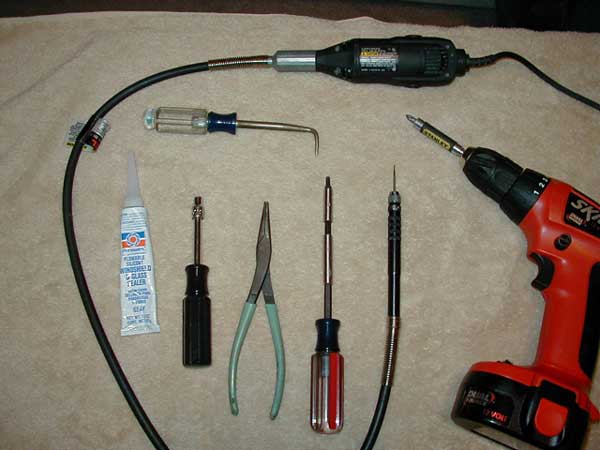
Tools needed:
-5/32 hex head driver or suitable sized Torx driver
-Duck Bill pliers or long needle nose pliers
-7/32 magnetic nut driver
-Phillips screwdriver
-Dremel tool with high-speed cutting bit (I used model #190) or small (less than 1/8) drill bit.
-Cotter pin extractor
-Silicone sealer
-Can of compressed air-recommended
-Safety glasses-recommended
Tools needed
I recommend starting by first parking the car on a level surface in front of a wall or garage door and noting the position of the beam pattern on the wall. This will make it easier to realign the lights later once everything is done. Keep in mind that if you have to move the car during this, you will need to park it in the EXACT same spot so it's best to just leave the car there if possible.
Removing the headlamps
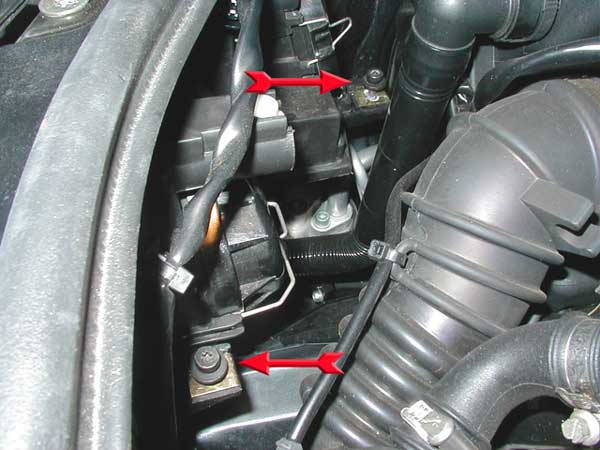
There are four screws holding each headlamp in place, two are on top in plain view, remove these. The other two are back and down behind the headlamps. To get to the screws in the back you will need to remove the plastic cover over the power steering reservoir on the drivers side and on the passenger side you will have to take off the air intake tube which runs from the grill to the intake box. There are only two Phillips screws holding this intake tube in place. Once these pieces are out you should be able to see the back screws. You DO NOT need to remove the two back screws just loosen them a few turns. (Fig 1)
Fig 1 Bottom two screws on passenger side, drivers side is the same.
The headlamp should feel loose in the car now. Unplug the harness and pop off any other wire looms that may be attached to the lamp assembly. You should now be able to pull the lamps off the car completely.
Prepping the lights
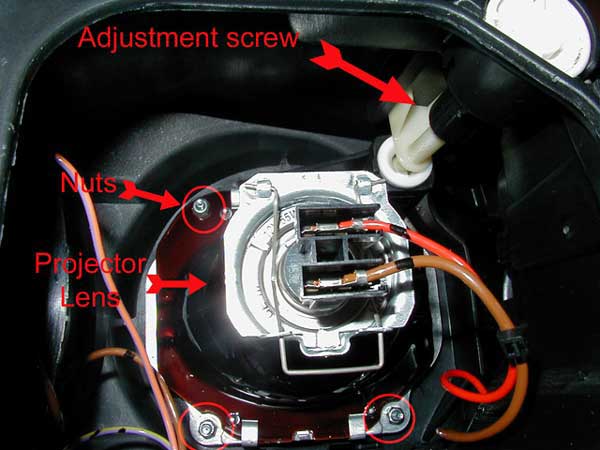
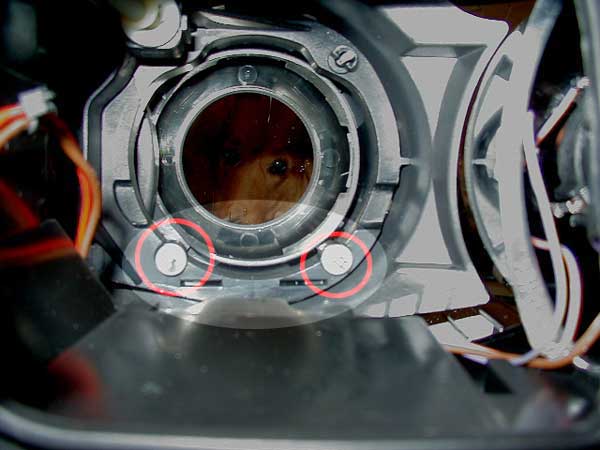
Remove the rubber gasket that surrounds the lamp being careful not to tear it. Next remove the amber turn signal bulb, the access cover for the low beam and then the halogen bulb itself. Inside you will see the back of the projector lens assembly held in place by three small nuts and a silver metal clip. You will also notice the beam adjustment screw. (See fig 2 and 3)
Fig 2. Close up of lens, adjustment screws and nuts.
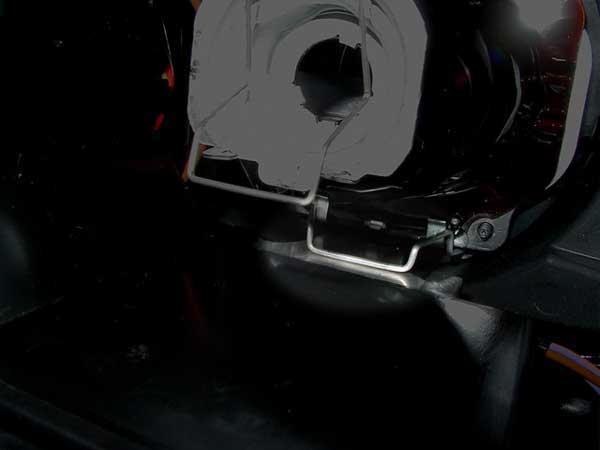
Fig 3. Metal clip
First remove the metal clip using the duckbill pliers. Grab one side and push it inward while also pulling on it being very careful not to slip and hit the glass of the projector lens. Do not bend this clip out of place you WILL need to reinstall it. It's purpose is to put pressure on the light assembly so that when going over sharp bumps the lights do not shake up and down.
Once the clip is out remove the three little nuts. Now the lens should feel completely loose. Next you will need to turn the adjustment screw so that all or most of its threads are extended. The goal here is to "swing" the internal assembly (towards the front of the car) so that there is enough clearance to get the lens out. You should not need to touch the other adjustment screw but it may help. Once the screw is at it's max you can try to remove the lens. I found the best way is to pull the lens straight out while slightly and gently twisting it around. It may not seem like it will come out but if you extended the screw enough giving it proper clearance it will.
It is very important to note that there are two white nylon spacers around the two threaded studs opposite the adjustment screw. If these fall off while taking out the lens be sure to retrieve them immediately. You will not be able to remount the lens without these in place. (See fig 4)
Fig 4 Projector assembly removed. Note the white nylon spacers on the threaded studs.
Removing the amber insert
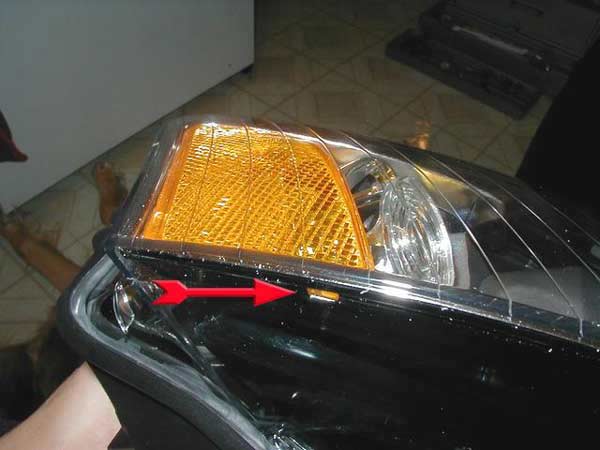
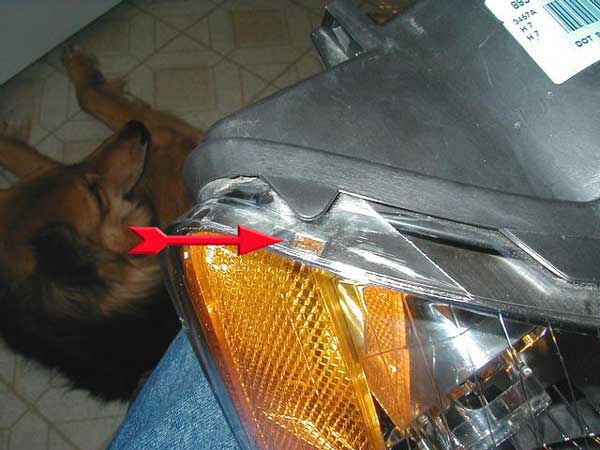
Since you removed the rubber gasket before it's very easy to see the two little tabs that hold the insert in place. (Fig 5 and 6) The goal is to drill a small hole thru the clear plastic of the lamp assembly from the outside and "eat" away at the tabs with the tip of the Dremel bit. You need to be very careful when doing this as you will now be creating a hole that will be visible from the outside so you want to remove only enough material to free the amber insert.
Fig 5 View of bottom tab.
Fig 6. View of top tab.
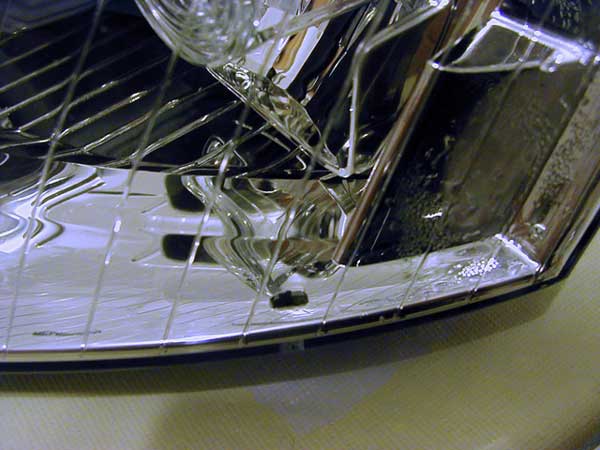
Place the lamp assembly securely on a table or bench and carefully begin to carve out the tabs with the Dremel tool. You want to try to cut only the amber plastic and not try to enlarge the existing holes any more than necessary. (See fig 7) I suggest doing the top tabs first. I found that a medium speed works best. Too fast a speed will just melt the plastic. Be sure to wear some type of safety glasses when doing this.
After you think you have cut enough material so that the insert is free, insert the tip of the cotter pin extractor into the turn signal bulb socket to try and slide the insert away. Be very careful not to scratch the inside of the lamp with the tip and also not to disturb the clear plastic "lens" piece that covers the bulb. If done correctly, the insert should just need a little nudge to break loose. You may need to slightly tweak the whole internal turn signal assembly to allow clearance for the insert to slide out. Looking thru the access cover you will see how this possible.
If all went well you should have been able to get the insert out and can just grab it thru the large hole that the projector lens mounts into.
Fig 7. This is how the hole should appear when finished.
Blow compressed air throughout the inside to blow away any particles that may have been created by the drilling.
Make sure the white nylon spacers are in place around the threaded studs and reinstall the projector lens. Pay attention to the way you insert the lens assembly to reinstall it. It must and can only be mounted one way. Be careful not to over-tighten the little bolts and also not to cross-thread them. Reinstall the metal clip exactly as it was making sure it has contact with the metal plate on the bottom. Reinstall the halogen bulb and the orange turn signal. Seal up the holes with silicone sealer and reinstall the rubber gasket. Do not over do it with the silicone, you don't want it to seep inside and overflow into the headlight. Just use enough to make a watertight seal.
Reinstall the headlamps into the car checking their operation before securing all the screws. Once all screws are tight, don't forget to realign the headlights.
If you did a good job, you should be able to save the amber inserts so they can be reinstalled later.
Good luck.


")