Steve_D
Registered User
The information i wanted with pics about the rear calipers and handbrake assembly was very limited so went into this somewhat blind.. other than seeing a great writeup of a B6 rear caliper setup... so thought i would just post a few pics here so you can see the grubbings for those that might or want to do this for themselves... maybe haha.
So basically my troubles were, a sticking caliper. and the handbrake has some loose travel when applying it.
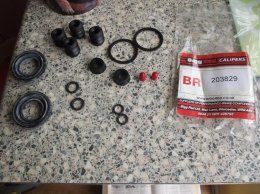
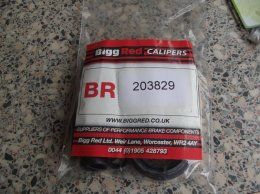
Went to biggred.co.uk and ordered a repair kit.
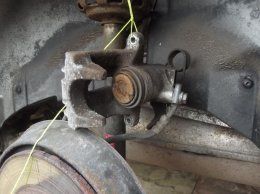
The offending caliper (and Hole in the Backbox!) for the beady eyed viewers
So i didnt loose too much brake fluid, i put a plastic bag folded a few times under the cap of the reservoir.. i lost about a cap full in drips
Splits in the Dust Boot
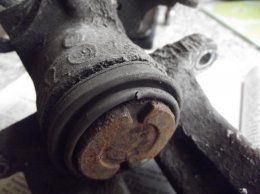
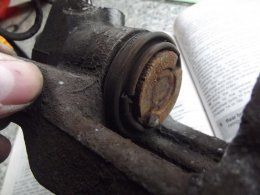
No airlines necessary to take the piston out on the rears... just pump the handbrake mechanism, but wear goggles.. brake fluid WILL Squirt out in any direction once the boot comes out of its seat

Take the spring off, the nut on the rear of the handbrake mechanism and pull off that plate under it, undo the star bolt and take off the other one.. it makes it easier to do before you open up the system and find yourself covered in brake fluid from waist to toe
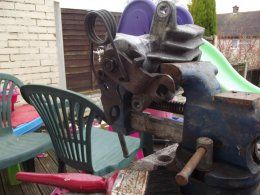
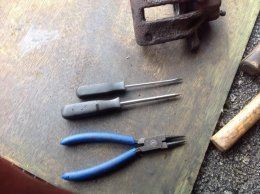
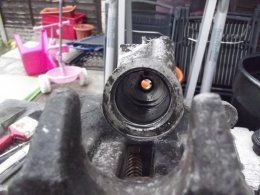
These were caked in dust/crap even inside the Dust boot seat.. i dont know the correct tool to do this, but i used a very narrow flat had screwdriver and cleaned it out.. all was smooth after and made the seal much better. I didnt take a picture of the circlip inside here, i forgot. Its under the fluid and is a real pain in the *** to shift out. Just be careful not to damage the smooth surface inside it can be done and this is not under load from the spring.. see the next pic
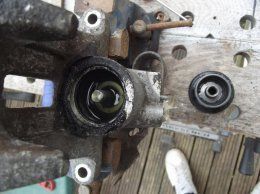
I did not see any point in opening this up so left it in tact, but where the o-ring is gave that a good shine it was the cause of my sticking handbrake, the corrosion (very slight) was just enough to make it stiff in the hole and not return to the lowest point. I used some abrasive strips that is used to clean copper pipe (also useful for the tail pipe too!)
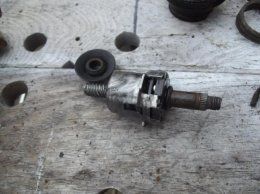
You can see the scoring made, the oring makes the seal inside the housing so as long as you dont take too much off when smoothing this out you will be fine.

Put it all back together, bled the system and the handbrake is working so smoothly now, it feels completely different. Dont get me wrong if you want just go and buy a new one... but since i have never taken one apart nor attempted to take and thing off the braking lines, it was more to learn something new and not just take off, put on.
This was my method, some may frown on it, some may not and just laugh haa haa, but it worked for me and have a fully functional caliper and handbrake again! Also its not in great detail, but im tired lol
So basically my troubles were, a sticking caliper. and the handbrake has some loose travel when applying it.
Went to biggred.co.uk and ordered a repair kit.
The offending caliper (and Hole in the Backbox!) for the beady eyed viewers

So i didnt loose too much brake fluid, i put a plastic bag folded a few times under the cap of the reservoir.. i lost about a cap full in drips
Splits in the Dust Boot


No airlines necessary to take the piston out on the rears... just pump the handbrake mechanism, but wear goggles.. brake fluid WILL Squirt out in any direction once the boot comes out of its seat

Take the spring off, the nut on the rear of the handbrake mechanism and pull off that plate under it, undo the star bolt and take off the other one.. it makes it easier to do before you open up the system and find yourself covered in brake fluid from waist to toe

These were caked in dust/crap even inside the Dust boot seat.. i dont know the correct tool to do this, but i used a very narrow flat had screwdriver and cleaned it out.. all was smooth after and made the seal much better. I didnt take a picture of the circlip inside here, i forgot. Its under the fluid and is a real pain in the *** to shift out. Just be careful not to damage the smooth surface inside it can be done and this is not under load from the spring.. see the next pic

I did not see any point in opening this up so left it in tact, but where the o-ring is gave that a good shine it was the cause of my sticking handbrake, the corrosion (very slight) was just enough to make it stiff in the hole and not return to the lowest point. I used some abrasive strips that is used to clean copper pipe (also useful for the tail pipe too!)

You can see the scoring made, the oring makes the seal inside the housing so as long as you dont take too much off when smoothing this out you will be fine.


Put it all back together, bled the system and the handbrake is working so smoothly now, it feels completely different. Dont get me wrong if you want just go and buy a new one... but since i have never taken one apart nor attempted to take and thing off the braking lines, it was more to learn something new and not just take off, put on.
This was my method, some may frown on it, some may not and just laugh haa haa, but it worked for me and have a fully functional caliper and handbrake again! Also its not in great detail, but im tired lol


