

been putting off a grumbling rear bearing replacement, mainly because I dont have a press, cant be ***** taking the rear strut off and stealing the wifes car to get it to an engineers to be fleeced £10 for 2 minutes work that I will have to wait 2 days for!
so I stumbled across something that anyone can use on their drive for pennies.
My local builders merchants had a box of M24 Chemset studs. (5 in a box with 5 nuts and thick washers for £30).
they use them to fix large metal beams to concrete by way of some kind of epoxy compound in the hole to fix the stud. (hence the name) they are big feckers and fit perfectly through the flange/driveshaft hole.
So I set about whipping the rear strut off (remarkably everything came away swiftly and it took me less than 15 mins all in)
with the cunning use of an old drive shaft, the inner ball from a CV joint and a 2lb hammer I knocked out the flange and inner race in one pop and then taking the other inner race out, swap it to the outside side of the old bearing and with some careful "tapping", the rest of the old bearing popped out fairly easily.
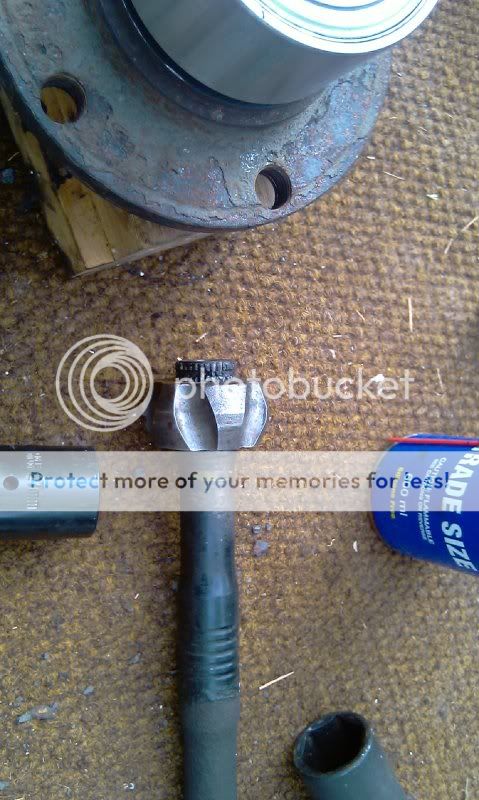
best bit about the CV/shaft combo is it fits perfectly into the inner race of the old bearing and cups the face to keep it all straight.
few tricky taps with a flat tool removed the inner race off the flange without problem.
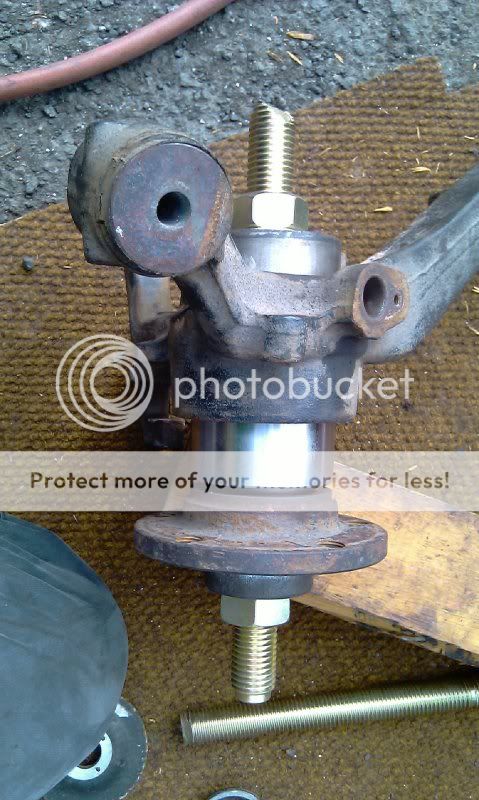
Now comes the cunning bit. Wrapping the M24 stud spin a nut and washer on (which the new bearing conveniently came wrapped in) to protect the splines of the flange I drove the flange into the new bearing.
(make sure you get it the right way round, from bitter experience the last time I did this I didnt and had to take the new one off and flip it....after it had come apart and fallen in the crap in peices!)
flange in new bearing.

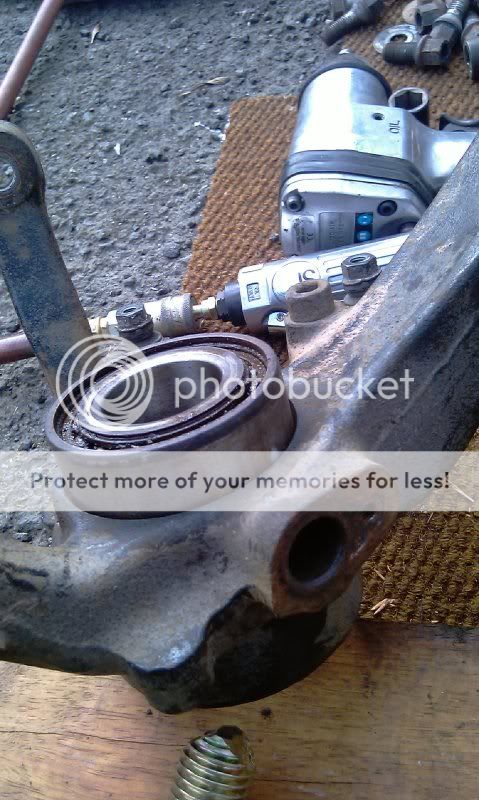
taking the old bearing and grinding a half mm of material of one edge it sits in the back side of the upright perfectly (remove ABS sensor if you havent already! it will chop the end off!) put one of the old inner races on the outside.
ground

inserted
keeping the plastic cover inside the splined area of the flange line it all up with a big washer and double nut the flange side, you could do it with one but it cleared the flange better with two
inline
pair of stilsons as I didnt have an 24mm spanner and get tightening!
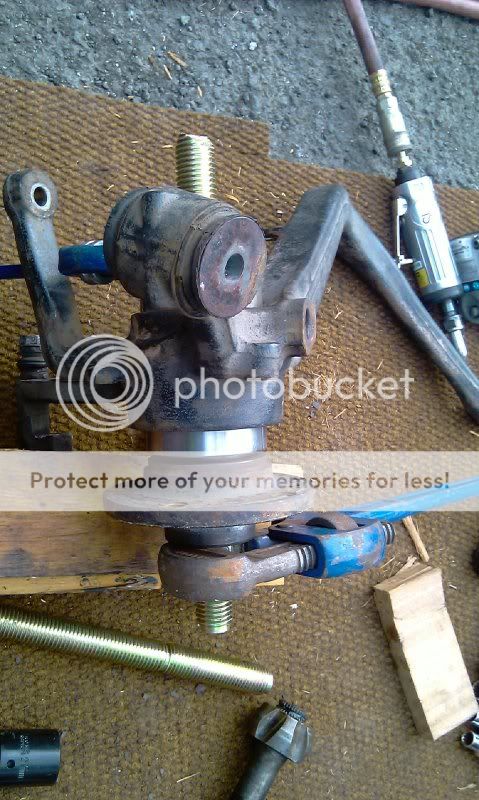
after 2mins of turning you are half way there, slips in nice and easy. very obvious feel to the final closure.
unscrew, remove old bearing adapter, job done!

bit of faffing getting it all in place and finding my tools. all in, wheels on and test driven - less than 2 hours
reckon I could do the other side in a little over an hour now.
now an invaluable part of my tool box, not sure what I am going to do with 5 of them but if anyone wants them you can have them for postage (heavy though)
so I stumbled across something that anyone can use on their drive for pennies.
My local builders merchants had a box of M24 Chemset studs. (5 in a box with 5 nuts and thick washers for £30).
they use them to fix large metal beams to concrete by way of some kind of epoxy compound in the hole to fix the stud. (hence the name) they are big feckers and fit perfectly through the flange/driveshaft hole.
So I set about whipping the rear strut off (remarkably everything came away swiftly and it took me less than 15 mins all in)
with the cunning use of an old drive shaft, the inner ball from a CV joint and a 2lb hammer I knocked out the flange and inner race in one pop and then taking the other inner race out, swap it to the outside side of the old bearing and with some careful "tapping", the rest of the old bearing popped out fairly easily.
best bit about the CV/shaft combo is it fits perfectly into the inner race of the old bearing and cups the face to keep it all straight.
few tricky taps with a flat tool removed the inner race off the flange without problem.
Now comes the cunning bit. Wrapping the M24 stud spin a nut and washer on (which the new bearing conveniently came wrapped in) to protect the splines of the flange I drove the flange into the new bearing.
(make sure you get it the right way round, from bitter experience the last time I did this I didnt and had to take the new one off and flip it....after it had come apart and fallen in the crap in peices!)
flange in new bearing.
taking the old bearing and grinding a half mm of material of one edge it sits in the back side of the upright perfectly (remove ABS sensor if you havent already! it will chop the end off!) put one of the old inner races on the outside.
ground
inserted
keeping the plastic cover inside the splined area of the flange line it all up with a big washer and double nut the flange side, you could do it with one but it cleared the flange better with two
inline
pair of stilsons as I didnt have an 24mm spanner and get tightening!
after 2mins of turning you are half way there, slips in nice and easy. very obvious feel to the final closure.
unscrew, remove old bearing adapter, job done!
bit of faffing getting it all in place and finding my tools. all in, wheels on and test driven - less than 2 hours
reckon I could do the other side in a little over an hour now.
now an invaluable part of my tool box, not sure what I am going to do with 5 of them but if anyone wants them you can have them for postage (heavy though)