[FONT=arial, geneva][FONT=verdana, arial, geneva]
Tech Article Title[/FONT] [/FONT][FONT=verdana, arial, geneva]
Author[/FONT] [FONT=verdana, arial, geneva]
Date[/FONT] [FONT=verdana, arial, geneva]
Repair Brake Pads/Rotors/System Bleed (A4)[/FONT][FONT=verdana, arial, geneva]
Stratocaster1422[/FONT] [FONT=verdana, arial, geneva]
2004[/FONT]This writeup was done on a MY2000 A4 1.8TQM. All the usual disclaimers apply. If your not mechanically inclined or own no tools, don't attempt this. I am not responsible for you braking your car or hurting yourself or others from following these procedures.
GENERAL TIPS FOR FRONT
1.) When changing front or rear pads, make sure to open the master cylinder reservoir cap so as to not build excessive pressure in the M/C.
2.) Have an old turkey baster on hand to remove any excess fluid from the reservoir. (brake fluid spillage will take your paint off)
3.) Tips from ModifiedA4:
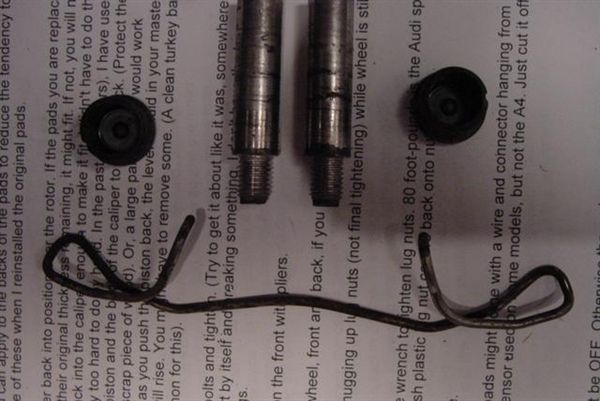
- when doing the fronts (pad change), check for excessive grooving in the slide pins. replace pins if needed (2 per side, I replaced mine at 40k)
also make sure to relube the pins with the proper hi temp brake lube
Front Brake Pad Change: http://www.audiworld.com/tech/wheel25.shtml
Front Rotor Change:
1.) Remove caliper using above tech article. No need to remove the pads unless changing them.
2.) Remove the two 17mm bolts in the back that attach the caliper carrier.
3.) Rotor slides right off
4.) Install is reverse of removal
5.) Use "good and tight" torque spec for rear bolts
Rear Pad/Rotor Change (Quattro Only!!!):
Some of this is taken from the write up already in the tech section written by Dale Black (
http://www.audiworld.com/tech/wheel2.shtml), I just wanted to see pictures with it.
GENERAL TIPS FOR REAR
1.) When changing front or rear pads, make sure to open the master cylinder reservoir cap so as to not build excessive pressure in the M/C.
2.) Have an old turkey baster on hand to remove any excess fluid from the reservoir. (brake fluid spillage will take your paint off)
Tools:
- 13mm open end box wrench and socket
- 15mm open end box wrench
- 8mm Hex Key/Hex Socket
- Hammer
- 3/8 ratchet/breaker bar
- Brake Caliper tool - you can buy from Harbor Freight or rent a "brake cube" from Autozone. The one I show is the purchased one from HF.
- Adjustable wrench
1.) chock the front wheels, put car in gear, and take off the E-brake
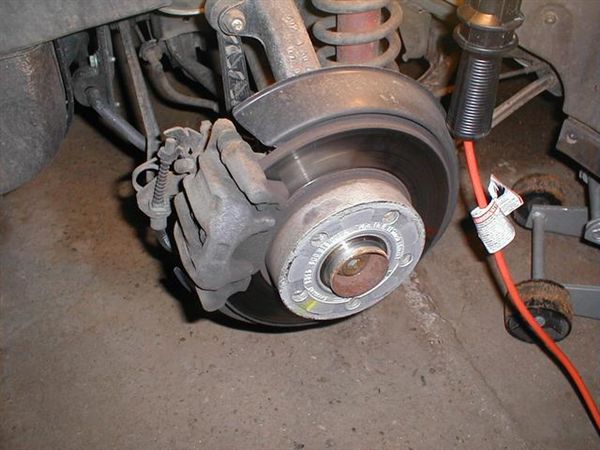
2.) Jack up the back and remove the rear wheels
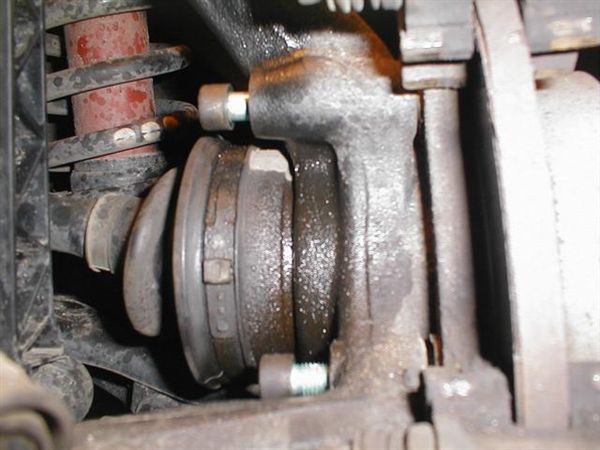
This is what you should be looking at now:
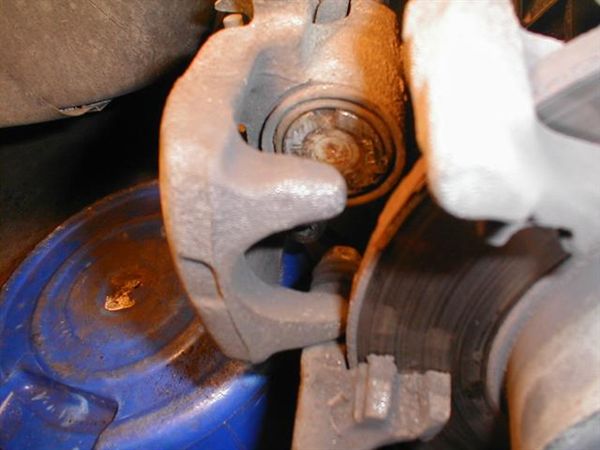
3.) Next, you remove the 2 bolts holding in the rear caliper. This is done by placing a 13mm socket or box wrench on the bolt, while holding the 15mm nut with a box wrench or adjustable wrench.
There is that top bolt, and then one on the bottom of the caliper
4.) The caliper should now pull off. The pads will probably stay on the rotor, and aren't fastened in any way (except possibly with a squeal-preventer compound, although my originals weren't). Pry the old pads out.
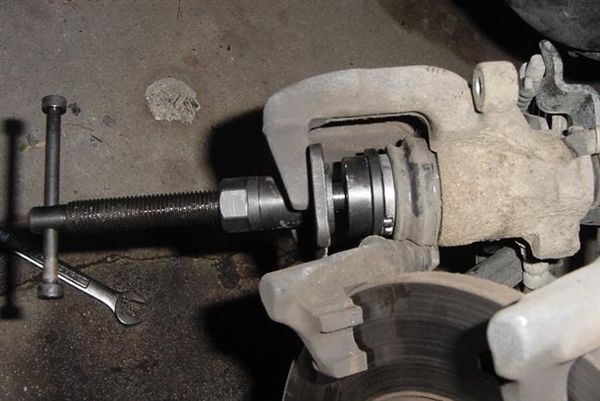
5.) Compress the caliper piston with the caliper tool.
You can see on the piston two small holes. If you look at the tool, there are two pins that fit in these holes. Basically the tool twists the piston while it pushes
In this picture, one hole is at the 12 o'clock position, and the other is at 6 o'clock
Here is the tool installed
pic courtesy of ModifiedA4
Twist the caliper tool until the piston is completely compressed.
6.) Now its time to remove the rotor. If you aren't doing this, skip down step 8
There are two 8mm hex bolts holding in the rear caliper carrier. These must be removed (bolts are greenish color). I sprayed them with PB Blaster and used my 3/8 breaker bar and 8mm Hex Socket. I had to hit the breaker bar with a hammer to break them loose
With the bolts removed, the caliper carrier comes off and the rotor just slides right off.
7.) Put the new rotor back on the hub, and install the two 8mm Hex bolts. Tighten to "good and tight" torque spec
")
8.) To install the rear pads, lay them in place on the rotor. They should stay there by themselves. Then try to place the caliper over the pads and rotor. This is easier than putting the pads into the caliper and installing the whole assembly.
9.) The rear pads have "spring" mechanisms on the back sides that fit between the caliper and the pads. Make sure that these are in the correct position (inside of the caliper) when you put the caliper on. It is easy to get the end of the spring poking out of the hole in the caliper, so watch out for this.
You can sort of see the springs in this picture. Make sure they are not sticking out of this slot in the caliper (slot in the very bottom of the pic):
10.) Reassemble the caliper. You can use a Blue loctite on the bolts to keep them from falling out if you want. You will need to use the double-pliers method again to tighten the caliper mounting bolts.
11.) Do other side
12.) Before starting car and driving: Pump the brake pedal several times until it firms up and feels relatively normal. Check brake fluid level. Pump pedal again after starting car just in case. The pumping seats your loose pads against the rotor. (If the pads are loose and you drive off, you may be surprised by a brake pedal that goes all the way to the floor.)
Follow manufacturers recommendations for bedding in the new pads.
Now you have new rear pads
Brake Bleed Procedure (W/O ESP):
A VAG-COM IS NEEDED FOR VEHICLES EQUIPPED WITH ESP
Per RKA's advice, do not bleed the brakes before doing your pads. Replace your pads and rotors first, then bleed brakes with calipers and pads fully attached to the vehicle.
Also, this write-up uses the "pumping the brake pedal" method.
CAUTION: If you push down to far on the brake pedal while doing this, you can damage seals in your master cylinder. Some people put a 2x4 under the brake pedal to keep the pedal from going down to the floor.
Tools:
- 11mm box wrench
- 1/4"id clear vinyl tube
- some sort of plastic catch can - soda bottle/juice bottle
- a "helper" to pump your brakes
- 1.5 - 2L of Valvoline SynPower DOT4 Brake fluid
Basically, there is one procedure that you do on each caliper. Start at the furthest point from the master cylinder and work your way toward it.
Do the calipers in this order..
Passenger Rear
Driver Rear
Passenger Front
Driver Front
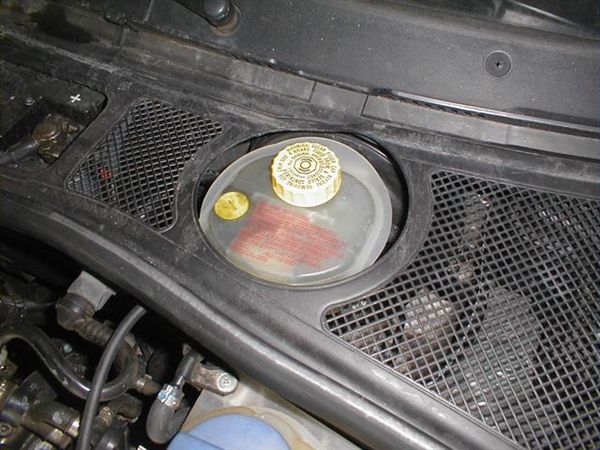
1.) Open master cylinder reservoir and a bottle of new fluid. Make sure the reservoir is full.
Here is the Master Cylinder:
2.) Pull off wheel and the brake bleed cover
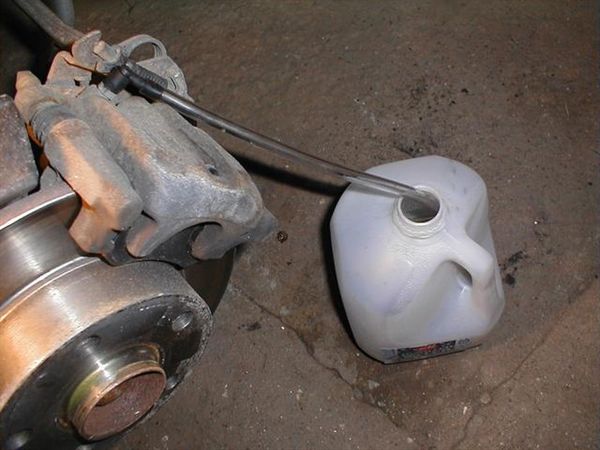
3.) Pour enough brake fluid (new or old doesn't matter) into the soda bottle.
4.) Put the tube in the bottle make sure the end is below the fluid level.
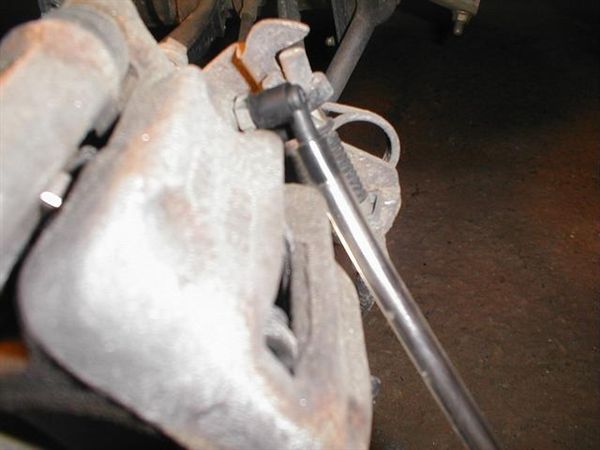
5.) Put the other end of the tube over the bleed barb on the caliper
In this picture I used an adapter from a brake bleed pump kit. But the 1/4 tube will stay right on the bleeder valve.
6.) Keep box wrench on the bleeder valve at all times.
7.) Have "helper" pump brakes a few times until it gets hard to pump.
8.) Unscrew the barb (with hose on it) until fluid starts to flow. Probably 1/4 of a turn. Have helper keep pumping brake pedal. So that fluid flows.
9.) Tighten barb immediately after a few pumps and
check fluid level in reservoir.
10.) Add new fluid to max line.
11) Repeat steps 7,8,9,10 until fluid color/consistency changes coming out of caliper.
Make sure that air pockets in the plastic tube don't get sucked back into the caliper.
12) Tighten up the bleeder screw, replace the cap, and put the wheel back on.
If the pedal goes to the floor with little/no effort after the procedure you got air in the system. redo the brake bleed. (or if you have an idea where you messed up, redo that caliper and the calipers after that one and you may be ok). If the pedal is still squishy, you could have a damaged seal in the master cylinder.
Hopefully everything went well and you can now keep up good maintenance on your brake system.


 I coulndt get the piston to retract so I was told that if you keep doing a half turn outwards it will eventually turn inwards with ease. Well unfortunately I kept turning and turning until the piston came too far out, I got it back in and got it retracted, fitted the pads and all was well, but now the pedal goes in completely to the floor. I think I have managed to get air into the system
  I have read that if you have ESP and ABS you will need VAG-COM to bleed the brakes? Is this the case or can it be done the old fashioned way?