Retrofit headlamp washers

mjsewell

Registered User
Joined
Oct 2, 2004
Messages
74
Reaction score
0
Points
6
Location
Bedford
Hi,

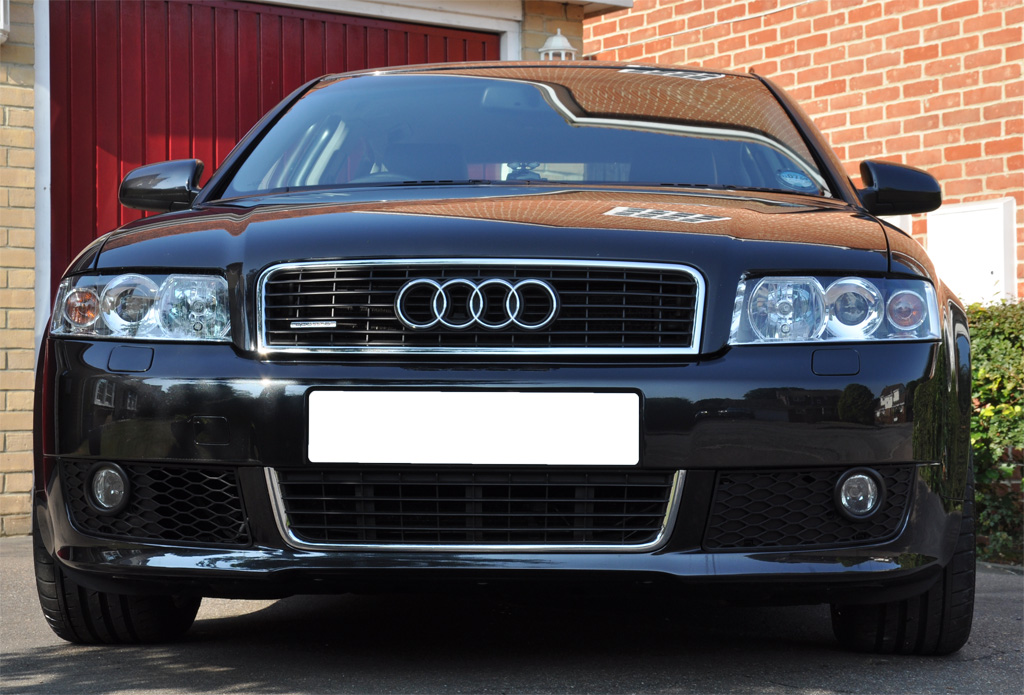
I've just bought a complete S-Line front bumper and grills at a bargain price. Just one problem, the bumper has cut-outs for the pop-up headlamp washers, so the previous owner presumably had HID's fitted.

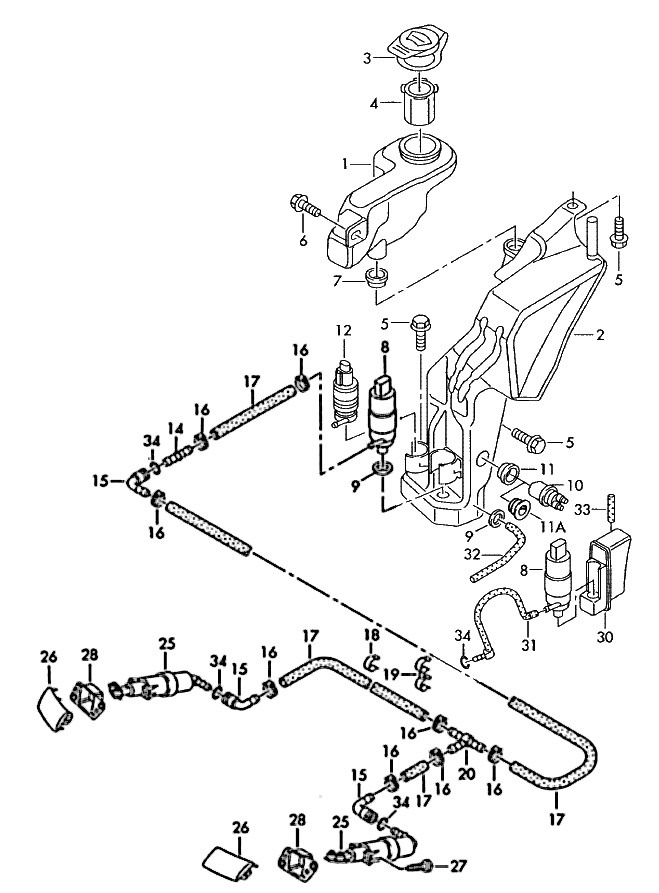
Does anyone know if it's possible to retrofit the necessary washers? Is it simply a case of buying the washers and bumper trim and running some additional rubber hose from the existing washer pump?

If it's not possible, or it's a massive job, can I buy just the bumper trim to cover up the two holes in the bumper?

Cheers,

Matthew
 
Hi Matthew, I just fitted an S4 front bumper to my A4 and converted it to work the washers on the new bumper.

The new bumper come with all the washer jets, pipes and connector etc, so if you haven't got thses you will need to get them.

The only tricky part was putting an additional pump onto the washer bottle, the bottle is located under the wheel arch on the passenger side, you will need to take your front wheels off and pull back the splash guards to access the bumper fixings and washer bottle (the bottle is split into two parts)

I bought a second pump and grommit from vag parts, I think it cost less than £30 for this.
Once you have removed the washer bottle you will find a flat area where new the washer pump plugs into, you will need to drill a hole out (approx 20mm) using a starret holesaw for a neat job, plug your grommit into this hole and then just plug in your pump into the grommit.

Wiring, I spliced into the existing washer wire but you will find that after 5 long squirts your bottle will be empty so my next job is to incorporate a relay which will be wired through the lights so the headlamp washers will only work when the headlamps are on.

The hardest part of the job will probably be in the fitting of the new bumper, it took me a while, I had to do a few alterations to make it fit but it's well worth it.

2d46a1ee.jpg


Good luck, hope this helps.

Mike.
 
Thanks for that, Mike. Makes perfect sense.

Now to find the part numbers........

Cheers,

Matthew
 
..........Wiring, I spliced into the existing washer wire but you will find that after 5 long squirts your bottle will be empty so my next job is to incorporate a relay which will be wired through the lights so the headlamp washers will only work when the headlamps are on.

Headlight washers is an expensive retrofit, but I wanted to complete the functionality of a 2nd hand S-Line bumper, I sourced, with headlight washer holes. Unfortunately it had damaged washer caps and both jet assemblies were broken off and missing.

On a factory installed system the headlight washers spray for about 2 seconds and then stop when you do a pull of the screen wash lever with the dipped lights on.

Retrofitted wiring I implemented as per OEM spec..........

+12v supply for headlamp washers comes via fuse S237 (i.e. Large Fuse #37 - should be 30A - mine was originally 20A - my circuit diagrams say this was changed from 25A to 30A at some time during production). This fuse supplies both Windscreen and Headlight washers.

Headlight washer signal +12v comes out of power control module, located under fuse box, Pin 6 connector T10b-Pin 2 (Black 10-pin connector - red/white wire) - I used a repair wire to add this connection. No module re-coding is required - works with Xenon option on or off. I extended the repair wire (within heat-shrink tubing) under the carpet behind the pedals through the centre console and to the passenger side and made a connection with a female/male spade connector at the A-pillar connection point.

The "official" wire goes to the n/s A-pillar connection panel to connector T1a (1-pin black connector) - and then through the bulkhead in the wheel arch to the pump. The ground for the pump should also be on the A-pillar ground point - brown wire.

I passed two wires, in heat shrink, through the bulkhead to the headlight washer pump. The 2nd wire being the ground which was connected to the A-pillar ground point. I sourced the pump connector and utilised a further two repair wires to make a proper connection to the pump.

Now this has worked out expensive and well worth trying to salvage the "wet" parts from the scrappy, but if you have the money here we go:

From ETKA illustration 955-30

08 Headlight washer pump 1x 3B7 955 681 £38.71
- Flat Connector 1x 1J0 973 722 A £4.29
14 Connecting Part 1x 4B0 955 873 £2.77
15 Angled Connecting part 3x 1J0 955 975 C £2.77 = £8.31
16 Pipe Clip 8x N 100 980 01 £0.81 = £6.48
17 Hose (min order qty=5!) 5x 1J0 955 464 F £6.07 = £30.35
18 Terminal 2x 8A0 971 848 C £2.29 = £4.58
19 Clip 3x 447 971 848 C £0.55 = £1.65
20 T-piece 1x 113 955 975 B £1.43
25 Lift Cylinder / Jet (L) 1x 8E0 955 101 C £51.83
25 Lift Cylinder / Jet (R) 1x 8E0 955 102 C £51.83
26 Cover Cap Primed (L) 1x 8E0 955 275 D £8.24
26 Cover Cap Primed (R) 1x 8E0 955 276 D £8.24
27 Screws 4x 8H0 807 199 A £0.49 = £1.96
28 Guide Frame (L) 1x 8E0 807 787 £1.52
28
Guide Frame (R) 1x 8E0 807 788 £1.52

Repair Wire 2x 000 979 133
Total = £223.71 + VAT


Done
:rockwoot:
 
makes me even more glad that I made Fontain put my factory fitted ones back in!!

I was sharing your "Fontain" pain reading your thread as I bought more and more into this retrofit!
:lmfao:


If I had a been quicker I could of got down to Iver and made them an offer for the parts they removed from your car!
 
Hi,
I want to retrofit headlight washers to my B6 and I have some questions.
- I will need a new bumper or I can drill the holes on my existing bumper?
- If I buy a new bumper these holes are ready there?
- Is there any DIY or photos for this retrofit?
Thank you.
 
You need a new "top" bumper that has the washer holes you can not cut the holes!
Part numbers.....
- 8E0 807 103 F GRU Cover for Bumper (Primed) - NOT THIS ONE
- 8E0 807 103 G GRU Cover for Bumper with headlight washer system (primed)

Fit the new bumper skin with your existing valance and then you fit the washer system parts. The washer jets can not be bolted to the bumper off the car as you can not get them past the horn and associated fixings.

I have pictures of the washer bottle modification to add the headlight washer pump - you simply drill a hole in the right place. Do not have any pictures of the rest of the job as it all takes place behind the bumper and could not get any shots - but the ETKA parts diagram, (illustration 955-30) shows you all the parts exploded - that's what I used to build this
retrofit. With a length of Audi hose it was just a case of cutting to length for each section.

I have "enhanced" the Headlight Washer parts in the diagram below.
All the parts numbers are referenced in my previous part list post above.
Wet%20Parts.jpg


Washer Bottle out the car with new pump to fit....
01_WasherBottle.jpg


Hole centre to drill is 22mm from each flat edge on existing bottle......
02_PumpHoleLocation.jpg


Hole drilled with a 20mm Hole cutter.......
03_HLHole.jpg


Grommet fitted to new hole, I used self adhesive "cable tie bases" to secure the pump to the washer bottle......
04_GrommetTies.jpg


Pump fitted and secured......
05_PumpTied.jpg


Back in the car behind n/s headlight......
06_InCar.jpg
 
Last edited:
Thank you Woorlord for the photographs and for the directions.
I am waiting the new bumper to start this work.
 
Hi,

doing the same for an audi B7 now, just have a look at

http://www.audi-sport.net/vb/showthread.php?p=855177#post855177

PS
Woorlord has replied to me with some more details on how to connect the wiring. I am taking the liberty to post his comments here:

Woorlord said:
Working from the washer bottle back....

1. Connect to Washer pump 0v & 12v wires (1 repair wire cut into two parts is sufficient to make a connection in the housing). The repair wire obtained from Audi has the correct metal connector that inserts into the Headlight Washer pump connector shell - this gives the best electrical connection to the pump. You have to extend this as repair wires are usually only 600mm long. (I think the repair wire for this connector houing is Part No 000 979 133 {2.8mm2 size wire})

2. Extend both wires in heat shrink for extra protection from the elements.

3. INSIDE: Remove the large plastic cover under your steering wheel and above your pedals. This will give you access to all the wiring under the dashboard. Also remove the left kick side panel (This is known as the A-Pillar. FYI: Where seat belts are mounted behind the front seats this is known as the B-Pillar.)

4. OUTSIDE: Remove the road wheel directly next to the Washer Bottle and then remove wheel arch plastic liner. Looking in the wheel arch you should see the washer bottle to the left or near the front of the car. As with all other wires in this area run them at the top of the wheel arch and then down the right to where the wires go into the cabin through a large rubber grommet seal. You can make a tiny hole in a spare rubber nipple of the grommet.

5. INSIDE: Wires should now be accessible in the cabin.

6. INSIDE: The Washer Motor "0v" wire needs to pick up a chassis connection to ground it. There is a ground point with various brown wires connected at one central point in the A-pillar area.
6. In the cabin, the Washer Motor "+12v" wire needs to pick up Pin 6 connector T10b-Pin 2 of the "Power Control Module" (Black 10-pin connector - red/white wire) - I used a repair wire to add this connection. (I think this Repair Wire is Part No. 000 979 133 {2.8mm2 wire}). The Power Control Module is a flat black box to the left and below your steering wheel under a number of relays.

Connecting the headlight washer pump to the control module as described ensures you get a ~2 second headlight wash only when the headlights are on.
 
Last edited:
i have got all the washer pumps, jets and bottle etc for a B5...If they fit your car you can have the hole lot cheap if thats any help...
 
hi, appreciated, but i do have all the equipment now, i believe... thanks
and some parts seem to be different e.g. the water bottle.
 
At the Headlight Washer Pump, there are numbers 1 and 2 marked on the mating pump connector. For correct operation of the pump, 1=0v and 2= +12v. If you get the headlight washer pump connections around the wrong way then the jets will not pop up.

Headlight%20Washer%20Pump.jpg
 
Last edited:
I drilled a hole 20mm in diameter, this seemed to be large enough - i think had i added 2 mms, it would have been too loose.
 
Further information for all, had a PM asking about connection to Power Module......

The Pin 2 wire on connector T10b will not be there - that is why you need a repair wire to put into the "free" space. Normally you will have to remove a pin retaining strip and then push in the connector and then refit the retaining strip to secure the wire.

Look very closely at the connector pin numbers will be marked in small digits on the relevant connector, normally Pin 1, then Pin 5. Pin 6 & Pin 10 maybe? From the circuit above and other circuits I have, the black connector T10b is should have wires as follows, some maybe missing if optional extra's like headlight washers:

  • Pin T10b/1 = no connection
  • Pin T10b/2 = red/white [1.5mm] (small connector)......Optional Headlamp washer motor
  • Pin T10b/3 = green/yellow [2.5mm]
  • Pin T10b/4 = black/white [2.5mm]
  • Pin T10b/5 = black/yellow [2.5mm]
  • Pin T10b/6 = no connection
  • Pin T10b/7 = brown [1.5mm] (small connector)
  • Pin T10b/8 = black/green [1.5mm]
  • Pin T10b/9 = red [1.5mm]
  • Pin T10b/10 = red [2.5mm]
Cable sizes in [brackets] according to circuit diagrams.

The simplest way to test the output is with a Digital Volt Meter (DVM) or simpler a 12v bulb and a couple of wires. In each case, connect one end to the chassis (0v) and the other end to the T10b Pin 2.
Now make sure your ignition and LIGHTS are fully ON - squirt the windscreen washer stalk - the bulb should light or the DVM should read ~12v for ~1.5-2,0 seconds. If this works connect the motor up and test, etc.

Safer to have water in the bottle when operating the pump but not essential as you do occasionally run out of water when on the road - stick a litre in for testing anyway!
 
Last edited:
hi Woorlord,
thanks again for your help.

I still seem to have a problem.
Woorlord said:
The Pin 2 wire on connector T10b will not be there - that is why you need a repair wire to put into the "free" space. Normally you will have to remove a pin retaining strip and then push in the connector and then refit the retaining strip to secure the wire.

Do you mean I should be using one of the two empty 'slots' in the plug to put the repair wire in? There is no metal pin behind this - the module only has 8 pins that can be connected to! Behind 2 of the 10 openings in the plug, there is nothing...

But the only number I can find, is a '1' on the opposite side. So can it be i have to add to one of the existing wires there? (since you also only named 8 connections in the overview)

thanks
PS here is a picture of what my connector looks like:
http://www.audiforum.nl/forum/attac...non-sproeiers-inbouwen-powercontrolmodule.jpg

The encircled wire ("this one?") in the photo is the only red/white one.
I should mention that this is a B7, not B6 A4
 
Last edited:
:
Do you mean I should be using one of the two empty 'slots' in the plug to put the repair wire in? There is no metal pin behind this - the module only has 8 pins that can be connected to! Behind 2 of the 10 openings in the plug, there is nothing...

But the only number I can find, is a '1' on the opposite side. So can it be i have to add to one of the existing wires there?
:

On my A4/B6 I have a compatible "Central Electronics" controller which has the necessary electronics to feed the installed wire for the Headlight Washer Motor - My Central Electronics part number under VAG-COM (Module 09) scan is 8E0 907 279 B.
Probably a different part number on a B7?? However, just checked circuits up to Year 2007 and they all use same pin out, i.e. T10b/2!

Also your picture link is no good unless you are a member of that website as you have linked above - so I can't see this picture. I require a login to this Dutch website - all registration details are in Dutch.

I have shown above the relevant pin numbers and wire colours - what do you have on yours with respect to connected wires and their associated colours on the T10b plug. Also what is the indicated part number on the module?
 
Last edited:
Hi

sorry about the photos - i'll see if i can fix that.
should we be looking for the number on the black plastic box or is there another module number inside it?

in any case this is stated on the box in my car:
8E0 907 279 L

and

ILM B7
TFK22.12.2004
0304

So just an L instead of B; for the rest it's the same number

thanks
 
Last edited:
The L vs B is the difference in this case and makes all the difference in not having the headlight washer circuitry.
What we need to establish is what version is correct for a B7 with the Headlight Washer option??

Anybody any ideas?? You may also want to start a thread in the B7 section to ask what versions people have on their B7's with the Xenon and Headlight Washer option.

I know that my version wilnot support the "AUTO" lights or the "Coming Home Light" options.
 
i'm extra confused now - have a look at this picture:
http://cgi.ebay.de/Bordnetzsteuerge...temQQptZAutoteile_Zubehör?hash=item3ca838cd9c

it shows the module with extension B but it does also just have 2x4 pins? I am talking about the slot that sits aligned with and above the number 8E0 907...

it looks identical to mine but has extension 'B'
:wacko:

so your version 'B' does have 10 pins there?

this is my version:
http://cgi.ebay.de/Audi-A4-S4-RS4-8...ItemQQimsxZ20091128?IMSfp=TL091128208005r1008

I started a separate thread here:
http://www.audi-sport.net/vb/showthread.php?p=863581#post863581
 
Last edited:
I think I know your problem and I have just verified this on my module!

Pins 5/4/3/2/1 are clearly marked on the cable side of the plug shell and then it runs down the connector strip and then below we have Pins 10/9/8/7/6.
So Pins 1 and 6 are blank in this instance.
Pins 2 & 7 are the smaller connectors which is one of the Headlight washer connectors (T10b/2).
Pins 10/9/8 & 5/4/3 are the larger connectors.
:haudrauf:
8E0%20907%20279%20B.jpg


Wires according to circuit diagrams:

  • Pin T10b/1 = no connection
  • Pin T10b/2 = red/white OEM [1.5mm] (small connector)......Optional Headlamp washer motor (Yellow repair wire when retro-fitted.)
  • Pin T10b/3 = green/yellow [2.5mm]
  • Pin T10b/4 = black/white [2.5mm]
  • Pin T10b/5 = black/yellow [2.5mm]
  • Pin T10b/6 = no connection
  • Pin T10b/7 = brown [1.5mm] (small connector)
  • Pin T10b/8 = black/green [1.5mm]
  • Pin T10b/9 = red [1.5mm]
  • Pin T10b/10 = red [2.5mm]
Cable sizes in [brackets] according to circuit diagrams.
 
Last edited:
ok some updates. Pump and cabling is ok, just dont get signal on pin 2 (Woorlord thanks for the pics! Just colours are different with the b7 but same pins connected).

It may be I need to activate the washer signal and I will try this coming Sunday.
VCDS:
Channel 13 (settings for washer)
std value:115
+032 - Scheinwerferreinigungsanlage (SRA) aktiv
meaning: headlight washers system activated

From a German site I am getting positive feedback suggesting the L is in fact a Highline module so it should all work. This is all regarding a B7 car so I'll leave it at that here :)
cheers
 
Last edited:
Just thought to post one more comment - it's working! The car was accepted for the German and (hopefully, eventually) Dutch roads yesterday. All it took was a recoding in VCDS to activate the headlight washers. Worth noticing however is, that it might actually have been the setting 'Rest of World' as opposed to 'US' that did the trick. Not necessarily the actual setting of 'headlight washers active'. Not 100% sure. It looked like that setting was already there.

Only issue left now is that the S4 bumper does not seem to wrap nicely around the B7 front. I did remove the plastic air inlets but still, the headlights 'stick out' a bit and the bumper doesnt nicely align with the fenders. But it's a small detail, a matter of 1-2 cm.

So all in all - THANK YOU!! Woorlord - without your detailed information this whole project would have not been possible! I have not found this information elsewhere in such detail. Been a great help! :) :thumbsup:
Arne
 
Last edited:
Sorry lads for refreshing such an old topic but I have bought a S line bumper to my B6 with the holes for the washers. Now I am collecting stuff to get them working properly. If I was to look on scrap yards, ebay etc. What other jets would suit s line bumper to make them work perfectly? I mean like would a passat's suit? Or Octavia's? I think we should now tidy it up into one post so it will be easy and all in one spot, not all over the place.
Thanks!

I doubt if another model headlight wsher jet will fit as they are moulded to the contour of the bumper.
Note that even the windscreen washer jets are slightly different in size from Passat to A4 and are not directly interchangeable.
The jets are marked "Manufactured in UK" - not sure by who for Audi.
Be interesting what you find?

The jet assemblies are easily damages if the bumper skin is detached and the jets need to be unscrewed and removed before removing the skin.
 
For those looking to source an alternative non-Audi sourced hose the following may be useful.........

The hose I had left over and it has the following markings stamped on it:
"HELLA N 67 063 >EPDM< 108"
It's a black hose and the cross section shows a fibre braid in the hose wall.
The internal diameter is approximately 9.8~10.0mm. The external diameter is 15.6mm.
 
hi i need help i have 8E0 907 279 N COMMAND like that ^ is same but wire is diferent color i need the original color beacose the conector is burn onli wire color is see is 10 pin 5 pin and 7 pin .
the pin 10 in my 8E0 907 279 N is black/green pin 5 is black yellow. pin 7 is brown. in my 8E0 907 279 N. please help and sorry for my bad language

I do not understand the question??

Perhaps you require original OEM wire colours for the T10 connector?
Original wire colours are listed in thread #24 according to Audi circuit diagrams.
 
has any1 ever tried installing the universal ones? I have a bumper with the cutouts but it's a bit dear to spend like 200euro on the washers, I found universal ones for like 50 euro and they include the pump, 2 washers and the hoses
 
hello all...

everybody who added washing system in you car, please help me...I have also wanted to added this system in my car, buy on Ebay I don't find any OEM parts for this...Are oyu buy parts on local Audi dealer?
How much is all this OEM parts for headlight washing system? is this easy to install in car?

what about sensor for automatic headlight height? Have anybody this OEM instalation in car?

with best regards,
ROk

Post #5 indicates cost of all parts required at the time of post in GB Pounds Sterling - for some reason the £ sign is a different character?

Kufatec in Germany do a kit for adding auto levelling headlights - not sure how complete this kit is?
 
another rejuvenation of an old thread...
I just failed the Finnish MOT for having HIDs but not having headlamp washers fitted. What's the rationale there? the coorelation between HIDs/xenons and washers?
I think i'll most likely revert to halogen for the retest but may start gathering bits for the retro fit of washers. Looks like i'll need a new bumper for starters though. ******. If anyone comes across a crystal blue upper bumper (or whole thing/s4 bumper) on their travels feel free to tip me off :)
 
**** it. HIDs and LED side lighst temporarily back to halogen until the test, then back to pure crispy white light again..
 
Hey everyone,

I did this to my B7 and here is an update, my car came with a wire wired up to the module I traced the wire to the terminal block and found it I connected the headlight washers to it and nothing. Ran volt meter tests and changed some programming and still nothing. My module part number is 8E0 907 279 N and I am stumped. I tested the pump and jets directly to a 12V source and everything works so I know that is not the problem it either comes down to that module or the programming. Any ideas?

Thanks a bunch!