

Hello!
Hopefully this will be a good enough fix.
My heaters have been stuck in HOT for months. The wife hates my car, when we use it she has to melt in the passenger seat.
I had to get the glove box off as the hinge had snapped.
So whilst it was out, I decided to pop off the motors.
I popped off the screen flap motor first as this sometimes refuses to open.
The actual pictures are of the centre flap motor iirc. It was just for the sake of pictures.
Once off the car, carefully open up the case by pushing in the clips and opening it all the way round.
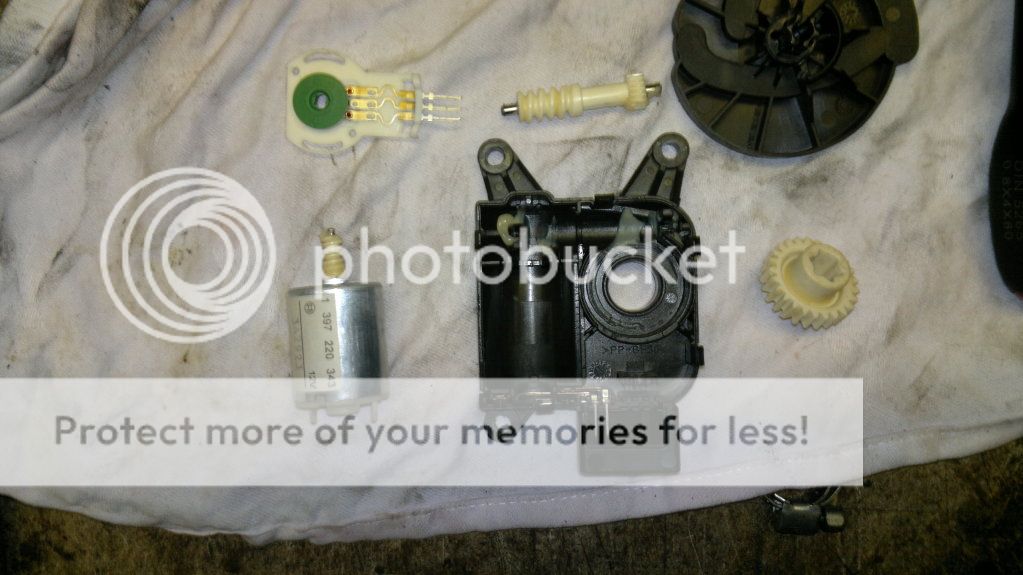
As above, I have taken it apart.
Pop out the motor first, gently lever it out from the power connection end.
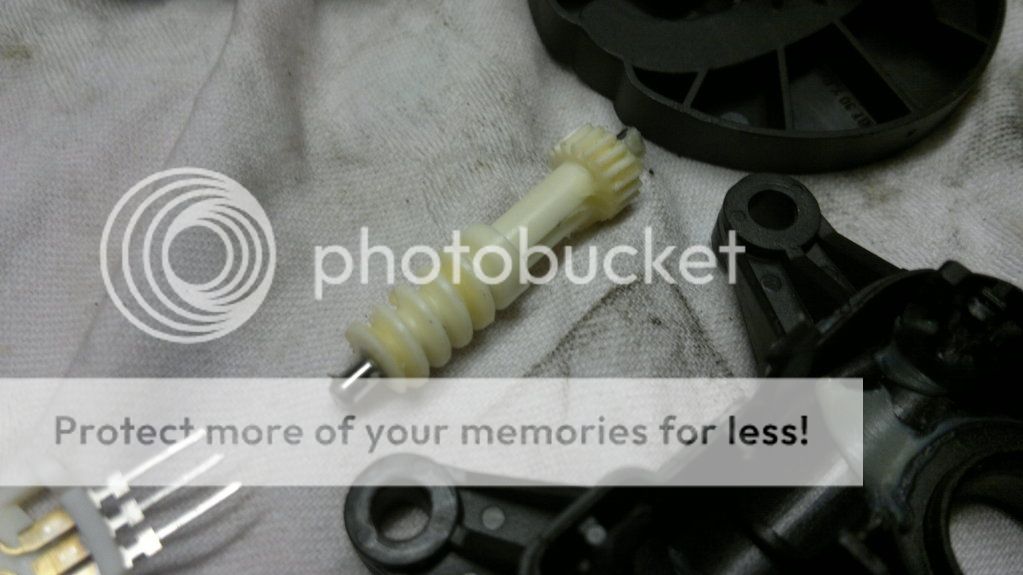
Then pop out the long cog.
Carefully remove the sensor ontop of the round cog.
Put all the parts somewhere clean and safe.
To remove the main cog, turn over the case and gently pry the outer connection from the cog. It will just pop off.
If yours is like mine, you'll find the cog is quite tight in it's holder.
Put it out and give it all a good clean up.
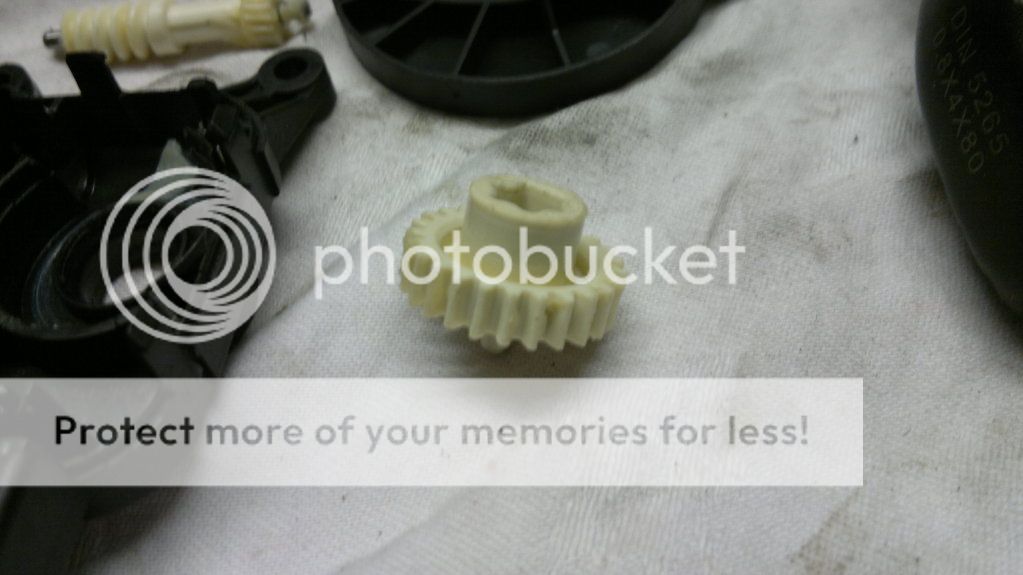
Give all the parts a really good clean. I found having a mate to hold a cloth tight whilst you run the cogs over the edge of the cloth helped clean out nooks and crannys.
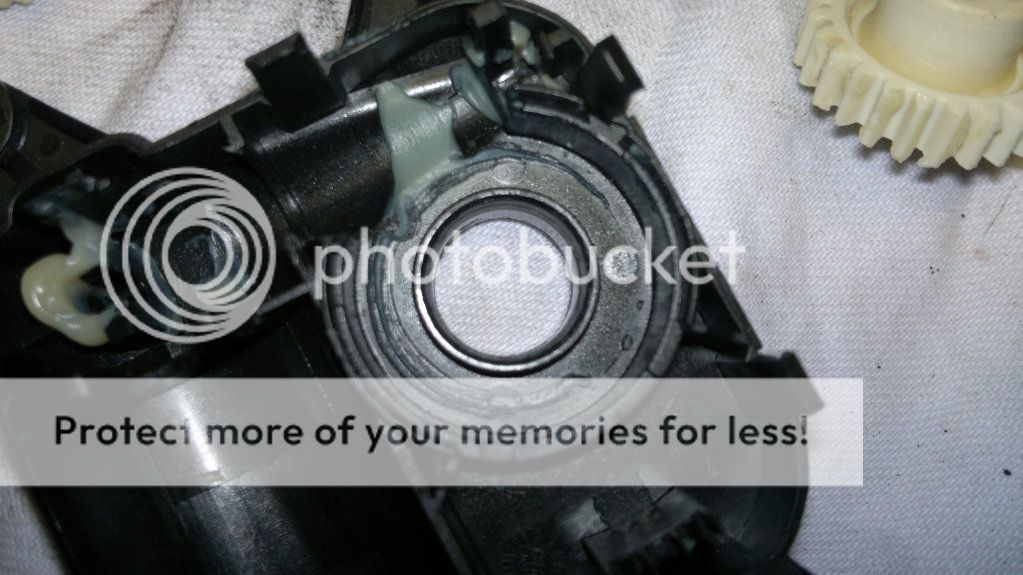
Once you've got it all lovely and clean. I opened up the hole in the plastic up a touch with some wet and dry wrapped round a bolt. Keen doing this until the cog turns nicely in the hole.
Once done, give the unit another good clean up.
Now you need to grease everything back up. I used a light white grease we use at work on moving pistons.
Smear any mating faces. Make sure the white cog turns nicely in the unit. I found it was alot freer after this. My heatflap motor was nearly solid!
Pop the white cog in first, then push the outter connection on. It will only go in one way. I tried to get it back in line as it was before as much as possible. Whether this is needed, I'm not sure.
Grease up the long cog on the metal part and on the cog bits.
Put a small smear of grease on the cog of the motor and pop it back in place. Sticker points up.
Pop the case back on and give it a try.
I ran heater calibration afterwards but it seemed to work fine before the calibration.
I also put a smear of grease on the joints of the lever on the heater box.
Hope this helps!
Hopefully this will be a good enough fix.
My heaters have been stuck in HOT for months. The wife hates my car, when we use it she has to melt in the passenger seat.
I had to get the glove box off as the hinge had snapped.
So whilst it was out, I decided to pop off the motors.
I popped off the screen flap motor first as this sometimes refuses to open.
The actual pictures are of the centre flap motor iirc. It was just for the sake of pictures.
Once off the car, carefully open up the case by pushing in the clips and opening it all the way round.
As above, I have taken it apart.
Pop out the motor first, gently lever it out from the power connection end.
Then pop out the long cog.
Carefully remove the sensor ontop of the round cog.
Put all the parts somewhere clean and safe.
To remove the main cog, turn over the case and gently pry the outer connection from the cog. It will just pop off.
If yours is like mine, you'll find the cog is quite tight in it's holder.
Put it out and give it all a good clean up.
Give all the parts a really good clean. I found having a mate to hold a cloth tight whilst you run the cogs over the edge of the cloth helped clean out nooks and crannys.
Once you've got it all lovely and clean. I opened up the hole in the plastic up a touch with some wet and dry wrapped round a bolt. Keen doing this until the cog turns nicely in the hole.
Once done, give the unit another good clean up.
Now you need to grease everything back up. I used a light white grease we use at work on moving pistons.
Smear any mating faces. Make sure the white cog turns nicely in the unit. I found it was alot freer after this. My heatflap motor was nearly solid!
Pop the white cog in first, then push the outter connection on. It will only go in one way. I tried to get it back in line as it was before as much as possible. Whether this is needed, I'm not sure.
Grease up the long cog on the metal part and on the cog bits.
Put a small smear of grease on the cog of the motor and pop it back in place. Sticker points up.
Pop the case back on and give it a try.
I ran heater calibration afterwards but it seemed to work fine before the calibration.
I also put a smear of grease on the joints of the lever on the heater box.
Hope this helps!
