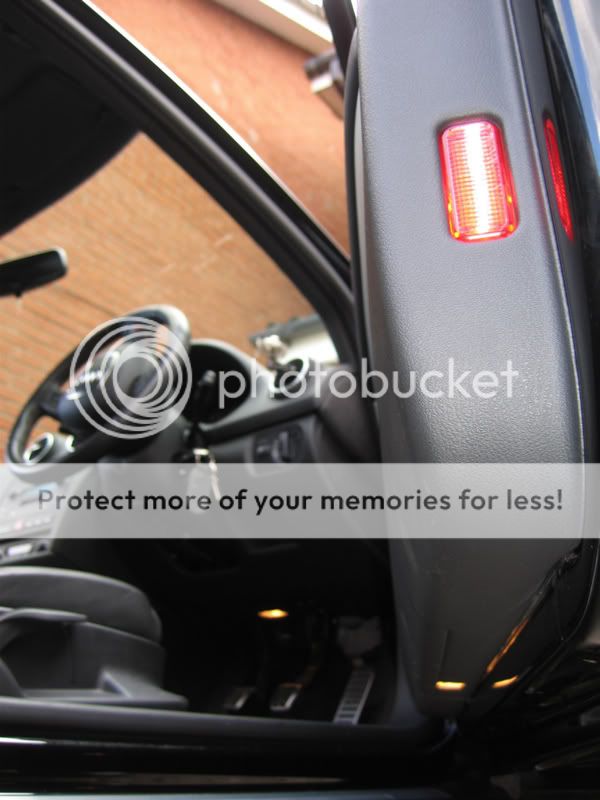
My DIY guide for Retro fitting Puddle Lights

RobinA3

Well-Known Member
Gold Supporter
Joined
Aug 11, 2005
Messages
2,021
Reaction score
128
Points
63
Location
Cheshire
As promised in my post about DIY retro fitting footwell lights (http://www.audi-sport.net/vb/showthread.php?t=58215) here is my guide to fitting puddle lights and warning lights.

I fitted these this morning, took about 6 hrs in total for both doors.

You'll need VAG-COM to switch on the puddle and warning lights, i would advise you to do this first.

You'll need to go to 42 and 52 for the door electrics.
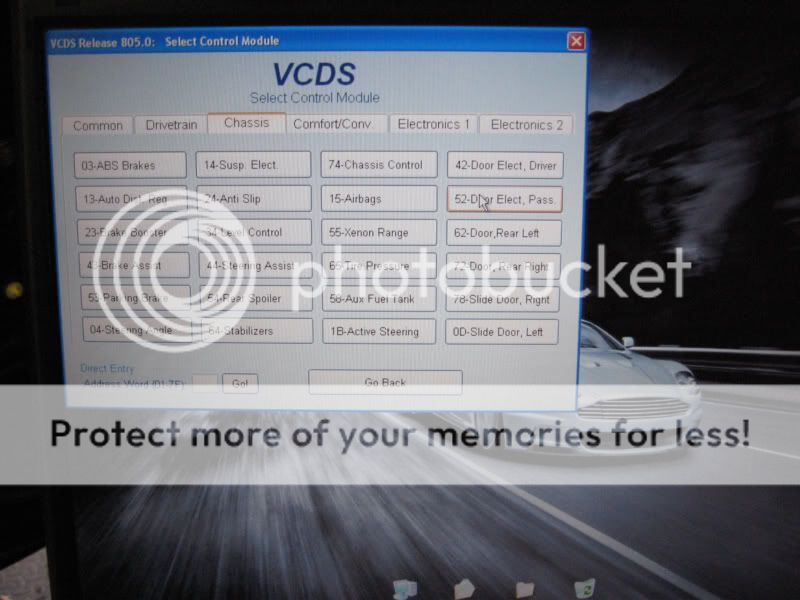
puddle9.jpg


Then in the coding option you'll need to add '64' to the number you already have in the top box, mine was 0000560 so the final number needed was 0000624.
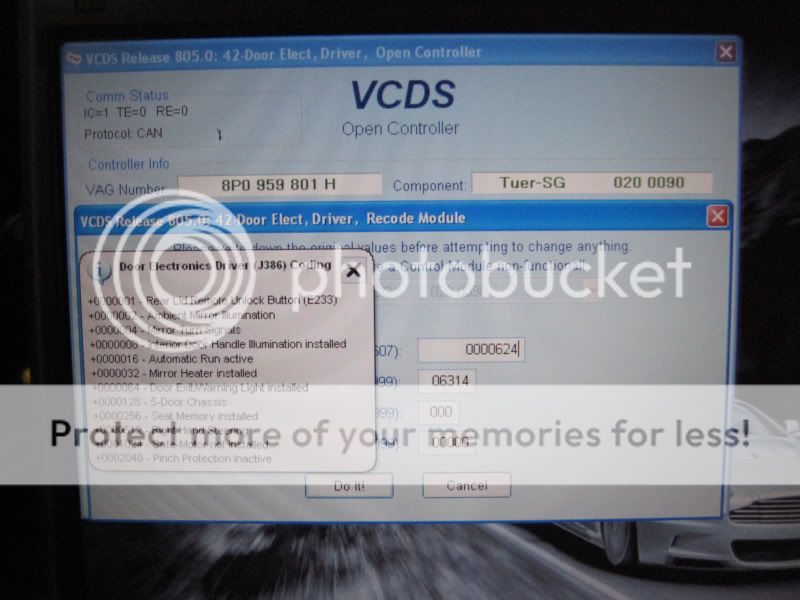
puddle10.jpg


Do this on both 42 and 52.

This the vag com side sorted out.

Now for the hard work.

First of all the doorcards will need to be removed.

Remove the trim.
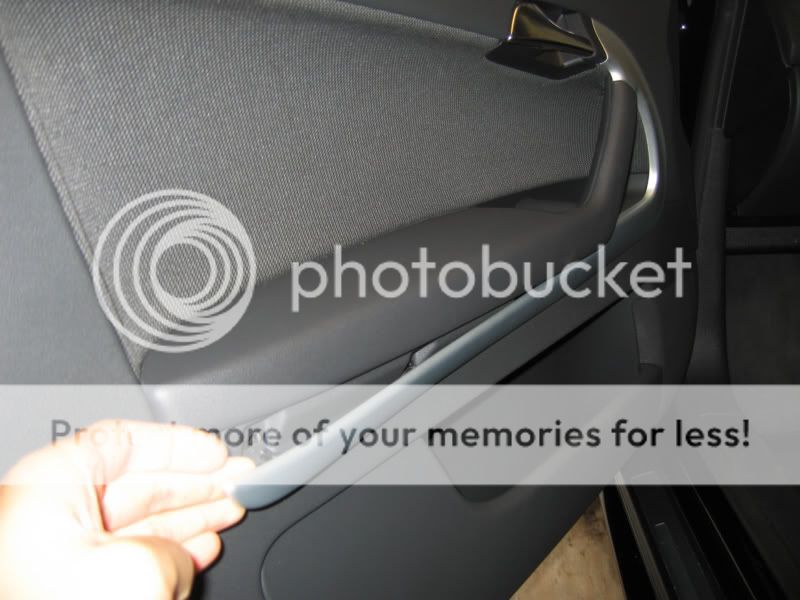
puddle2.jpg

puddle3.jpg

puddle4.jpg


Undo the 3 screws holding on the door card.

Pull the door card off.

Undo the door handle cable and the electrical cable going to the door controller.
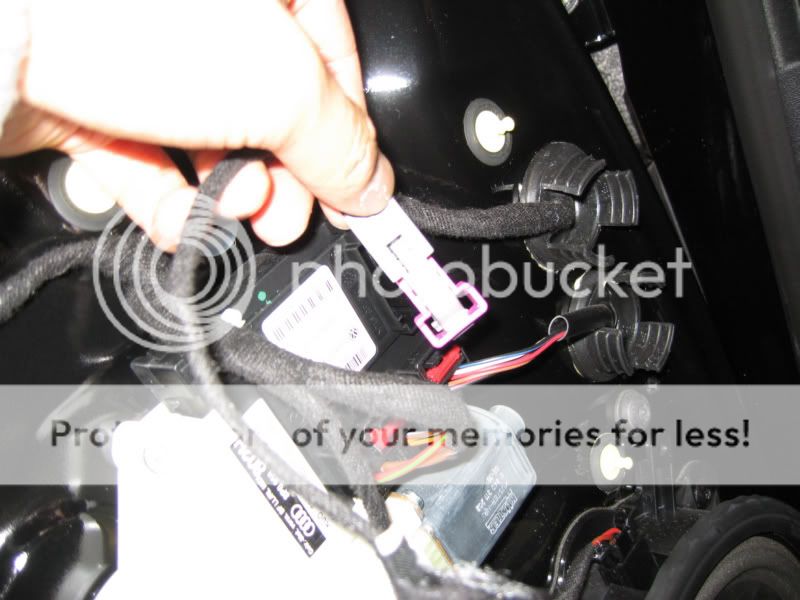
puddle5.jpg


Remove the white foam stuff.

Now you'll need to remove some of the bottom of the door card for the light to sit in place.

I used a drill and used a small drill bit to drill around the rectangle.

puddle13.jpg


Now the light can be palced into the hole, i used a tiny bit of superglue to keep the light in place.
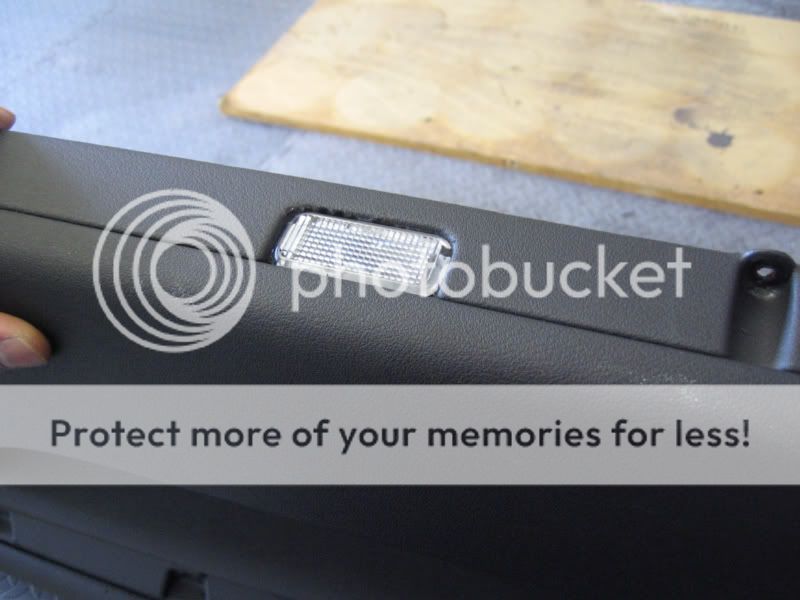
puddle14.jpg


Now for the wiring - DRIVERS SIDE

You can wire the set up in different ways but this is the way i have done it.

Remove the housing from the main connector (GREY).
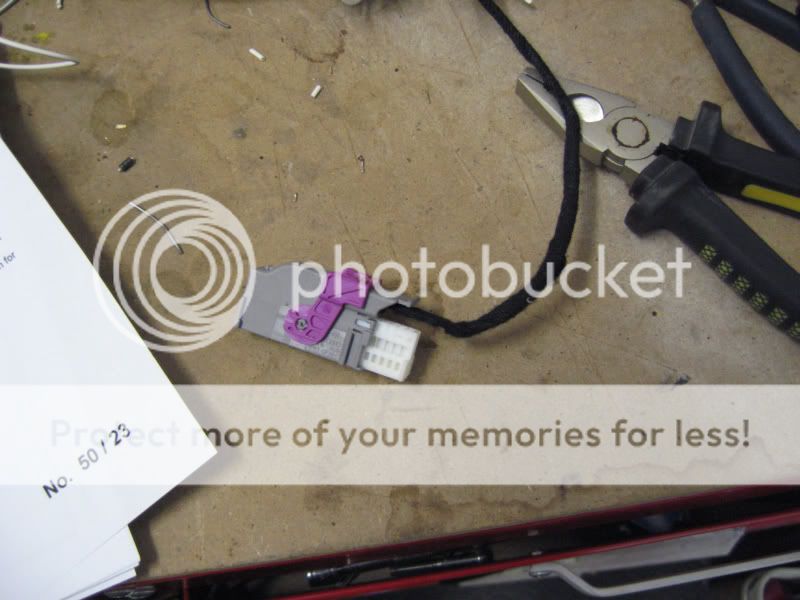
puddle6.jpg


Now pin 1 is the supply and pin 2 is the earth.

You'll need to get the supply wire to both the puddle light and the warning light.

I used one wire which then split off into 2.

As for the earth this is the way i did it:

Unplug the connector going to the door lock switch.
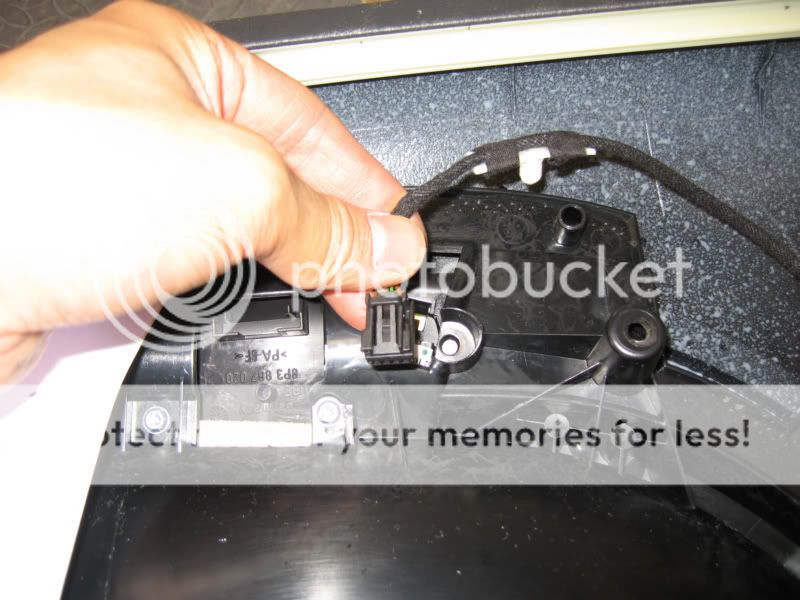
puddle15.jpg


Undo the clip from the connector by sliding it away.
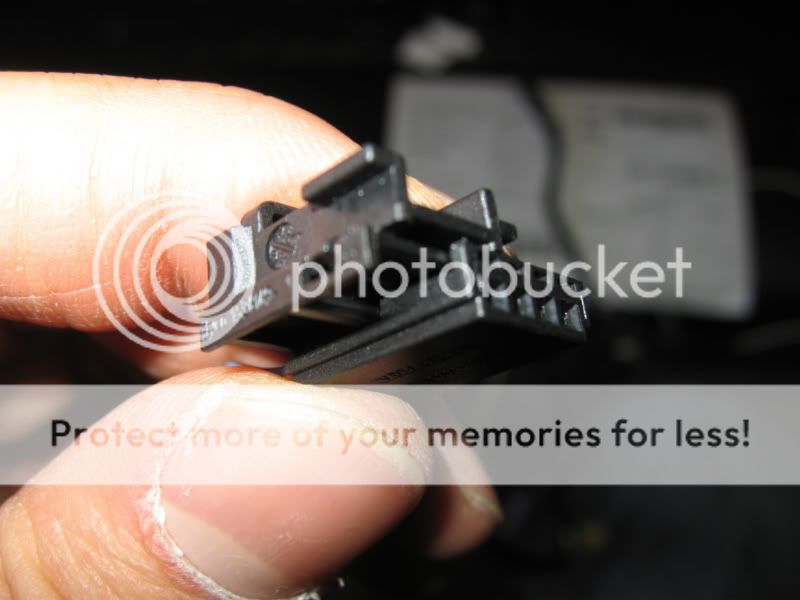
puddle16.jpg


Remove pin 1.

puddle17.jpg


Replace this wire with another earth wire going from pin one to the earth on the warning light.

The wire which was removed from pin one must now be soldered onto the wire you just put in.
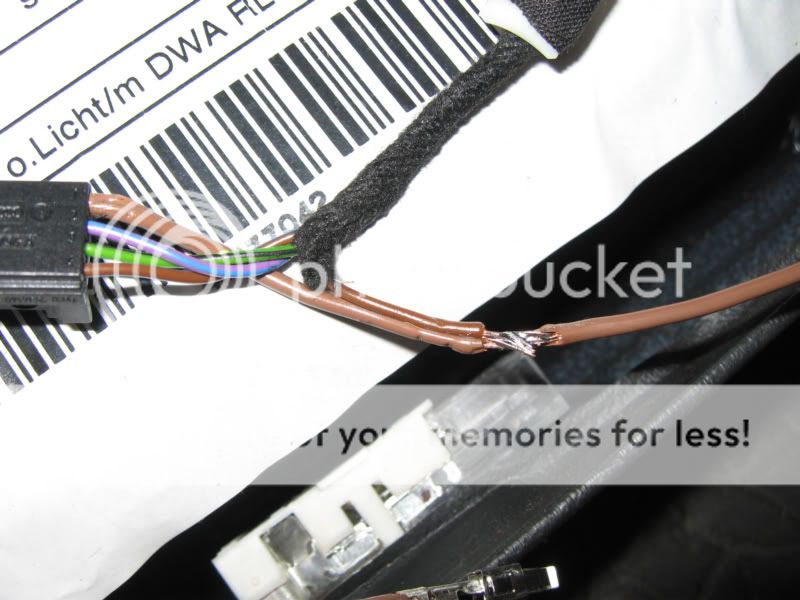
puddle20.jpg


Now you must solder an earth cable going from the puddle light to the earth wire you have just put in.

Put the connector back and plug it back into the locking switch.

Now put the main grey connector back together.
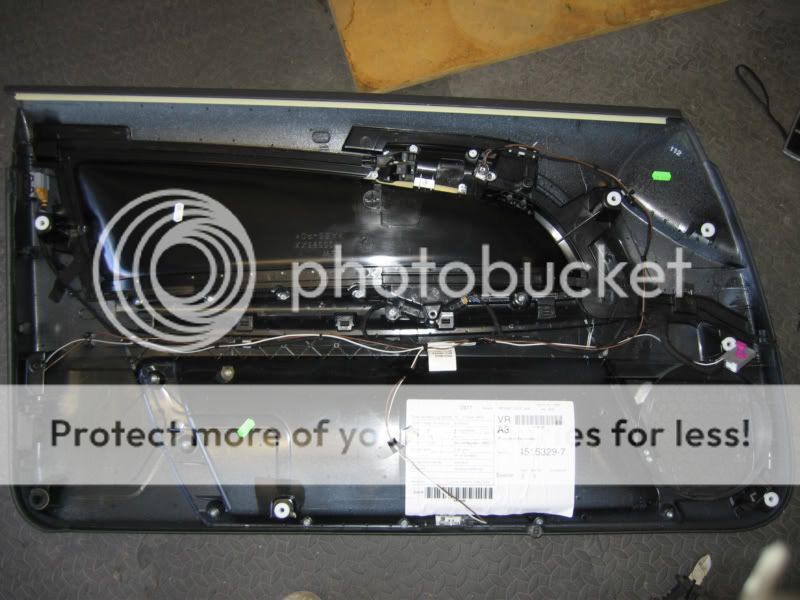
puddle21.jpg


This is what mine looked like when completed.

Put the door card back along with the door handle cable and electrical connector.

The lights should go on when the connector is plugged back in.

Now for the PASSENGER side

The same goes for the passenger side but there is no locking switch to mess with.

As with the drivers door grey plug needs to be taken apart, pin one is the feed and pin 2 is the earth.

Supply the lights with an earth and a supply just like the drivers side.
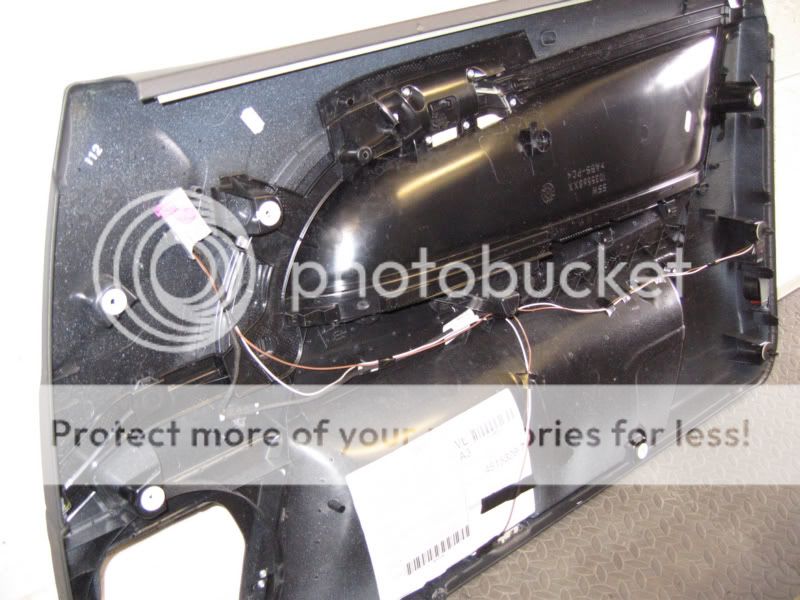
puddle11.jpg


Remember to tie the wiring down so it doesn't rattle when the doorcard is back on.

Put the door card back on and thats it really.

Here is the end result
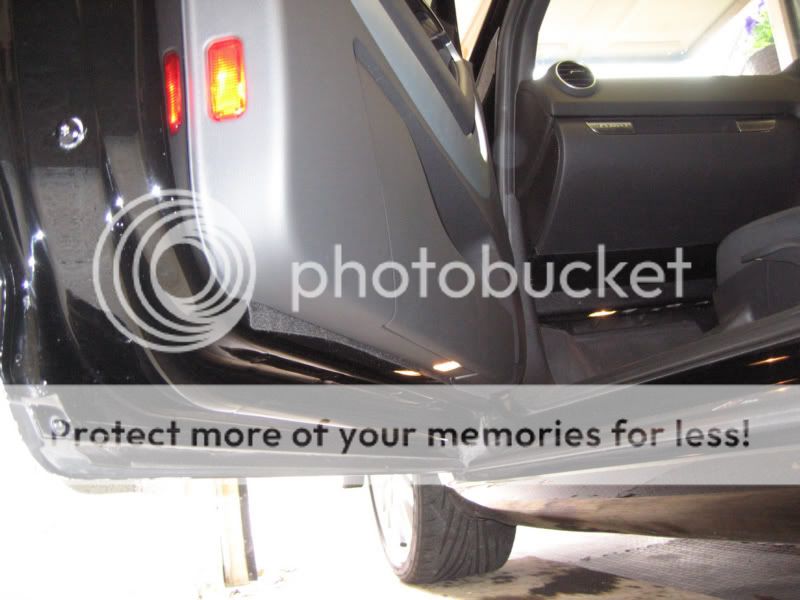
puddle12.jpg

puddle1.jpg


If anyone needs any of the correct electrical connectors for the plugs etc then let me know as i have a supply of them.

Hope you find this post useful.
 
  • Like
Reactions: Marek196c, TorqueTerrorist and D3mon
Very impressive - another good write up ! Interested to know what the next one is going to be ?

Richard
 
  • Like
Reactions: Nikolaos
Nice guide, thankyou! The light pack is the one option I regret not getting, gonna have to have at adding it soon.
 
The part numbers that you'll require are the following:

Puddle Lights / Footwell lights - 8D0 947 415 - £5.72 exc VAT
Door Warning Light - 6Y0 947 411 - £6.80 exc VAT
Plastic Connector for the lights - 893 971 632 - £1.35 exc VAT

You'll need the metal electrical connectors as well for the main connectors on the car and also the plastic connectors, i don't know the part numbers for these as i got hold of some elsewhere, if you need some connectors and can't find any let me know as i have a load of spare ones.

I can provide the metal connectors for the lights and the ones which go on the vehicle loom, also i have plastic connectors for the lights and also footwell lights if anyone is interested.
 
Interesting - one feature missing from my A3 that was a backwards step from my Mark IV Golf.

Are you saying that pin 2 (Earth) on the drivers side is used, but not used on the passenger side ?

Regards,

Paul
 
i noticed the light unit at the edge of the door and had wondered why they didnt work but it will be because its just a reflector with no actual light in behind it.
 
Interesting - one feature missing from my A3 that was a backwards step from my Mark IV Golf.

Are you saying that pin 2 (Earth) on the drivers side is used, but not used on the passenger side ?

Regards,

Paul

On both doors pin 1 is the feed, pin 2 is the earth.

On the drivers door the locking switch uses the pin 2 as its earth so the lights need to share that earthing pin.
 
I am currently making a proper loom up for both doors for a member on the forum, i will post pictures of it later on.
 
Small modification to the wiring to make life easier on the drivers door, the looms i have made are slightly different in that instead of going up to the locking switch for the earth its easier to take out pin 2 on the door controller and put in the earth from the puddle light loom into pin 2 and then solder the previous earth going to pin 2 to the new earth cable.

Hope that makes sense.

I mean either way doesn't matter but its just whats easier.............
 
My foot well and door puddle/warning looms arrived in the post today.

Very nicely constructed with cloth loom tape to match the OEM looms.

I will let you know how I get on when I've installed them (hopefully this weekend).

Thanks Robin :icon_thumright:

Paul
 
I have had a quick scan but cannot see part numbers :( what are the ones required to do the work?

thanks :)
 
To be honest there is a fair number of parts required including various crimp pins for the connectors.

I just opted to order the complete loom ready to go from Robin.

Paul
 
^^^I no longer supply the lights, i only supply the 3 looms and connectors for £40 inc recorded delivery^^^
 
Good man - I will be in touch, looking to buy a few things when pay day comes along so bare with me!

thanks
 
Many thanks Robin - my package came in the post today - looks very proffesional - just trying now to get away early to fit them - otherwise will be the weekend

Richard
 
I agree. I ordered the Footwell lights and they were the same. Top job.

Robin
Just so I get this right.

The wiring should be as follows in the grey connector in Passenger door.
Pin1 is the Supply. (IE the grey/white cable on your loom)
Pin2 is earth (brown cable on your loom)

In the Drivers door it is the either same as above, or you connect the earth (brown cable on your loom) using the solder and connect it to Pin 1 of the door lock switch.

Is this right? Only I have read above and got myself confused with the Pins 1 and 2 above.

I will be looking to fit at the weekend (weather depending) so plenty of time to reply.
 
Passenger side is correct.

Drivers side you need to put the grey/white wire into pin 1 on the grey connector, and then take pin 2 out and solder it onto brown wire (which i have made a cut out for) and then put the connector on the loom into pin 2.

Let me know if you need any more info or if you have any problems.
 
Thanks to Andy he has found out the following:

From May 2007 there is a wiring change.

Warning lights are now on pin 18 and you can pick up an earth on 19
 
  • Like
Reactions: martinivw and Ben2487
Can I thank Robin again for his excellent looms. Fitted both sets of Puddle lights in about hour and half this morning. Would have been less time if I could have used power tools to cut the hole in the door card for the puddle light. But as my dad was in bed after a night shift this was a no no and good old elbow grease had to suffice.

They work an absolute dream and I didn't break any clips on the door.

I did find when fitting the white puddle light, that if you use the plastic heat shield from the red warning light as a template, that you can cut the hole for the puddle light, it is roughly the correct size for the lense. It is actually slightly too small, but you can trim to exact fit. It means though that if you don't have any superglue handy when you do it, then the light clips in properly and doesn't drop out.
 
I did find when fitting the white puddle light, that if you use the plastic heat shield from the red warning light as a template, that you can cut the hole for the puddle light, it is roughly the correct size for the lense. It is actually slightly too small, but you can trim to exact fit. It means though that if you don't have any superglue handy when you do it, then the light clips in properly and doesn't drop out.


I did my passenger door on Saturday, all went well, I used the existing warning light hole to make a cardboard template, so again no glue required here.

What didn't go so well was my attempt to install LED door release illumination, it didn't work. But I now also have an issue with my passenger window switch not lighting up or working. The Window and everything else works fine, VCDS doesn't see the switch operate at all. Test meter indicates that the loom is OK and the switch does seem to work (well it gives different resistance values depending on which way it is moved).

I will try a hard reset this week by dropping the battery off for 30 minutes and see if that brings it back to life. I didn't check everything before I took the door apart though, so it could be un-related.

Paul
 
I would suspect that the earth connection from the original 32pin block to your window controller is not connected properly.

As a matter of interest, can you open the passenger window from the driver's door?

Also where did you take the feed from for the door release LEDs?
 
I would suspect that the earth connection from the original 32pin block to your window controller is not connected properly.

As a matter of interest, can you open the passenger window from the driver's door?

Also where did you take the feed from for the door release LEDs?

I used the pin as shown in my wiring diagrams for a 2005 (pin 14), I will take it all apart again next Saturday, to be honest my thoughts were that either the earth pin isn't making a good connection or that by using an LED (12v so no resistor) in place of what I assume is a 5W bulb on the OEM solution, that I have managed to trip protection or worse blown an output stage in the module (I'm hoping there is protection on the circuit).

I wired the LED between pin 14 and shared the earth on pin 2 with the warning/puddle lights.

The Window works fine from the Drivers switch.

I did have to tighten the door puddle contacts up at the plug at one point, due to disassembling it a few times, they worked fine the first few times that I unplugged the door from the module, but then threw a circuit fault in VCDS.

Perhaps I'm trying to be too cutting edge.

Paul
 
I'm confused - have you replaced the 5w bulb in the lights Robin provided, or have you tried to wire in the red leds above the interior door handle?

If you're wiring in the red LEDs all you need is a feed from the interior illumination circuit.
 
I'm confused - have you replaced the 5w bulb in the lights Robin provided, or have you tried to wire in the red leds above the interior door handle?

If you're wiring in the red LEDs all you need is a feed from the interior illumination circuit.

No I have added a 12v high intensity 3mm LED to the interior door handle and used the pin out on the module (14) that is used by the OEM door handle illumination (when fitted) but I suspect that is done using a 5w bulb on the OEM option and not an LED.

I haven't touched the 5w bulbs in the kit.

Paul
 
Have you measured the supply voltage from the wire coming from pin 14?
 
The OEM fit is LED's part No 4B0 919 063A

Pin 14 is correct for the year of your car, I think the output needs to be coded on by the dealer or with VAG-COM.

Andy
 
Ive done the oem door handle led fit, and it does need to be coded into the car! Ive just connected it to the window switch illumination for mow until i get my lead. It give a nice warm effect!
 
If you look on this picture, you will need to add another +8 to the coding to activate the door handle illumination.

puddle10.jpg
 
Also, just wanted to say thankyou to Robin for my looms that arrived today. Very well made, almost OE quality.:thumbsup:

I've fitted the puddle lights already, the footwell lights will have to wait until the weekend!

Just for reference, mine is a 2008 car, and the plug in the drivers door had no earth on pin 19, so all I had to do was plug Robins loom into the empty chambers. Pin 18 for the live feed, and pin 19 for the earth, same on the passenger side. No soldering needed at all.:sm4:

Thanks again Robin!
 
  • Like
Reactions: GeForce>XI<
Glad people are liking my looms!

Makes the lonely evenings in the garage worth it.................
 
  • Like
Reactions: GeForce>XI<