A3 Cruise control fit.

L33AEX

Registered User
Joined
Feb 21, 2014
Messages
68
Reaction score
5
Points
8
Location
Beds
Hi all,

I am looking at fitting cruise control to my Audi A3 8p 2007 TDI.

I have been looking at stalks and covers on eBay, i am a little confused to whether or not I will need to fit an extra wire?

Or is it a case of fitting a new stalk and activating via vagcom. I have spoken to a chap who said that there is a how to with controller part numbers on here but i can't seem to find it.

My steering control module number is 8P0 953 549 F
Component number: J0527
Coding: 0012111
VC ID: 418940B51849D116D49-8014

Thanks in advance!
 
no need for extra wire. just buy a double stalk and a lower trim with cutout for a cruise stalk (or you can carve the one you have and save a few pounds if you have nerves of steel) and its just a straight swap. Your module is the highline model so it supports cruise as well as MFSW if you don't have one already fitted.
 
how do i find out if my module supports cruise? is there a partnr anywhere? i have fis, no mfsw, no dsg. and no vagcom
 
you need to know the module serial number and there are two ways to find out. First is to ask someone who has a Vagcom to look it up for you and the other one is to dismantle the lower trim of the steering wheel column as the control unit is at the bottom.
 
how do i find out if my module supports cruise? is there a partnr anywhere? i have fis, no mfsw, no dsg. and no vagcom

If you have DIS which shows MPG etc on your speedo then you'll have a midline module which will definitely support CC.
 
If you have DIS which shows MPG etc on your speedo then you'll have a midline module which will definitely support CC.

Thats what i thought too. But as I have a 54 plate, i've heard you need a specific cc stalk for that model. Do you know what partnr for the cc i need?
 
I don't think you will be able to get a hold of the 8P0953513B-spec of the stalk as it has been discontinued by Audi. You can get a D-spec which is a direct replacement and it works in the same way. Alternatively you can get a F-spec if you fancy some DIY as it requires to swap the spacer element inside the stalk that allows the stalk to click and lock in forward position (high beam). You will use the spacer from the lights stalk you have ATM. That's what I did anyway and it works like a charm. But if you don't want any hassle just get a D-spec or an used B-spec and you should be fine.
 
Seems you must be a master of diy'er. Cant risk the f-rev method ..
Will this stalk work? It doesnt say what revition it has.. But has the right part nr
y2y9u5ym.jpg

http://www.ebay.com/itm/291211944241
 
I am affraid it won't. Well it will work but not in the expected way according to the pictograms on the cruise stalk. It has to say B/D/F at the end of the p/n.To be honest to change the spacer element is not that big of a deal if you cant find other than F spec stalk. I can make a couple of pics to show you what has to be done later in the evening if it helps.
 
Oh ok! That would be great! :)
So i need to order a new trim that supports cruise stalk, then the cruise stalk itself? Any more?
I have vagcom, would i need to access 01-engine and type in an activation code for cruise?
 
Firsrtly you need to undo 5 screws, three on the bottom holding the PCB and two on the top of the stalk. (I did not have a stalk with cruise with me, but there are few more screws on top I think and you need to undo the cruise stalk part cover first in order to be able to remove lights stalk cover).
IMG 0075 50IMG 0077 50IMG 0078 50
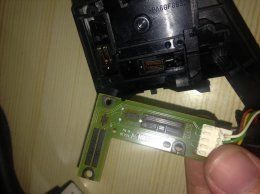
Once the PCB is removed take out the small rake like things that operate the lights so you don't loose them. Make note which direction they were mounted, it will ease the assembly process later on. If you take a look at the PCB you will get an idea how the stalk works basically.
IMG 0116 50IMG 0114 50IMG 0115 50IMG 0110 50
then remove the plastic ring by loosening the brackets on top and bottom, pull it away through the stalk, then you will need to remove the top cover by undoing the clips on side it will pop off nicely.
IMG 0079 50IMG 0080 50
next step is to remove the stalk itself. You do this by pulling it up (towards you if it was mounted in car direction).
IMG 0083 50
Then you want to remove the little plastic thing that is the culprit here :) you need two very thin screwdrivers or nails that can loosen two clips that hold it in place. once you insert those two screwdrivers in take a third one which will pry the little sucker up while pushing two small ones against the clip so that it becomes loose enough to pull the thingy out.
IMG 0085 50IMG 0089 50IMG 0090 50IMG 0091 50IMG 0088 50
you will see that the F spec stalk has only one groove while older specs have two grooves which makes it possible to hold possition of the high beam. Photos are not very good but once you get there you will see it properly. The PCB part is the same on all of them, so once you swap these two arround you will have an F spec stalk that works as D spec.
IMG 0100 50IMG 0094 50
when assembling the stalk, you need to put the two groove part in firstly, push it down until it clicks, then take the stalk itself and insert it into the casing. It is a little bit tricky so have a patience. The pointy thing at the end of the stalk is spring loaded and you need to push it against the grooved part in casing and then align the bottom pivot with the space on the stalk. It will all come together nicely. At the same time you need to put the little aluminium shaft in between the pointy end and bottom part of the stalk, so once you move the stalk it will operate the lights properly. Just note everything during disassembly and you will be fine. once the stalk is in place put on the top cover and screw it together, put on the plastic ring.
IMG 0108 50IMG 0113 50
move to the bottom part and insert the small bits that operate the lights. they have a opening for a shaft on the backside. then put on the PCB on and screw it all together tightly and you are done.
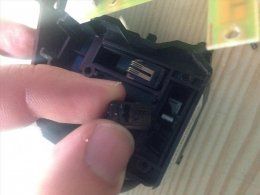
IMG 0126 50
seems difficult but be careful and you should be able to do it with little fiddling around fairly quickly and easily.
 
Just wow! Thank you very much for writing the diy. Good use of picture is always useful. I will definatly use this guide when getting the stalk. Hope this helps with other's too!
 
1 more question. When coding, i need to code somewhat in 01-engine. Do i also need to code in something in steering module? I also need a wire to connect in a pin to alow cruise
 

Similar threads

Replies
1
Views
494
O
Replies
6
Views
836