

Okay so i spent today de chroming the front grill and getting it a nice matte black colour. Completely changes the front end IMO, but yeah here is the guide:
Tools
1 x Can of black Plastidip (£16 off eBay)
2 x Small flat head screwdrivers
1 x 100mm masking tape (didn't have any to hand to i used 24mm and 100mm clear low tack packing paint)
1 x Microfibre Cloth
1 x Glass Cleaner
Step 1:
Removing the 4 rings badge. Okay so i didn't get any photos of this actual process but what i did was prise the left side out with one screwdriver then insert the other to hold it out more then use the first driver to push the clip up and it should disengage. Its a very fiddly job but doesn't take long. I moved along doing all the bottom ones first then I did the two side ones. For the top 4 clips i didn't use the driver to prise simply pull down and out and then use a driver to push the clip and continue until all 4 are out and your rings are free! Leave the S3/S-Line badge on

Step 2:
Clean! to be fair it depends how dirty it is but my surround and center was pretty cleans so i just cleaned it all with a glass cleaner (fast drying/no smear) but you do have to make sure it is all clean and dry!

Step 3:
Tape Up! okay so i used 25mm tape for the close stuff then used a low tack 100mm tape for the surrounding areas. Here's the key part when you tape close to the edge DO NOT tape right up to the edge. This is because when Plastidip hardens it comes off as one and if you do it right to the edge your going to pull off the dip on the chrome as well. The gap also acts as a seam and the dip will actually tear in this seam. Don't worry plastidip comes straight off so its not going to affect your paintwork. For taping the S3 Badge just put a piece of tape over it youll find the backing plate is black anyway!


Step 4:
First coat! Okay so the first coat is going to be a really light coat at about 50% transparency. When spraying this stuff make sure your about 15 cm away, spraying on a horizontal axis with the can aimed slightly down (prevents overspray onto the radiator) and never stop on the areas your spraying always over spray and stop and go back on the tape. I made the mistake of stopping and i got a textured result on my first coat but hey ho its only the first one. Also i only did one pass over one area on this coat being as its more of a bonding coat. Now wait half an hour and go to step 5

Step 5:
Apply your second coat! Using the same method, horizontal action slightly tilted and only one pass over. Wait another 30 mins.
Step 6:
Apply your 3rd coat! Again same method. Wait another 30 mins.
Step 7:
Apply 4th coat! Now the coats should have really started to build so this time were going to do 2 passes over the whole thing. I would do one pass and cover it all then start again and do another pass. Again wait 30 mins
Step 8:
Apply your 5th coat! Same as 4th coat two passes over the entire grill. Now wait 45 mins - 1 hour.
Result:

Step 9:
Remove Tape! Okay so start to remove the tape very slowly ensuring that the plastidip is coming up from in the seam/gap and off the paint work it should come off quite easily seems we have given it plenty of coats!
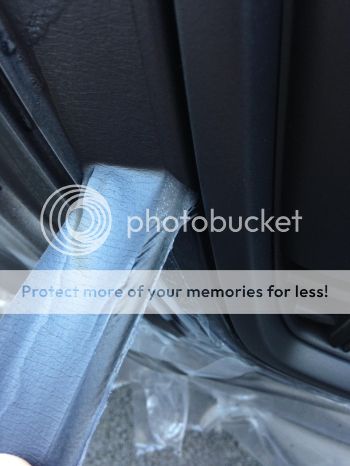
here you can see where the tape ends and the plastidip starts, it almost acts like a tape itself!
Step 10:
Refit the 4 rings (very easy just push on, however make sure they are the right way up!) Clean off any excess but dont try to clean the plastidip just yet, and then stand back and admire your results!


If you get any runs:
This was my first go at it and i'm really impressed with the results. It wasn't perfect i did get a small run however if you wait the 30 mins till the run is touch dry then use your finger (with a glove on) dip in some thinners and rub the run until it is gone and then wait for it to dry and respray the entire thing again.
This guide can be applied to any plastidipping, i used about 3/4 of a can for this i wanted there to be lots of coats for protection and it makes it easier to take off. I did it today in the shadow of my house but air temp was at about 13 degrees. I only waited 30 mins because i wanted to ensure it had ample time to dry. But it does take 4 hours to completely dry so try to avoid touching it for that amount of time. I wasn't worried about overspray onto the radiator because its distance from the grill ensures that the plastidip is well dispersed and it shouldn't cause any problems anyway as its still flexible up to 93 degrees!
Anyway i hope this helps anyone that wants to spray their grill!


