Oil Catch Can mini group buy anyone? including PCV system simplification.

Ok folks, catch cans all sent out this morning by post office recorded delivery :icon_thumright:

Tracking numbers are as follows:

1. OllieH
2. Imteyaz - AG002679299GB
3. Speedy Steve - AG002679237GB
4. Morgan-VAGCHECK - AG002679223GB
5. 1Animal1 - AG002679206GB (Have put N75 in parcel aswell, cheers)
6. Westle - AG002679245GB
7. J B - AG002679285GB
8. The Doctor - AG002679254GB
9. jonny87 - AG002679271GB
10.BigD-a3tq - AG002679268GB
11. vRshafz - AG002679210GB

I will try and get a fitting guide done asap if anyone is really stuck on how to do it :icon_thumright:
 
Great news, now comes the hard bit of removing what needs to be removed and leaving in place what doesn't!
 
i just recieved my catch can, many thanks ollie

shame im not going to get to fit it :(
 
Right, I've been looking at a couple of places to mount the can on my S3, and the only two places I can see are on the side of the battery box or on the bulkhead behind the TIP:

photo8.jpg


photo4.jpg


The problem with the battery box is that the plastic side only comes to halfway along the box, meaning the can must be mounted quite far forwards, meaning there isn't much room to t-off the inlet pipe to the crankcase breather, as can be seen on the picture (the crank breather would come up from where the inlet manifold branches are.) Also, because we need the inlet and outlet facing the back of the car, we will need to bend the supplied bracket to a 90 degree angle to give us something to mount it with.

The other option of mounting behind the TIP on the bulkhead is the option I'm currently running with because I think it looks better there and will be easier to drain it. There are two blank studs there to mount the bracket on:

photo5.jpg


The right hand stud would be ideal but the thread on it is weird. I cannot match the thread to any regular size. The bloke down my local hardware store reckons it's an Audi only thread?? Anyone any ideas what this stud is for?? Maybe something is mounted there on another model? The stud on the left is a regular size, but unfortunately is too far over to be any use. The bracket could be made to go over there, but would need a twist in it as the stud is at a slant.

Any ideas would be great as I'm really busy at the moment and want to get a guide up asap for others to use.

Might go to Audi at some point to see if they have a nut to fit that right hand stud?

EDIT: Apologies for some of the make-shift boxes I had to use to send the cans out.:)
 
Yeah, thought about that. Can get hold of one from work aswell, but the thread is quite deep and coarse, so would need to take it down quite abit. Either that or grind the current one off and weld a different stud on there.

Will see where I get with the die method tomorrow.
 
I've received the usual "you were out" delivery card today, prompting the also-usual "so what have you bought for that car now then?" question from the Mrs. Ha ha, she had no idea what I was talking about when I told her it was an oil catch can. Now she thinks it's sprung a leak and I've bought something to catch the drips! I might fit a letter box to my garage so the postie can just bung all my mail in there!

Anyway, thanks Ollie, great job, looking forward to seeing your fitment guide on here.
 
i too was looking a the two studs on the bulkhead ollie

thought the thread looked a bit odd, we got a shed load of nuts and bolts etc at work, some really old and odd threads too so il try and match it up and let you know what i find
 
as i said before, thats where its going on our A3 which doesnt have these studs......best in my view as the multipipe coming out of the rocker spirals upwards so as to not promote the oil all the way through the system.....placing the can as high as pos is always going to be more beneficial
 
Interesting! Is there some connection scheme, how to fit the pieces together? The original pcv valve is a one way valve (right?) does the catch can also function as a one way valve?
 
I recieved my can yesterday Ollie. Cheers for the whole roll of brown tape too, took me about 10 mins to get into the parcel haha.

I'm hoping to get al mine fitted this weekend but I still need a few bits like clips and bungs.
 
being fair mate im just gona wack a bolt in the existing bend under the mani meaning i only have to source the top pipe ;)
 
Just a thought to the right hand stud thread, it might be for a clip type washer, i.e. like the washers used to secure the heatsheilds, have a star shaped inner section that bites into the thread as you push it over the stud.
 
yeah good call, i have just bought two of these from Audi for her shields, not exactly brilliant for holding a can though, it'd flap everywhere
 
I think the stud you are talking about is for a plastic 10mm nut,i dont think it would hold the can if it is anyway heavy because it will ring if tightened to much,a black self tapper with the 10mm nut should do the trick.
 
Sorry for all those waiting for a guide, I've been too busy to even get a look at mine, but will hopefully get a chance this weekend. Imteyaz suggested to me that if I can get into the plenum chamber behind the firewall then I could drill a fresh hole and use a nut and bolt through the new hole. Does anyone know if you can get access into this area??
 
just had a ganders and a 1/4 inch whitworth unc nut seems to fit nicely on the right hand side stud, tightens up without slipping or stripping the thread

im going to grab a load of them tomorrow and tighten one up with a spanner just to make sure, if anyone wants a few of these pm me your address and il send a few out to you

Brilliant, will see if I can get one of these over the weekend :icon_thumright:
 
Fit it at side of the battery, its easier to get to, your going go to struggle with it behind the TIP.
 
only trouble (and i know i suggested this location originally) is that the battery box is at a lower point....cant see it being a massive issue but every little helps (as my misus keeps telling me :) )

Ollie cant you get a bolt through by lifting the scuttle panel lid where the pollen filter goes?
 
just had a ganders and a 1/4 inch whitworth unc nut seems to fit nicely on the right hand side stud, tightens up without slipping or stripping the thread

im going to grab a load of them tomorrow and tighten one up with a spanner just to make sure, if anyone wants a few of these pm me your address and il send a few out to you

ok ignore that, i got my nuts mixed up (ouch!)
i bought a load of 1/4 whit stuff home with me to find out they dont fit lol
i think they are just 6mm, but judging by my last fail i wouldnt trust me :tocktock:
 
Finally picked mine up from the Royal Mail depot thanks OllieH:icon_thumright: well if i wasnt clearing out the garage this weekend id try fitting it but as theres no guide yet i think i will wait till i strip the front end to fit the FMIC and all piping for that and do it all in one hit
 
Fit it at side of the battery, its easier to get to, your going go to struggle with it behind the TIP.

Trouble is with the cans we have is that they're quite tall, so with the can on the side of the battery box, the drain is pretty much sat right on top of the gubbings below.

Ollie cant you get a bolt through by lifting the scuttle panel lid where the pollen filter goes?

Where is this lid?? Was looking in that area today but didn't see anything??:think: Nearside?

ok ignore that, i got my nuts mixed up (ouch!)
i bought a load of 1/4 whit stuff home with me to find out they dont fit lol
i think they are just 6mm, but judging by my last fail i wouldnt trust me :tocktock:

It's 5mm I think, but I can't seem to match the thread type with anything. I'm assuming it's as someone has said above, that it's meant for a plastic nut with a dodgy thread on it!

I will have a look tomorrow for this lid panel and see if anything can be done with that. My next idea if that doesn't work is to grind off the right hand stud and use the bracket to attach it to the left hand stud. If all goes well I should have a guide up by tomorrow night :icon_thumright: (Providing I don't get rained out like I did today)
 
Last edited:
have it somewhere accessible, you do need to remove it to empty it

in the winter it fills with water pretty quickly
 
Cant wait to see some updates with pics! This thread has inspired me to order one myself however ive ordered it with the outlet pointing to the right so i can mount it on the battery box.

Now i gotta wait for it to be built and delivered :)
 
Hi folks, sorry for the delay. I haven't finished my install yet but I thought I'd post what I've done so far.

I'd decided on the firewall install as I think it looks better there than the battery box location, plus there's more room there to drain the tank.

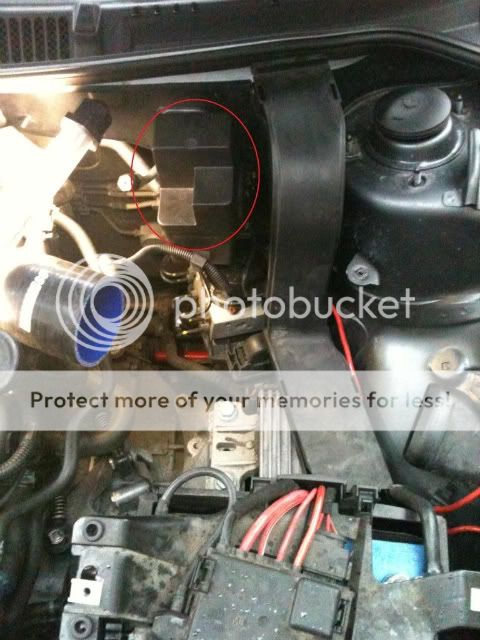
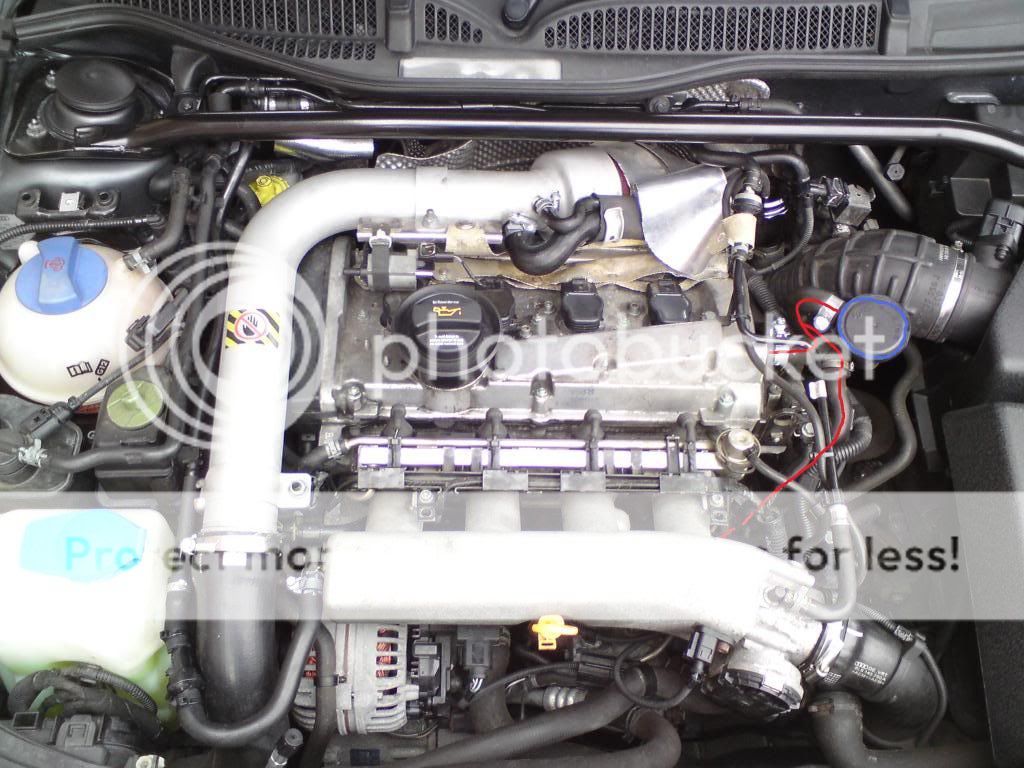
First off I removed the strut bar and the airbox to give myself some room:

0056A-1.jpg


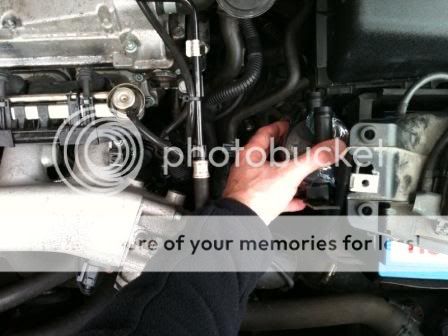
Next, (thanks to a link from Imteyaz) was to get rid of the relay box shown circled in red above by relocating the relay inside it. (This will give more room to drain the tank from the side. It's not essential to remove this, but if left there you will have to drain the can by reaching under the TIP, where there is only a limited space)

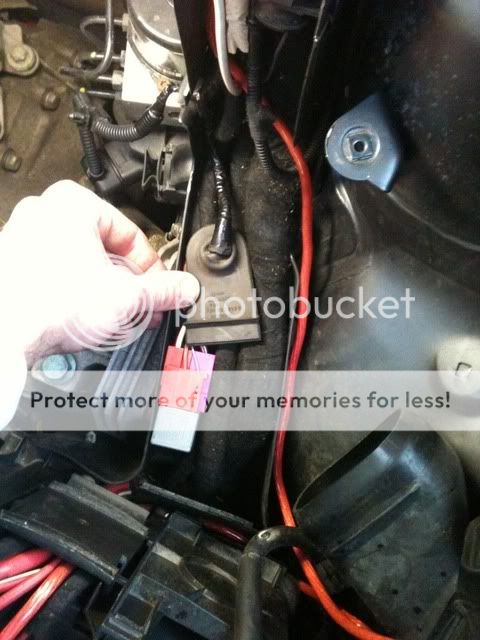
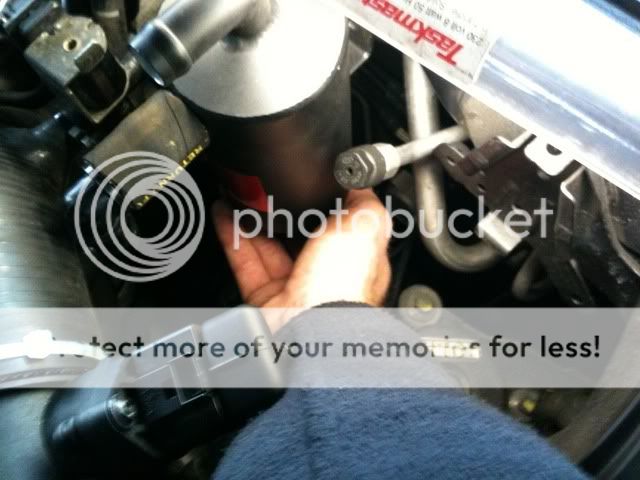
First, remove the plastic cover from the cable run to the right of the box:

IMG_0057.jpg


Then remove the lid from the relay box:

IMG_0058.jpg


Remove the relay from the box and pull the cable clear:

IMG_0063.jpg


Now remove the relay box from the bulkhead.

Next, massage the relay and cabling into the cable run area:

IMG_0066.jpg


Then replace the cover and you are left with this:

IMG_0068.jpg


Next was the mounting of the can. The right hand stud shown on the last picture on post #208 was where I wanted to mount it, but I couldn't get a nut to match the thread type. I therefore decided to remove this stud altogether. I did this with a small cutting disc on a dremmel. At a later stage I will rub this down and paint it:

IMG_0070.jpg


I appreciate not everyone has a dremmel, but there is enough room to get an angle grinder in there aswell if you have one of these. If you have neither, you might be able to get a junior hacksaw in there, but if not all I can suggest is you ask a garage to cut it off for you. They normally have little air driven cutting discs for removing rusted exhaust bolts, so should do the trick nicely.

Now there's two options that can be taken here. The first is to drill a fresh hole in the firewall and use the pollen filter flap to put your hand in and pass a bolt through from the inside. I tried this but my hand was too big to get past the cable runs that are behind there. All I can suggest is that you give it a try yourself and see whether you can get your hand in there.

The second option is to use the left hand stud on the firewall, which is what I did. In order to use it, you have to make some adjustments to the supplied bracket (or make a whole new bracket). First thing is to flatten the supplied bracket:

IMG_0071.jpg


Then using a vice, make a bend in the bracket which is roughly the same angle as the one on the firewall. Then attach it to the catch can:

IMG_0072.jpg


I then used one rubber washer and a couple of steel washers to mount the bracket on the left hand stud:

IMG_0075.jpg


IMG_0076.jpg


You will have to angle the bracket down slightly so that when you replace the strut bar, it does not catch the top of the can.

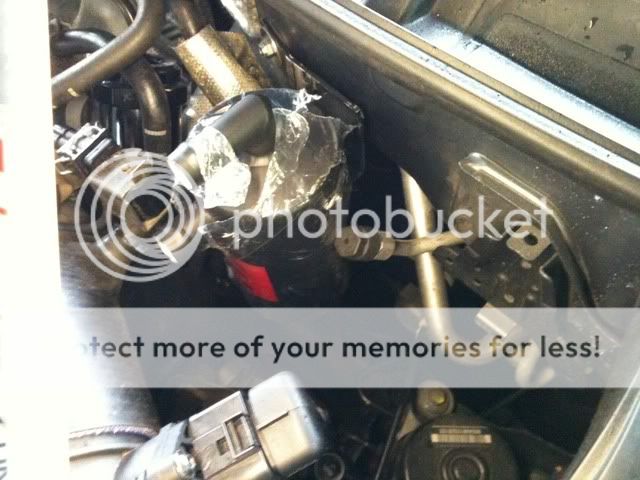
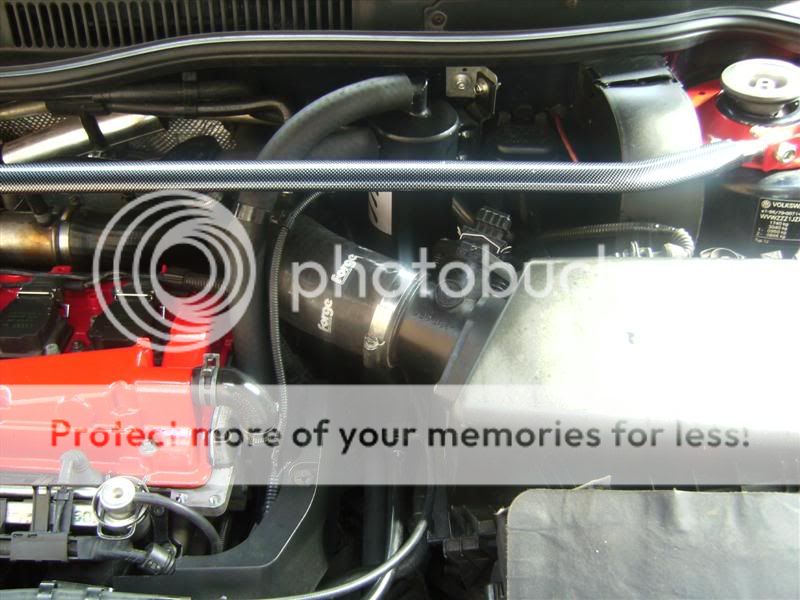
You can see from the following picture that the can is pushing up against the N75 valve, and also the aircon recharge pipe is pressed up against the side of the can aswell:

IMG_0077.jpg


I got around this by elongating the hole on the bracket and on the can, making the can sit more to the right. I then bent the aircon pipe over so it wasn't rubbing against the side. It does bend quite easily without damaging it, but if you do do this, be it at your own risk.

IMG_0079.jpg


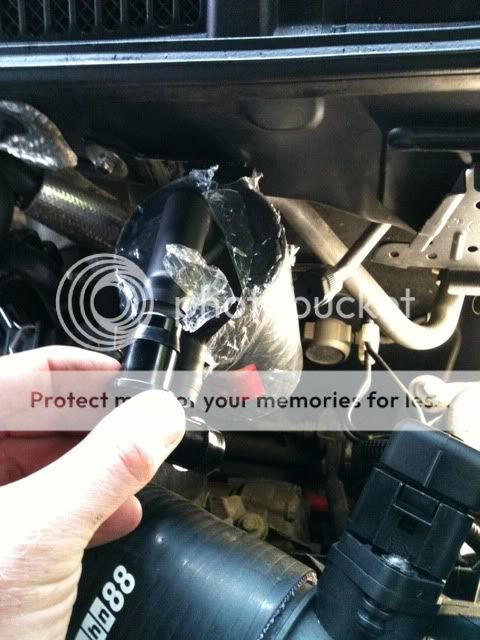
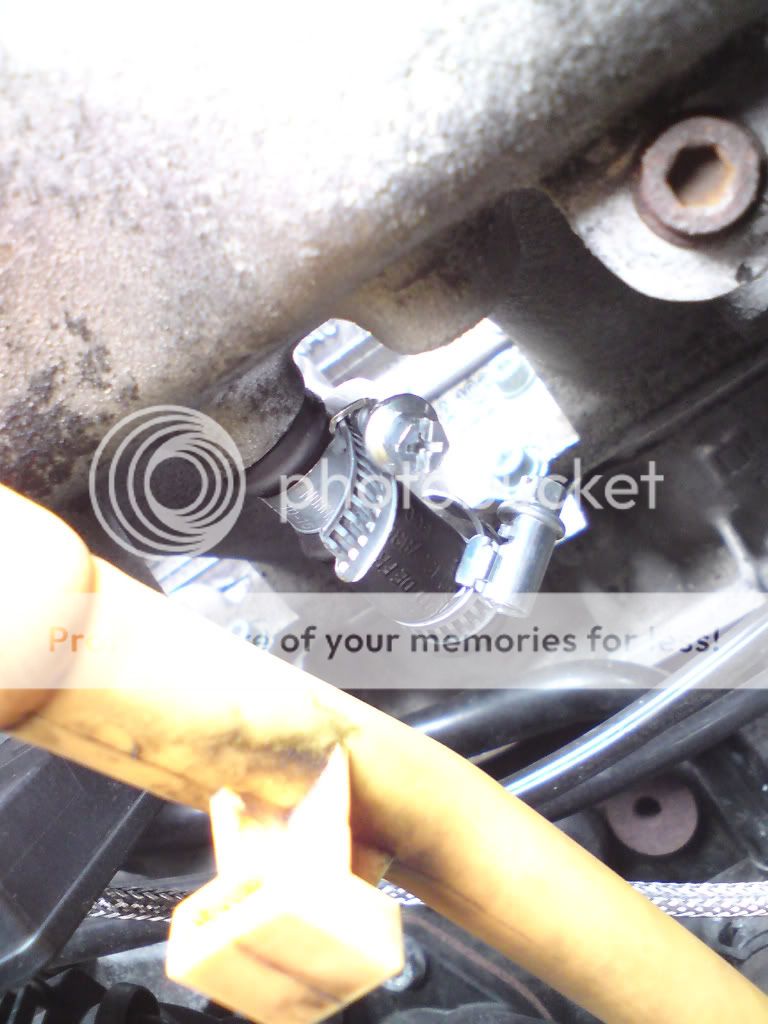
The next job is how to route the hoses to and from the can. You can see from the above photos that the inlet and outlet from the can is quite close to the TIP, close enough that there isn't enough room to bend the hoses down under the TIP. You will therefore need to purchase two 90 degree pipe connectors, like these ones: http://cgi.ebay.co.uk/ws/eBayISAPI.dll?ViewItem&item=110490634827&ssPageName=STRK:MEWAX:IT

They will point the hoses downwards like the following pictures show:

IMG_0078.jpg


IMG_0088.jpg


This is as far as I've got at the moment as I only had one 90 degree pipe connector so I'm still waiting for another one to come in the post.

My plan is to put the PRV (hockey puck valve) directly into the TIP connection and have it pointing upto the outlet of the catch can (bottom connection). The inlet to the catch can will bend underneath the TIP and T-off into the rocker breather and crank breather.

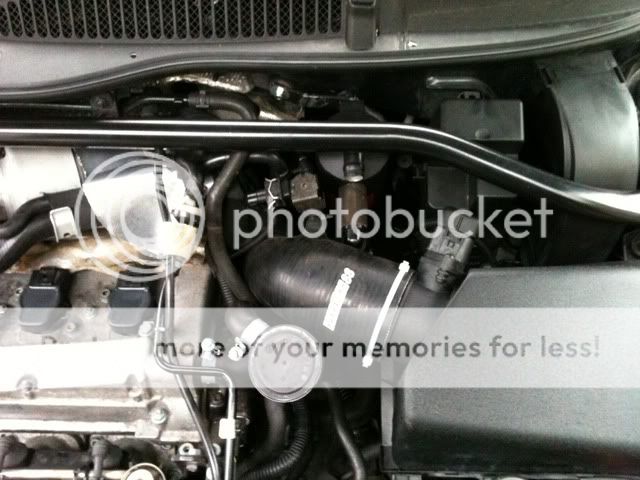
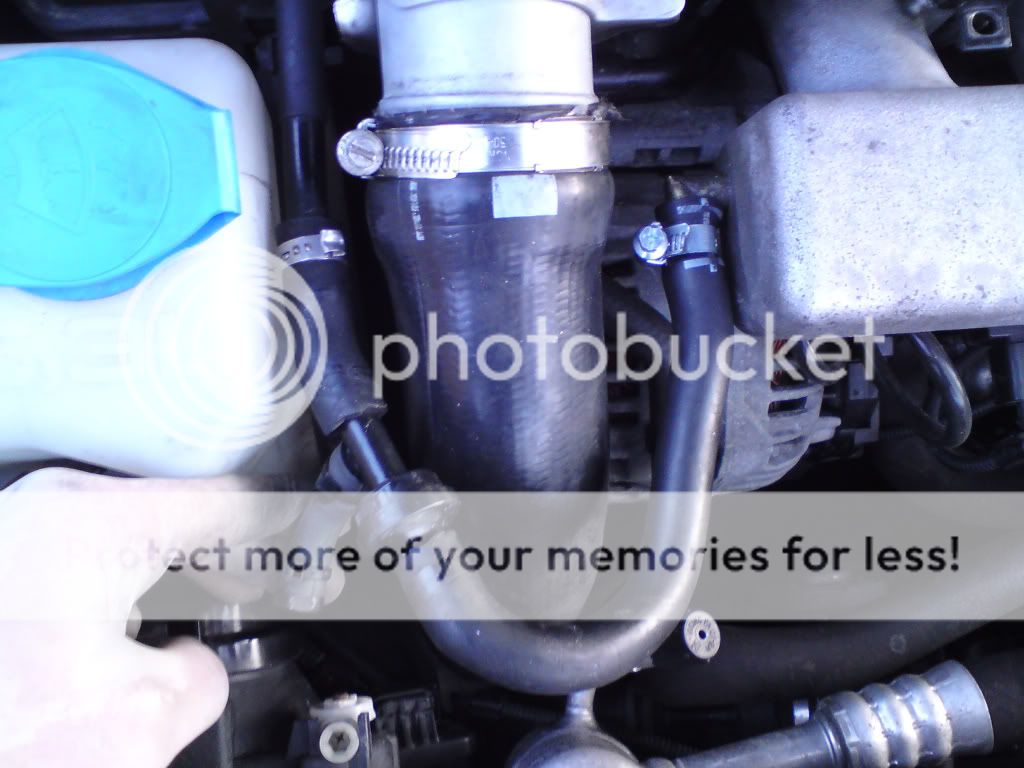
The following picture shows the amount of room available to drain the can with the relay box removed:

IMG_0093.jpg


The next picture shows the relay box back in place, with very little room for draining:

IMG_0092.jpg


With the strut bar back in place ( I will be removing the relay box later):

IMG_0095-1.jpg


IMG_0095-1.jpg


Apologies if some of what I've posted doesn't make sense. I'm writing this whilst really tired, so will check it again tomorrow...

As soon as I get the pipe connector I'll try and get it all fitted asap, then complete the full guide, recapping on the deleted pcv system :icon_thumright:
 
Great write-up so far OllieH, really clear and very helpful. Looking forward to the next episode...
 
just made a start on mine Ollie, going to be getting pics up as soon as i can get my bracket bent (need to borrow neighbours vice when hes back)

im fitting the same way but the outlets are facing the hockey puck valve (meaning only 2 inch of pipe to the puck) which is mounted straight off the TIP, then im gonna run the top hose through the middle of the two N75 valve pipes (under the 007p)and run it into the T piece which will be integrated into the pipe from rocker to block

idea being that the pipe run from rocker to block is a clear run, and the breather pipe from the can is quite low down (Tee'd off) , so any oil has to travel into the T piece and upwards as far as possible.... looking really good as it stands and gonna spray my new brackets with satin plastikote to make it look OEM....wil post pics on our A3 build thread and post the link here once complete

obviously the S3 fitment may be slightly different as previously discussed

Nice one mate :icon_thumright: will be good to see it on the A3. Yours can be the guide for the other A3's on here aswell :)

Gutted I didn't have the pipe connector for this weekend as the weather has held out for me!! I might have another go at getting my hand in the pollen filter flap at some point, and then mount directly on the firewall.
 
it would look better, my inspiration was page 3 of the vortex thread.....chap fitted it to the firewall and it looked awesome with a reduced pipe run.... ive been scratching my head today cos i want the main run to drop to the block....and have the breather line into the can tapping into that, all that without making it look tragic....its a task :)
 
You on about this picture:

BILD1435.jpg


It's a shame the S3 TIP is not the same as this, with the PRV connection on top. I also like the way the can inlet goes off to the rocker breather with the y-piece? for the crank breather. Might have another look into this when I get a chance.
 
thats the one mate, trouble is the relay box on ours is bigger whi9ch means the run to the valve is much smaller..... im fully expecting having to trim the engine covers too when they eventually get refitted.... although the A3 has many more ill fitting ones than the S3 luckily for you :)

oh and i have a lovely N75 sat bang on top of the TIP to contend with and its right in the way...... means i cant sight the can as high as that in the picture, it will be much tighter but hopefully i can make it neat to a degree considering what i have to contend with
 
anybody fancy drawing me a little diagram on how you are piping these, as I have read this thread about 10 times and still dont understand... you completely doing away with pcv?
 
anybody fancy drawing me a little diagram on how you are piping these, as I have read this thread about 10 times and still dont understand... you completely doing away with pcv?

Yes, deleting the PCV system altogether. Pull all of the following out, except the 90 degree crank breather pipe (marked with yellow circle). You will need that piece to attach your 19mm hose to. (Make sure you remove the PCV valve, which is the T-piece marked up with the purple circle, as you will not be using that.)

3a.jpg


Here is the crank breather on the engine. This needs to stay where it is.

DSC00912.jpg


When you have done that, you will be left with an open nipple on the underside centre of the inlet manifold. You will need to blank this. I think it is 1/2" ID pipe, and then put a bolt in it and tighten with jubilee. Like this:

DSC00916.jpg


You will also have the open nipple on the left hand end of the inlet manifold, where the part circled in orange on the first picture used to be. Use the brake servo hose that used to connect to the part circled in red and attach it to the open nipple. You will have to cut it in half and put a one way valve in there. Use the one from the pcv system you have just removed. You will have to blank one of the legs on this as it has three connections. Like this:

DSC00886.jpg


This is just a temporary measure until we can source a nice piece of 3/8" ID hose and a non return valve with only two connections. I can't stress enough on how important it is to put the non return valve in there. If you don't, you will not hold a vacuum in the brake servo, which means you will have unservo'd brakes, and you may do damage when the engine is boosting. Also, make sure you jubilee the manifold nipples tight. I forgot to put a jubilee on the brake servo feed altogether, which subsequently popped off when I was accelerating, and then I had unservo'd brakes, which was a scary moment joining the A3 from the M25!!

Next is to remove the hose in the following picture that is marked up red. This goes down and connects where the blue arrow is on the first picture above.

10.jpg


The part marked up in blue on the above picture is the PRV. You will need to keep this also as it'll be used on our can install. What we'll most likely do though (not confirmed yet as I haven't tried it) is put this PRV straight into the TIP connection rather than on the end of the extension hose that it's currently on.

The following picture shows the can position and pipe routes. The red line is the can outlet which will go under the TIP and into the TIP connection via the PRV. The blue line is the can inlet, which starts at the crankcase breather (90 degree pipe talked about above) and rocker breather, which connect together with a T-piece and then goes under the TIP and into the can.

11.jpg


Excuse the dodgy pictures. As I talked about a couple of days ago, I'm yet to route my pipes as I am waiting on some pipe connectors to come in the post. Hopefully this clears up what we are planning to do. Any more questions let me know :icon_thumright:
 
Last edited:

Similar threads