Jimmeh
Registered User
Morning chaps. I've been around for some time now, but have recently had a few topics aound regards my new S3 - Hibiscus Red. I've finally got round to working on it and bringing it back up too scratch.
The following was written on behalf of DetailingWorld.co.uk - feel free to question me at the end with any issues/ideas. I must warn, it's quite a long read (esp. now the images have had to be made into links!) - grab a cuppa, a cookie or two and enjoy - thanks.
*~*~*~*~*~*~*~*~*~*~*~*~*~*~*~
*~*~*~*~*~*~*~*~*~*~*~*~*~*~*~
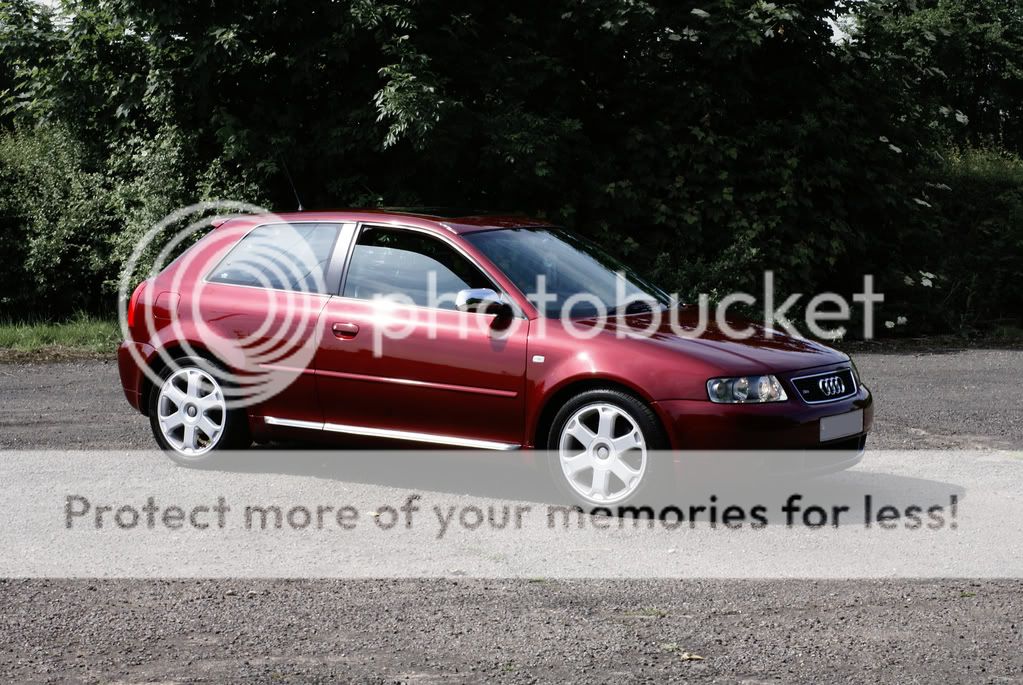
Having taken a few days off work, Ive finally got round to putting some life back into my new car. (Audi S3 2001) I have splashed several photos around already, but just to let you know of its condition prior to my detail:
Drivers side R ¼:
http://i291.photobucket.com/albums/ll297/Jimm3hh/DSC09308Large.jpg
Bonnet:
http://i291.photobucket.com/albums/ll297/Jimm3hh/DSC09310Large.jpg
I think its fair to say I quite a big job ahead of me.
So, Wednesday I loaded up and drove some 10m to my Fathers (use the double garage!), as the forecast was a bit touch and go and I didnt fancy my chances. Turns out, the weather held for the majority but still, better safe than sorry.
Before I get in too deep, Id just like to note that this job was carried through over two days. My first day was mainly spent machine polishing with an abrasive compound, and the second day was spent refining the finish/wet-sanding/details
Process and Pictures
Wheels worked with Megs WB, Swissvax wheel brush and EZ Detail Brush
http://i291.photobucket.com/albums/ll297/Jimm3hh/Audi S3/folder II/DSC09656Custom.jpg
Foamed with SSF and AB foam Lance (awaiting my additional plastic connector)
http://i291.photobucket.com/albums/ll297/Jimm3hh/Audi S3/folder II/DSC09658Custom.jpg
http://i291.photobucket.com/albums/ll297/Jimm3hh/Audi S3/folder II/DSC09659Custom.jpg
http://i291.photobucket.com/albums/ll297/Jimm3hh/Audi S3/folder II/DSC09660Custom.jpg
http://i291.photobucket.com/albums/ll297/Jimm3hh/Audi S3/folder II/DSC09661Custom.jpg
Rinsed at full power to remove surface dirt
http://i291.photobucket.com/albums/ll297/Jimm3hh/Audi S3/folder II/DSC09663Custom.jpg
Washed with TBM with Megs GC and my Ulti-mit
http://i291.photobucket.com/albums/ll297/Jimm3hh/Audi S3/folder II/DSC09665Custom.jpg
Spritzed with Megs LT and dried.
http://i291.photobucket.com/albums/ll297/Jimm3hh/Audi S3/folder II/DSC09667Custom.jpg
Rolled into the garage for the work to begin.
General swirlage on the bonnet:
http://i291.photobucket.com/albums/ll297/Jimm3hh/Audi S3/folder II/DSC09697Custom.jpg
http://i291.photobucket.com/albums/ll297/Jimm3hh/Audi S3/folder II/DSC09699Custom.jpg
Test patch on the bonnet with Menz IP on a Lake Country(?) orange cutting pad
http://i291.photobucket.com/albums/ll297/Jimm3hh/Audi S3/folder II/DSC09676Custom.jpg
http://i291.photobucket.com/albums/ll297/Jimm3hh/Audi S3/folder II/DSC09678Custom.jpg
After a pass with the PC:
http://i291.photobucket.com/albums/ll297/Jimm3hh/Audi S3/folder II/DSC09705Custom.jpg
Massive transformation but plenty of room for improvement.
My Menz IP ran out, so I stepped up to Megs #83.
I used small spot pads for those hard to reach areas (and the difficult angles)
http://i291.photobucket.com/albums/ll297/Jimm3hh/Audi S3/folder II/DSC09706Custom.jpg
http://i291.photobucket.com/albums/ll297/Jimm3hh/Audi S3/folder II/DSC09709Custom.jpg
A fair few nicks and RDS were left, however the refining stage was too follow.
Drivers side Wing before:
http://i291.photobucket.com/albums/ll297/Jimm3hh/Audi S3/folder II/DSC09712Custom.jpg
and after:
http://i291.photobucket.com/albums/ll297/Jimm3hh/Audi S3/folder II/DSC09710Custom.jpg
50/50 on same area:
http://i291.photobucket.com/albums/ll297/Jimm3hh/Audi S3/folder II/DSC09727Custom.jpg
http://i291.photobucket.com/albums/ll297/Jimm3hh/Audi S3/folder II/DSC09731Custom.jpg
(^this area was hit again)
More drivers side wing before:
http://i291.photobucket.com/albums/ll297/Jimm3hh/Audi S3/folder II/DSC09753Custom.jpg
http://i291.photobucket.com/albums/ll297/Jimm3hh/Audi S3/folder II/DSC09756Custom.jpg
http://i291.photobucket.com/albums/ll297/Jimm3hh/Audi S3/folder II/DSC09760Custom.jpg
http://i291.photobucket.com/albums/ll297/Jimm3hh/Audi S3/folder II/DSC09761Custom.jpg
After:
http://i291.photobucket.com/albums/ll297/Jimm3hh/Audi S3/folder II/DSC09763Custom.jpg
http://i291.photobucket.com/albums/ll297/Jimm3hh/Audi S3/folder II/DSC09766Custom.jpg
50/50:
http://i291.photobucket.com/albums/ll297/Jimm3hh/Audi S3/folder II/DSC09770Custom.jpg
http://i291.photobucket.com/albums/ll297/Jimm3hh/Audi S3/folder II/DSC09778Custom.jpg
http://i291.photobucket.com/albums/ll297/Jimm3hh/Audi S3/folder II/DSC09785Custom.jpg
Drivers side wing/arch before:
http://i291.photobucket.com/albums/ll297/Jimm3hh/Audi S3/folder II/DSC09787Custom.jpg
Buffing:
http://i291.photobucket.com/albums/ll297/Jimm3hh/Audi S3/folder II/DSC09789Custom.jpg
After:
http://i291.photobucket.com/albums/ll297/Jimm3hh/Audi S3/folder II/DSC09792Custom.jpg
A random mark on the drivers door. Looks to have been brillod in a previous life:
http://i291.photobucket.com/albums/ll297/Jimm3hh/Audi S3/folder II/DSC09805Custom.jpg
^This proved to be a pain to remove. Will require some soft wet-sanding at a later date.
General 50/50 on drivers door:
http://i291.photobucket.com/albums/ll297/Jimm3hh/Audi S3/folder II/DSC09830Custom.jpg
Driver door handle/areas before:
http://i291.photobucket.com/albums/ll297/Jimm3hh/Audi S3/folder II/DSC09833Custom.jpg
http://i291.photobucket.com/albums/ll297/Jimm3hh/Audi S3/folder II/DSC09835Custom.jpg
http://i291.photobucket.com/albums/ll297/Jimm3hh/Audi S3/folder II/DSC09836Custom.jpg
Afters:
http://i291.photobucket.com/albums/ll297/Jimm3hh/Audi S3/folder II/DSC09840Custom.jpg
http://i291.photobucket.com/albums/ll297/Jimm3hh/Audi S3/folder II/DSC09842Custom.jpg
http://i291.photobucket.com/albums/ll297/Jimm3hh/Audi S3/folder II/DSC09843Custom.jpg
http://i291.photobucket.com/albums/ll297/Jimm3hh/Audi S3/folder II/DSC09844Custom.jpg
Drivers side R ¼ before:
http://i291.photobucket.com/albums/ll297/Jimm3hh/Audi S3/folder II/DSC09846Custom.jpg
http://i291.photobucket.com/albums/ll297/Jimm3hh/Audi S3/folder II/DSC09847Custom.jpg
Before 50/50 work carried out..
http://i291.photobucket.com/albums/ll297/Jimm3hh/Audi S3/folder II/DSC09850Custom.jpg
50/50:
http://i291.photobucket.com/albums/ll297/Jimm3hh/Audi S3/DSC09855.jpg
http://i291.photobucket.com/albums/ll297/Jimm3hh/Audi S3/folder II/DSC09864Custom.jpg
http://i291.photobucket.com/albums/ll297/Jimm3hh/Audi S3/folder II/DSC09885Custom.jpg
http://i291.photobucket.com/albums/ll297/Jimm3hh/Audi S3/folder II/DSC09891Custom.jpg
and upper R ¼ before:
http://i291.photobucket.com/albums/ll297/Jimm3hh/Audi S3/folder II/DSC09914Custom.jpg
after:
http://i291.photobucket.com/albums/ll297/Jimm3hh/Audi S3/folder II/DSC09915Custom.jpg
http://i291.photobucket.com/albums/ll297/Jimm3hh/Audi S3/folder II/DSC09922Custom.jpg
After noticing a poor effort at the front end I revisited the wing. Before:
http://i291.photobucket.com/albums/ll297/Jimm3hh/Audi S3/folder II/DSC09933Custom.jpg
and after:
http://i291.photobucket.com/albums/ll297/Jimm3hh/Audi S3/folder II/DSC09936Custom.jpg
The nasty mark still remains:
http://i291.photobucket.com/albums/ll297/Jimm3hh/Audi S3/folder II/DSC09937Custom.jpg
Passenger side R upper ¼ before:
http://i291.photobucket.com/albums/ll297/Jimm3hh/Audi S3/folder II/DSC09965Custom.jpg
and after:
http://i291.photobucket.com/albums/ll297/Jimm3hh/Audi S3/folder II/DSC09971Custom.jpg
http://i291.photobucket.com/albums/ll297/Jimm3hh/Audi S3/folder II/DSC09975Custom.jpg
http://i291.photobucket.com/albums/ll297/Jimm3hh/Audi S3/folder II/DSC09979Custom.jpg
Passenger side rear cluster before:
http://i291.photobucket.com/albums/ll297/Jimm3hh/Audi S3/folder II/DSC09985Custom.jpg
http://i291.photobucket.com/albums/ll297/Jimm3hh/Audi S3/folder II/DSC09986Custom.jpg
http://i291.photobucket.com/albums/ll297/Jimm3hh/Audi S3/folder II/DSC09987Custom.jpg
After:
http://i291.photobucket.com/albums/ll297/Jimm3hh/Audi S3/folder II/DSC09988Custom.jpg
http://i291.photobucket.com/albums/ll297/Jimm3hh/Audi S3/folder II/DSC09990Custom.jpg
Drivers side rear cluster before:
http://i291.photobucket.com/albums/ll297/Jimm3hh/Audi S3/DSC00086.jpg
http://i291.photobucket.com/albums/ll297/Jimm3hh/Audi S3/DSC00087.jpg
After:
http://i291.photobucket.com/albums/ll297/Jimm3hh/Audi S3/DSC00090.jpg
http://i291.photobucket.com/albums/ll297/Jimm3hh/Audi S3/DSC00092.jpg
The car had collected a sheet of dust throughout the polishing stages so was returned outside for a quick wash. Et voila, end of day 1.
http://i291.photobucket.com/albums/ll297/Jimm3hh/Audi S3/folder II/DSC09999Custom.jpg
Oh, and I stupidly ran over my Megs LT spray bottle.. Nightmare. It was full. It made a huge explosion, scared the life out of me, and a passing dog, and covered my freshly washed car in a rich mix of detail spray. Heh. (Could be worse .)
http://i291.photobucket.com/albums/ll297/Jimm3hh/Audi S3/folder II/DSC00004Custom.jpg
Day two. Again, the weather looks bad, so I re-pack the car and set off down the road to fathers. Pre-wash, TBM wash, dried and back into the garage for the refining polish.
Although I used Megs #83 to cut, I went with Menz FF to refine over Megs #80 as I am a bit more familiar with FF.
Drivers side F wing before (after correction with Megs #83):
http://i291.photobucket.com/albums/ll297/Jimm3hh/Audi S3/DSC00007.jpg
Drivers side F wing after Menz FF:
http://i291.photobucket.com/albums/ll297/Jimm3hh/Audi S3/DSC00011.jpg
FF going onto the bonnet:
http://i291.photobucket.com/albums/ll297/Jimm3hh/Audi S3/DSC00016.jpg
Before: (shocking attempt!)
http://i291.photobucket.com/albums/ll297/Jimm3hh/Audi S3/DSC00020.jpg
^note the buffer trials too
and After:
http://i291.photobucket.com/albums/ll297/Jimm3hh/Audi S3/DSC00023.jpg
http://i291.photobucket.com/albums/ll297/Jimm3hh/Audi S3/DSC00025.jpg
Given another quick hit to take some bad bits:
http://i291.photobucket.com/albums/ll297/Jimm3hh/Audi S3/DSC00031.jpg
http://i291.photobucket.com/albums/ll297/Jimm3hh/Audi S3/DSC00037.jpg
Polish worked to residue is clear:
http://i291.photobucket.com/albums/ll297/Jimm3hh/Audi S3/DSC00034.jpg
Bonnet finished:
http://i291.photobucket.com/albums/ll297/Jimm3hh/Audi S3/DSC00044.jpg
Time to work down the sides of the car. I started with the Drivers side working my way back..
Two small pea-sized blobs of FF on a Blue spot pad:
http://i291.photobucket.com/albums/ll297/Jimm3hh/Audi S3/DSC00050.jpg
http://i291.photobucket.com/albums/ll297/Jimm3hh/Audi S3/DSC00051.jpg
Drivers side pretty much refined and LSP ready:
http://i291.photobucket.com/albums/ll297/Jimm3hh/Audi S3/DSC00054.jpg
http://i291.photobucket.com/albums/ll297/Jimm3hh/Audi S3/DSC00056.jpg
http://i291.photobucket.com/albums/ll297/Jimm3hh/Audi S3/DSC00057.jpg
(still some small RDS)
http://i291.photobucket.com/albums/ll297/Jimm3hh/Audi S3/DSC00062.jpg
http://i291.photobucket.com/albums/ll297/Jimm3hh/Audi S3/DSC00063.jpg
Onto the tailgate Before:
http://i291.photobucket.com/albums/ll297/Jimm3hh/Audi S3/DSC00075.jpg
http://i291.photobucket.com/albums/ll297/Jimm3hh/Audi S3/DSC00079.jpg
http://i291.photobucket.com/albums/ll297/Jimm3hh/Audi S3/DSC00081.jpg
and some bad after shots:
http://i291.photobucket.com/albums/ll297/Jimm3hh/Audi S3/DSC00082.jpg
http://i291.photobucket.com/albums/ll297/Jimm3hh/Audi S3/DSC00084.jpg
Now, with where I was, I was quite happy. I knew I had one or two areas yet to look at, but progress was good. I wasnt expecting such results from the VAG paint and a PC. Pretty smug about it all at this point.
Moving back to the front of the car I noticed the headlights could do with a spruce.
http://i291.photobucket.com/albums/ll297/Jimm3hh/Audi S3/DSC00104.jpg
Swirls/random scratches and rough marks that were stealing their crystal look.
A few hits with Megs Scratch-X/#83 on a orange spot pad and I was left with:
http://i291.photobucket.com/albums/ll297/Jimm3hh/Audi S3/DSC00107.jpg
Better. But again, room for improvement.
I put some 2000 wet/dry paper in some fairy liquid to soak some 30 minutes before my actions, but I went on to douse the headlight with LastTouch and lightly work the area to remove and stubborn/oxidised bits:
http://i291.photobucket.com/albums/ll297/Jimm3hh/Audi S3/DSC00110.jpg
Which when dry, left me with:
http://i291.photobucket.com/albums/ll297/Jimm3hh/Audi S3/DSC00112.jpg
(Nothing too serious, I wanted to be careful not to apply too much pressure)
The sanding marks were hit again with a mix of Megs #83/Scratch-X:
http://i291.photobucket.com/albums/ll297/Jimm3hh/Audi S3/DSC00115.jpg
Muchos better. (in real life anyway, tough to tell the difference on the photos)
Passenger side headlight before:
http://i291.photobucket.com/albums/ll297/Jimm3hh/Audi S3/DSC00133.jpg
During:
http://i291.photobucket.com/albums/ll297/Jimm3hh/Audi S3/DSC00134.jpg
Sanding marks: (note the scuff on the bumper, this is my next job)
http://i291.photobucket.com/albums/ll297/Jimm3hh/Audi S3/DSC00135.jpg
After:
http://i291.photobucket.com/albums/ll297/Jimm3hh/Audi S3/DSC00137.jpg
http://i291.photobucket.com/albums/ll297/Jimm3hh/Audi S3/DSC00139.jpg
So, moving on to that scuff, I used the same approach as I used for the headlights. Wet n Dry, Megs #83 and a cut spot pad.
Scuff before: (quite hard to photograph, but it was quite evident and stood out well)
http://i291.photobucket.com/albums/ll297/Jimm3hh/Audi S3/DSC00146.jpg
http://i291.photobucket.com/albums/ll297/Jimm3hh/Audi S3/DSC00143.jpg
Sanded:
http://i291.photobucket.com/albums/ll297/Jimm3hh/Audi S3/DSC00145.jpg
(I must get myself a sanding block, everywhere is currently sold out!?)
After several hits with #83:
http://i291.photobucket.com/albums/ll297/Jimm3hh/Audi S3/DSC00147.jpg
http://i291.photobucket.com/albums/ll297/Jimm3hh/Audi S3/DSC00164.jpg
http://i291.photobucket.com/albums/ll297/Jimm3hh/Audi S3/DSC00166.jpg
There too was a bad scuff on the passenger side rear bumper. The usual places where people decide to drive/reverse into bins/shopping trolleys/small animals and children:
http://i291.photobucket.com/albums/ll297/Jimm3hh/Audi S3/DSC00153.jpg
http://i291.photobucket.com/albums/ll297/Jimm3hh/Audi S3/DSC00154.jpg
I wasnt expecting 100% improvement here, it really was just a quick seeing too.. I had to be soon packed up and away as it was getting late in the day.
Rear side scuff after:
http://i291.photobucket.com/albums/ll297/Jimm3hh/Audi S3/DSC00163.jpg
The whole car (minus the lowers (under bump strips! )) is now LSP ready:
http://i291.photobucket.com/albums/ll297/Jimm3hh/Audi S3/DSC00167.jpg
However it again had collected some serious dustage so I ran around with (a NEW) bottle of LastTouch and wiped clear with a clean MF:
http://i291.photobucket.com/albums/ll297/Jimm3hh/Audi S3/DSC00168.jpg
http://i291.photobucket.com/albums/ll297/Jimm3hh/Audi S3/DSC00171.jpg
http://i291.photobucket.com/albums/ll297/Jimm3hh/Audi S3/DSC00172.jpg
Victoria Concours applied and buffed:
http://i291.photobucket.com/albums/ll297/Jimm3hh/Audi S3/DSC00175.jpg
http://i291.photobucket.com/albums/ll297/Jimm3hh/Audi S3/DSC00179.jpg
Finished. Now to do some small details. The tyres were dressed. Wheels wiped. Windows cleaned quickly annnd.. that was about it. Oh, the exhaust was scrubbed up too.
http://i291.photobucket.com/albums/ll297/Jimm3hh/Audi S3/DSC00185.jpg
http://i291.photobucket.com/albums/ll297/Jimm3hh/Audi S3/DSC00191.jpg
Packed up and put round the front to sit in the sun for a bit of an inspection:
http://i291.photobucket.com/albums/ll297/Jimm3hh/Audi S3/DSC00200.jpg


I hope to get some better after pictures at some point today.
So in the end there are still areas yet to tackle (lower door sills, revisit the scuffs and remove some RDS throughout..) but Im pretty chuffed with what I have achieved. Inadequate PC experience I thought would let me down, however I hung on tight and I worked wonders for me.
Thanks for reading once again, Im knackered now and I have a MASSIVE bird bomb smack in the centre of the bonnet. How annoying. Also, can I just note the pictures do the colour no justice, at all.. It really is quite a dark plum/maroon colour - it's lovely. "Hibiscus Red" for you Audi nuts.
Todays job: well, not a lot really. Meet some guys for lunch. Cruise over to my local Audi Dealership and then given the chance, see about doing some more wet-sanding.
The following was written on behalf of DetailingWorld.co.uk - feel free to question me at the end with any issues/ideas. I must warn, it's quite a long read (esp. now the images have had to be made into links!) - grab a cuppa, a cookie or two and enjoy - thanks.
*~*~*~*~*~*~*~*~*~*~*~*~*~*~*~
*~*~*~*~*~*~*~*~*~*~*~*~*~*~*~
Having taken a few days off work, Ive finally got round to putting some life back into my new car. (Audi S3 2001) I have splashed several photos around already, but just to let you know of its condition prior to my detail:
Drivers side R ¼:
http://i291.photobucket.com/albums/ll297/Jimm3hh/DSC09308Large.jpg
Bonnet:
http://i291.photobucket.com/albums/ll297/Jimm3hh/DSC09310Large.jpg
I think its fair to say I quite a big job ahead of me.
So, Wednesday I loaded up and drove some 10m to my Fathers (use the double garage!), as the forecast was a bit touch and go and I didnt fancy my chances. Turns out, the weather held for the majority but still, better safe than sorry.
Before I get in too deep, Id just like to note that this job was carried through over two days. My first day was mainly spent machine polishing with an abrasive compound, and the second day was spent refining the finish/wet-sanding/details
Process and Pictures
Wheels worked with Megs WB, Swissvax wheel brush and EZ Detail Brush
http://i291.photobucket.com/albums/ll297/Jimm3hh/Audi S3/folder II/DSC09656Custom.jpg
Foamed with SSF and AB foam Lance (awaiting my additional plastic connector)
http://i291.photobucket.com/albums/ll297/Jimm3hh/Audi S3/folder II/DSC09658Custom.jpg
http://i291.photobucket.com/albums/ll297/Jimm3hh/Audi S3/folder II/DSC09659Custom.jpg
http://i291.photobucket.com/albums/ll297/Jimm3hh/Audi S3/folder II/DSC09660Custom.jpg
http://i291.photobucket.com/albums/ll297/Jimm3hh/Audi S3/folder II/DSC09661Custom.jpg
Rinsed at full power to remove surface dirt
http://i291.photobucket.com/albums/ll297/Jimm3hh/Audi S3/folder II/DSC09663Custom.jpg
Washed with TBM with Megs GC and my Ulti-mit
http://i291.photobucket.com/albums/ll297/Jimm3hh/Audi S3/folder II/DSC09665Custom.jpg
Spritzed with Megs LT and dried.
http://i291.photobucket.com/albums/ll297/Jimm3hh/Audi S3/folder II/DSC09667Custom.jpg
Rolled into the garage for the work to begin.
General swirlage on the bonnet:
http://i291.photobucket.com/albums/ll297/Jimm3hh/Audi S3/folder II/DSC09697Custom.jpg
http://i291.photobucket.com/albums/ll297/Jimm3hh/Audi S3/folder II/DSC09699Custom.jpg
Test patch on the bonnet with Menz IP on a Lake Country(?) orange cutting pad
http://i291.photobucket.com/albums/ll297/Jimm3hh/Audi S3/folder II/DSC09676Custom.jpg
http://i291.photobucket.com/albums/ll297/Jimm3hh/Audi S3/folder II/DSC09678Custom.jpg
After a pass with the PC:
http://i291.photobucket.com/albums/ll297/Jimm3hh/Audi S3/folder II/DSC09705Custom.jpg
Massive transformation but plenty of room for improvement.
My Menz IP ran out, so I stepped up to Megs #83.
I used small spot pads for those hard to reach areas (and the difficult angles)
http://i291.photobucket.com/albums/ll297/Jimm3hh/Audi S3/folder II/DSC09706Custom.jpg
http://i291.photobucket.com/albums/ll297/Jimm3hh/Audi S3/folder II/DSC09709Custom.jpg
A fair few nicks and RDS were left, however the refining stage was too follow.
Drivers side Wing before:
http://i291.photobucket.com/albums/ll297/Jimm3hh/Audi S3/folder II/DSC09712Custom.jpg
and after:
http://i291.photobucket.com/albums/ll297/Jimm3hh/Audi S3/folder II/DSC09710Custom.jpg
50/50 on same area:
http://i291.photobucket.com/albums/ll297/Jimm3hh/Audi S3/folder II/DSC09727Custom.jpg
http://i291.photobucket.com/albums/ll297/Jimm3hh/Audi S3/folder II/DSC09731Custom.jpg
(^this area was hit again)
More drivers side wing before:
http://i291.photobucket.com/albums/ll297/Jimm3hh/Audi S3/folder II/DSC09753Custom.jpg
http://i291.photobucket.com/albums/ll297/Jimm3hh/Audi S3/folder II/DSC09756Custom.jpg
http://i291.photobucket.com/albums/ll297/Jimm3hh/Audi S3/folder II/DSC09760Custom.jpg
http://i291.photobucket.com/albums/ll297/Jimm3hh/Audi S3/folder II/DSC09761Custom.jpg
After:
http://i291.photobucket.com/albums/ll297/Jimm3hh/Audi S3/folder II/DSC09763Custom.jpg
http://i291.photobucket.com/albums/ll297/Jimm3hh/Audi S3/folder II/DSC09766Custom.jpg
50/50:
http://i291.photobucket.com/albums/ll297/Jimm3hh/Audi S3/folder II/DSC09770Custom.jpg
http://i291.photobucket.com/albums/ll297/Jimm3hh/Audi S3/folder II/DSC09778Custom.jpg
http://i291.photobucket.com/albums/ll297/Jimm3hh/Audi S3/folder II/DSC09785Custom.jpg
Drivers side wing/arch before:
http://i291.photobucket.com/albums/ll297/Jimm3hh/Audi S3/folder II/DSC09787Custom.jpg
Buffing:
http://i291.photobucket.com/albums/ll297/Jimm3hh/Audi S3/folder II/DSC09789Custom.jpg
After:
http://i291.photobucket.com/albums/ll297/Jimm3hh/Audi S3/folder II/DSC09792Custom.jpg
A random mark on the drivers door. Looks to have been brillod in a previous life:
http://i291.photobucket.com/albums/ll297/Jimm3hh/Audi S3/folder II/DSC09805Custom.jpg
^This proved to be a pain to remove. Will require some soft wet-sanding at a later date.
General 50/50 on drivers door:
http://i291.photobucket.com/albums/ll297/Jimm3hh/Audi S3/folder II/DSC09830Custom.jpg
Driver door handle/areas before:
http://i291.photobucket.com/albums/ll297/Jimm3hh/Audi S3/folder II/DSC09833Custom.jpg
http://i291.photobucket.com/albums/ll297/Jimm3hh/Audi S3/folder II/DSC09835Custom.jpg
http://i291.photobucket.com/albums/ll297/Jimm3hh/Audi S3/folder II/DSC09836Custom.jpg
Afters:
http://i291.photobucket.com/albums/ll297/Jimm3hh/Audi S3/folder II/DSC09840Custom.jpg
http://i291.photobucket.com/albums/ll297/Jimm3hh/Audi S3/folder II/DSC09842Custom.jpg
http://i291.photobucket.com/albums/ll297/Jimm3hh/Audi S3/folder II/DSC09843Custom.jpg
http://i291.photobucket.com/albums/ll297/Jimm3hh/Audi S3/folder II/DSC09844Custom.jpg
Drivers side R ¼ before:
http://i291.photobucket.com/albums/ll297/Jimm3hh/Audi S3/folder II/DSC09846Custom.jpg
http://i291.photobucket.com/albums/ll297/Jimm3hh/Audi S3/folder II/DSC09847Custom.jpg
Before 50/50 work carried out..
http://i291.photobucket.com/albums/ll297/Jimm3hh/Audi S3/folder II/DSC09850Custom.jpg
50/50:
http://i291.photobucket.com/albums/ll297/Jimm3hh/Audi S3/DSC09855.jpg
http://i291.photobucket.com/albums/ll297/Jimm3hh/Audi S3/folder II/DSC09864Custom.jpg
http://i291.photobucket.com/albums/ll297/Jimm3hh/Audi S3/folder II/DSC09885Custom.jpg
http://i291.photobucket.com/albums/ll297/Jimm3hh/Audi S3/folder II/DSC09891Custom.jpg
and upper R ¼ before:
http://i291.photobucket.com/albums/ll297/Jimm3hh/Audi S3/folder II/DSC09914Custom.jpg
after:
http://i291.photobucket.com/albums/ll297/Jimm3hh/Audi S3/folder II/DSC09915Custom.jpg
http://i291.photobucket.com/albums/ll297/Jimm3hh/Audi S3/folder II/DSC09922Custom.jpg
After noticing a poor effort at the front end I revisited the wing. Before:
http://i291.photobucket.com/albums/ll297/Jimm3hh/Audi S3/folder II/DSC09933Custom.jpg
and after:
http://i291.photobucket.com/albums/ll297/Jimm3hh/Audi S3/folder II/DSC09936Custom.jpg
The nasty mark still remains:
http://i291.photobucket.com/albums/ll297/Jimm3hh/Audi S3/folder II/DSC09937Custom.jpg
Passenger side R upper ¼ before:
http://i291.photobucket.com/albums/ll297/Jimm3hh/Audi S3/folder II/DSC09965Custom.jpg
and after:
http://i291.photobucket.com/albums/ll297/Jimm3hh/Audi S3/folder II/DSC09971Custom.jpg
http://i291.photobucket.com/albums/ll297/Jimm3hh/Audi S3/folder II/DSC09975Custom.jpg
http://i291.photobucket.com/albums/ll297/Jimm3hh/Audi S3/folder II/DSC09979Custom.jpg
Passenger side rear cluster before:
http://i291.photobucket.com/albums/ll297/Jimm3hh/Audi S3/folder II/DSC09985Custom.jpg
http://i291.photobucket.com/albums/ll297/Jimm3hh/Audi S3/folder II/DSC09986Custom.jpg
http://i291.photobucket.com/albums/ll297/Jimm3hh/Audi S3/folder II/DSC09987Custom.jpg
After:
http://i291.photobucket.com/albums/ll297/Jimm3hh/Audi S3/folder II/DSC09988Custom.jpg
http://i291.photobucket.com/albums/ll297/Jimm3hh/Audi S3/folder II/DSC09990Custom.jpg
Drivers side rear cluster before:
http://i291.photobucket.com/albums/ll297/Jimm3hh/Audi S3/DSC00086.jpg
http://i291.photobucket.com/albums/ll297/Jimm3hh/Audi S3/DSC00087.jpg
After:
http://i291.photobucket.com/albums/ll297/Jimm3hh/Audi S3/DSC00090.jpg
http://i291.photobucket.com/albums/ll297/Jimm3hh/Audi S3/DSC00092.jpg
The car had collected a sheet of dust throughout the polishing stages so was returned outside for a quick wash. Et voila, end of day 1.
http://i291.photobucket.com/albums/ll297/Jimm3hh/Audi S3/folder II/DSC09999Custom.jpg
Oh, and I stupidly ran over my Megs LT spray bottle.. Nightmare. It was full. It made a huge explosion, scared the life out of me, and a passing dog, and covered my freshly washed car in a rich mix of detail spray. Heh. (Could be worse .)
http://i291.photobucket.com/albums/ll297/Jimm3hh/Audi S3/folder II/DSC00004Custom.jpg
Day two. Again, the weather looks bad, so I re-pack the car and set off down the road to fathers. Pre-wash, TBM wash, dried and back into the garage for the refining polish.
Although I used Megs #83 to cut, I went with Menz FF to refine over Megs #80 as I am a bit more familiar with FF.
Drivers side F wing before (after correction with Megs #83):
http://i291.photobucket.com/albums/ll297/Jimm3hh/Audi S3/DSC00007.jpg
Drivers side F wing after Menz FF:
http://i291.photobucket.com/albums/ll297/Jimm3hh/Audi S3/DSC00011.jpg
FF going onto the bonnet:
http://i291.photobucket.com/albums/ll297/Jimm3hh/Audi S3/DSC00016.jpg
Before: (shocking attempt!)
http://i291.photobucket.com/albums/ll297/Jimm3hh/Audi S3/DSC00020.jpg
^note the buffer trials too
and After:
http://i291.photobucket.com/albums/ll297/Jimm3hh/Audi S3/DSC00023.jpg
http://i291.photobucket.com/albums/ll297/Jimm3hh/Audi S3/DSC00025.jpg
Given another quick hit to take some bad bits:
http://i291.photobucket.com/albums/ll297/Jimm3hh/Audi S3/DSC00031.jpg
http://i291.photobucket.com/albums/ll297/Jimm3hh/Audi S3/DSC00037.jpg
Polish worked to residue is clear:
http://i291.photobucket.com/albums/ll297/Jimm3hh/Audi S3/DSC00034.jpg
Bonnet finished:
http://i291.photobucket.com/albums/ll297/Jimm3hh/Audi S3/DSC00044.jpg
Time to work down the sides of the car. I started with the Drivers side working my way back..
Two small pea-sized blobs of FF on a Blue spot pad:
http://i291.photobucket.com/albums/ll297/Jimm3hh/Audi S3/DSC00050.jpg
http://i291.photobucket.com/albums/ll297/Jimm3hh/Audi S3/DSC00051.jpg
Drivers side pretty much refined and LSP ready:
http://i291.photobucket.com/albums/ll297/Jimm3hh/Audi S3/DSC00054.jpg
http://i291.photobucket.com/albums/ll297/Jimm3hh/Audi S3/DSC00056.jpg
http://i291.photobucket.com/albums/ll297/Jimm3hh/Audi S3/DSC00057.jpg
(still some small RDS)
http://i291.photobucket.com/albums/ll297/Jimm3hh/Audi S3/DSC00062.jpg
http://i291.photobucket.com/albums/ll297/Jimm3hh/Audi S3/DSC00063.jpg
Onto the tailgate Before:
http://i291.photobucket.com/albums/ll297/Jimm3hh/Audi S3/DSC00075.jpg
http://i291.photobucket.com/albums/ll297/Jimm3hh/Audi S3/DSC00079.jpg
http://i291.photobucket.com/albums/ll297/Jimm3hh/Audi S3/DSC00081.jpg
and some bad after shots:
http://i291.photobucket.com/albums/ll297/Jimm3hh/Audi S3/DSC00082.jpg
http://i291.photobucket.com/albums/ll297/Jimm3hh/Audi S3/DSC00084.jpg
Now, with where I was, I was quite happy. I knew I had one or two areas yet to look at, but progress was good. I wasnt expecting such results from the VAG paint and a PC. Pretty smug about it all at this point.
Moving back to the front of the car I noticed the headlights could do with a spruce.
http://i291.photobucket.com/albums/ll297/Jimm3hh/Audi S3/DSC00104.jpg
Swirls/random scratches and rough marks that were stealing their crystal look.
A few hits with Megs Scratch-X/#83 on a orange spot pad and I was left with:
http://i291.photobucket.com/albums/ll297/Jimm3hh/Audi S3/DSC00107.jpg
Better. But again, room for improvement.
I put some 2000 wet/dry paper in some fairy liquid to soak some 30 minutes before my actions, but I went on to douse the headlight with LastTouch and lightly work the area to remove and stubborn/oxidised bits:
http://i291.photobucket.com/albums/ll297/Jimm3hh/Audi S3/DSC00110.jpg
Which when dry, left me with:
http://i291.photobucket.com/albums/ll297/Jimm3hh/Audi S3/DSC00112.jpg
(Nothing too serious, I wanted to be careful not to apply too much pressure)
The sanding marks were hit again with a mix of Megs #83/Scratch-X:
http://i291.photobucket.com/albums/ll297/Jimm3hh/Audi S3/DSC00115.jpg
Muchos better. (in real life anyway, tough to tell the difference on the photos)
Passenger side headlight before:
http://i291.photobucket.com/albums/ll297/Jimm3hh/Audi S3/DSC00133.jpg
During:
http://i291.photobucket.com/albums/ll297/Jimm3hh/Audi S3/DSC00134.jpg
Sanding marks: (note the scuff on the bumper, this is my next job)
http://i291.photobucket.com/albums/ll297/Jimm3hh/Audi S3/DSC00135.jpg
After:
http://i291.photobucket.com/albums/ll297/Jimm3hh/Audi S3/DSC00137.jpg
http://i291.photobucket.com/albums/ll297/Jimm3hh/Audi S3/DSC00139.jpg
So, moving on to that scuff, I used the same approach as I used for the headlights. Wet n Dry, Megs #83 and a cut spot pad.
Scuff before: (quite hard to photograph, but it was quite evident and stood out well)
http://i291.photobucket.com/albums/ll297/Jimm3hh/Audi S3/DSC00146.jpg
http://i291.photobucket.com/albums/ll297/Jimm3hh/Audi S3/DSC00143.jpg
Sanded:
http://i291.photobucket.com/albums/ll297/Jimm3hh/Audi S3/DSC00145.jpg
(I must get myself a sanding block, everywhere is currently sold out!?)
After several hits with #83:
http://i291.photobucket.com/albums/ll297/Jimm3hh/Audi S3/DSC00147.jpg
http://i291.photobucket.com/albums/ll297/Jimm3hh/Audi S3/DSC00164.jpg
http://i291.photobucket.com/albums/ll297/Jimm3hh/Audi S3/DSC00166.jpg
There too was a bad scuff on the passenger side rear bumper. The usual places where people decide to drive/reverse into bins/shopping trolleys/small animals and children:
http://i291.photobucket.com/albums/ll297/Jimm3hh/Audi S3/DSC00153.jpg
http://i291.photobucket.com/albums/ll297/Jimm3hh/Audi S3/DSC00154.jpg
I wasnt expecting 100% improvement here, it really was just a quick seeing too.. I had to be soon packed up and away as it was getting late in the day.
Rear side scuff after:
http://i291.photobucket.com/albums/ll297/Jimm3hh/Audi S3/DSC00163.jpg
The whole car (minus the lowers (under bump strips!
)) is now LSP ready:http://i291.photobucket.com/albums/ll297/Jimm3hh/Audi S3/DSC00167.jpg
However it again had collected some serious dustage so I ran around with (a NEW) bottle of LastTouch and wiped clear with a clean MF:
http://i291.photobucket.com/albums/ll297/Jimm3hh/Audi S3/DSC00168.jpg
http://i291.photobucket.com/albums/ll297/Jimm3hh/Audi S3/DSC00171.jpg
http://i291.photobucket.com/albums/ll297/Jimm3hh/Audi S3/DSC00172.jpg
Victoria Concours applied and buffed:
http://i291.photobucket.com/albums/ll297/Jimm3hh/Audi S3/DSC00175.jpg
http://i291.photobucket.com/albums/ll297/Jimm3hh/Audi S3/DSC00179.jpg
Finished. Now to do some small details. The tyres were dressed. Wheels wiped. Windows cleaned quickly annnd.. that was about it. Oh, the exhaust was scrubbed up too.
http://i291.photobucket.com/albums/ll297/Jimm3hh/Audi S3/DSC00185.jpg
http://i291.photobucket.com/albums/ll297/Jimm3hh/Audi S3/DSC00191.jpg
Packed up and put round the front to sit in the sun for a bit of an inspection:
http://i291.photobucket.com/albums/ll297/Jimm3hh/Audi S3/DSC00200.jpg
I hope to get some better after pictures at some point today.
So in the end there are still areas yet to tackle (lower door sills, revisit the scuffs and remove some RDS throughout..) but Im pretty chuffed with what I have achieved. Inadequate PC experience I thought would let me down, however I hung on tight and I worked wonders for me.
Thanks for reading once again, Im knackered now and I have a MASSIVE bird bomb smack in the centre of the bonnet. How annoying. Also, can I just note the pictures do the colour no justice, at all.. It really is quite a dark plum/maroon colour - it's lovely. "Hibiscus Red" for you Audi nuts.
Todays job: well, not a lot really. Meet some guys for lunch. Cruise over to my local Audi Dealership and then given the chance, see about doing some more wet-sanding.