IHI VF34 Conversion Pics

I know, proper geek! I have had to refer back to my photos on the odd occation..........my defense :drool:

Gav, I might have them fitted within the next few weeks. Have to wait and see how work goes. Trying to decide on the best option of valve spring compressor at the mo. Apparently the valves and springs are deeply recessed into the head.

They are a pain to strip out!!

Send it over to Dave Grissel and haev it ported and rebuilt by him!! Far easier and will flow nicer too!
 
Rich, by your wording it sounds like you are intending to swap rods without removing the head........or am I reading that incorrectly?

Thanks for the tip Gav, hadn't seen that one before. Could you do me a favour and measure the dameter of the ends. The inlet buckets are 24mm in diameter so it needs to be no bigger I assume. Exhaust buckets are larger, so no problem there.

Will do that in a short while Kev

Kev, I make the big end od as 30mm, id is 21mm and the small end od as 25 mm, id 18mm. It wouldn't take much to have the small end machined down a bit. I would do it with my angle grinder if I had to.

Failing that, a man with your talents wouldn't spend too long working out a way to do it on the bench.

The tool has a reach of 6 inches.

HTH

Gavin
 
Cheers Gav. Grinding that down wouldn't be an issue. I've seen another option where a guy has use a large G clamp with a modified socket. See below:

Photo-0109.jpg

Photo-0105.jpg


Would probably be a little slower. I'll see how much these G clamps are, but I'll probably end up getting the proper tool knowing me.
Will be purchasing a bolt stretch gauge as well for the rod bolts. I prefer this method over a torque wrench.

I don't suppose you know if the OEM rings require gapping do you?
 
Rich, by your wording it sounds like you are intending to swap rods without removing the head........or am I reading that incorrectly?

Thanks for the tip Gav, hadn't seen that one before. Could you do me a favour and measure the dameter of the ends. The inlet buckets are 24mm in diameter so it needs to be no bigger I assume. Exhaust buckets are larger, so no problem there.

I think i was unclear. Head is most definitely coming off. Got all my parts, starting tuesday:)
 
where did you get the engine mounts from im interested in some, thanks
 
Okay Rich, thought that might be the case. Will you be using a stretch gauge for the rod bolts. Got myself one of these the other day. Supposed to be best way to tighten the big ends.

s3_kev said:
where did you get the engine mounts from im interested in some, thanks

Got them from these guys --> http://seatcupra.net/forums/showthread.php?t=178365
 
Okay Rich, thought that might be the case. Will you be using a stretch gauge for the rod bolts. Got myself one of these the other day. Supposed to be best way to tighten the big ends.


Got them from these guys --> http://seatcupra.net/forums/showthread.php?t=178365

Nope...just good old torque wrench. They are ARP studs, so not stretch bolts.

Took the head off today. What a b*stard of a job! Its a really easy job, that would have taken me an hour, tops, if it hadnt been for the manifold bolts / turbo bolts .etc. Wasted my day, and a fair bit of blood loss on that. :banghead:

Pistons and rods come out tomorrow and new ones go in. Hope to have the majority of it all reassembled tomorrow

Rich
 
Rich, did you received ARP 2000 bolts with your rods? If so, these ARE stretch bolts and needed to be tightened to .006" of stretch. If you can't get to a stretch gauge then you need to torque 3 times using the thread lube (tighten, untighten etc). But it will be a bit of a guess.

Bolts on mine are a little easier than on the jabba mani...still going to be a few swear words I'm sure. Going to make a bent spanner this time round I think.
 
Kev,

thanks for the info. Hadn't even got around to checking out the torque figures yet. I'll see if i can get hold of one, but failing that what torque should they be tightened too?

Pistons are out and cleaned and ready for re-assembly.

Rich
 
Torque spec for those bolts is 50 ft/lbs. If they are nice and clean and lubed up, you should be okay. Don't go over. If you stretch the bolt by as little as .001" you'll ruin it with regards to correct clamping and strength.
 
Cool. ok.

btw - the sump is a b*stard to get off too. The 2 bolts nearest the gearbox require a universal joint on a thin socket extension to get the out. The bores are looking in surprising good shape considering. Will be interesting to see what yours look like. When are you starting?
 
I'm waiting on a few things. Possible headwork, researching the new turbo choice and some tools.

Will make a start when it's all finalised. Probably going with a different tuner for software too.

Cheers for the heads-up on the sump bolts.
 
I see from your pic ;) That would most like be my choice too should i come to change. Pistons are back in, big ends torqued up. Head going back on after lunch and then the rest of the re-assembly...the easy stuff! I used a sealey ring compressor to pop the pistons back in...biggest pile of *****... The ratchet kept undoing so had to hold it tight with one hand and tap the piston in with the other being careful not to damage the rings. All good now though.

Will post up some pics later.
 
Not the greatest or most useful pics, but was hard to take pics with filthy hands and arms when there was anything insteresting.

Anyway, pic of installed pistons and rods from top and underside.

P1000165.jpg

P1000171.jpg


You can just about see the big ends in the second one. Everything was in surprisingly good condition considering.

Head is back on and most other bits and piece too. All that is left to do is timing belt, aux drive belt and intercooler pipework to go back.

Rich
 
All done. Compression is even at ~170psi on all 4 cylinder and started first time OK. Job done.

Im aching a little mind!
 
Or both :) Need to replace the clutch next. Was going to do that this week too but ran out of time. Will give it an easy 300 miles or so to run it in and then open it up properly.
 
nah i changed the rings. Thought i may aswell while it was in pieces.
 
Little update. I've now added a Walbro fuel pump. Mounted it under the car rather than in the engine bay like some. I'm still trying to keep the bay as OEM as possible.

Also decided to buy a new turbo. My car still isn't boosting right. Most of the time it will be okay, but the odd time it will overboost as before. I've been though everything and the people I've spoken to all suggest boost creep or a cracked turbine housing. Whatever is up, its whistling above 22psi and I need to keep watching the boost gauge. Can't reliably boot it.

So in the search for a better unit I grabbed a TD05H-18G hybrid. It's a Blouch item sourced through Scooby Clinic. Has the stronger 14psi (1bar) actuator and a ported turbine housing to hopefully eliminate all boost creep.

It's a bolt on replacement for the subaru engine so the compressor and turbine housing are oriented differently to how I need them. So I decided to rotate the housings to suit the 1.8T (some people call it "clocking").

As it came:
TD05H-18G_Clocking_003_640x480.jpg

TD05H-18G_Clocking_005_640x480.jpg

TD05H-18G_Clocking_008_640x480.jpg


18G vs K03
TD05H-18G_Clocking_011_640x480.jpg


Oil and water fitting removed.
TD05H-18G_Clocking_013_640x480.jpg


After removing a large circlip for the compressor housing, the clamp ring for the turbine housing and the actuator it was possible to slide off the housings and remove the CHRA.
No balancing is required if the CHRA is left untouched as I have done.

Turbo disassembled:
TD05H-18G_Clocking_025_640x480.jpg


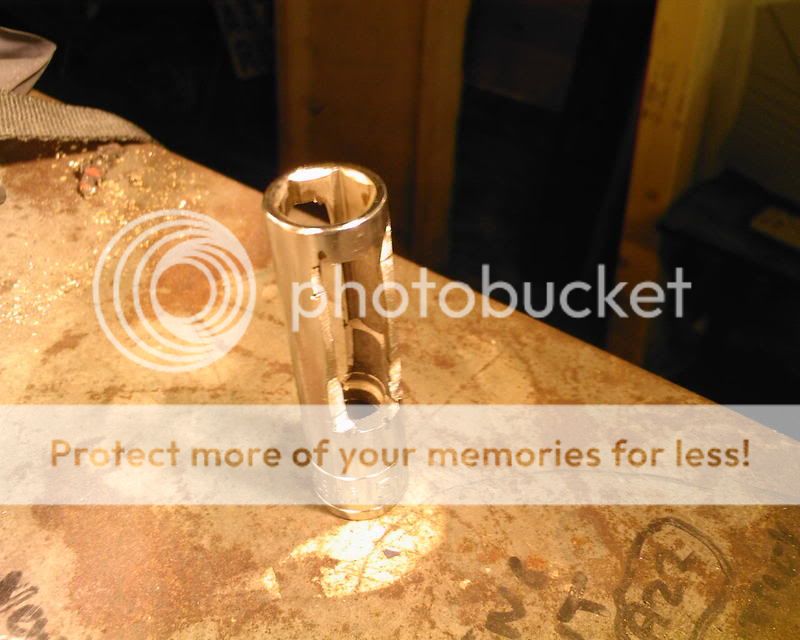
Subaru turbos have a pin inserted into the turbine housing that locates with a hole in the CHRA for correct orientation. Obviously I needed to remove this to re-orient for the 1.8T. Five minutes with the dremel was required to grind it flat.

TD05H-18G_Clocking_029_640x480.jpg


View of the ported tubine inlet:
TD05H-18G_Clocking_029a_640x480.jpg


Then all that was required was to re-assemble.

Back together with housings pointing in the correct directions:
TD05H-18G_Clocking_040_640x480.jpg


The turbo is now pretty much ready to go on but due to the modification I'll need to weld on a couple of bosses to bolt the actuator to (area circled in pic). Shouldn't be too difficult. Bought some aluminium offcuts off ebay for the job.
TD05H-18G_Clocking_041_640x480.jpg


Not sure when I'll get stuck in fitting it. Going to do the engine work at the same time. I'm waiting on some machine shops to get back with prices on some head work. Mainly fitting the new valve guides. If anyone knows of a good place in the south, then let me know.
 
It will need new software as it pumps a fair bit more air than the VF34. I will run it around on the old map for a while as I'll be bedding in the new piston rings so not to heavy on the pedal.
 
your cars mental mate you spend a fortune on it, what hp you aiming for now then??
 
Can't be sure what the power will be at the moment. I know of a golf with the same turbo running about 360bhp. I'd like to see torques into 300s also.
 
Won't be much to update on for the moment. I'm off to Saudi and Egypt for work for a short while. Also waiting for simch to get back to me about head work.

I did buy one of these boost controllers yesterday just in case I need it. If not, I'll sell it on.

Apexi_EBC.jpg
 
My guy can do whatever you need with your head, but he agreed it would be best for him to see it assembled and together as it would need a check at those sort of miles befroe too much is disturbed.

Is it nitrided inlets and inconel exhausts you have?
 
what happend? did you fit the turbo? or did I miss something. I searched it through google.