Bad Sir's S3 Restoration and Redemption thread

Bad Sir Culation

Registered User
Joined
Nov 9, 2011
Messages
296
Reaction score
17
Points
18
Location
Leeds, UK
Decided to start a thread to keep a diary of progress and work on the S3.

The car was in a poor state when collected. The shocks were knocking, the steering was heavy and the exhaust was moving about far too much.

Here it is:

20131221 112918

Drove it home from Kent, THEN discovered that the rear shocks were basically rotten:

20131217 154639

I knew the fronts were on their way out, or at the very least the top mounts were, as it was rattling like hell over speed bumps. I also discovered that the tyres are 235's instead of the 225's it should have. The car needed everything doing, but I didn't realise the full extent of work needed initially.

So as soon as I discovered the state of the shocks, I ordered a set of Koni STR.T shocks with H&R springs. A couple of days passed and I was then informed that they wouldn't be here until January 24th! Great. So I then had to spend another £100 buying a set of used shocks just to run the car until then. Not really what I was hoping for.

I found out that the exhaust hanger on the passenger side was missing, so ordered one of these. Unfortunately it also looks like there are no places for a new one to bolt to... :wtf:

While I was ordering stuff I also bought some LCR top mounts and new bearings for when the Konis arrive. In addition I bought a red Powerflex dogbone bush.

20131219 181925

20131220 134112

The eagle eyed among you will notice that the dogbone has been put back together the wrong way round in that pic :laugh:

Re-attaching the dogbone was a mission in itself. Unfortunately, one of the stretch bolts threaded out the hole when I tried to tighten to the specified torque. Could have done without extra problems, but there you go. I ended up using a different bolt instead and have managed to torque that up, so that will do.

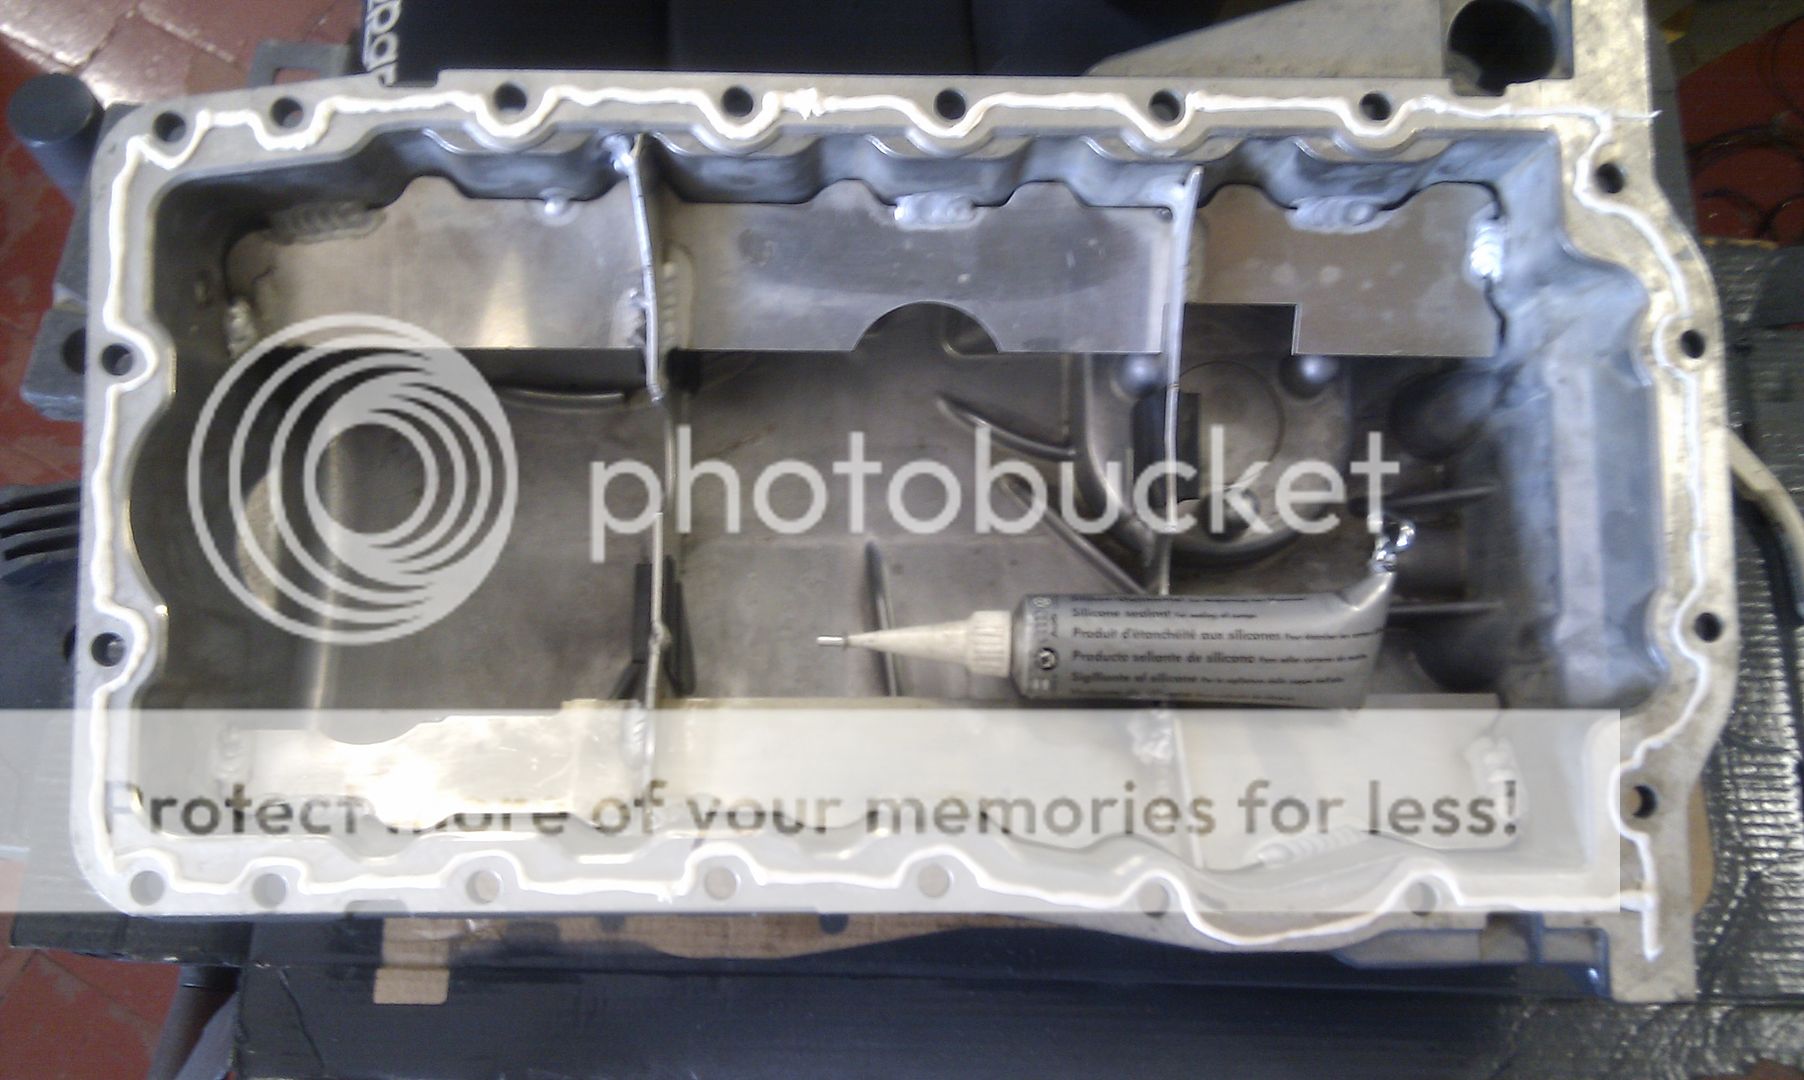
At the same time I did this, I also removed and cleaned the sump, and fitted a new oil strainer and pickup pipe. I didn't like how the car sounded, and having had a Leon Cupra in the past that suffered a seized engine due to the head being starved because of a blocked strainer, I wasn't going to take any risks.

20131219 121403

20131219 134425

20131219 164545

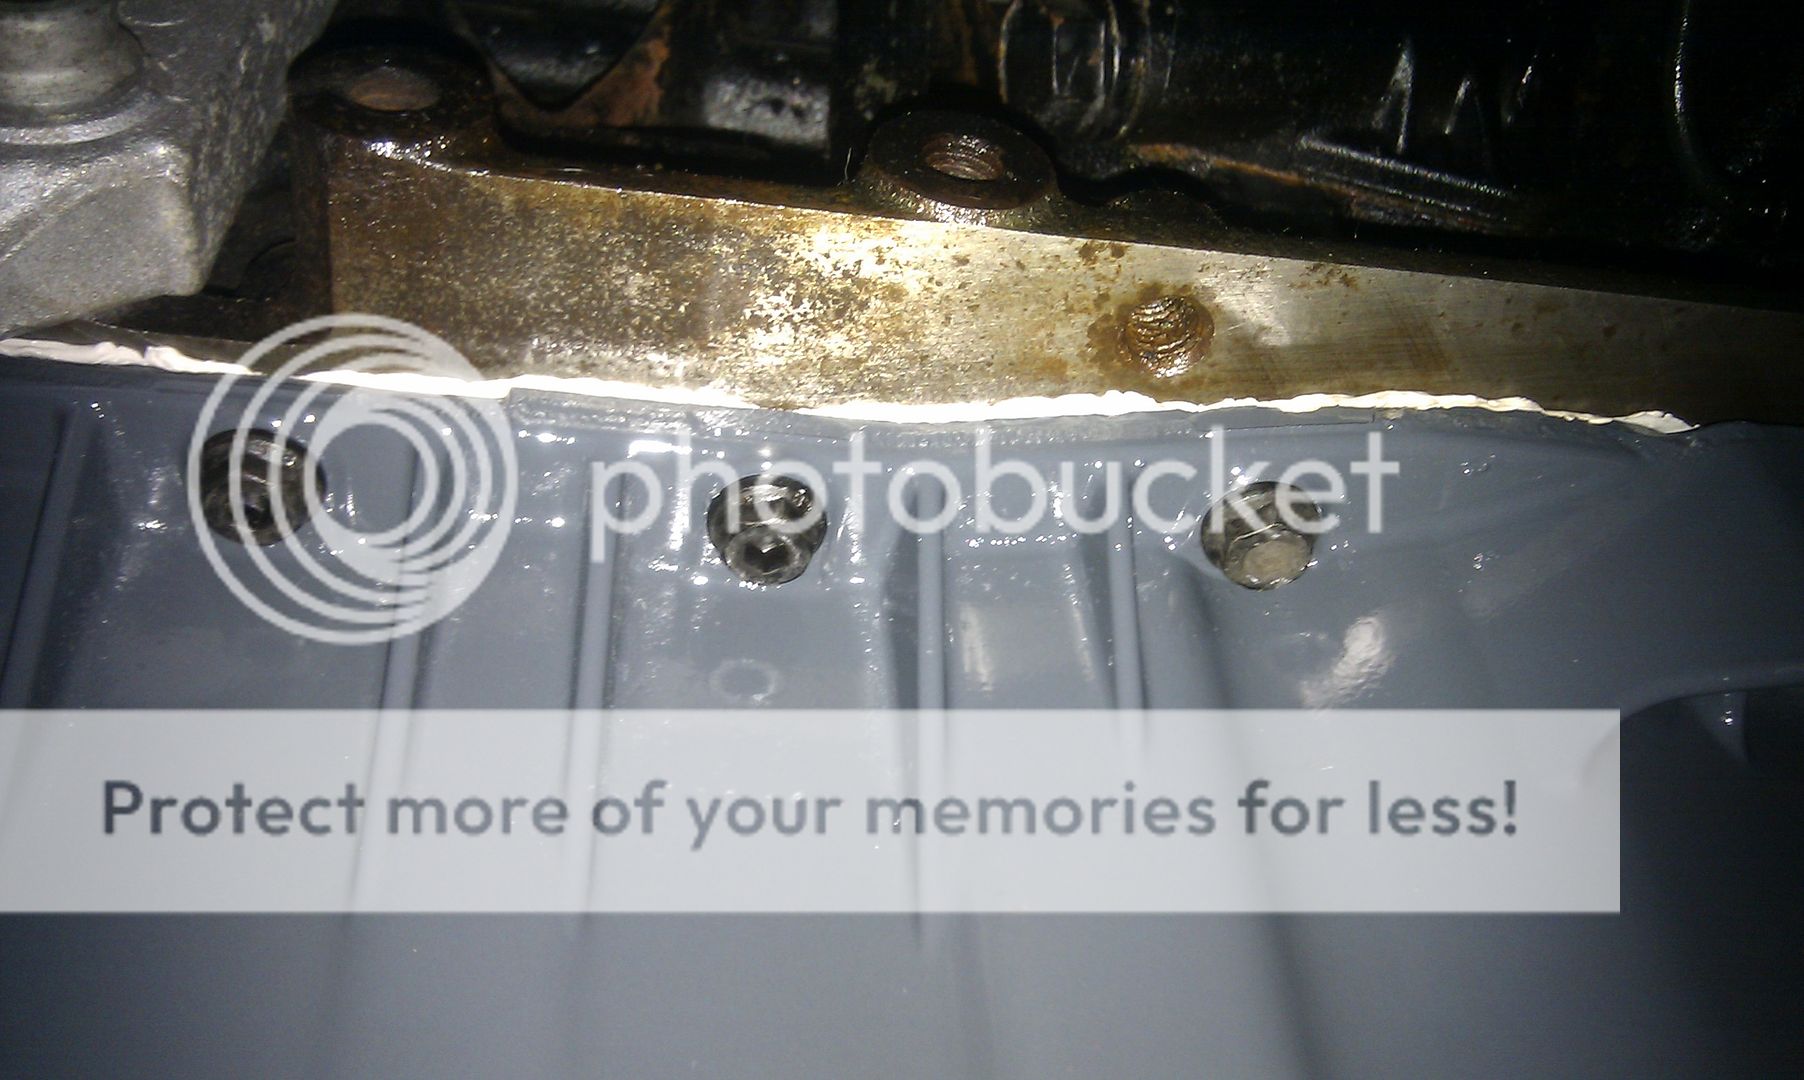
Installing the new pipe was quite straightforward but putting the sump back on went slightly wrong. Without much space under the car, the sump hit a pipe as I was replacing it, and that managed to knock some of the sealant off. As it had been about ten mins since I started applying it at this point, I had to just go ahead and put it back on and cross my fingers.

It almost worked!


I have a very very slight oil leak from the sump now. I will have to do it again but not just yet. It's so slight that I can ignore it for now and there are more important jobs to do. I still have an idle problem to deal with, but the engine sounds much better.

I got the car with a piddly little cone filter on it, and took my chance when a nice K&N cone came up on eBay. I also bought a heat shield and fitted them both at the same time:

20131216 183025

20131216 183117

I changed the rotten shocks once the used replacements arrived and got the car back on the road. One of the rear coil springs had actually snapped at the bottom.

Because the shocks had been changed, the alignment was out. I took it somewhere to see if they could sort it, as I couldn't stand the thought of leaving it until the brand new shocks came. Unfortunately they said they couldn't do it due to play in the steering components.

I then went out and bought new tie rods and tie rod ends to correct the problem. I did this today and guess what? No more play! One of the inner tie rods had massive play in the ball joint. It was easily the worst I've ever seen!

Check out one of the tie rod ends:

20131229 171312

Today has also seen me take the front bumper off and try to correct the headlight situation.

The headlights have no back covers and have been swapped out for Depo facelift style lights, with an HID kit. It has been implemented very badly, and leaves a lot to be desired. The wires are exposed and there are bits that should be connected that aren't, bits that shouldn't be connected that are, and so on.

Hopefully tomorrow I will manage to get the new lights I bought fitted, but I will have to wait a while for some new headlight washer jets. When I got the bumper off, I found that these were disconnected, with one of them actually broken. The fogs weren't connected either... :motz:

I also set about tidying up the wings around where the headlights fits. This was done badly and wasn't at all tidied up afterwards when someone fitted facelift lights. When I got it it was like this:

20131208 125356

20131208 125408

I have not cut some more of the bumper guide and a bit more metal away at both sides, and this evening I painted the exposed metal and touched the area up as best I could. I will take some pics in the daylight tomorrow.

Here's the washer jets:

20131229 145829

20131229 131219

20131229 131223

Phew! That took some writing, but I can keep this current from here which will be great for me keeping track of what I've done.

I've missed a couple of minor things but that's the majority of it. What a mission this has turned into, the sodding money pit!
 
Last edited:
  • Like
Reactions: s3dave
Cheers, it will be rewarding once it's done, I am sure. It's just a real pain in the backside right now!

Very glad I can just get on and DIY though. This car wouldn't be viable if every job involved paying a garage for the work. I don't always fully know what it is I am doing, but can usually go in the right direction and find enough help online when I get stuck!
 
Tuffty made a useful post regarding how much sump sealent should be used

Seeing as I was fititng a sump today I thought I would take a few pics to help out...

Thin bead of sealant in the center of the flange going round the inside of the bolt holes...
IMAG0055.jpg


...when bolted up the sealant will squeeze out... if you use too much then it will be doing the same on the inside as the outside... this could break off and float around the sump so make sure not too over do it...
IMAG0056.jpg


<tuffty/>
 
Very impressive mate. You got a link to the track rods and ends you bought?
 
Sooooo!

Time to stick some updates on here. I've done quite a lot to the car since the last update to this particular thread. The rough idle is now resolved from the looks of it. I have also now sorted the battery drain!

So those new tie rods and tie rod ends went on nicely as said above. Here's a couple of little pics:

View attachment 25691

View attachment 25692

So once the steering was sorted and the lights were sorted, it was time to move on.

I didn't get the lights to sit as far back as I wanted due to them not having a mounting hole on the bottom for a bottom bolt. I did the best job I could and they don't sit too badly. Somebody previously has made a mess of the wings where the lights sit which hasn't helped. Tidied it up as best I could:

View attachment 25693

View attachment 25694

View attachment 25695

Bit of OEM Xenon loom I had to chop up and turn into a piece of my HID loom:

View attachment 25696

View attachment 25697

This is how the car now looked:

View attachment 25698

I had to move on after the lights and try to solve some of the other issues. I had a member run me a VCDS scan. We saw MANY fault codes! He cleared these for me, and then I went back a week later to see what had come back so that I could see what was current. The main issues remaining were brake light switch, a couple of things showing a short to ground, the injectors showing as Open Circuit, and the MAF again showing a fault. I also got an error about charge pressure being exceeded. Not sure how to deal with some of these as yet.

Over the last week I have done a lot of testing with a multimeter to try and find out what the hell was draining the battery overnight. After asking for a bit of advice on here and reading up via Google, I had the multimeter wired in series and discovered that the car had a drain of 2.5 - 3 amps going on constantly. Once I discovered this, I had my fiancé stand watching the multimeter while I pulled every fuse in the dash end fusebox. Not a sausage. The reading stayed as it was, other than the odd blip when reseating a particular fuse.

So that was me pretty confused! Someone on here mentioned that it was likely to be a fault with the alternator, so I figured out how to test it and went back out. Sure enough, it was the alternator.

Saturday morning, I went out and picked up a used alternator for the princely sum of £25! I was loathe to buy a used one to be honest, but money isn't too good for us this month and so my choice was effectively made for me.

Today, I set about removing the old one and fitting its replacement, with the help of this guide:

Audi area: Audi TT DIY Alternator Replacement (TT)

It was a fiddly job, but not particularly difficult to be honest. I think the hardest part was getting the alternators in or out. The guide above shows a bottle that can be removed on the TT, but my S3 did not have this, so I just had to fiddle around with pipes etc. and try to make things fit where they didn't really!

Here are some pics from the process:

Alt 1

Alt 2

A pic of it put back together!:

Alt 3

Very pleased that this is now done. I can FINALLY stop disconnecting the battery every time the car is parked up for any length of time. What a relief!

I mentioned above that the MAF kept flashing up on the fault code scans, so yesterday I also bought a MAF. This was a brand new Bosch item, although it is re-manufactured by Bosch as these are exchange items. By the time I had gotten the £30 back for exchanging my old MAF and used a 15% discount at GSF, I had paid about £60 for this.

Once home, I quickly got it fitted, which was a very simple job.

Old one and damaged plug:

MAF 1

MAF 2

New one in:

MAF 3

Car now idles absolutely perfectly. No more hunting or cutting out. Job done! :)

Third and final job for this weekend was also one I did yesterday and was a consequence of the fault code scan: Replace the brake light switch.

Pretty simple job. Unscrew and remove the lower dash and just twist the old one out, twist the new one in, test and put back together.

Old switch in situ, with some "extra" brown wires someone has had hooked up, presumably to a boost gauge at some point:

Brake Switch 1

Brake Switch 2

The old and new switches, side by side! Look at how much more substantial the new green one looks:

Brake Switch 3

New one fitted:

Brake Switch 4

Phew!

Next on the list now, find and check all the major earth points and try to figure out what's causing the open circuit for the injectors.

OH! And er..... I forgot to cable tie up the N249 valve. Because of that, it was just hanging down the back of the engine. I found this today:

Melted N249

Fail! Now need to find an N249 and a connector! Doh.

As usual, thanks for reading!
 
  • Like
Reactions: s3dave and Vex182
strong work bud, good to see you stuck at it and tacking 1 job at a time
 
Your S3 must be feeling such a relief now she's finally getting the attention and love it so clearly needs. Why can't some owners look after their cars?

Thanks for the interesting reading and my hat is off to you, Sir! :)
 
Cheers, hopefully the car is now feeling the love! It's such a ball ache at times, but every fix brings a new smile to me and my other half's faces when we drive it :)

And on that note, my new engine loom has arrived!
Uploadfromtaptalk1389894276893
 
So I'm a bit behind schedule at the moment. I didn't get anything done last weekend really.

This weekend I managed to fit my new headlight washer assembly.

Starting taking the front bumper off:
Uploadfromtaptalk1390820898798

Old washers with no piping:
Uploadfromtaptalk1390820996416

Uploadfromtaptalk1390821012412

Then came the pump. I thought someone had just taped up the pipe:
Uploadfromtaptalk1390821047791

However, someone had FIBREGLASSED IT!! :
Uploadfromtaptalk1390822480894

I had to chip away at this until I could free it from the pipe. I then connected it all up with the new washers:
Uploadfromtaptalk1390822545966
Uploadfromtaptalk1390822583790

Put the bumper back on, tested it and..... Nothing! Tried a replacement fuse and still nothing. Looks like the pump is knackered. At least it's easy to change....

Today I bought the next lot of parts:
Lemforder front drop links
Lemforder rear drop links
Lemforder front ARB bushes
Lemforder solid rubber wishbone bushes
Lemforder front ball joints

Probably going to have to go to the dealer for rear ARB bushes.
 
They aren't expensive from the dealer, a fiver each or so and making good progress:icon_thumright:
 
Mate who the hell owned this car before you? Its got to be the worst example of a s3 ive ever seen.

Least you sorting it though. The washer bottle pumps are only a few quid off ebay.
 
Yeah will ring dealer today.

One of the former owners is on here. Told me he sold it as spares a few years ago. Seems like it fell into the hands of somebody who didn't want to spend any money on it. They then obviously allowed it to just keep mounting up issues and did nothing to address them.

Unfortunately my Mrs is suffering a bit as she has a joint/muscle condition that driving a manual regularly can exacerbate, so the car may yet end up being sold around April/May. I'll be gutted if that has to happen after all this.
 
might be a bit of work but you appear to have put in a lot of work anyway, so it might not be a daunting task.

Why not convert it to a Auto?
 
Just a small update here, but some toys have arrived!

Uploadfromtaptalk1391117081333

Uploadfromtaptalk1391117098573

Uploadfromtaptalk1391117110437

Uploadfromtaptalk1391117127888

Oh yeah!!

Oh and here's the old water pump I replaced for the headlight washers:
Uploadfromtaptalk1391117198495
 
No, I haven't had any chance to go near them. I have the old ones in the back garden, so going to look at the nozzles on them. I'll probably blow through the new ones at the weekend as suggested with an air line, but not sure if it will do any good. The blockage MUST be in the jets themselves though, as if it were the pipes they wouldn't pop up from what I can gather.
 
Been a few weeks.... and now I am back to update!

It has been a gruelling journey to get to where we are now. This has been an extremely tough project in terrible weather outdoors. The whole thing came to a head the evening before the car was due in for its alignment, which saw me outside in heavy rain until almost 3AM. The removal of the hub carrier bushes/rosejoints and fitting of the new ones was gruelling.

I tried to use a large socket to squeeze them out into, with a smaller socket pushing against the bush and the usual threaded bar with nuts which you tighten up. After a lot of frustration, it ended up with me getting a lump hammer, putting a large bolt through the middle of the hub, and hammering for all I was worth, from about 8pm to 11pm. I improvised with a bar to hit into the bolt at times and this really helped, but imagine whacking something, a couple of hours in, and each hit moving it maybe half a millimetre.... Jesus Christ.

The night ended with me going around and checking bolts, getting stuff out from under the car, and having to lay in two inches of cold water at 3am to reach some of these things. Not the best!

So here are some pics of my progress:

Rear trailing arm bushes:
20140202 161624

20140201 201524

20140201 181211

Powerflex bush in:
20140201 201545

Handbrake cable bracket, where the bolt managed to shear:
20140201 201607

Drilled out the old bolt remains, and retapped the hole:
20140202 124858

New bolt in!:
20140202 142825

Removing front wishbone bush:
20140204 122430

Knackered CV joint:
20140208 200122

Front bushes in:
20140208 200152

One of the new Konis and H&R Springs:
20140202 211016

Rear suspension on:
20140202 154244

Alignment printout:
20140226 210845

Pic of the car on the new setup and with centre caps now fitted :)
20140220 073111

Had a great time in it after the alignment, and well pleased I bought a set of Dave's adjustable rear arms for it. The garage, Drury Lane Services in Oldham, did a great job as always. I won't take my cars anywhere else for this sort of stuff. Unfortunately trips there always seem to coincide with terrible weather!

Took the car along Snake Pass afterwards and had a drive over to Ladybower Reservoir. The drain hole was spectacular with the reservoir being so full. Also saw a lovely Nogaro Blue S3 nearby (Sat 15th).

Honestly can't believe all the work I have done to this, and that there's still more to do. Best bit in this stage was finding out that I didn't have seaized rear rose joints on one side. No, someone at some point had replaced the rose joints ON ONE SIDE ONLY with the newer bushes, but left the original rosejoints in place on the other side!!

Work done in this post:
Polybushing rear arms
Polybushing rear trailing arms
Fitting Dave's adjustable rear tie arms
New springs and shocks all round
Polybush front wishbone front bush
Solid rubber TT rear bush on front wishbone
New driver side front driveshaft
Swap steering wheel for a non worn item

There will be something I have forgotten, as always, but that lot kept me very busy! Finishing it was very much a relief.

Now I need to find a new ABS sensor plug as the wires pulled clean out of mine on the passenger side, resulting in an ABS light. I also still need to unblock the headlight washers, and I have also got a strange problem with an intermittent sidelight on the passenger side. Absolutely no idea what causes it. It isn't the bulb, as it does it with any bulb I put in. It's totally random but seems to have decided to stay off for the last few days.

It does not flash up a dead bulb warning on the cluster. Very weird.

Also need to try and fix the passenger seat up/down adjustment.

Best bit of this: I might have to get a fresh MOT on the car in April and then put it up for sale, as my fiancée has found driving a manual to be too painful for her long term :(

Not too pleased at the prospect of that, but her health comes first. Hopefully I will get to enjoy the car a bit longer yet!
 
  • Like
Reactions: cammage08, kwistof and s3dave
dude hats off to you, thats dedication to stick with it.
i would of set it on fire or broke my wrist punching it :laugh:
 
Just some advice, the sidelight bulbs are not linked to the "bulb out" display. Awesome update dude, keep up the good work!
 
Great up date and fair play for sticking with her, as you found it it's totally worth it once they're sorted :racer:

I'm sure if/when you do come to sell her then someone will be getting a very well restored S3 from yourself :o.k:
 
Well I haven't updated in a while! Car is going in for new MOT in the morning and then going up for sale!

Bad points are the bodywork is a bit tatty in places and I think there's an oil leak. Also knocking from one of the CV's on the driveshaft I didn't replace.

Other than that it's pretty much spot on, and a fun car to throw around on its fresh suspension. Not sure how much to put it up for but will probably go the eBay route and try for £2.5k. 141k miles might put some folk off though :(
 
Last edited:
Well it passed! Needs new rear pads though so got one advisory for that. Going to sort that when I get back off holiday and then put her up for sale....
 
Jeez, after all the time and effort you put into this car.. someones going to be getting a brilliant car!
 

Similar threads

Replies
6
Views
793
Replies
17
Views
2K
IPG
Replies
4
Views
1K
Replies
14
Views
2K