Rice's S3

No, I bought the car from Audi. I knew it had belonged to them, but I didn't know it was 'famous'.

I found the video by chance, and recognised the number though it has a private plate on now. At least I know it has had adventures!
 
  • Like
Reactions: AVLO
Ha thats pretty cool!

So another update for y'all!

Ordered some new vacuum hoses as i hate blue silicon hoses!!! (just got a couple more to replace as you'll see). I also got round to ordering some genuine screws for the battery and coolant cover, much better than horrible hex bolts it had before.

So the before shot... Should have fitted it all in so you can see the overall difference with the new screws.


After


As i said above just the DV and N75 hoses to change to red or black now.

Got my paddle clutch from CG motorsport also... Although i am slightly dubious of it as the springs seem so small?! Maybe its just because the springs are further in so its got less of a leverage, so doesn't need as strong springs... I dont know really. But i was recommended them by a mate whos in the motorsport business.


Having it fitted this weekend as well as a new manifold.

£454 later at TPS....


Lucky ive got a mate who works there so got me good rates!

New manifold, gaskets, nuts, washers, flywheel bolts, one of the bevel box seals (the other i had to source from edinburgh TPS, very helpful i must add), new coilpack as one of mine was a push on one instead of a bolt down, and an N112 valve as it had been bodged with superglue by a previous owner... which i found out when i was replacing the vac hoses -_-.
 
Nice update there mate like this car a lot
Was it hard to get a good finish on your headlights with wet n dry.?
Whats your next plan of action
Also what size hose did you use for the pipe that comes of the throttle body (the small one)
 
Thanks mate, you keeping the s3 then?

No really easy, depending on how far gone they are, you start with 800 grit in some soapy water and go side to side up and down, working up to 3000 grit, then a quick polish, some people use a DA/rotary polisher but its easy to ****** them up by getting them too hot.

Umm, poly bushing it i think... Well that or get a small bit of paint work done on the front arches, got a bit of rust, nothing major.

Its 8mm internal. 14mm external, so got some new spring clips for it too. I got some ram air hose off silicone hoses off ebay, really nice red, not the usual bright red but slightly deeper, as you can see in the photo.
 
Yea decided to keep it now and sort the bits that need doing
Think I might give my headlights ago with that method then.
I get my silicone from sfs on ebay seems good quality and fairly priced
B5 tip is next for me I think
 
Good on your bud!
Give R tech an email, their TIP's are the same as b5 i believe, and they charged me £100 fitted when i was up there! Which i think is cheaper than the b5 tip.
 
Ok bud will do can I ask what your map cost as im looking at going stage 2 and wanted to compare between a couple of places
 
The seal above the front screen,does it just pull off ?

yeah, it's stuck to the screen with adhesive tape, so best pulling it upwards away from the screen. I wouldn't try replacing it with the screen in, ball ache. Ended up bending the inner metal strip slightly, but looked a lot better than cracked rubber!!
 
So thought id carry on with my engine bay tidy up... Ordered some VHT black wrinkle paint, some m6 stainless bolts and cam cover gaskets. I chose wrinkle paint as the plastic covers in the bay have a wrinkle effect to them.


First off, heres a before shot;


Cam cover off and degreased, also sanded off some of the casting marks and scotched it up ready for paint


After paint, in hind sight i put too much paint on, which made the wrinkles more pronounced and less like the oem plastic covers in the bay, i was unsure of whether i liked it, but after curing it in the oven and trying it on the engine i liked it.


And all refitted, one of my coil packs has been replaced as there was one miss matching push-on type. I removed the brackets for the N249 valve as its been bypassed anyway so no need for it to be on there. But as the ecu gets upset if you disconnect the wire i cable tied it behind the hard pipe out of sight connected up.
I also sprayed the m6 nuts that bolts down the cam cover with wrinkle paint, and one of the vacuum hard pipes as some tit of a previous owner polished it... probably thinking it was ali or stainless!


Next job, replace skanky blue hoses, do something with the throttle body and inlet manifold and fit an oil catch tank.


Cheers mate :), ill probably order some when I get paid, they're not very expensive though, bout £30 I think.
 
It'll look good with them done to do you usually have a engine cover for the rocker cover
 
She's looking good matey you going to AITP?. Although I've got a white s3 myself I'm jealous haha.... Keep up the good work pal.
 
Looking good!

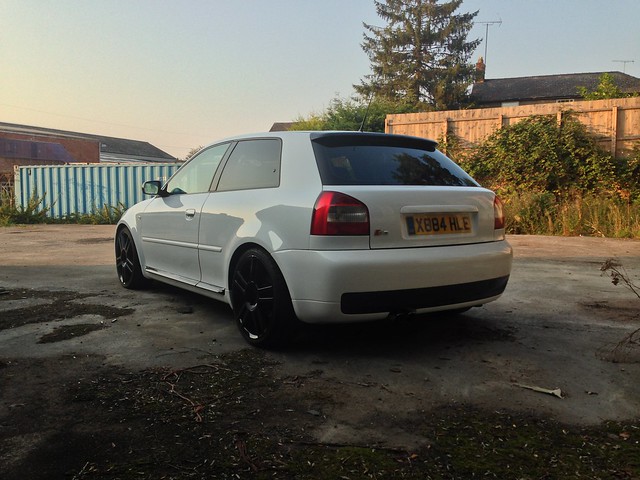
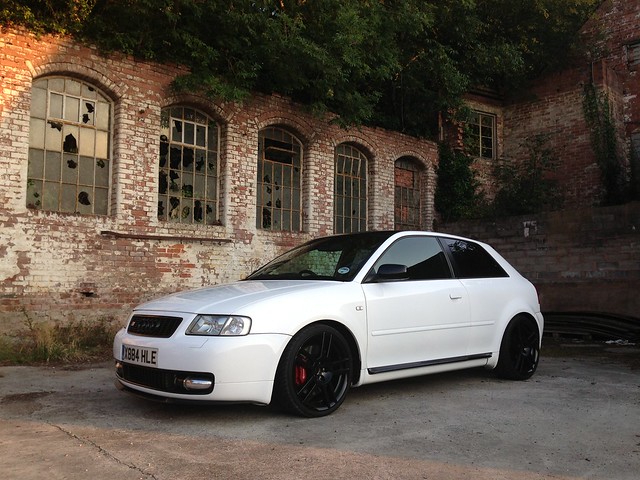
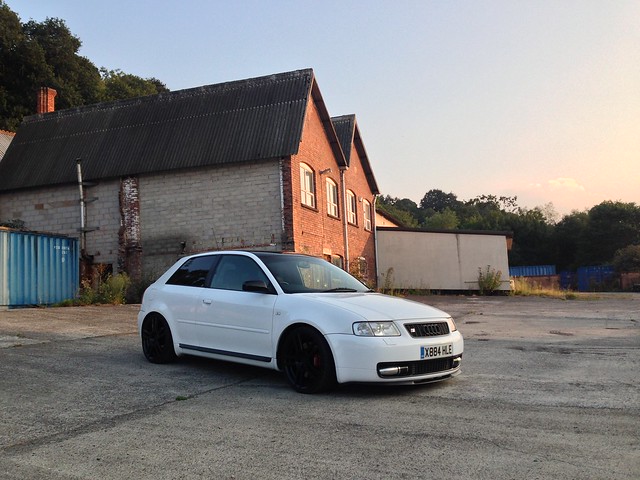
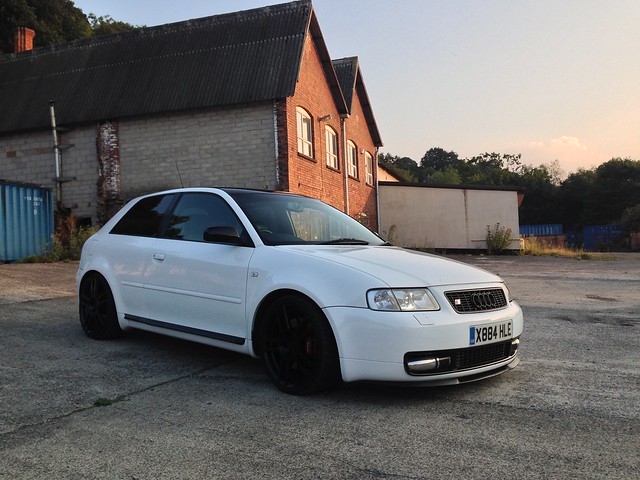
I always had a soft spot for white s3's....they look so good!

Thanks :)
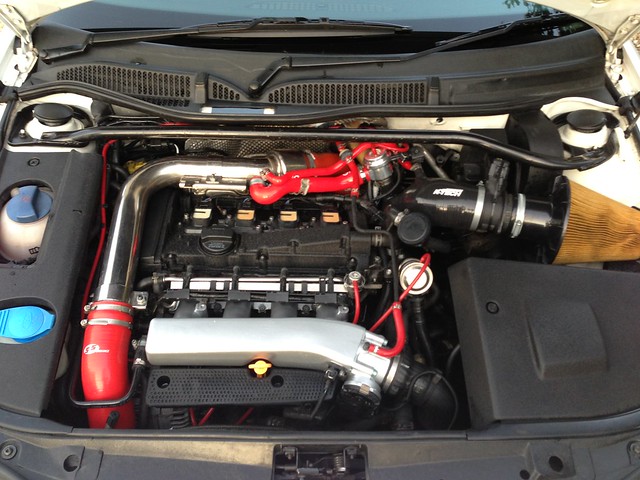
! Yeah I think it's my favourite colour, although maybe I'm just biased lol.

It'll look good with them done to do you usually have a engine cover for the rocker cover

I did, but I've left it off now as I prefer the look of the cam cover now :).

She's looking good matey you going to AITP?. Although I've got a white s3 myself I'm jealous haha.... Keep up the good work pal.

is that the one at castle Combe? Perhaps :), if its up to scratch. Need a small bit of paint work doing on the front arches, bit of rust around the arch from it chipping off. Thanks though dude :), appreciate it.
 
Ahh yeah Scottb5 told me about that. Probably not! I'd be up the one at castle Combe, can't remember what that ones called....
 
So finally sorted out the INFURIATING noise that was coming from my divert valve, it was like a flute noise at between -5 - 0 boost, both standard divert valves I bought from TPS were faulty, so I was fed up with it and looked for an uprated item. Found a used Forge 006p (before the 007p) divert valve on eBay for a reasonable price so got that. Turned up today. Seems to have sorted out the noise after a short drive which is a relief! And added some more bling to the bay ;)!


B742E023-DA5D-4CA1-8322-8967B283FA35-781-000000583E10E2BD_zpsa505f430.jpg


91F4A6DC-4580-40D8-8E14-C8F557ED764B-781-0000005838A3B835_zps5f5c305f.jpg
 
Another boring update :)

Drivers side window lifter wire thingy ma jiggy snapped -_-! Decided the eBay ones can go **** themselves (my passenger side one has a 14mm different in height between lifters, consequently it whistles when doing anything over 80). So got one from TPS, my god it was so simple! Just drilled out a few rivets, placed the new assembly on and rivetted to the door frame. If anyone's lifter breaks, just get one from TPS and save yourself the ballache of putting in a new wire which will probably be the wrong length between lifters and get on your tits.

I'd first like to thank s3dave for his guide on cleaning injectors before I start the next subject...


Cleaned the fpr and injectors in an ultrasonic bath I borrowed from work! Loads of crap came out! First I put them in redex/injector cleaner in a jar in the bath for 20 mins or so, as the sonic waves aren't as strong through glass. Then from that into the water, as the pic shows to get rid of any other crap. Then shook the water out and put them in petrol as I didn't want the water corroding them before I put them back in the next day.
I couldn't be ***** to set up a rig type thing to see how they performed, it was just one of those things I wanted to have a go at... Maybe next time!


2D0FD42E-3A2D-4C1E-85A8-C07E7DA1B68F-7180-000003AE283FD255_zpsa12f5bae.jpg


Clean injectors :)!


10512054-0948-4EF8-8DF6-C3BB4D383842-7180-000003AE2DDCB12A_zps29e5e3ce.jpg
 
Another small update :)...


Decided to remove the inlet manifold and spray it as it was letting the bay down...


Heres the inlet and maf sprayed, got new gaskets and bolts from TPS, looks much with new bolts!


9603421596_a4a2940011_z.jpg


Also got new DV hoses as i dont like blue hoses...


9600216703_58378069f1_z.jpg


A mate very kindly lent me his DA so i set to work on saturday machine polishing it, had lots of small scratches on it, and im pretty happy that i got the majority of them out.


9603480652_1e7dbc9e3e_z.jpg


9600256713_aa673a2822_z.jpg


Started off with a scholl concepts high cut polish, then autoglym paint renovator, then a fine cut scholl concepts polish, then a chemical guys glaze, then two coats of poorboys nattys wax. Spent saturday and sunday afternoon - late on it, then finished it off this morning.


9600254391_8955f4eacd_z.jpg


DAT BEADING DOE!!!!


9600249889_84d0744616_z.jpg


Few pics i took this evening...


9600222629_da6bbfaea9_z.jpg


9600241131_72f88579e2_z.jpg


9603469870_761b291966_z.jpg


9600228433_ffd86c9c58_z.jpg


Those were only taken on my phone i forgot to charge up the battery on my camera.
 
Wow thanks! Really appreciate that buddy!
 
Might aswell comment here to looks spot on mate
You could always do mine:thumbup:
 
Yeah it would look better with them hidden somehow. It's kinda more "beaten up drift s13" than tidy Audi looks wise.

Even if they were black?
 
I've been thinking about buying another pair of them and getting them anodised, to see how it looks.

Thanks for the compliments though guys :)
 
Put some bucket seats in it. Chuffed with how they look, only thing I'm not majorly keen on is the smoked chrome type eyelets (or whatever they're called). May see about getting them changed to black by some method or another...

And a hefty 40kg saving over the recaros. Don't know if ill keep the rear bench in or not as it's pointless as no one could get back there, but I think it looks better with them in. That's the main thing I like about the look of the seats, they're very oem+ looking imo.

10097334786_579ba58c28_c.jpg


Yet to take it for a drive but I'm very excited to see how they feel/support.
 
  • Like
Reactions: slowcoach3
Looking good.

Can you give me a few details of what seats and brackets you used. Also did you have to drill some holes in the floor to bolt the seatbelt buckles down? I was lead to believe that they are originally attached to the OE recaros?

Also how did you get around the airbag light that comes up when removing the seats?
 
The seats I don't know the model of im afraid. I got the seats, sparco side mounts and what I believe to be universal sliders, so I didn't have to source anything, they bolted up straight to the recaro subframe. It's got spacers on one side of the seat > side mount of around an inch (haven't measured them), the holes on the bottom of the side mounts have been elongated slightly to fit the rails. And two holes were drilled at the back of the rails to fit the subframe. I think I saw 'cama' on the sliders, so maybe they're made by them? They're not the greatest sliders, but it's not like I'm going to move my seat position very often.

It already had buckles attached to the side mounts so that's how I left it.

I didn't actually know about the airbag light lol, I've not switched the ignition on yet. Ill have to speak with a mate who's just fitted buckets into his s3 as he's an audi technician so he should know. Ill let you know what I find out.

If you need measurements of anything just let me know and ill do the best I can to help :).
 
He's wired one of these into each connector.

http://bit.ly/19rBnx5

Ill let you know exactly how to when I come to do it myself :).
 
  • Like
Reactions: Westy
looks nice dude, i would definitely take the rear seats out they weigh a ton, you could always do something to make whats left look a bit nicer instead of leaving it with bare metal
 
Thought id update the thread as not much seems to be happening on the forum at the moment!

Got new suspension on it now, the plan all along was to get uprated shocks, but then some Fk highsport coilovers came up for a price that i couldn't say no to. They're not a bad ride to be honest, and have improved the the amount of roll i get.

Also got the front lower control arm bushes changed, the fronts i put in powerflex polybushes and the rear solid oem bushes, as they seem to be the ones people recommend.

Heres a picture, everyone likes a picture.


Ah that reminds me, the n/s/r caliper was sticking slightly, so decided to buy a service kit for it, in the hppe that the pistol was ok. Luckily it was, just scotched it off and it was good as new! No more sticky caliper... yay!

Took the car back up to Niki at R tech a few weeks ago for a final tune.

Very pleased with how the car (and niki lol) performed! Got 280bhp and 305ftlb of torque. He says its flowing very well, so he didn't need to up the boost as much, running around stage 1 boost apparently, 1.4 bar. Its good considering its only got the standard cat back exhaust on there.
Very happy, and a brilliant drive home - albeit the terrible traffic.
Skipped out the M5 and chose the A429 (iirc) through the cotswolds, which was a nice drive, and had good fun chasing an 07 plate boxster s down the A road.

Standard graph picture!


Similar threads

Replies
0
Views
764
Replies
31
Views
3K
Replies
20
Views
2K
Replies
10
Views
984
Replies
2
Views
621