

Roll cage
- Thread starter Rab1987
- Start date
You are using an out of date browser. It may not display this or other websites correctly.
You should upgrade or use an alternative browser.
You should upgrade or use an alternative browser.
- Joined
- Dec 2, 2008
- Messages
- 17,400
- Reaction score
- 1,104
- Points
- 113
Hi all, i am new to this forum i am building a audi a3 track car & i have had no luck trying to find a roll cage, any help would be much appreciated.
Try having a look at Prawns thread. It'll have all the info you'll ever need to build an A3 track car.
- Joined
- Dec 8, 2006
- Messages
- 12,100
- Reaction score
- 4,340
- Points
- 113
- Location
- Eastleigh
- Website
- twitter.com
Wooooooohooooooooo, that's 3 os uf on the forum with Proper cars now  Welcome Rab!
Here's a few posts quoted from when I installed my cage:
Welcome Rab!Here's a few posts quoted from when I installed my cage:
Got it home easily in the Hilux, and stuck it next to the car just for a photo
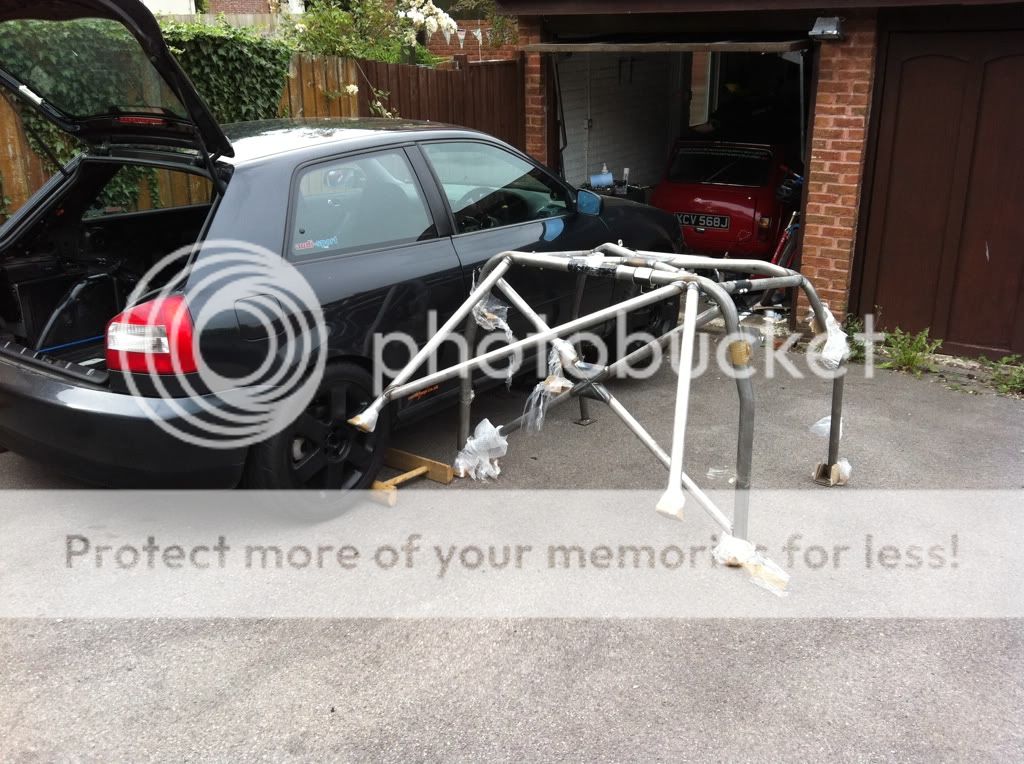
It has tabs to bolt to the roof above the screen and the B pillars, so I think I'll pull the seats out, then bolt up the cage inside the car and fix it to the pillars, and see where the feet end up and make the boxes to suit
So, finally got a bit of time to work on this over the weekend, despite working until 4 on Saturday, I'm happy with that's been done.
Gearbox finished off saturday night, everything went back on nicely, and I did the final jobs this morning, refitting the driveshafts and putting it back on it's wheels.
Then it was time to start work on the cage!
I'll start by saying, a MASSIVE thanks to AndyP for his help (huge effort) today. Not only for being 10x better than me at welding and fabrication, but also for driving 35 miles to get here, to work hard from 9-7, Couldn't have done this without Andy at all. Top man.
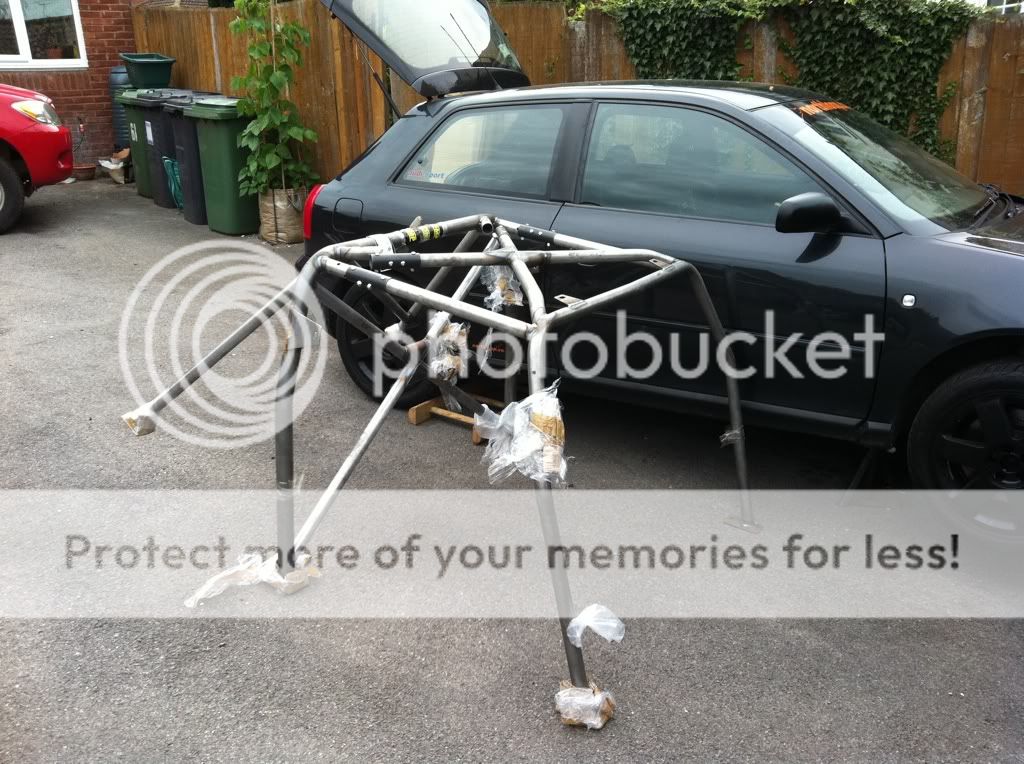
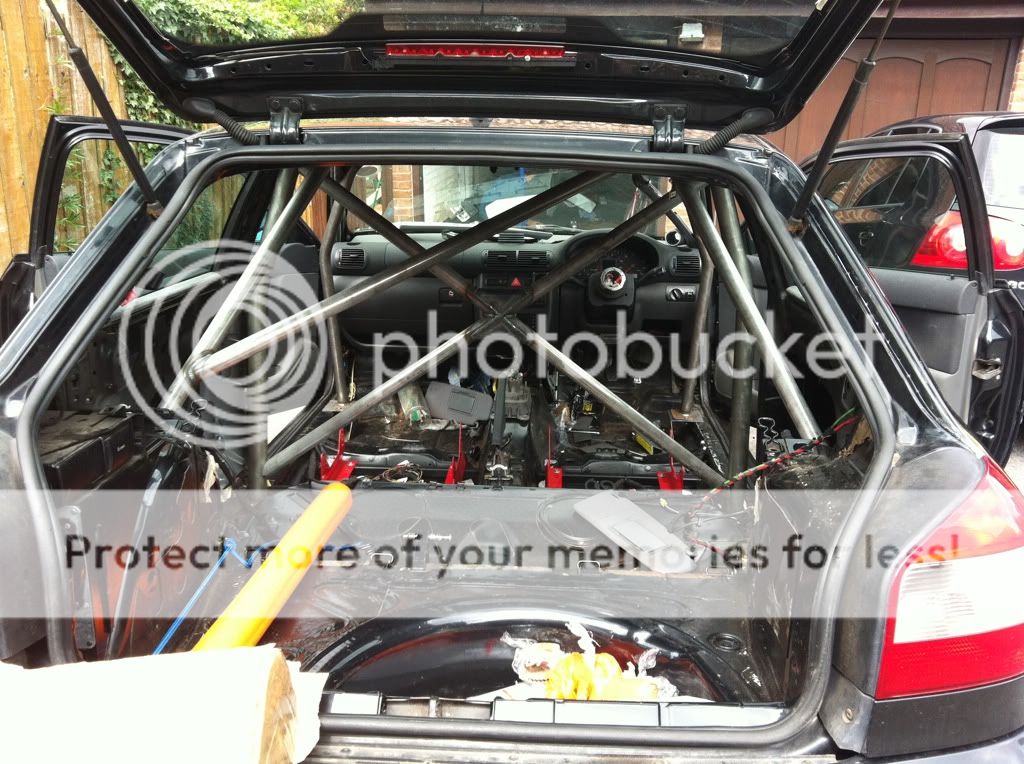
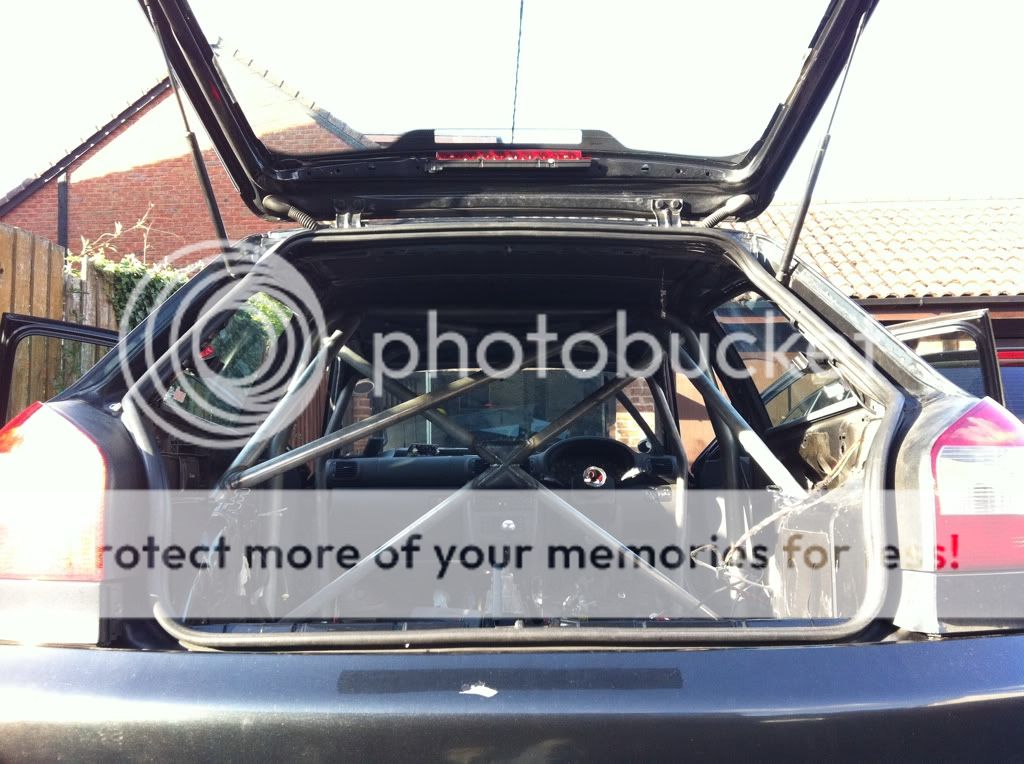
After taking both the front and rear sections in and out, SEVERAL times each, we eventually found a way of getting both of them into the car at the same time.
It sounds stupid, but was seriously difficult to get it all into place. Took a good few hours just to wangle it in.
Finally though, it was near to it's final resting place:
Onto a bit of CAD (Cardboard aided design) to start making up the feet:
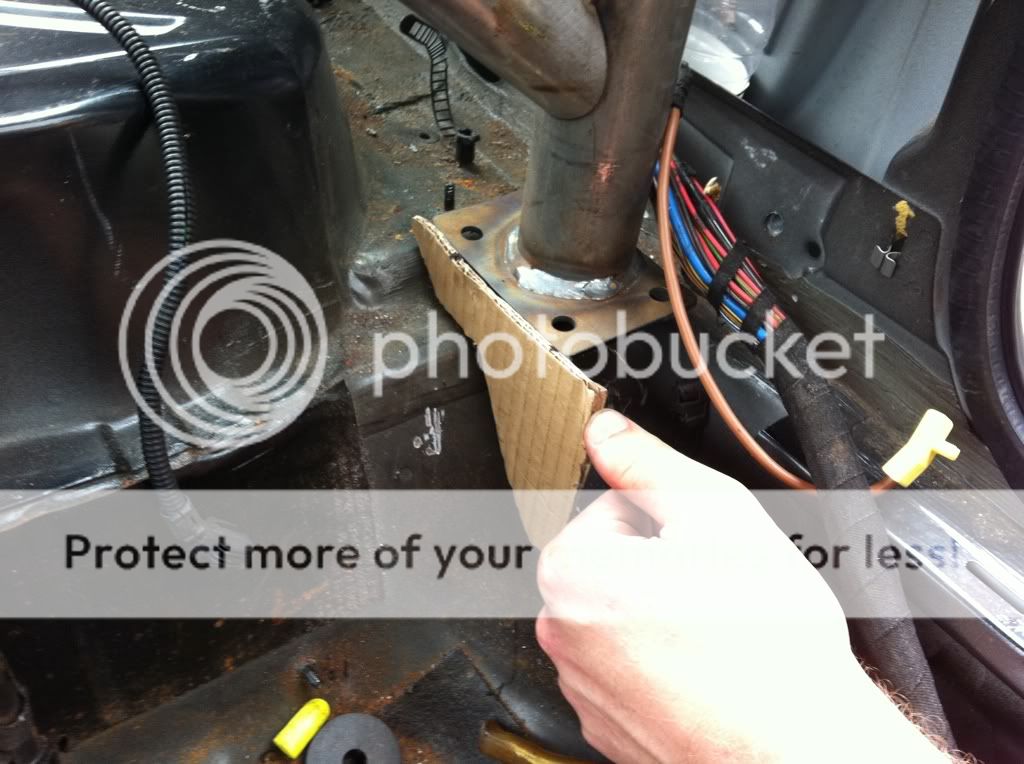

Boxes were cut and made up to sit under the feet, and when we were happy with them, Andy welded them up, ready for fitting:
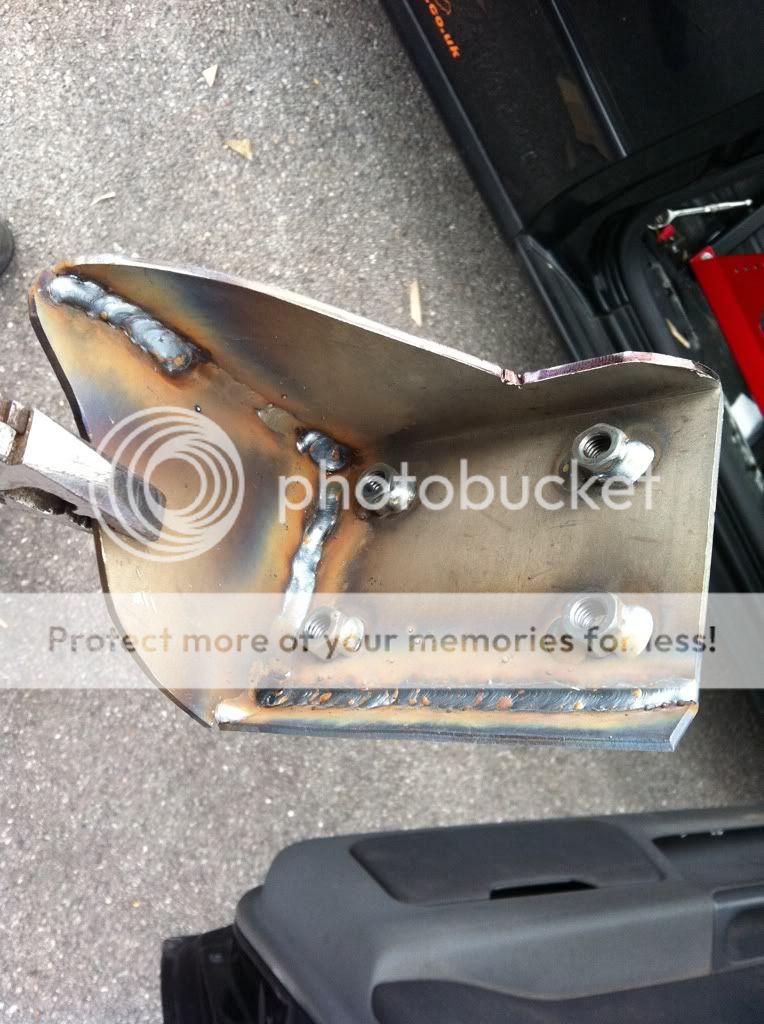
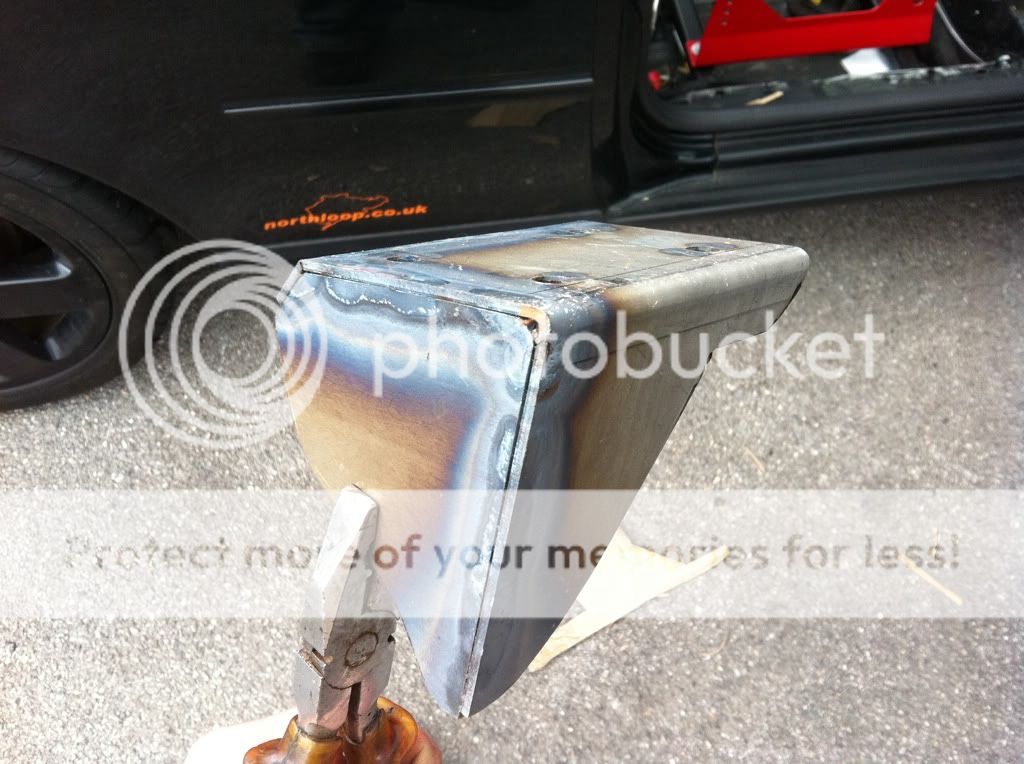
First box in place, and ready for welding:

Second box in, and partly welded up:
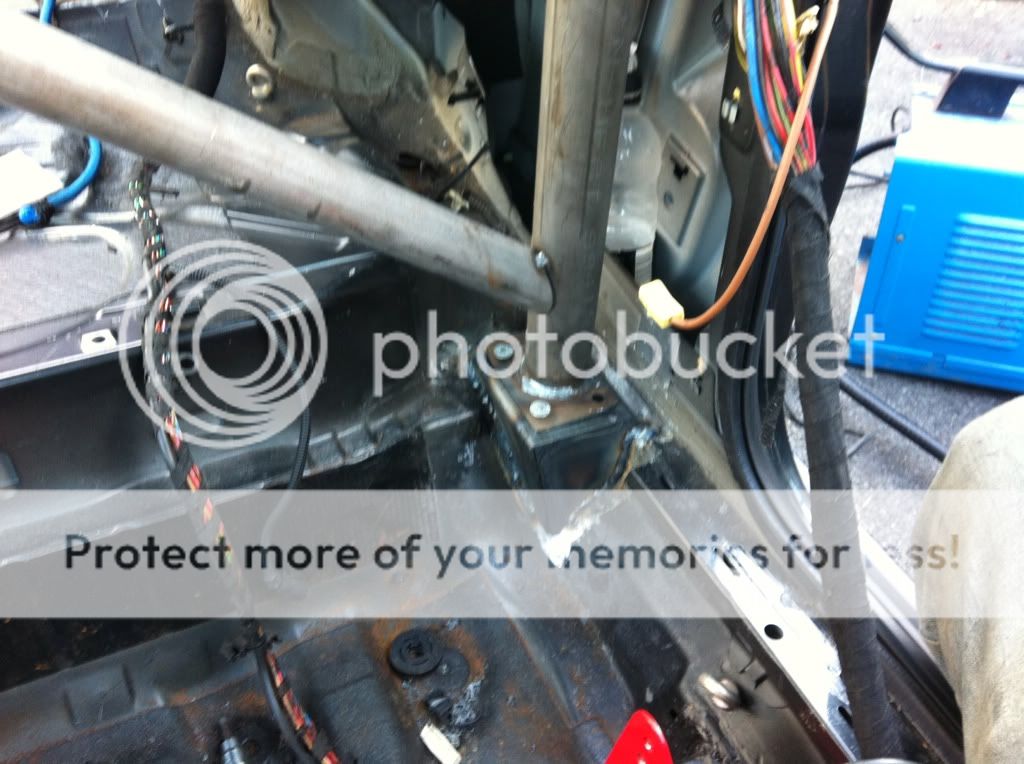
Annoyingly, at this point, we ran out of gas for the welder, so had to stop welding for the day.
Moved onto making up the boxes for the front legs instead, ready to weld up next weekend:

I also noticed, once the cage was in, I couldn't open the glove box any more!
Being a DRT, this has to remain comfy to drive to Germany 600 miles from Cornwall, so I'm keeping the glovebox, electric windows, aircon, and stereo.
5 minutes with a grinder and a stanley knife, and the glovebox opened again, even if it does look a bit ghetto.


Finally, it's not yet finished, but I have a roll cage
- Joined
- Dec 8, 2006
- Messages
- 12,100
- Reaction score
- 4,340
- Points
- 113
- Location
- Eastleigh
- Website
- twitter.com
because it isnt finished yet
The original plan was to dry build and fit it, then pull the cage out for painting.
Having struggled like hell to even get it into place, I've now decided it's NEVER comming out again. I honestly don't think I could remove it even if I wanted to.
So, new plan, is to paint it in the car
Will also be typing the cage into the shell at a few points where it's VERY close already.
the cage isn't actually 8L specific, it's for a 5 door mk4 golf!
Turns out golfs are alittle more square around the windscreen, because the front cage is jammed up tight against the windscreen surround at the top, although the tighter a cage is to the shell the better really!
The front hoop is fairly close to the dash, and it's as far forward as it can be. At the top of the screen the cross bar sits perfectly, and the corners are RIGHT tight in the corners above the screen, so I guess it's where it's ment to be!
the front legs have quite a rake on them, so I'm hoping getting in/out shouldn't be too much of a problem.
I guess that's the downside of a bolt in cage that doesn't go through the dash, but i wanted it bolt in like this, I I guess I have to live with the access limitations!

the reason the front legs are straight like that, is to keep them MSA/FIA compliant. Regs only allow a certain number of bends in the front legs, and the jap style ''dash dodgers'' don't comply. This one is fully FIA compliant
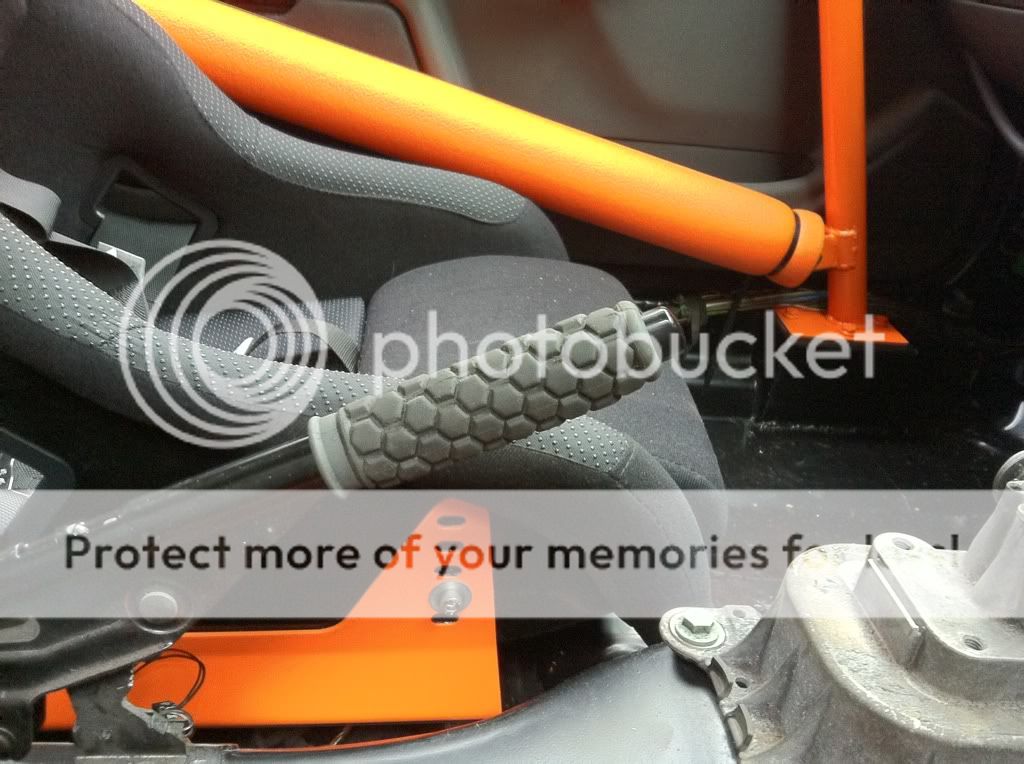
You can see from the side mounts where my seat will sit. i'm hoping it'll be OK!
May need a snap off steering wheel boss to help my Dad get in though!
")
- Joined
- Dec 8, 2006
- Messages
- 12,100
- Reaction score
- 4,340
- Points
- 113
- Location
- Eastleigh
- Website
- twitter.com
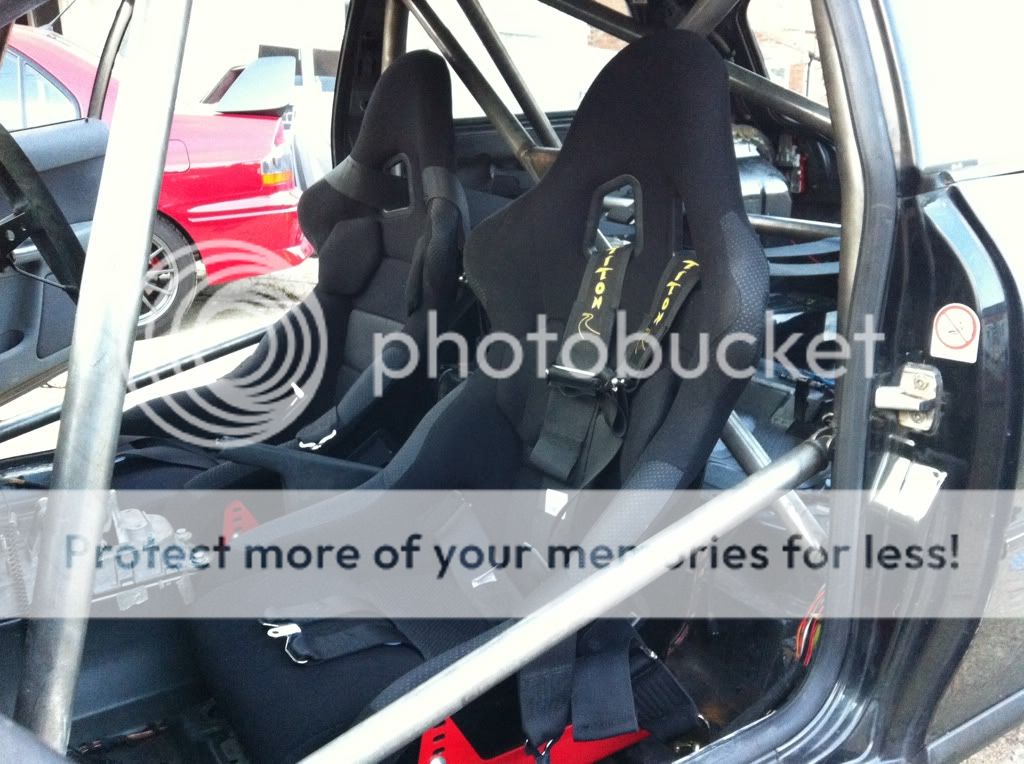
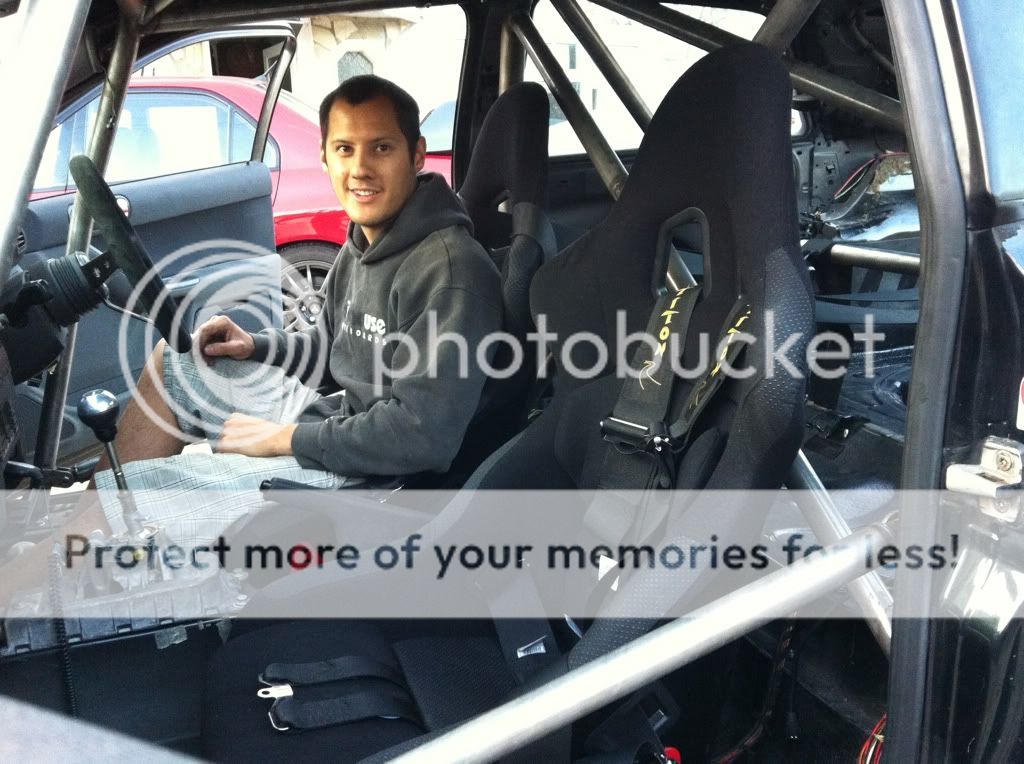
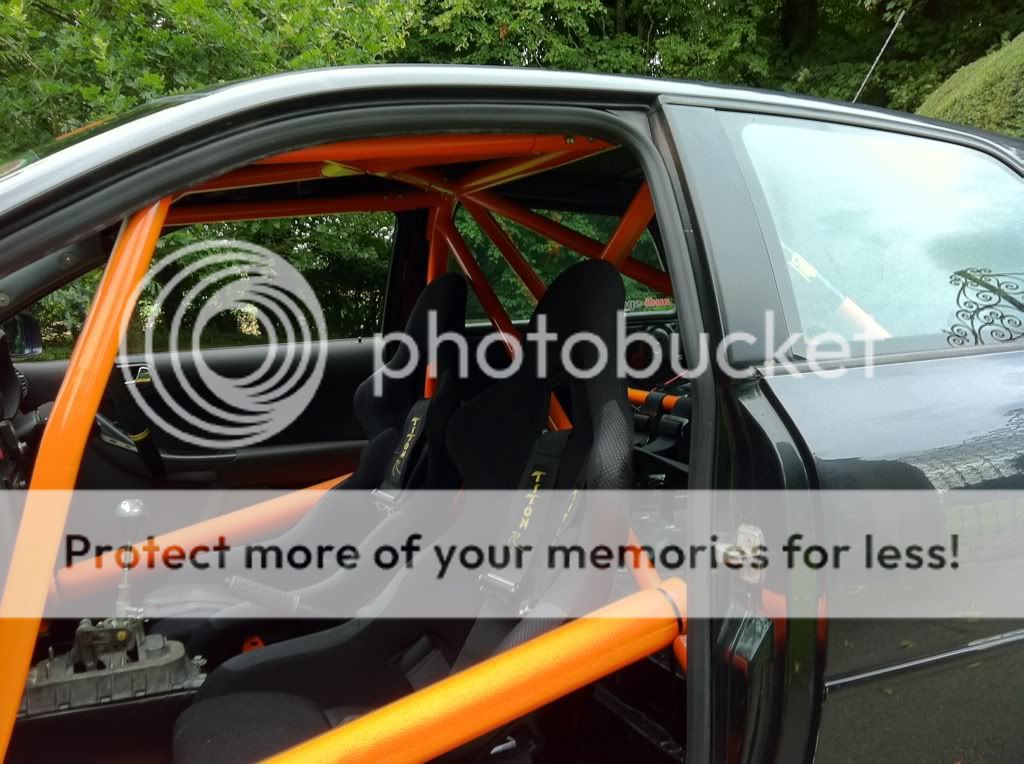
.Got a bit worried today ater a few comments, that my seat might clash with the X-brace in the main hoop. SO tonight after work, I threw the seat in to see how it was.

Good news is, it fits fine!
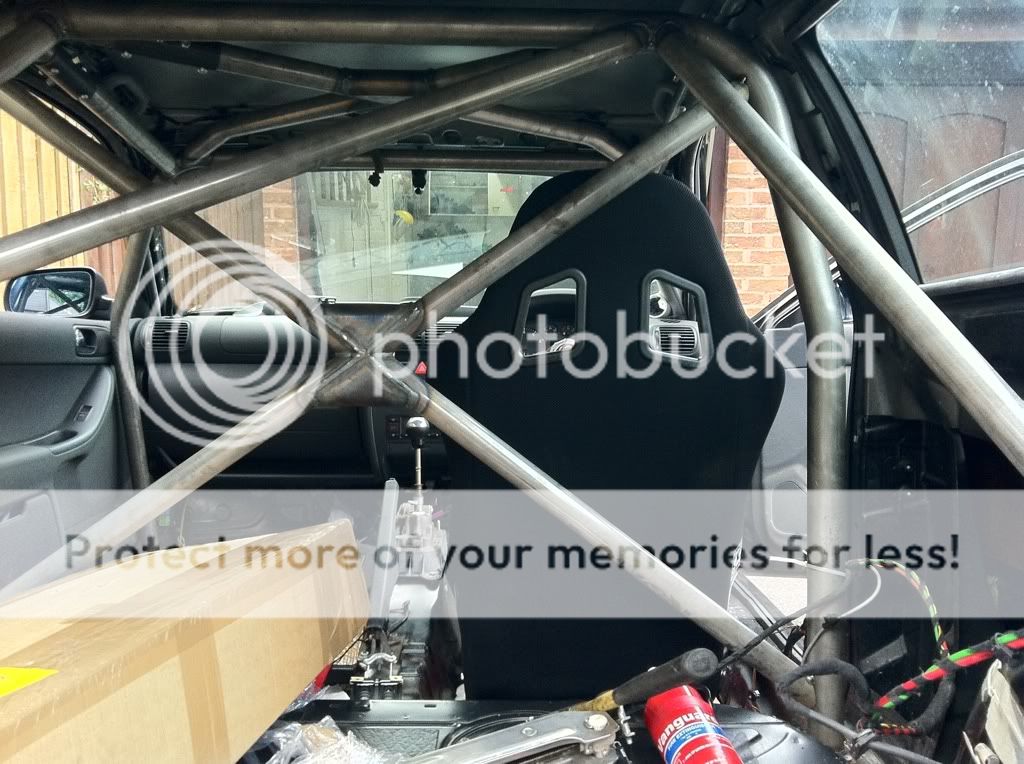
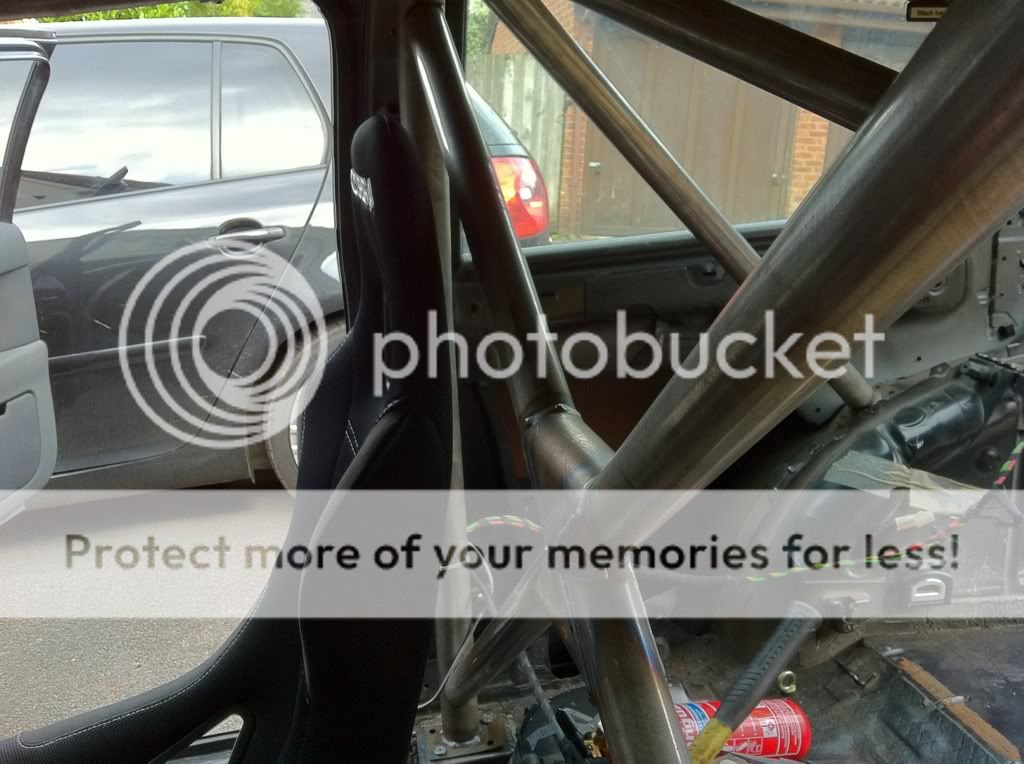
about 35-40mm between the seat back and the cage brace, and the brace is nowhere near the harness slots either, so shouldn't cause any issues.
Got a few more pics of how tightly it fits the shell too
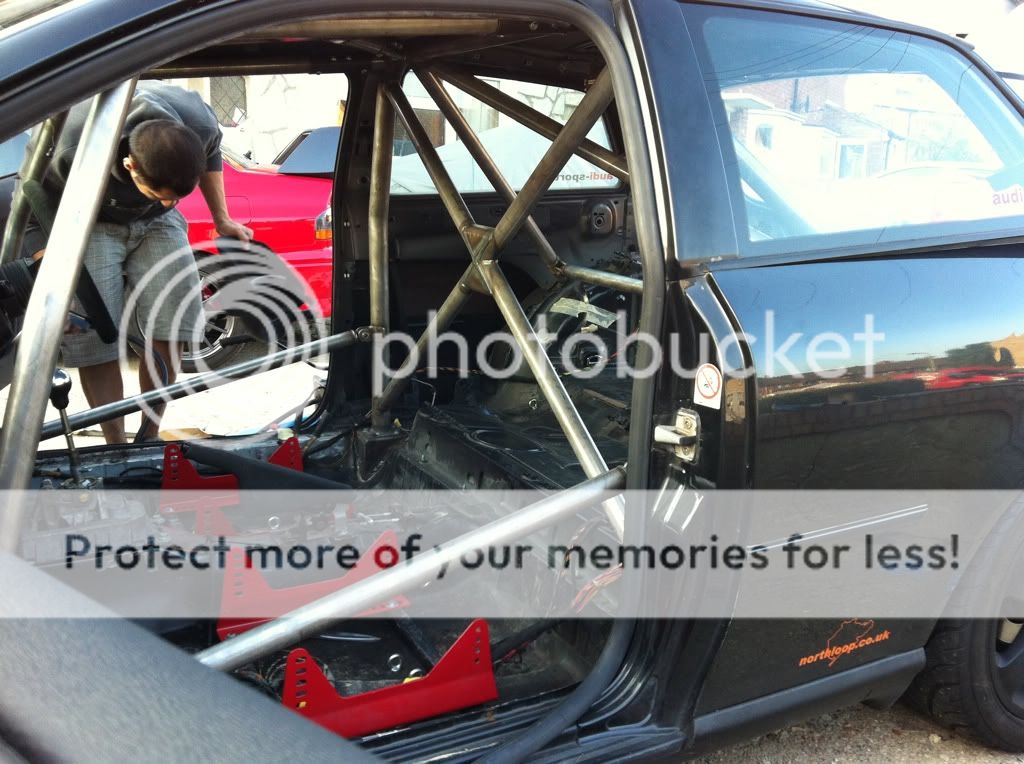
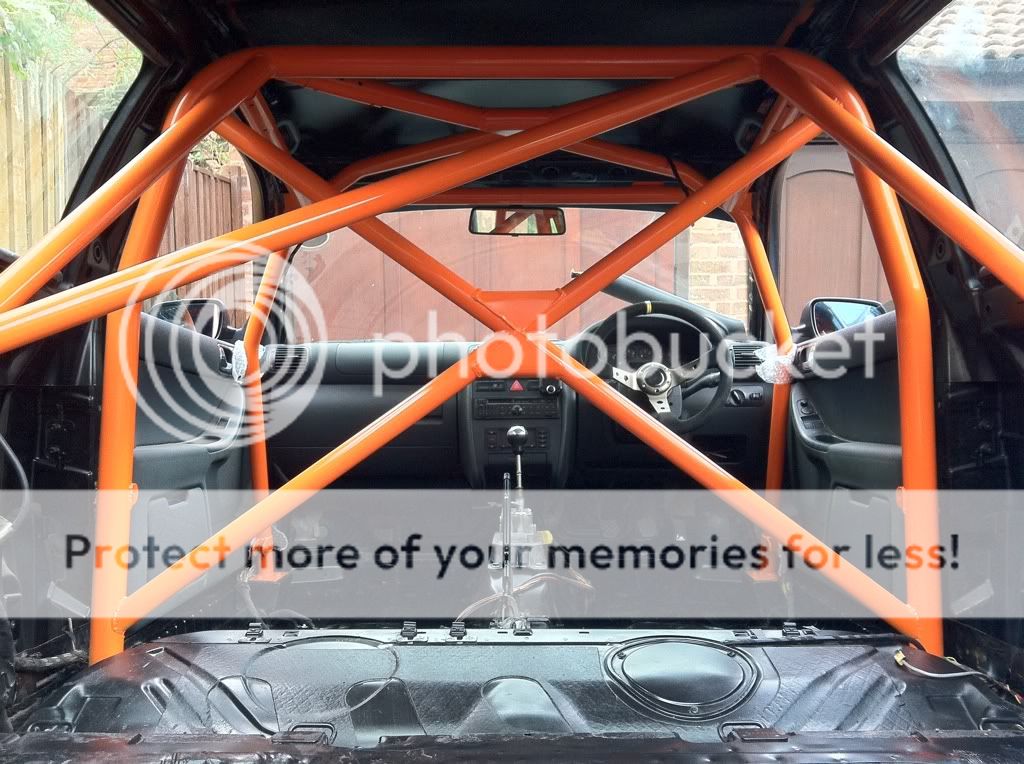
I like how the front hoop is fairly wide, to aid vision, and steering wheel clearance, which is often overlooked on 'Dash dodger' style cages like this.

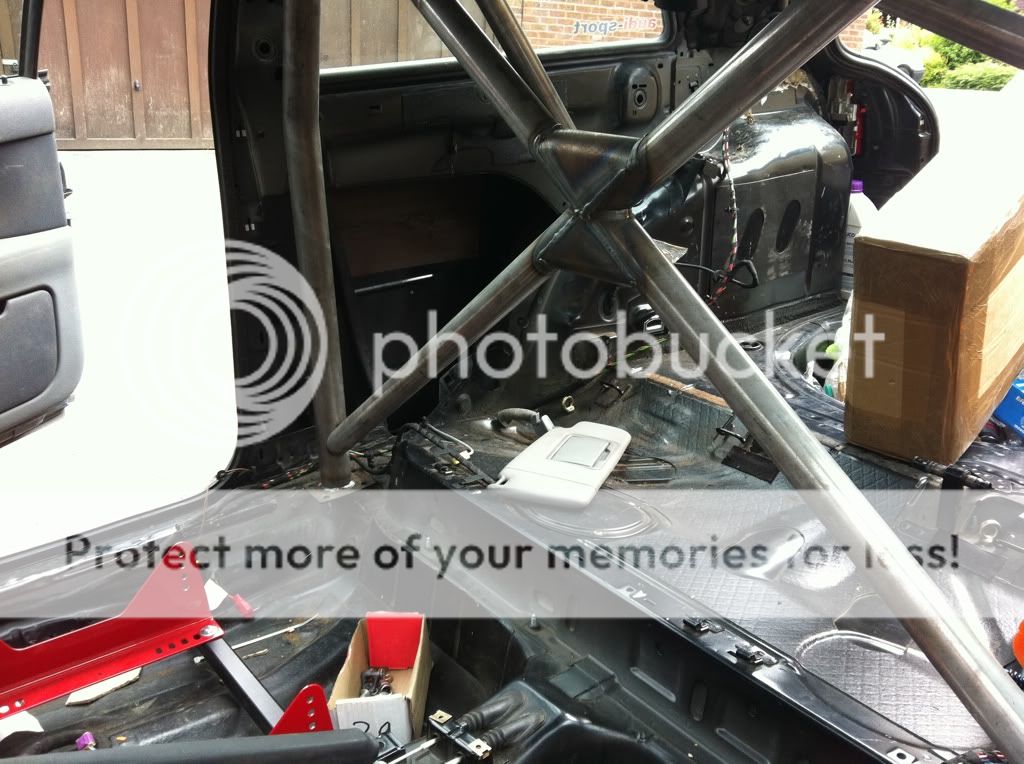
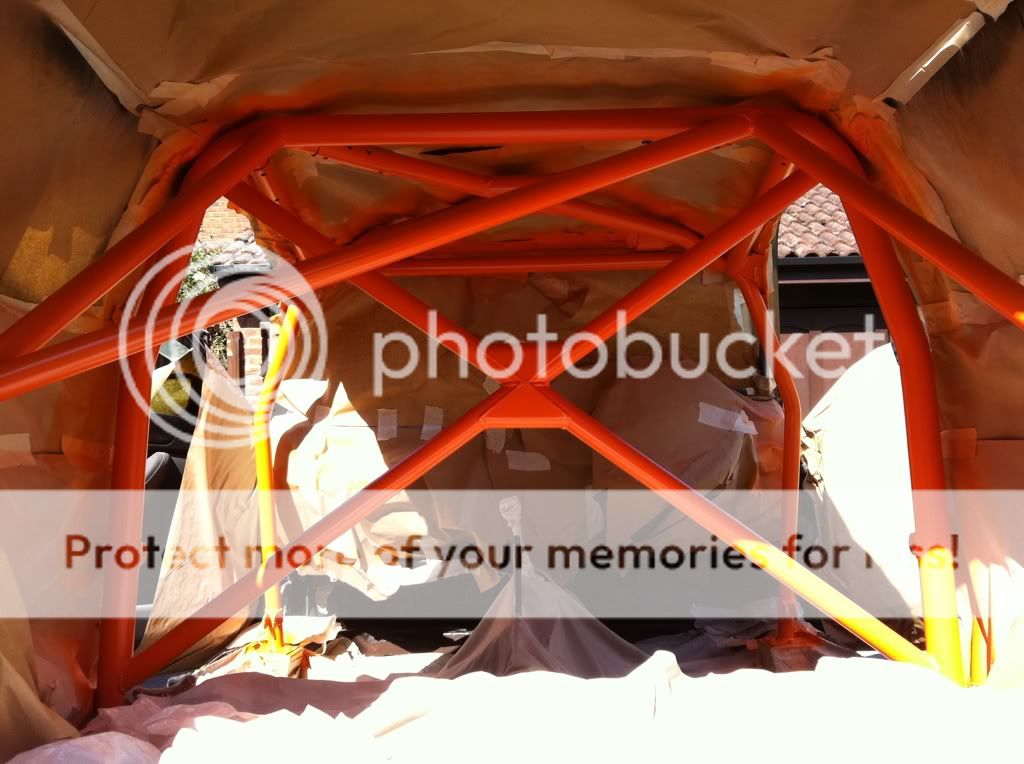
It sits dead tight against the top corners of the screen too, it's actually touching the shell here, so I think I'll put a weld at this point, to tie it in further, and stop it from creaking:


The main hoop also seems to fit the roof nicely. I was a bit worried when I saw the AHS golf that the main hoop sat a little low, but those fears are gone

Front cross bar also fits the windscreen very nicely, and the X-brace in the roof isn't too low either as it's bowed upwards

Considering this cage is built for a 4 door mk4 golf, I'm VERY happy with the fit
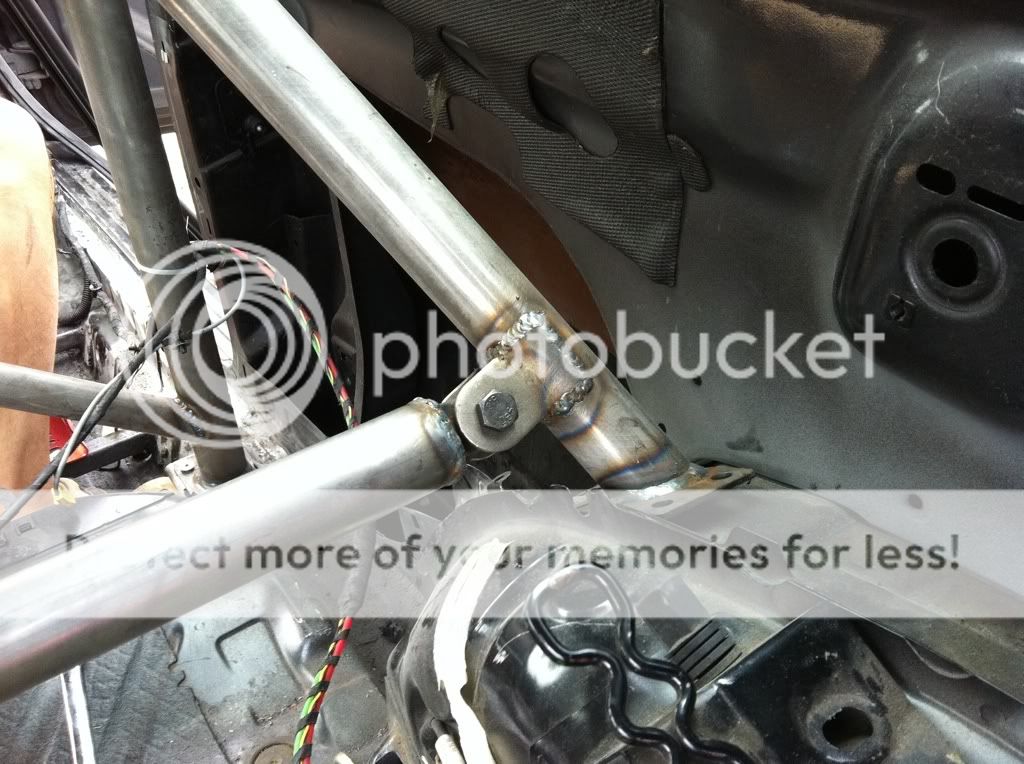
Will be taking JJ's advice on the front feet, really glad we didn't weld them in now! (removing part of the thing metal near the inner sill to get a continous weld)
WIll also be welding the boxes up externally as well as internally, I don't think you can be too safe!
Just the door bars and harness bar to do after that lot. Harness bar I'm not worried about at all, or the first door bar. It's the second X-d door bar I think we're going to struggle with!
- Joined
- Dec 8, 2006
- Messages
- 12,100
- Reaction score
- 4,340
- Points
- 113
- Location
- Eastleigh
- Website
- twitter.com
,Got the cage finished today!
Our work station for the day

We originally thought the front feet would be easy, but on advice from JJ at R-Tek we decided to totally remove the ****ty metal shelf on the inner sill.
After a good few hours, we got the front feet in and sorted. Lovely welding from Andy
Then we moved onto the harness bar.
We had decided to just go with single door bars for now, for access reasons mainly. This means I had a spare sermon door bars. I thought I'd see if I could use the tube to a harness bar, and to my amazement, it fitted perfectly with all the fittings in place as per the door bar!
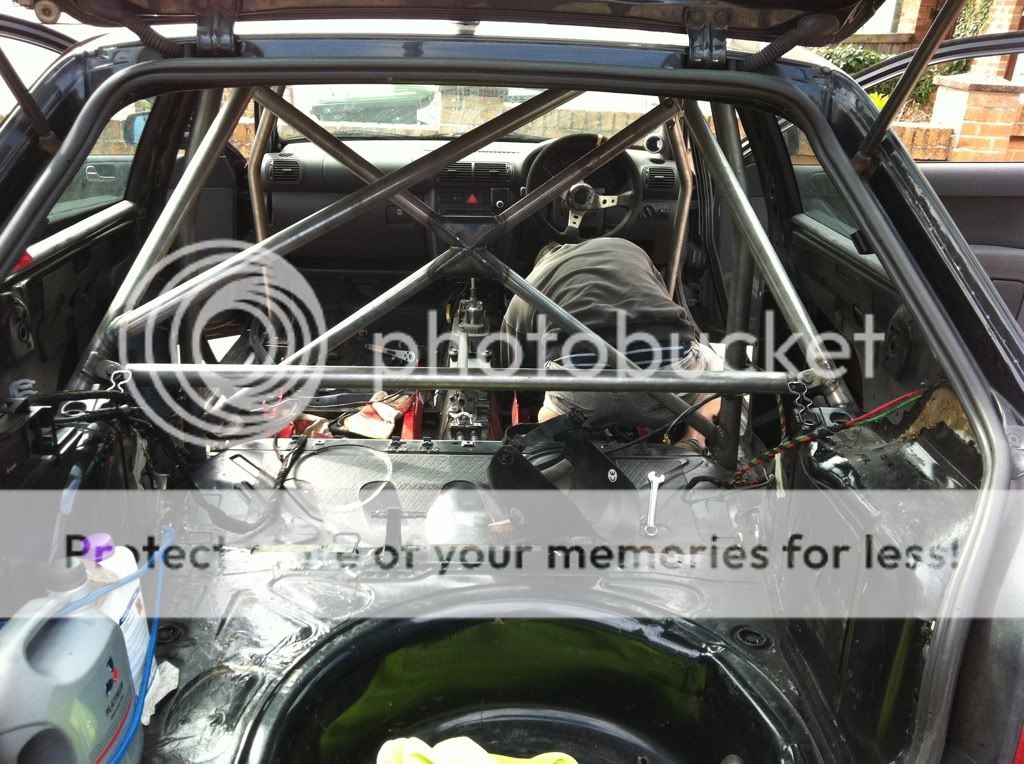
Then onto the door bars:
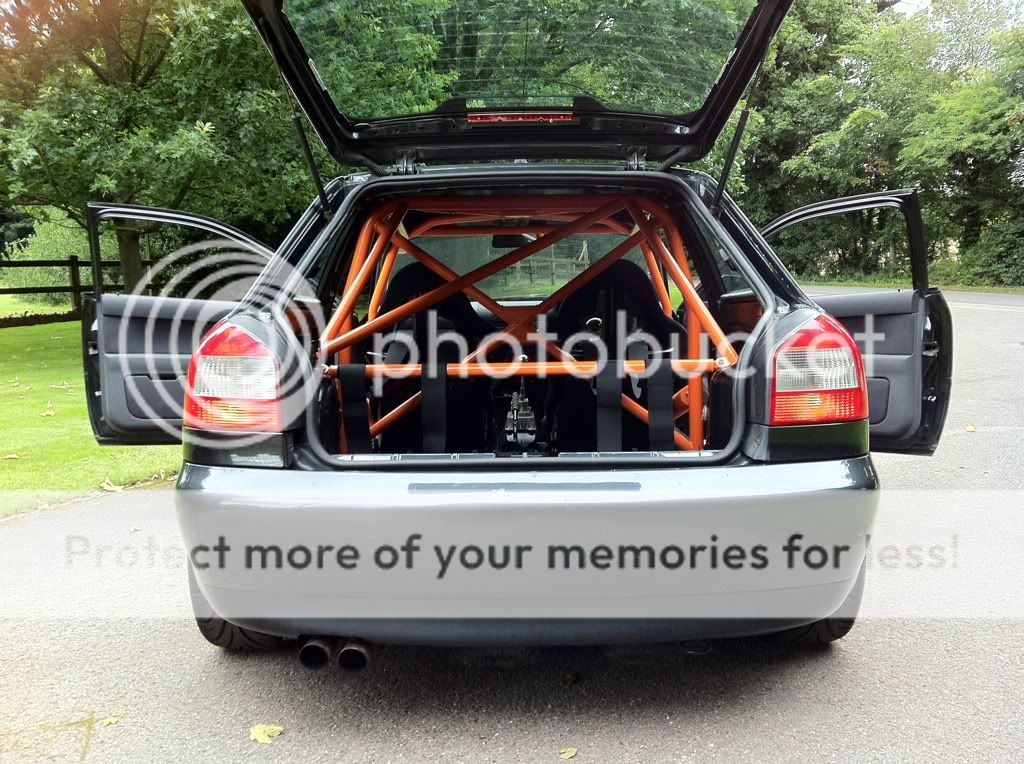
Seats went back in:
Harnesses fed onto the harness bar:
Andy having a sit to see how it feels
More tomorrow, tired now!
- Joined
- Dec 8, 2006
- Messages
- 12,100
- Reaction score
- 4,340
- Points
- 113
- Location
- Eastleigh
- Website
- twitter.com
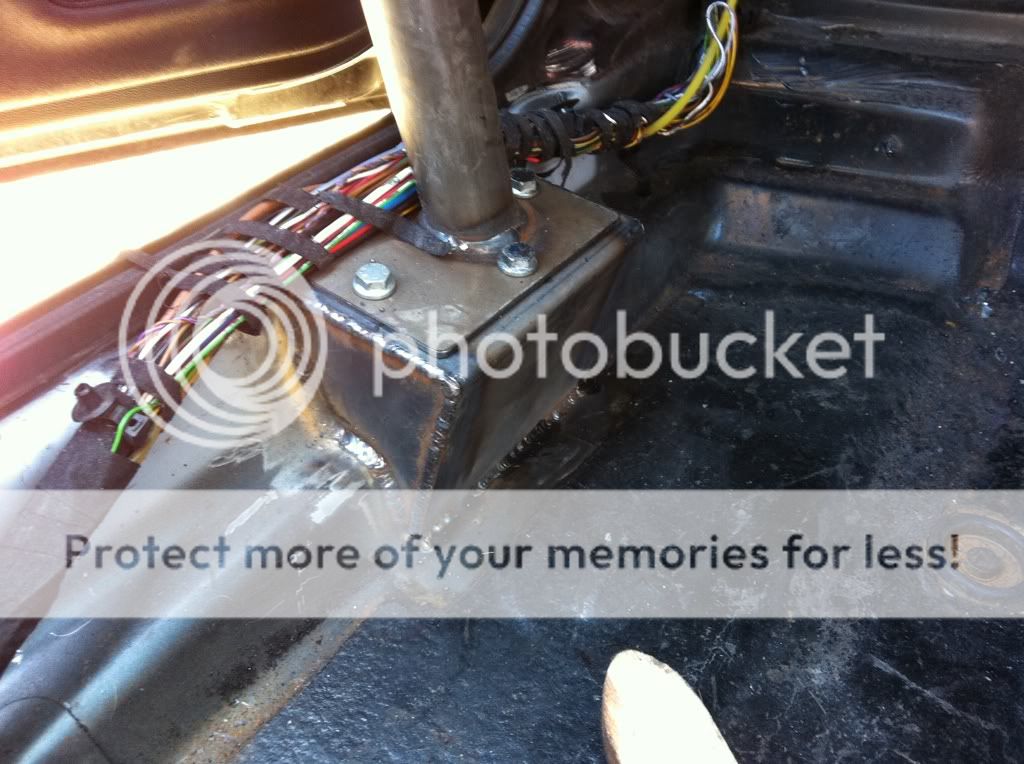
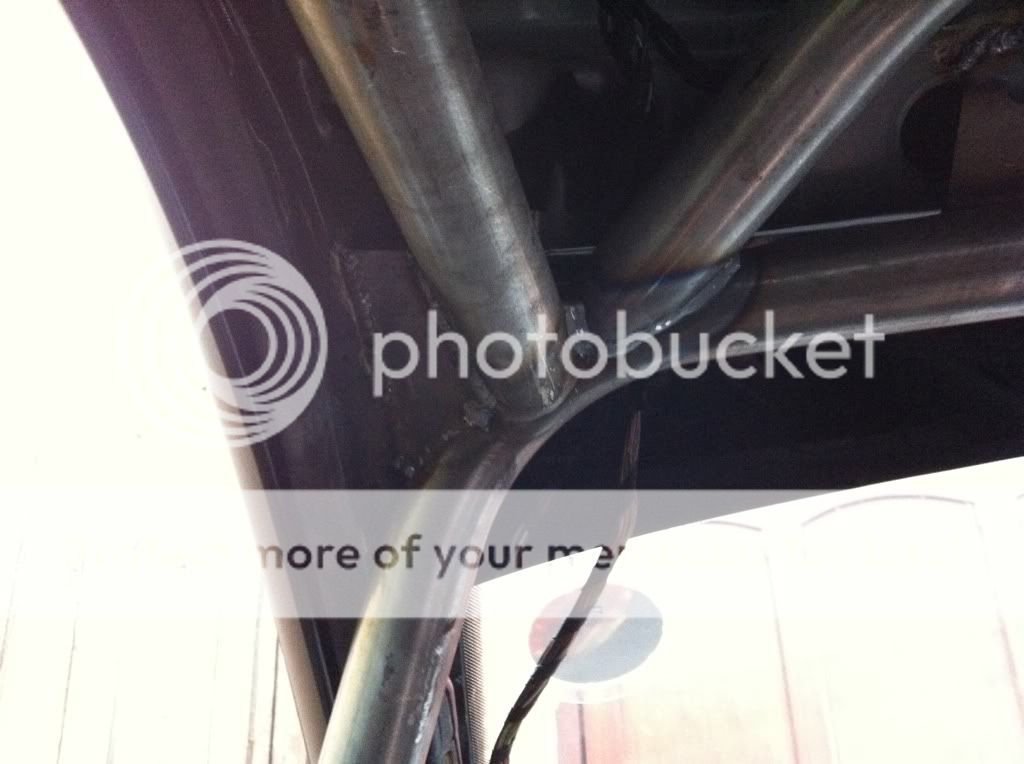
.We decided to tie the cage into the roof structure with a few plates, as it's not like it's ever going to come out again anyway!
the main hoop was tied into the B pillars, right by the standard seatbelt top mounting, so we know it's a strong area:
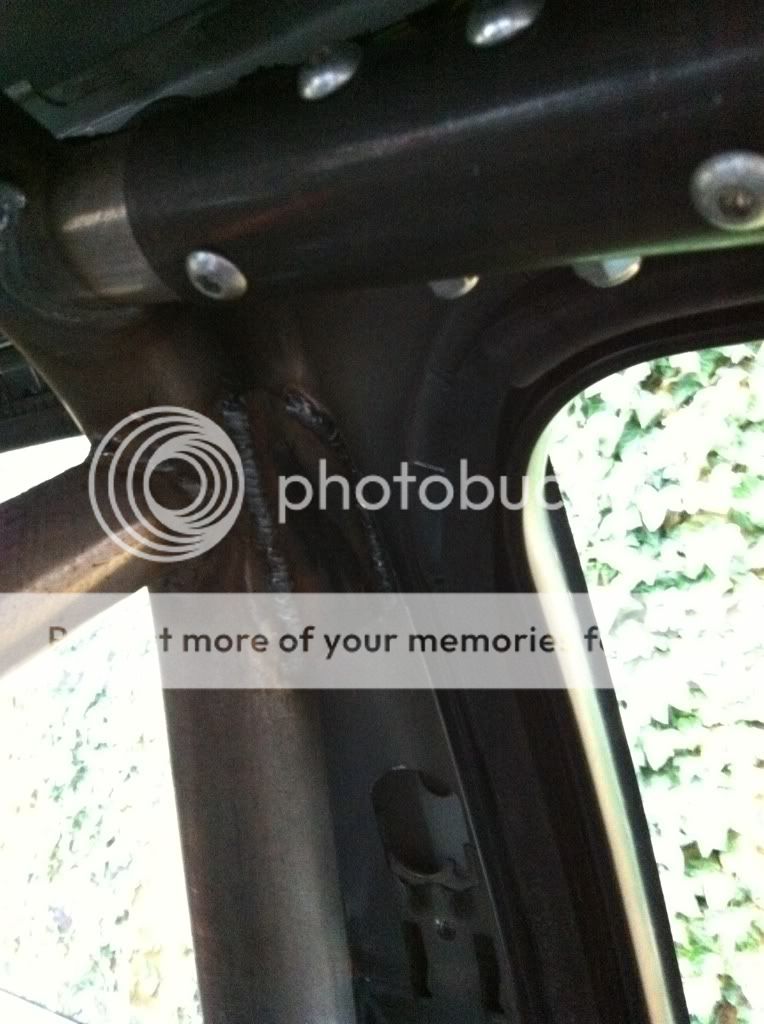
Then the front legs are tied into the A-pillar with a fairly long strip that covers both the upright, and the fore-aft members of the cage, and a 4'' seam weld into the A-pillar.

Now I just need to paint the ****** thing!
the car feels SO solid now it's unreal. Rear wheel lifts off the ground comming into my garage court yard:

Thankfully we shouldn't find such extreme camber changes on the Ring, so hopefully it'll keep all 4 wheels planted.
- Joined
- Dec 8, 2006
- Messages
- 12,100
- Reaction score
- 4,340
- Points
- 113
- Location
- Eastleigh
- Website
- twitter.com
So, onto the cage!
well, 2 10 hour days, a **** load of blisters, and 14 (yes - fourteen) cans of paint, 80m of masking tape, and about 50m of 18'' brown paper roll, and the interior has been fully painted, both floorpan, roof, and cage! and I did the seat side mounts too for good measure!
Can't believe how much paint it's taken to get a decent finish.
4 cans of satin black blitzed on the interior, baring in mind I've done inside all the pillars, the roof skin, inside the rear quarters, everywhere. That brings us up to last nights update.
So, starting today:
I went to the paint shop this morning, and bought another 2 cans of satin black, an extra can of white primer, and an extra can of laquer to be safe.
Back to the house, and I finished off painting the interor. an extra two coats in the front footwells to combat wear from shoes, and a decent coat over the inside of the roof skin which was still in primer from the factory. so that's 4 cans of paint gone into it so far.
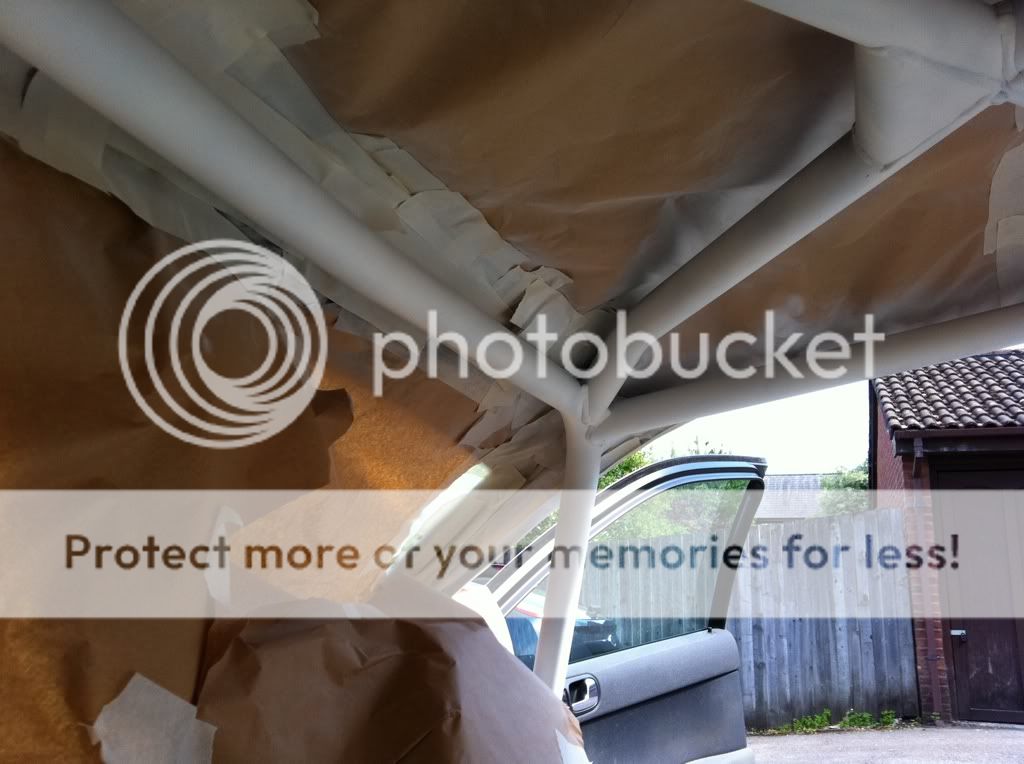
I gave that a while to dry, and then I started masking up the car:

I couldn't believe how long it took to mask up everything, it was almost 1pm before I had it all masked.
I cage the cage a quick rub with with scotch brite, and then wiped it all down with meths to make sure it was clean.
Then the primer went on, it took 3 500ml cans to get a good even coating over the entire cage. 7 cans of paint down so far!

3 cans did about 2 decent coats over the whole lot, just enough to not look patchy any more
With that done, I moved onto the orange, and applied the first coata light dust coat at first, then after 10 mins, a first proper coat:
Such a good feeling to finally see it going into colour! 1 full coat of the cage took 2 400ml cans of base coat to get a decent coverage. 9 cans used now.
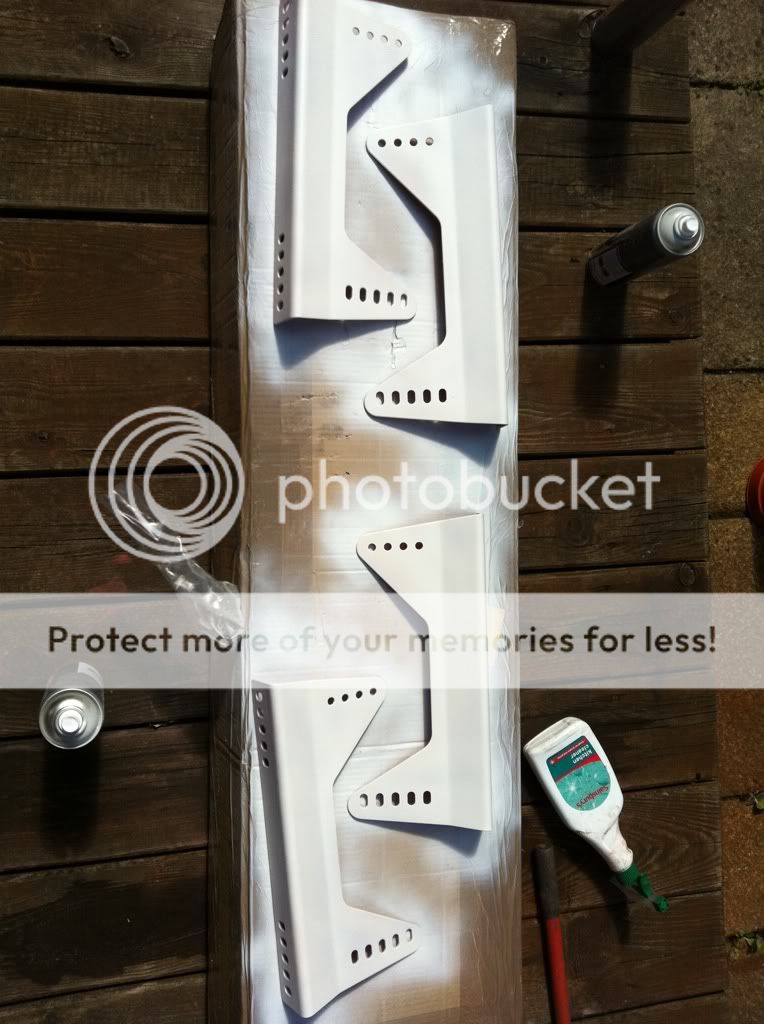
1 coat of orange done, I left it to dry for 30 mins. Whilst that was drying, I rubbed down the seat side mounts, and gave them a coat of primer:
I then moved onto a second coat on the cage. No pics of this stage, because it looks the same! another 2 cans, up to 11 cans of paint so far!
WIth that done, I stuck a few coats of orange onto the side mounts whilst the cage was drying, just enough left from the last can to do these:
Then finally onto the laquer, 2 decent coats of laquer over the cage. each coat took a full can, so that's 13 cans of paint to get to this point!
Then finally, one more can of laquer started for the side mounts, didn't use it all, but it brings the paint can total for this work up to a whopping 14 cans!

Left it to dry for a bit, then started taking the masking tape off:
Really happy with how it's starting to look
I really like the contrast inside with the black and orange. I've got one or two bits of overspray that I'll sort at some point:

Looks much smarter with the inside of the roof painted:

Just got the door bars and harness bar to refit, and put the seats back in on the new orange side mounts, and make the sliders work, and she's Ring ready!
- Joined
- Dec 8, 2006
- Messages
- 12,100
- Reaction score
- 4,340
- Points
- 113
- Location
- Eastleigh
- Website
- twitter.com

- Joined
- Dec 8, 2006
- Messages
- 12,100
- Reaction score
- 4,340
- Points
- 113
- Location
- Eastleigh
- Website
- twitter.com
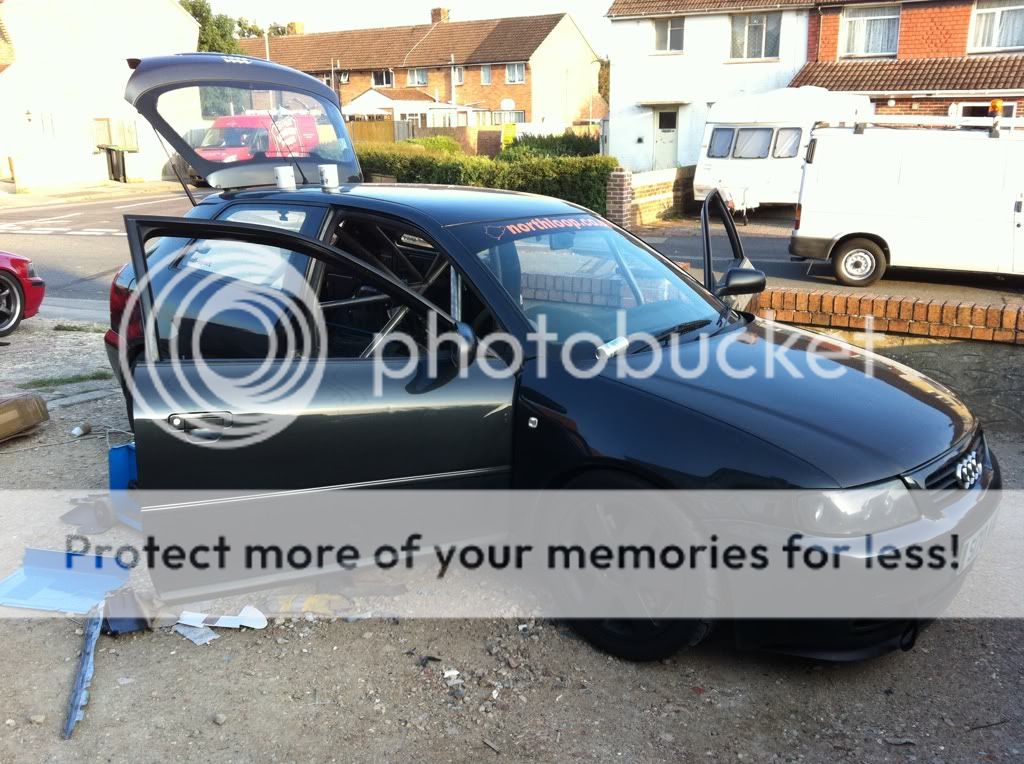
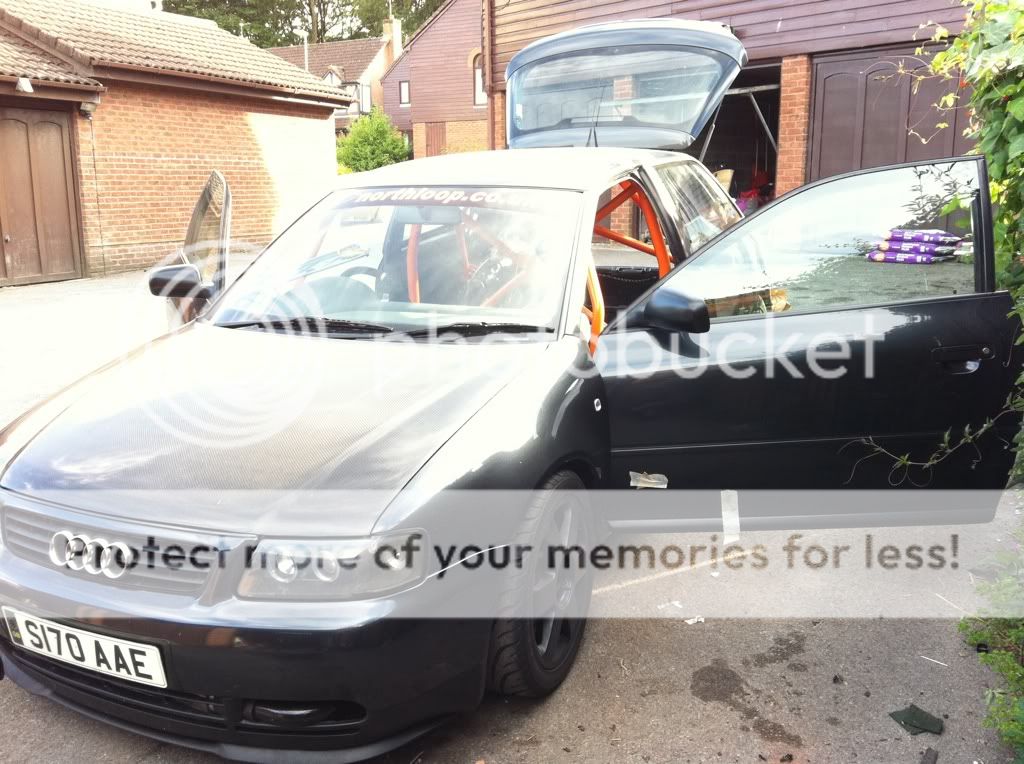
.And the finished interior:
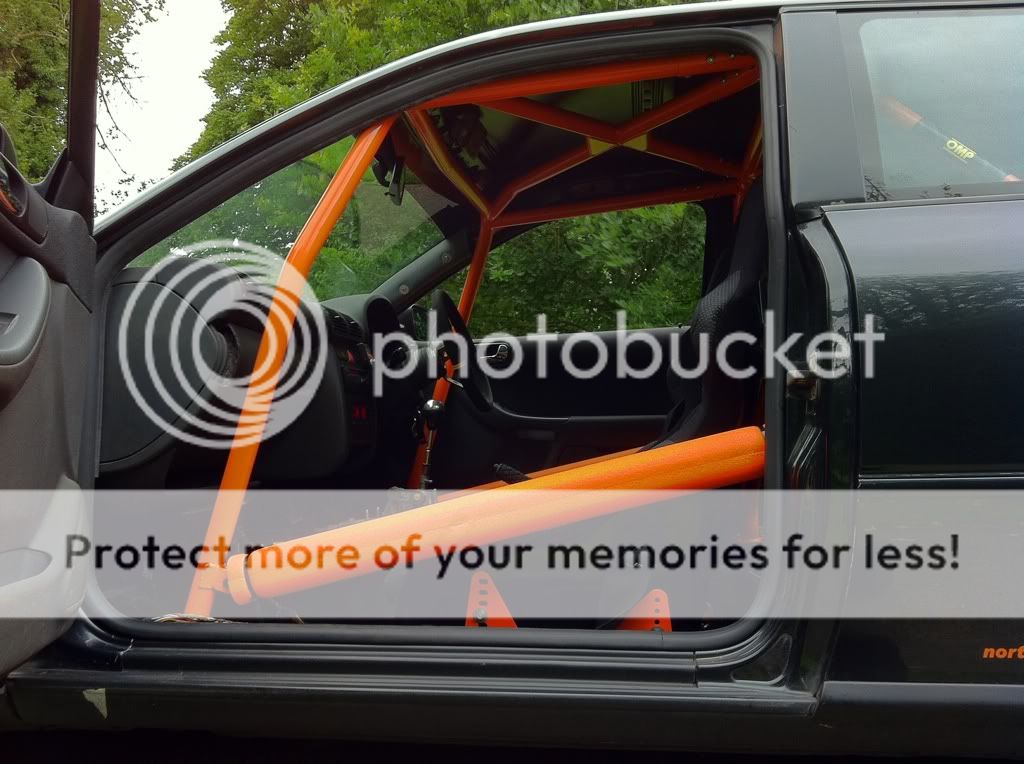
Padding turned out to be a perfect colour match
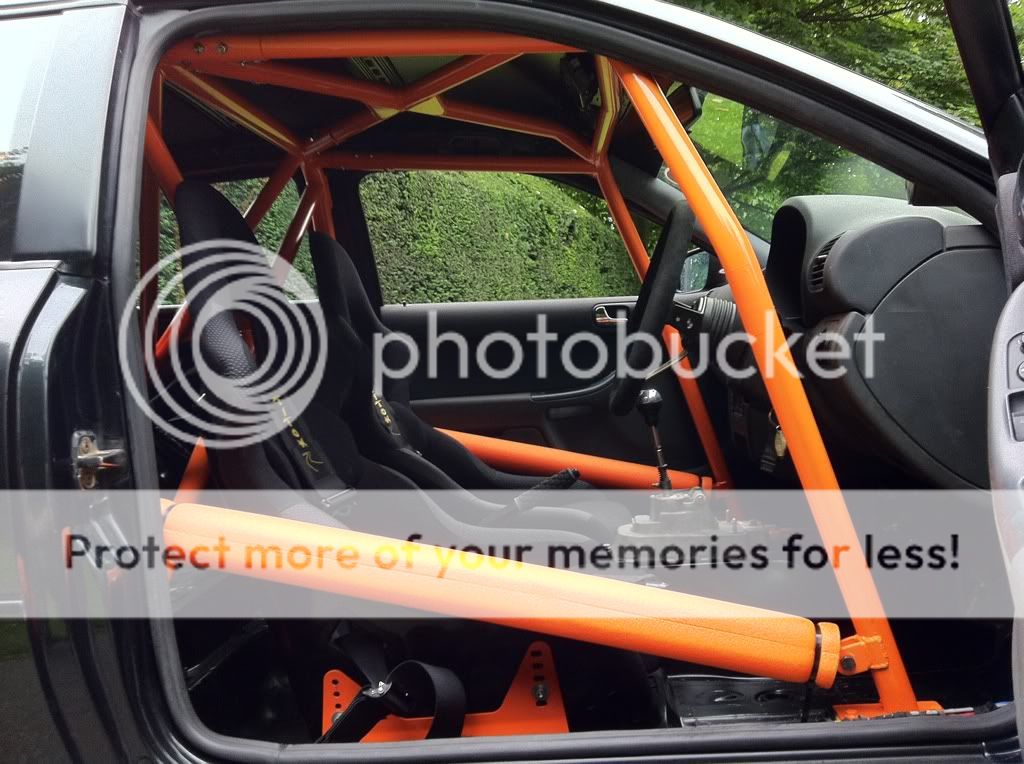
I even ditched the standard handbrake cover, in favour of this ultra light weight High grip Rubber alternative:
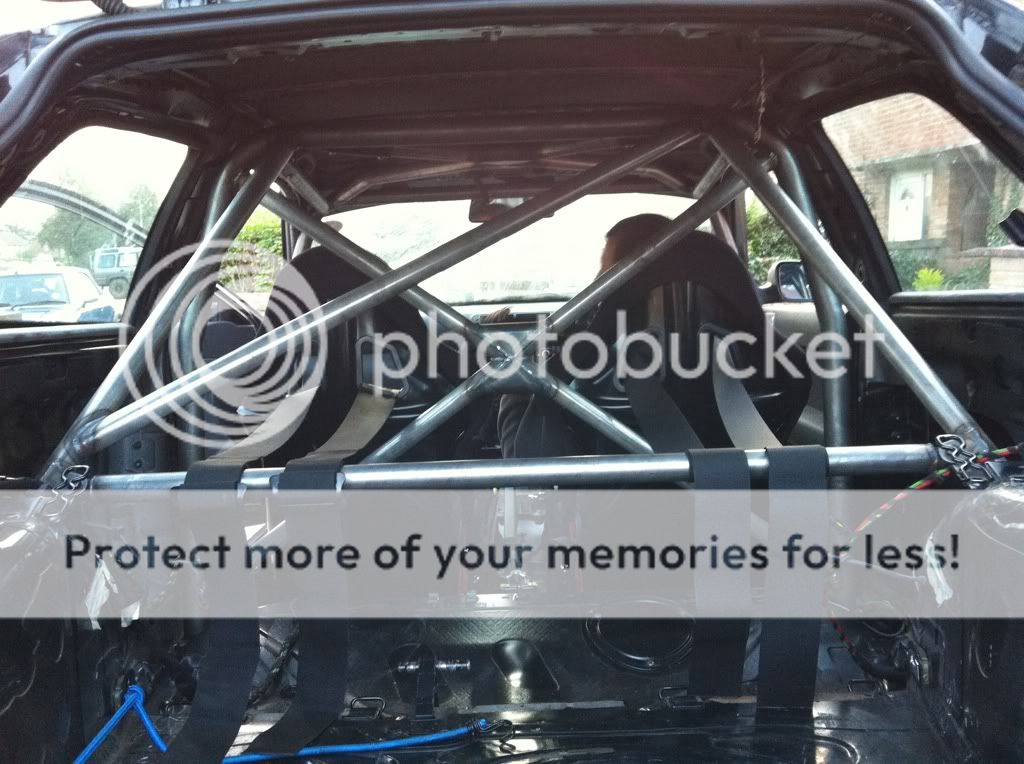
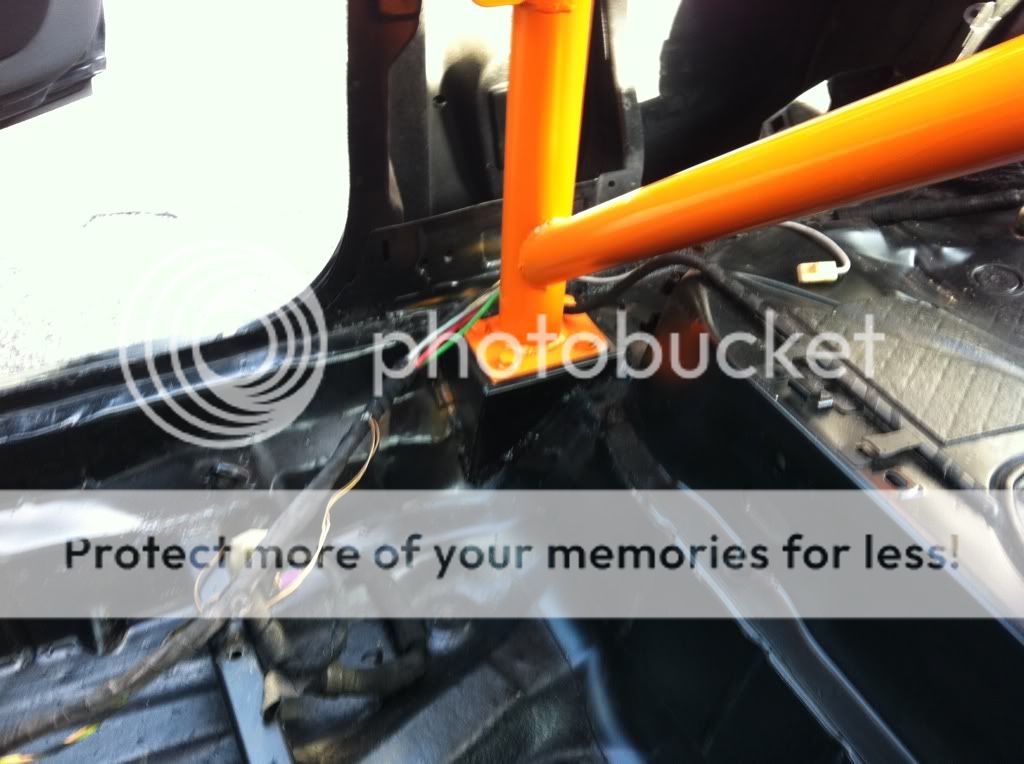
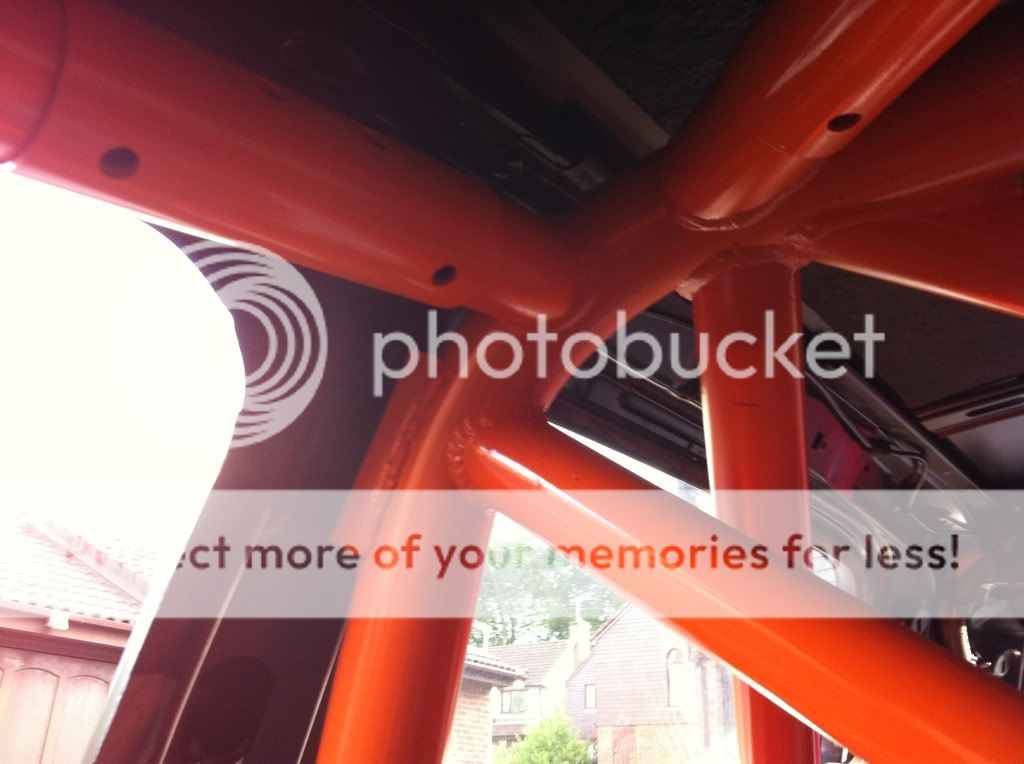
I love this junction of tubes:
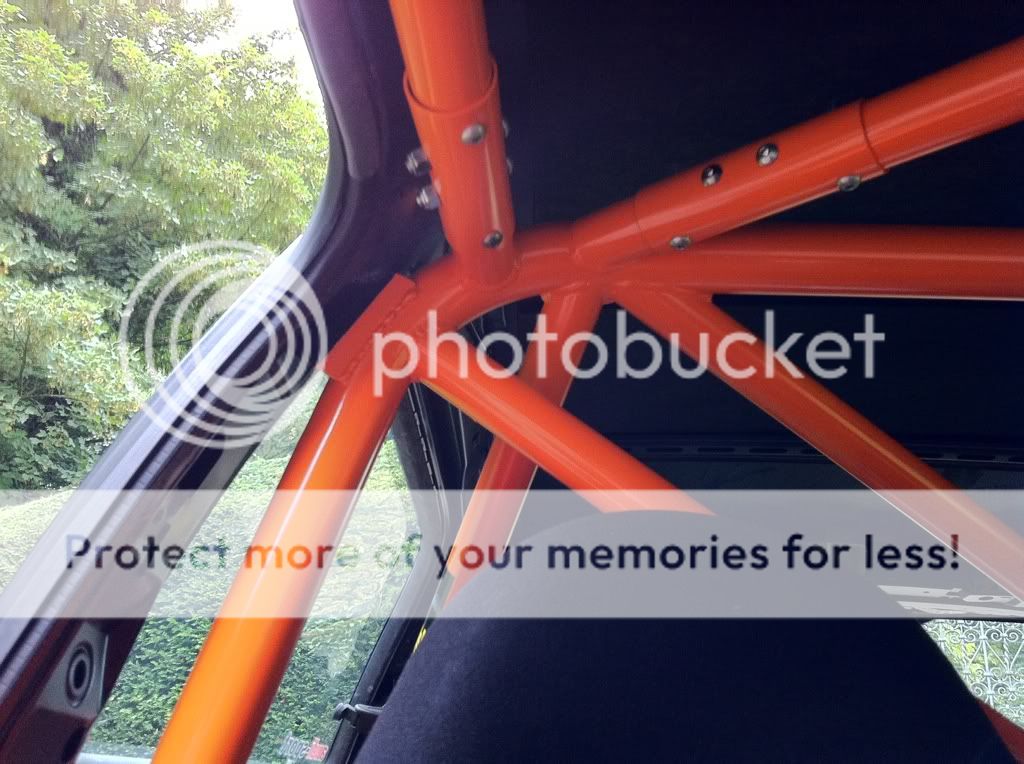
So many tubes coming together in one place, I think it looks great.
So, this is it, the car is almost complete. What on earth do I do with it now?

- Joined
- Dec 8, 2006
- Messages
- 12,100
- Reaction score
- 4,340
- Points
- 113
- Location
- Eastleigh
- Website
- twitter.com
Now, after copying all that, I realise I've not yet said what cage it is 
Ohps.
My cage is an OMP multi point bolt in, part number AB105-P from demon tweeks, it was around £680 for the cage, plus an extra set of door bars from which I made a removable harness bar, plus all the padding.
It makes a fantastic difference to the car, but it is a serious amount of work to install, all the foot plates were made, and all 4 are different, the prep and time taken to install the cage and paint it was probably 5 solid days labour in the end.
Wouldn't be a track car without a cage though, get some pics of yours up man!
- Joined
- Dec 2, 2008
- Messages
- 17,400
- Reaction score
- 1,104
- Points
- 113
Jesus Prawny! It's no wonder new members dont bother using the search button when people just do all the leg work for them 
Cheers bud, could'nt find one anywere, engines getting work done at the moment hopfully be producing 450+bhp time its finished, have got few pics the way at looks at moment now not to sure if i will keep it like that, will get them up asap.
- Joined
- Dec 8, 2006
- Messages
- 12,100
- Reaction score
- 4,340
- Points
- 113
- Location
- Eastleigh
- Website
- twitter.com
Feels amazing mate
the main aspect of the cage is safety, but it does do wonders for the handling and chassis stiffness too.
Im also fairly sure the car would now be in a scrap yard were it not for the cage!
the main aspect of the cage is safety, but it does do wonders for the handling and chassis stiffness too.
Im also fairly sure the car would now be in a scrap yard were it not for the cage!